Making paper crafts does not require professional skills or financial costs. The Internet offers an endless selection of master classes on how to make original crafts from paper. For creative activities, you only need to prepare glue, scissors and a couple of sheets of paper.
- Advantages of cardboard and paper
- Tools and materials
- General principles of making paper toys
- Origami Craft Options
- Origami Rose for Beginners
- Origami heart
- Volumetric paper toys
- Cool giraffe
- Volumetric elephant
- Fantastic Christmas tree toys
- Decoupage of a balloon with a picture
- Christmas tree made of snowflakes
- Garland "snowmen"
- Beautiful candy
- Simple paper crafts
- Chamomile
- Colored balls
- Ladybug
- Paper toy unfoldings
- Paper Toys Without Glue
- The boat
- Pigeon
- Paper heart
Advantages of cardboard and paper
Among the obvious advantages of these two materials, the following should be highlighted:
- ease of processing;
- even a child can create a large number of crafts from them;
- sold in many stores;
- have good plasticity.
Tools and materials
To create paper crafts with your own hands, you will need the following materials and tools:
- scissors;
- glue;
- schematic layout of the product;
- sheets of paper and cardboard;
- pencils;
- handles;
- glitter;
- needle and thread;
- foil;
- knitting loom;
- brushes and paints;
- beads;
- meter;
- textile;
- ruler;
- stapler;
- compass.
General principles of making paper toys
Immediately before starting work, it is necessary to prepare the required materials. You can model a homemade sketch of the craft. However, it is recommended for beginner needlewomen to use a ready-made template.
Please note! There are many master classes on the Internet that are best to follow in order to move in a creative direction without making mistakes.
Origami Craft Options
The most popular and easy to make paper toys using origami technique:
- butterflies;
- house;
- boats;
- rocket;
- airplane;
- crane;
- rose;
- heart;
- swan;
- flower.
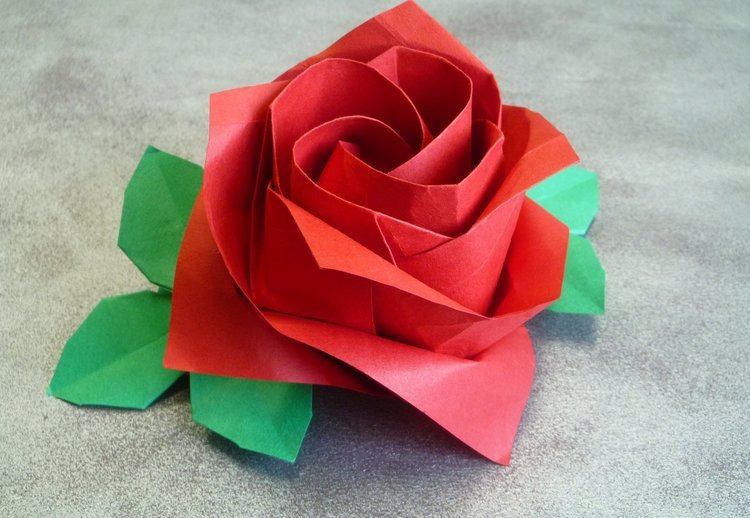
Origami Rose for Beginners
When spring comes, you want to decorate your home with something beautiful. Below is a master class on making a simple rose:
- Fold the original square in half, unfold it and make the cross side in the same way.
- Fold the four corners towards the center to create a basic pancake shape.
- Turn the square 90 degrees, fold the blank again into an envelope, which should turn into a “double pancake”.
- Fold all the corners, iron the folds well and begin to unfold the petals.
- Sequentially bend back the tops of the triangles of each layer, and twist the edges onto a pencil.
- Shape a sheet of green paper into a “kite” – fold it in half diagonally and straighten it out.
- Fold the top and bottom sides to the central axis, connect the origami toy along the longitudinal line.
- Bend the sharp corners of each side upward, straighten them out and glue the leaves to the back of the flower.
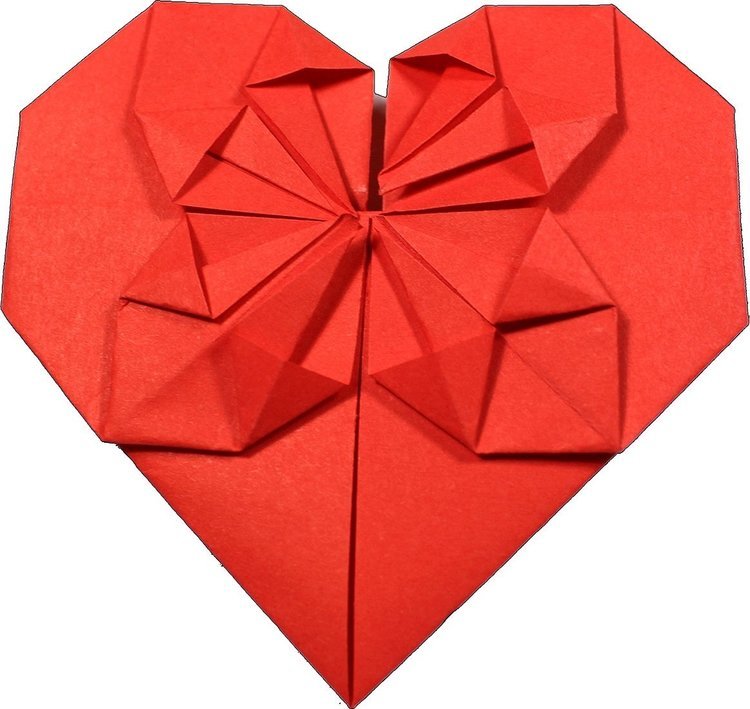
Origami heart
Step-by-step instructions on how to make a volumetric origami heart:
- On a paper base, using a pencil and a ruler, draw a rectangle in a 2:1 ratio.
- Fold the sheet diagonally and unfold it – you should get two cross-shaped lines.
- Fold one side along the crossed lines towards the center point, and do the same on the other end.
- From the center, wrap all the elements to the edges, open the resulting flaps and tuck in one of the sides.
- Turn the workpiece over, bend each corner, and turn it over again.
- Open the additional eight valves one by one and carefully fold them in.
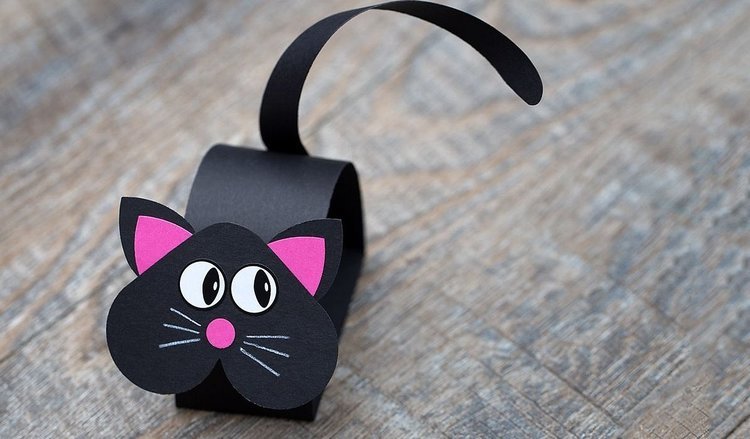
Volumetric paper toys
Very easy to make options for volumetric toys:
- frog;
- birds;
- funny cat;
- sword;
- horse;
- planet;
- giraffe;
- girl;
- walking elephant;
- eagle.
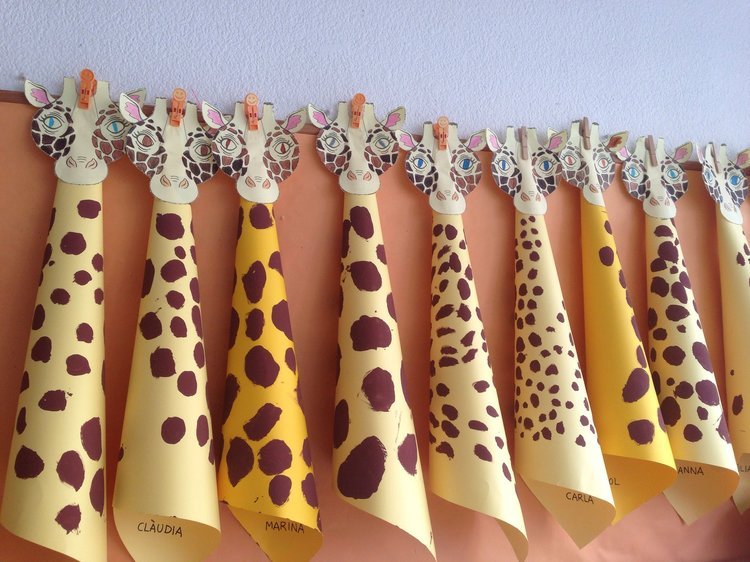
Cool giraffe
Materials required:
- yellow cardboard;
- scissors;
- black marker;
- a sheet of brown colored paper;
- glue.
Stages of creating a craft:
- Roll a cone out of yellow cardboard.
- Cut off the bottom to add stability.
- Draw a face on one of the remaining pieces of paper.
- Randomly cut brown paper into small pieces.
- Glue brown spots onto the resulting animal.
Volumetric elephant
Materials required:
- 5 double-sided sheets of pink and white A5 paper;
- simple pencil;
- scissors;
- glue.
Step by step production:
- Roll four pink leaves into identical cylinders.
- Glue the cylinders at the top.
- Roll the remaining sheet in the same way as the four.
- Place a single cylinder on top of the glued ones.
- Cut out a trunk from a two-centimeter pink strip.
- Curl the strip with scissors and glue it to the body.
- Make the tail in the same way.
- Cut out 2 circles from pink paper and glue them to the sides of the head.
- Draw the face carefully.
Fantastic Christmas tree toys
You can create beautiful New Year's toys from paper. A festive ball made using decoupage technique, paper Christmas trees, voluminous snowflakes, New Year's garlands, cones, candies and snowmen will look great on the tree.
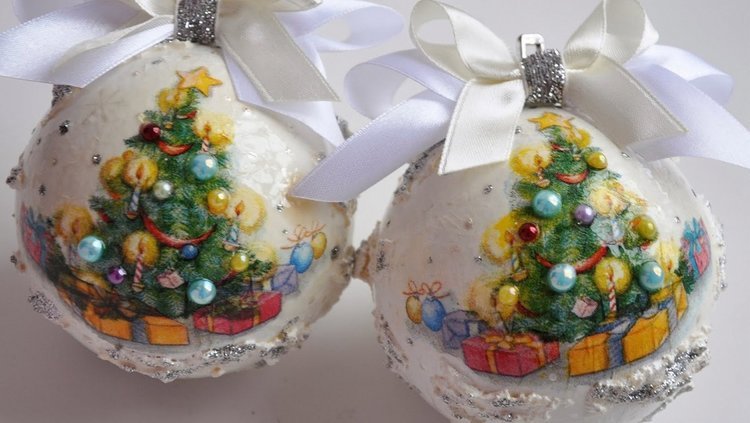
Decoupage of a balloon with a picture
The process of decorating the ball is as follows:
- Treat the entire surface with fine sandpaper and brush off dust.
- Apply primer to the ball with glue in two stages using a sponge.
- Choose a napkin with a thematic motif and cut out the design.
- Remove the bottom paper layer and soak the photo in water for a short time.
- Use a needle to remove the top layer.
- Dilute the glue in a 1:1 ratio and glue the picture.
- Smooth the image from the center to the edges.
- Sand the edges, paint the rest of the ball.
- Cover the finished Christmas ball with varnish.
NoteThere is a technique of reverse decoupage. In this case, the motif is glued on the inside.
Christmas tree made of snowflakes
Materials required:
- paper snowflakes of different sizes;
- scissors;
- glue;
- wooden stick for the base;
- beads;
- small pot.
Stages of creation:
- Prepare snowflakes.
- Place each snowflake on the base, alternating with one bead.
- Secure the finished tree in the pot.
- Fill the pot with rain.
Please note! Each snowflake and bead placed on the base must be secured with glue.
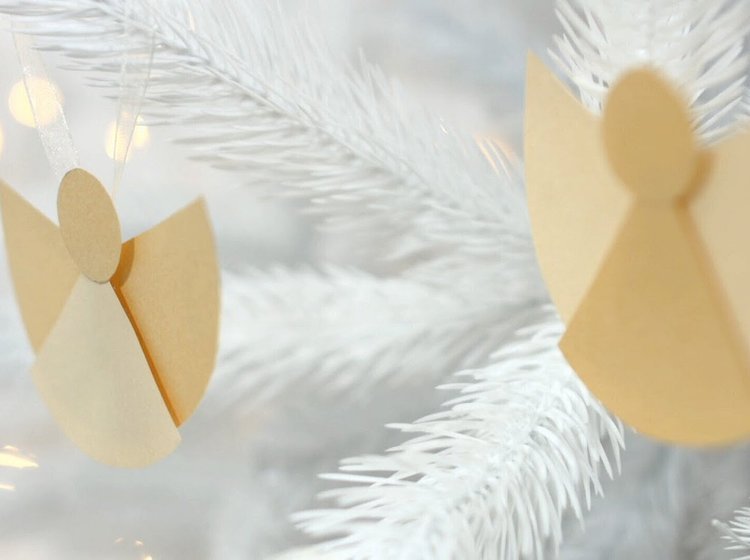
Garland "snowmen"
Steps to create a snowman garland:
- Cut out three circles of different sizes from paper.
- Bend the circles in half and coat one half with glue.
- Glue the second folded circle to one folded half.
- Connect the third and fourth halves with glue.
- Pass a ribbon through the middle, glue the fifth circle, closing the ring.
- Assemble the medium and small circles in the same way.
- Glue the smaller circles above the largest one.
- Hang several voluminous snowmen on the ribbon.
NoteTo make the garland more beautiful, it is recommended to attach bright additional elements between the snowmen.
Beautiful candy
What you will need:
- serpentine;
- cardboard;
- wrapping paper;
- scissors;
- ruler;
- scotch;
- satin ribbon.
Stages of creation:
- Cut a piece of wrapping paper measuring 30x30 cm.
- Form a “candy” in the shape of a cylinder from cardboard.
- Place the base in the middle of the edge of a sheet of wrapping paper.
- Start rolling the “candy”, wrapping the shape into a roll.
- Secure the edge with tape.
- Fold the “tails” on both sides and tie them with a serpentine.
- Decorate the “candy” with any materials at hand.
Simple paper crafts
Several options of what can be made from colored paper quickly and easily:
- paper weapons;
- colorful bouquet;
- telephone;
- chamomile;
- dragon;
- colored balls;
- toy boy;
- parrot;
- ladybug;
- corrugated flower.
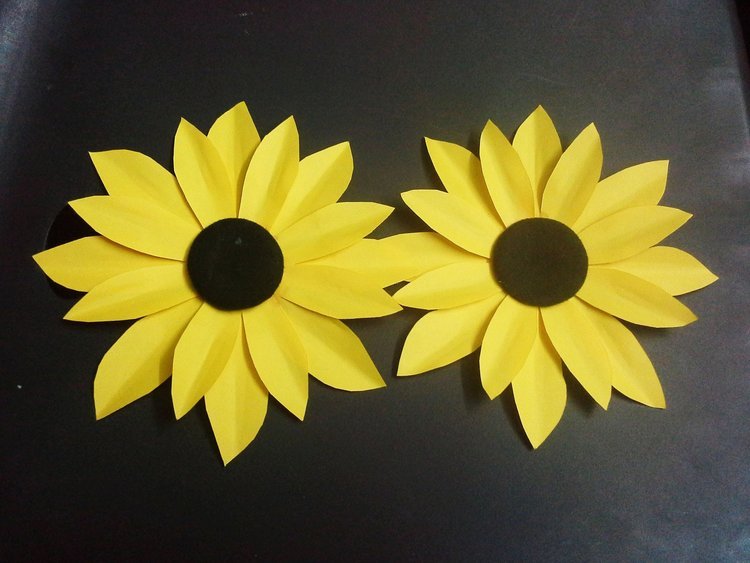
Chamomile
Materials required:
- yellow paper;
- white sheet;
- glue;
- scissors;
- compass;
- pencil.
Manufacturing stages:
- Cut white paper into strips of equal width.
- Use a compass to draw two circles on a yellow sheet of paper and cut them out.
- Glue the petals from white stripes.
- Glue the petals onto the yellow circle.
- Glue another yellow circle into the middle of the chamomile.
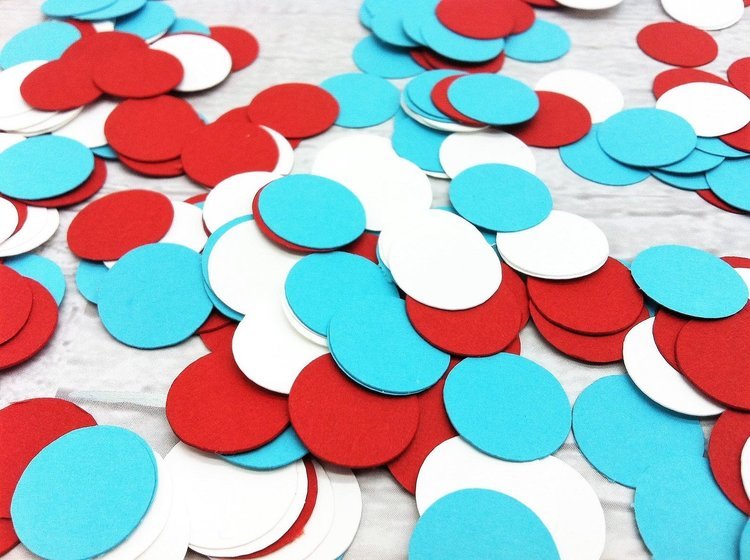
Colored balls
To make a light multi-colored Christmas tree ball, you need:
- Fold a sheet of colored paper in half.
- Remove the second half and fold the first half into a fan.
- Glue the fan at the base.
- Make four fans of different colors.
- Connect the pieces into one ball using paper glue.
- Thread the thread through the bottom of the finished toy.
Helpful advice. Instead of glue, it is safer to use a faster stapler to secure the fan.
Ladybug
To create this craft you will need:
- red paper;
- black sheet;
- a regular sheet of A4 paper;
- green paper;
- glue;
- scissors.
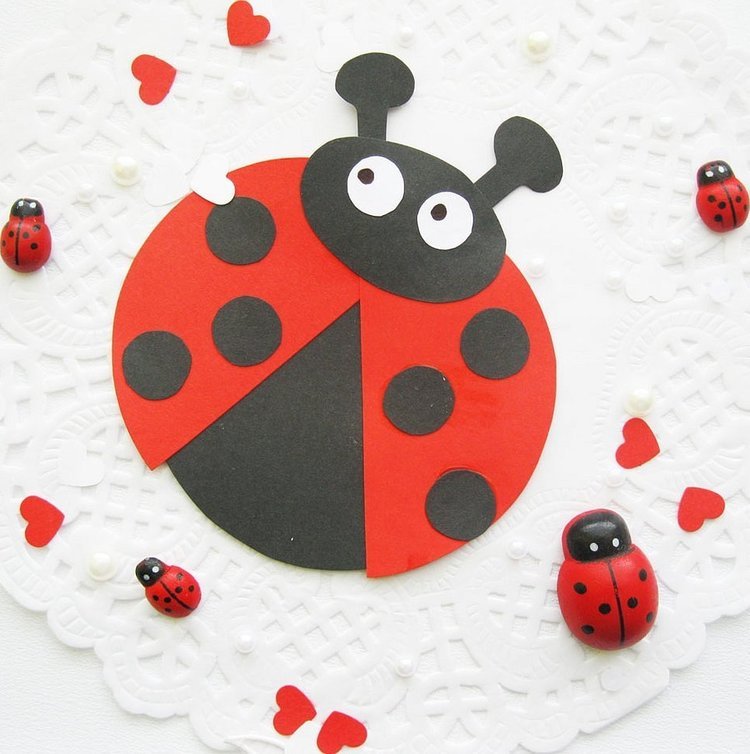
Step-by-step algorithm:
- Cut out small circles, a head and whiskers from black paper.
- Cut three identical circles from a red sheet of paper.
- Bend the red circles in the middle and glue them together.
- Cut blades of grass from a green leaf.
- Glue the head, grass and the three-dimensional workpiece itself onto a white sheet of paper.
- Glue black circles onto the red wings.
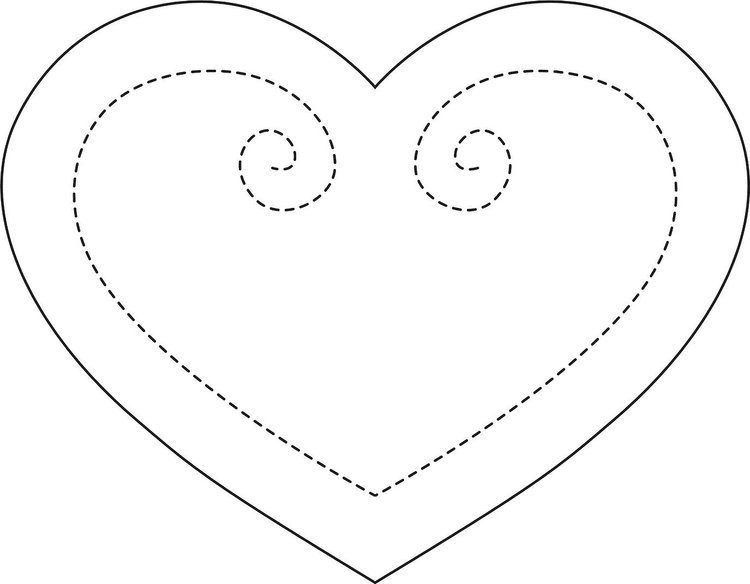
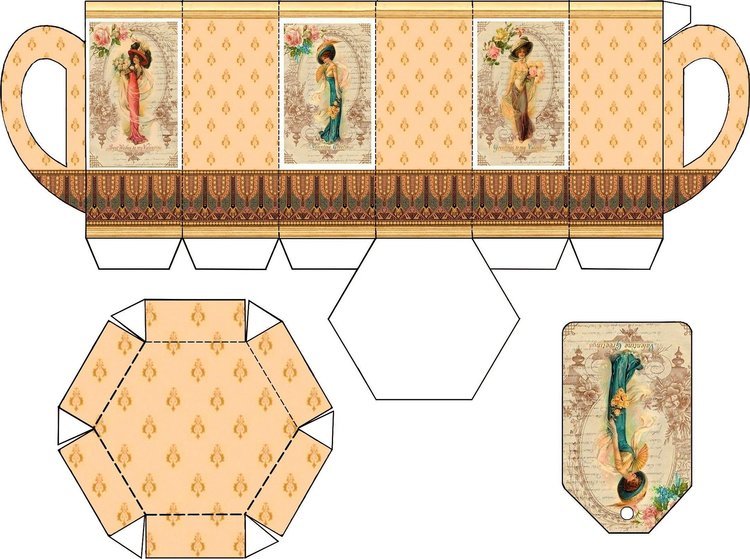
Paper toy unfoldings
Below are schematic diagrams of the original toys.
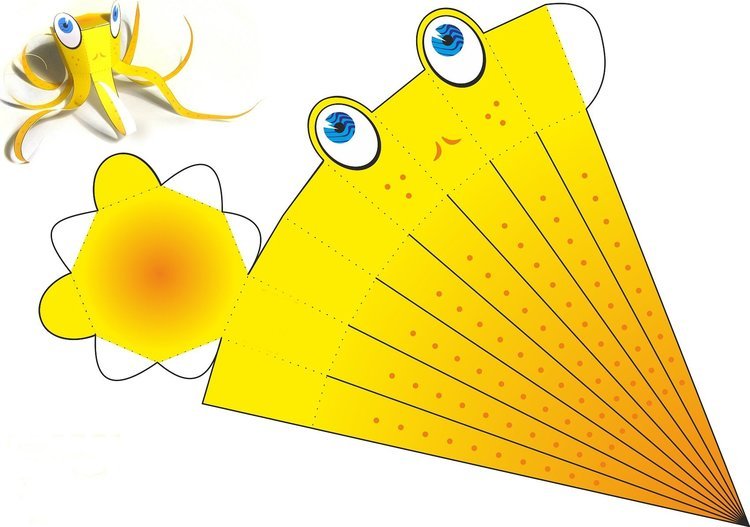
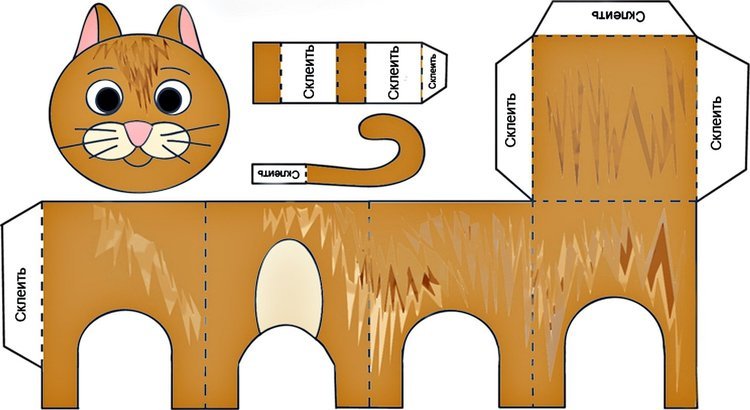

Paper Toys Without Glue
When creating paper crafts without using glue, a step-by-step assembly scheme must be followed. Using this technology, you can make an interesting boat, a bunny, a dove, a heart or an airplane that can fly.
The boat
The process of creating a boat is as follows:
- Fold a sheet of A4 colored paper in half.
- Fold the short side back towards the short side.
- Open, fold the edges from the top to the middle.
- Bend the strip upwards and fold the corners.
- Turn the figure and bend back the second strip.
- Open it up and make a square out of the figure.
- Bend the bottom corner slightly, do the same on the inside.
- Unfold the form, pull the figure in different directions by the edges.
- Level the bottom.

Pigeon
Instructions for making a paper dove without using glue:
- Prepare a square sheet of paper of the desired color.
- Fold diagonally, then again to form a triangle.
- Open the figure, fold the left corner to the right;
- Do the same on the back.
- Turn and fold the top part to the bottom.
- Open the bends, bend all sides of the figure inward.
- Fold the opening fragment along the strip and turn it over.
- Press the head inward at the center, wrap the tail towards you.
- Open the bent part of the tail, divide it in two, draw the eyes.
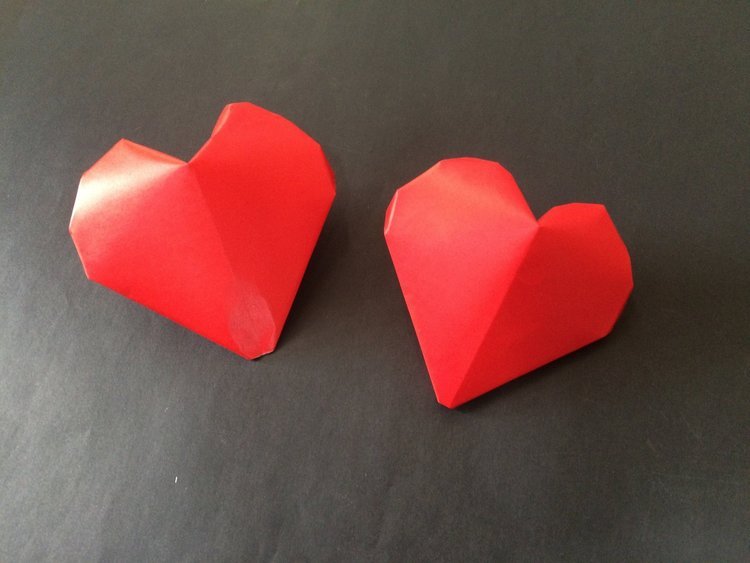
Paper heart
Step-by-step algorithm for making a paper heart toy:
- Fold a double-sided red sheet of paper in half.
- Unfold and fold into two parts again.
- After unfolding again, you should have one square with 4 inside.
- Fold the bottom piece in half towards the center of the large figure.
- Rotate and pull the outer right corner towards the middle.
- Now you need to do the same with the second element.
- Unfold, form two sides to the middle.
- Fold the lower right corner and roll the second one.
- Fold the outer and outside corners, smooth the folds of the edges.
Paper is a fantastic material for creating a variety of decorative items. You can find a huge number of master classes on making toys and home decorations online. By carefully following the instructions, anyone can prepare a beautiful gift for a friend or transform their home.


