Paper cats, of course, will not replace real pets, but they will bring a lot of fun, joy and good mood. When making crafts, you can come up with your own accessories or improve the scheme and templates. More experienced craftsmen often make voluminous paper toys; to make them, you first need to collect all the parts separately and only then attach them to each other.
Benefits of Children's Paper Crafts
Paper crafts have only one drawback - their fragility and short life. However, by choosing the right material, you can increase the service life of the toy. Many beginners name another disadvantage, which applies mainly to origami - this is the complexity of assembly.
The advantages of paper crafts include:
- availability of all items for making toys;
- do not cause harm, like store-bought plastic toys that release harmful impurities;
- do not require additional costs;
- the child will definitely not be disappointed with the finished gift, because the craft is made according to his wishes;
- can decorate the interior of a house, are suitable for decorating a desktop, a Christmas tree and for many other purposes;
- You can make a toy together with your child, this will help develop his fantasy and imagination.
Of course, you can't always achieve the desired result on the first try, but that's the beauty of paper crafts - you can make many attempts, because there is no limit to perfection.
What you need to create a toy
Before making a paper cat, you should stock up on the necessary tools and items. The craft does not require expensive and hard-to-find products, everything is made from simple means that can be found in any home.
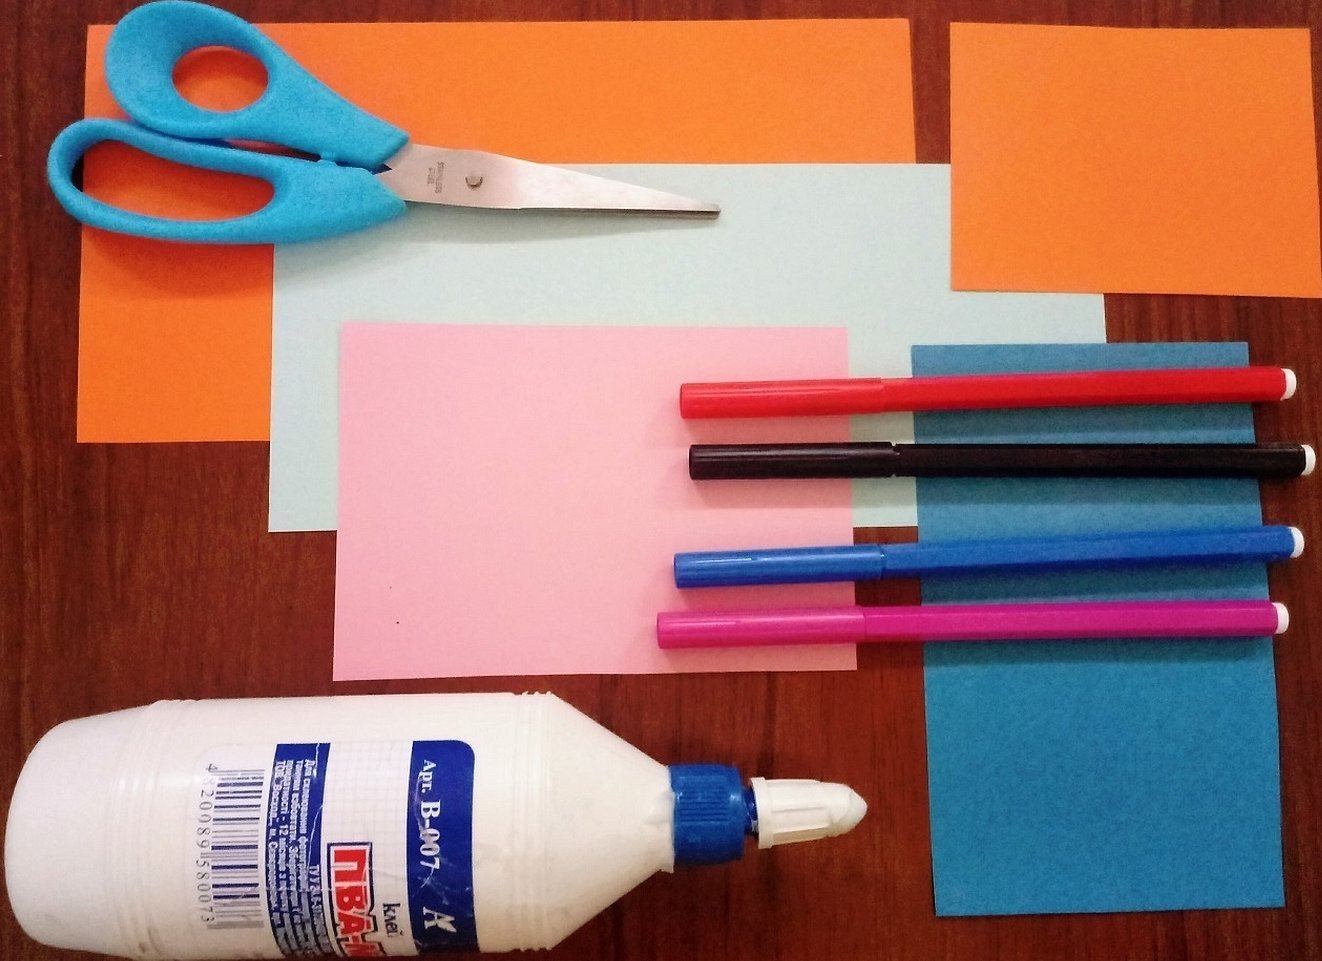
To make a paper cat, you will need:
- Material for the base of the product. You can take regular printing paper. However, to make the product more decorative and colorful, it is best to choose colored paper or origami paper. If the craft is made without folding, you can use napkins of different shades.
- Glue. For thick paper, PVA is best. For soft and thin material, as well as gluing small parts, it is recommended to purchase a glue stick.
- Felt-tip pens, pencils or gel pens.
- A needle and thread or a stapler.
- Ruler.
- Paper scissors. For small parts, it is better to stock up on small sharp scissors.
- Decorative ribbons, beads, elastic bands, buttons and other accessories.
Please note! For denser materials you will need a glue gun.
General principles of working with paper
Paper is probably the most accessible and inexpensive material for children's creativity. It is used not only for drawing, but also for creating appliques and even paper sculptures.
Over the long period of paper's existence, people have come up with many techniques for working with this incredible material:
- applique: flat, geometric, tear-off, volumetric, plastic, etc.;
- paper art;
- decoupage;
- origami: wet folding, modular, unfolding;
- kirigami;
- vytynanki;
- quilling;
- scrapbooking;
- weaving from paper strips.
It is not difficult to work with paper, but it is worth following some rules:
- It is best to choose a dense material intended for a specific type of creativity;
- do the work slowly, as the paper is quite fragile;
- “measure seven times and cut once” – this rule works well in this case;
- You should not crumple or bend the product unnecessarily for a long time, otherwise its appearance will lose its decorative value.
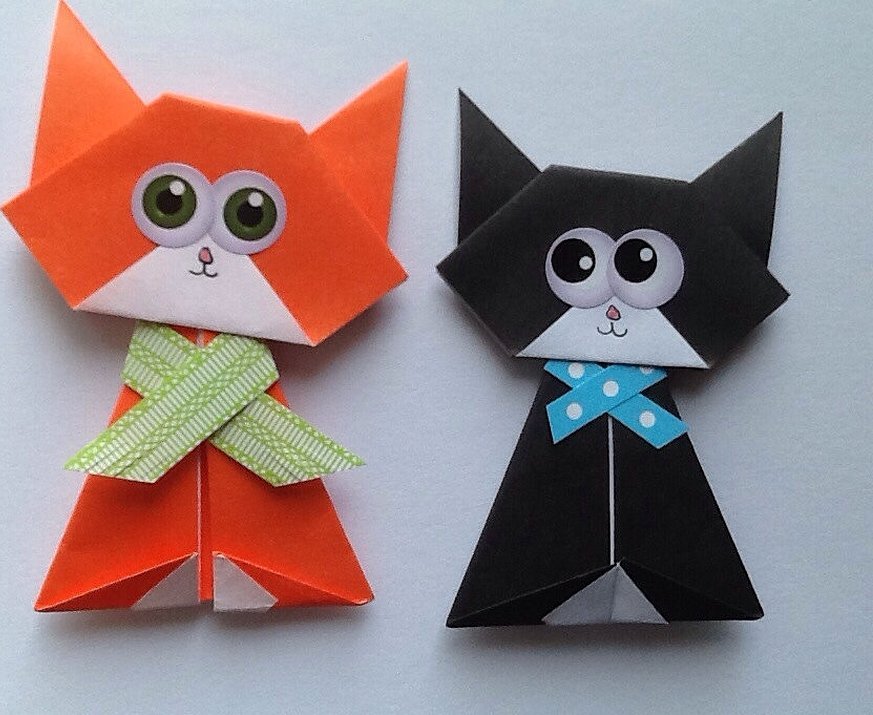
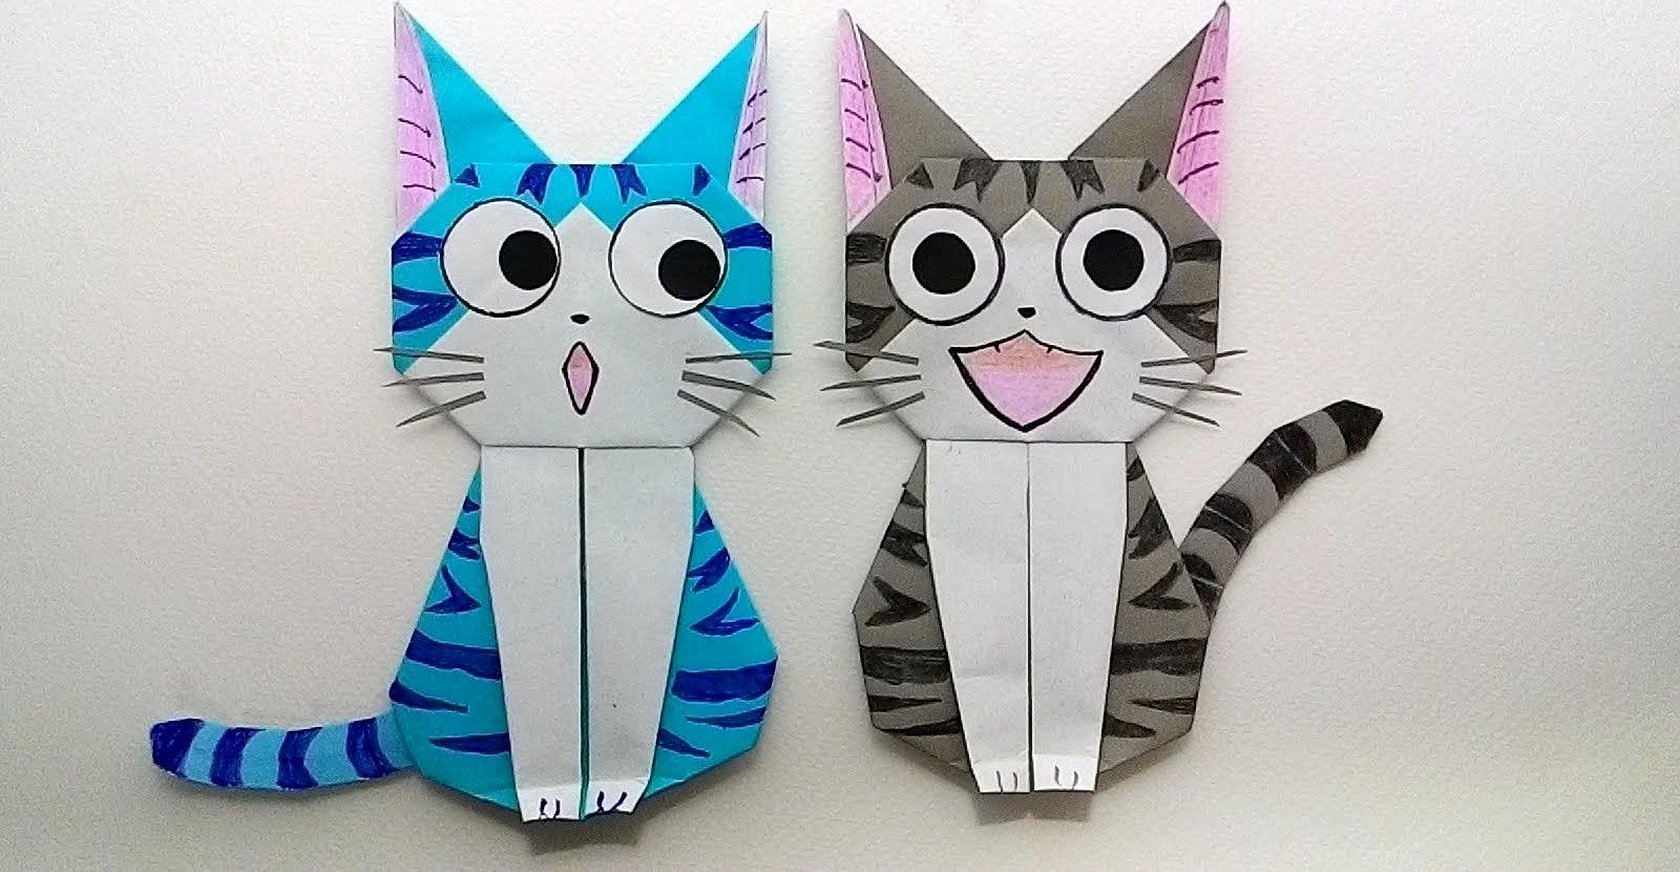
Origami Cat Variations
The most common ways to make a cat out of paper are, of course, origami. In this case, you can fold not only the muzzle, but also the entire body. To make the craft, it is recommended to purchase special origami paper. If this is not possible, you can get by with an ordinary thick sheet.
Please note! The craft will be bright if you use paper of different colors.
How to make a cat head using origami technique:
- Take the paper and fold it diagonally. The remaining edge should be cut off to get a square.
- Fold the resulting triangle one more time to form another triangle.
- Turn back into a large triangle.
- Fold the ends of the upper right angle down.
- To make the cat's ears, you need to fold the lower sharp corners upwards.
- Turn the product over to the other side and paint the cat's face.
The origami cat can be made entirely in two ways. The first product is easy to make, while the algorithm for creating the second is more complex.
Step-by-step simple plan on how to make a cat using origami together with the body:
- Take cardboard or paper and cut off a strip 10 cm wide.
- Fold the paper lengthwise into two equal sides. Then make another fold inward on each side.
- Straighten the workpiece to its original state.
- Fold the top left corner, then fold it in the opposite direction.
- On the other side of the blank, start making the cat's head. To do this, bend the corners diagonally and immediately, holding the middle of the paper with your fingers, pull the remaining space upwards.
- Smooth and straighten all the corners. The paper cat is ready and you can decorate your desktop with it.
The next diagram for an origami cat is a little more complicated:
- You need to take a square sheet of paper and fold it in half to make a rectangle.
- Unfold and fold the two top corners inward.
- Fold the edges of the paper in half. Then straighten them out and make two dotted lines along the fold line.
- Turn the product over and immediately fold back the right corner.
- Fold the product, lifting the right corner, making a bend along the previously drawn dotted line.
- Do the same manipulations on the left side. You will get a figure similar to a cat's tail.
- Fold the product in half along the long side.
- Turn it over and straighten out all the triangles.
- Bend back the ears and nose.
- Bend the body and tail. Give them a normal state.
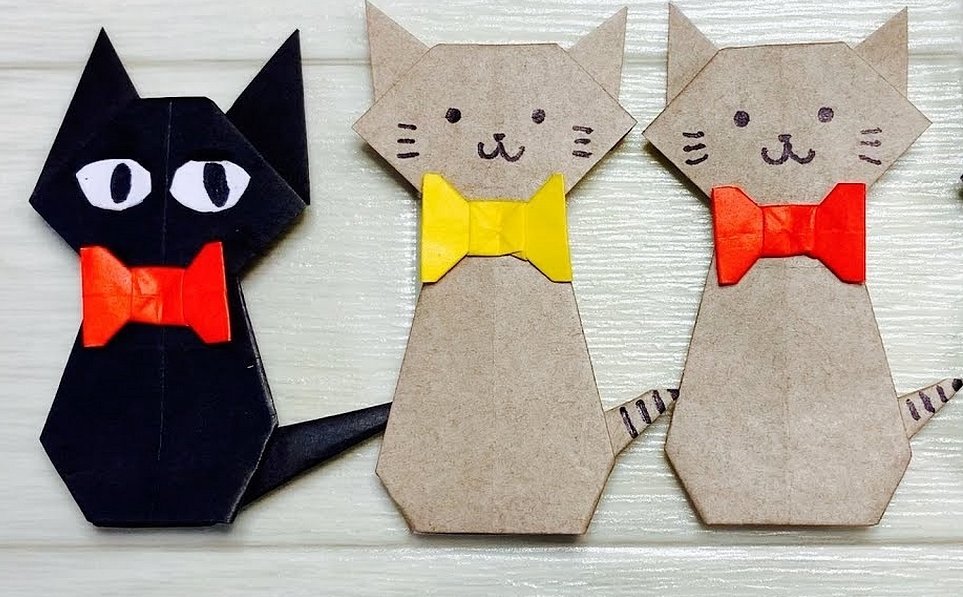
Please note! If desired, you can glue various accessories, such as bows, to the finished origami.
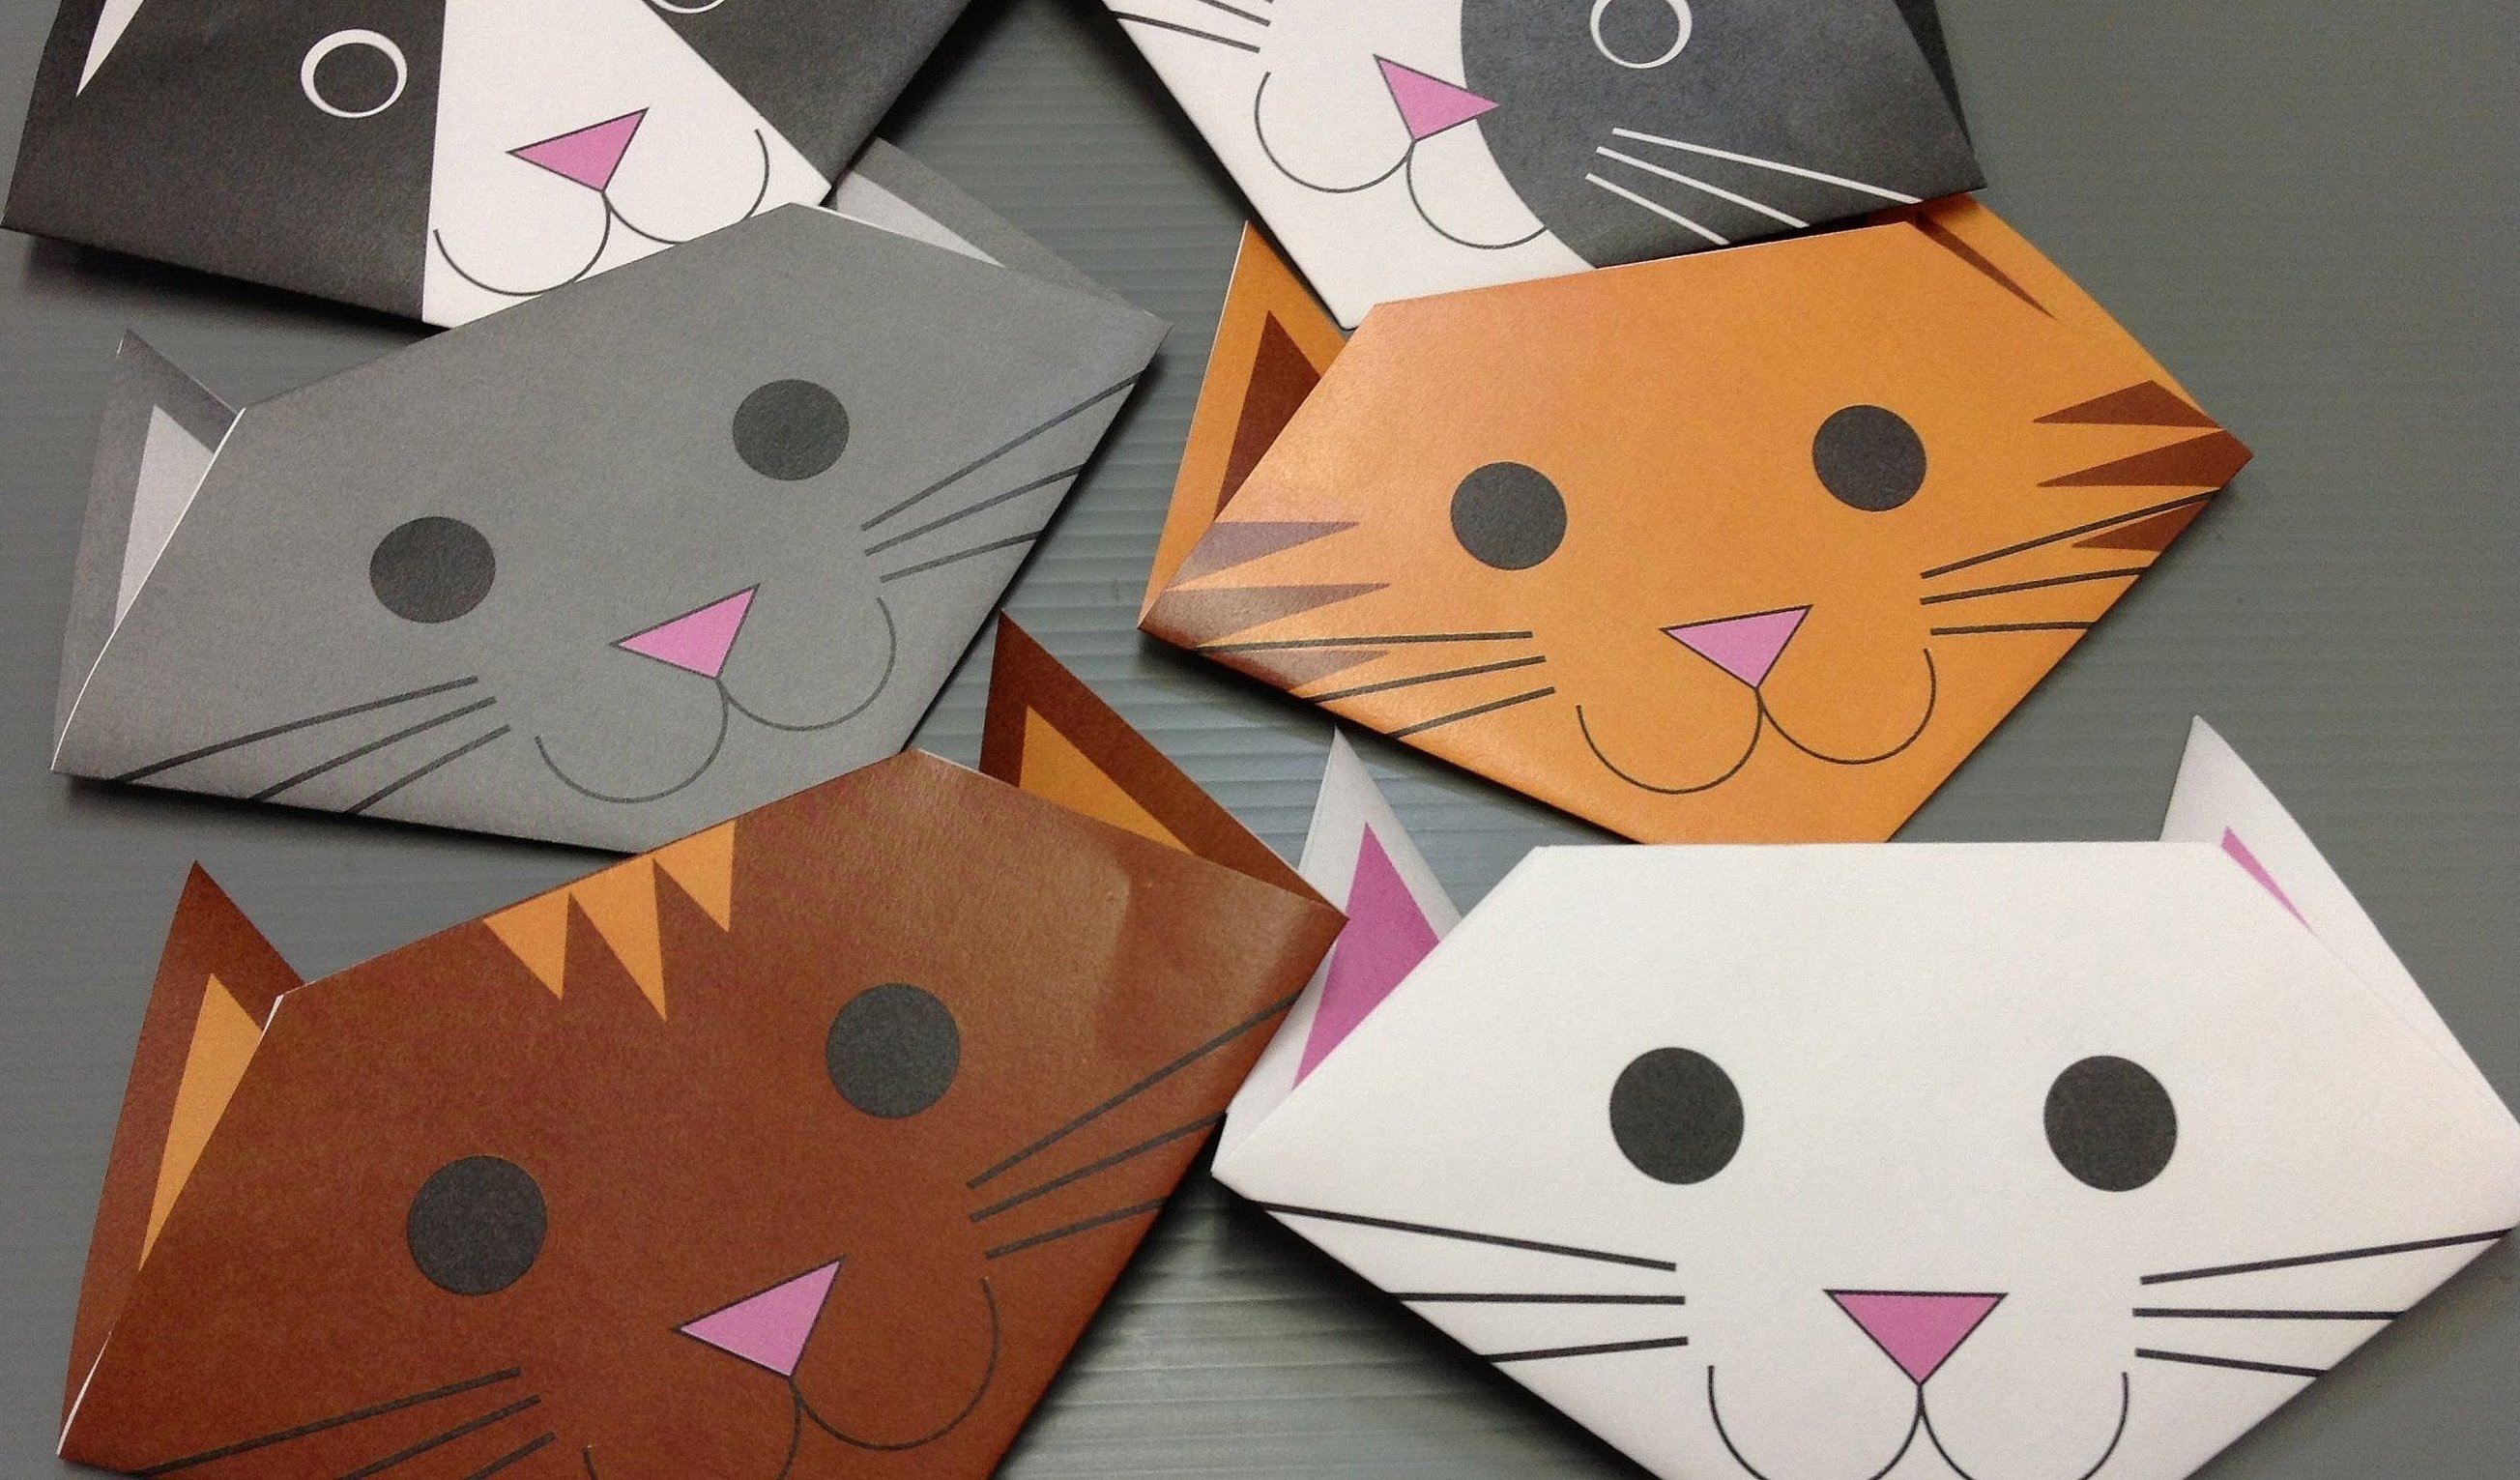
The simplest paper kittens
Simple paper cat crafts can be created in an easy and quick way. To make a child's toy last longer, it is best to use thick paper from boxes or colored cardboard. This method is ideal for beginners.
First, you need to print out ready-made templates from the Internet or draw and cut them out yourself. Step-by-step instructions for making a small and cute cat figurine from colored cardboard and paper:
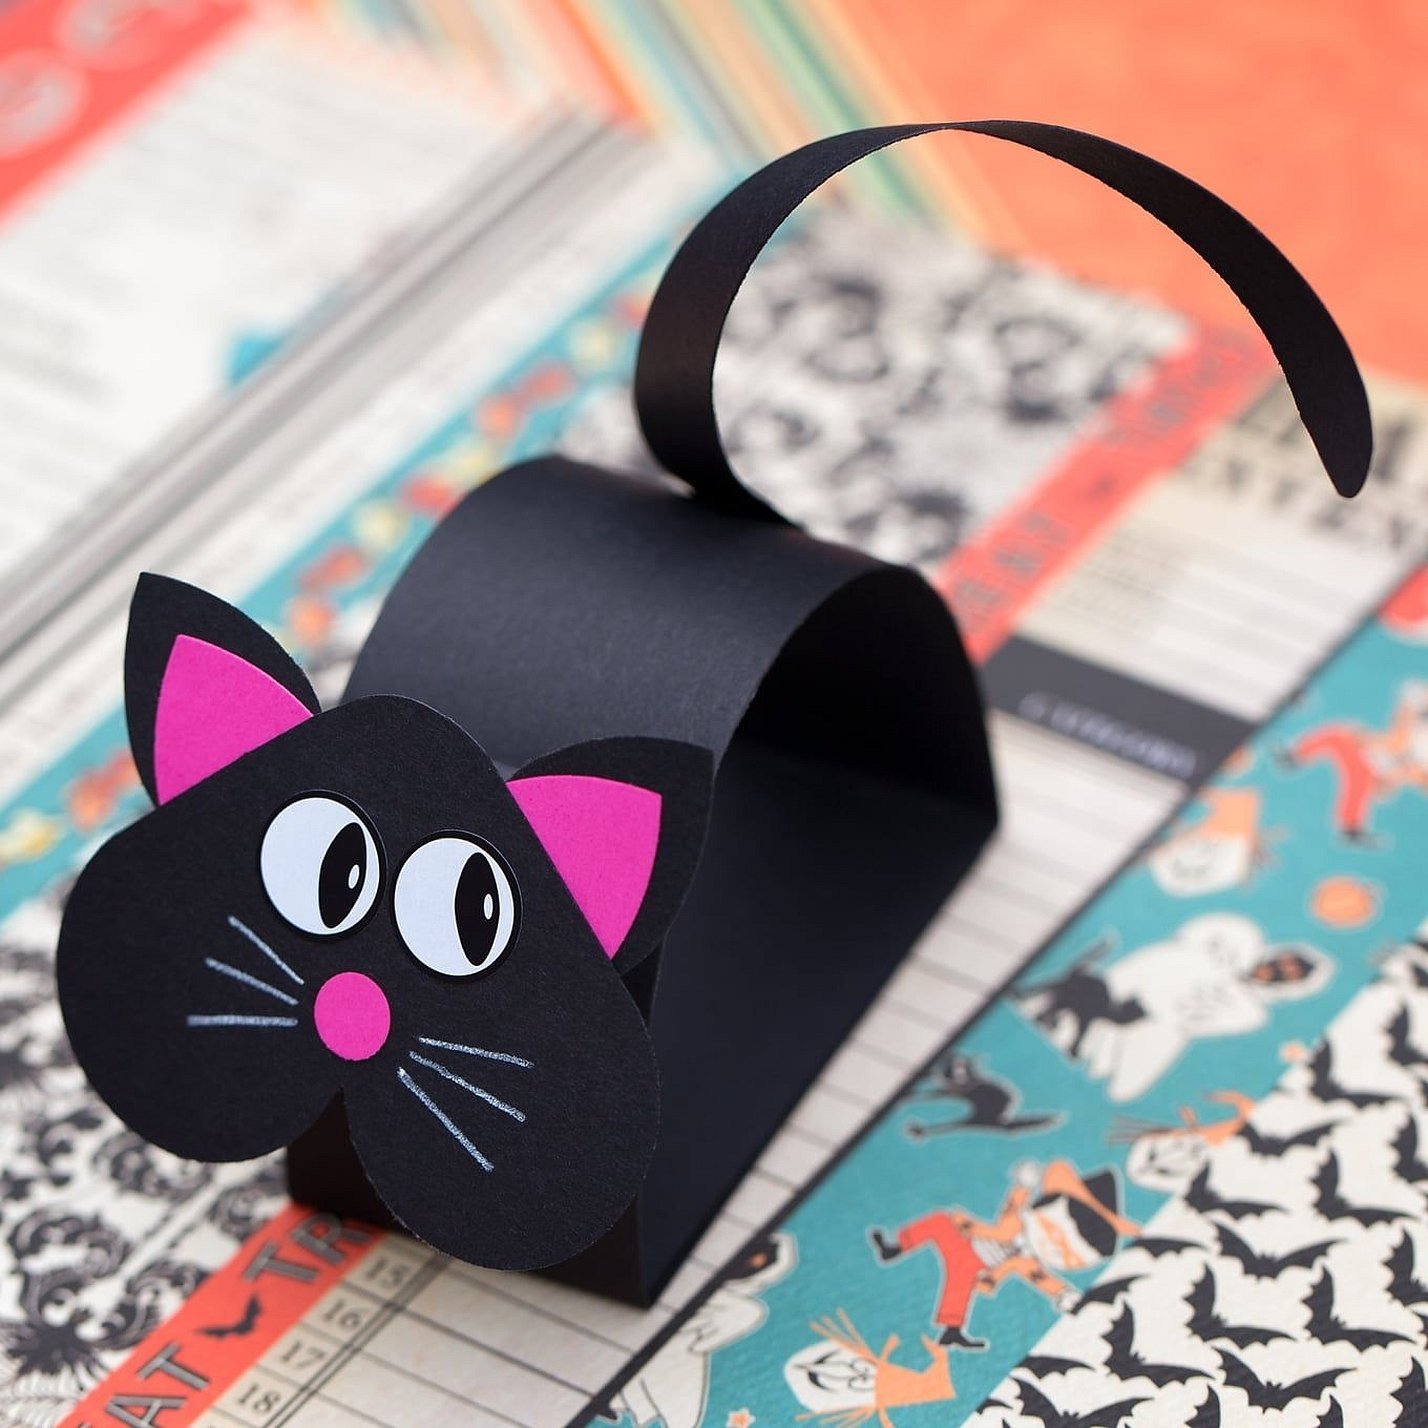
- Cut out figures from black cardboard for assembly: a rectangular elongated strip, a thin strip of softer paper, a heart-shaped rounded muzzle, eyes, pointed ears. From pink paper, cut out a nose and ears smaller than the black ones.
- Bend the ends of the large strip to the middle and glue them to each other. You will get a semicircle.
- Turn it over and place it straight side down on the surface.
- Glue the nose and eyes to the muzzle. Attach the ears to the back. Before this, the pink parts need to be glued to the front side of the black ears. Draw the whiskers with a white pencil.
- Glue the head to one side of the semicircle and the thin black strip to the other.
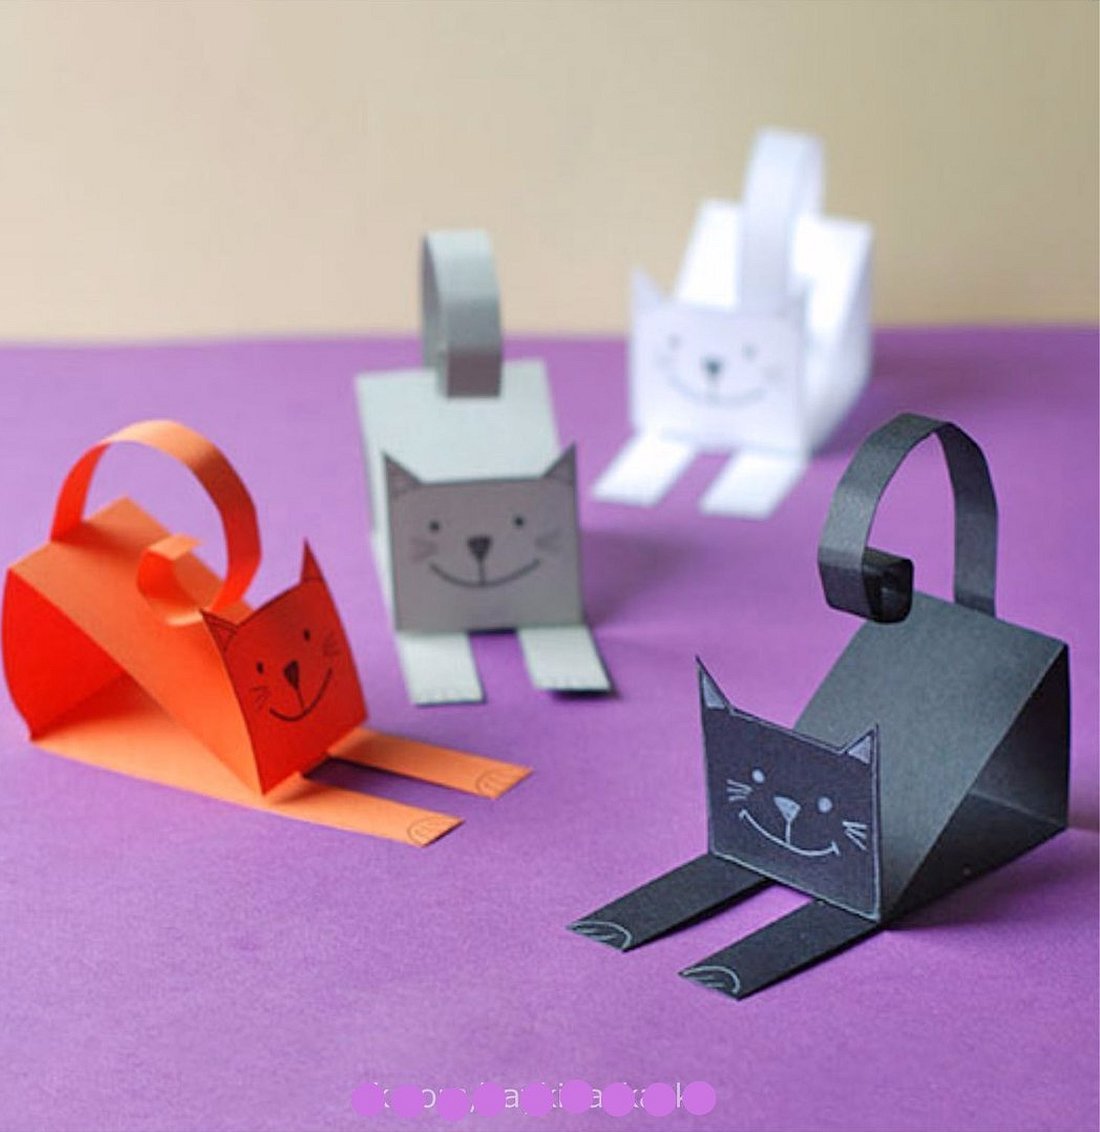
In a similar way, you can make a cat with its paws stretched forward:
- Cut a long rectangular strip from any color of thick paper or cardboard.
- Cut out the excess part from the top in a semicircle, forming pointed ears. Cut out the middle from the bottom as well, forming long front legs.
- In the middle of the strip, make a 2-3 cm gap by folding the paper.
- Bend the area near the muzzle and attach it with glue directly to the place where the paws begin.
- Draw the claws and face.
- Attach the tail and run scissors along the end to create a curl in the paper.
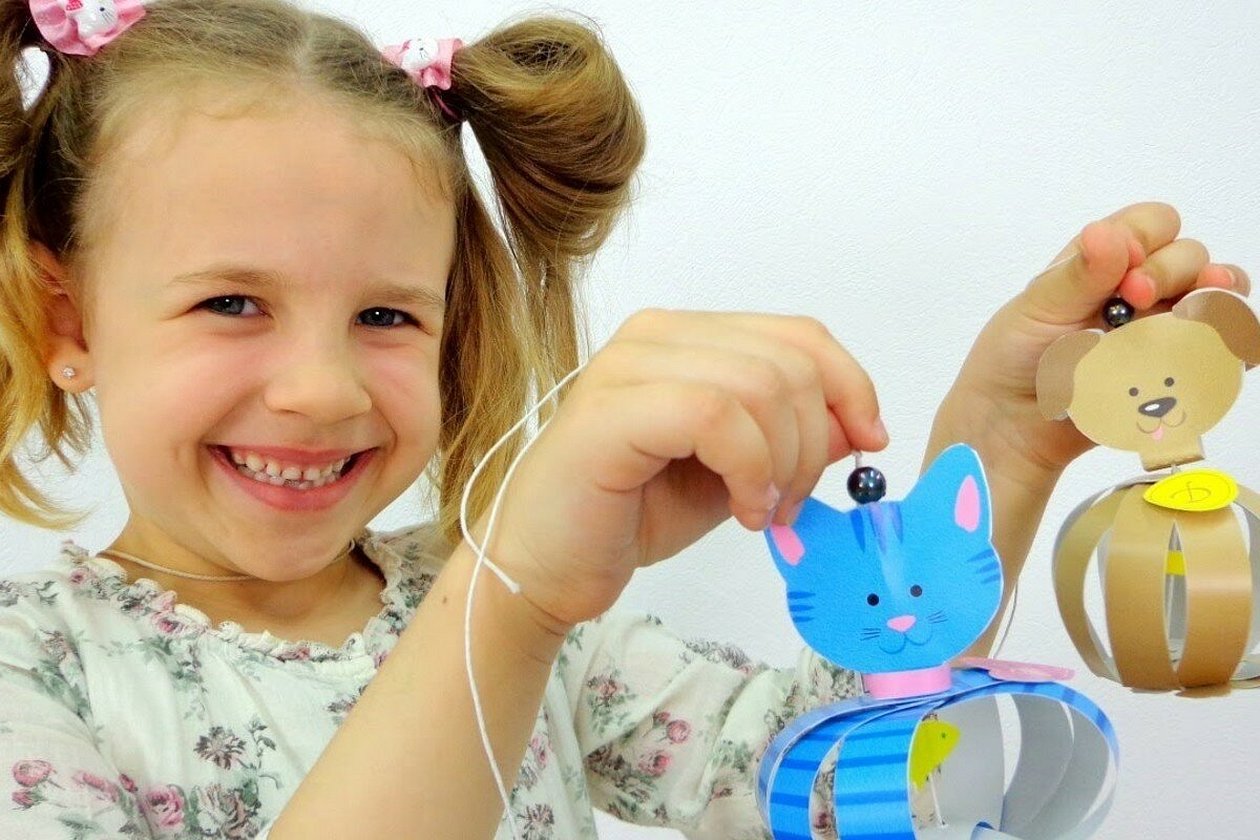
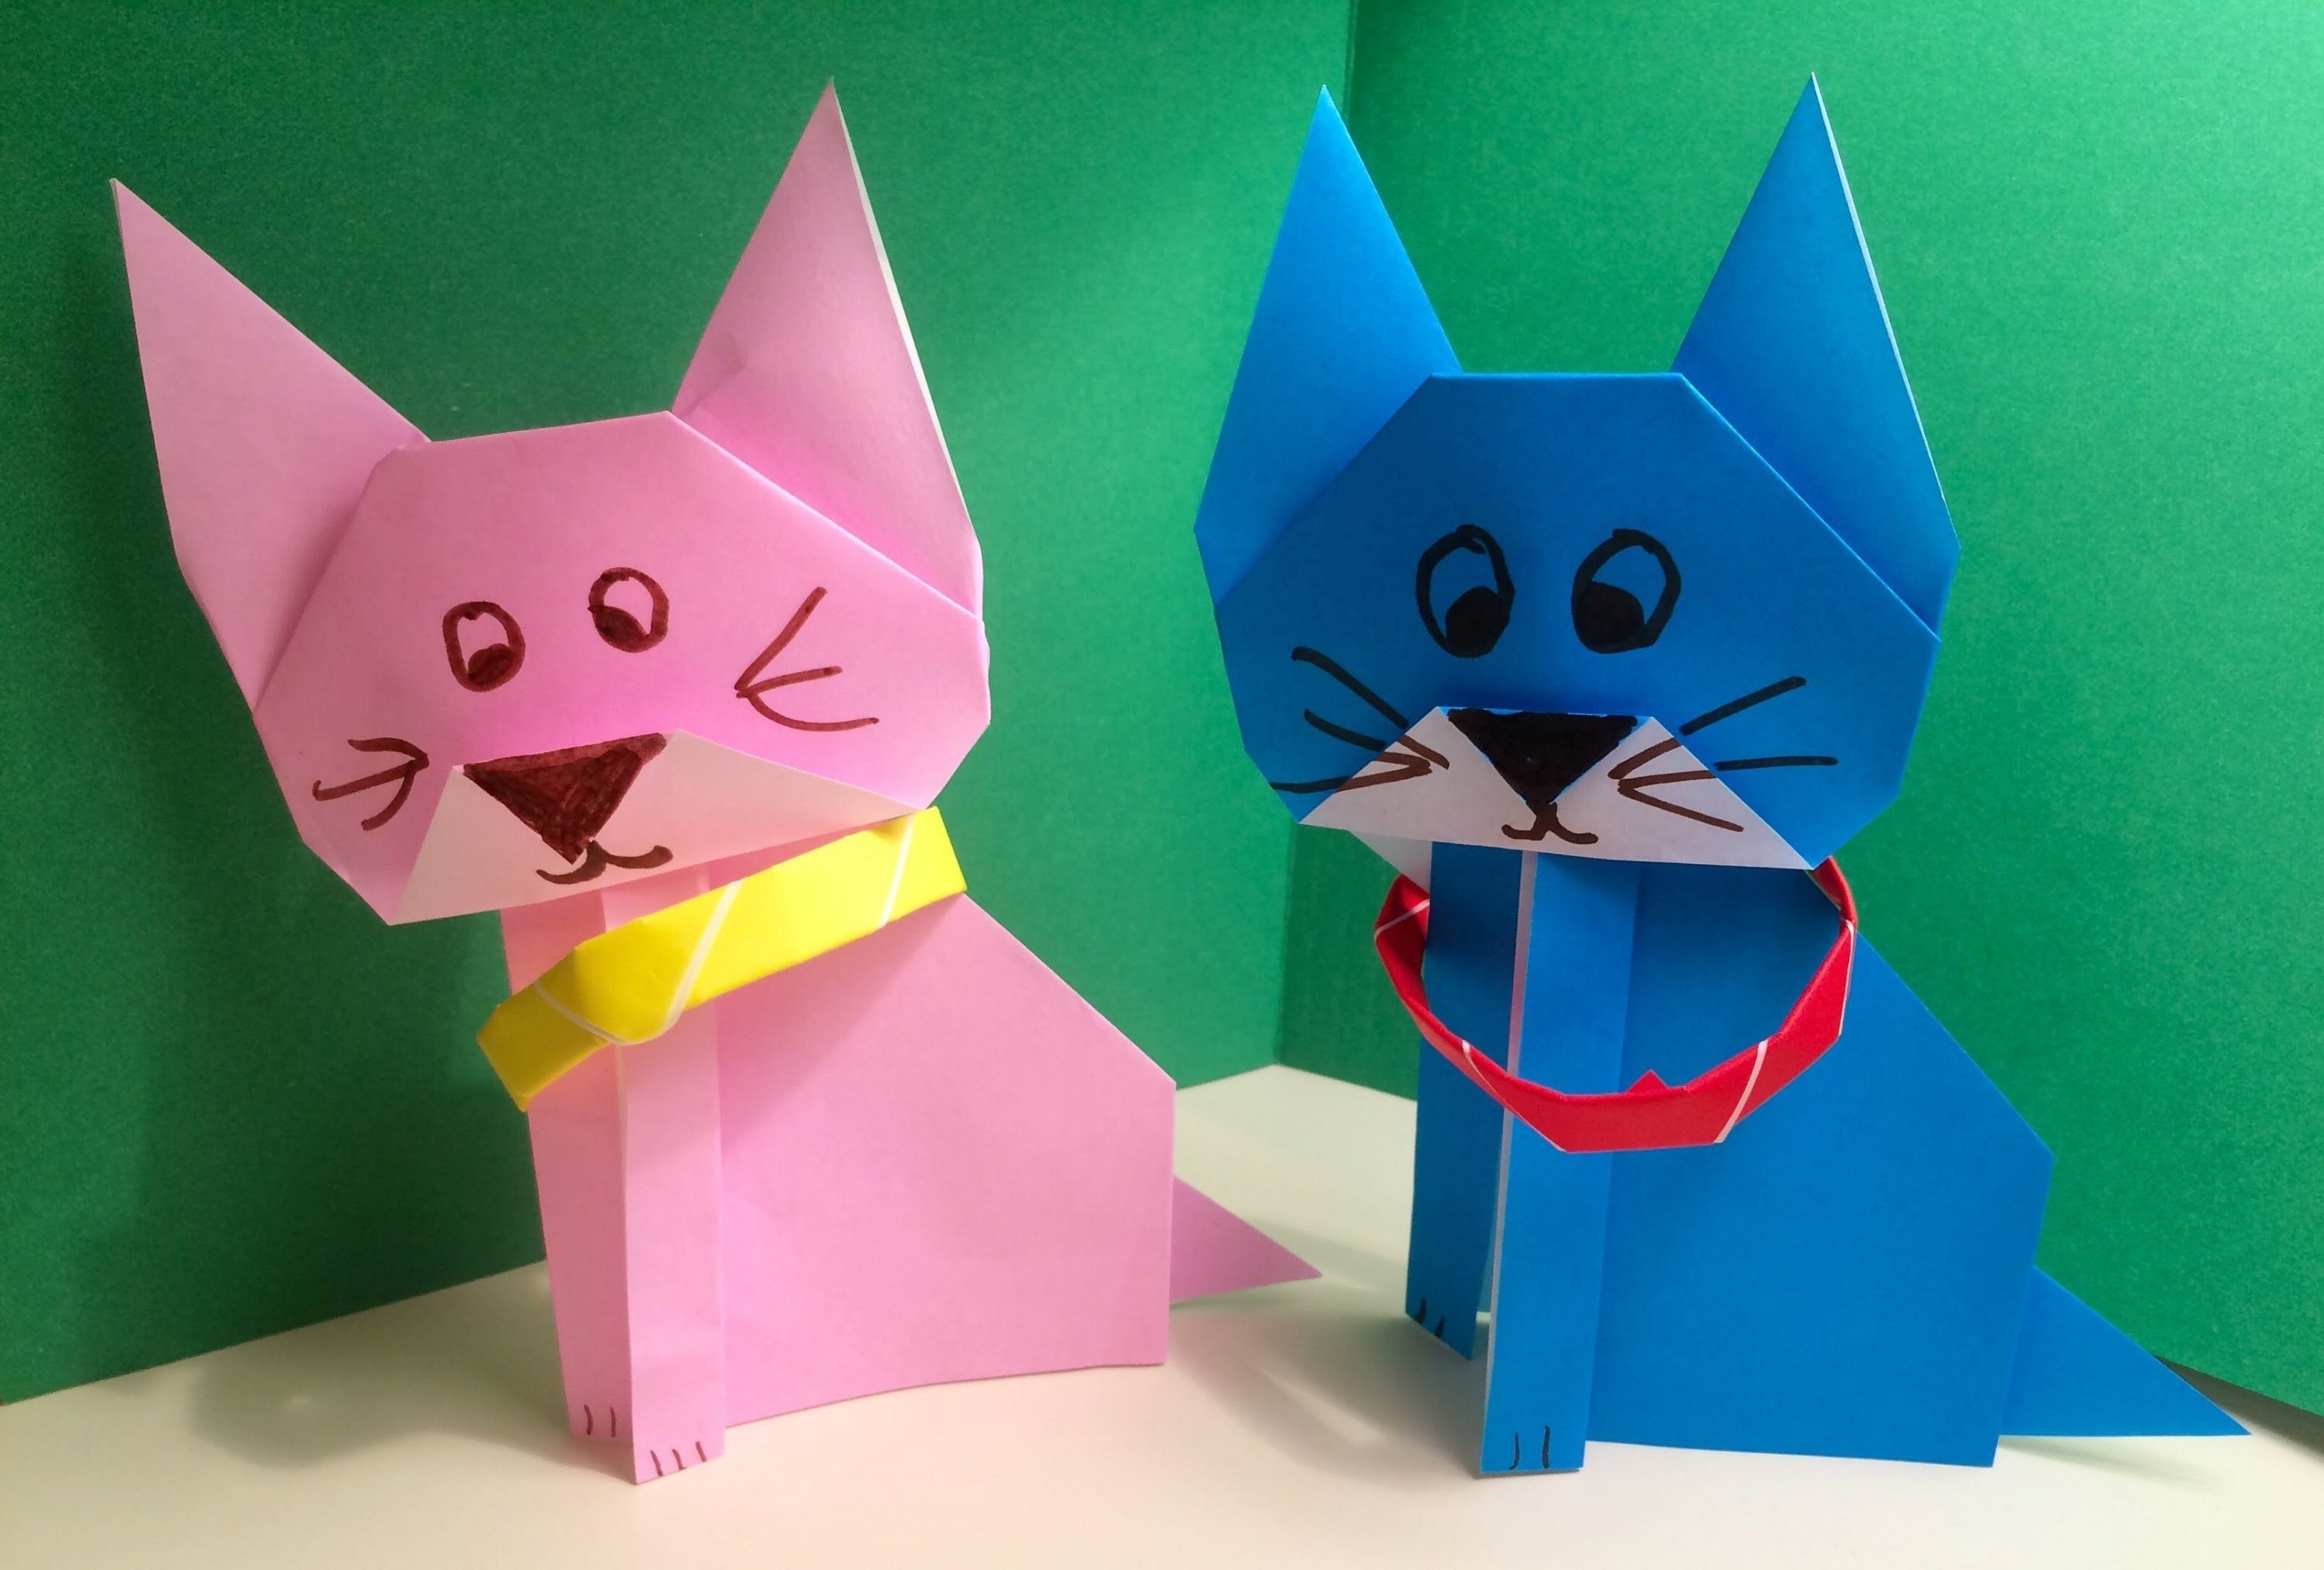
Volumetric cats made of colored paper and cardboard
To create a three-dimensional kitten figure, you need to stock up on glue or a needle and thread to assemble the product. Each part of the craft is made according to a specific template, then they are all assembled in a special order into a whole toy.
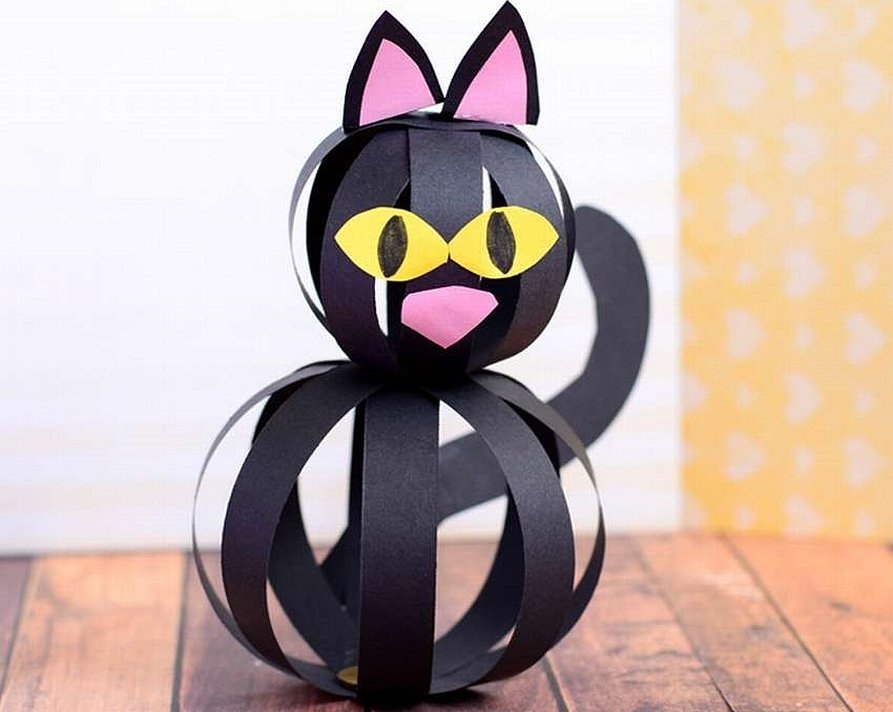
One of the few simple ways to create a craft cat is to assemble it from paper strips. The toy itself is one of the variations of the well-known paper New Year's lantern. It is necessary to cut many strips, the length and color of which depend on the personal preferences of the craftsmen themselves and the wishes of their children. Half of the strips should be a little shorter. Then you need to attach two of them in the form of a cross and glue the intersection. Place the other strips diagonally. Gather the ends up and glue to form a ball. Assemble a sphere from short strips in the same way. Cut out ears, a muzzle and eyes from a different color of paper and attach them to the head. Additionally, you can make paws and a tail.
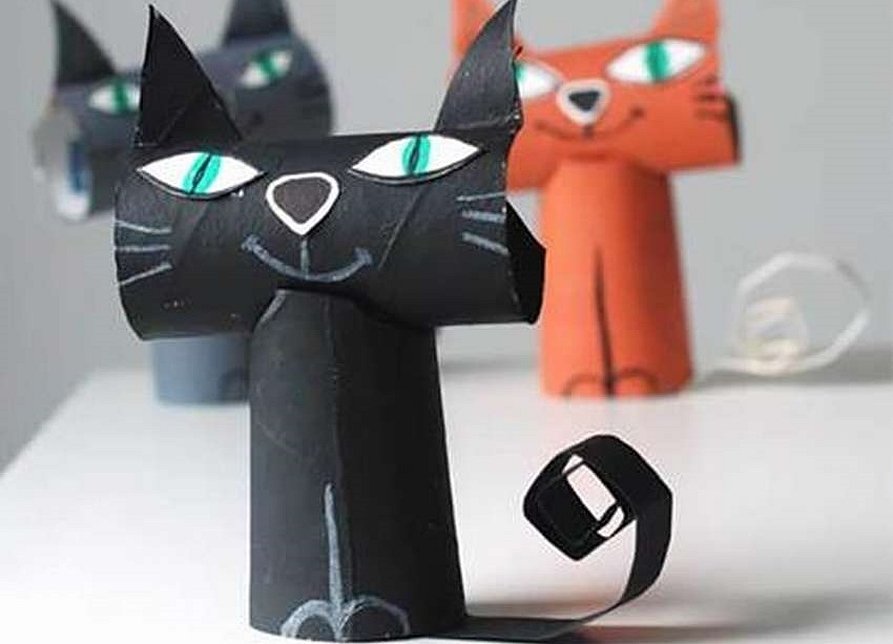
Another option for creating a three-dimensional craft from colored paper and cardboard:
- Make two cardboard tubes, one of which needs to be pressed inwards to cut off the bend. This will be the body.
- On the sides of the other head-sleeve, make curved cuts to create ears.
- Glue the cardboard tubes together.
- Tint the overall background of the toy in one color.
- Glue on the eyes, muzzle, nose and tail. You can make whiskers.
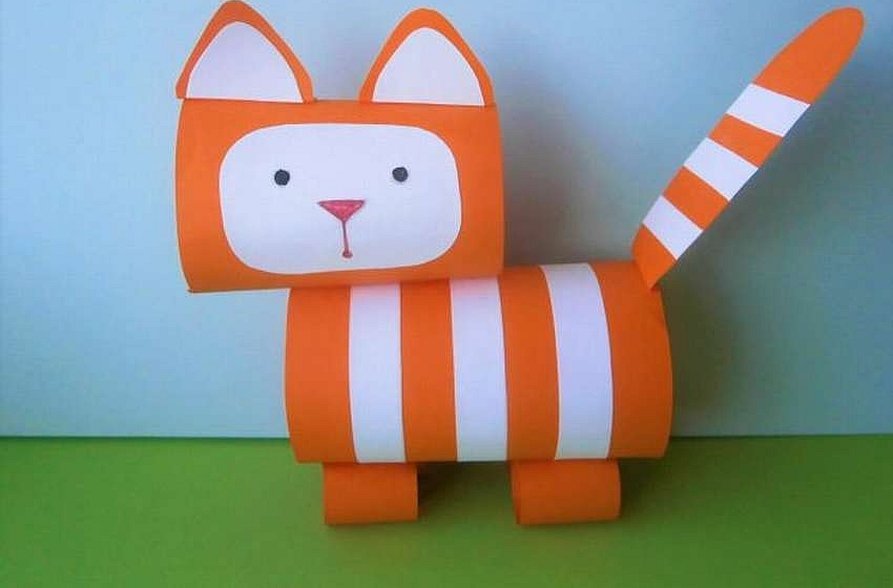
An unusual and interesting craft is the one on the spring:
- First, you need to cut out the following parts from orange paper: two rectangles for the body and head, 4 paws, an oval tail, 2 ears. For the body, a figure 6 cm wide and 13 cm long will do, and for the head - 7 and 14, respectively.
- From white paper, cut out 3 identical thin and long strips for the body, 6 thin short strips for the tail, an oval for the muzzle, and 2 ears.
- Attach the edge of the strip to one end of the body and fold it into a circle.
- Glue the ears, nose and eyes to the muzzle. Attach it to the head, roll the part into a tube and secure.
- Attach the head to the body firmly. You can use glue or a stapler.
- Also roll up the limb parts and glue them together. Attach to the body.
- Glue the strips to the tail and attach the part to the body
Please note! The easiest way to make a 3D cat is using a printed template. There are many different patterns and instructions for creating such toys on the Internet.
Toys made at home from many napkins also turn out to be voluminous. In this case, you first need to make a stable structure out of cardboard, to which you then attach the napkins.
Toy paper cats are cute super-crafts that are made from scrap materials. There are a huge number of ways to create them. You can also make a cat's face out of paper, paint it and use it as a mask.