The technology of creating crafts using paper raw materials is generally available and quite simple. The craft can be additionally processed, for example, painted. Due to the fact that working with paper does not require special knowledge and skills, both children and adults love to craft with this material. Following the step-by-step instructions, you can make the simplest applique or even create a three-dimensional figure, a bookmark for a book or an envelope for a photo, letter.
Why DIY Crafts Are Good for Kids
Scientists have proven that with the help of the most common and accessible materials, such as paper, cereals, plastic mass, you can create real works of art. Toys made by a child will serve as a great gift for a grandmother or grandfather.
Crafts made from paper help a child interact with the world around him and people. Children develop not only a point of view on the objects around him, but also respect for the work of other people.
At the age of 3-4 years, the baby's activity level is very high. His physical abilities and muscles are well developed, which cannot be said about fine motor skills. The process of creating crafts perfectly strengthens the hands, develops each finger separately and reinforces the skills of folding and gluing.
Educators and pediatricians believe that the process of making paper crafts allows a child to:
- Acquire the necessary perseverance.
- Develop imaginative thinking and imagination.
- Form a taste.
- To visually explore the importance of proportions.
- Develop the thinking process.
- Learn to follow instructions clearly.
- Develop independence.
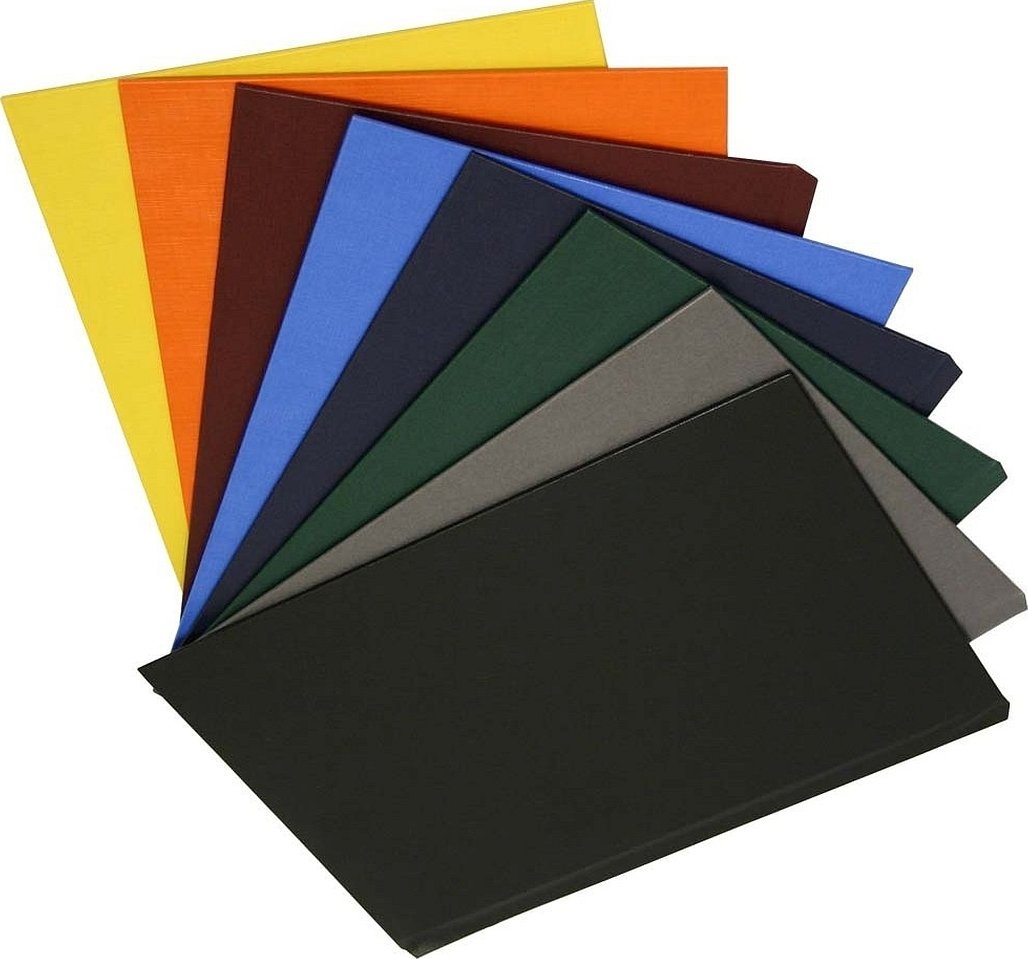
Due to the fact that paper is one of the most accessible and versatile materials, it is most often used for creativity. A sheet of paper is easy to cut, bend and glue. It is due to these qualities that it is very often used by educators and teachers for the development of children, usually in kindergarten.
A wide variety of raw materials can be used to make crafts:
- Ordinary paper, so-called office paper. It can be of various colors. Most often it is used as a basis for crafts.
- Corrugated or crepe paper. Convenient for creating, for example, crafts made using the papier-mâché technique and for making three-dimensional flowers.
- Paper napkins. You can make almost masterpieces from them. This technique is called decoupage.
Please note! There is a huge amount of paper raw material that can be easily used not only to create children's crafts, but also to make real interior items.
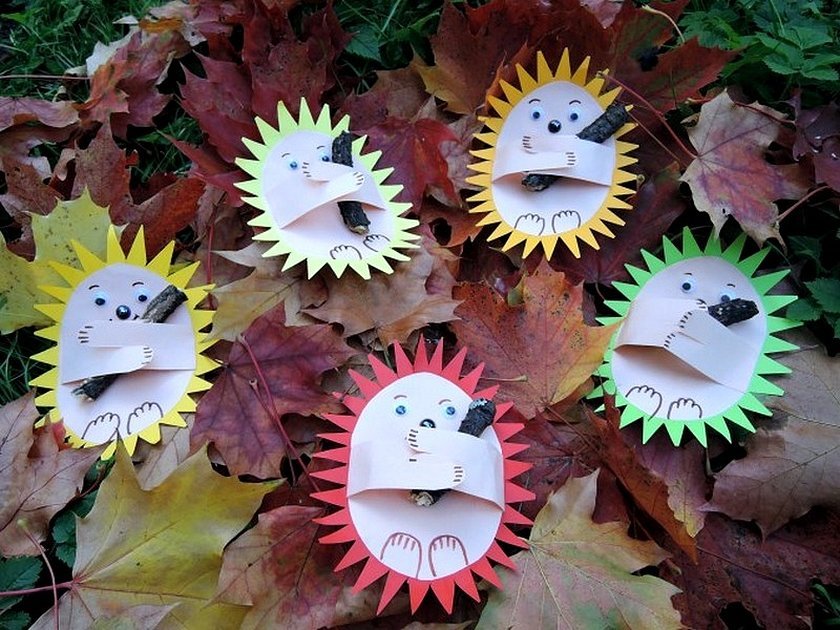
Making a volumetric hedgehog from paper
By turning craft making into a fun game, you can not only develop your child's fine motor skills, but also introduce him to geometric shapes without pressure.
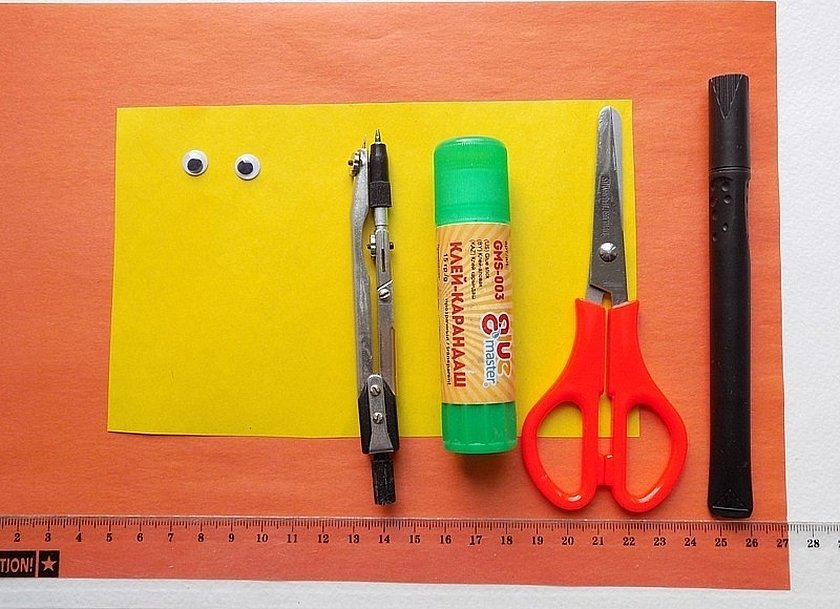
Materials and tools required to make a hedgehog:
- Colored paper in 2 colors: yellow and brown.
- Compass.
- Sharp scissors.
- Glue.
- Any dark colored felt-tip pen.
- Ruler.
- Plastic eyes. If you don't have them, you can just draw them.
Step-by-step procedure
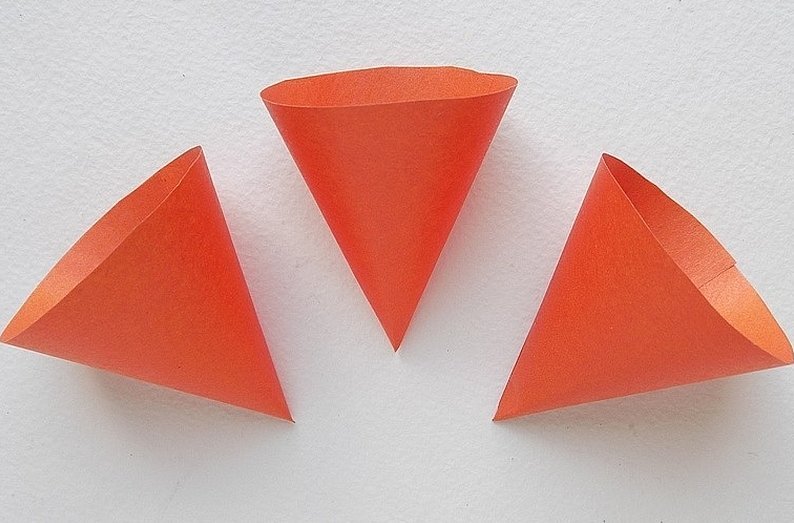
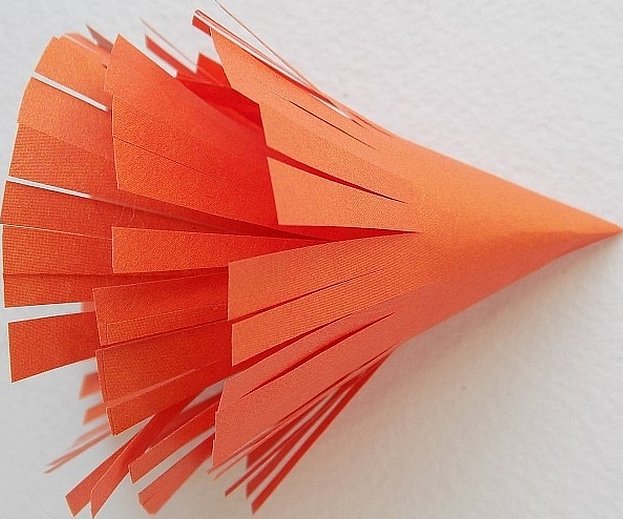
First of all, to create a hedgehog, you need to make three brown cones - they will be the needles of the animal and give volume to the craft. To do this, draw two equal circles on paper using a compass. The recommended diameter is 12 cm. Each circle must be cut exactly in half. Cones must be made from the 3 halves obtained. To do this, carefully roll up the workpiece and glue it together.
The next step is to form the hedgehog's needles. This is very easy to do with regular scissors - frequent cuts around the cone. It should look something like the picture.
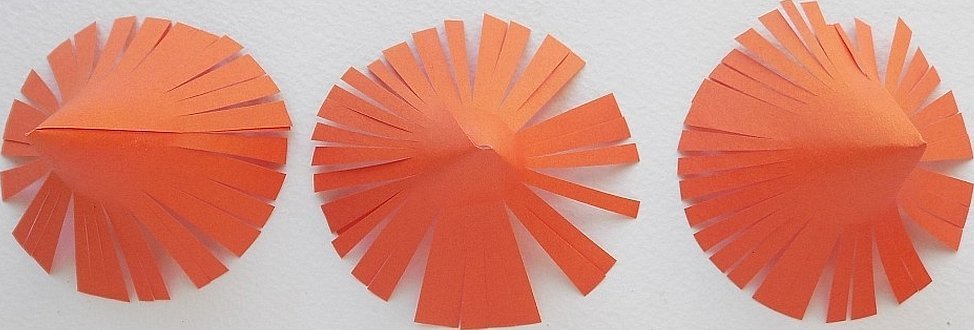
To get as many needles as a real hedgehog, the cones need to be inserted into each other.
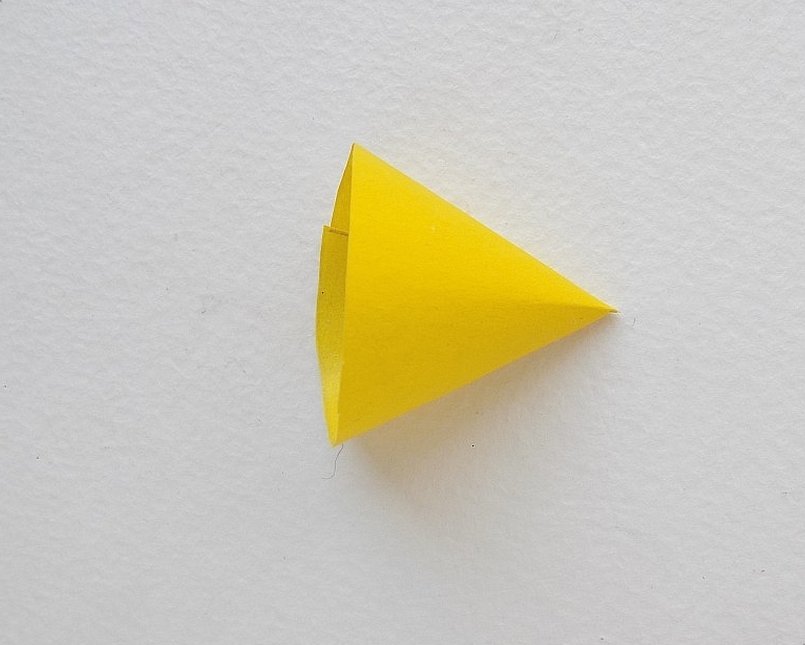
The hedgehog's muzzle is best made of yellow paper. Again, you need a compass. The diameter of the circle should be 7 cm. Having cut out the circle, you need to cut it exactly in half. As in the case of the needles, you need to make a cone.
After putting the muzzle on the needles and gluing it, you should begin the design process.
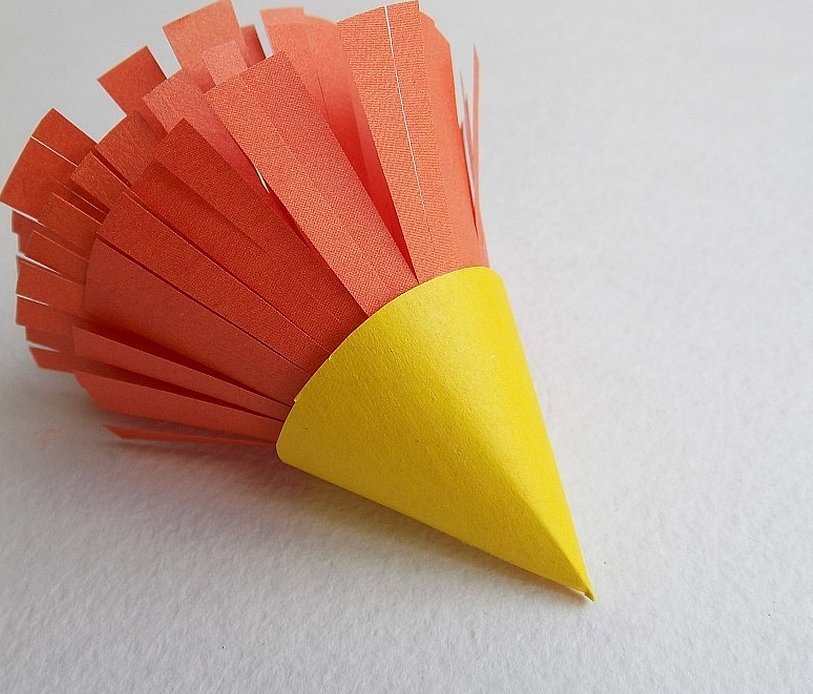
Using a regular felt-tip pen, you can draw a nose on the hedgehog or make one, for example, from a button. If you have plastic eyes, you should simply glue them on, if not, draw them.
That's it, the craft is ready.
Hedgehog from colored paper accordion
How to make a paper hedgehog? The manufacturing scheme is very simple. Even children aged 3-5 can create a hedgehog according to this instruction.
Attention. The use of scissors and glue must be done under adult supervision. It is very important to follow all safety rules.
Before making a paper hedgehog with your own hands, you need to prepare the following materials and tools:
- Colored paper or cardboard sheets. It is recommended to use yellow for the hedgehog itself, and green and orange for decorating the craft.
- Black felt-tip pen or marker.
- Scissors.
- Any glue. It can be PVA or a hard pencil.
Step-by-step procedure
The step-by-step master class involves the following actions:
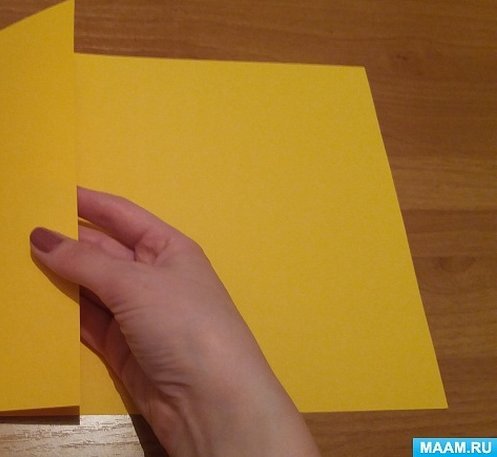
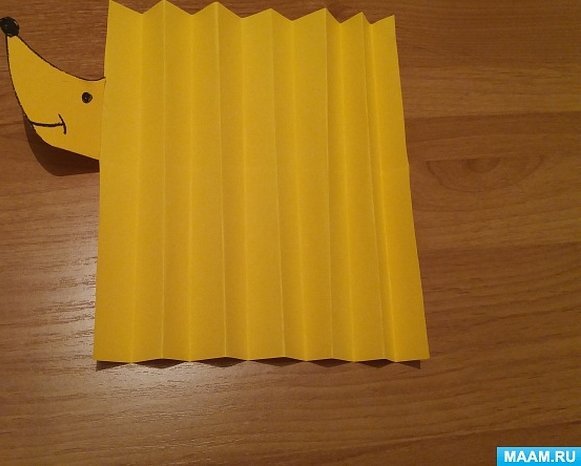
- Divide the yellow sheet into four equal parts in width and fold 1/4. It should look like this.
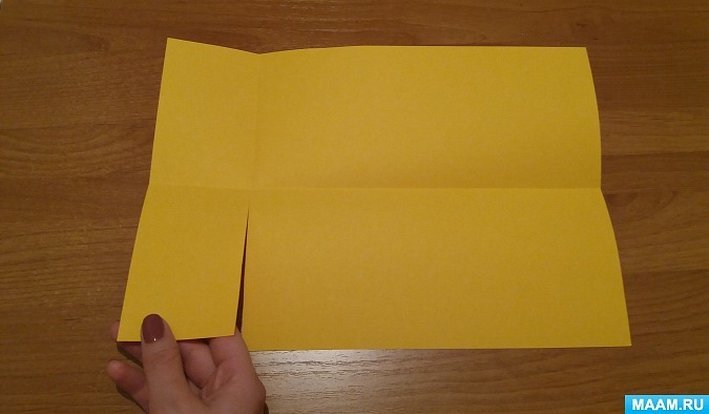
- Next, you need to fold the same sheet horizontally exactly in half. After unfolding the sheet, you need to cut it as shown in the picture below.
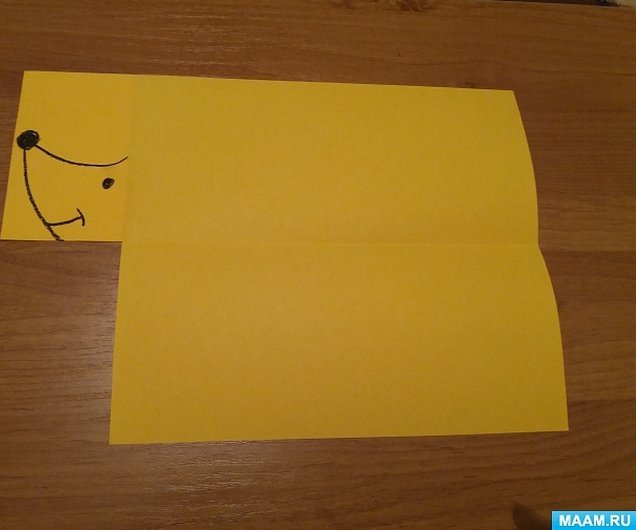
- The cut section needs to be glued to the upper, uncut part. On the resulting rectangle, draw the outline of the hedgehog's muzzle with a black marker.
- Cut out the muzzle along the drawn outline as carefully and accurately as possible. You should end up with the animal's head, combined with a large yellow rectangle.
- Form the body. To do this, fold the sheet so-called accordion. It is very important to do this in the direction of the muzzle.
- The accordion, gathered up to the muzzle, must be folded exactly in half and glued at the fold.
If all the steps were done clearly and correctly, you will get a hedgehog like in the picture, which you can also decorate. You can make a decoration for it, for example, from pieces of yarn or glue some fruit to its needles.
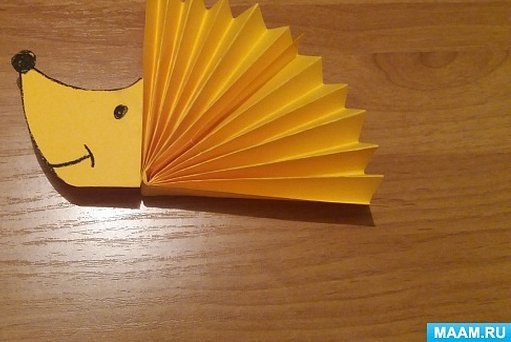
Pictures will help you study the process of creating a hedgehog in more detail.

You can complicate the manufacturing process by adding volume to the animal. In this case, it is recommended to replace the paper with cardboard. The manufacturing principle is identical to the master class described above, but the parts for the second side must be made mirrored.
NoteA DIY cardboard hedgehog will be more stable and can be used even in volumetric compositions.
Paper crafts are available not only because of the cheap material used as the basis of the product, but also because of the simplicity of their creation. For hundreds of years, people have been coming up with more and more new ways to make something unusual or even magical from an ordinary sheet of paper. Coloring books, origami figures, postcards, models of animals, transport or even houses. All this can be made from paper. The result depends only on your imagination and desire.


