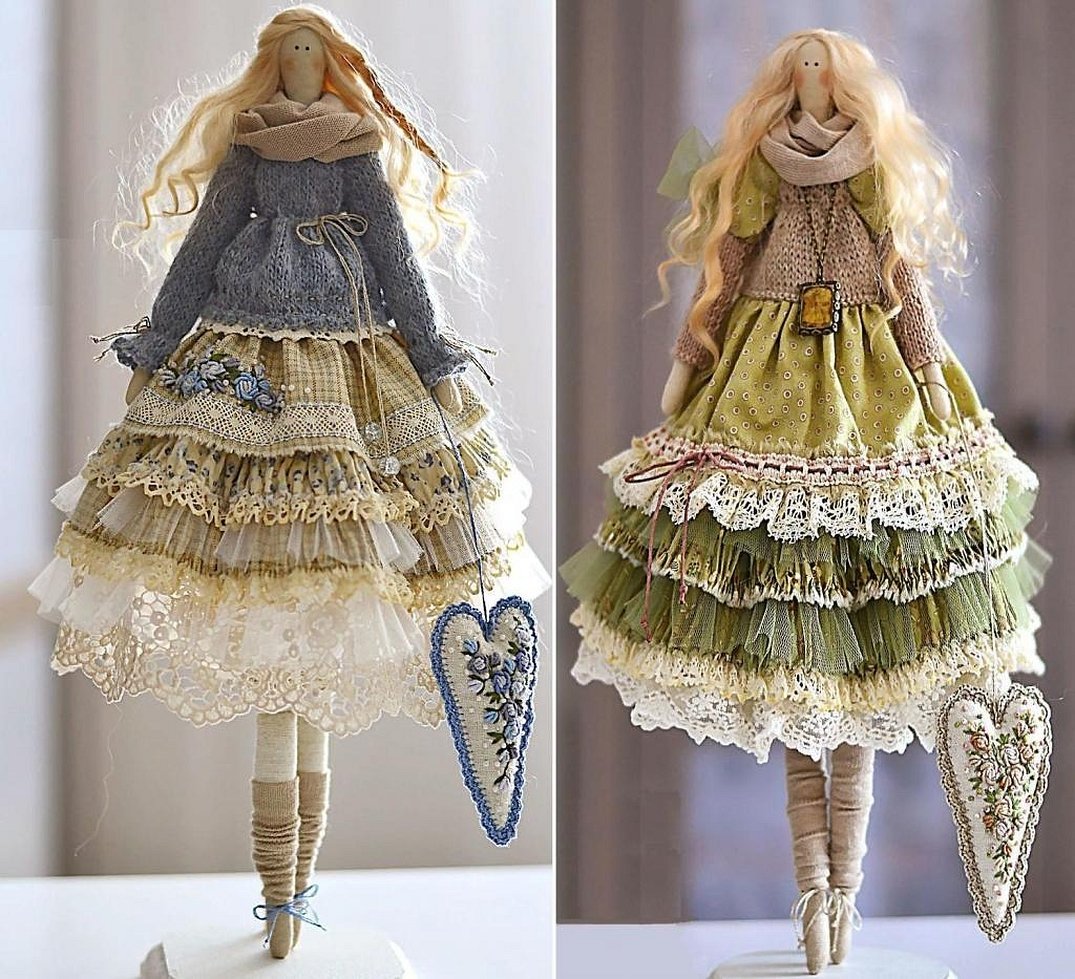
Tilda dolls are made exclusively by hand and only by prior order. Only natural materials are used to make dolls. This can be flax or cotton. Less often, you can find tildas sewn from calico. Most often, unique clothes for tilda are a real work of art. They are often complemented by exquisite accessories.
History of the toy
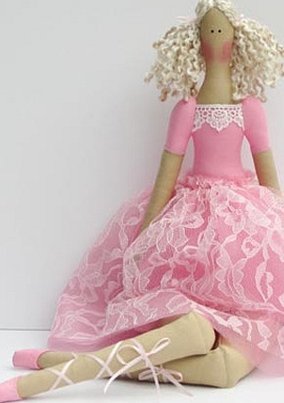
The first news about the Tilda doll came to the world from Norway. Designer Tone Finnanger created it in 1999. The unusual proportions of the doll gave it another name. Bigfoot has characteristic features that combine frivolity, some absent-mindedness and an unchanging sense of beauty. Very often it is expressed in an unusual and unfamiliar combination of things. This can be massive, even bulky shoes and an elegant evening dress. The facial features of the Tilda are always the same - small eyes, rosy cheeks.
Tilda has literally become recognizable and famous all over the world in just a few years. In recent years, the designer and author of the Tilda brand has been focusing on national characteristics in her books. In her collection, you can find dolls with a wide variety of features inherent in one or another ethnic group.
In her books, Tone reveals all the secrets of creating not only the doll itself, but also provides patterns for sewing clothes. You can also find patterns in them that allow you to knit openwork outfits using a crochet hook or knitting needles. For example, even a novice craftswoman can make a knitted jacket.
For reference! All doll patterns in the books are presented in life size.
Materials for sewing clothes for tilda dolls
Beginner craftswomen are recommended to sew a dress for a tilda from inexpensive and the simplest fabrics. The main condition is that the fabric should not stretch too much and slide when sewing. That is why clothes for a tilda doll are most often created from cotton and linen pieces of fabric.
In common practice, the doll's body is made of a single-color fabric. The most suitable shades are brown, beige, and gray. Sometimes yellow material is used to sew the doll. More experienced doll makers, who have already gotten the hang of it, use dyes to create their masterpiece. Onion peel or regular black tea are suitable for this.
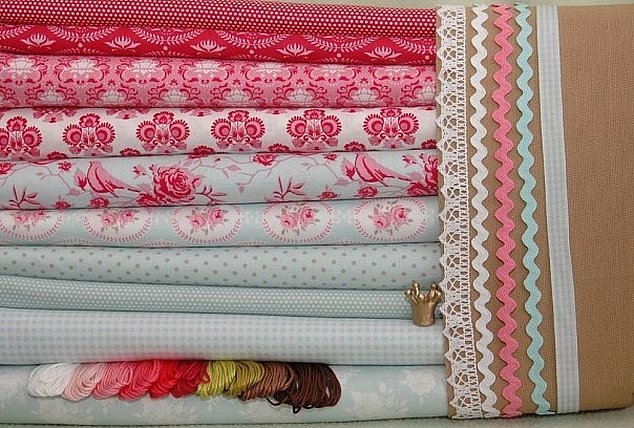
When choosing fabric for sewing a dress, it is very important to take into account the fact that large patterns are absolutely not suitable for this toy.
Attention! Tilda is an elegant doll, and she will look extremely ridiculous in “gaudy” outfits.
When creating the image of this interior toy, it is necessary to remember the generally accepted rules. Craftswomen advise buying fabrics with small flowers or polka dots. A checkered or striped outfit will also be appropriate. Monochrome outfits, with the right combination of colors, are also welcome for creating tilde clothing.
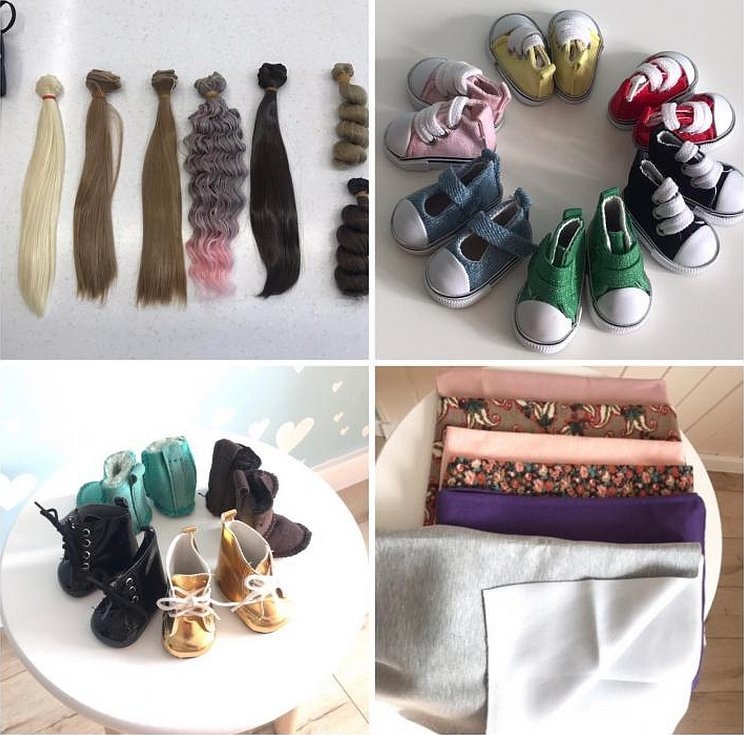
There is a huge palette of ready-made sets for sewing clothes for tilda on the market. They can include all the necessary accessories not only for sewing an outfit, but also for creating the tilda itself.
How to take measurements of a tilde
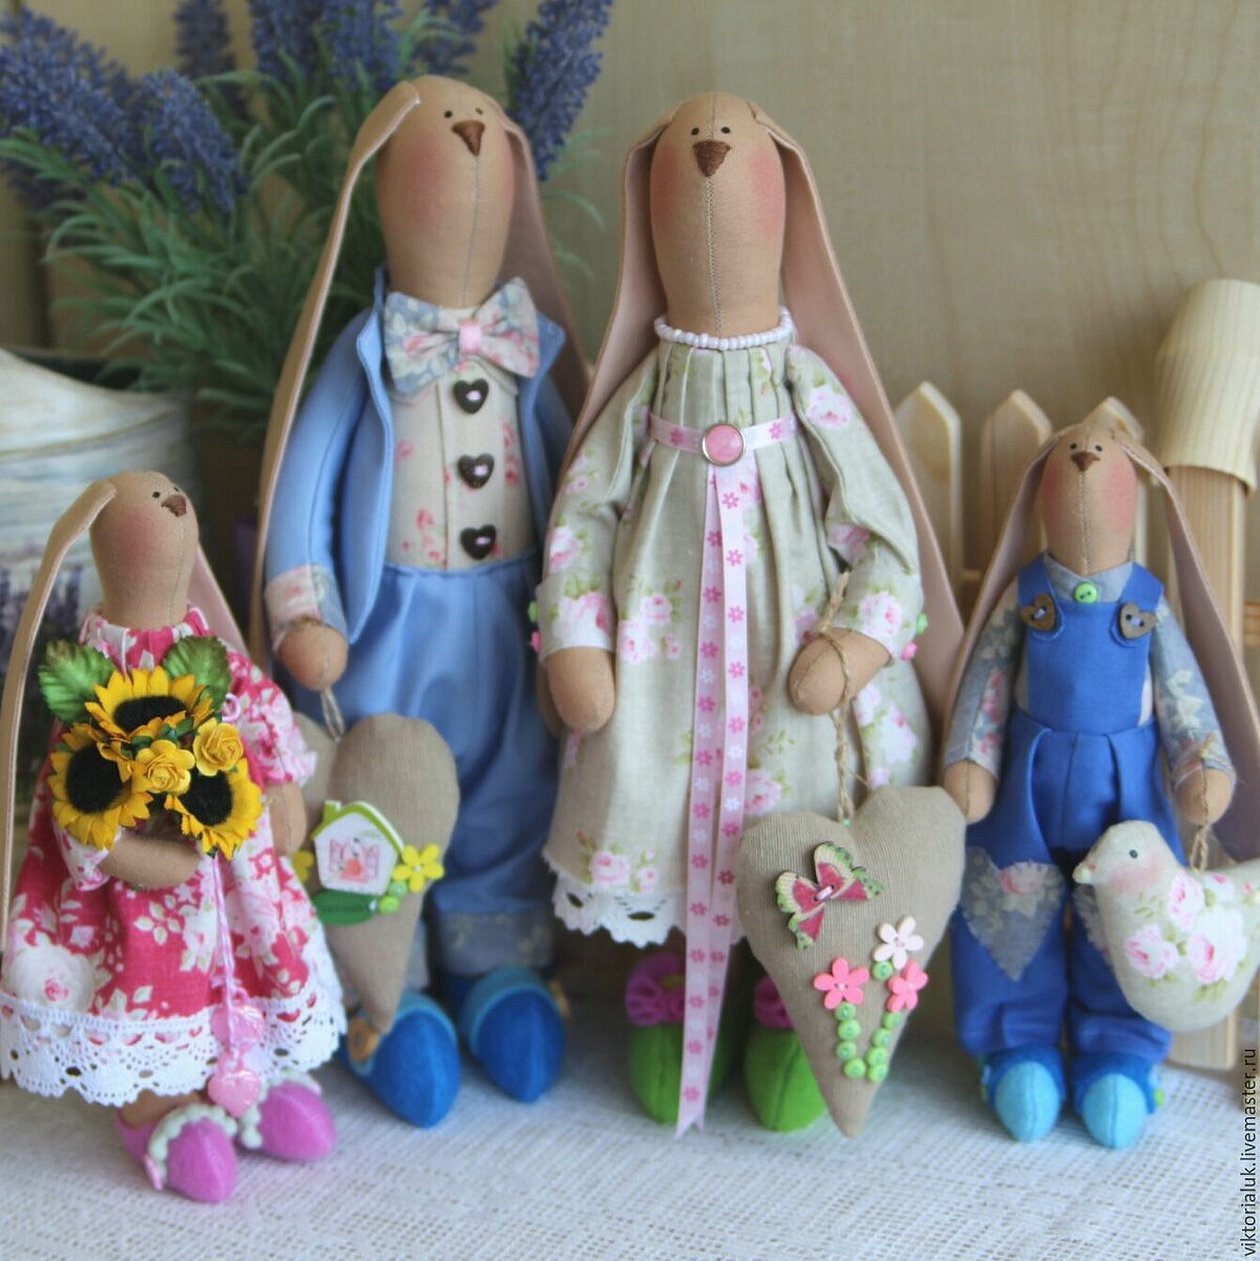
Over its 20-year history, the appearance of the tilde has changed greatly. Previously, they were graceful and very thin dolls, approximately the same size and with similar outlines. Now the tilde is a ballerina girl, a plump girl, a hare. Its size varies from very miniature to simply gigantic.
For reference! You can even order a life-size doll.
The measurements for each will naturally be different. To sew clothes for a tilde yourself, you need to do the following:
- The main indicators are determined. For this, two laces are tied on the doll's neck and in the waist area.
- Chest circumference (Cg) is measured along the neckline from one side seam to the other.
- The waist measurement (W) is taken from one side seam to the other. In sewing, it is common to use the half-girth of the waist. Or half of the previously tied lace is measured.
- Shoulder width (Shp) is the distance between the point where the right arm is sewn in and the left.
- Back length (BL) is the measurement between the neck cord and the waist cord.
- Arm length (L). The starting point is the point where the arm is sewn in and the distance to the wrist is measured.
- The thickness of the arm is measured exclusively in the armpit area, that is, the largest one is taken (Or).
- The neck circumference is measured completely (Osh). To do this, it is enough to measure the length of the cord tied earlier on the neck of the tilde.
- Chest height (Bh) is measured from the armpit to the waist.

Manufacturing process
The process of sewing clothes should always begin with the construction of a pattern. First of all, you need to start with the back pattern:
- A rectangle is drawn on any paper. One side of it should be equal to Cg, and the other to Dst.
- The width of the rectangle is divided exactly in half and a straight line is drawn downwards.
- At the top, measure ¼ of the neck circumference from the center line in both directions.
- The collar line is set off from the top intersection point. To do this, step back 2 mm and draw an arc through this indicator and two points Osh.
- Also, 5 mm is measured down from the top point - this will create a horizontal line, which will later be the basis for the starting point of the sleeve. At the intersection of the collar line and the rectangle line, 180 mm is measured from each point.
- At the bottom, you need to set aside 220 mm on each side.
- At the bottom, at the intersection of the rectangle and the central line, you should set aside Bg. Next, you should connect the intersection points of this indicator with point 6 with a line.
- The sleeve line will be obtained by connecting points 7 and 5 with an arc.
The next step is to create a pattern for the front:
- You need to completely copy half of the back pattern onto a new sheet.
- The most convenient way to draw the neck is with a compass.
- It is important not to forget to add 150 mm to the center line for the fastener.
The principle of pattern construction is identical for all tildas. Only the digital indicators can change.
Patterns and step-by-step instructions for sewing clothes
A step-by-step master class on sewing clothes for a tilda consists of clear and step-by-step implementation of all recommendations.
For a modern tilda, you can sew a denim jacket and trousers.
The jacket is made according to the basic pattern. It is best to use the thinnest denim possible.
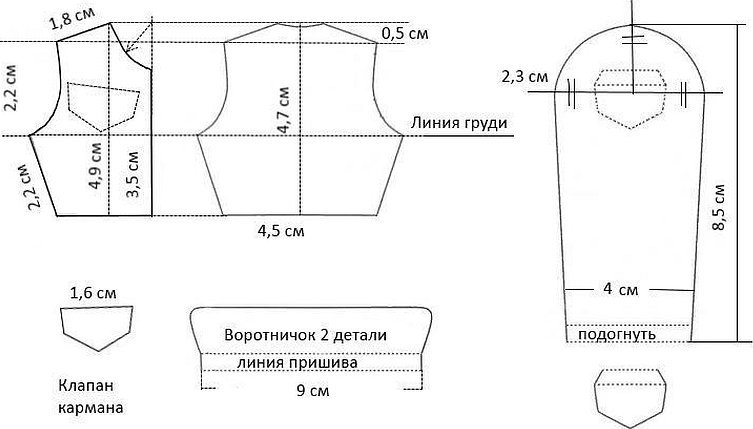
All pattern details are designed for dolls of standard height - 35 cm.
Attention! For a doll of a different size, it is very important to follow the rules of proportion.
Stages of sewing a jacket.
- All pattern pieces are cut out.
- The pockets are sewn onto the sleeve and the front. The next step is to topstitch them.
- The shoulder seams are also sewn on first and then stitched out.
- The collar is sewn on.
- Once the side seams have been sewn, you can begin sewing in the sleeves.
- The bottom of the jacket is folded over and stitched as carefully as possible.
It is recommended to stitch all seams with white threads. The details should be carefully ironed before sewing to the product.
NoteIf you add 50 mm to the bottom of the pattern, you can make a belt at the bottom of the denim jacket.
If you sew hooks or put buttons on the front, you can even button the jacket.
Making clothes for rag dolls is a great pleasure. It is very convenient to sew directly on the tilde. Due to the soft body, the parts are easily attached directly to the doll.
Due to the peculiar body, the tilde's trousers should reach the hip line. This product does not even require a drawing. The fabric folded in half is applied to the doll. This is done in order to measure the length of the future trousers. The recommended length is to the ankles. The width is best measured at the place where the legs are sewn into the torso.
Attention! The needlewoman must not forget to make an allowance of at least 50 mm on each side.
The beginning of the legs is the point where the legs are sewn on. The fabric is cut exactly to this point.
For the elastic and hemming of the trousers, it is necessary to leave an allowance of at least 20 mm. The style of the trousers can be straight, or you can insert an elastic band into the hem and create a new model for your tilde.
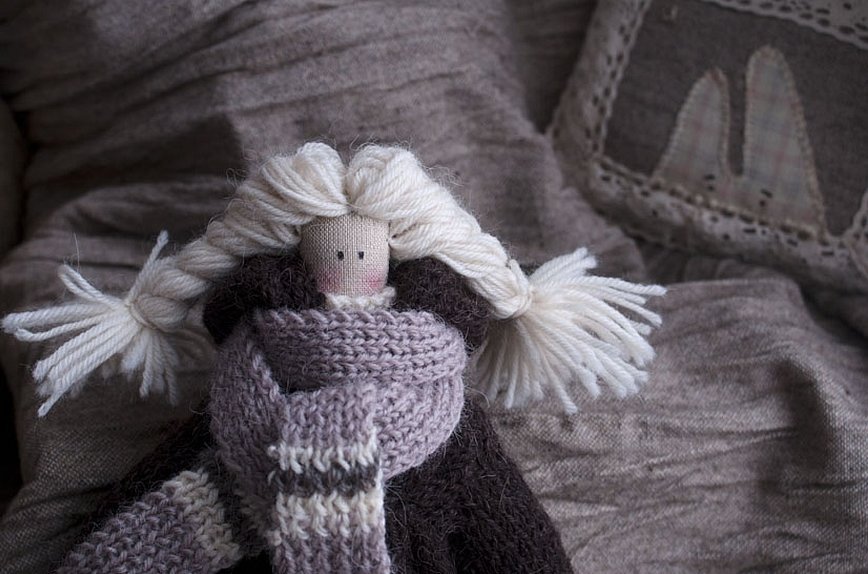
Knitted clothes for tilda girls
The description of the process of knitting clothes for tilda dolls will be considered using the example of a sweater for a tilda hare.
To work you will need to prepare in advance:
- 11 knitting needles No. 2.
- Acrylic yarn, total weight 30-40 grams.
- Tilda doll.
After taking measurements, you need to calculate the density of the future product. The universal knitting density is 1 cm - this is 2.5 loops.
The standard doll has the following dimensions:
- Hip circumference is 18.5 cm or 46 loops.
- Chest circumference - 16 cm (42 loops).
- Arm circumference 6 cm - this is 18 loops.
- Neck circumference 10 cm (24 loops).
Knitting a tilde dress is done according to the same principle, only two more indicators are added: the length of the product and its width at the bottom.
Making clothes for Tilda is not just fun. This way you can not only "get your hand in", but also gain invaluable experience in creating models.
Draperies, decorations, and a wide variety of accessories will allow you to turn a dull rag body into a real work of art.
It is not for nothing that for many years now tildes have been a sign of good taste and a real decoration of any interior. Beginning craftswomen should take ready-made patterns as a basis, and only then can they experiment and create their own clothes.


