Knitting needles are a versatile tool that can be used to create various wardrobe items and their tiny copies. Adult women and little girls are fond of making knitted doll clothes. Beautiful doll outfits are posted on the Internet, becoming role models and discussions among craftswomen. A doll jacket can be knitted or crocheted in a few hours and can be a good gift for a little girl.
Specifics of knitting doll clothes
Doll clothes are constructed and knitted differently than clothes for people. The proportions of a human body are different, so the assembly of the doll sweater parts is done in a different sequence.
The material for knitting toy clothes is leftover yarn. For this reason, finished products rarely correspond to the samples from magazines. It should be taken into account that large patterns are not suitable for miniature products. Before starting the main work, it is necessary to knit a sample.
Please note! Some dolls and babies have splayed fingers on their hands, so it is impossible to pull on sleeves that are too narrow. These parts should have ties on the seams.
What yarn is best to use, necessary tools for work
On forums, craftswomen ask what yarn and tools are suitable for making doll outfits. The choice of material depends on:
- size of the toy;
- type of clothing;
- models.
Most often, thin threads and needles are used. Most manuals in magazines indicate the yarn and needle size to use. These can be:
- acrylic;
- mixed with lurex;
- "grass";
- cotton.
If the type of material is not specified, you can use any yarn from the list below. The yarn should be very soft. Several types of threads are suitable for this purpose:
- Nirvana (Filatura di Grossa brand). One skein contains 25 g and 340 m. The factory produces products dyed in popular colors.
- Merinosilk (Grignasco Knits). In a skein 25 g and 350 m.
- Merino silk (from Seam). This yarn is available in a large number of colors. In a ball of 50 gr. and 670 m. The yarn is suitable for miniature dolls and soft toys.
Formal dresses and blouses are knitted from Madeira brand threads intended for embroidery. One spool contains 400 m. This amount is enough to make several items.
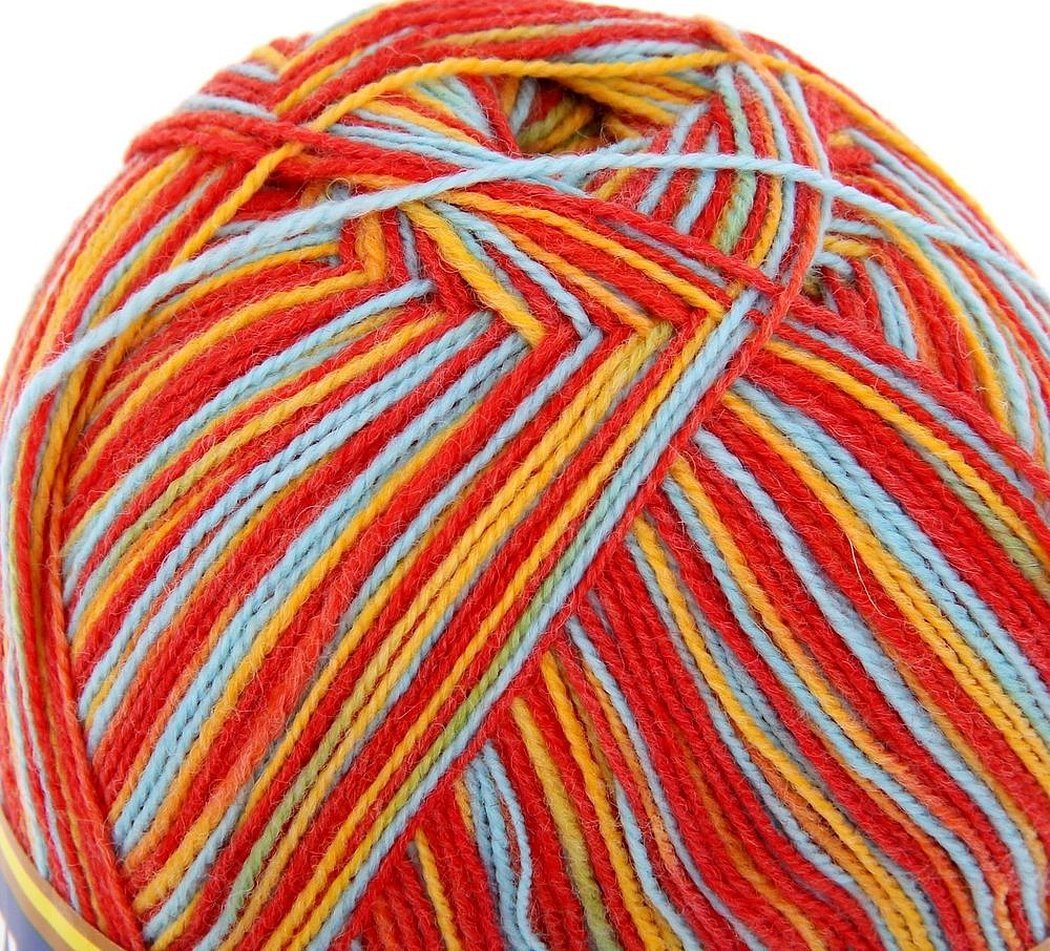
Experienced knitters recommend melange yarn to beginners. This type of thread gives the products a smart look. Sweaters, jumpers, fur coats are knitted from "grass". Fluffy pile masks small flaws and imperfections well.
Please note! To work with special yarn, thin needles from 0.5 to 0.9 number and a hook are required. This is the most commonly used tool.
Popular models of knitted blouses
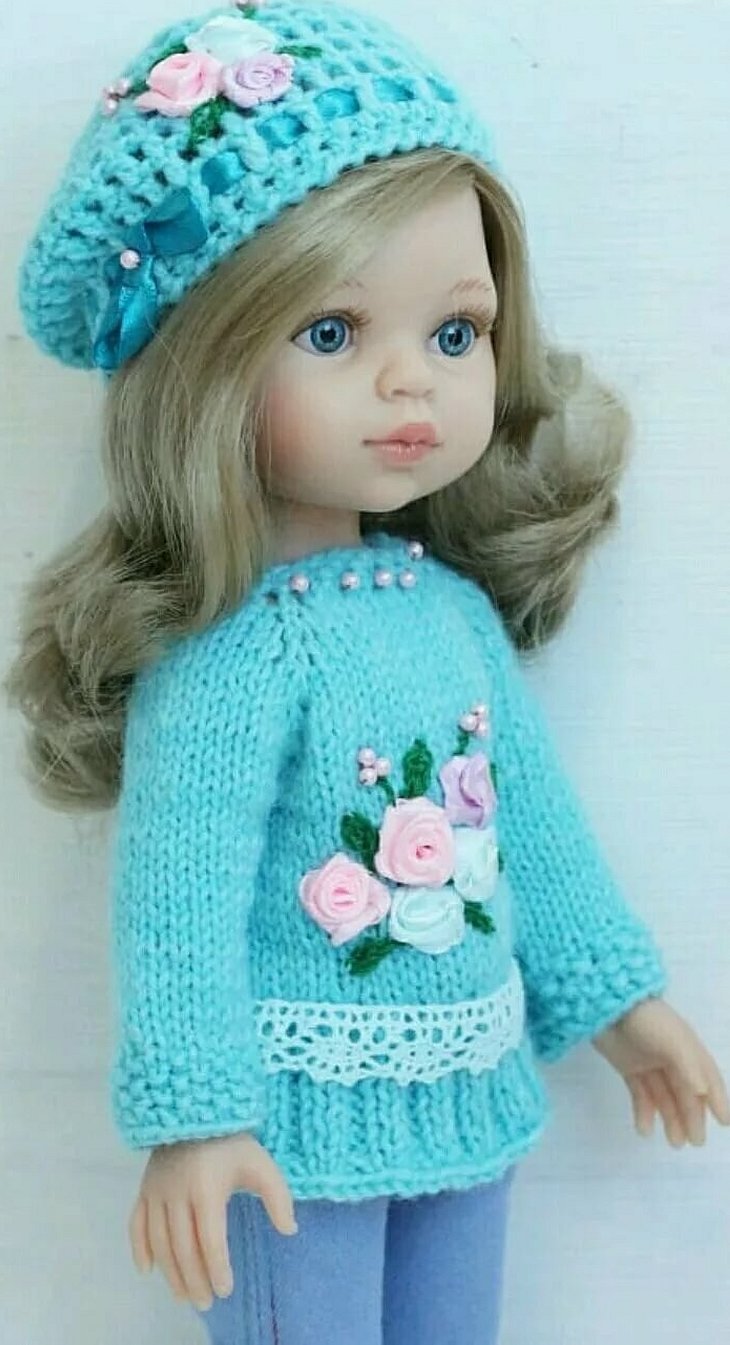
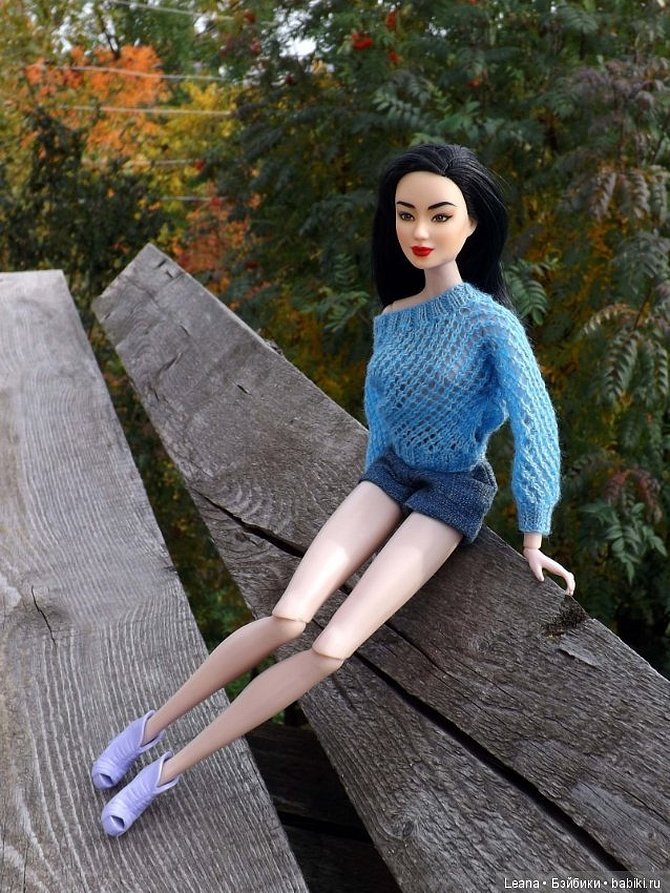
Several types of dolls are popular among girls. These are Paola Reina, Barbie and Monster High. Magazines publish many photos and instructions for knitting original blouses for them.
Most of the tutorials are designed for toys with a height of 32 cm. It is convenient when the scheme immediately gives the calculation for a certain type of doll. In this case, craftswomen do not need to take measurements. Due to the disproportion of the doll's head in relation to the body, almost all sweaters and jumpers have a fastener on the back or front.
Please note! Before starting work, it is necessary to knit several rows to match the knitting density with that indicated in the instructions.
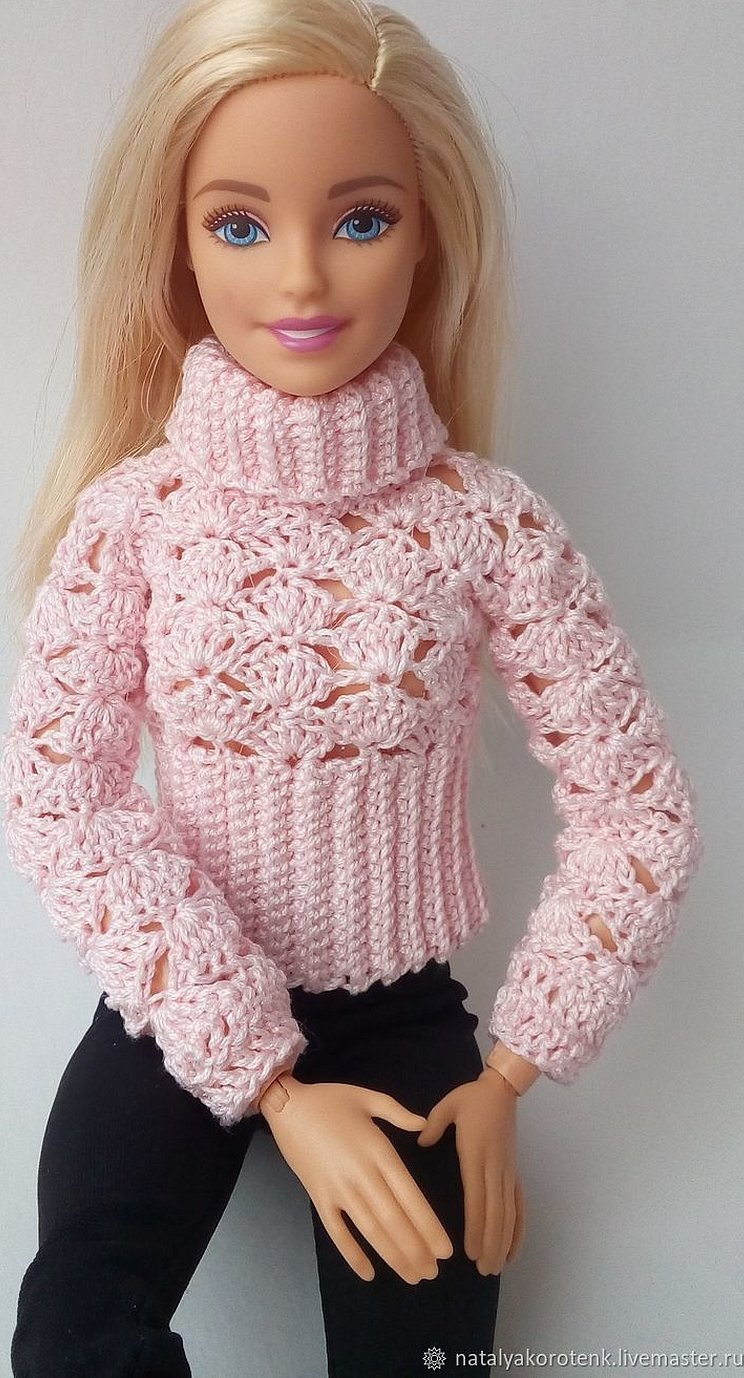
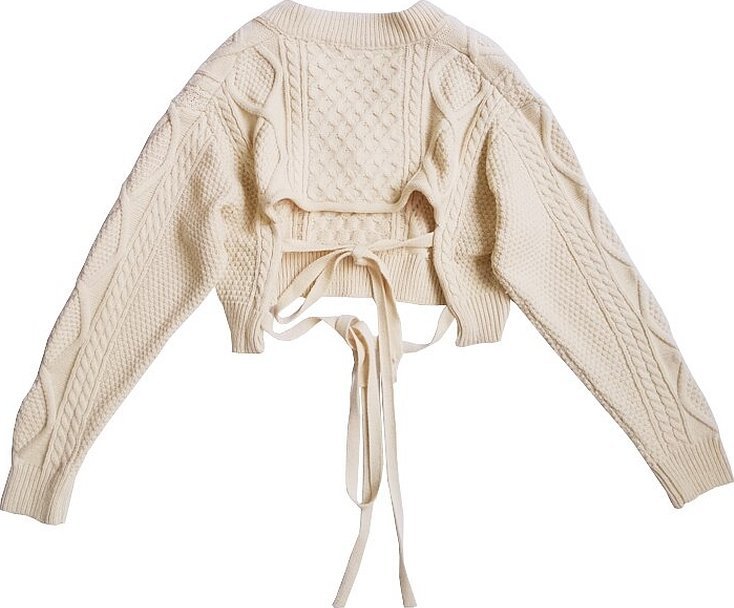
You can make an openwork blouse with short sleeves from thin yarn. Children like it when their miniature girlfriends are dressed brightly and fashionably. Pullovers with raglan sleeves and jumpers with a braid pattern are popular.
Scheme for constructing a sweater pattern
It is quite difficult to find a simple construction scheme on the Internet, despite the large number of photos and publications. Most instructions are designed for people with extensive knitting experience. Therefore, it is easier to construct a pattern yourself.
The simplest version of a pattern for a doll's jumper is made on checkered paper. For this work you will need:
- a simple pencil or ballpoint pen;
- eraser;
- ruler;
- centimeter;
- doll.
Step-by-step instructions for constructing a pattern:
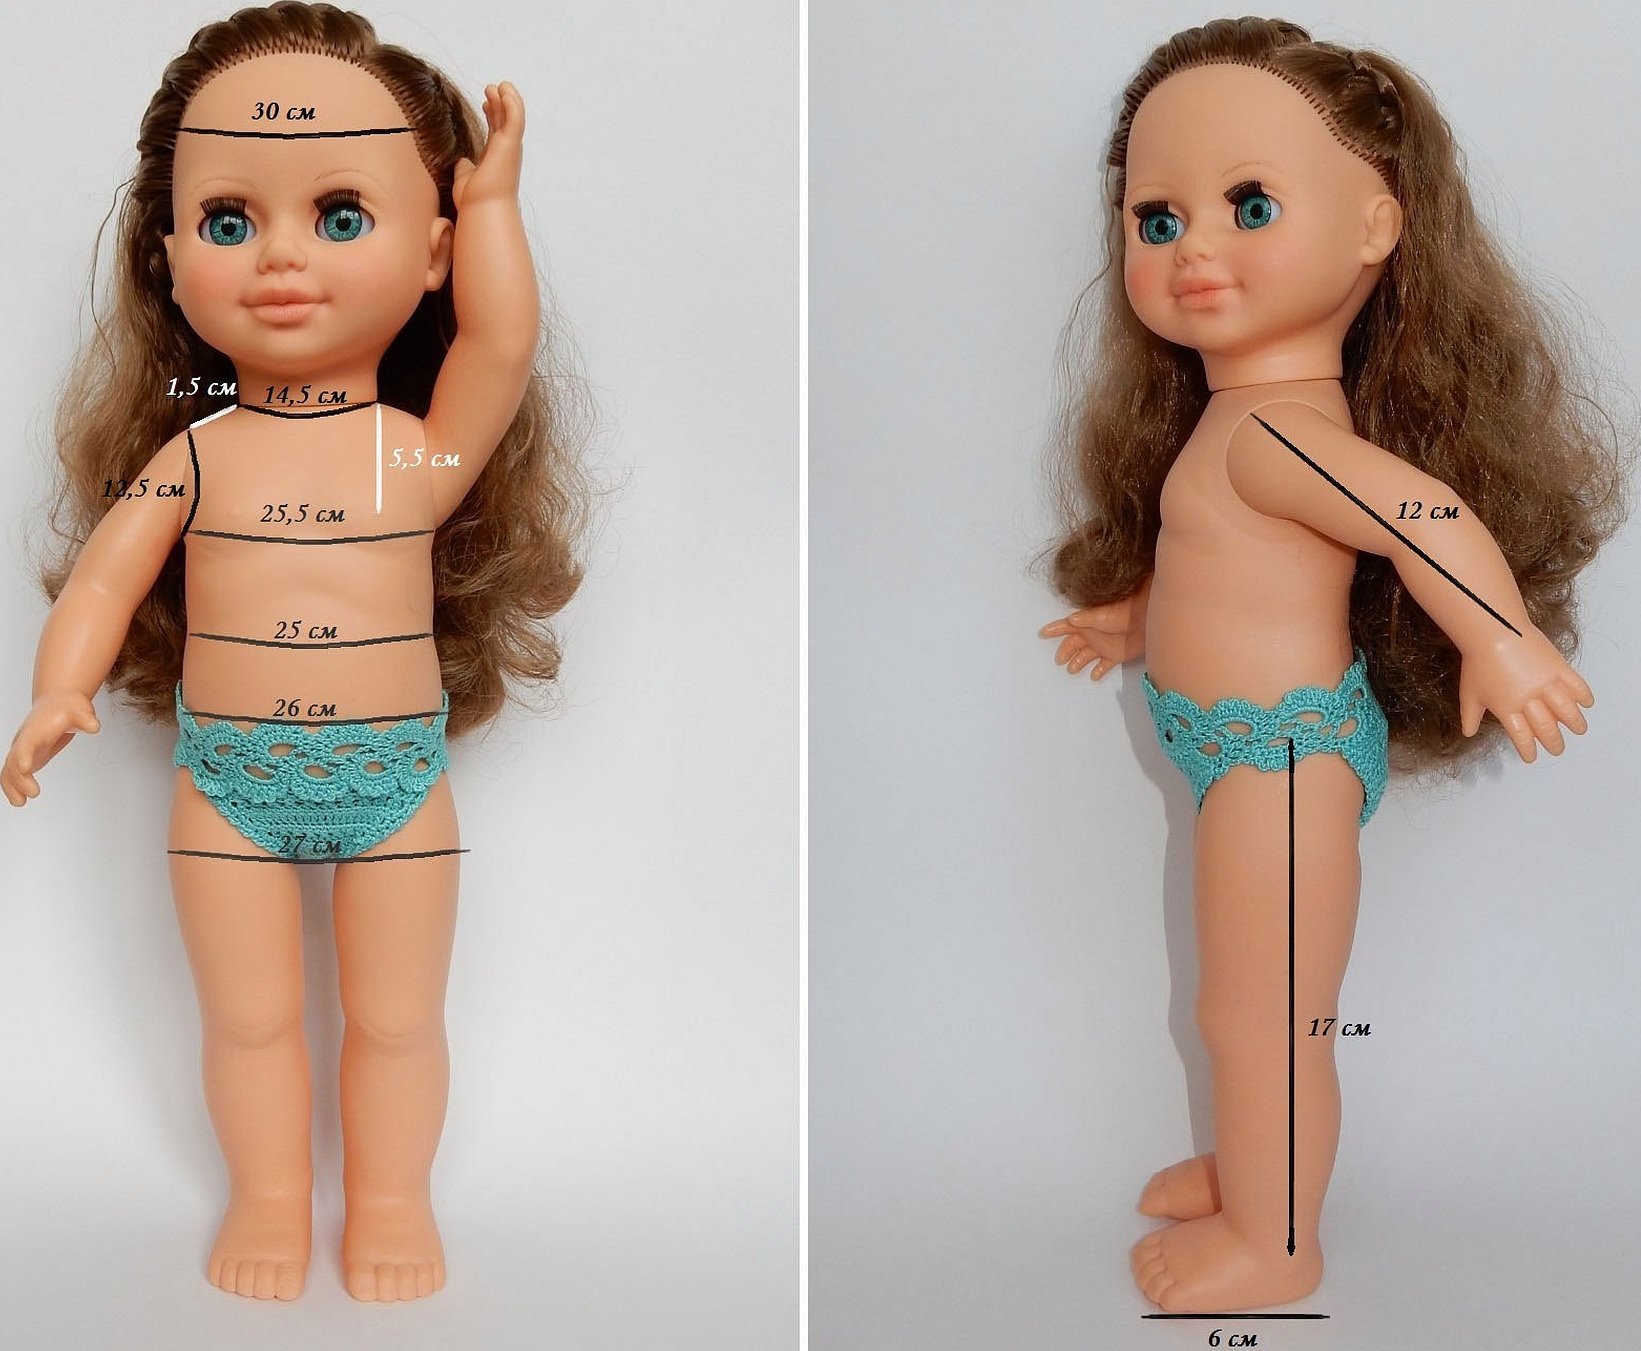
- Take measurements from the doll: neck circumference, shoulder width, circumference above the chest, arm circumference and length.
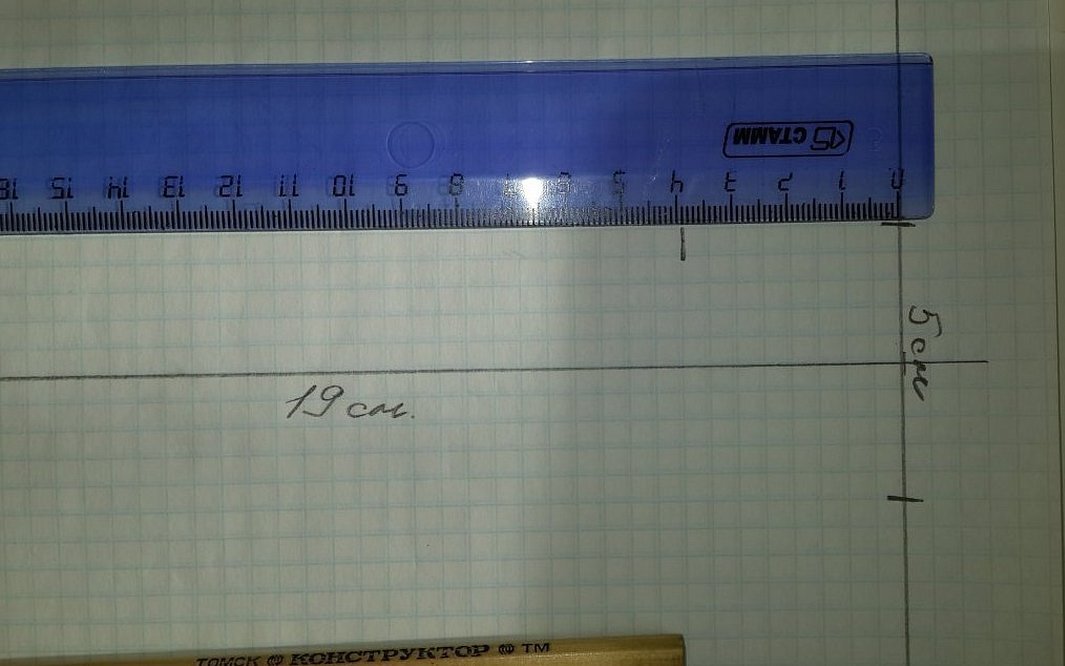
- Draw a straight line on a piece of paper.
- On a straight line, put aside the length of the sweater - 19 cm and draw a parallel line. This will be the bottom and top of the sweater.
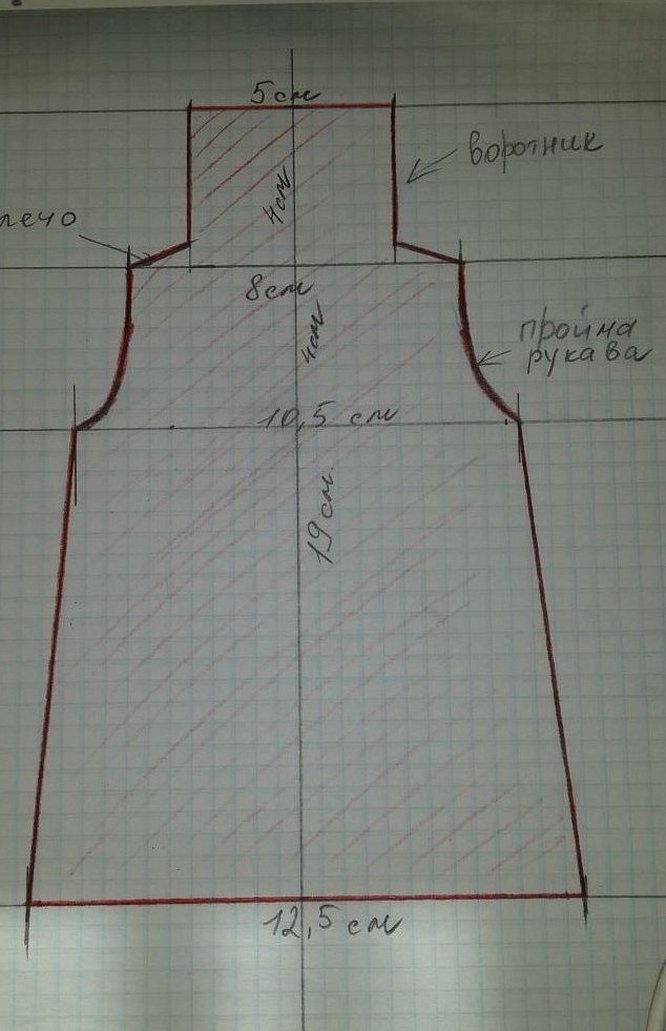
- Mark the neckline width on the top line. On the drawing, measure 2.5 cm to the left and right of the central vertical line (the measurement taken should be divided in half).
- From each point, measure 4 cm down. Draw segments through the resulting marks to get the shoulder line.
- From the point of intersection of the shoulder line with the central vertical line, step back 4 cm to the left and right.
- From the point where the shoulder line intersects the central vertical line, measure down 4 cm (the arm circumference measurement taken = 10 cm/2 = 5 cm - 1 cm).
- Draw a line through the resulting point, parallel to the bottom of the sweater. Mark the half-girth of the chest on the line (the measurement taken is 21/2 = 10.5 cm).
- Draw the armhole.
- The doll used as a sample has a hip circumference of 25 cm. On the bottom line, you need to set aside 12.5 cm (half the hip circumference). Connect the armhole to the bottom of the product.
The doll taken as a model has:
- arm circumference 10 cm;
- wrist circumference 8 cm;
- Sleeve length 16 cm.
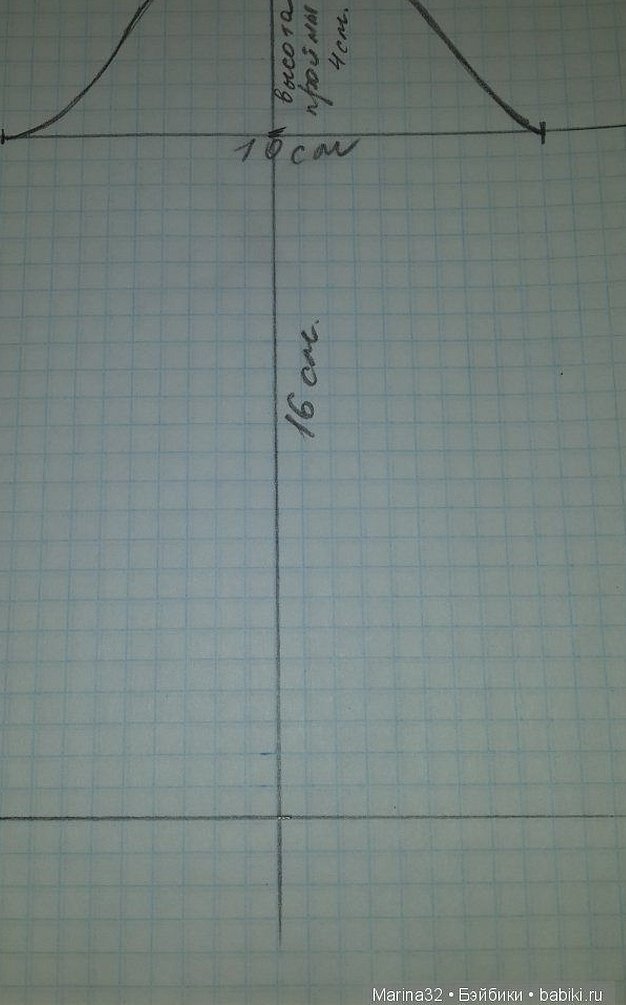
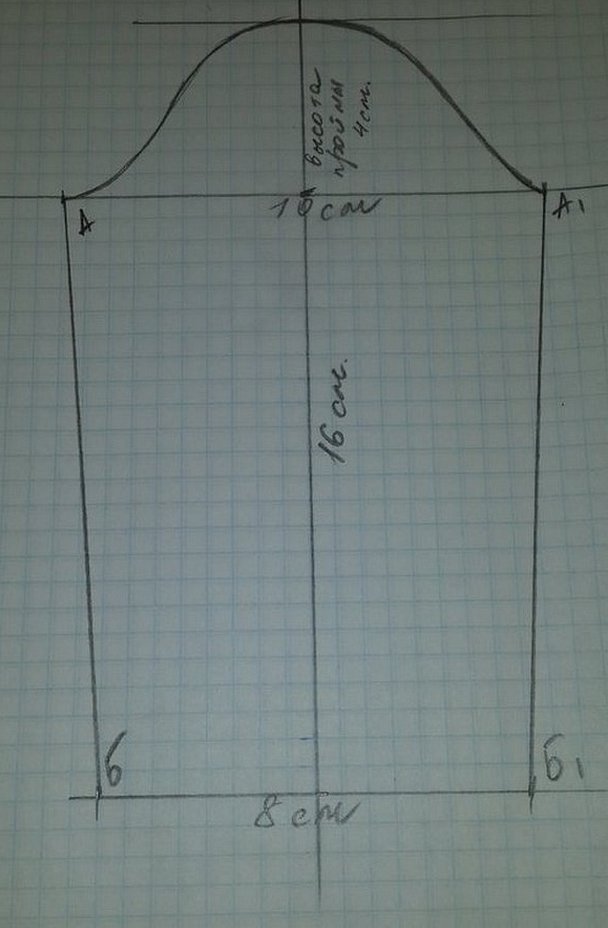
Construction of the sleeve pattern:
- On a sheet of paper in a grid, draw a vertical line on which to mark the length of the sleeve.
- Put the armhole height down – 4 cm. Draw a straight line perpendicular to the vertical line. Then put the full arm circumference on it – 10 cm. Mark points A and A1. Draw the armhole by eye.
- On the bottom line of the sleeve, measure the full circumference of the wrist – 8 cm. Mark points B and B1.
- Connect points A and B, A1 with B1.
The pattern is ready. Using this master class, you can create a drawing for doll clothes of any size.
Knitting patterns for doll sweaters
The simplest and most accessible pattern for a craftswoman with any level of experience is garter stitch. The required number of loops of the first row are cast on the knitting needles. One row is knitted with face loops, the next with purl. Then you should knit according to this pattern until the end. The finished parts remain to be sewn together. It is more difficult to make a product with an interesting pattern.
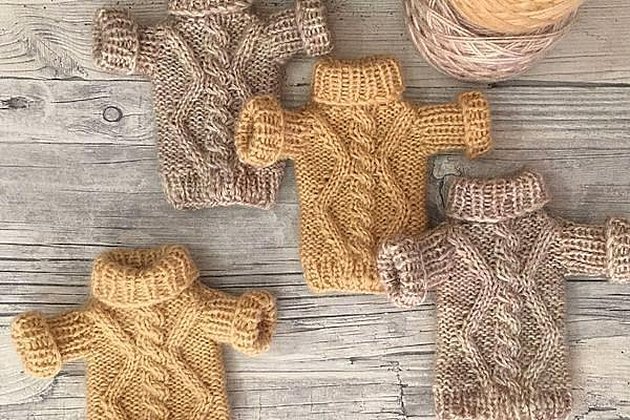
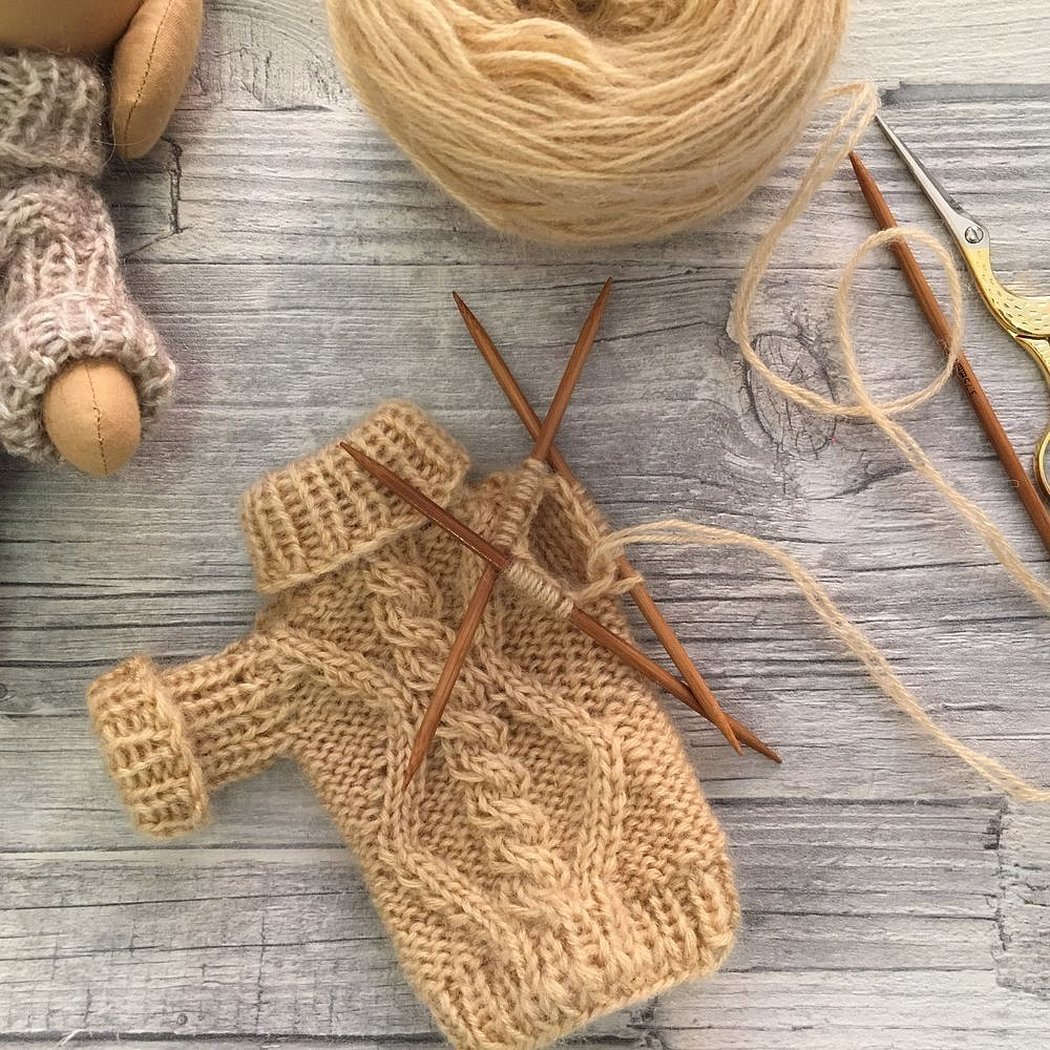
A miniature knitted jumper suitable for a soft plush Teddy and dolls.
Please note! To change the original size, you need to increase or decrease the number of loops, or use knitting needles of a different thickness.
To work you will need:
- dense threads (250-550 m/100 g);
- 3.75-4 mm double knitting needles;
- embroidery needle;
- manicure scissors.
Warp:
- Cast on 40 sts, divide into 10 sts per four knitting needles.
- Knit the first 5 rows, alternating 1 purl and 1 front loop.
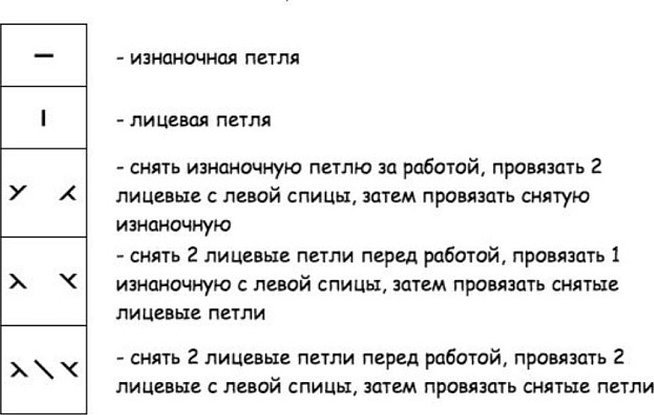
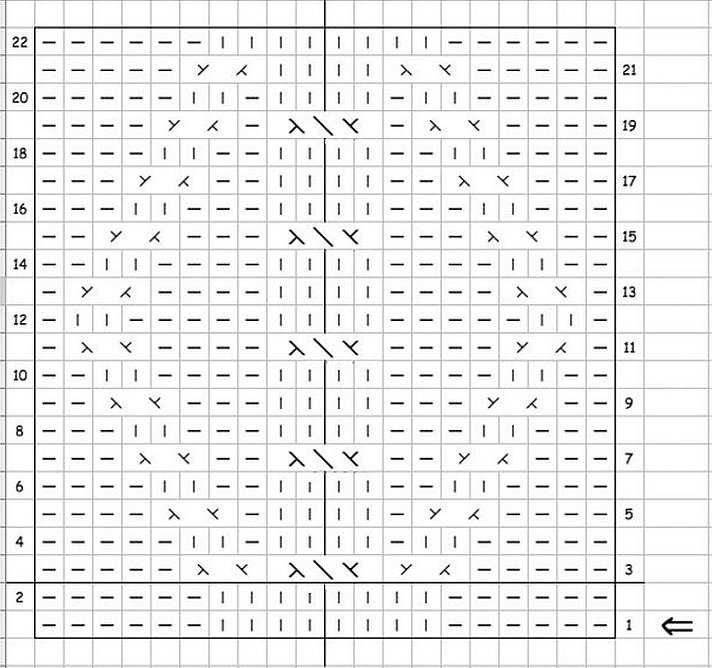
- Next, the pattern is knitted on 20 loops according to the diagram, and the rest are purl-knitted.
- The pattern repeat is knitted completely to the end (up to the 22nd row).
- Then you only need to knit 20 loops back and forth (this creates the openings for the arms);
- Knit 10 rows according to the pattern (starting from rows 3 to 12).
- In row 11, close the first 4 loops.
- Knit 12 loops in a rib pattern: 1 i. p. on 1 l. p..
- Close the remaining 4 loops with a crochet hook.
Next, the sleeves are knitted:
- The thread is tied to the slit in the sleeve.
- Cast on 6 stitches on each of the three knitting needles and knit in a circle with an elastic band for 15 rows in a row.
The second sleeve is knitted in the same way.
To make the next item, you can use the same patterns and knitting method on 4 hosiery needles. The difference is in the pattern. You can knit only the front part of the jumper with a pearl pattern, and knit the back with garter stitch.
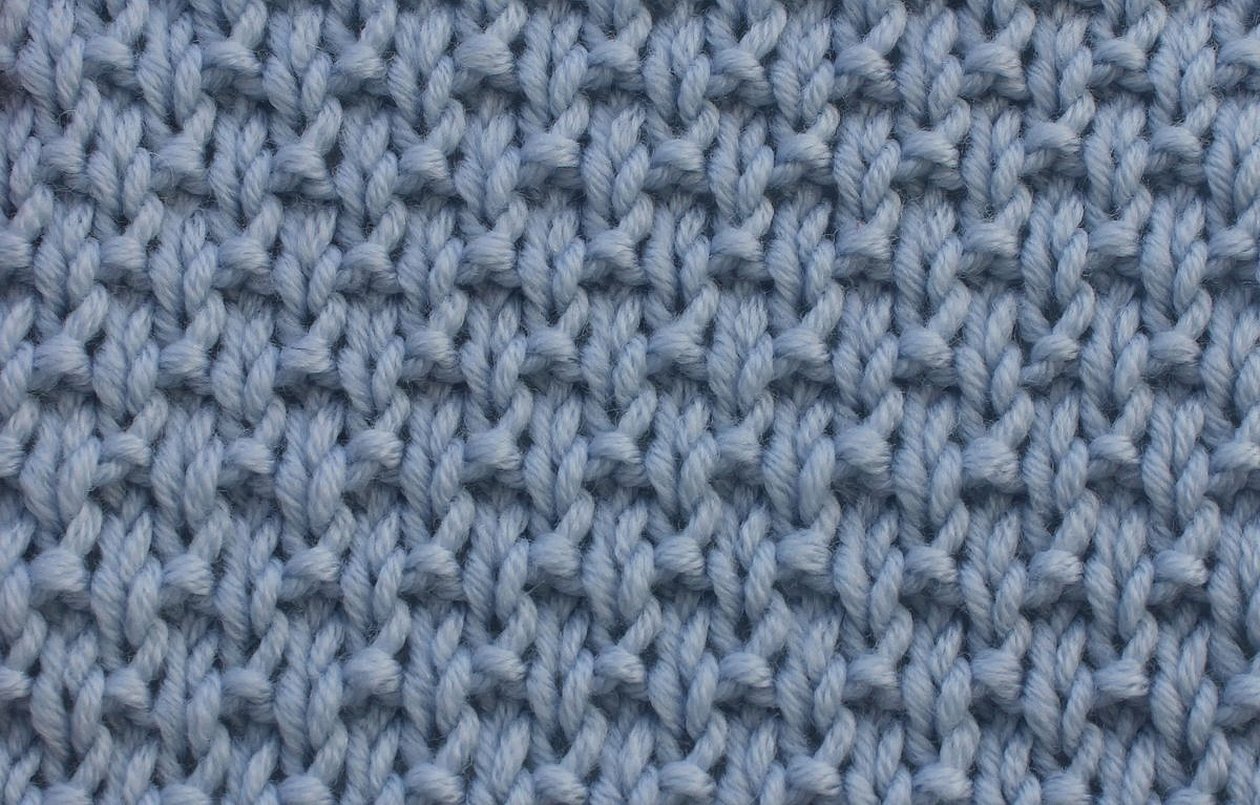
Description of pearl pattern:
- 1 l. p, 1 i. p, then the pattern should be repeated until the end of the row.
- Over knit stitch knit stitch, over i. stitch knit stitch.
- 1 i. p, 1 l. p, then repeat the pattern until the end of the row;
- Over knit stitch knit stitch, over i. stitch knit stitch.
Repeat these rows until the desired length of the sweater is knitted.
Any beginner craftswoman can knit a doll sweater using the given patterns and instructions. Sometimes difficulties arise for those who hold knitting needles in their hands for the first time. To understand how the first row is cast on, you need to watch the lessons of experienced craftsmen.


