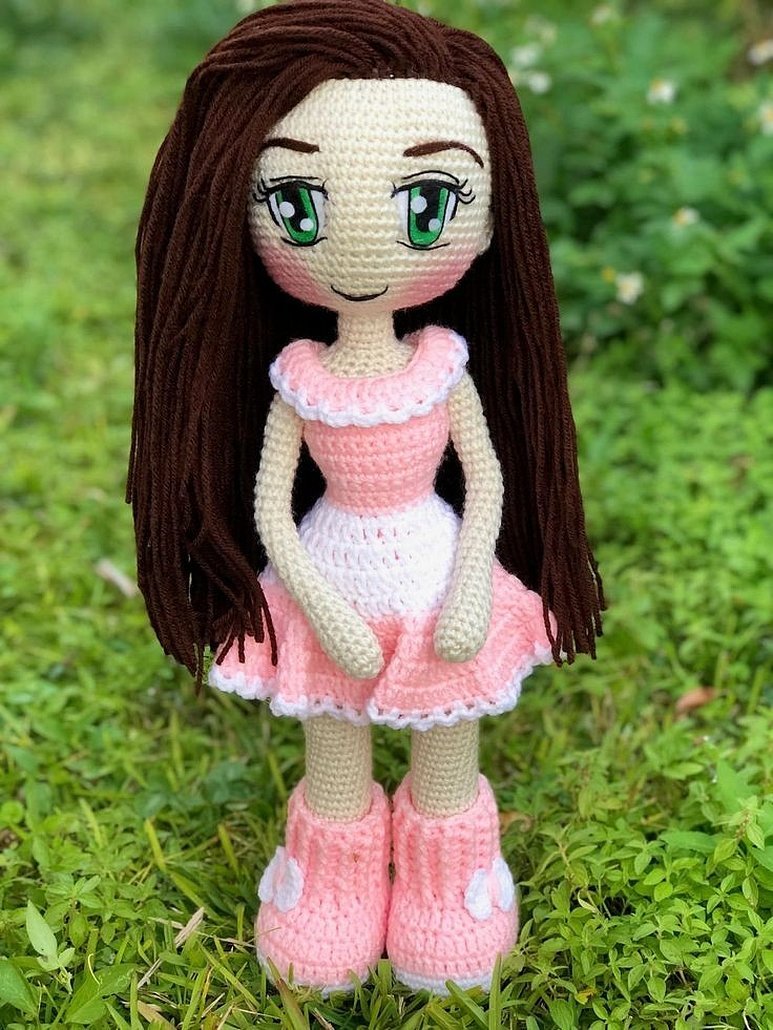
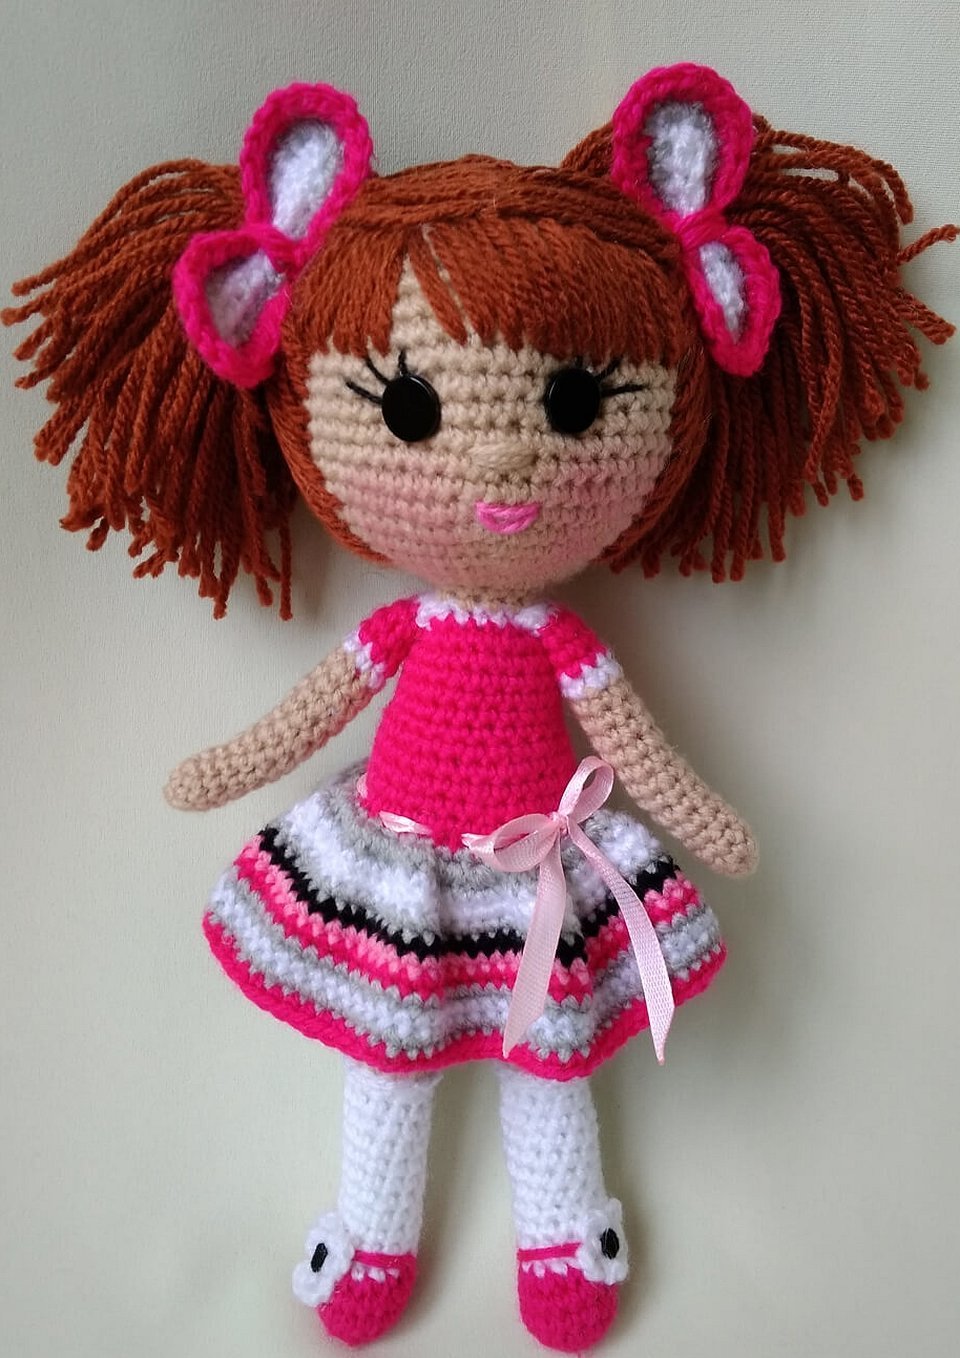
Knitting is a simple and unpretentious way to create crafts that will appeal to both children and adults. A homemade toy can decorate the interior, creating a cozy atmosphere of warmth. The child will not want to part with it. Crochet dolls are not at all like toys bought in a regular store. After all, they keep the warmth of mother's hands and a piece of her soul.
Popular types of dolls
There are currently many ways to make toys from yarn, but the most popular are amigurumi and articulated dolls. A great idea is also a comic Russian doll called Bolshonogka. The article discusses in detail the step-by-step diagram and description of crocheting a tilde doll.
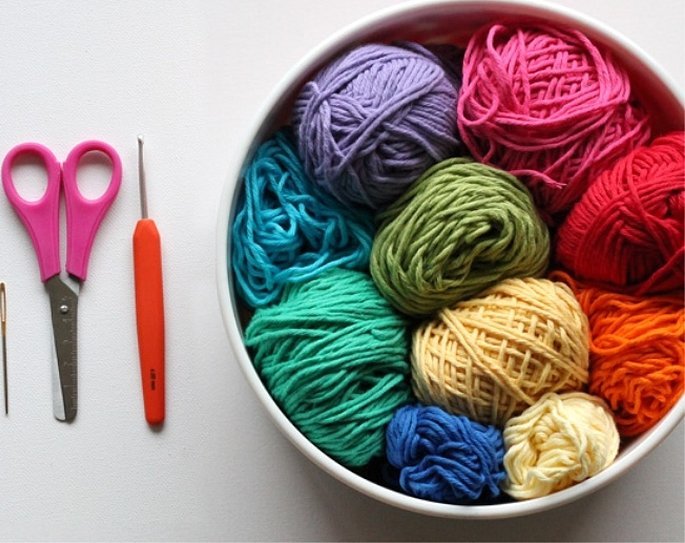
Necessary materials and tools
To create this designer toy, you will need a 2.5 mm hook, as well as white, beige, gray, light brown, pink and light gray yarn. The yarn should be high-quality and soft. Professionals recommend using mercerized cotton threads. For the doll's eyes, you can take beads, buttons, etc. about 10 mm in size.
Important! The yarn must be of high quality, since the durability of the toy depends on the material used.
Master class on how to knit a tilda doll
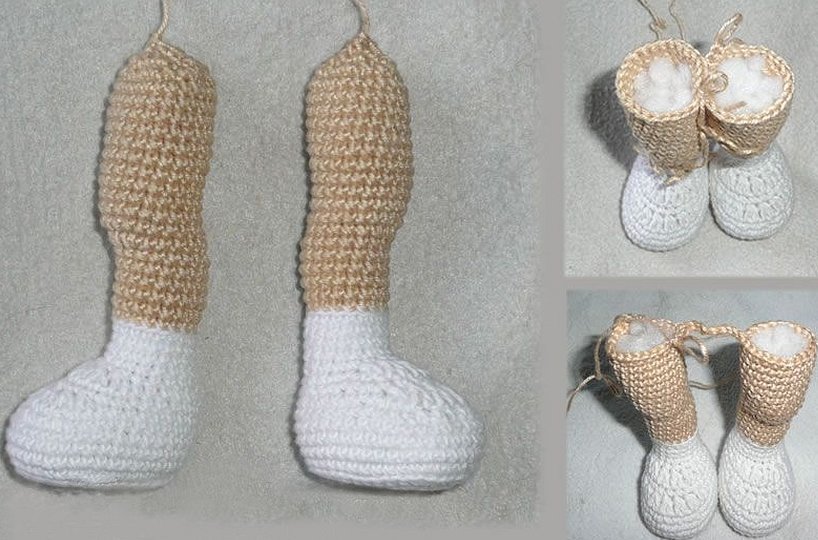
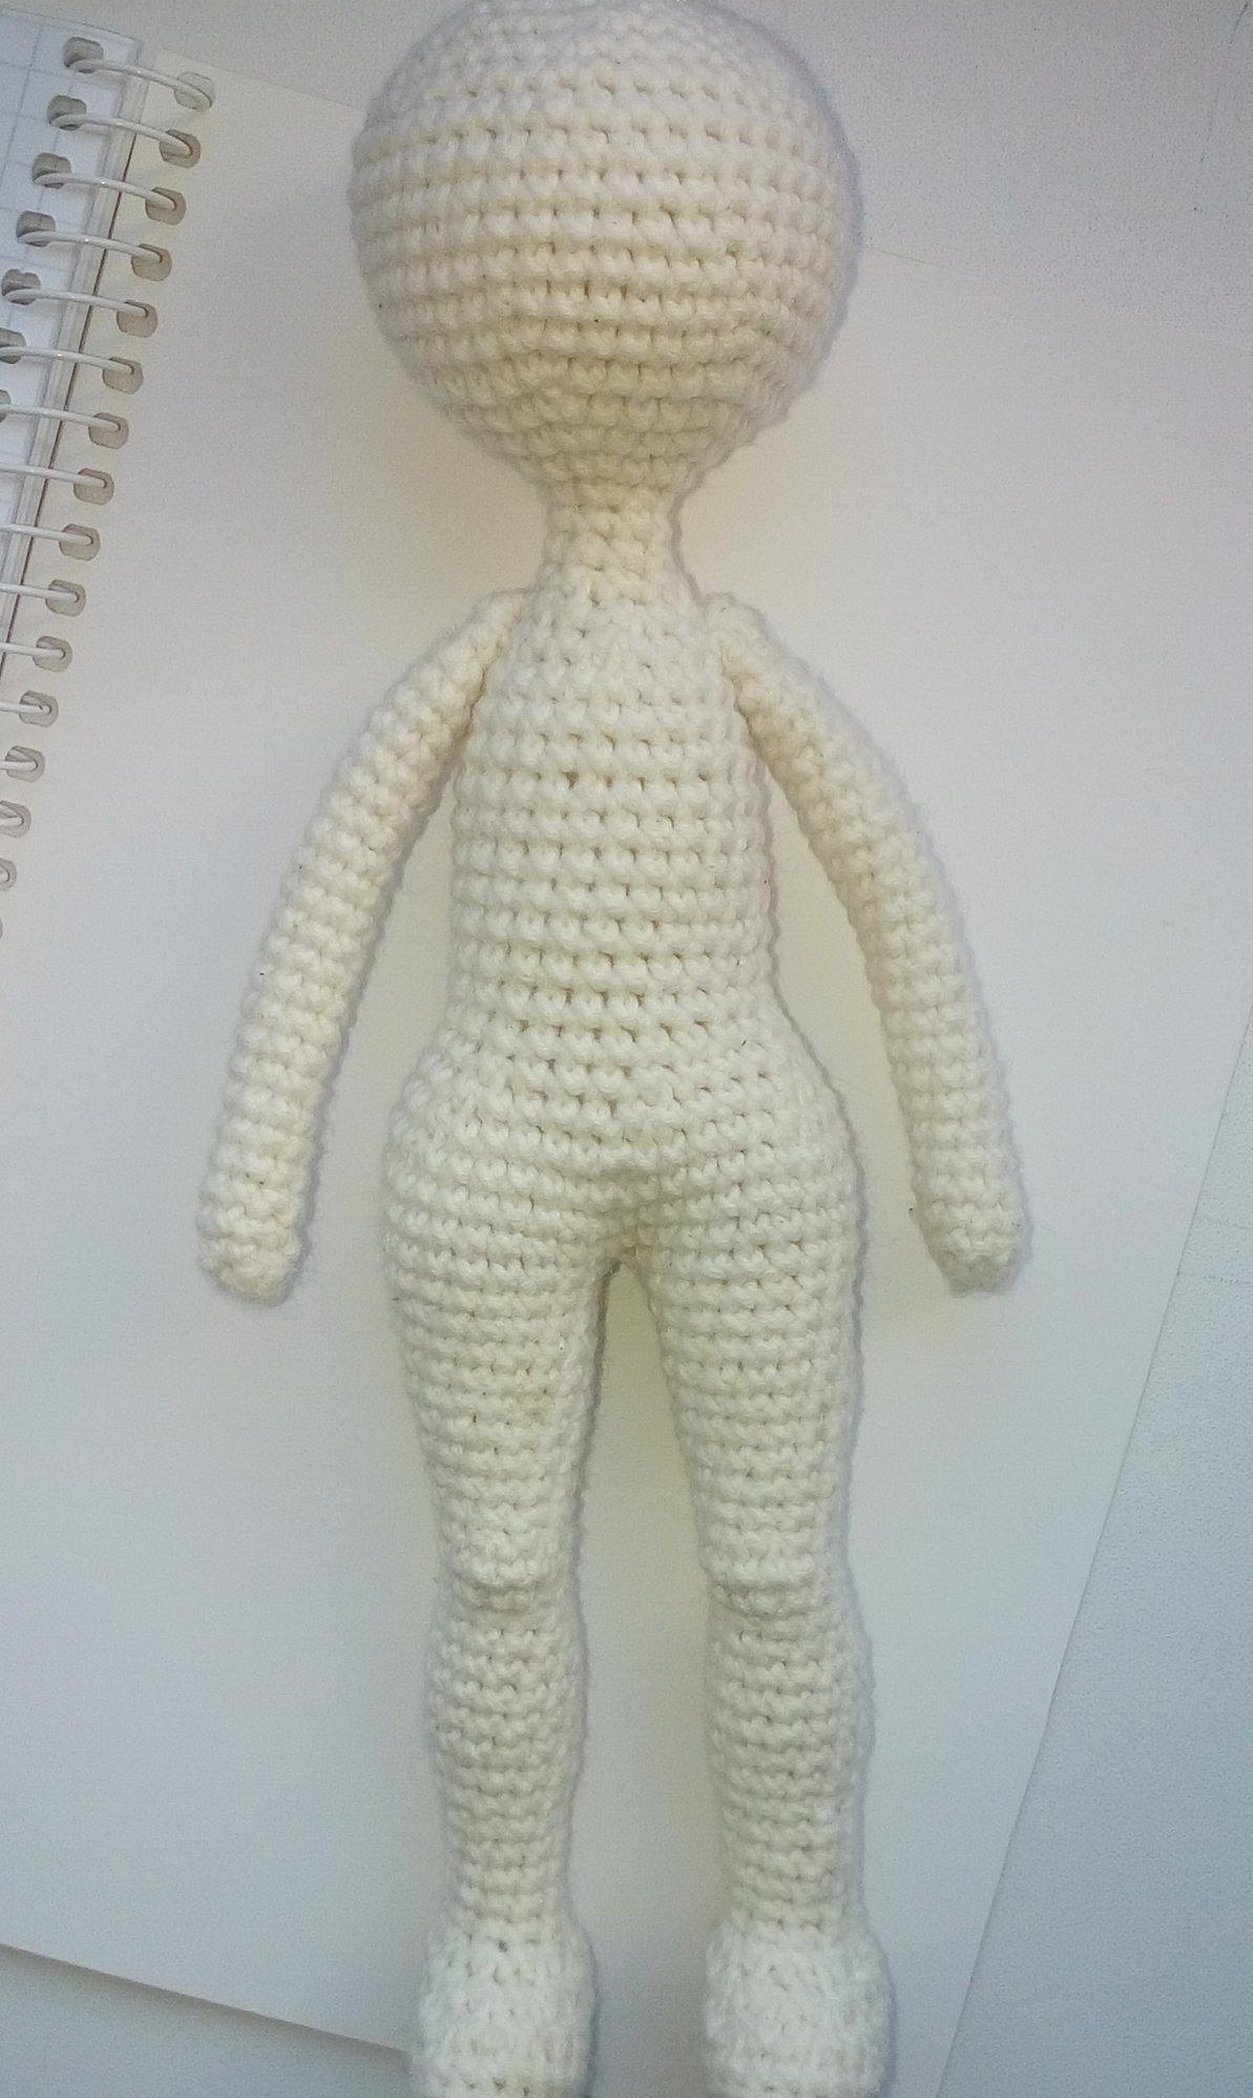
According to the step-by-step instructions, the doll's production should begin with its legs. White, gray and beige yarn is used for them:
- Take a white thread and cast on 8 chain stitches.
- Make an increase in the second loop from the hook, then knit five single crochets, 4 single crochets in one loop. Turn the product and knit 5 single crochets on the other side, make an increase. As a result, you should get 18 loops.
- 4 dc and increase – repeat 6 times, 1 sc – 26 loops in total.
- 2 dc, *4 dc and increase* – repeat 6 times, sc – 34 stitches.
- 8 dc, increase, *4 dc and increase* – repeat 5 times, 7 dc – 41 stitches.
- Single crochet, increase, 39 regular stitches – 42 in total.
- Knit 42 single crochet stitches through the back wall.
- Take dark gray yarn and knit 42 regular stitches from rows 8 to 10.
- 12 sc, decrease, *2 sc and decrease* – repeat 5 times, 8 sc – 36.
- 36 regular columns.
- 11 regular columns, decrease, *column and decrease* – repeat 5 times, 8 regular sts – 30 columns.
- 8 regular crochets, *sc and decrease* – repeat 6 times, 8 regular crochets – 24.
- 24 regular columns.
- 3 sc, *2 sc and decrease* – repeat 6 times, 3 sc – 18.
- 18 regular columns.
- Take white yarn and knit 18 single crochet stitches.
- Knit 18 regular stitches through the front wall.
- From rows 20 to 22, knit 18 regular stitches.
- Take the beige thread and tie 18 sc behind the back wall.
- From row 24 to row 41, knit 18 st. bn.
- 2 tbsp and decrease – repeat 6 times – 12.
- Single crochet and decrease – repeat 6 times – total 6.
- Pull the loops together and cut the thread.
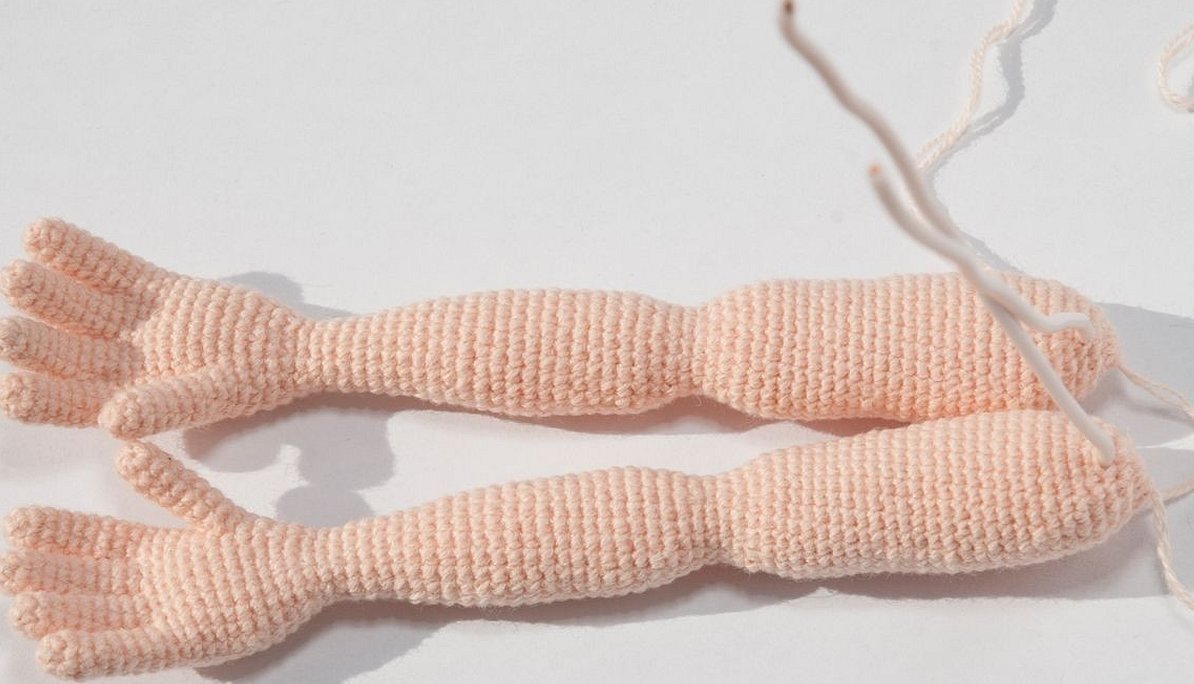
Knitting pattern for handles:
- Take beige yarn and cast on 6 single crochet stitches into an amigurumi ring.
- Make 6 increases. The result should be 12 loops.
- 2 tbsp. without yarn over and increase – repeat 6 times, single crochet. Total 18 loops.
- From rows 4 to 8, knit 18 regular stitches.
- Single crochet and decrease – repeat 6 times – total 12 sc.
- From rows 10 to 34, make 12 regular stitches.
The doll's body is knitted with beige yarn:
- Join 6 single crochet stitches into a ring.
- Single crochet and increase stitch – repeat 6 times, single crochet – 12 stitches.
- 2 tbsp, increase – repeat 6 times – 18 tbsp.
- 3 tbsp, increase 6 times – 24.
- 4 tbsp, increase 6 times – 30.
- 5 tbsp, increase 6 times – 36.
- 6 tbsp, increase 6 times – 42.
- 7 tbsp, increase 6 times – 48.
- 8 tbsp, increase 6 times – 54.
- 9 st. bn, increase – 6 – 60.
- 10 st. bn, increase – 6 – 66.
- From rows 12 to 17, knit 66 single crochet stitches.
- 10 sc, decrease – repeat 6 times. Total 60 stitches.
- 9 tbsp, decrease 6 times – 54 stitches.
- 8 tbsp. bn, decrease – 6 – 48.
- 7 st. bn, decrease – 6 times – 42.
- 6 st. bn, decrease – 6. Total 36 st.
- 36 single crochet stitches.
- 5 tbsp. bn, decrease – 6 – 30.
- 4 tbsp. bn, decrease – 6 – 24.
- From rows 39 to 42, knit 24 regular stitches.
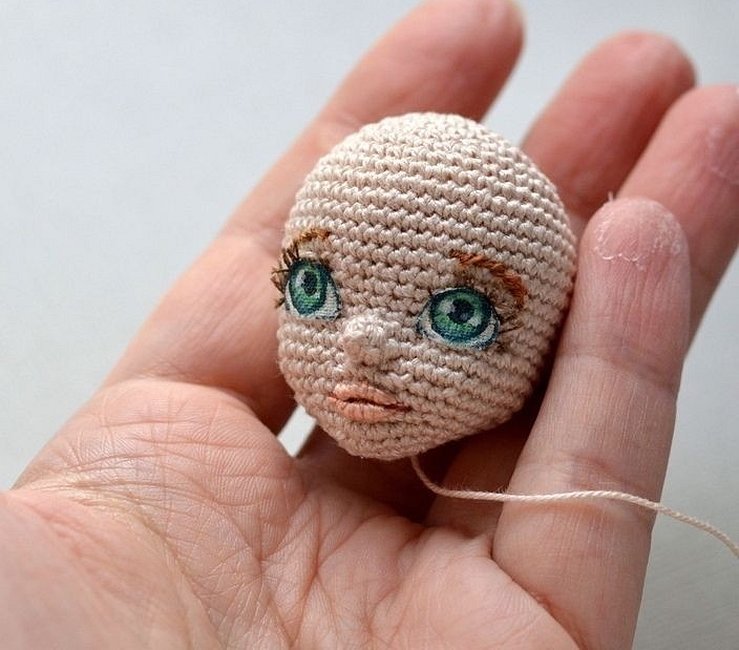
Knitting the head:
- Take the beige thread and join six single crochet stitches into a ring.
- Single crochet and increase – repeat 6 times. There should be 12 loops in total.
- 2 single crochets and increase – repeat 6 times – 18 single crochets.
- 3 single crochets and increase – 6 times – 24.
- 4 sc and increase – 6 times – 30.
- 5 sc and increase – 6 times – 36.
- 6 sc and increase – 6 times – 42.
- 7 sc and increase – 6 times – 48.
- 8 sc and increase – 6 times – 54.
- 9 sc and increase – 6 – 60.
- 10 sc and increase – 6 – 66.
- From rows 12 to 21, knit 66 sc.
- 9 sc and decrease – 6 – 60.
- 8 sc and decrease – 6 – 54.
- 7 sc and decrease – 6 – 48.
- 6 sc and decrease – 6 – 42.
- 5 sc and decrease – 6 – 36.
- 4 sc and decrease – 6 – 30.
- 3 sc and decrease – 6 – 24.
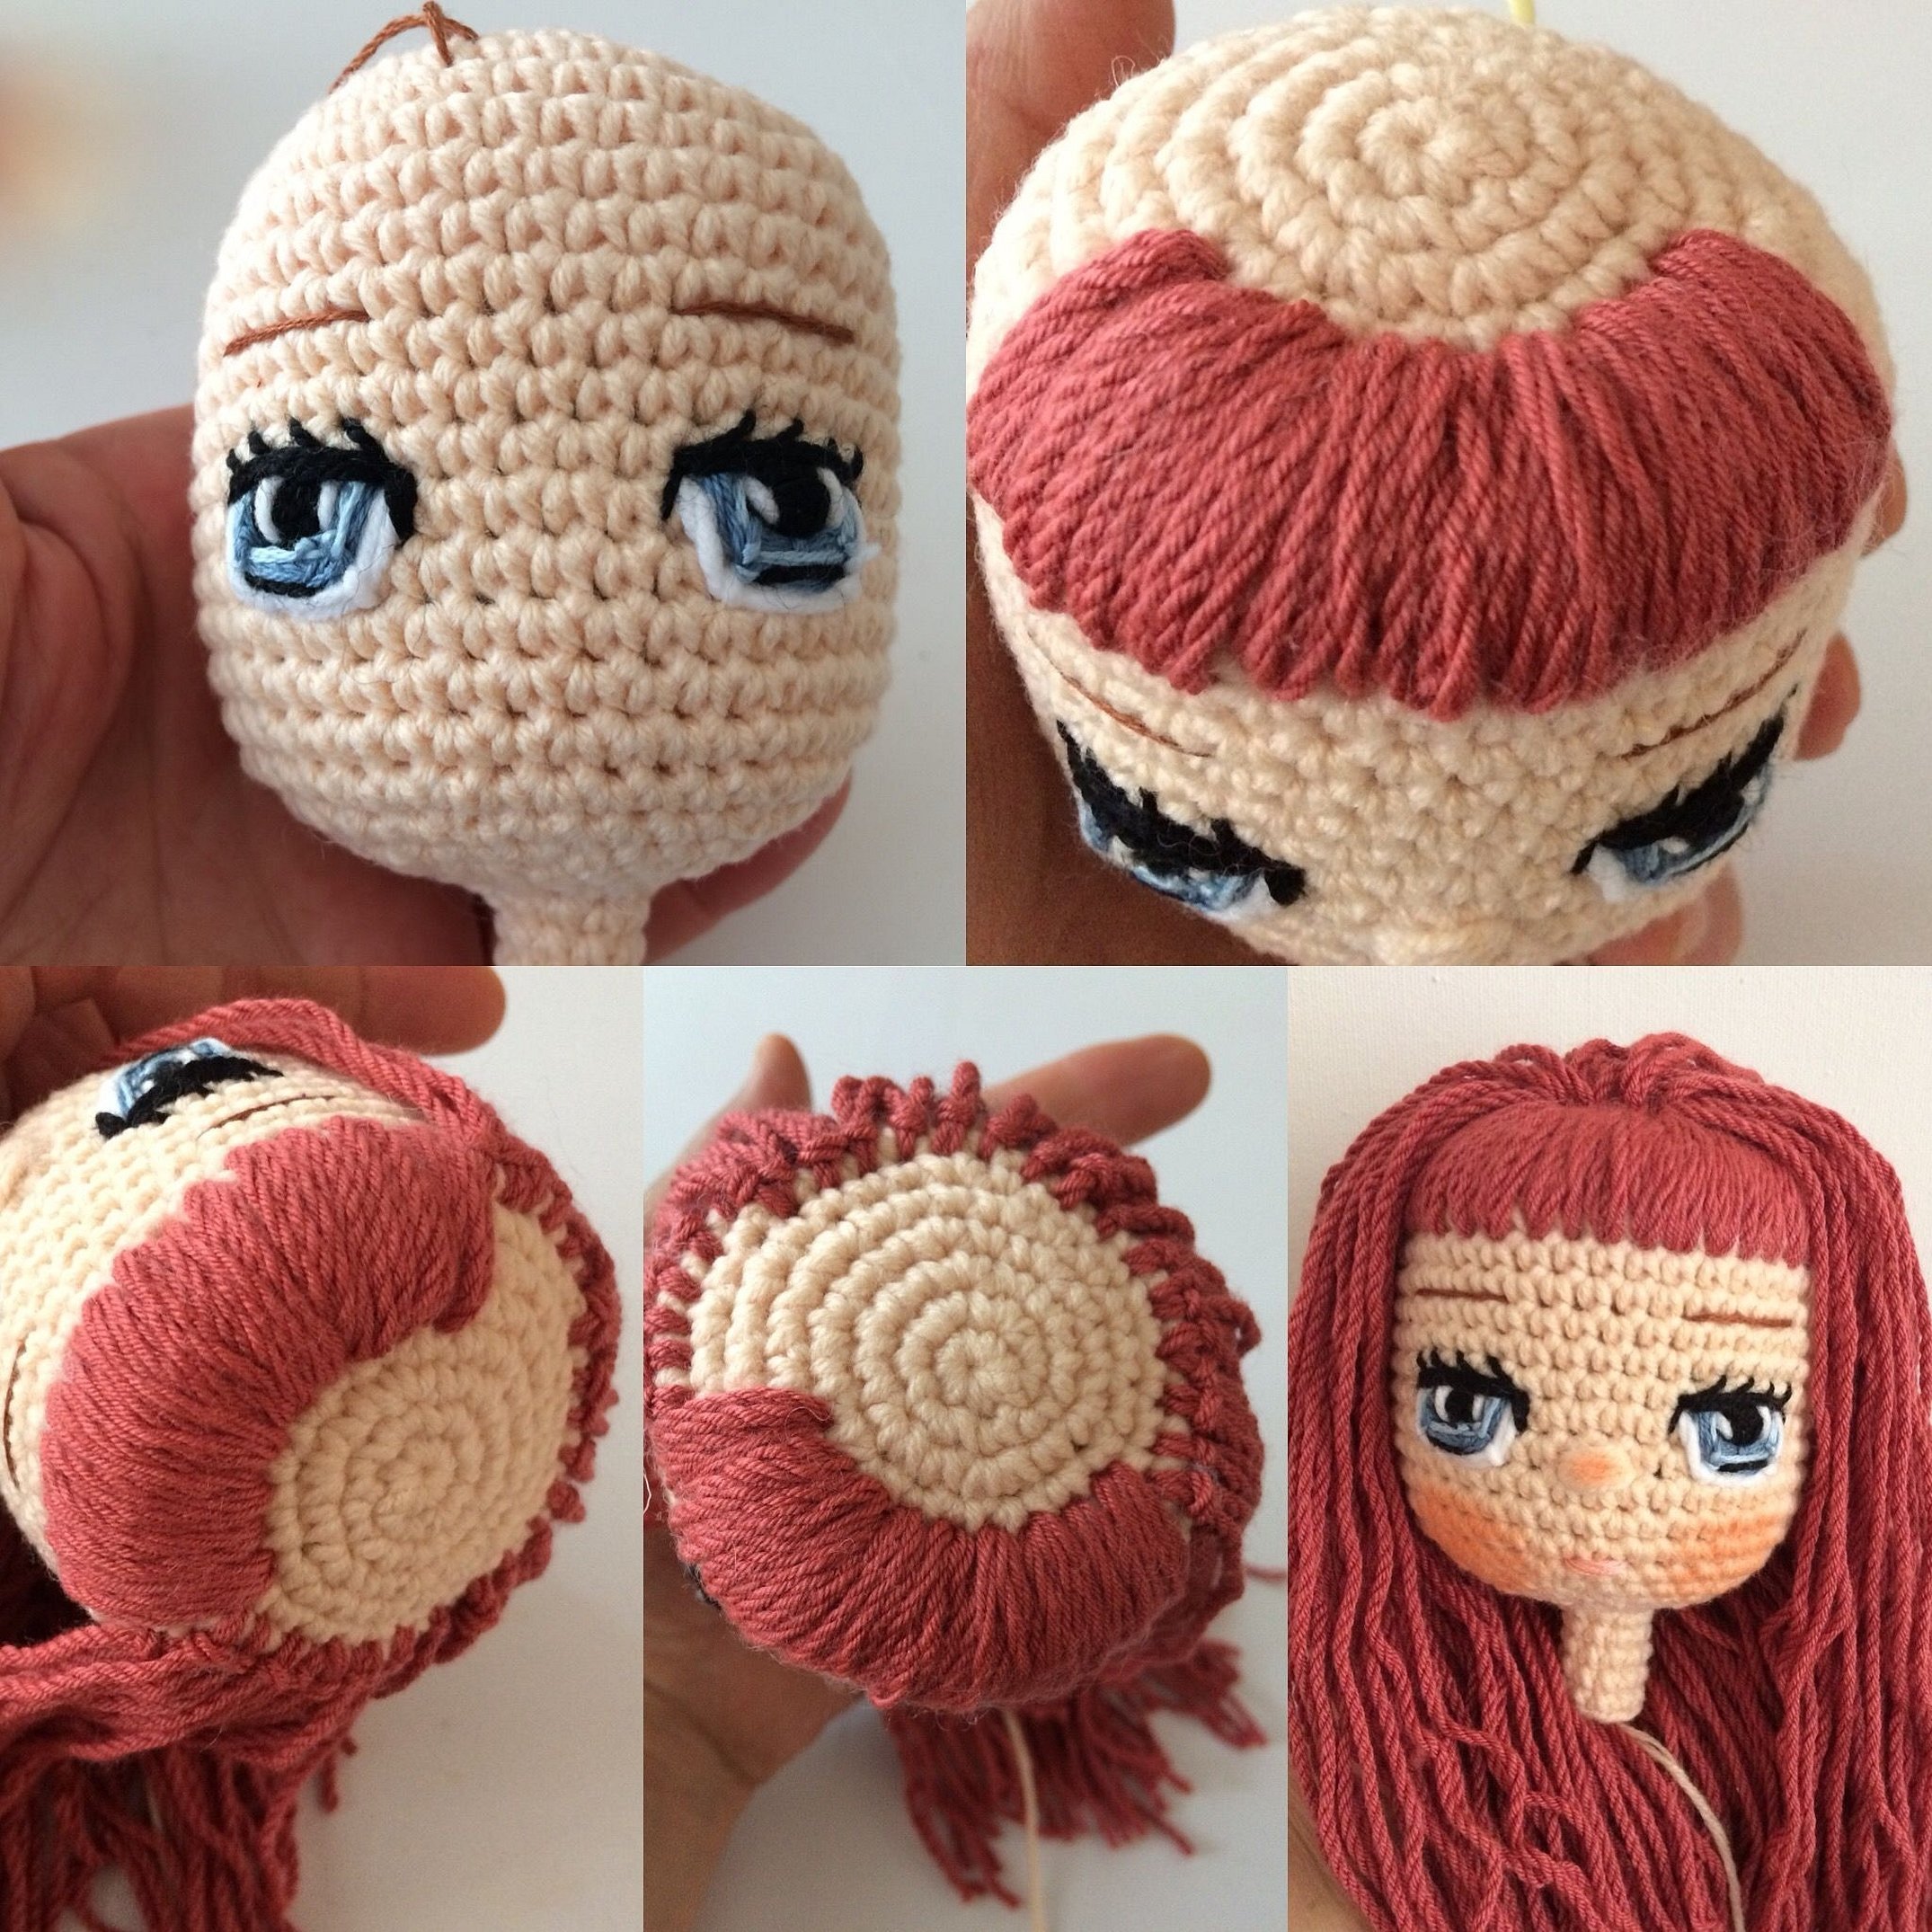
Next, you need to make a wig and hair for the girl. The MK for making these parts involves the following steps:
- Connect 6 single crochet stitches into a ring.
- Single crochet and increase – repeat 6 times. There should be 12 loops in total.
- 2 sc and increase – repeat 6 times – 18 stitches.
- 3 sc and increase – 6 times – 24.
- 4 sc and increase – 6 times – 30.
- 5 sc and increase – 6 times – 36.
- 6 sc and increase – 6 times – 42.
- 7 sc and increase – 6 times – 48.
- 8 sc and increase – 6 times – 54.
- 9 sc and increase – 6 – 60.
- 10 sc and increase – 6 – 66.
- 11 sc and increase – 6 – 72.
- Knit 72 sc.
Next, knit the doll's hair: 45 chain stitches into the second loop from the hook, a blind stitch into each chain stitch, a blind stitch into the wig loop.
When all the parts are connected, you need to put them together. This can be done with a regular thread and a needle. When finished, the little doll should be dressed like a model in a beautiful dress or another outfit you like, for example, a jumpsuit. With the help of a costume, you can create any image for the doll. She can look like a doctor, a first-grader in class, or a simple housewife. You can also sew a Russian folk costume with patterns. If someone you know is planning a wedding, then a doll in a wedding dress or a bridesmaid costume will look original.
Please note! You can also knit a boy doll using this pattern. You can sew a soldier or policeman uniform for him.
How to stuff a knitted doll
There are many materials that can be used to stuff a toy. It all depends on who it is intended for. If a child will play with the doll, it is better to choose synthetic fluff, as it is hypoallergenic, or wool, as it is a natural material. You can also use synthetic padding, scraps of fabric, cotton wool.
Please note! For medicinal purposes, you can fill the toy with dry herbs. Then it will be not only beautiful, but also useful.
Clothes and shoes for dolls
To knit an elegant dress for a Tilda doll, you need to take yarn of a beautiful color, for example, pink:
- Knit forty single crochet stitches + eight air loops. In the 9th loop from the hook knit 40 sc, then turn the product and knit another 40 sc.
- 1 chain stitch, 2 sc and increase – repeat 13 times, 1 sc, turn the piece and knit 53 sc.
- 1 ch, 6 single crochets, 10 ch (skip 10 loops), 21 sc, 10 ch (skip 10 loops), 6 sc, turn the work – 53 sc.
- 1 ch, 53 single crochets.
- 1 ch, 2 sc and increase – 17 times, 72 sc.
- 1 ch, 1 sc and increase – 34 rows, 106 sc.
- 1 ch, 106 sc.
- 1 ch, 106 regular stitches.
- 8 ch, 106 regular columns.
- From rows 10 to 29, knit 1 ch, 106 sc.
- In row 30, knit 1 ch, decrease, 105 sc.
- 1 ch, decrease, 104 sc.
The doll's dress is tied as follows:
- 3 ch, skip 2 loops, then “blind” loop for the entire row.
- 1 blind loop in the first arch, 3 ch, 2 sc together, 2 ch, 3 sc, 2 ch, 2 sc together, 1 sc.
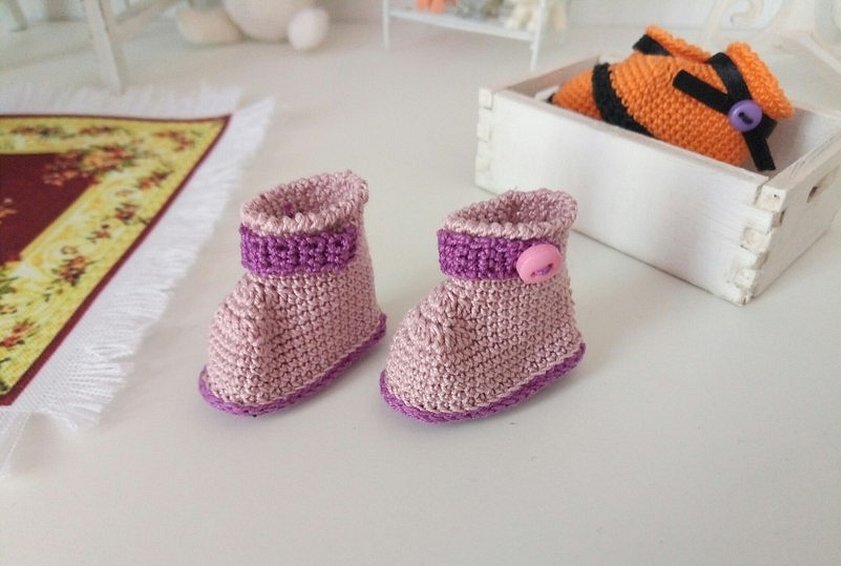
The shoes are knitted according to the following pattern:
- Air loops.
- Half-column, tie the chain on both sides, knit in rounded places, 2 half-columns.
- Half double crochet, 5 double crochets, half double crochet.
- Half columns.
- 9 half double crochets, 3 double crochets in one loop.
- 5 ch.
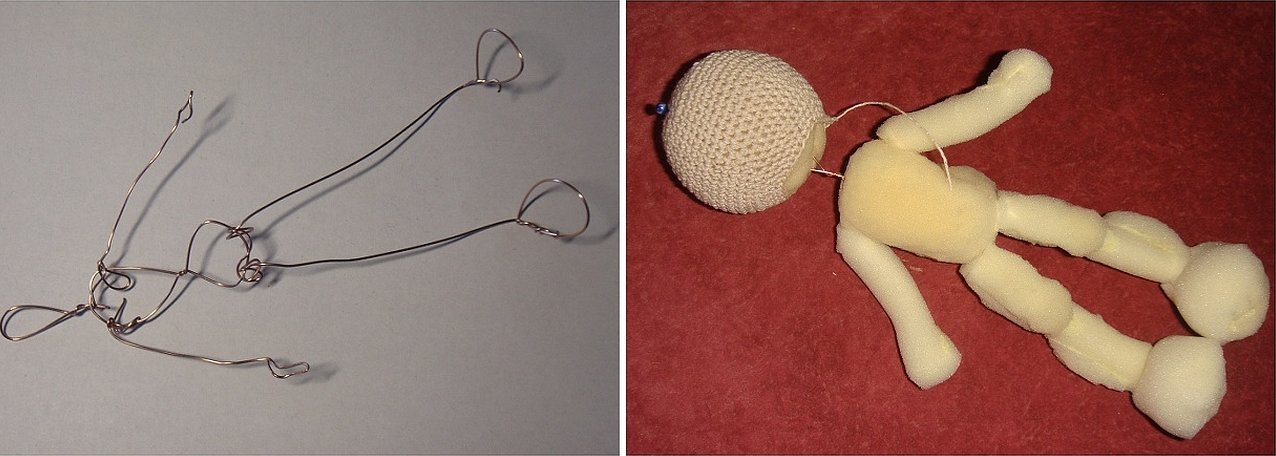
Features of knitting a frame doll
The basis of such a doll is a frame, which is made of wire or something similar to this material. Each element of the frame is first wrapped with a filler material, and then "dressed" in a thread shell. The features of a frame doll are that its legs and arms bend, which makes it more real and alive. Knitted interior dolls of this type serve as an excellent decoration for the house. They can also be used as a gift for any holiday.
Features of knitting amigurumi dolls
The doll itself, or rather its author's amigurumi image, came to Russia from Japan. It is the national doll of this country. Amigurumi is very cute and beautiful, its face expresses real emotions. Each toy can have its own character. The amigurumi doll is knitted in a special way in a circle. The hook for such a product should be one size smaller than recommended for the selected yarn. Then the knitted fabric will be quite dense and the filler will not be visible through it.
Crochet dolls are very cute toys that bring good luck and prosperity. The main thing is that the creation of this toy brings joy to both the needlewoman and the child.


