Hand-knitted headdresses become an adornment of any doll's wardrobe. Every girl gladly dresses her favorite in unique things knitted by her mother or grandmother.

Specifics of work
The peculiarity of knitting hats for dolls is that it is necessary to use thin knitting needles and hooks, as well as thin yarn (cotton, acrylic, wool). Often for this purpose they take embroidery threads "Iris".
In addition, you don’t need a lot of material to make them: sometimes, leftover colored yarn from working on larger items will be enough.
A selection of diagrams with descriptions
Below are several master classes on how to knit a hat for a doll using crochet and knitting needles for beginners and experienced needlewomen.
Abbreviations and designations used in all descriptions:
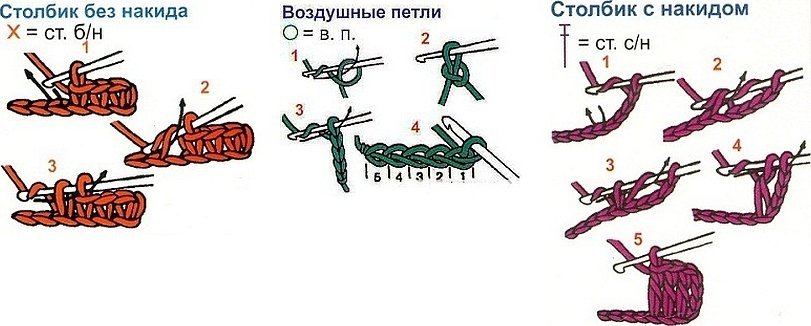
- VP – air loop.
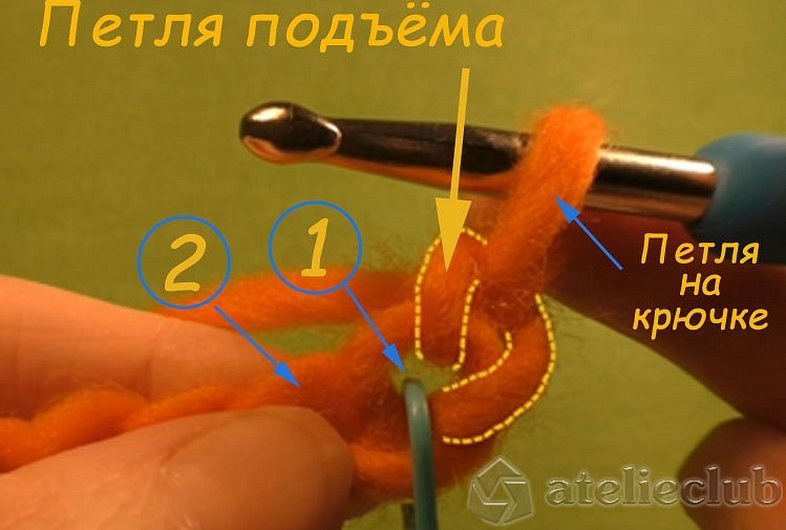
- LPW – air lift loop.
- ССН (SC) – double crochet.
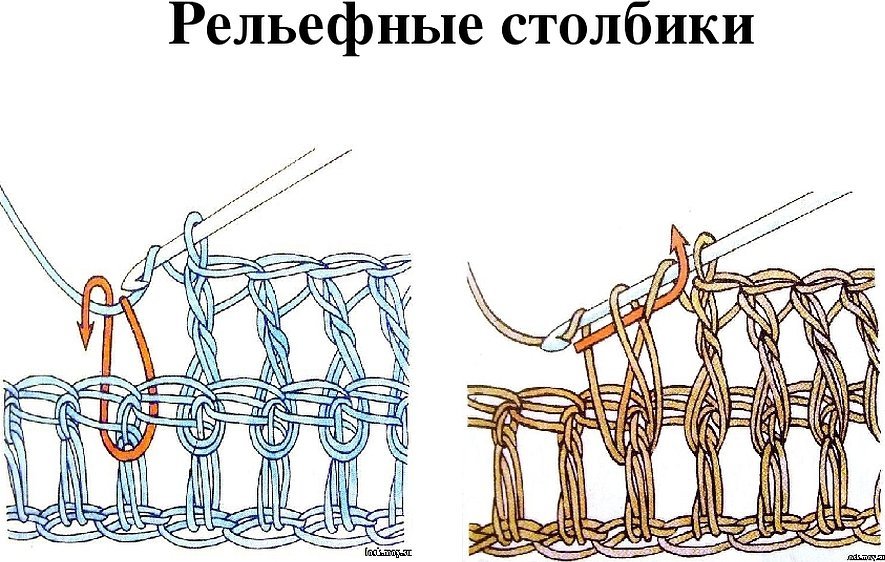
- RVSN – raised convex column with a yarn over.
- SC (SC) – single crochet.
- PSBN – half double crochet.
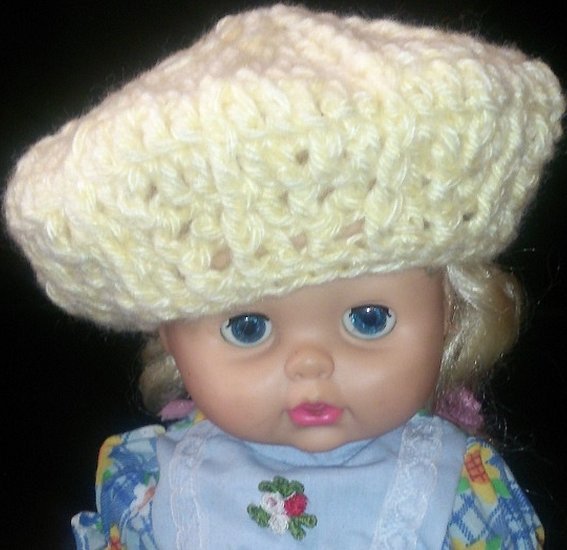
Cap with a visor for dolls
You will need hooks #1, #3 and thin yarn.
Please note! You can use a 50g skein as a guideline for the length of 300 m.
The product is knitted in a circle. Below is a step-by-step description of how to knit a hat for a doll.
The initial sliding ring is collected - this is the beginning of the cap. In this cap there will be 12 wedges with an addition of 1 loop in each row of each wedge.
1 row – 3 VP, 11 ST. WITH NAK. (knitted into a ring), PSBN in the upper loop of the lifting column.
2 rows – 3 VP, 1 SC into the loop of the lower column, then into the same column 1 RVSN (the hook is inserted under the lower column, and as if wraps around it, creating a convex relief), reproduce 11 times, PSBN into the upper loop of the lifting column.
3 rows – 3 VP, 1 SC with NAC in the upper lifting loop of the previous row, 1 RVSN (grabs the lower RVSN of the previous row), 2 SC with NAC in the next loop of the lower row, 1 RVSN – repeat 11 times, each row ends with PSBN.
4th row – 3 VP, 2 SC into loop of bottom row, 1 RVSN, 3 SC into 2 bottom loops, 1 RVSN – repeat 11 times, 1 PSBN.
5 rows – 3 VP, 3 ST. WITH NAK., 1 RVSN, 4 ST. WITH NAK., 1 RVSN – repeat 11 times, 1 PSBN.
6th row – 3 VP, 4 ST. WITH NAK., 1 RVSN, 5 ST. WITH NAK., 1 RVSN – repeat 11 times, 1 PSBN.
The increase in loops in each wedge must be evenly distributed over the loops of the previous row.
The result should be a circle with an approximate diameter of 6 cm.
7 rows – knit without increases. 3 VP, then knit as the loops look – in each lower column 1 ST. With NAK., observing the location of the RVSN – all 12 wedges are made, and finish with PSBN.
8th row – loops begin to decrease, 3 VP, 2 CT with NAK, 2 CT with NAK knit with a common top, 1 RVSN, 3 CT with NAK, 2 CT with NAK with a common top, RVSN – repeat 11 times, HDBN.
9th row – 3 VP, 2 ST. C NAC. with a common top, RVSN, 2 ST. C NAC., 2 ST. C NAC. with a common top, RVSN – repeat 11 times, PSBN.
10 rows – 1 VP, in each loop of the bottom row 1 SC to the end of the row, PSBN – closes the row.
The doll's beret is made. But the cap needs a visor. To knit it, 4 central wedges or 16 loops are allocated. The first row is started with a single crochet to pull a new thread through, and knit for the front walls of the loops of the bottom row:
1 row – 3 sc, 2 sc in the bottom loop, 3 sc, 2 sc in the next loop, 3 sc, 2 sc in the next loop, 4 sc.
2 rows – 1 VP, skip 1 loop and knit 17 SC, skip the last loop of the previous row.
3 rows – 1 VP, skip the initial loop, 3 SC, 2 SC in the next loop, 6 SC, 2 SC in the next loop, 3 SC, 2 SC with a common top.
4 rows – 1 VP, skip the initial loop, 7 SC, 2 SC in the next loop, 5 SC, 2 SC with a common top, leave the last column of the previous row without knitting into it.
Secure the thread.
You need to tie the cap in a circle with PSBN, only in the corners of the visor you need to knit 2 SC for a beautiful appearance of the cap.
Please note! The size of the cap can be varied by the number of rows or the thickness of the threads.
Ushanka hat
Necessary materials and tools: thin yarn (approx. 300 m per 50 g), 1.5 hook, remnants of grass-type yarn for finishing.
Job Description:
Row 1 – start with a sliding loop. Cast on 12 CCHs (shown on the diagram as [ɬ].
Row 2 – knit 2 CCH in each column of the bottom row.
Row 3 – add 1 DC into every 2nd column of the bottom row.
Rows 4–7 are knitted with DC stitches in a circle without increases.
Pattern diagram for a hat with earflaps:
| 1 p. | ɬ | ɬ | ɬ | ɬ | ɬ | ɬ | ɬ | ɬ | ɬ | ɬ | ɬ | ɬ |
| 2 p. | ɬ ɬ | ɬ ɬ | ɬ ɬ | ɬ ɬ | ɬ ɬ | ɬ ɬ | ɬ ɬ | ɬ ɬ | ɬ ɬ | ɬ ɬ | ɬ ɬ | ɬ ɬ |
| 3 p. | ɬ ɬɬ | ɬ ɬɬ | ɬ ɬɬ | ɬ ɬɬ | ɬ ɬɬ | ɬ ɬɬ | ɬ ɬɬ | ɬ ɬɬ | ɬ ɬɬ | ɬ ɬɬ | ɬ ɬɬ | ɬ ɬɬ |
| 4 p. | ɬ ɬɬ | ɬ ɬɬ | ɬ ɬɬ | ɬ ɬɬ | ɬ ɬɬ | ɬ ɬɬ | ɬ ɬɬ | ɬ ɬɬ | ɬ ɬɬ | ɬ ɬɬ | ɬ ɬɬ | ɬ ɬɬ |
| 5 p. | ɬ ɬɬ | ɬ ɬɬ | ɬ ɬɬ | ɬ ɬɬ | ɬ ɬɬ | ɬ ɬɬ | ɬ ɬɬ | ɬ ɬɬ | ɬ ɬɬ | ɬ ɬɬ | ɬ ɬɬ | ɬ ɬɬ |
| 6 p. | ɬ ɬɬ | ɬ ɬɬ | ɬ ɬɬ | ɬ ɬɬ | ɬ ɬɬ | ɬ ɬɬ | ɬ ɬɬ | ɬ ɬɬ | ɬ ɬɬ | ɬ ɬɬ | ɬ ɬɬ | ɬ ɬɬ |
| 7 p. | ɬ ɬɬ | ɬ ɬɬ | ɬ ɬɬ | ɬ ɬɬ | ɬ ɬɬ | ɬ ɬɬ | ɬ ɬɬ | ɬ ɬɬ | ɬ ɬɬ | ɬ ɬɬ | ɬ ɬɬ | ɬ ɬɬ |
To knit the visor, you can knit the middle 18 sts with a CCH in 4 rows.
The ears are knitted with the main thread. From the visor, knit 9 loops of the CCH - 4 rows, then make a decrease in each row, without finishing the outer columns. A total of 4 rows.
Please note! To decorate, the ears and visor are tied with grass thread, which are then attached to the hat.
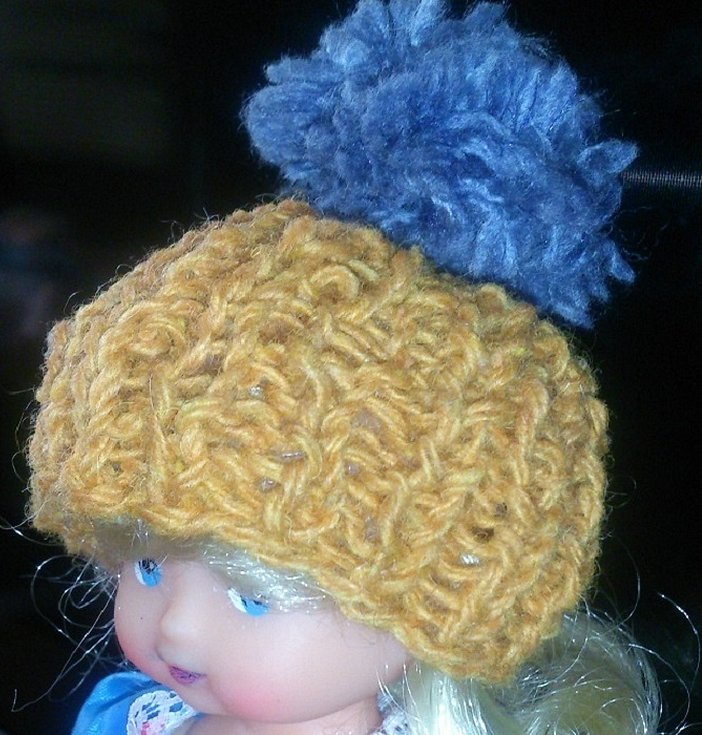
Hat with pompom
For this you will need: leftover thin yarn, a hook of a suitable size (for example, No. 3), a pompom (you can use fur or make it yourself from any thread).
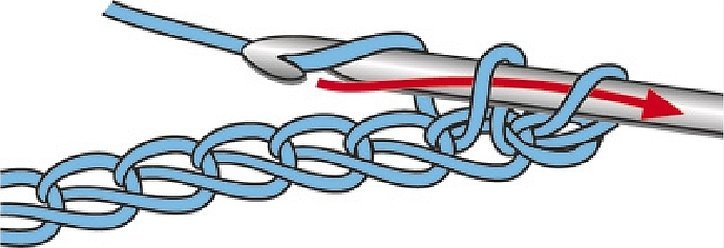
Cast on a chain of 6 loops and knit the elastic using single crochet stitches:
1 row – 1 VP, 6 SC.
2 rows – 1 VP, 6 SC, which are knitted behind the back wall of the loops of the bottom row.
3-30 rows – repeat as 2nd row.
The number of rows varies depending on the volume of the doll's head. The doll in the photo has a head volume of 17 cm. Connect the elastic band into a ring with connecting single crochets and begin knitting the hat itself. First, tie the elastic band with 30 sc, and then:
1 p. - 3 VPP, 29 SSN
2 rows – 3 VP and knit 2 columns together – a total of 14 CCH.
Row 3 – 3 VP, 7 CCH. Connect all the loops to finish the hat. Attach the finished pompom.
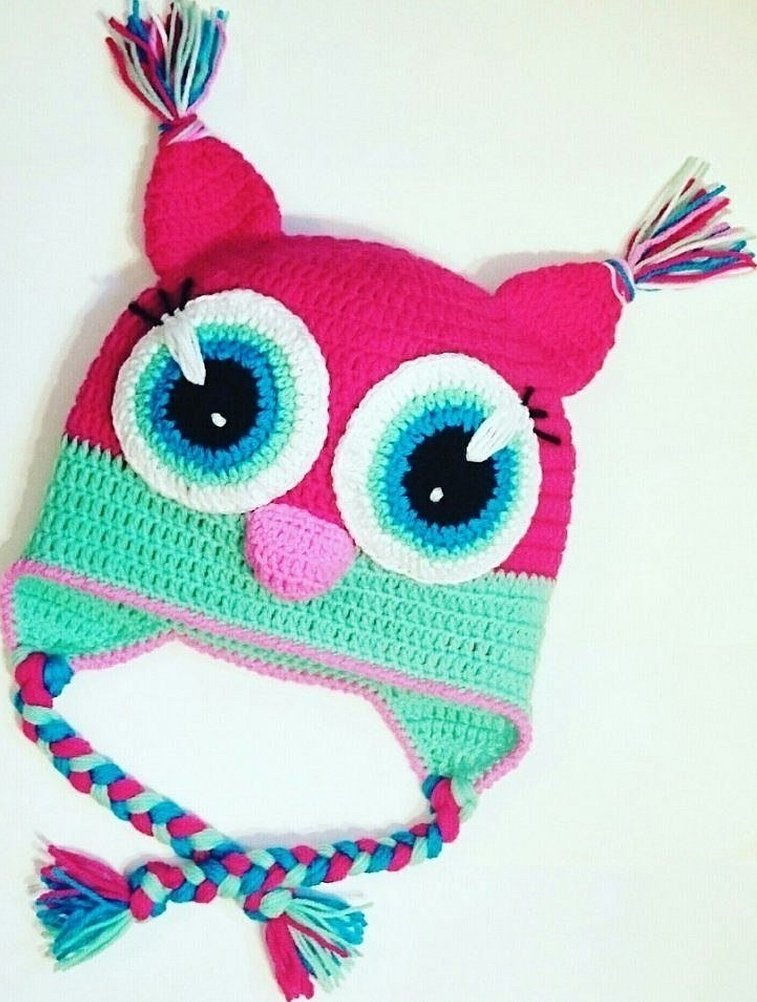
Crochet Hat "Owl"
For this you will need: leftover thin yarn of several colors, a hook, 2 large beads for the eyes.
Work starts from the crown. 6 SC are knitted into a ring, the first row is closed into a ring. In each following row, 6 increases are performed evenly.
1 row – 6 sc.
2 rows – 12 sc.
3 rows – 18 sc.
4 rows – 24 sc.
6 rows – 30 sc.
7 rows – 36 sc.
8 rows – 42 sc.
Knit another 3-4 rows with the yarn of the initial color without adding loops. Then switch to another yarn and knit another 4-5 rows. The cap is divided into parts for knitting the ears as follows: front - 17 sts, 1st ear - 8 sts, back - 9 sts, 2nd ear - 8 sts.
The ears are knitted from 8 loops with double crochets, decreasing the number of loops in each row by 2. There are 4 rows in total.
The ears for the top of the hat can be knitted as flat triangles or small cones, starting with 5 loops (or 10 loops of the DC for a cone) and decreasing to 1 loop (3 rows). They are attached to the top and decorated with small tassels made of thread.
Knitting eyes from white threads starts from a ring of 6 sc, 2nd row - 12 sc, 3rd row - 24 sc. Sew a bead or a small button onto the cap instead of a pupil.
The owl's beak is made with a few stitches using a thick needle in the center of the cap between the eyes.
Please note! The finished hat is tied around with a contrasting thread using sc. You can make braids from the remaining threads for the ears as ties for the hat.
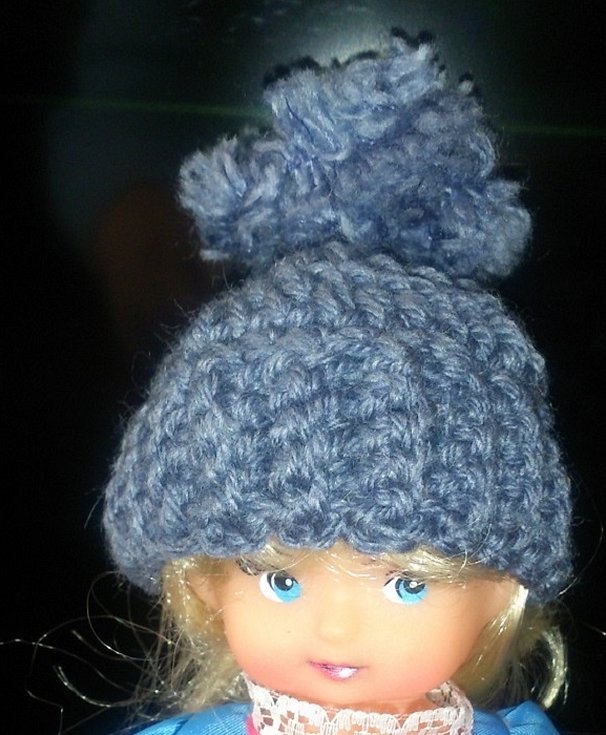
Knitted hat with pompom for doll
The following materials are used for this: leftover yarn, No. 2 knitting needles, a crochet hook, and a ready-made pompom.
Work order:
- Cast on 32 sts.
- Make a 1x1 elastic band (1 front, 1 back st.) – 5 cm. You can make it longer to create a lapel.
- Then begin decreasing every 2nd loop.
- Another 1 row decreases to 8 sts.
- The remaining loops are pulled together at the top of the head.
- Attach the pompom.
The hat is ready.
Please note! The number of loops and the height of the hat can be changed depending on the size of the doll's head.
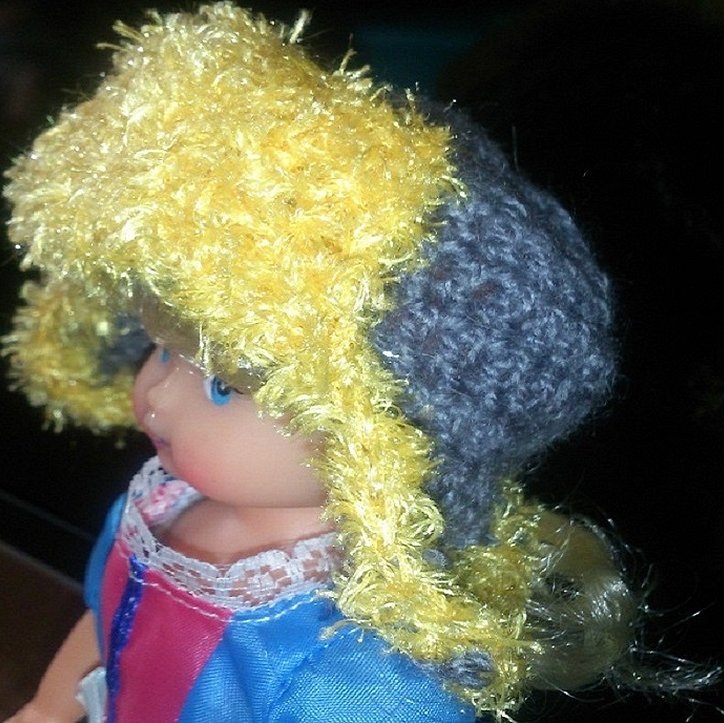
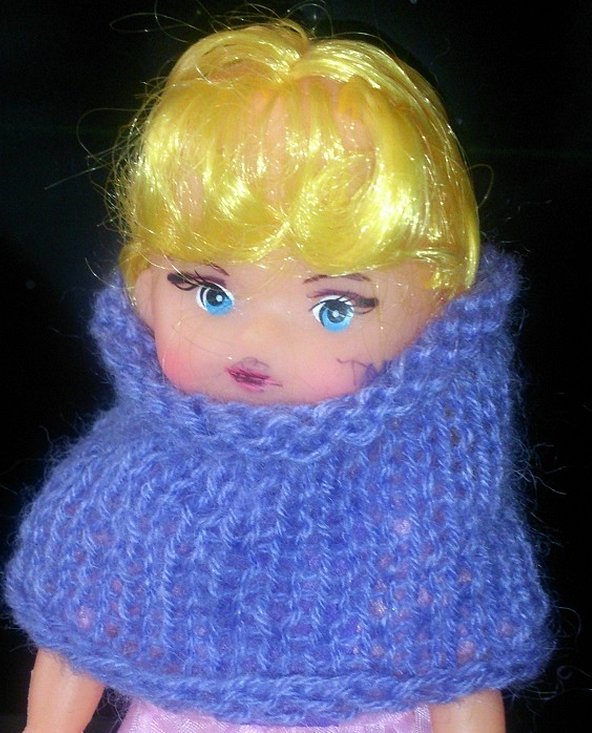
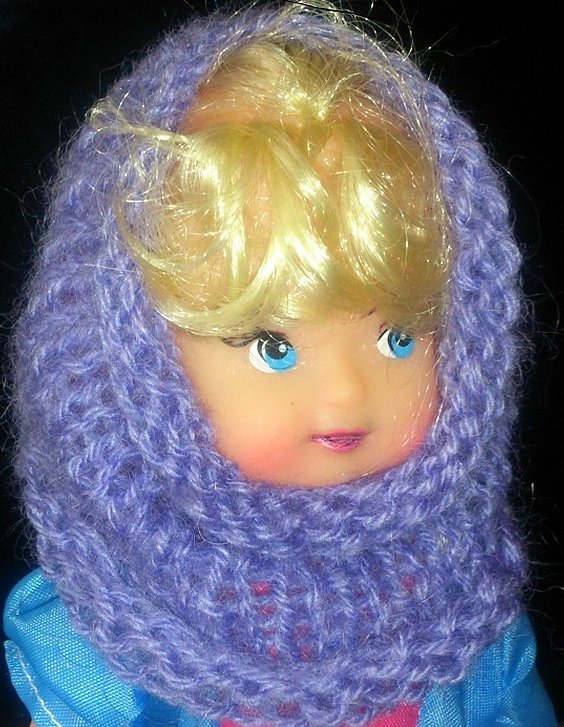
Scarf hat or tube hat
This is the easiest type of headdress to make.
The following tools and materials are used for it: thin yarn (for example, leftover angora), thin knitting needles.
Work order:
- Cast on 30 stitches.
- Work with stocking stitch for approximately 8 cm.
- Close the loops.
- The sides of the knitted fabric are sewn together to create a tube scarf.
It can be worn as a bonnet or a scarf. Both of these options are shown in the photo.
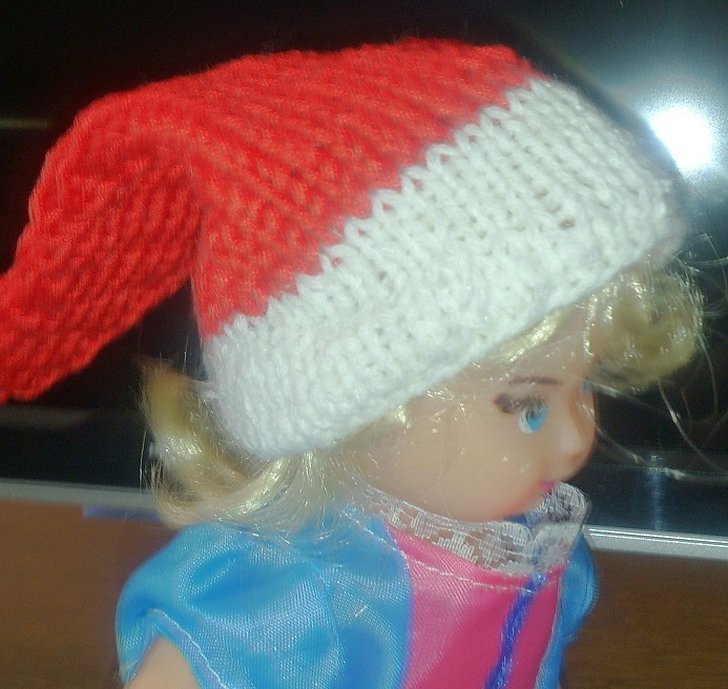
Hat-cap for a gnome
This is a MK for beginner knitters. You will need red and white thin yarn, 4 hosiery needles. The product is knitted in a circle on 3 needles, as it is very small.
Work order:
- Cast on 42 loops with white thread (for a doll's head circumference of 17 cm).
- They are distributed among three knitting needles and knitted with the front surface in 2 cm.
- The transition is made to the red thread and another 1 cm is knitted in the garter stitch in a circle.
Next you need to start making decreases.
Row 1 – knit two together at the end of the first needle.
Row 2 – knit two together at the end of the second needle.
Row 3 – knit two together at the end of the third needle.
Row 4 – knitted without decreases.
Starting from the 5th row, perform according to the pattern from the 1st to the 4th row. Reduce loops until 6 loops remain. Pull the working thread through these loops and tighten.
Please note! The tip of the cap can be adjusted using a pencil or a wooden stick, which must first be filed down to a point.
The cap is ready. Its approximate height is 17 cm.
How to knit a beret for Baby Born
To create a crochet hat for a doll, you can use the remains of medium-thick yarn (200 m in 100 g) and a No. 3 hook.
The initial sliding ring is collected - this is the beginning of the cap. The beret will have 12 wedges with an increase in each row in each wedge by 1 loop.
1 row – 3 VP, 11 CCH (knitted into the initial ring), PSBN into the third loop of the lifting column.
2 rows – 3 VP, 1 DC in the loop of the bottom column, then in the same loop 1 RVSN (the hook is inserted under the bottom column, as if wrapping around it, creating a convex relief), repeat 11 times, PSBN in the third loop of the lifting column.
3 rows – 3 VP, 1 DC in the upper lifting loop of the previous row, 1 RVSN (grabs the lower RVSN of the previous row), 2 DC in the next loop of the lower row, 1 RVSN – repeat 11 times, each row ends with a PSBN.
4 rows – 3 VP, 2 DC in the loop of the bottom row, 1 RVSN, 3 DC in 2 lower loops, 1 RVSN – repeat 11 times, 1 PSBN.
5th row – 3 VP, 3 CCH, 1 RVSN, 4 CCH, 1 RVSN – repeat 11 times, 1 PSBN.
You should end up with a circle with a diameter of approximately 16 cm.
6 rows – knit without increases. 3 VP, then knit as the loops look – in each lower loop 1 CCH, observing the location of the RVSN – make all 12 wedges, and finish the row with PSBN.
Row 7 – loops begin to decrease, 3 VP, 2 CCH, knit 2 CCH with a common top, 1 RVSN, 3 CCH, 2 CCH with a common top, RVSN – repeat 11 times, PSBN.
8 rows – 3 VP, 2 CCH with a common top, RVSN, 2 CCH, 2 CCH with a common top, RVSN – repeat 11 times, PSBN.
Row 9 – 3 VP, 2 CCH with a common top, RVSN, 1 CCH, 2 CCH with a common top, RVSN – repeat 11 times, PSBN.
10th row – 1 VP, in all loops of the bottom row 1 SC (the whole row in a circle), PSBN – closes the row. Tighten the outer loop, secure the thread.
The beret is ready.
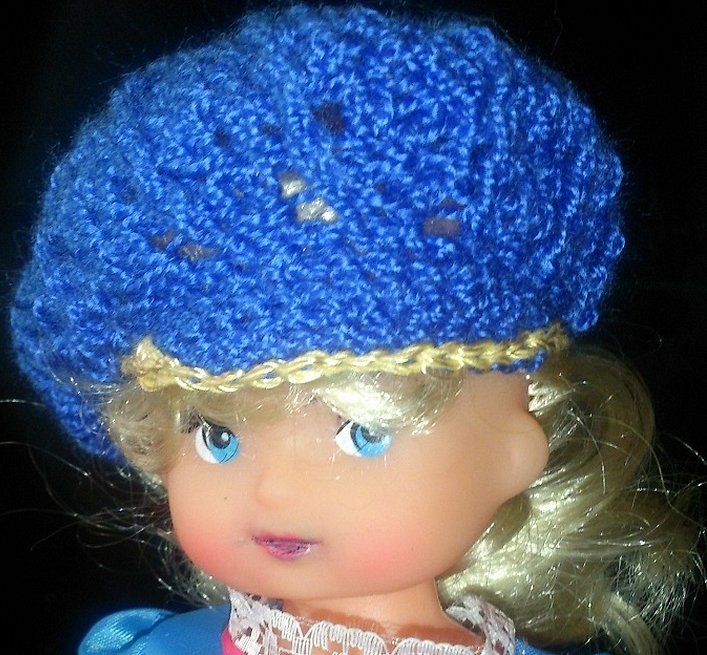
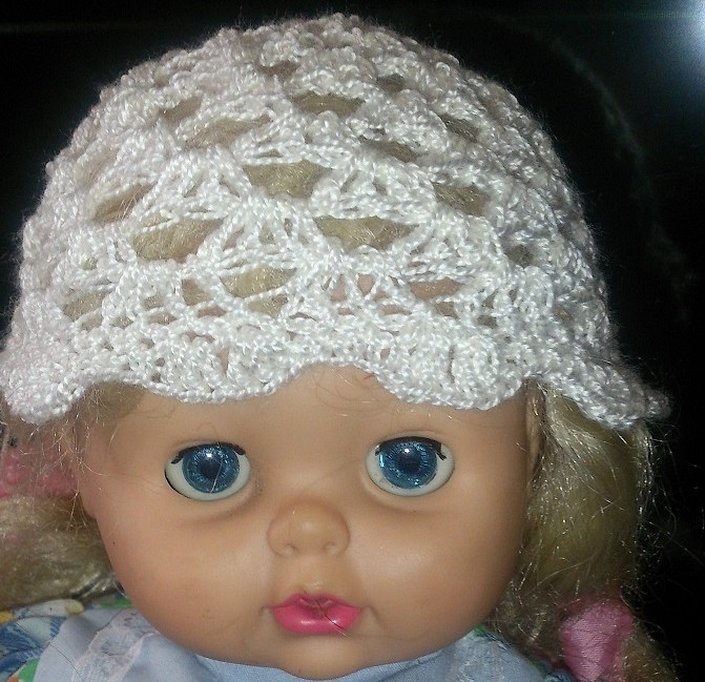
Knitted openwork hat for Paola Reina doll
For this model, thin threads like Iris for embroidery and hooks No. 1, No. 3 are suitable. The model is easy to make. The hat is knitted from the crown.
12 DCs are collected in the sliding ring.
2nd row – 3 VP. 1 VP, 1 CCH – repeat 11 times, connect 1 VP with the third loop of the lifting column.
3rd row – 3 VP, 1 CCH, 1 VP, 2 CCH – repeat 11 times, connect 1 VP with the third loop of the lifting column.
4th row – 3 VP, 2 CCH, 1 VP, 3 CCH – repeat 11 times, connect 1 VP with the third loop of the lifting column.
5th row – 3 VP, 3 CCH, 1 VP, 4 CCH – repeat 11 times, connect 1 VP with the third loop of the lifting column.
Rows 6-10 are performed according to the pattern of the 5th row.
Row 11 – 1 VP, 2 SC, 3 DC in one loop, 3 DC in the loop of the previous row, 3 SC – repeat 9 times, 3 DC in one loop of the previous row, 3 DC in the bottom loop.
This completes the knitting. You can try the new thing on the Paola Reina doll.
Please note! The diameter of the lower part of the openwork cap is approximately 7 cm.
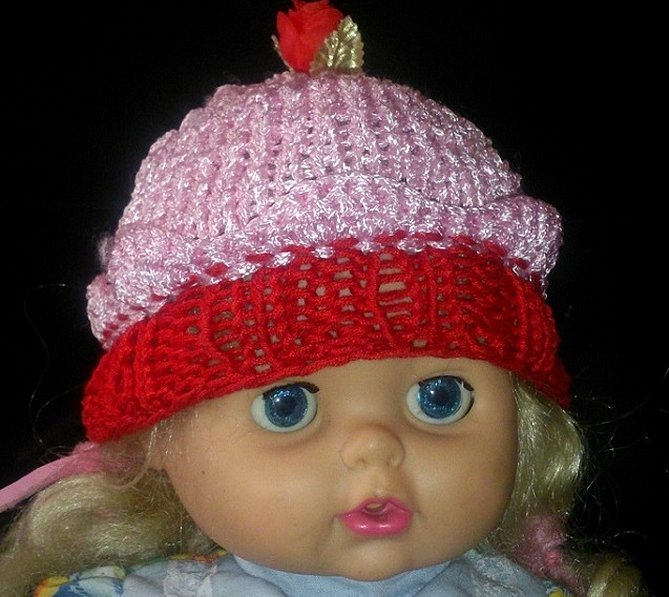
Pie hat
For this you will need the following materials: leftover thin red yarn, pink or white yarn, #2 knitting needles, and a crochet hook.
Next comes:
- Cast on 40 stitches with red thread. Knit 2.5 cm with a 2x2 elastic band.
- Insert another thread into the work and knit the first row with yarn of a different color from the front side as purl, while adding 1 loop every 5 loops. In total, you should get 48 loops.
- Work another 3 cm in stockinette stitch.
- Then you need to decrease by knitting together every 5th and 6th stitch (only from the front side).
- Repeat until there are 6 stitches left on the needles.
- Pull them together with the main thread and sew the hat.
For decoration on the hat, in the back row on its front side, knit as follows: 1 VP, 2 SC, 3 DC in one loop, 3 DC in one loop, 3 SC – repeat 7 times, 3 DC in one loop, 3 DC in one loop.
Please note! The top of the hat can be decorated with a flower or a crocheted cherry.
The product is ready.
All the above descriptions can be used to knit hats for dolls of various sizes and models. And some styles are even suitable for small children.


