Tilda toys are loved by children and adults for their cute and touching appearance. It all started with the creation of dolls, but then needlewomen began to make animals and male characters in this style. It is not difficult to create a tilda hare with a crochet hook: you can find patterns for knitting it even for beginner craftswomen.
Features of Tilda style toys
The products of this direction differ from others in their appearance. Thanks to it, they look touching and become not just toys, but also interior decoration. The distinctive features of tilde toys are as follows:
- absence of nose and mouth;
- large head size relative to the body;
- long thin arms and legs.
Important! Most often, craftswomen complement Tilda dolls with additional elements: clothing, accessories and appliques.
Products made under this brand are unique because they are always handmade. Such toys do not have a nose or mouth embroidered on purpose, so that the doll does not have a certain expression. This allows the person and the tilde to be on the same emotional wave.
The creator of these dolls wanted each of them to have their own character. So she could dress them in an evening dress and sneakers in a modern style, or make her a flower lover. The same goes for tilde animals: the toys do not necessarily have to be close to real ones. On the contrary, the products will look more interesting this way.
There are two ways to make a tilde hare: sew it from fabric or crochet or knit it. Be sure to use a filler so that the product holds its shape. Synthetic padding or holofiber are suitable for this. Lace, beads and satin ribbons are used to decorate clothes.
Important! When creating a Tilda toy, you should think through the overall concept of the doll in advance. Its appearance and character will depend on this. This is what distinguishes the products of this brand from other toys.
Options for decorating a knitted bunny
Of course, you can make a regular toy, the appearance of which will be close to natural. But a crocheted tilde bunny with decorative elements will look more interesting.
Important! It is better not to use rhinestones or sequins to decorate the toy. Tilda is associated with home comfort, so natural materials are suitable for creating this effect.
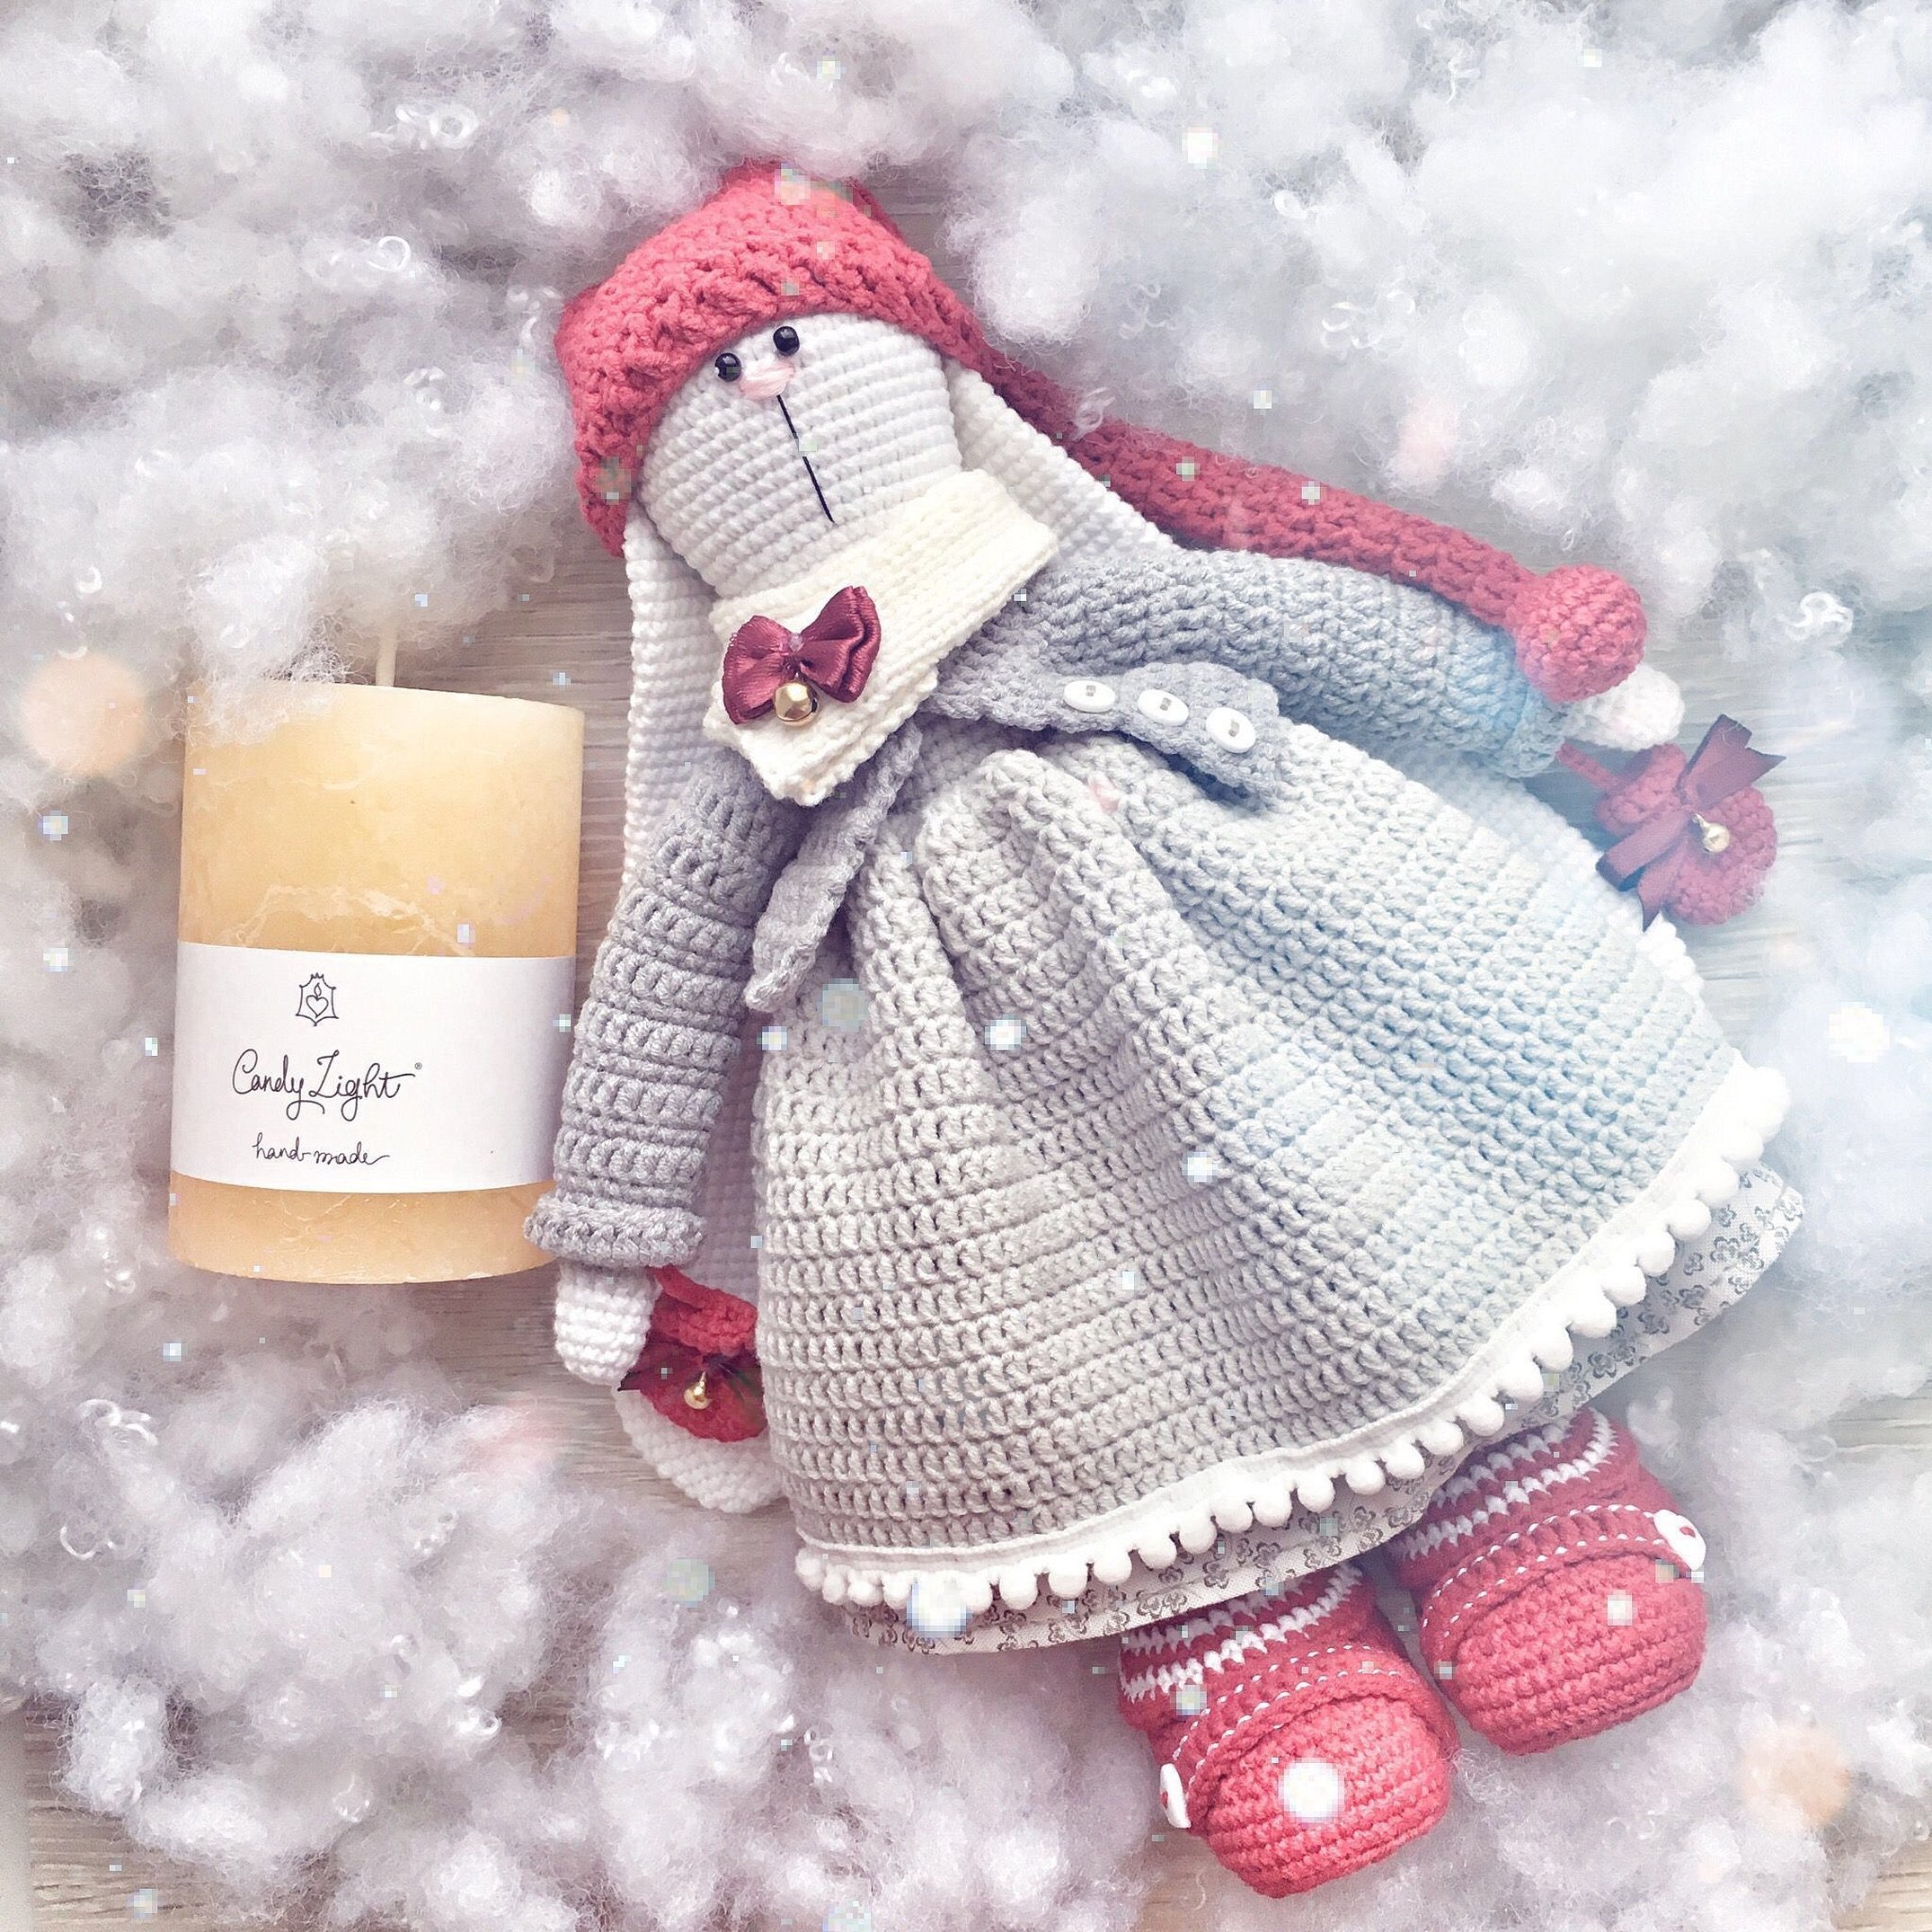
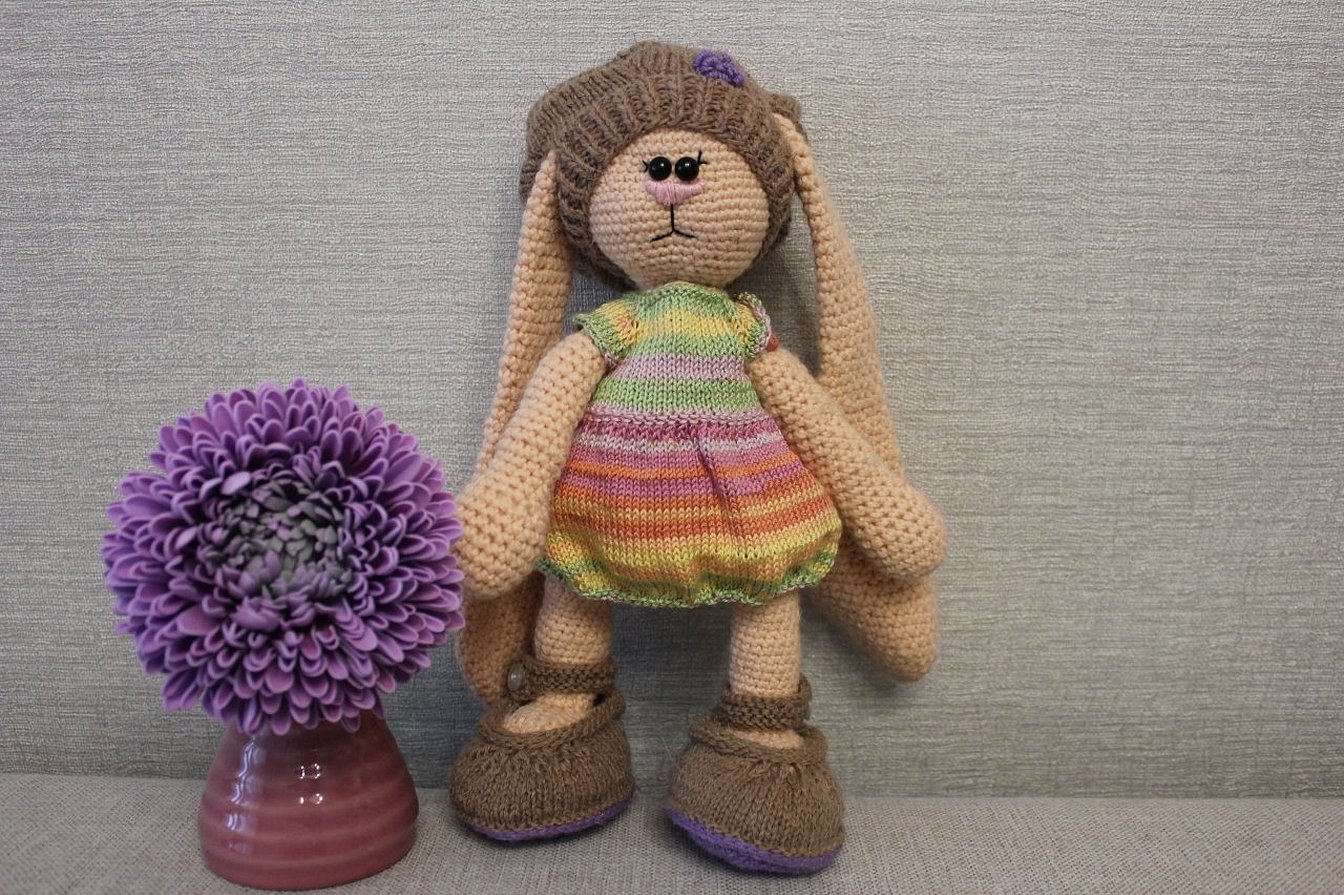
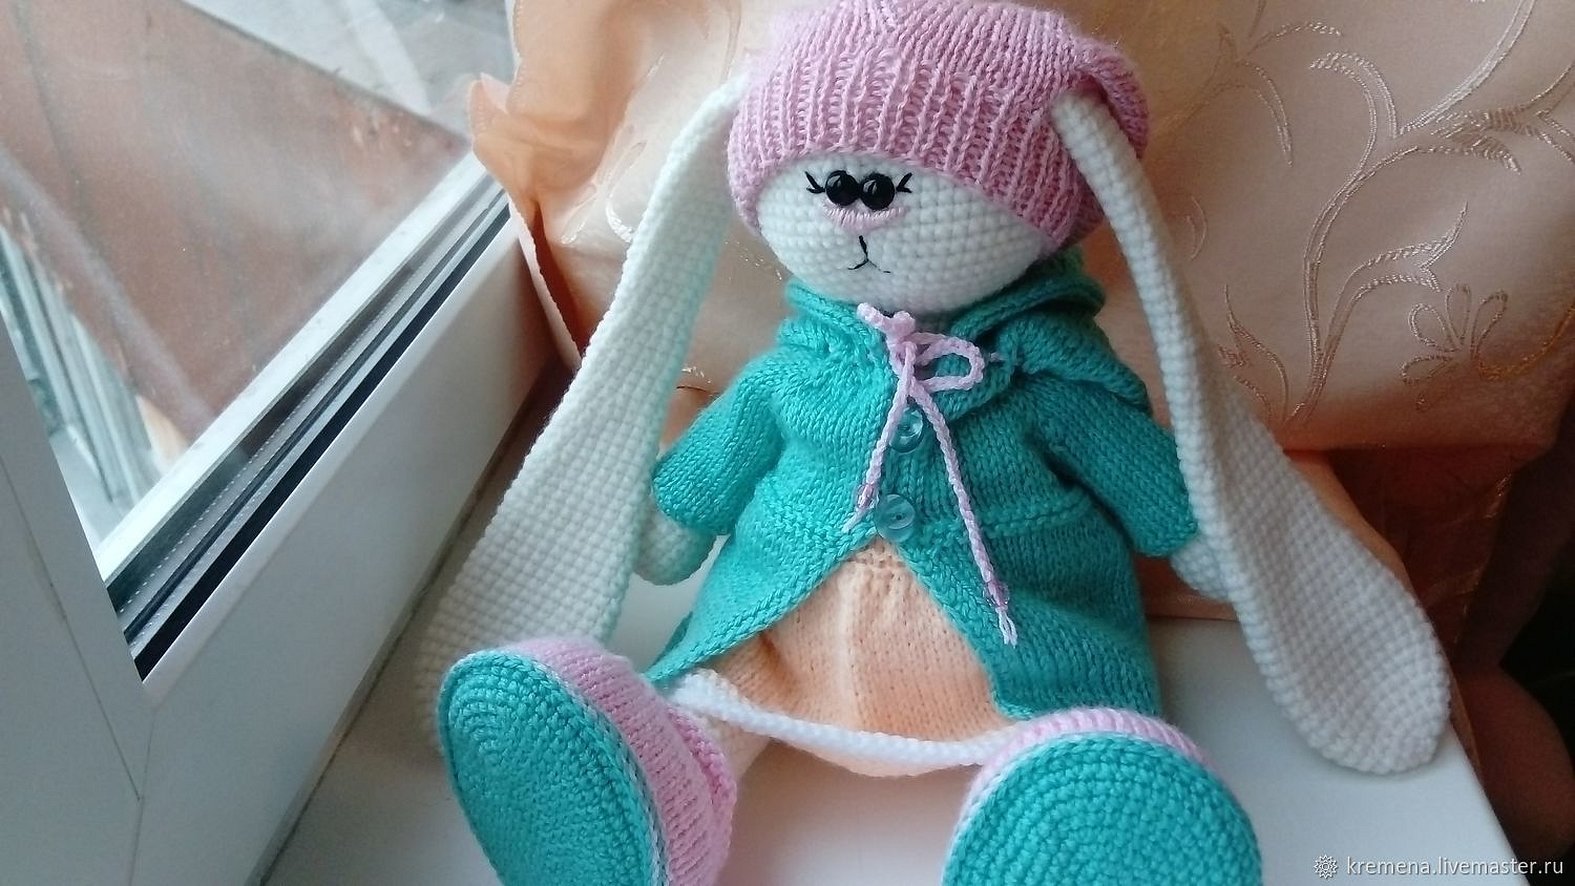
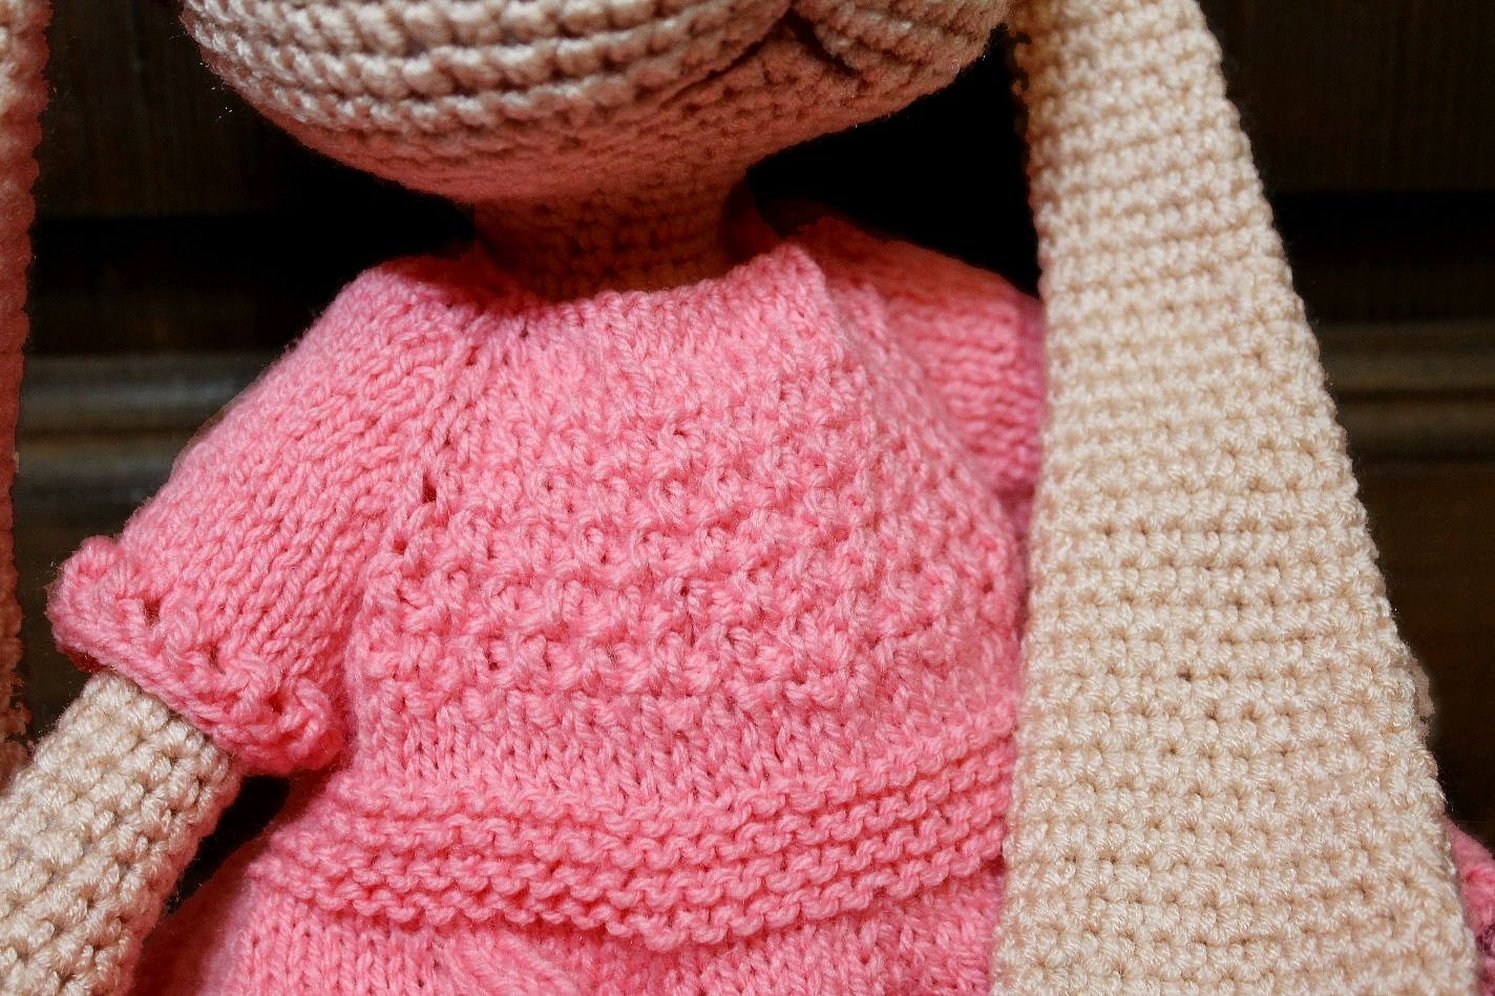
The most common option for decorating a knitted bunny in the tilde style is clothing. Thanks to this, the needlewoman can convey the character of the toy and gender difference. Dresses, skirts, and sundresses are sewn or knitted for the bunny. But if the craftswoman wants to give the doll a more independent, daring character, she can dress her in a pantsuit. The standard clothing option for a bunny is trousers, shorts, and a vest.
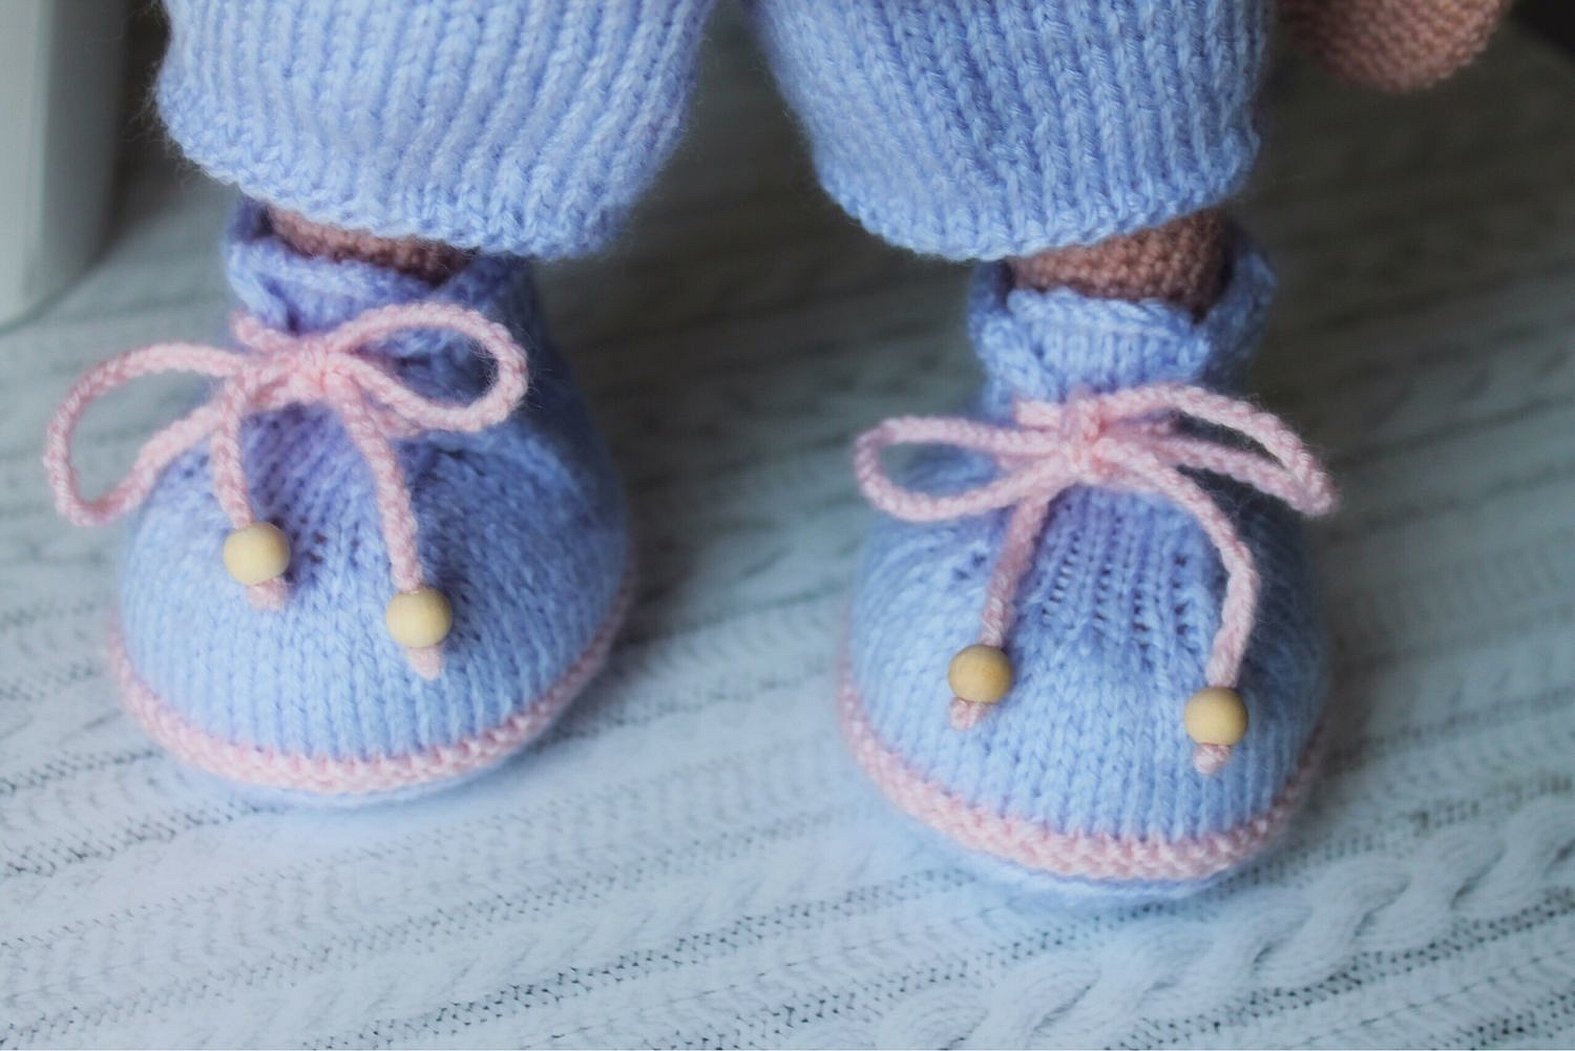
In addition to clothes, do not forget about shoes. They can match the chosen outfit, or be of a different style. Also, the bunny's head can be decorated with a bow, a beautiful hat. If desired, it is permissible to make a beautiful hairstyle.
To decorate a crocheted Tilda doll, needlewomen use:
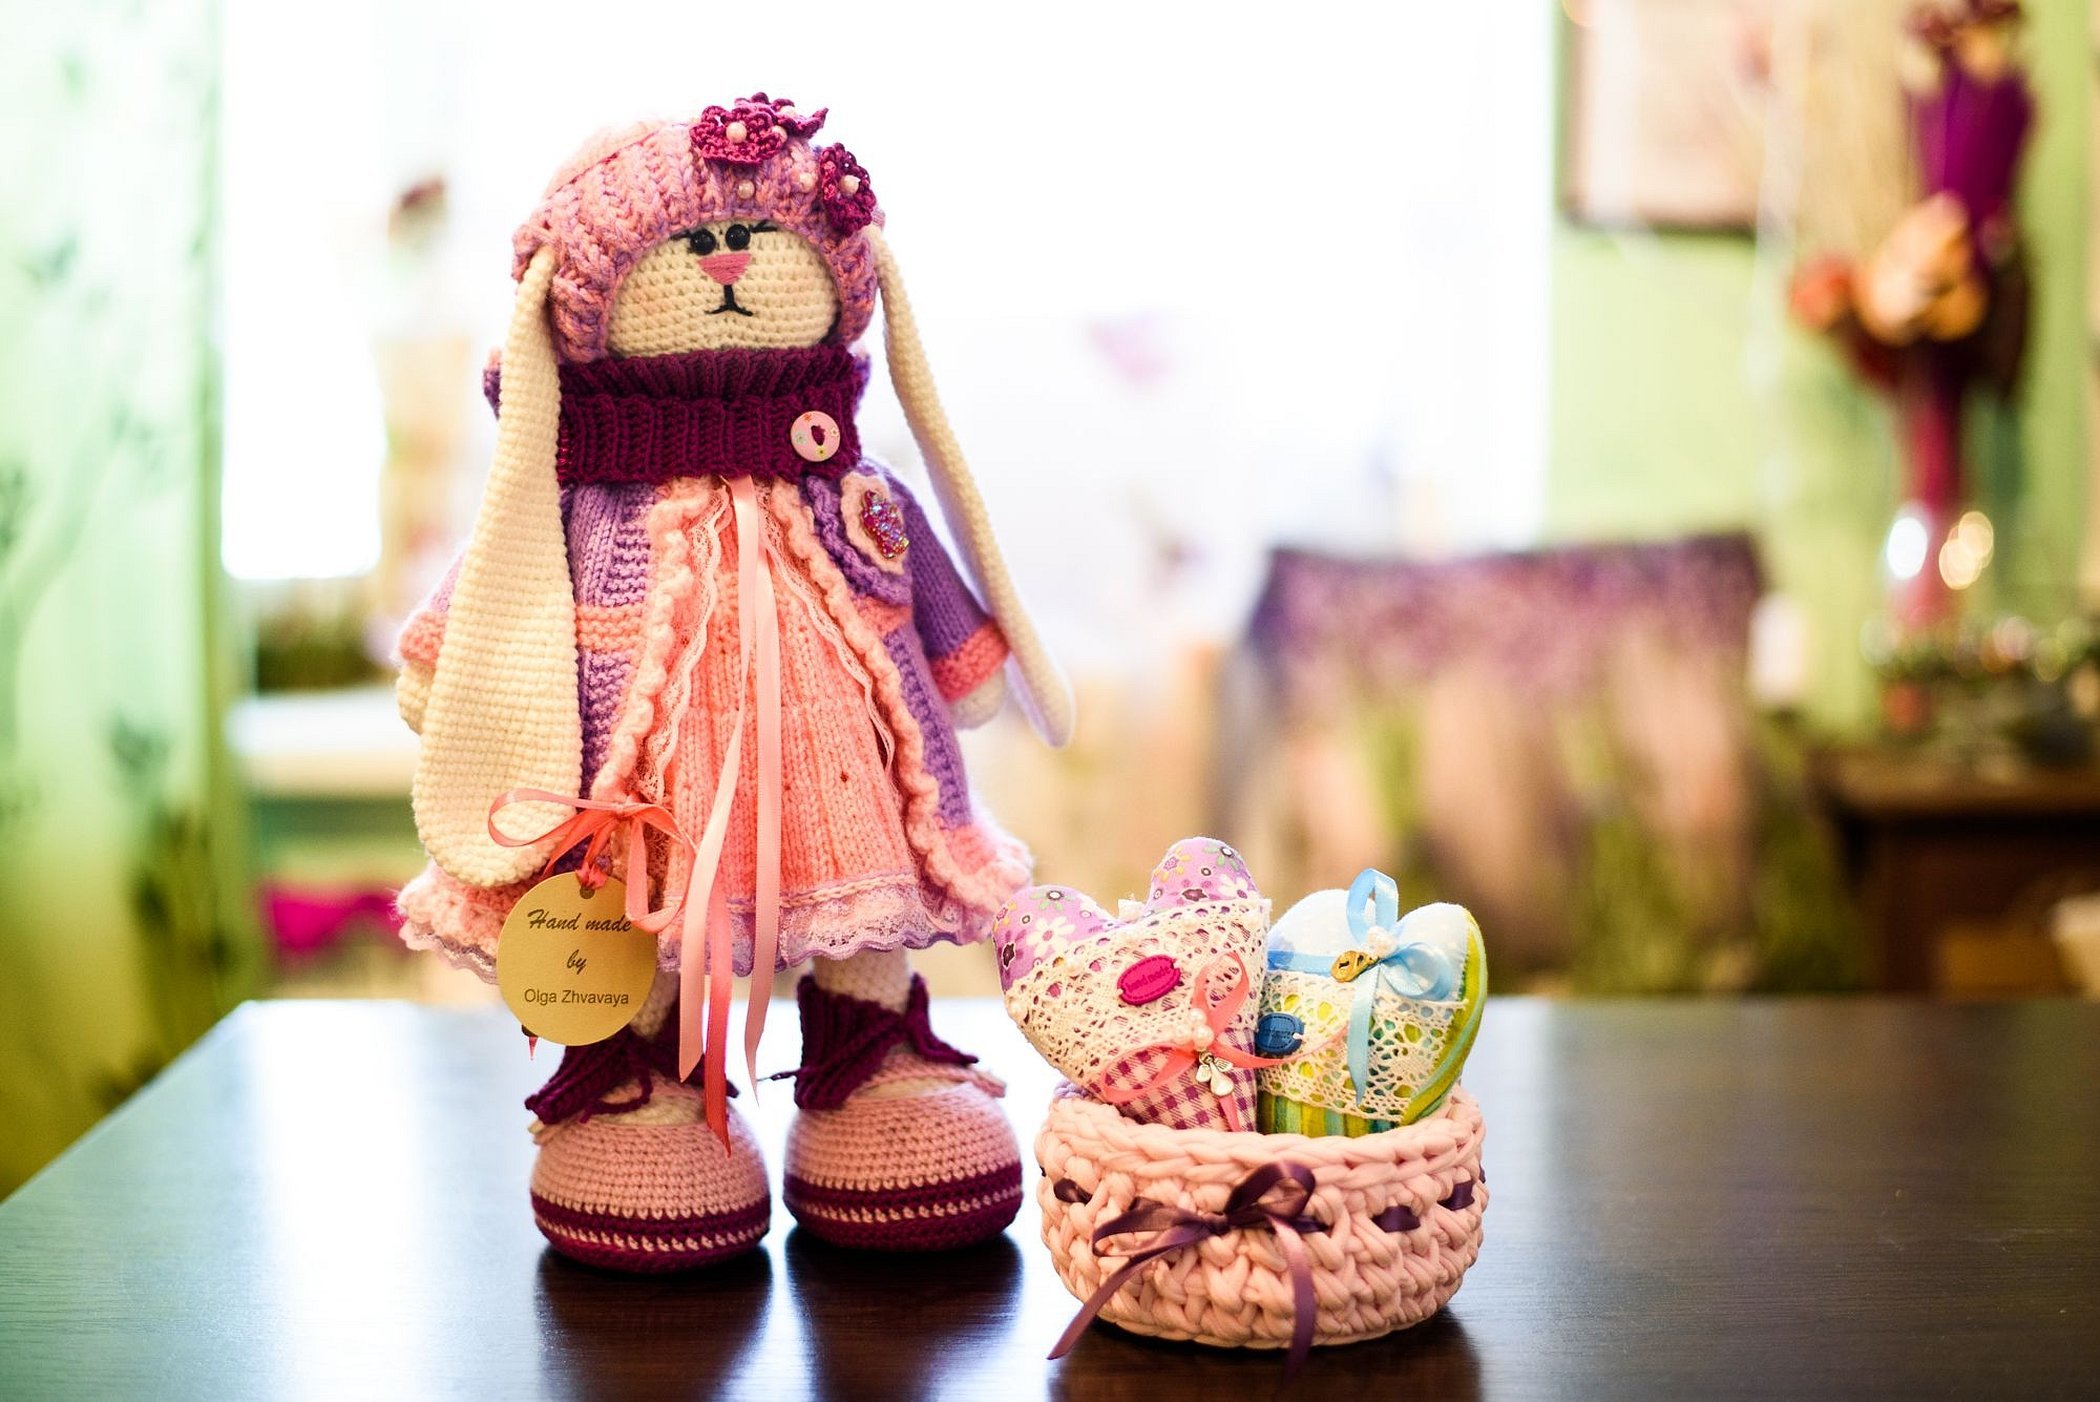
- lace (to create beautiful frills);
- ribbons;
- beads;
- buttons;
- small objects to more accurately convey the intended image of the toy.
All decorations can be knitted or sewn from fabric - it all depends on your skills in handicrafts and the image of the toy. The most popular option for decorating a knitted hare is an applique in the form of a carrot or wildflowers.
You don't have to focus on a lot of details, but just make beautiful clothes. A neatly crocheted hare in the tilde style will be a wonderful gift for children and adults.
What you need to crochet a tilde hare
It is easy to make such a toy, so the patterns for knitting it are suitable even for beginner needlewomen. To create it, you will need the following tools and materials:
- yarn;
- hook;
- fittings;
- needle;
- filler.
For work, it is better to choose cotton and acrylic yarn. The first type of thread is suitable for creating toys for small children, because it is hypoallergenic. Both types of yarn are easy to work with. In addition, they have a large selection of colors.
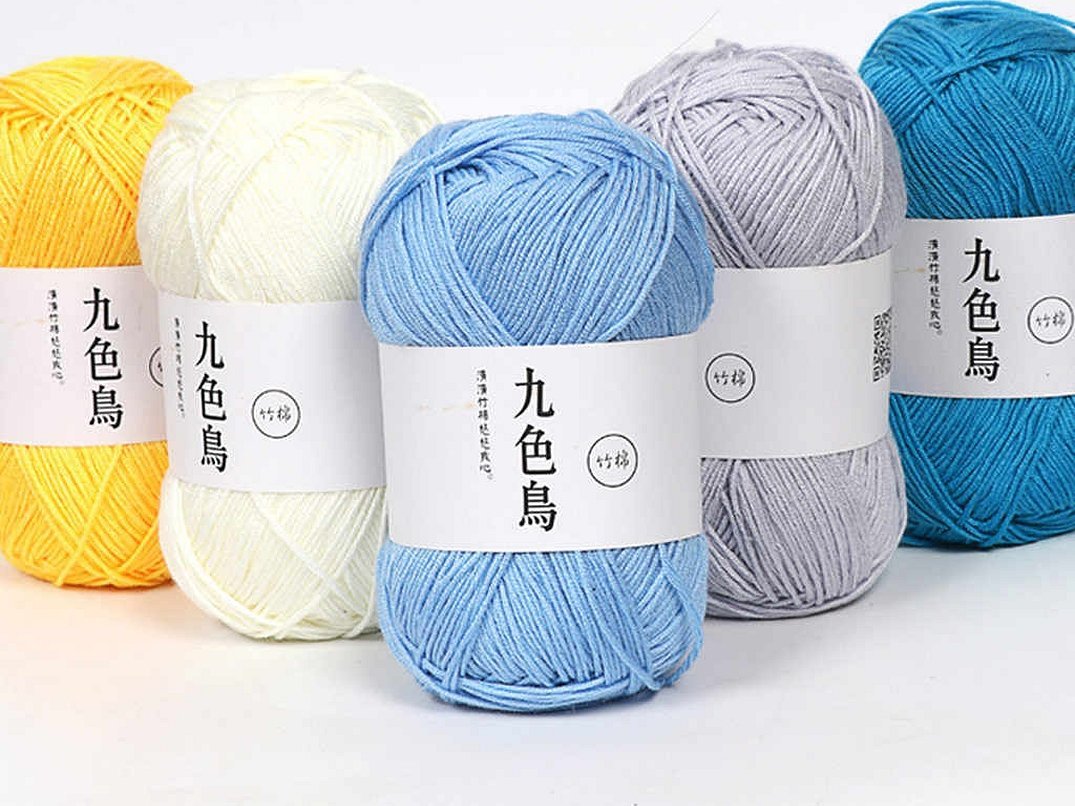
Important! For knitting clothes, it is recommended to choose threads of a thinner thickness than for the main parts of the toy.
The hook is selected depending on the thickness of the threads. Therefore, if several types of yarn are used for knitting, then the appropriate hook is selected for each.
To make a tilde, you will need a filler. The mistake most beginners make in needlework is using cotton wool. But this material quickly rolls up, which has a bad effect on the appearance of the toy. The best options are: synthetic padding and holofiber.
In addition to the above materials, you should choose a suitable knitting pattern. Without it, it will be difficult to create a beautiful and neat tilde toy. The pattern should indicate the number of rows, the transition between colors and the types of loops.
Please note! Beginners should not immediately choose complex options: simple ideas can also be used to knit a tilde bunny.
Step-by-step master class with description of details
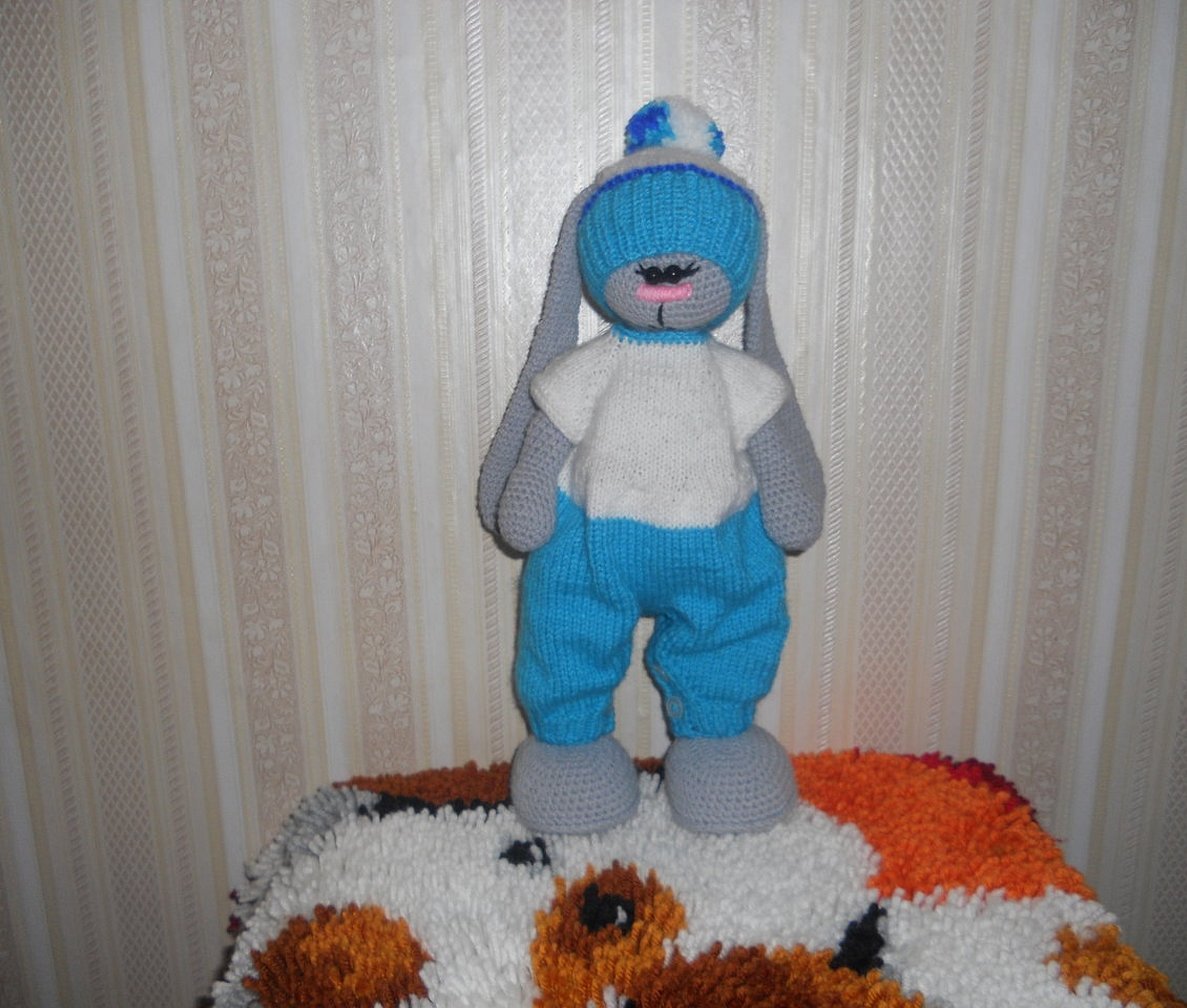
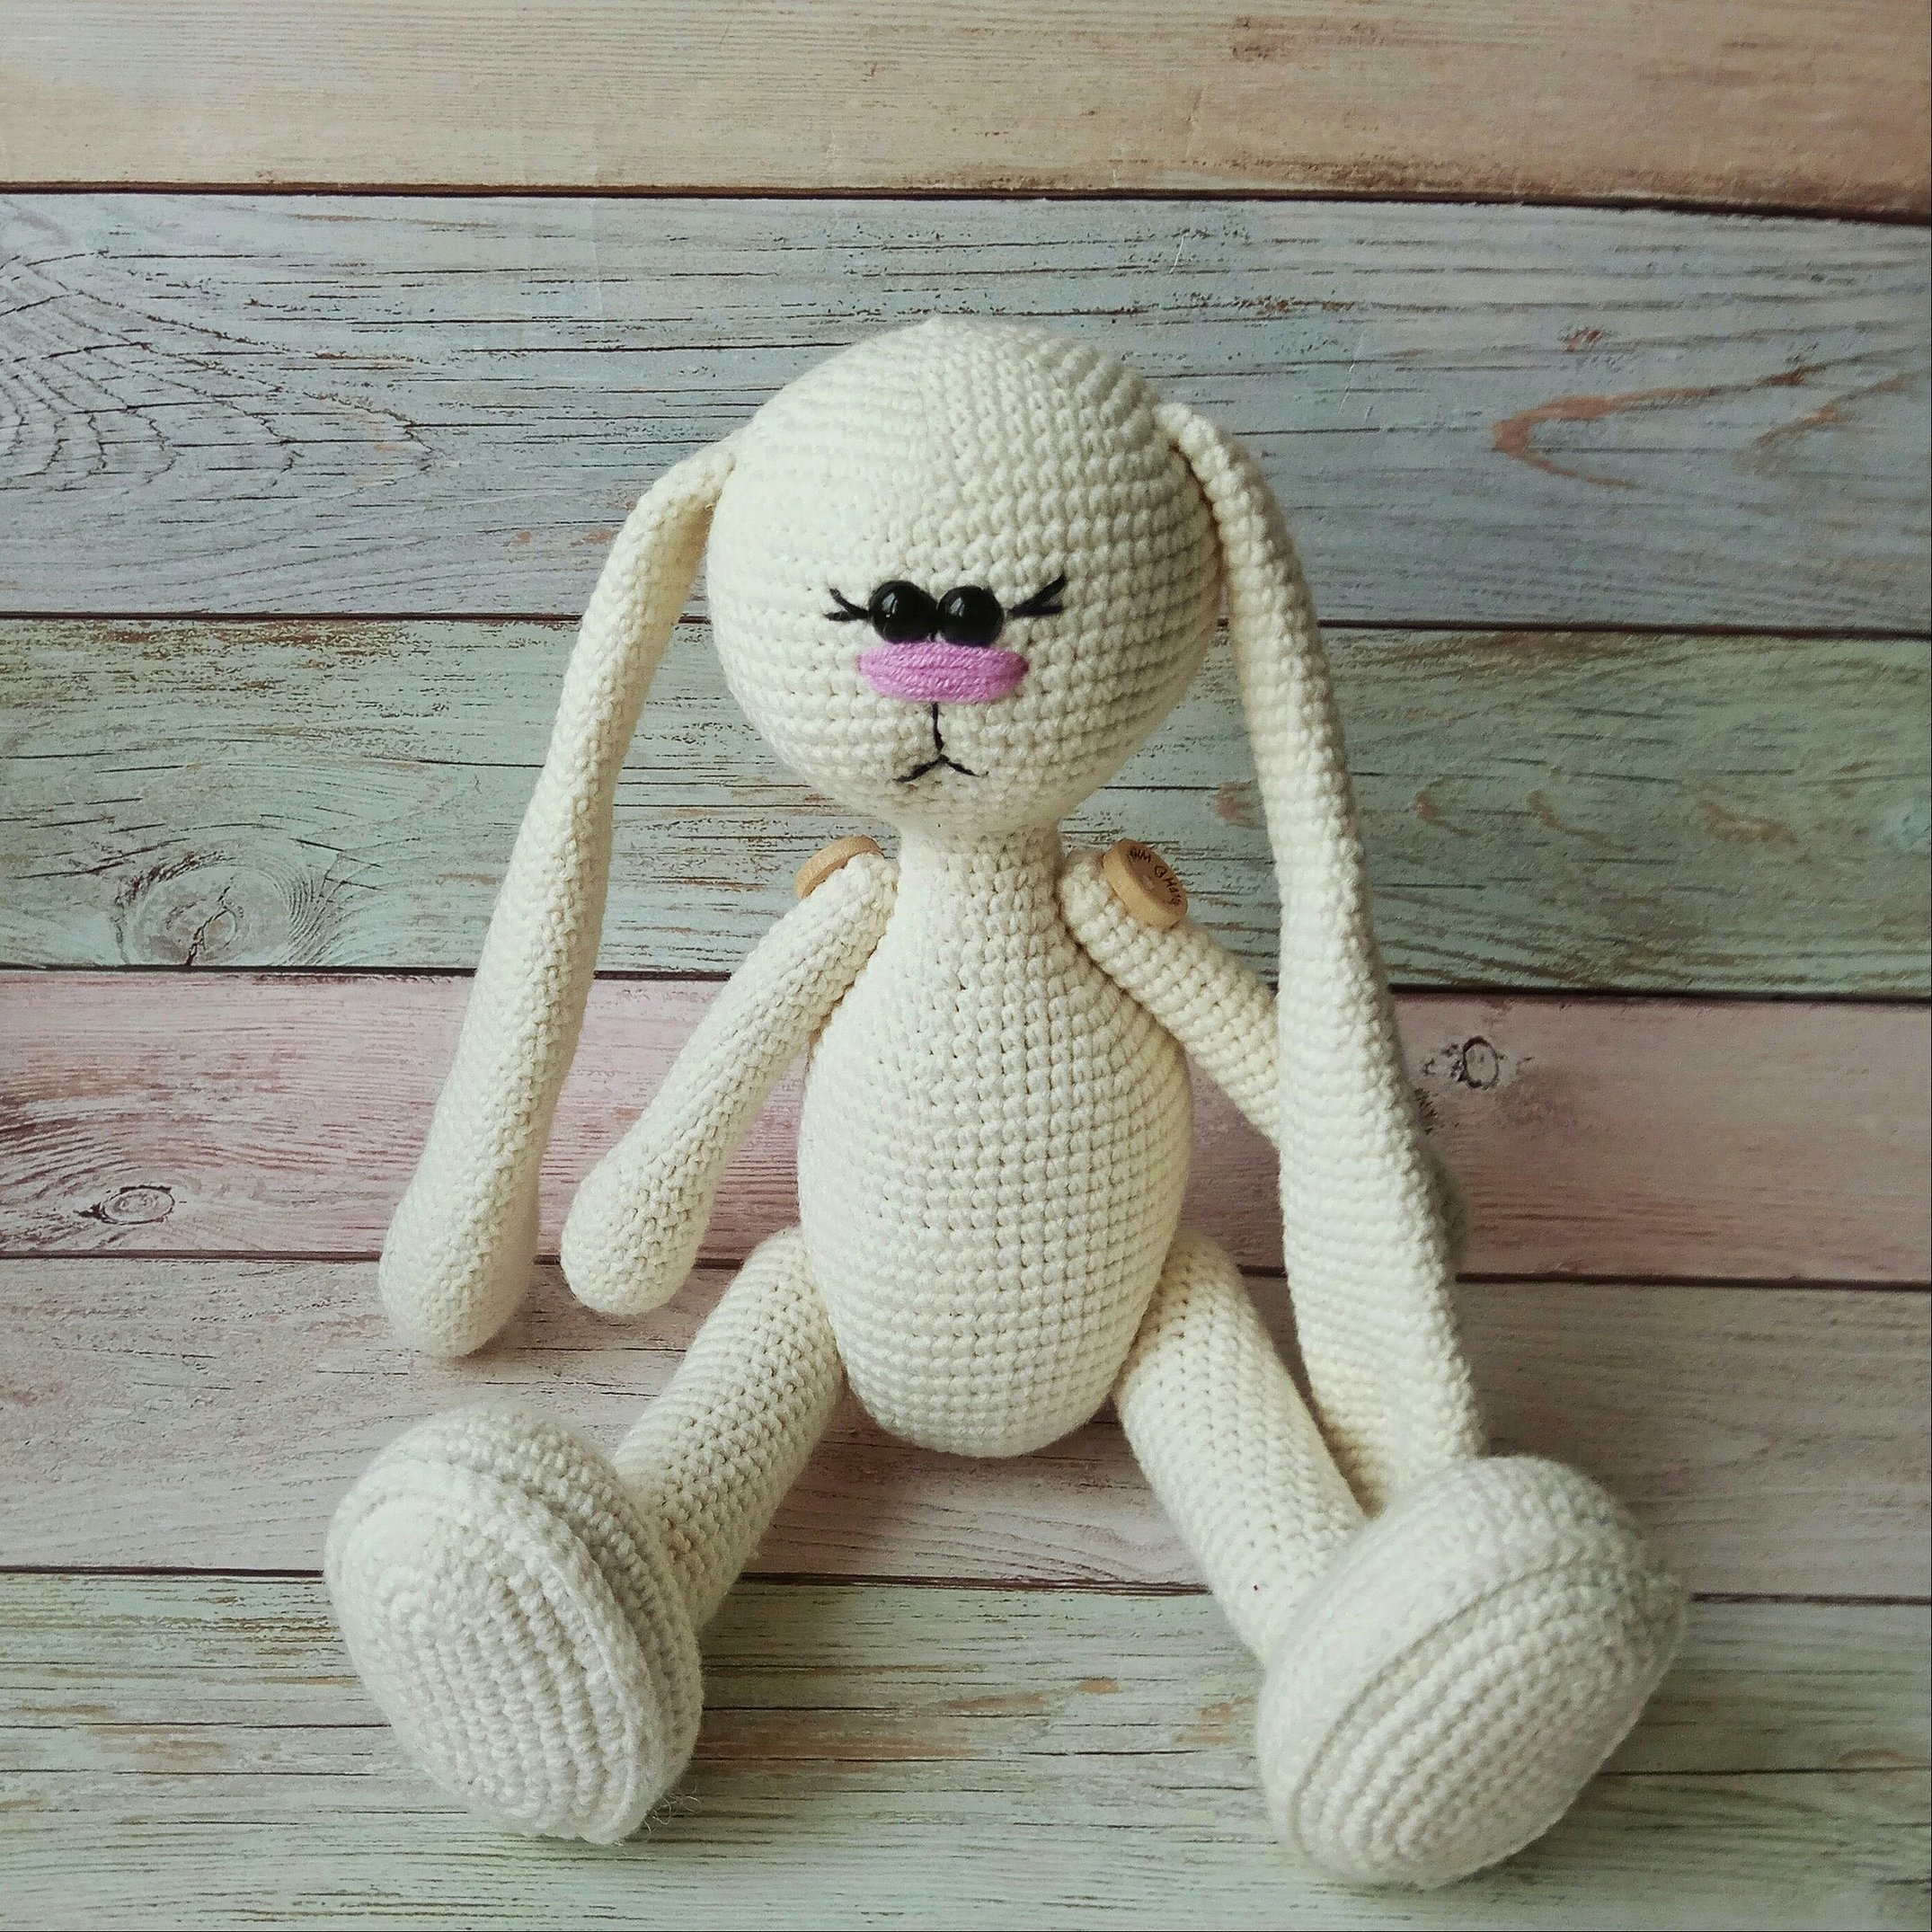
It is not difficult to knit a tilde bunny, the main thing is to choose a pattern. All the details of the toy must be knitted separately, and then combined into one product. A bunny with very long ears looks very touching and cozy.
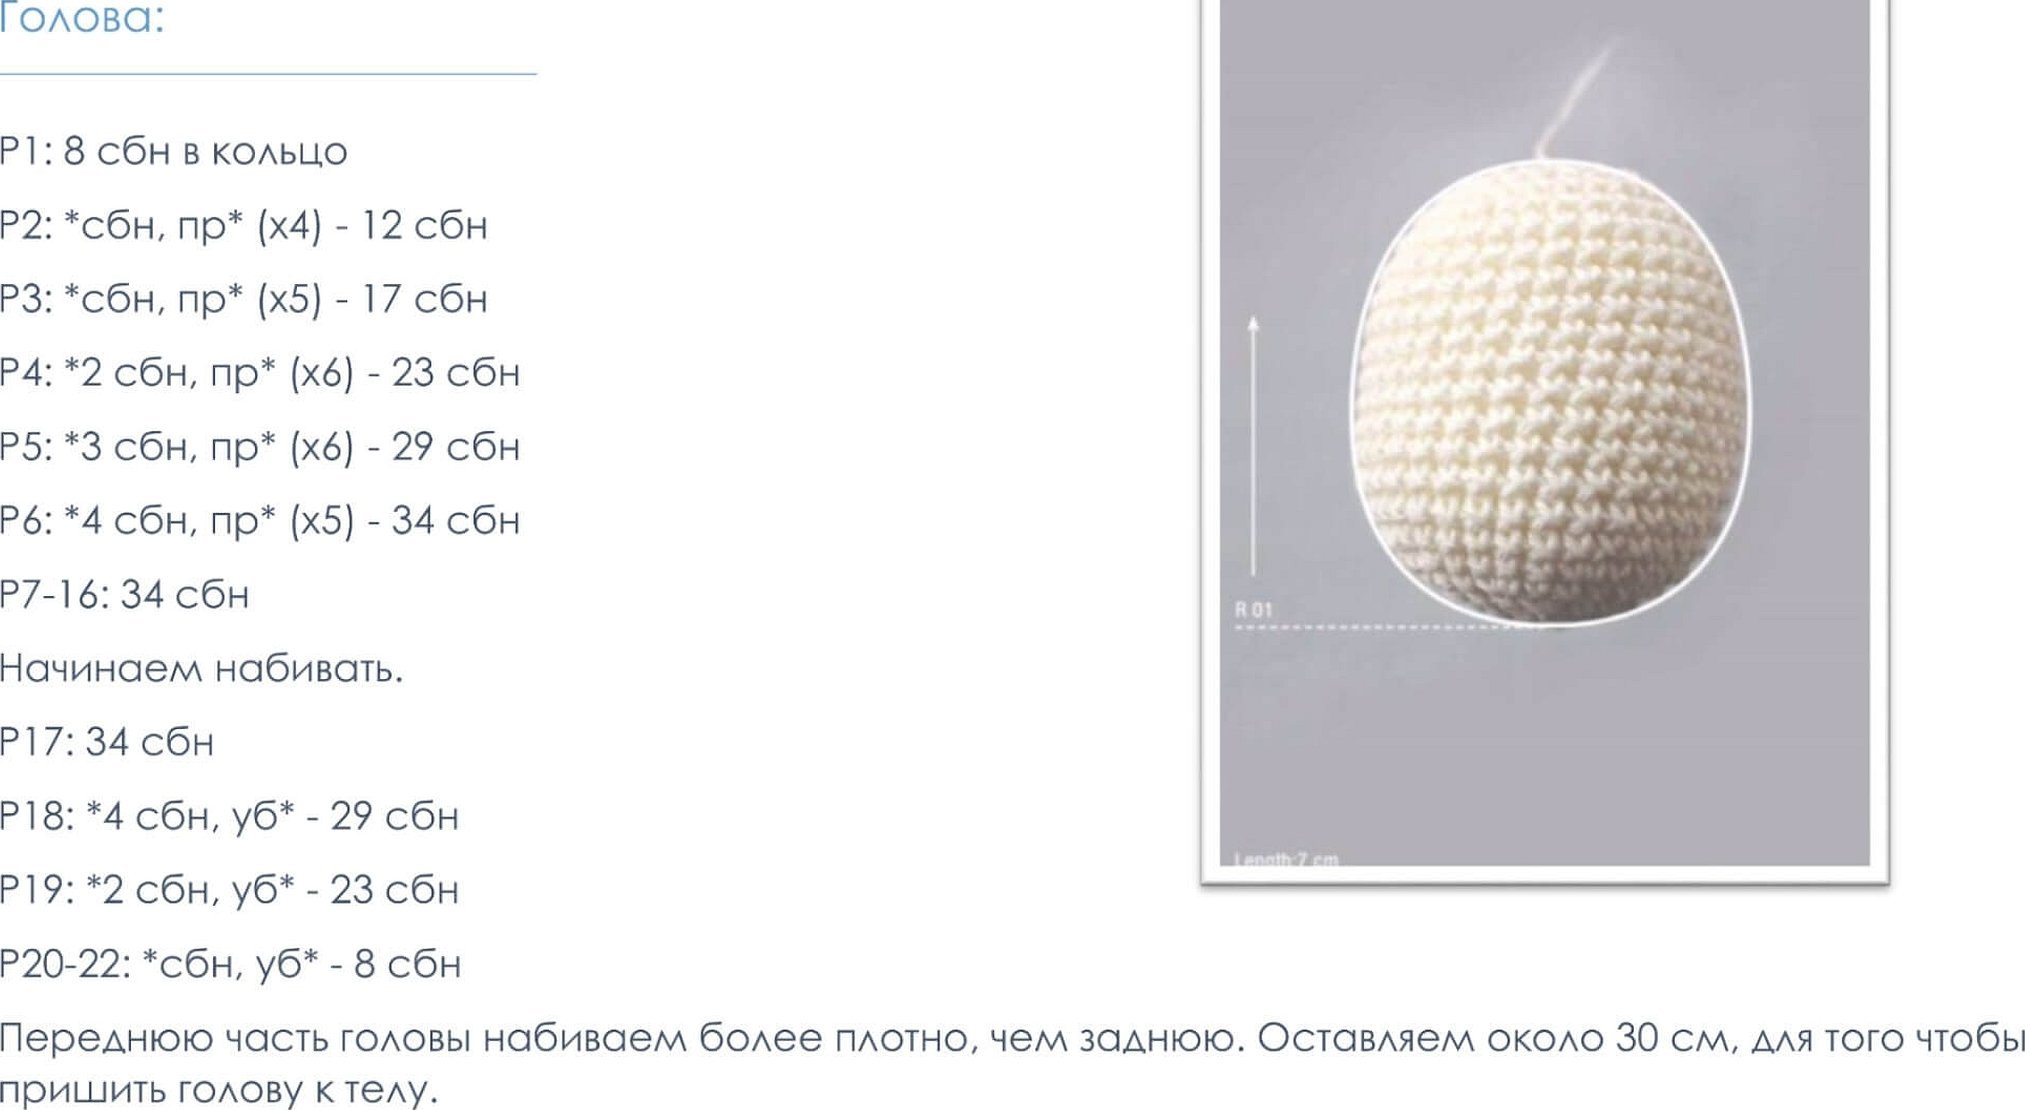
Head and neck
Work begins with the head. For this, you should take yarn of white or another light shade.
- The base is an amigurumi ring consisting of 6 single crochet stitches (SC).
- In the next row you need to increase 6 loops.
- For row 3, make 1 sc and increase 6 loops.
- From rows 4 to 6, increase the number of sc by one. Make sure to add 6 loops.
- For row 7 you will need to knit 36 of these columns and 2 shift columns.
- For row 8 you need 5 sc with an increase of 6 loops.
- In rows 9 and 10 the number of columns is increased by one with increments.
- In rows 11 and 12, make 54 sc.
- For row 13, knit 25 single crochet stitches, then decrease their number by one until row 21. Additionally, decrease 2 stitches.
- From rows 17 to 22, knit 92 columns.
- The next row consists of 17 single crochets with a decrease of 2 loops.
- In row 24, make 4 columns with a decrease of 6 loops.
- Row 25 consists of 30 sc.
- Row 26 – 3 sc with a decrease of 6 loops.
Please note! After this, the part is stuffed with filler and a thread is left for attaching to the body.
Body
You need to continue working with yarn of the same color as the head and neck.
- You need to knit 2 sc, increasing 6 times.
- In the next 3 rows you need to increase the number of columns by one with an increase of 6 times.
- The next row is knitted with just 42 sc.
- Then make 6 single crochets with an increase of 6 times.
- Next, the number of columns is increased by one 6 times.
- Next row 16 sc with increase.
- Then knit 54 columns.
- Then make 9 sc with a decrease of 6 times.
- In the next 8 rows, the number of columns is reduced by one and the decrease is made 6 times.
Then the body is stuffed and connected to the head and neck. In places where increases were made, a more convex knitting is obtained - this is the front part of the toy.
Paws-hands
There should be two paws:
- 1 row knit 6 sc and connect them into an amigurumi ring;
- for the 2nd row, knit sc, making increases;
- from 3 to 6 rows make 12 sc;
- then you need to change the thread and from rows 7 to 36 knit 12 sc;
- in row 37, decrease 6 times.
Then the paws and arms are attached to the body.
Legs
There should also be two of this part. Start knitting from the bottom of the foot:
- The basis of the detail is a set of 10 air loops (VP). Then make an increase in the 2nd loop from the end. Knit 7 SC, and in the last loop - 4 SC.
- On the reverse side, make 7 sc with an increase.
- In the next row, the following sequence occurs: 2 increases – 6 sc, 6 sc – increase 2 times.
- For the 3rd row, do the following alternation: sc – increase, 7 sc – increase 7 times, 6 sc – increase, 6 sc – increase and sc.
- Row 4 consists of 6 sc and 6 increases.
- Row 5 is knitted in the following order: increase, 7 sc and increase 6 times.
Next, make an insole from cardboard and start knitting the upper part of the piece. Here is a step-by-step description:
- the upper part of the foot begins to be knitted with a set of 10 VP and then the row is knitted in the same way as the legs (the number of columns and increases is the same);
- in the 2nd row, perform the following alternation: 2 increases – 6 sc, 6 increases – 6 sc, 2 increases;
- Row 3 is knitted similarly to row 3 of the previous piece;
- the next one consists of 6 sc, 6 increases;
- Row 5 is made from an increase, 7 sc and an increase 6 times;
- from rows 6 to 12 knit 54 sc.
Please note! The thread should be left. Connect the top and bottom of the foot, having previously inserted the insole.
Next, knit the legs:
- cast on 18 sc and knit in a circle for 24 rows;
- on the 25th row make sc and decrease 6 times;
- in row 26, decreases are made.
During the knitting process of tilda legs, they are stuffed with filler.
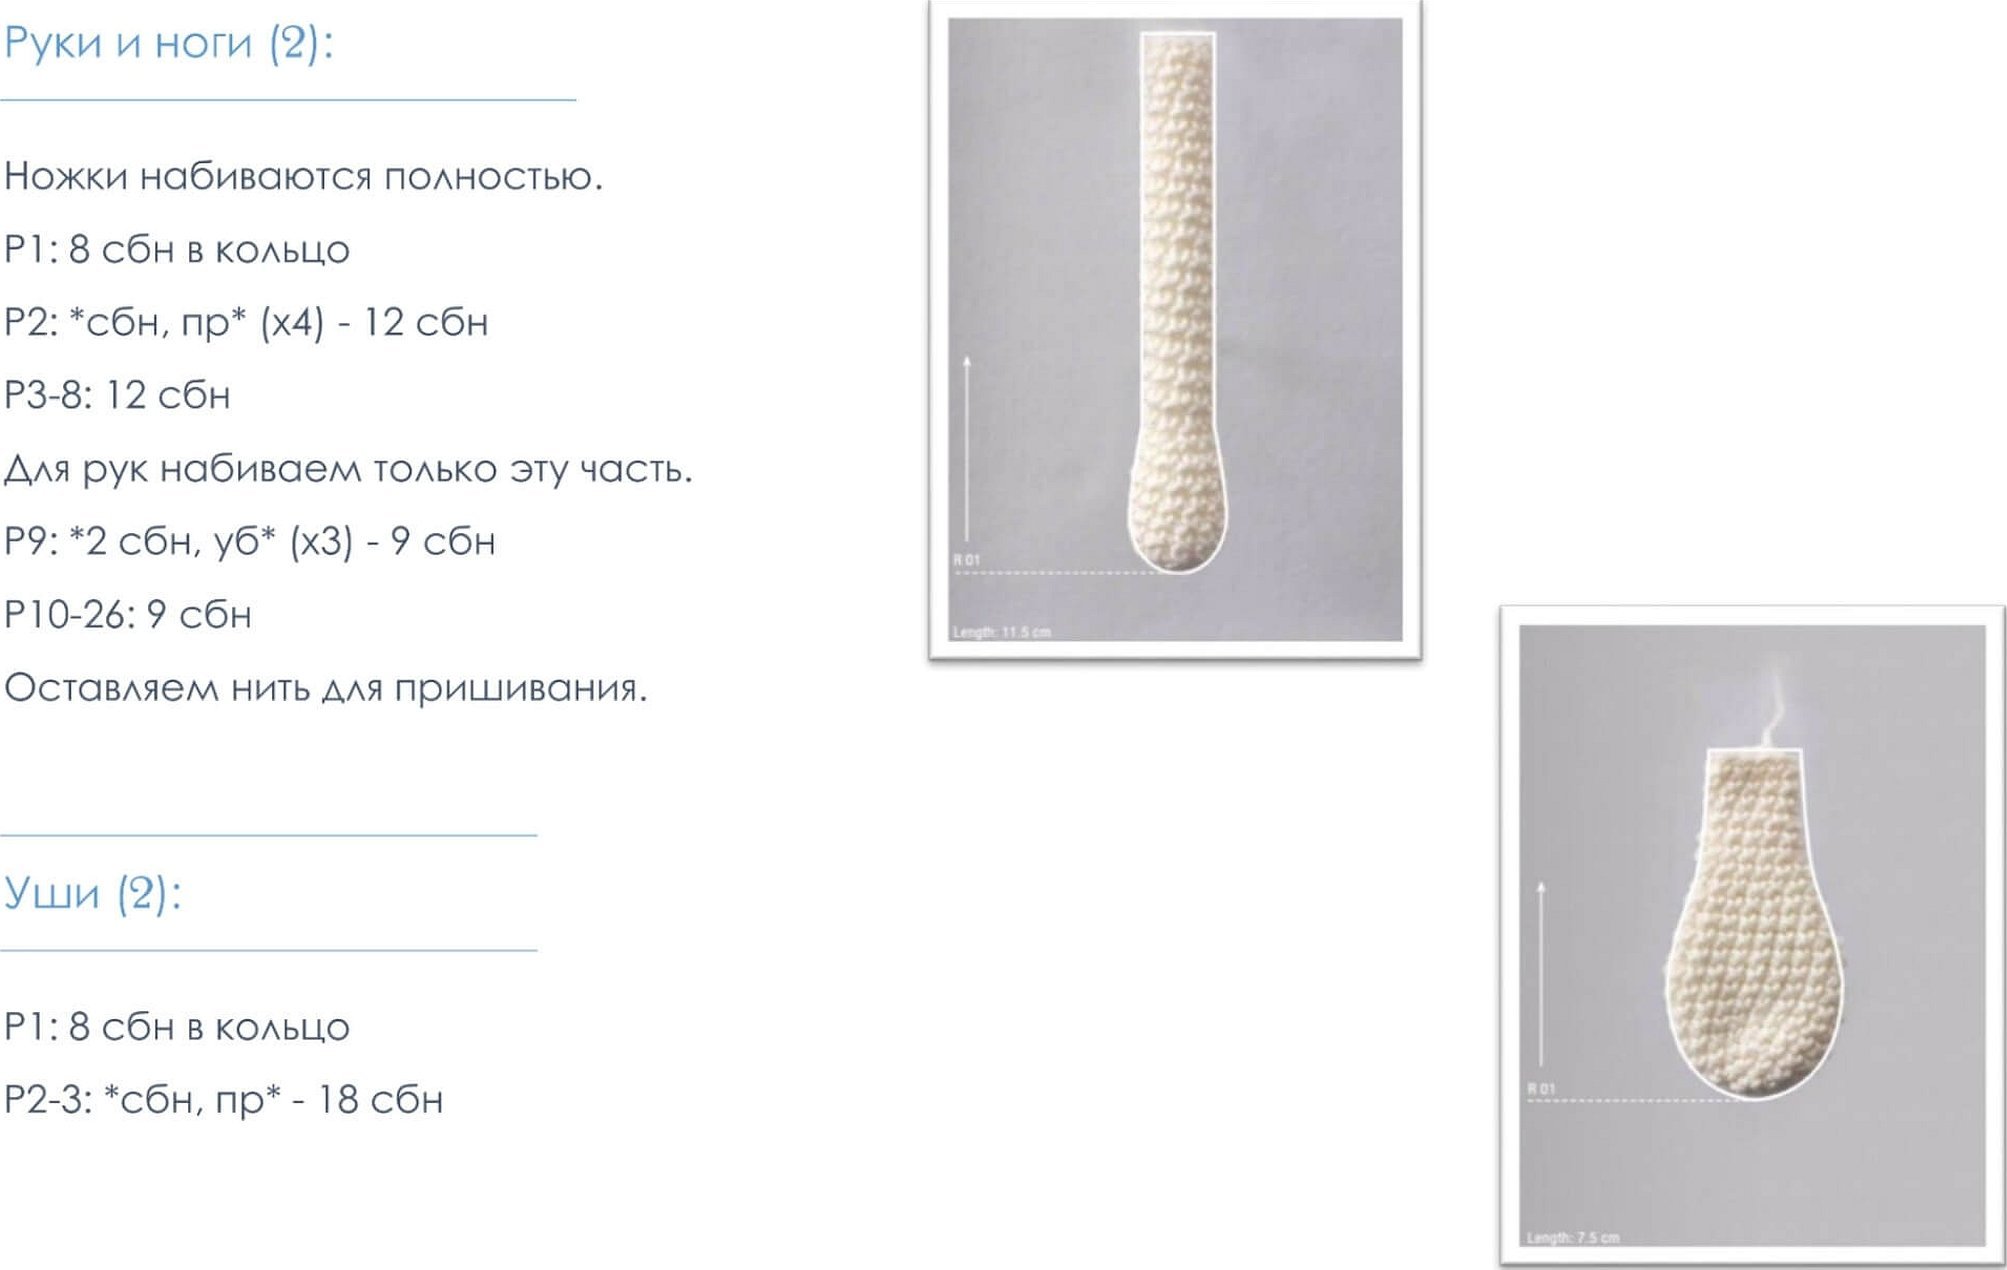
Ears
The distinctive feature of this product is the long ears, which give the toy a touching look. The ear is quite easy to knit:
- the basis of the piece is an amigurumi ring made of 6 sc;
- in the next row, increase 6 times;
- Row 3 consists of sc and an increase of 6 loops;
- 4 chain – 18 sc;
- 5th chain – sc and increase 6 times;
- next row – 24 sc;
- Row 7 – 3 sc and increase 6 loops;
- from 8 to 12 rows – 30 sc;
- in the 13th row, decrease, 13 sc, decrease, 13 sc, decrease;
- from 14 to 16 rows – 28 sc;
- 17th chain – 12 sc, decrease, 12 single crochets, decrease;
- from rows 18 to 20 make 26 sc;
- Row 21 – 11 sc, decrease, 11 sc, decrease;
- from 22 to 24 rows – 24 sc;
- the above-described alternation is done up to row 61;
- In row 61, the piece is folded in half and connected together.
The other ear is knitted in the same way.
Please note! There is no need to use filler for this part.
Design of the face
The muzzle is easy to make. Eyes are made from beads, the nose is embroidered with red or pink thread. To make the muzzle look like a hare's, the mouth needs to be embroidered with black thread. You should also take pink pastel to draw the cheeks.
Boots
Another important element of the tilda doll is shoes. The easiest option is to knit boots. For this, you will need yarn of a different color. The knitting technique is similar to the feet. Only from the middle of the work, use knitting needles, creating purl and face loops.
You can use only a hook if the needlewoman does not have knitting skills. Then the difference between the boots and the feet will be in the straps. To do this, dial a chain of 25 VP. Having retreated 4 loops, you should knit 22 SC. Then they are sewn to the boots.
What to dress a bunny in: examples of clothes with knitting patterns
In the master classes on creating a tilde toy kryuchkom there are patterns for making clothes. The simplest outfit option is a skirt:
- 1 row – 3 VP with a lift, in each you need to make an increase of a column with a yarn over (DC);
- for the 2nd row, also make 3 VP with a lift, then alternate between CCH and an increase;
- from rows 3 to 20 knit 124 DC.
Please note! You can make lace frills along the edge of the skirt.
A suitable clothing option for beginners in needlework is a bolero:
- 1 row consists of 40 VP, in each of which a CCH and an increase are knitted;
- for the 2nd row, knit 10 columns;
- in the 3rd chain make another CCH;
- alternating sc and dc is done in row 6;
- in row 7, increase 10 times;
- Row 8 – VP, 60 SC;
- 9 row – 2 VP, 60 SSN;
- Row 10 – VP, 60 RLS.
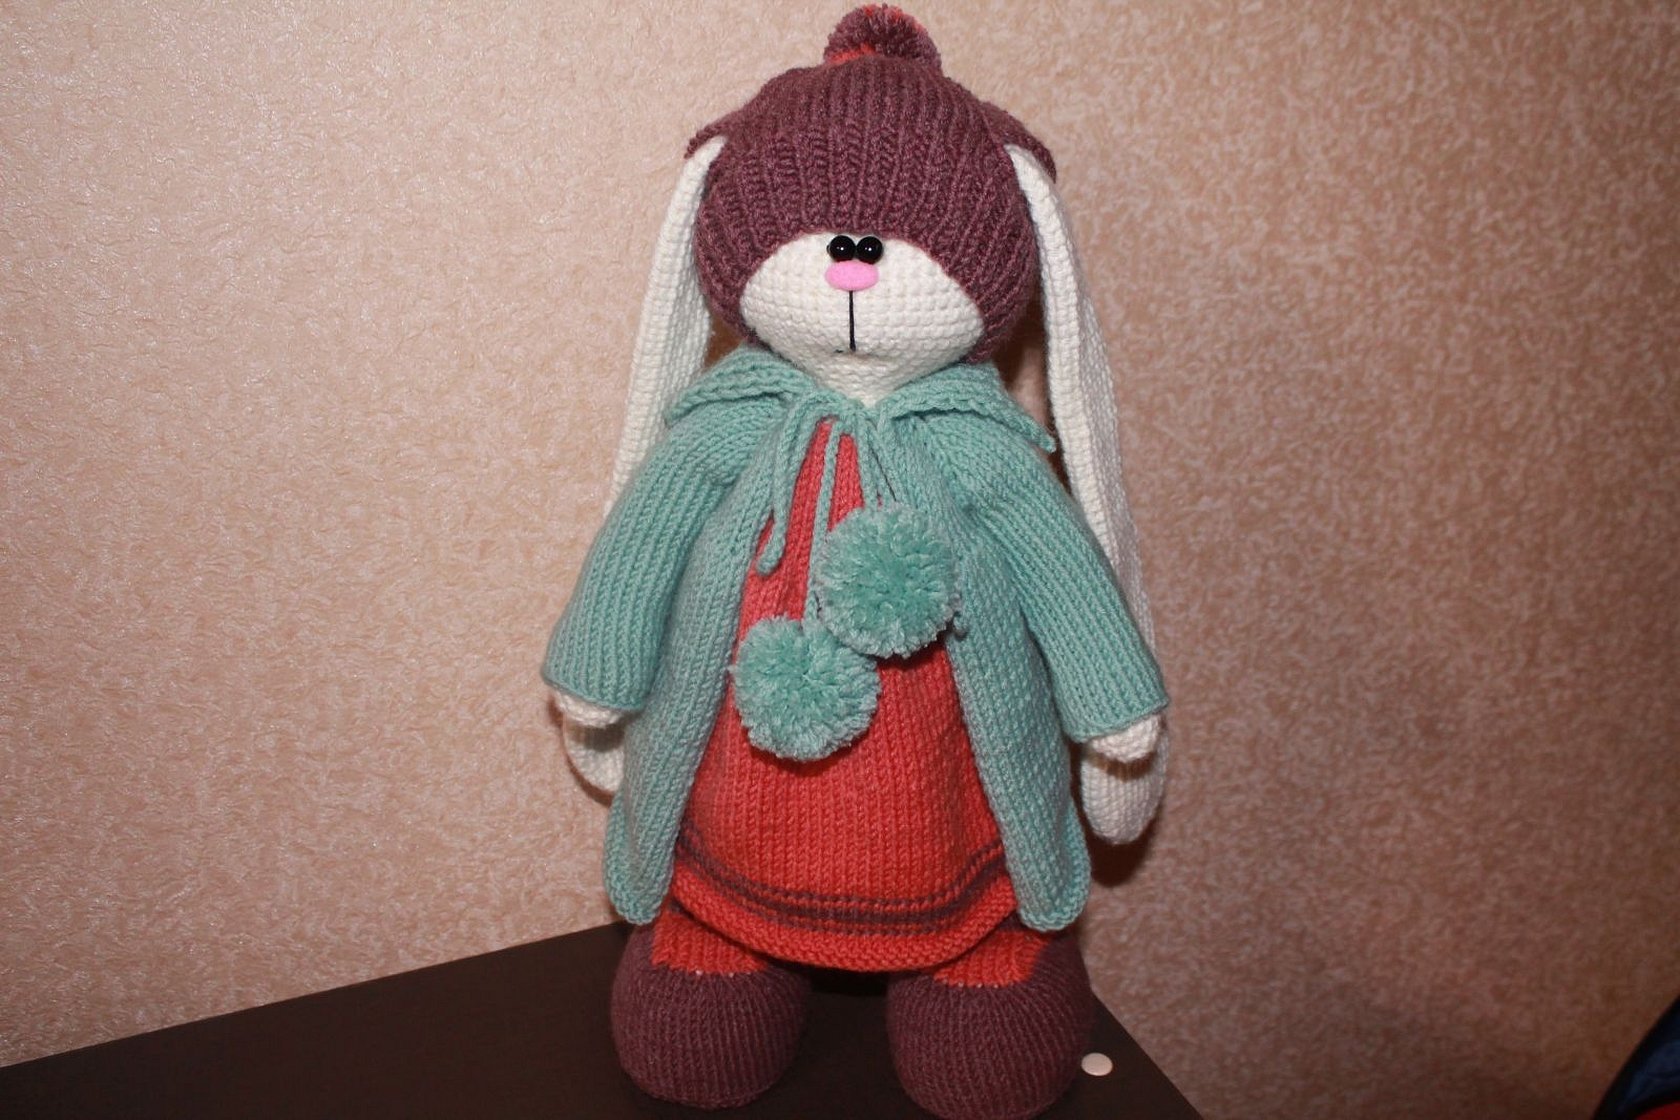
Some items of clothing are more convenient to knit, for example, a coat. You can sew clothes from fabric, it will go well with a crocheted toy. This will add coziness to the Tilda doll and make it even cuter.
Handicrafts will be a great gift not only for children, but also for adults. The crocheted tilde hare looks good in any interior and adds coziness to the home environment. It is not difficult to make. The crocheted tilde hare described above can be used by a beginner in handicrafts.


