Using available materials, mainly cardboard and paper, the dog can be made quickly and easily. It is better to make the toy together with the child. The child will be able to master the skills of drawing, cutting, learn to use glue, and also get to know the parts of the animal's body better.

Ideas for making paper dogs
Before you start preparing the necessary tools for creativity and assembling the dog, it is worth deciding on the type of craft. The animal can be made in various techniques and, accordingly, have a different appearance:
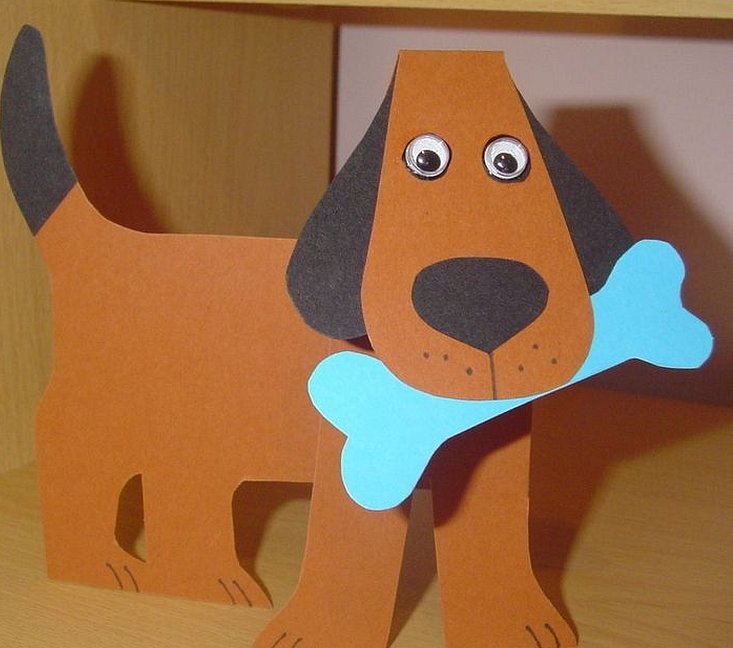
- Do-it-yourself flat paper dog. This type of toy is more like an applique. It can be cut out whole or in separate elements, but it is worth preparing the background on which it will be located in advance.
- The volumetric version involves more painstaking work. The entire dog or only parts of it, for example, the body, can be three-dimensional. The process of creating such a work will be described step by step later in the article.
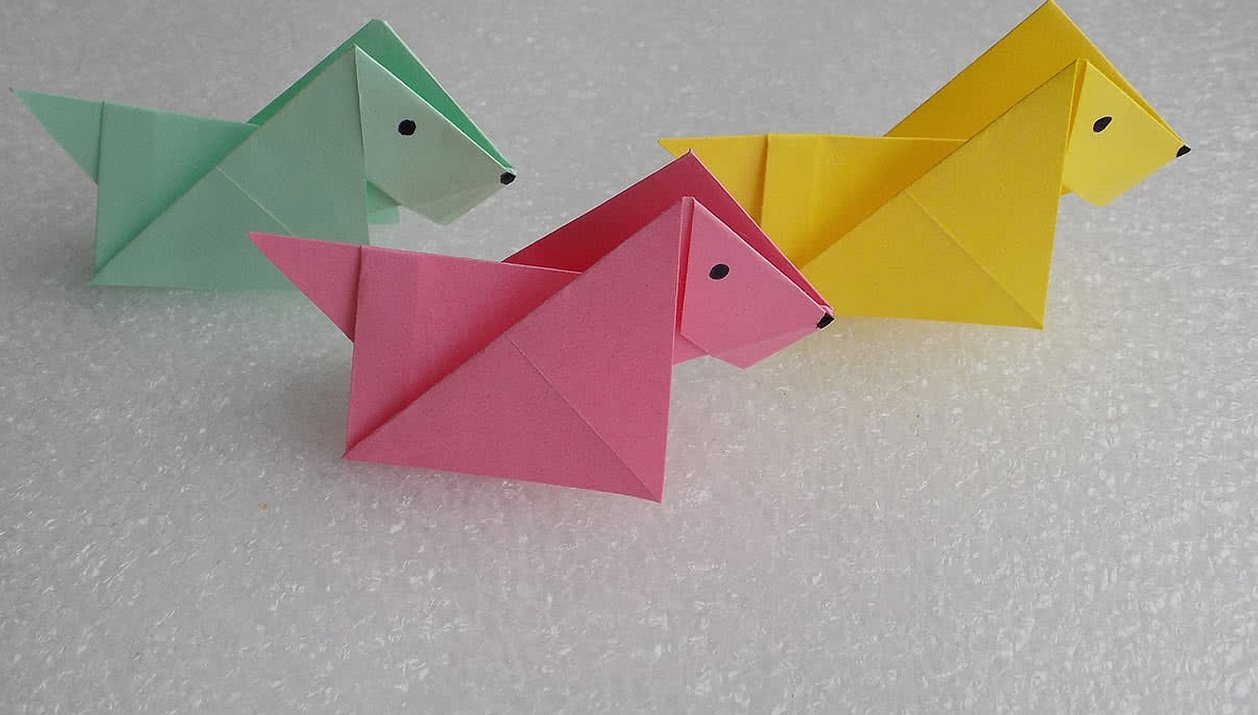
- Origami style dog. This method is suitable for those who are thinking about how to make a dog from one sheet of paper. In this case, you do not need to cut out the parts and glue them - the whole structure is usually folded from a square sheet according to a certain pattern.
- Quilling dog. The technique involves using narrow strips of colored smooth and corrugated paper. The strips are twisted into circles and then given the desired shape. In this way, you can make a voluminous round muzzle, oval-shaped paws, drop-shaped ears, a conical tail, etc.
- A postcard or bookmark with a picture of a dog. It also has many variations and levels of complexity. For example, a simple greeting card can depict only the animal's head and a little detailing - ears, nose, mouth. It can be decorated with rhinestones.
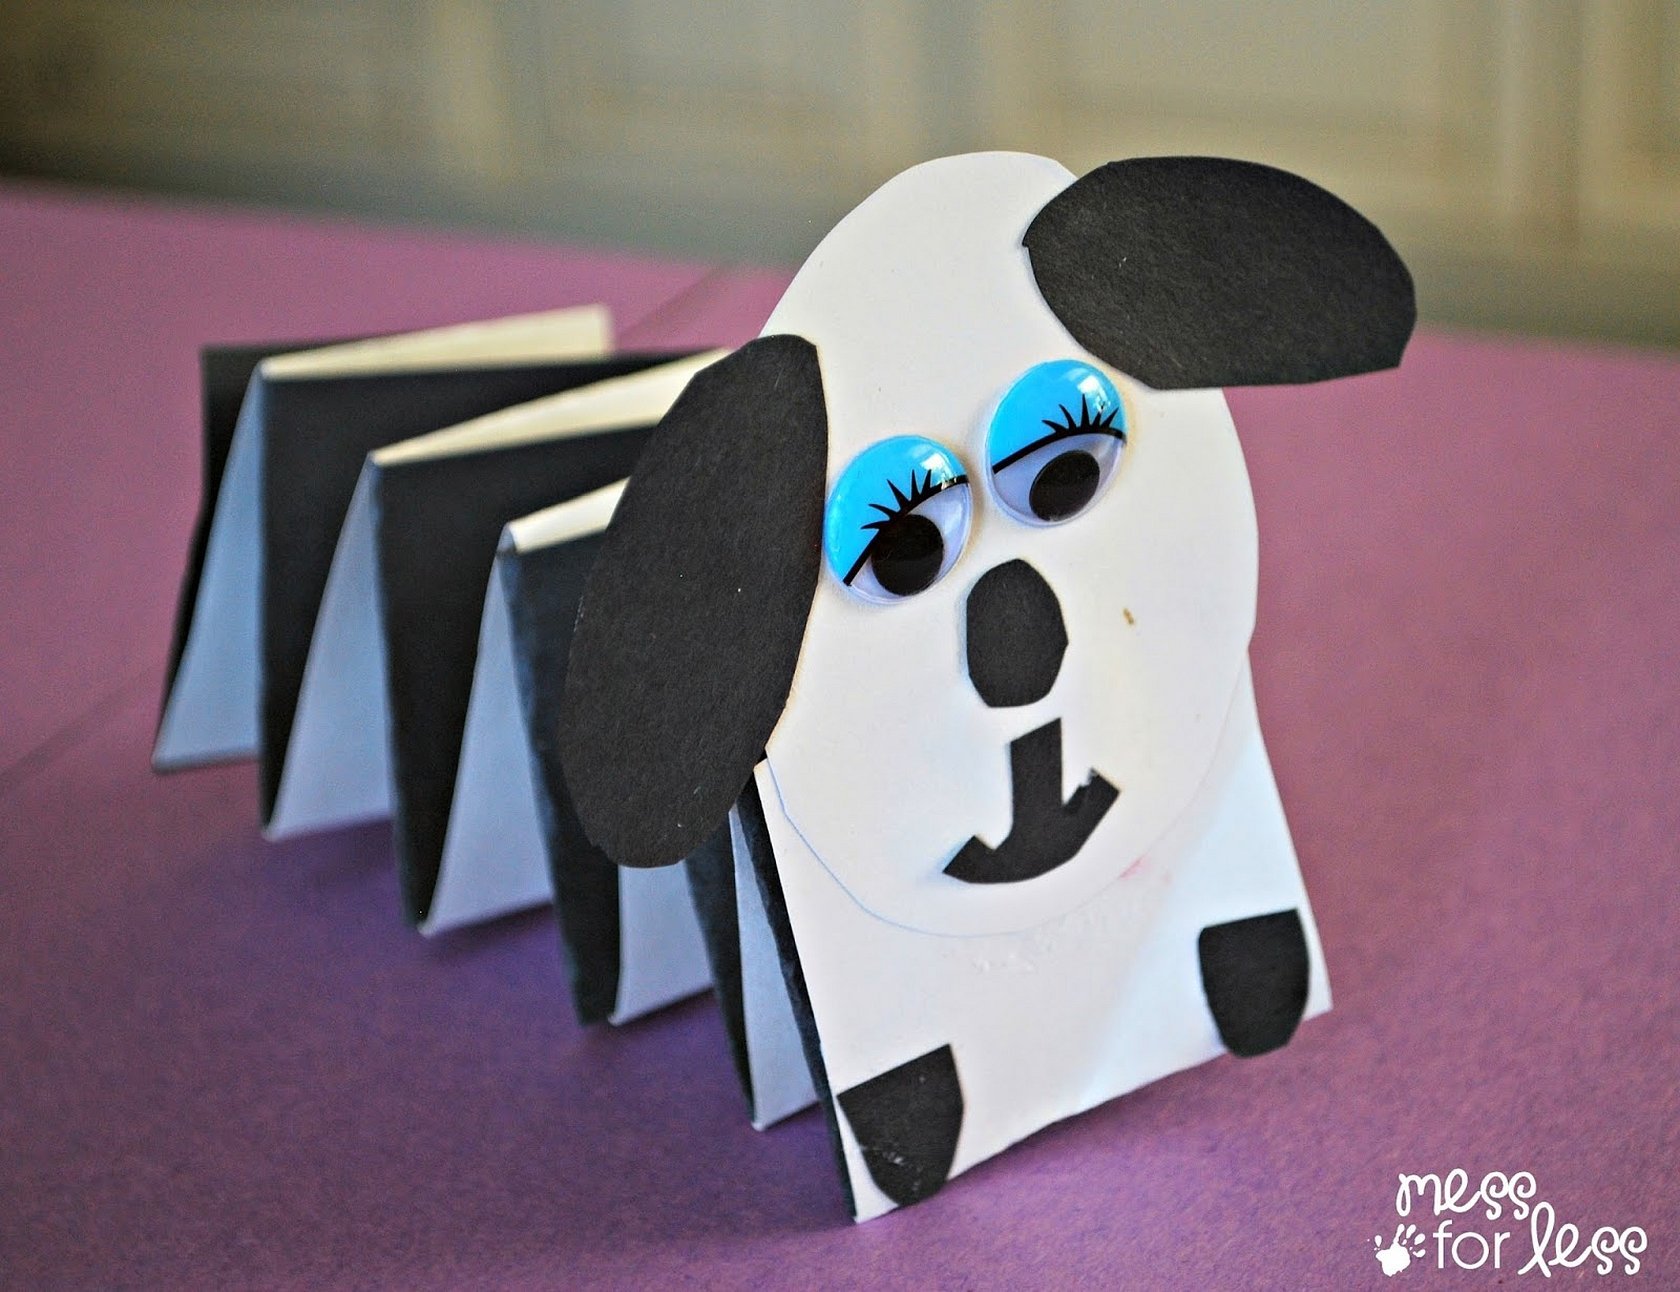
- Creative crafts require the ability to fantasize and use additional accessories for the craft. So, the dog's body can be presented as an accordion, making many folds. An old music disk can serve as the body, and beads as the eyes. The dog's fur can be easily made from thick threads. For example, a collar can be made from felt or fabric, and a plate with the animal's name can be attached to it. It is not difficult to glue a magnet to the finished product and place it on the refrigerator.
NoteTo make it more interesting for the child to work together, you can give the future dog a name, for example, Sharik, and make a kennel for him.
How to make a volumetric dog from colored paper
The master class will show how to make a dachshund dog out of paper. Necessary materials:
- brown paper;
- pencil;
- scissors;
- ruler;
- glue.
Important! To make the toy neat, all its elements must be drawn and matched in size, and only then cut out.
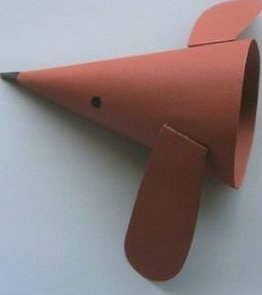
Making a toy starts with the head. You need to draw a circle and cut it out. You will only need the 4th part of the circle. You need to make a cone out of it. To do this, you need to connect two straight sides and fix them with glue.
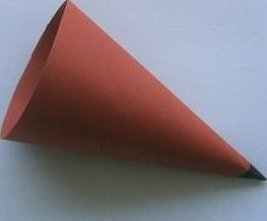
On the head of the biter there are ears, a nose and eyes. Each ear is an oval. On one side it needs to be cut to get a straight line. Glue the ears on the head, left and right. At this stage, you can already mark the nose at the end of the cone-muzzle and small eyes - two black dots.
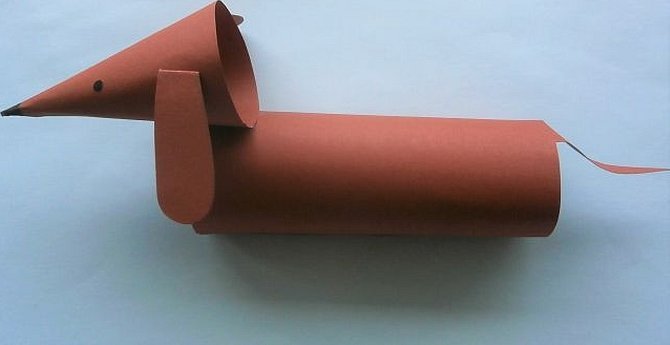
The dog's body is cylindrical. To get such a figure, you should first make a rectangle, then connect its two opposite sides, fasten with glue. The dachshund should also have a tail - a triangle with long side lines and a narrow base. The tail is attached to the back of the cylinder-body.
Advice: Geometric shapes such as rectangles and triangles are conveniently drawn on squared paper. You can make a sketch on a notebook sheet, cut out and trace the stencil on colored paper.
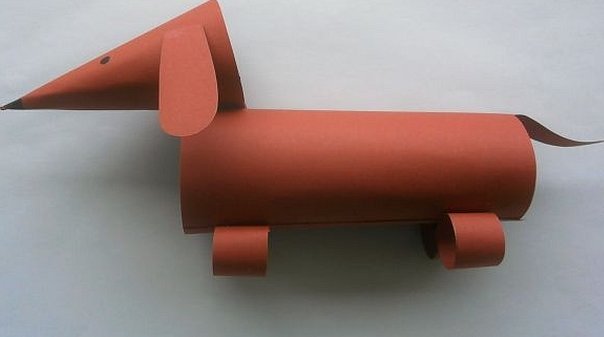
At the final stage, you need to make four paws. They are elongated small rectangles. Each of them needs to be folded into a cylinder, i.e. follow the analogy of creating the body. The paws are glued to the body from below and the dog made of colored paper is ready.
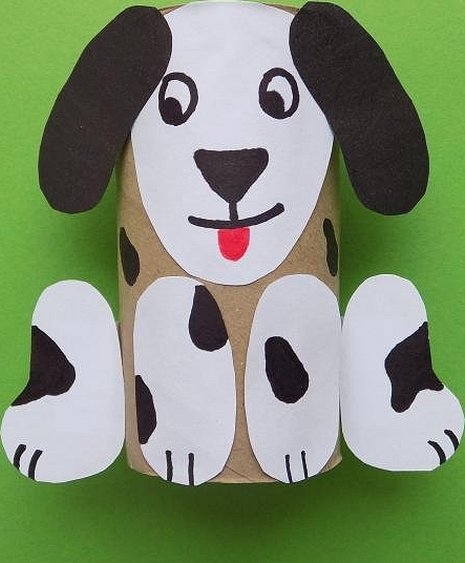
Craft dog made of cardboard
The dog will be more stable and durable from cardboard. Paper will also be used. The full list of materials is as follows:
- A cylindrical cardboard sleeve.
- Paper white, black.
- A simple pencil.
- Glue.
- Scissors.
- Pencil (marker) of black and red colors.
The step-by-step work plan is as follows: first, you need to prepare all the paper parts, then glue them together in order to form a dog.
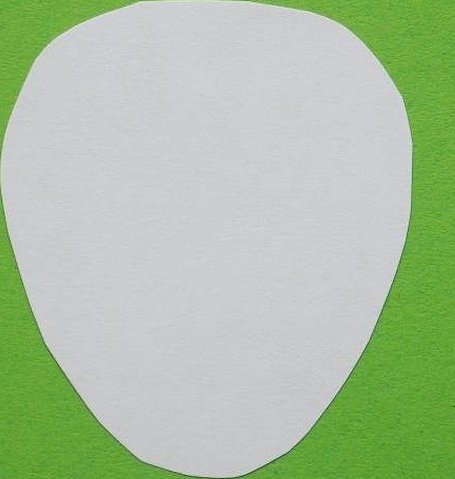
The dog's head is an oval made of white paper.
Dog ears are made from black paper - slightly curved ovals.
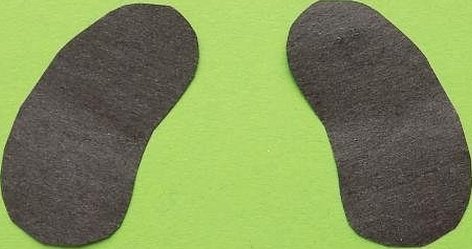
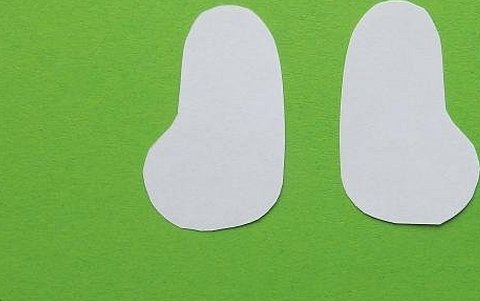
The front paws are also identical ovals. For them, you need to take white paper.

The hind legs are a slightly different shape - they resemble small felt boots with the toes pointing in different directions.
Now you need to place the head on the cardboard base, with ears on the sides. The front paws are at the bottom in front, and the back ones are visible slightly to the side. Then you need to draw the muzzle: two eyes, a nose, a mouth, and a red tongue. Decorate the animal's body and paws with black spots, and mark the claws with lines.
Please note. It is not necessary to look for a bushing for the body; you can make a similar cylinder yourself from a rectangular sheet of cardboard. Since cardboard is denser and stiffer than paper, it is recommended to use double-sided tape or a stapler as a fastening material.
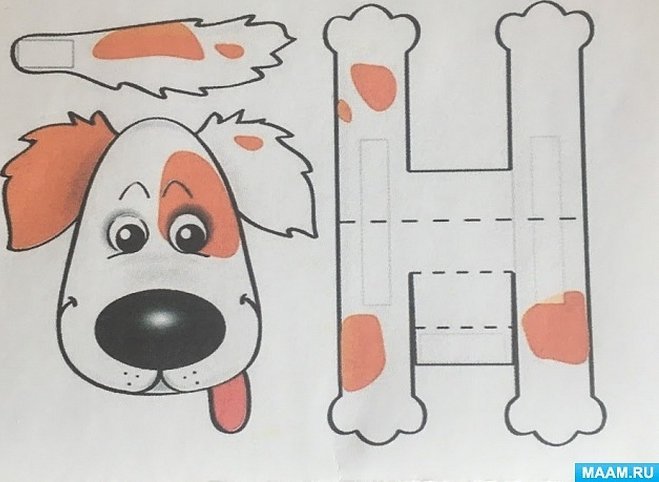
Options for ready-made templates
Among the ready-made templates, you can find dogs of all breeds. The peculiarity of such schemes is that they are easy to assemble, any preschooler can handle it. Stencils will be very useful for beginning creators who are not yet confident in their drawing skills. In addition, they will be useful in the future for creating new products.
The templates can look like a full-fledged dog. After printing the sample, you only need to trace it and cut it out. If you plan on making a three-dimensional toy, you will need to fold the paper along the main lines and then color the dog. Blanks of individual parts of animals are also common, most of them were discussed in the article. So, an elongated oval is ready-made ears or paws, a circle is suitable for the head, eyes and small details such as a nose, spots on the body, a triangle is a tail. Samples of a bone for a dog, its bowl, house and other additional items will also be useful.
For creativity, first of all, imagination and the desire to create something with your own hands are important. Secondly, the availability of the necessary materials. And thirdly, basic skills in drawing basic figures, the ability to work with tools (scissors, glue). The three listed points are enough to construct an interesting toy. The article examined in detail the process of how to make a dog out of paper in two different versions. Using these instructions as an example, you can implement your own ideas, involving both children and adults in the process.


