Having become fascinated with creating soft toys, needlewomen are looking for new interesting patterns for knitted figures. According to the Eastern calendar, the mouse is considered the symbol of 2020. That is why a handmade doll in the form of this animal is so popular now. This article provides several ways to knit a mouse with knitting needles with a step-by-step description of the process.
- What yarn is best to use?
- Tools
- Accessories
- Main stages of work
- A selection of master classes for beginners with detailed descriptions
- Mouse Yurka knitted
- Head with a pink nose
- Ears
- Body and tail
- Paws-hands
- Paws and legs
- Assembly
- The simplest mouse knitted
- Amigurumi toy knitted - mouse
- Bungo Mouse Knitted by Alan Dart
- Mouse Marisol knitted
What yarn is best to use?
Different types of yarn are used to work on a knitted toy, much depends on the purpose and size of the product. Twisted and smooth threads will allow you to knit body parts with a smooth surface. An interior toy with a long pile will collect too much dust and is more difficult to care for.
If you plan to knit a toy mouse for a baby, you can consider the option with shaggy plush threads. Grass and other fluffy yarn will help create the effect of a fur skin, making the doll even more similar to a real animal.
Attention! When creating a figurine for children's games, it is worth paying attention to the hypoallergenic nature of the fibers.
The same applies to knitting mittens or booties in the shape of mice - high-quality acrylic is suitable for such products, which will make them durable and pleasant to the touch.
The choice of yarn colors depends only on the knitter's imagination, it is not necessary to take only natural shades. For an interior toy, it is recommended to use yarn taking into account the furnishings in the room where the item will be located. A fluffy friend for a child can be of any color, even the most unusual.
Tools
The size of the knitting needles is usually selected based on the thickness of the threads. The following selection of tools is considered optimal:
- No. 0.5-1 - for very thin threads, approximately 1600–2000 m/100 g.
- No. 1-1.5 - 600-1500m/100g;
- No. 2-2.5 - 300-500m/100g;
- No. 3-3.5 - 250-350m/100g;
- No. 3–4 mm - 200m/100g;
- No. 5–6 mm – 100 m/100 g and even thicker.
The thinnest threads and knitting needles listed in the first two lines of the list are used for knitting tiny amigurumi that fit in the palm of your hand. The last two options for tools and yarn are suitable for creating large toys the size of a child.
By knitting a small test piece of fabric with the selected threads and needles, you can understand whether they are suitable for working on a toy. If the surface is dense and smooth enough to hold the shape of the parts and the stuffing, then the choice was made correctly.
Accessories
For stuffing, you can use any synthetic material with a loose structure. If you don’t have holofiber or synthetic fluff at hand, then crushed foam rubber or cotton wool will do.
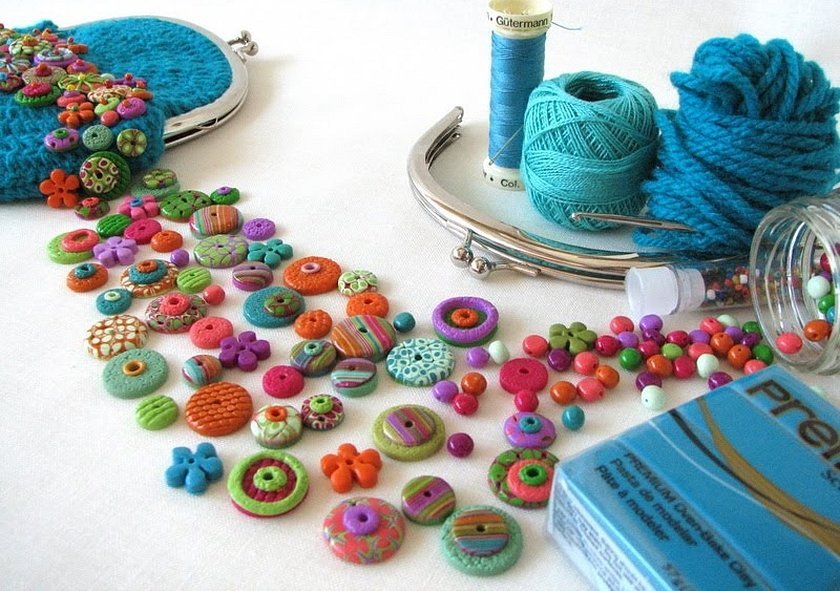
The finishing accessories are selected in accordance with the scheme and your creative imagination. Various small details can be useful for decorating the toy and giving it originality:
- ready eyes;
- beads;
- rhinestones;
- lace and ribbons.
It is thanks to such little details that the finished animal figurine will look interesting and unusual.
Main stages of work
The mouse, knitted with knitting needles, according to the description and patterns, is performed in a certain order. Here are the easy-to-use steps that make up the entire process:
- Manufacturing of parts.
- Stuffing every part of the body.
- Assembling the toy.
- Decorating with fittings.
Some changes in the given sequence are also possible.
For reference! Amigurumi dolls are usually stuffed as each individual piece is knitted.
A selection of master classes for beginners with detailed descriptions
There are many different ways to knit a mouse with knitting needles. Below are the most popular and simple MK, which even a beginner needlewoman can handle.
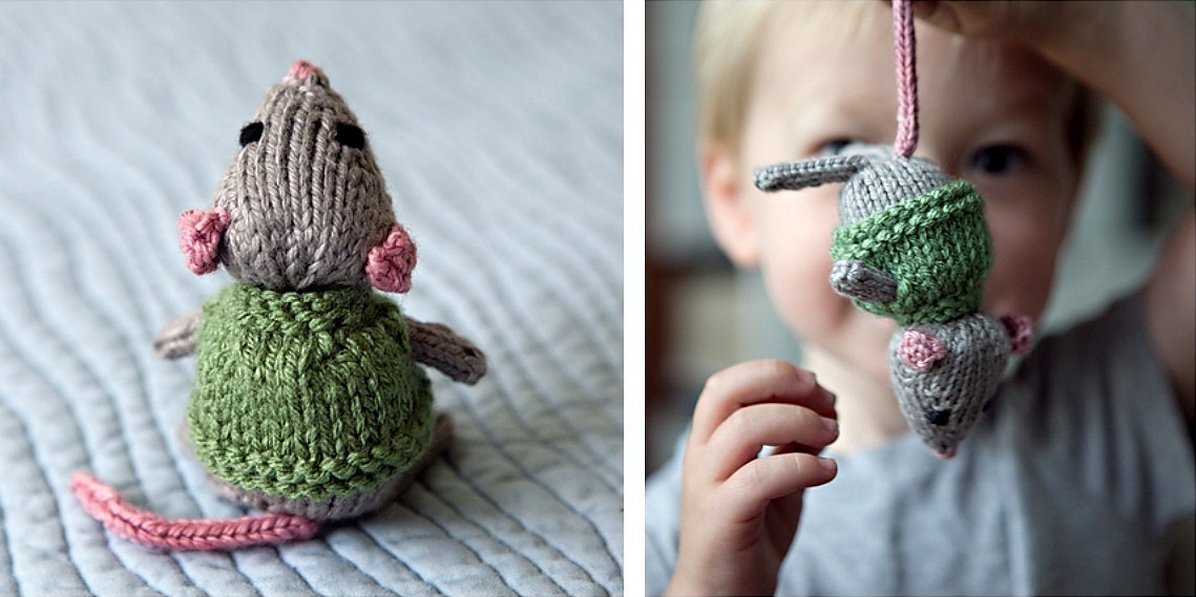
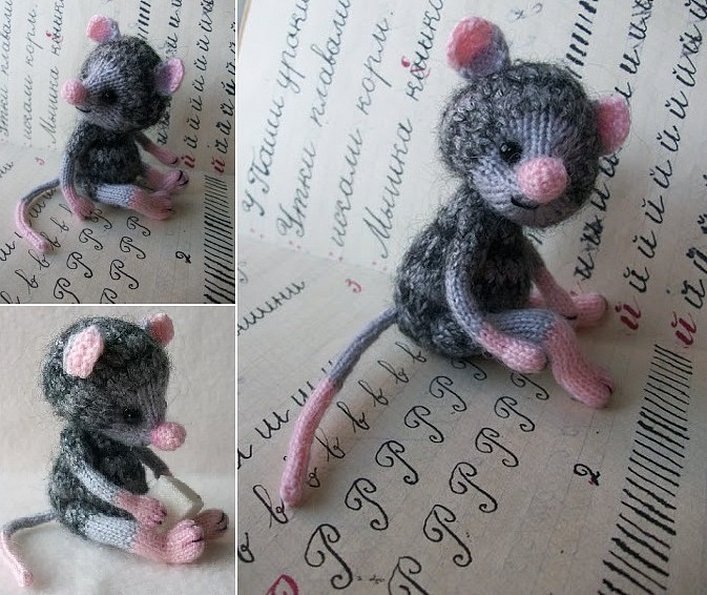
Mouse Yurka knitted
To create this mouse, it is best to choose thin light-gray threads and melange yarn, close in shade. The tips of the paws, ears and tail are made with light pink yarn.
Head with a pink nose
The entire piece is knitted entirely on double-pointed needles, from the tip of the nose to the back of the head. The steps are as follows:
- Cast on 6 sts with light grey thread and distribute onto 3 knitting needles.
- Rows 1-6 - knit with the front surface, in every second row adding first 1 st on each needle, and then twice 2 sts on each needle.
- 7 p. - all facial stitches without changes.
- Row 8 - at equal intervals add 1 st on the first needle and 2 sts on the other two.
- 9-10 p. - all facial stitches without changes.
- Row 11 - knit with grey melange thread, at equal intervals add 1 st on the first knitting needle and 3 sts on the other two.
- 12-20 p. - all facial stitches without changes.
- Row 21 - at equal intervals, perform 3 decreases on each needle.
- Row 22 - knit all loops 2 together.
- Cut the thread, pull it through the remaining 12 loops and tighten, having first done the stuffing.
For the tip of the nose, cast on 9 sts on the pointed muzzle, knit 4 rows and pull together to form a ball.
Ears
Cast on 7 sts with light grey yarn and knit 6 rows. Switch to pink yarn, knit 1 row without changes, and in the next two rows make 1 decrease on each side. Close the remaining loops. Knit the second eyelet in exactly the same way.
Body and tail
Working on the body is also not difficult. The sequence is as follows:
- Cast on 12 stitches with melange yarn and distribute them onto 4 knitting needles.
- Knit 6 rows and make even increases on each needle by 2 loops.
- Knit 6 more rows and also add 2 more sts on each needle.
- Work 6 more rows and make another increase of 3 sts on the needle.
- Knit 8 rows without changes, then at equal intervals make 3 decreases on each needle, and in the next row knit all loops 2 together.
- Cut the thread, pull it through the remaining 12 loops and tighten, having first done the stuffing.
Separately knit the tail, casting on 4 loops with light gray yarn. Finish the work when the tail reaches the desired length.

Paws-hands
Cast on 6 sts with melange yarn and knit 8 rows in a circle. Switch to light grey yarn and knit 10 more rows.
Change the yarn to pink, knit 4 rows, then evenly add 3 sts and knit 5 more rows. Break the thread, pull the tip of the foot and fix it. Make the second handle in the same way.
Paws and legs
Cast on 9 sts with melange yarn and knit 8 rows in a circle. Switch to light grey yarn and knit 10 more rows.
Change the yarn to pink, knit 7 rows, then evenly add 3 sts and knit another 7 rows. Break the thread, pull the tip of the foot and fix it. Make the second handle in the same way.
Assembly
Pin all the parts to the body and baste.
For reference! If desired, you can insert wire into the limbs. Sew black beads in place of the eyes. Make whiskers from a piece of fishing line.
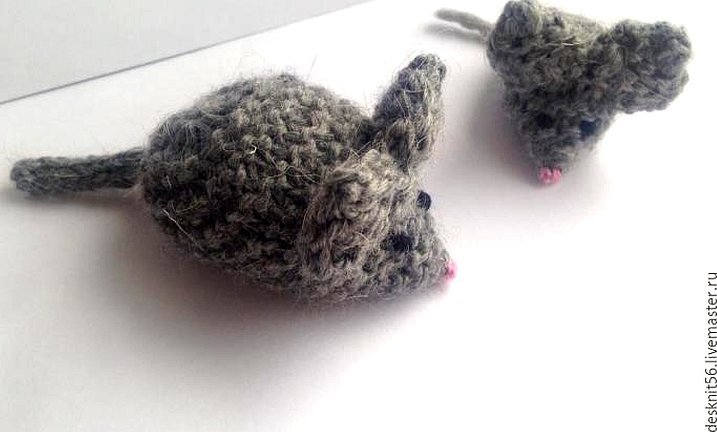
The simplest mouse knitted
This is a very easy garter stitch mouse that can be knitted in an hour or two. It also consists of several parts that are made separately.
The sequence of work is as follows:
- Cast on 3 sts on short straight needles and knit 1 row.
- Next, knit 12 rows, in each of which add 1 st on both sides.
- Knit the next row as follows: make 6 decreases, 1 knit, make 7 decreases.
- In the next 2 rows, knit all loops 2 together.
- Pull the remaining loops together and cut the thread. This completes the knitting of the body and head, all that remains is to make the bottom seam and stuffing.
- Next, knit two identical ears using the following pattern: cast on 5 sts and knit straight for 4 rows, in the 5th row make 1 decrease on each side, pull the thread through the remaining loops and tighten.
Attach the ears to the muzzle, sew on the bead eyes and nose. Next, sew two beads above the nose to make eyes or embroider them. A small piece of thread serves as the tail.
Amigurumi toy knitted - mouse
For the body of the knitted mouse, cast on 20 sts with grey thread and distribute onto 4 knitting needles. Knit 10 rows with the front surface, after which perform 1 decrease on each knitting needle.
At the bottom of the body, make a flap by casting on 7 sts and knitting 5 rows. In the last 3 rows, close 1 st on each side. Then follow these steps to form the head:
- Leave 4 sts on the 1st knitting needle and knit with return rows 3 rows on 12 sts. In this case, divide the loops into 3 parts (3/6/3).
- Continue working as for the toe heel, knitting together the stitches at the joints of the needles.
- Increase 4 sts evenly.
- Knit 1 row in the round
- Decrease in every second row twice by 1 st on both sides.
- Close the remaining loops and hide the thread.
All paws are knitted the same way. For one limb, cast on 8 sts and knit in a circle 10 rows. Then, on each side, close 2 sts twice, hide the thread.
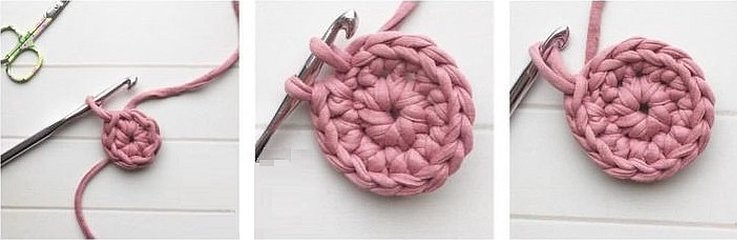
Two round ear parts are crocheted with single crochet stitches. The diameter of 1 ear is 2 cm.
The assembly is done by first stuffing the body and paws. For the tail, knit a chain of 15 air loops.
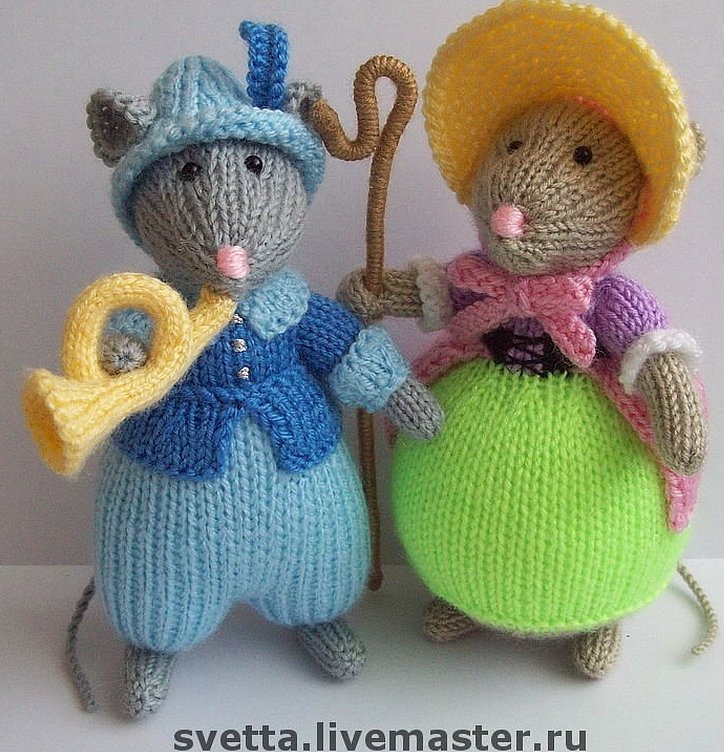
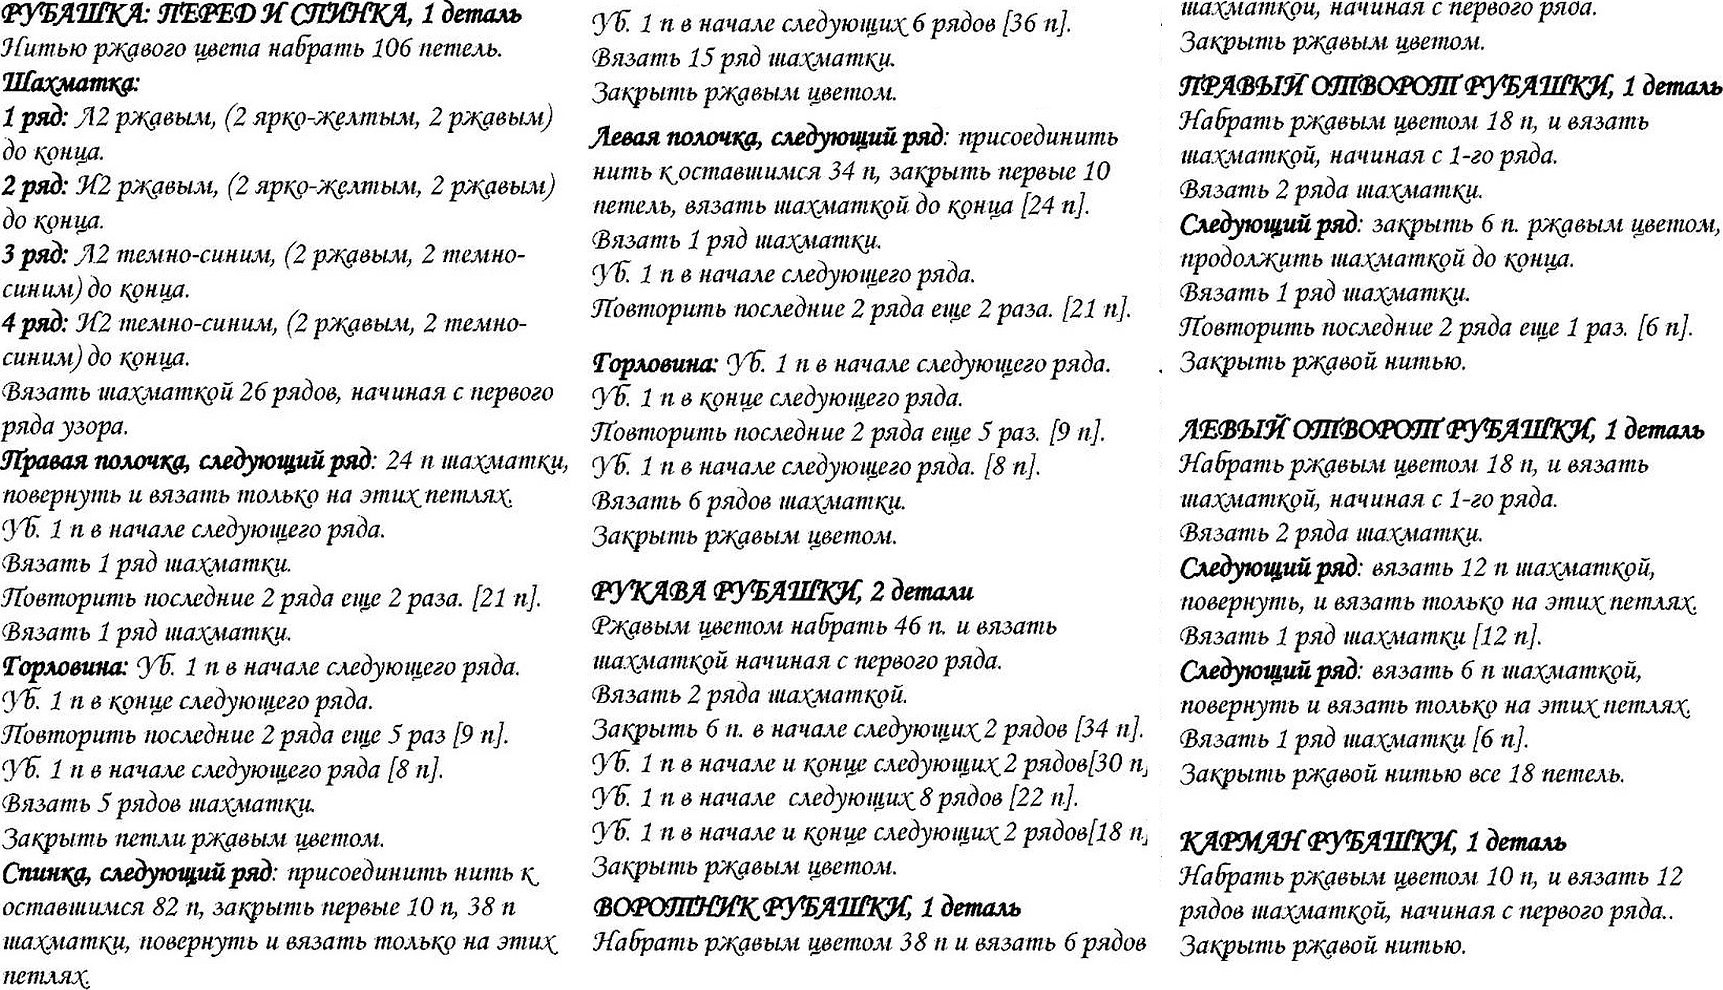
Bungo Mouse Knitted by Alan Dart
This lesson on knitting a rather large mouse is a bit more complicated than the previous ones. To knit such a toy, you need to follow detailed instructions.
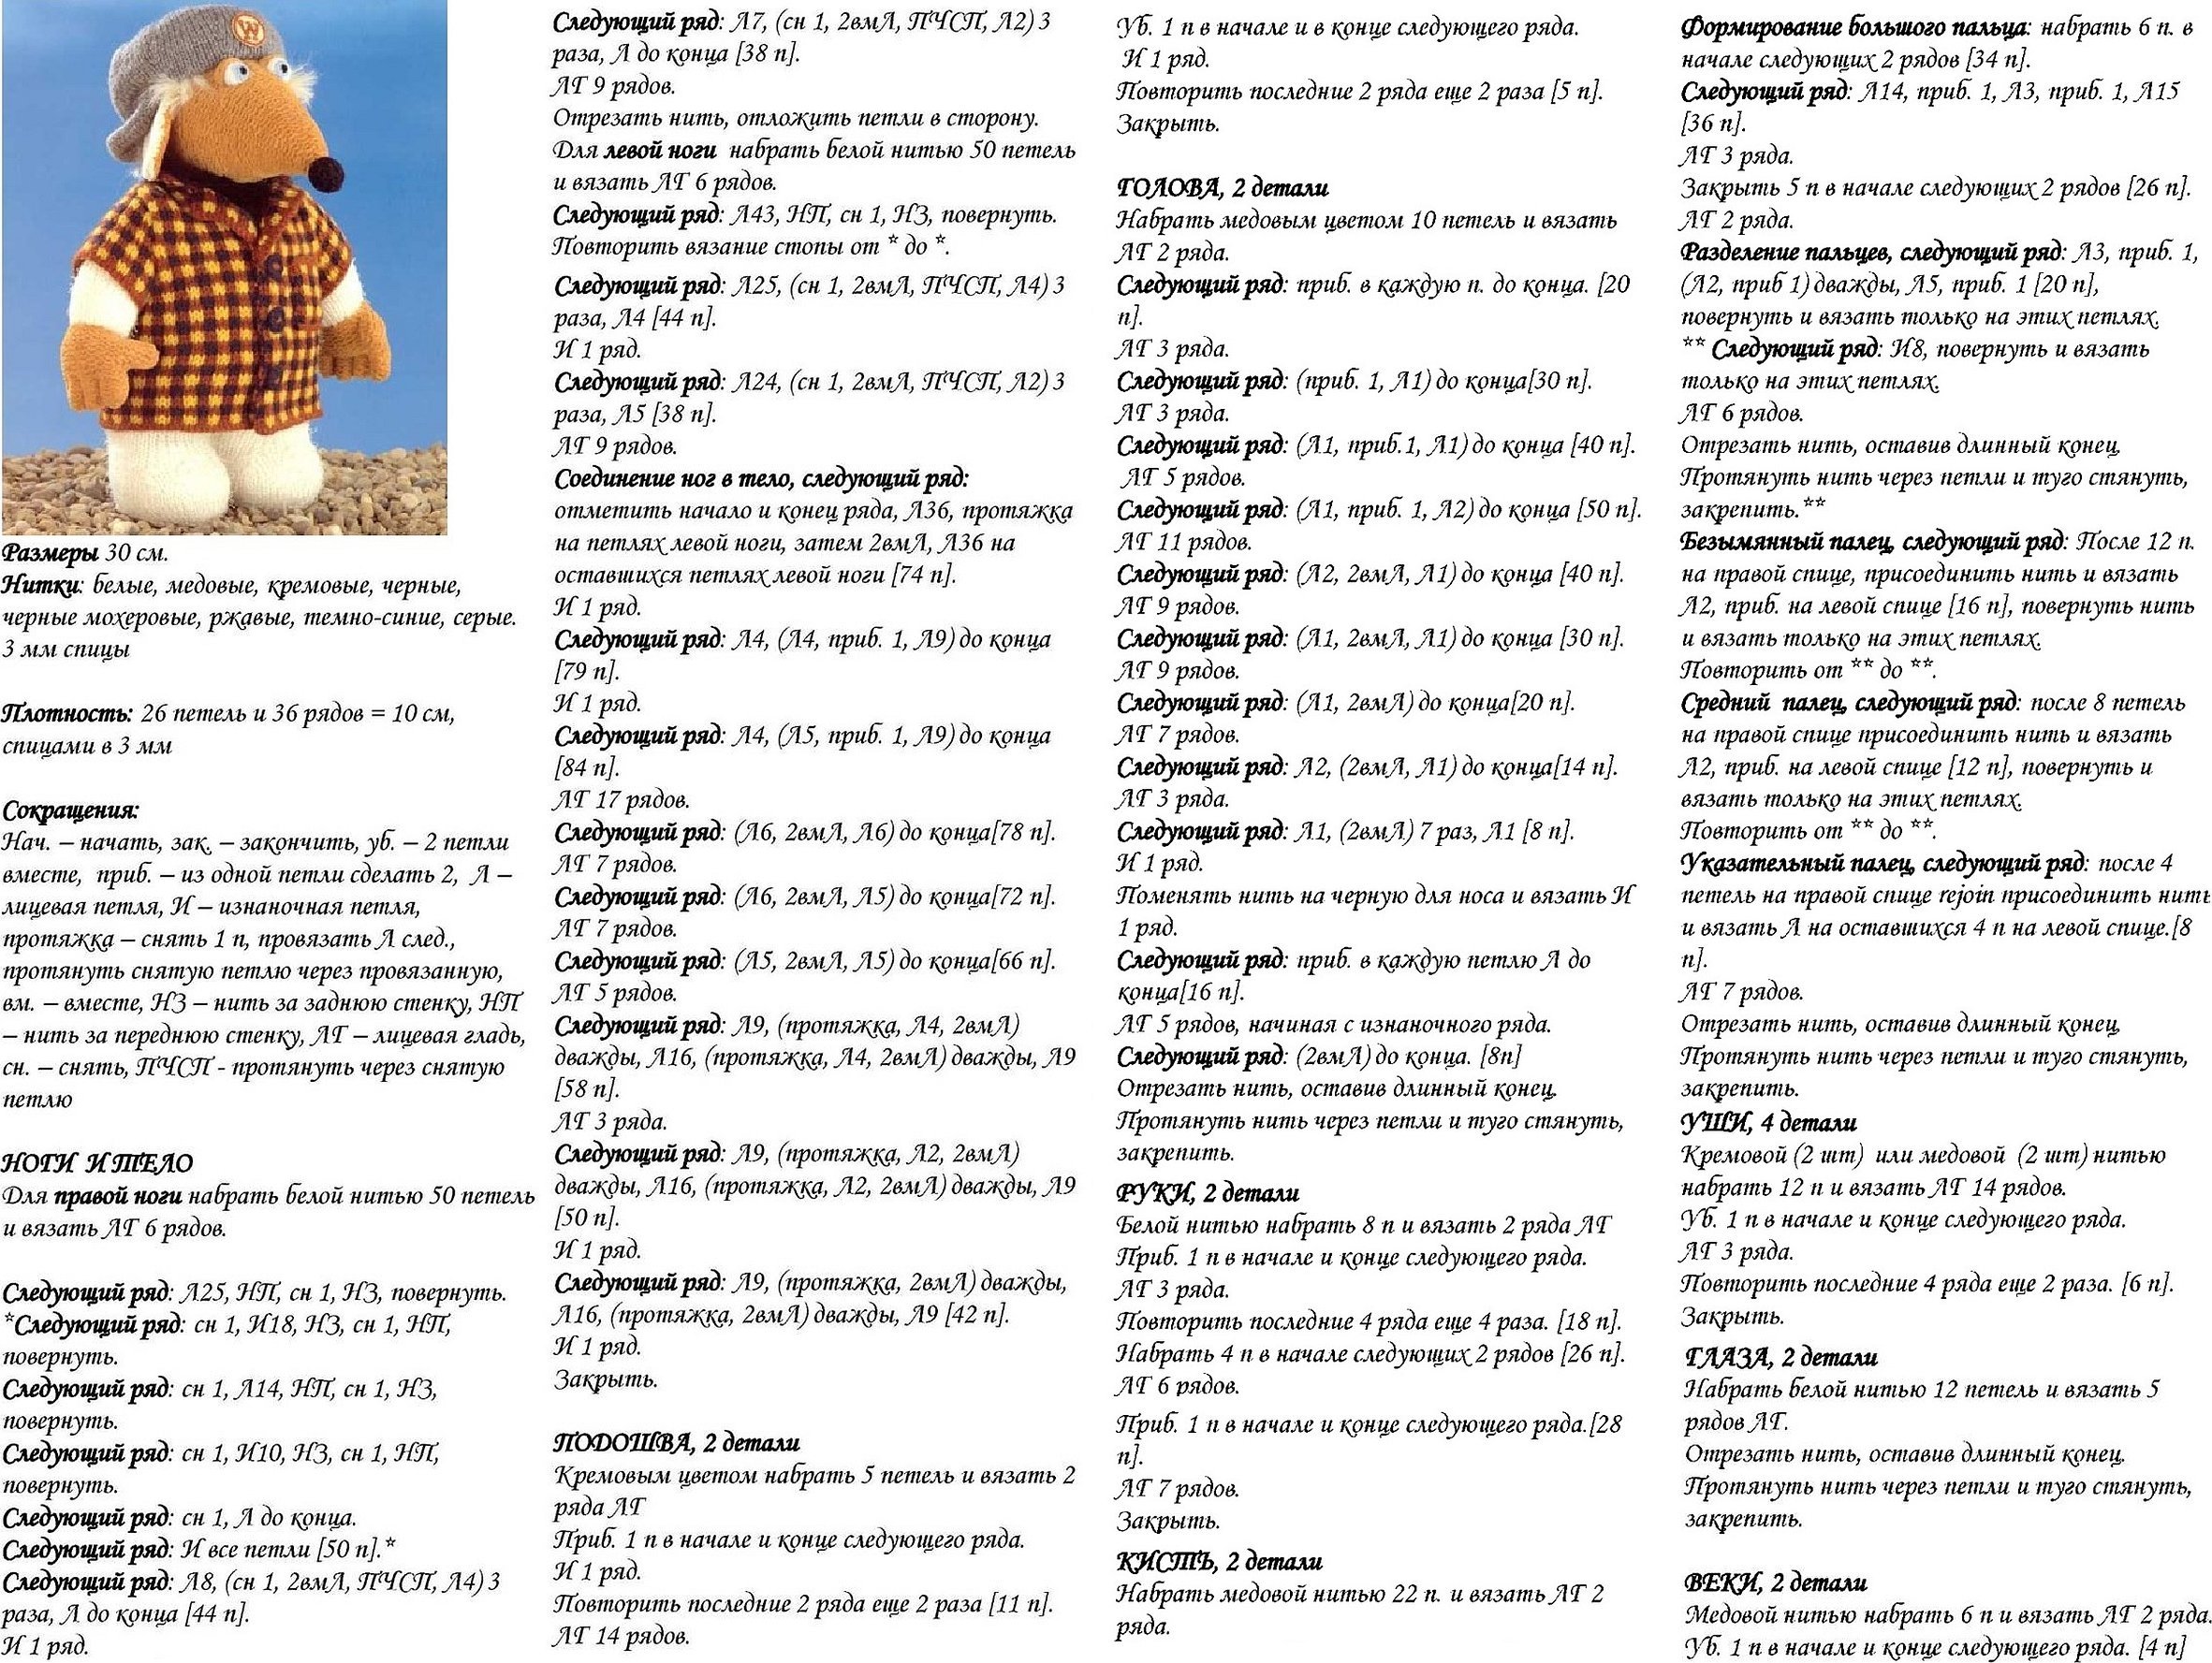
Clothes for such a toy are created separately. For it, you can use brighter and more saturated colors of threads than those shown in the photo.
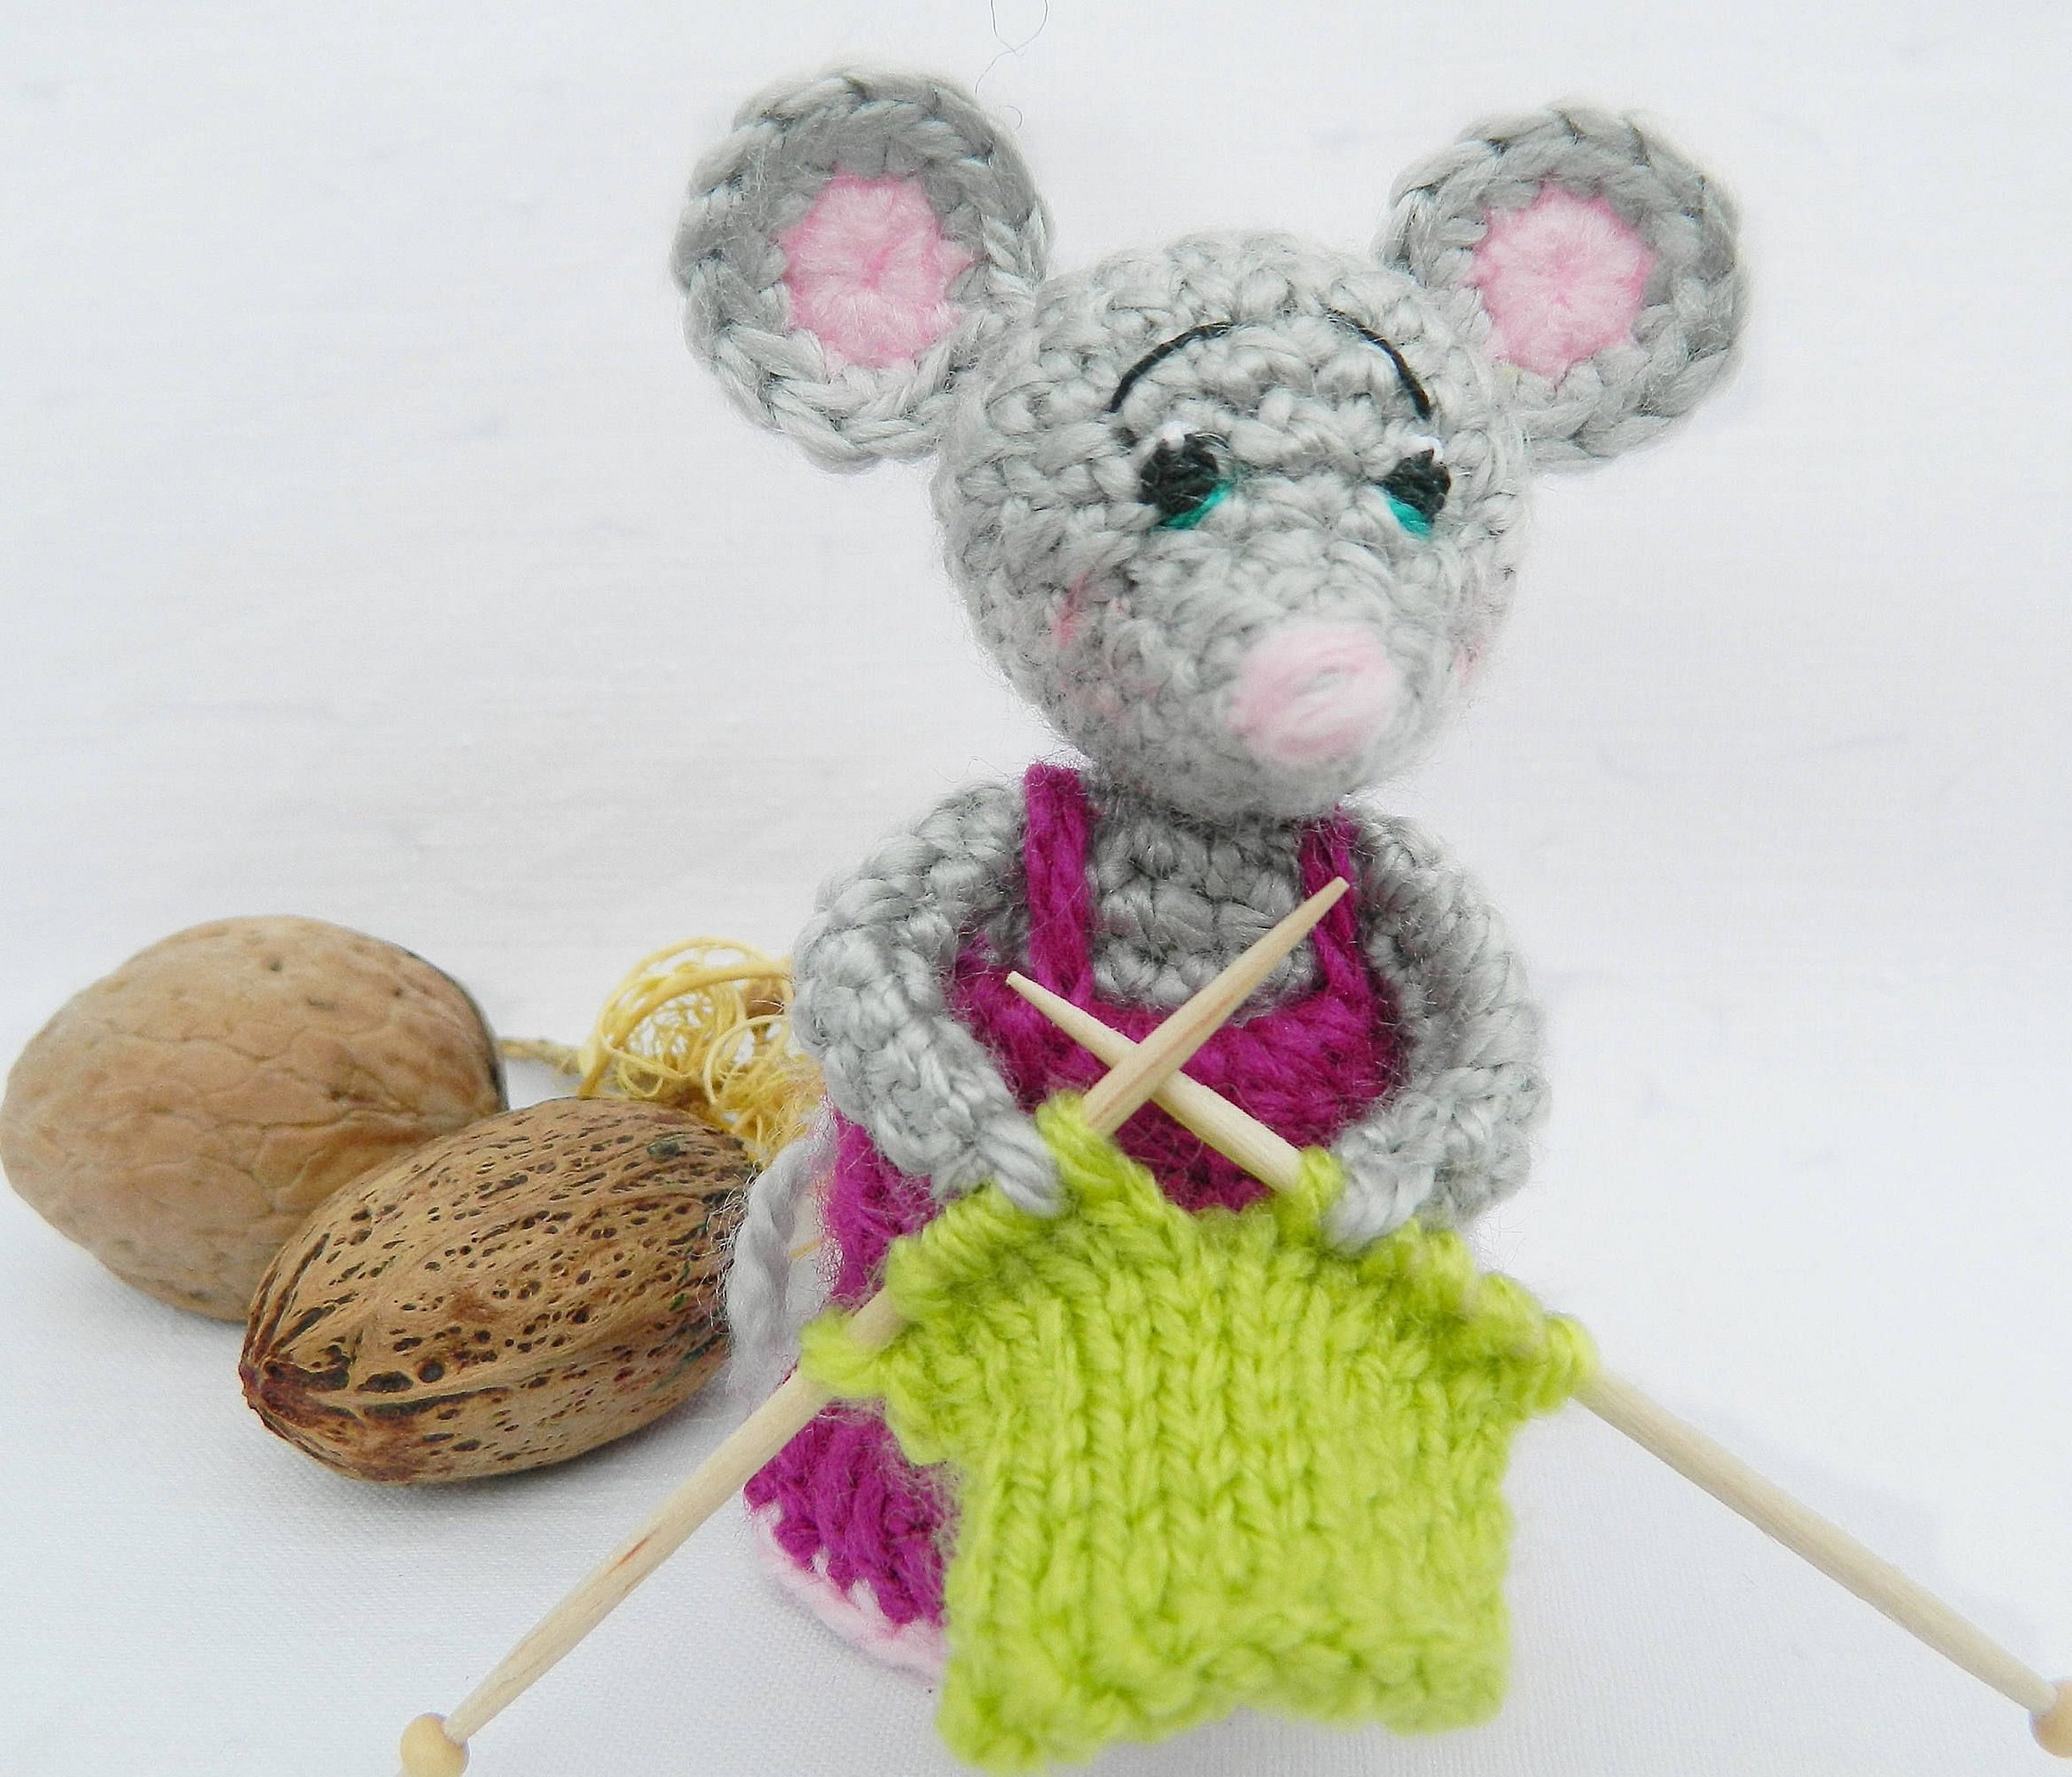
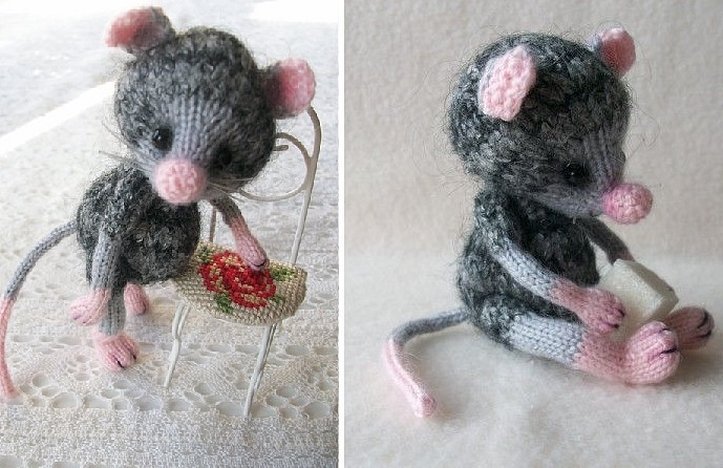
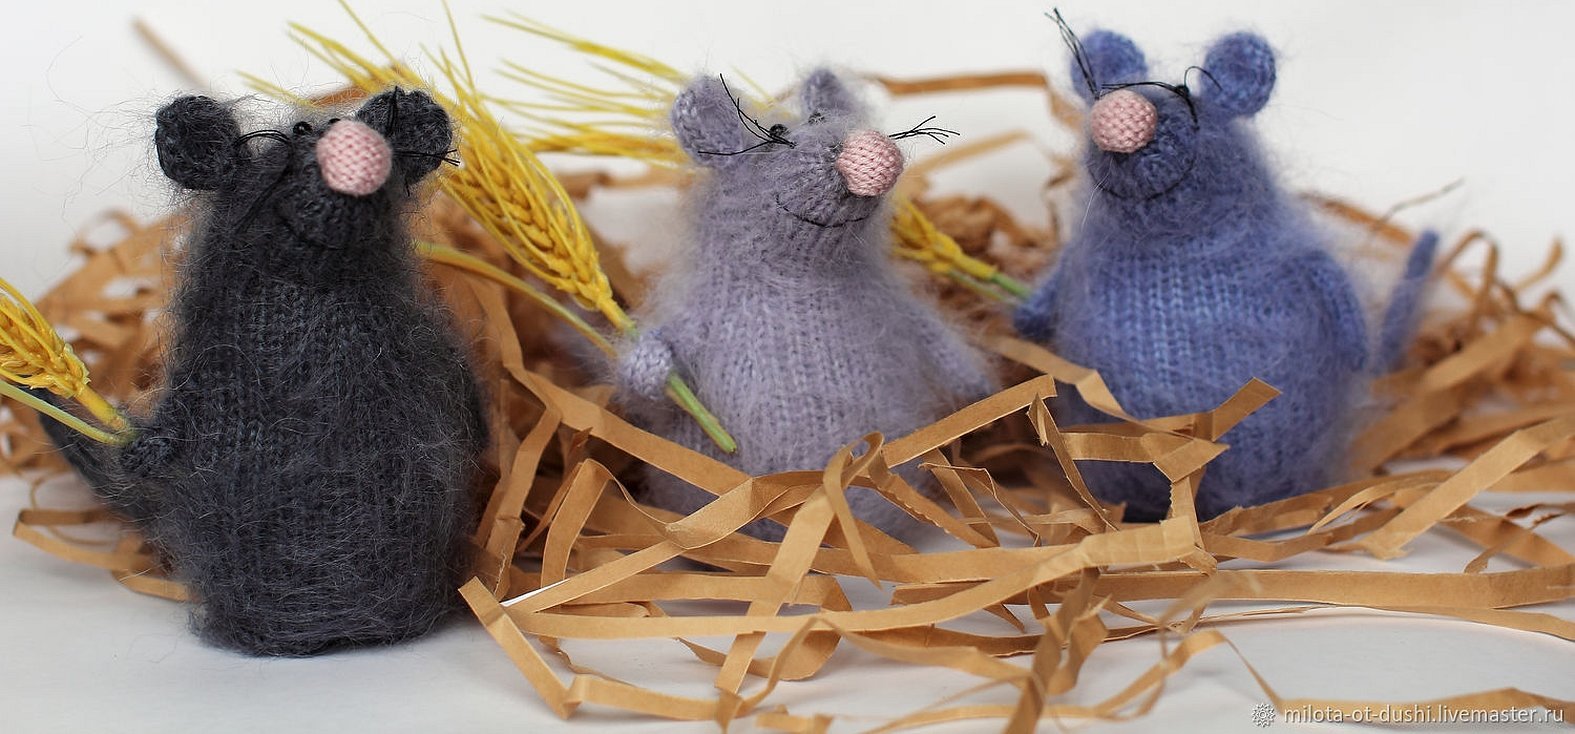
Mouse Marisol knitted
This toy is very easy to make. Its ears, tail and tip of the nose are made of pink yarn, and all other details are made of gray threads.

Cute mouse toys, knitted according to one of the suggested master classes, will delight their owners not only in a certain year. These miniature figures lift the mood and enliven the interior with their presence.


