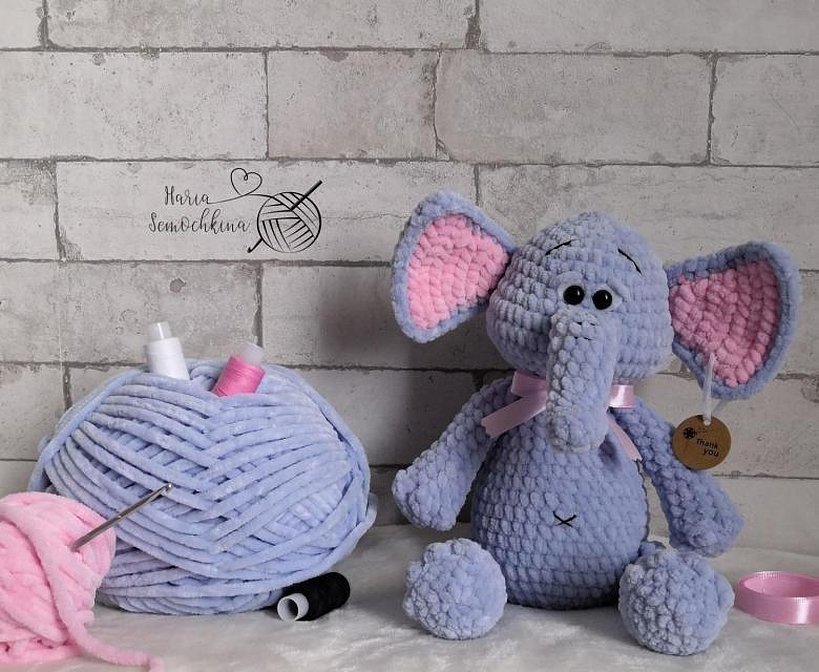
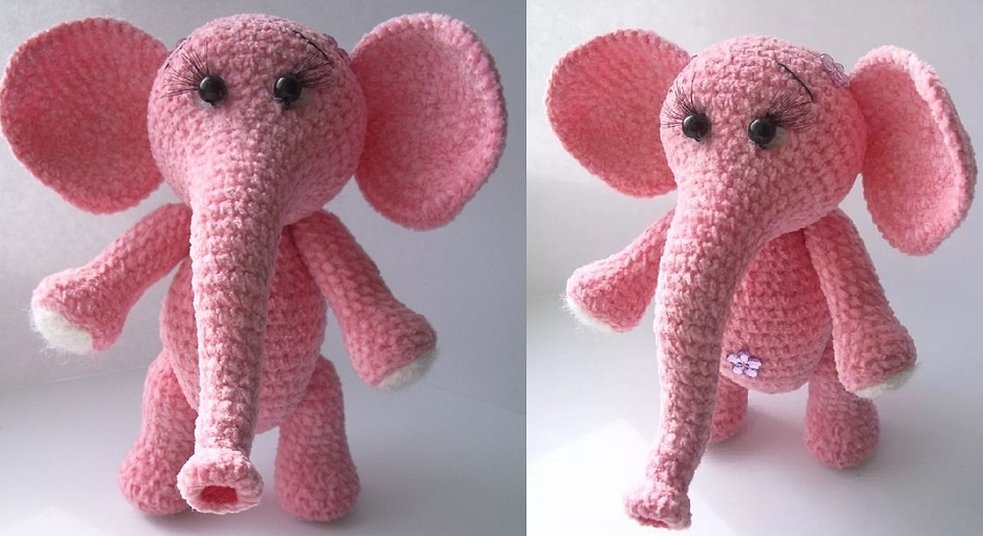
The fascinating hobby of creating soft toys is very popular among craftswomen. After all, a knitted elephant figurine can please not only a child. Often, a funny trinket becomes an excellent gift for adults and even a talisman for the home. This article describes in detail how to crochet an elephant.
What you need to make a toy elephant
When you start knitting a soft toy, you need to prepare the tools and materials that will be useful in the work. It is important to take into account some features and important details.
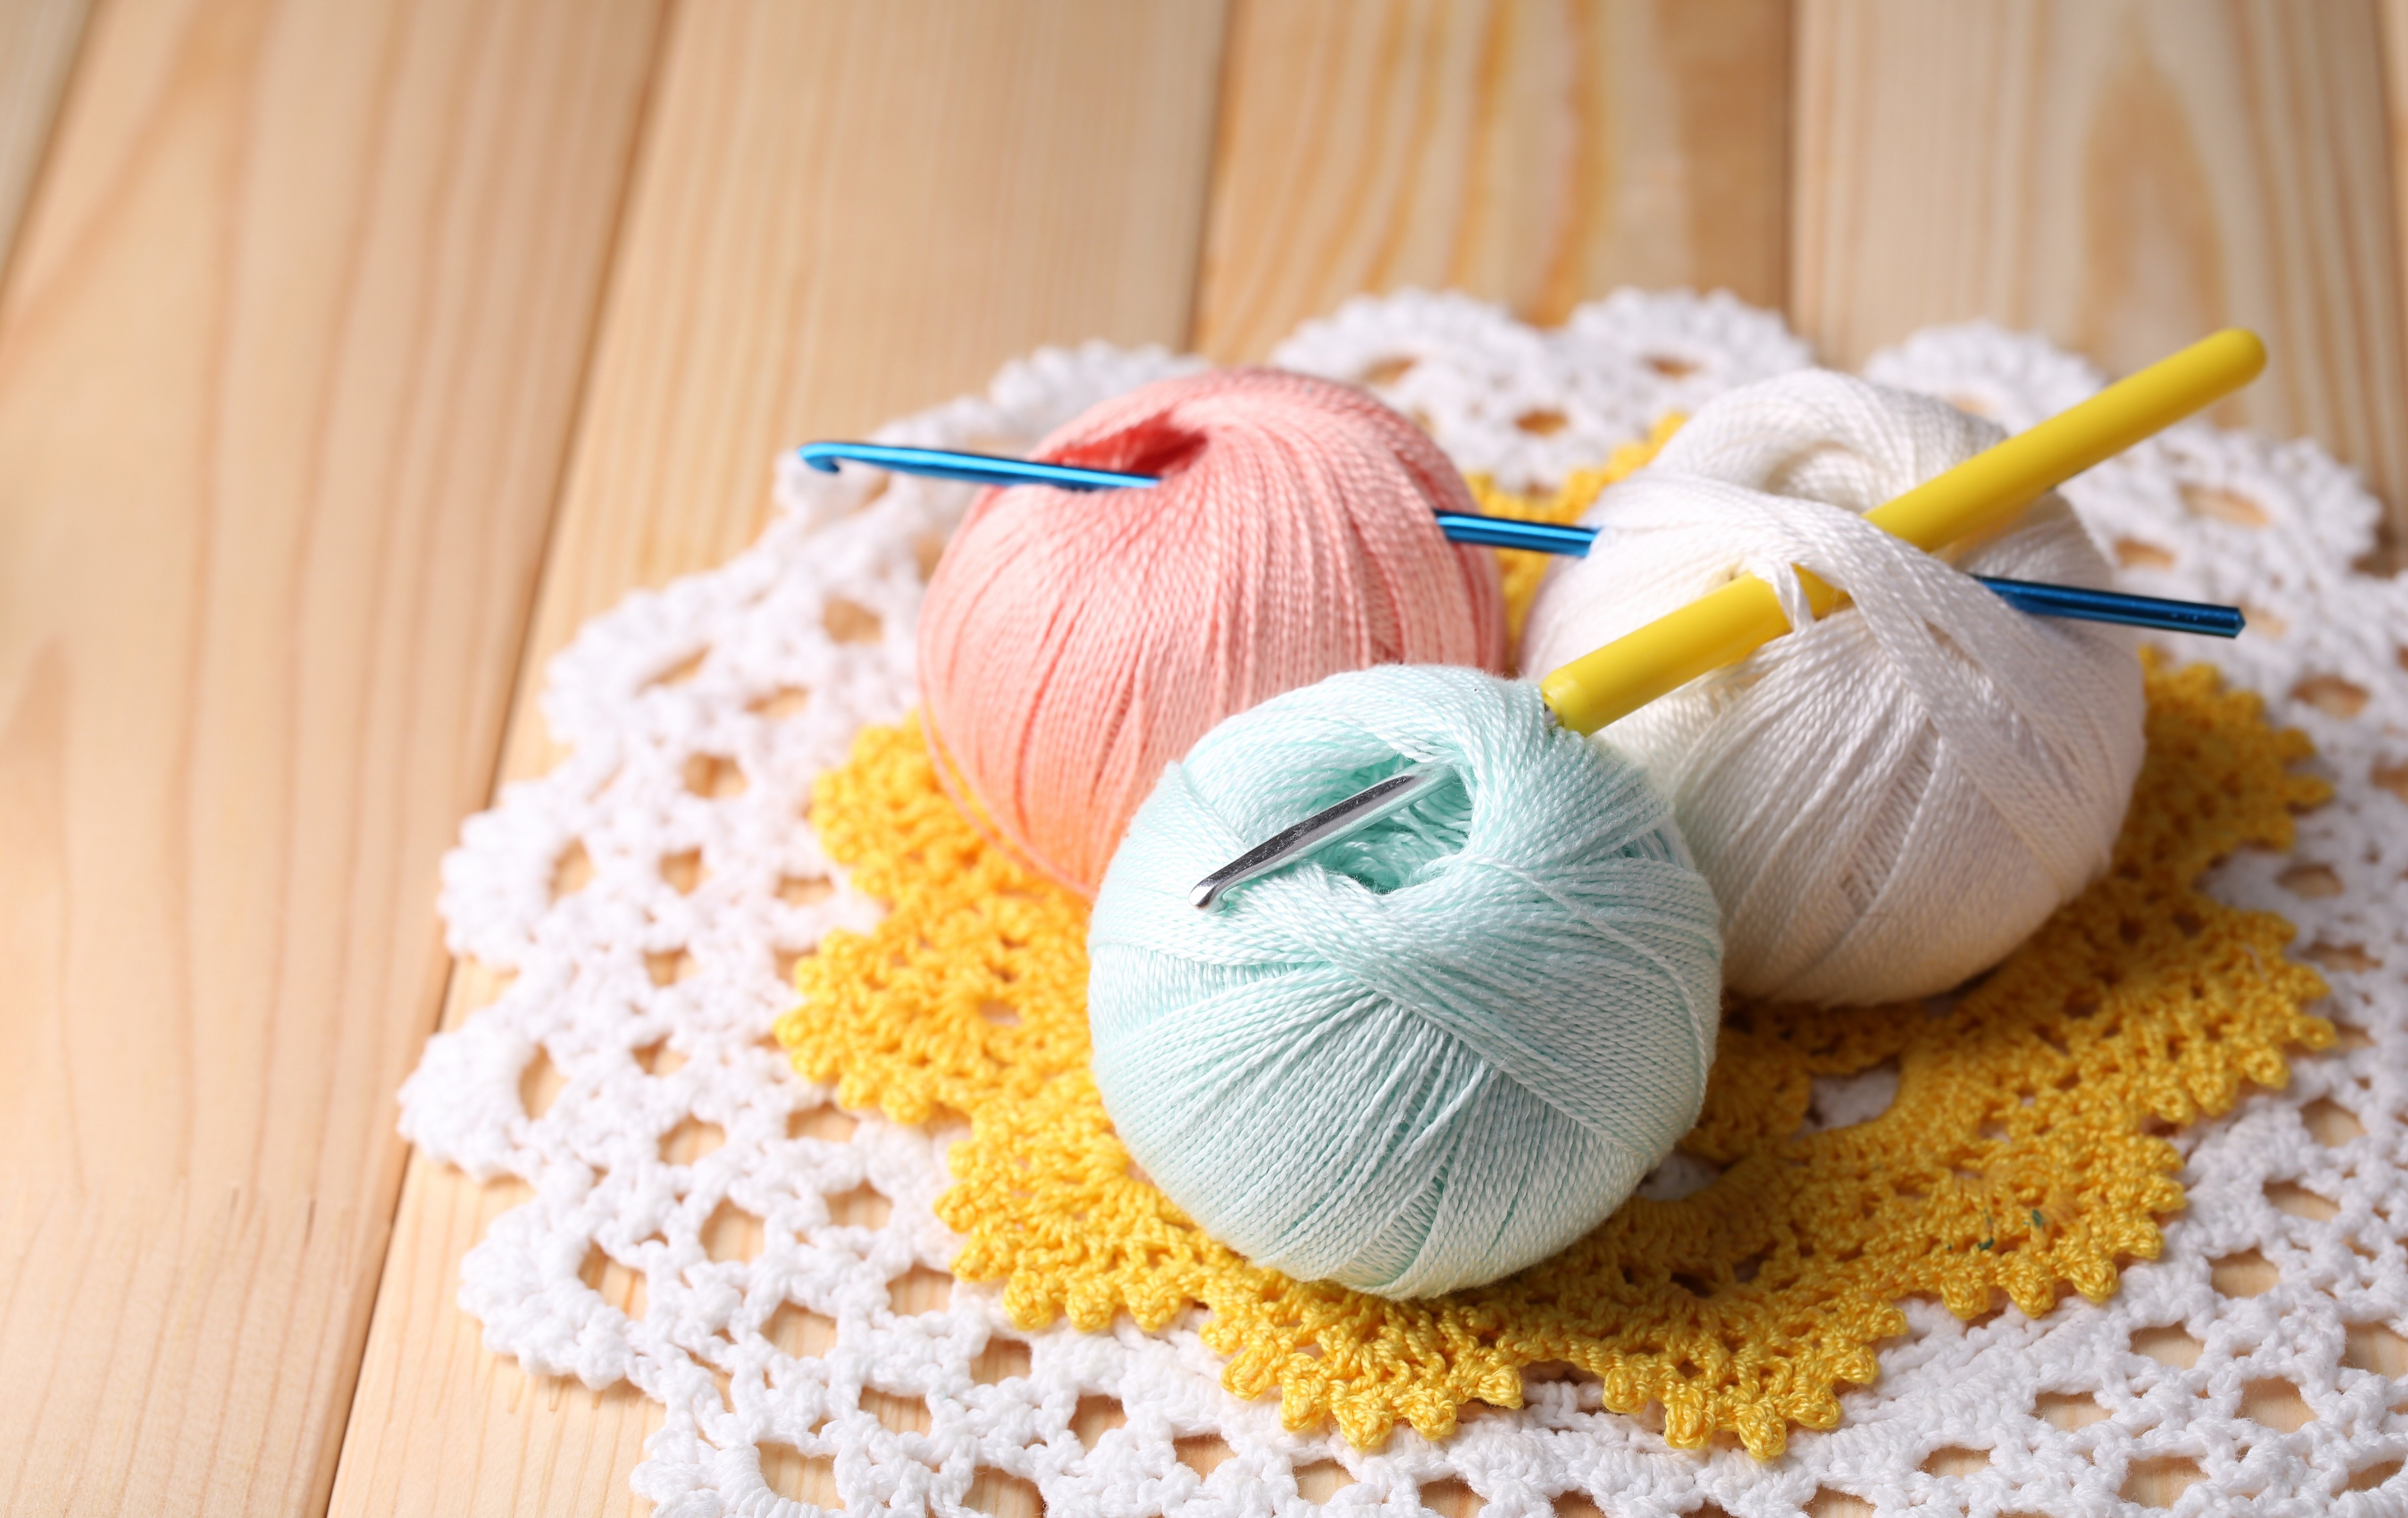
Yarn
The yarn used for knitting animal figures can be different. If you plan to crochet an elephant for a baby, then you should give preference to fluffy velour threads. Grass and other fleecy types of yarn will create the effect of fur, giving an additional resemblance to a real animal.
Different types of thick and smooth threads will allow you to get a smooth surface. In the case of an elephant, this may be more relevant. Although, using the same pattern of an animal with a trunk, you can knit a baby mammoth.
Please note! In any case, if the figurine is not just a decoration, but an object for children's games, the yarn should be hypoallergenic.
The choice of color is rather a matter of taste. An interior toy is knitted taking into account the furnishings of the room where it will be located. A plush friend for a child can be of any color or even combine several colors and shades.
Hook
The size of the tools is usually selected based on the thickness of the yarn. The optimal selection of hook or knitting needles would be:
- No. 0.5-1 – for threads 1600–2000 m long per 100 g;
- No. 1-1.5 – 600–1500 m/100g;
- No. 2-2.5 – 300–500 m/100g;
- No. 3-3.5 – 250–350 m/100g;
- No. 3-4 mm – 200 m/100g;
- No. 5-6 mm – 100 m/100 g and even thinner.
The first 2 options are usually used when creating amigurumi toys, the last 2 are for fairly large figures.
Please note! It is worth trying out the tool in advance with the chosen yarn, knitting a small piece with double and single crochet stitches.
This will help you understand whether the product will be dense enough to hold its shape and filling for a long time.
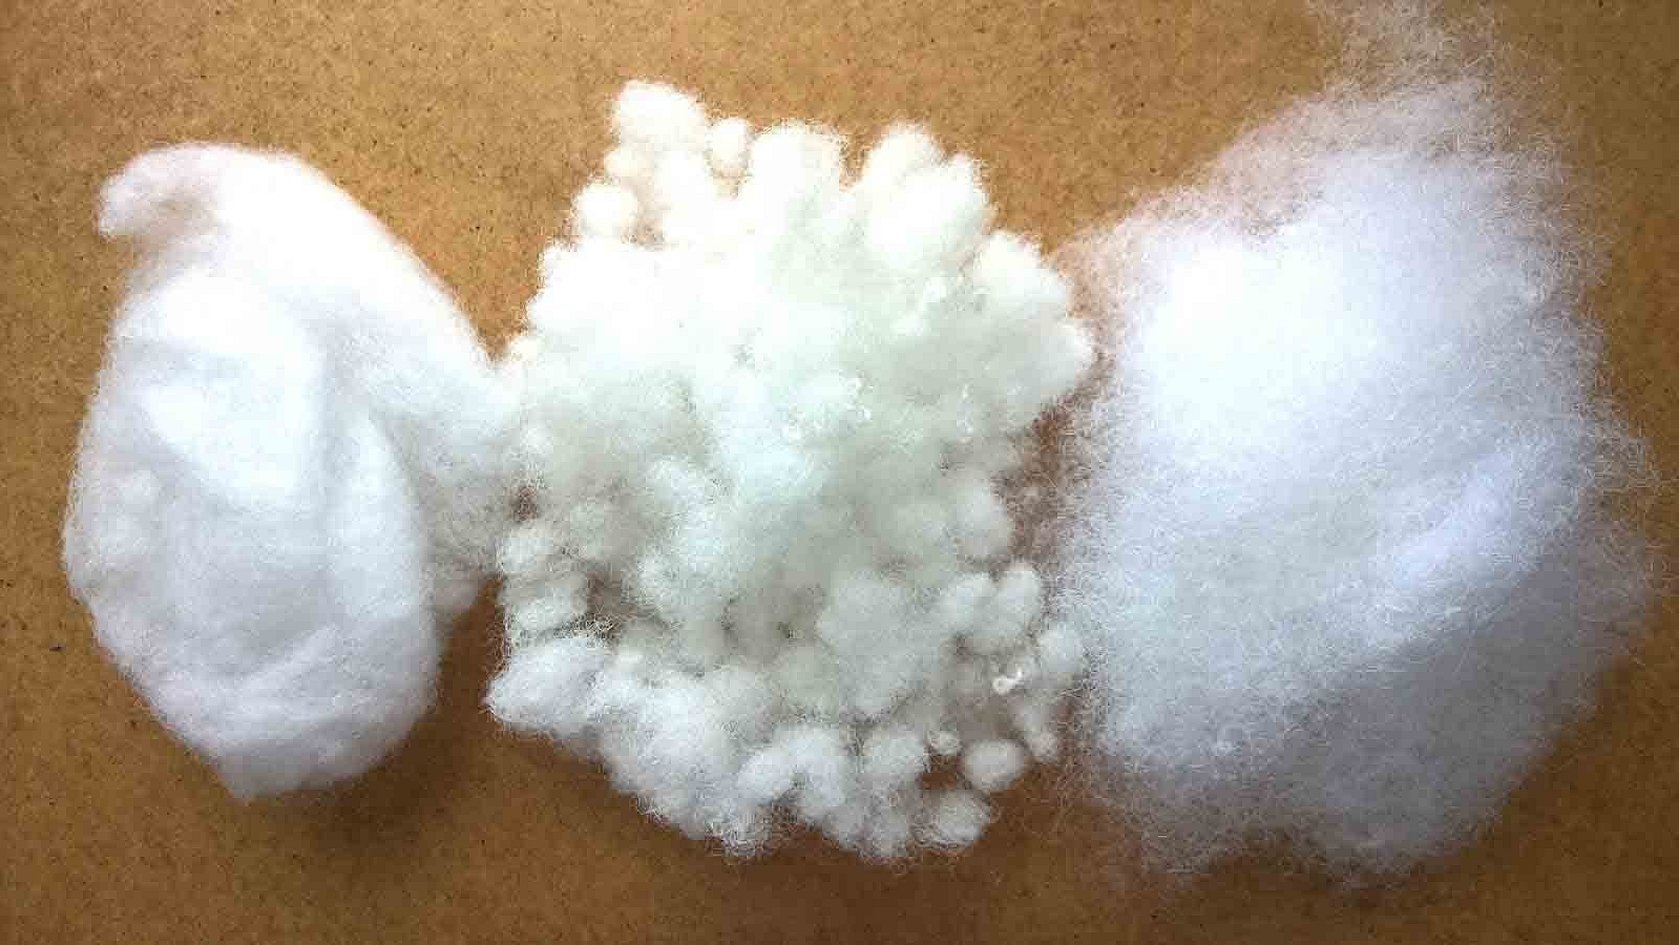
Filler
There are many modern materials that can be used to fill toys. They can be divided into 2 groups: natural and synthetic. Of the natural fillings, the most commonly used are:
- cotton wool;
- wool;
- bird down;
- dry herbs.
Important! Of the listed natural fillers, only cotton wool does not cause allergic reactions, so the others should be used with caution.
High-quality artificial stuffing materials are safer in this regard:
- synthetic down;
- synthetic padding;
- foam rubber;
- holofiber;
- polystyrene foam;
- plastic or glass granules and beads.
The last type of stuffing is suitable for anti-stress toys, but it is not recommended to give such a thing to small children.
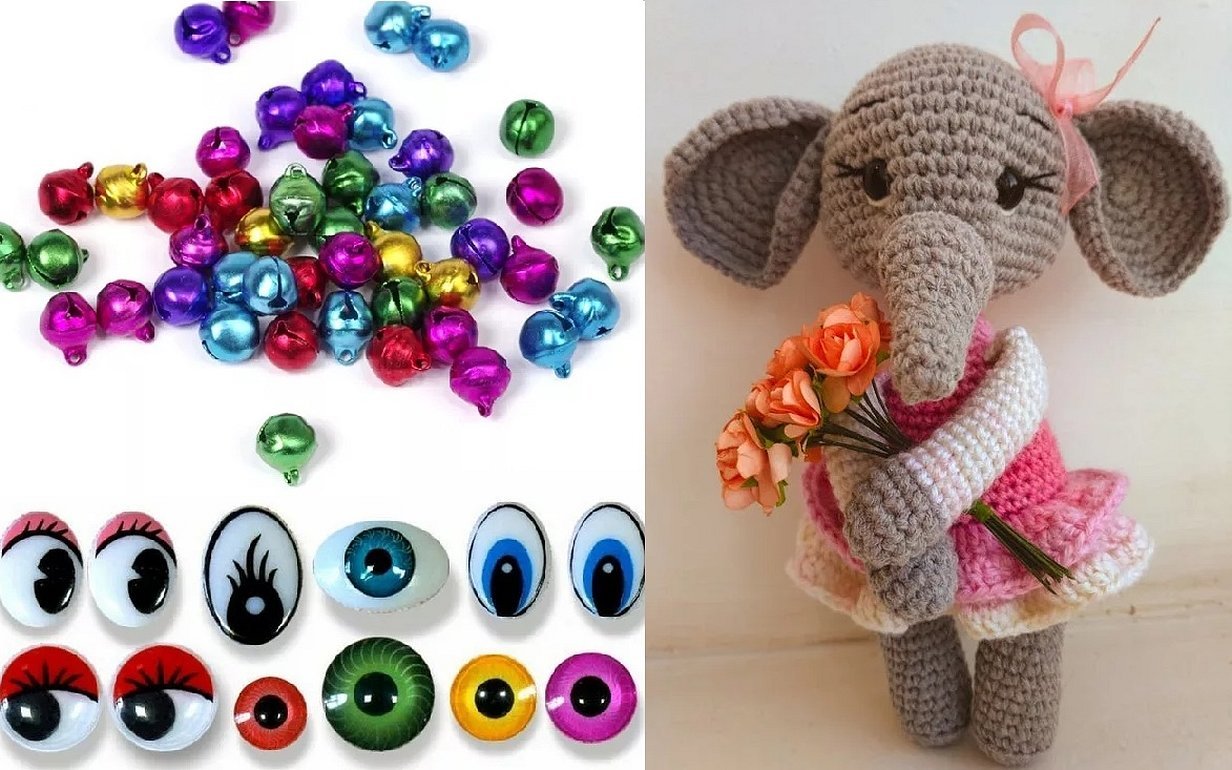
Accessories
Small finishing details are selected in accordance with the chosen scheme and relying on your own imagination. Various fittings may be useful in the work:
- ready eyes;
- beads;
- rhinestones;
- ribbons.
Using such little things will make the toy special and give it individuality.
Description of the process
Below is a method for crocheting an elephant (diagram and description). This master class details the step-by-step work on the toy and is suitable for beginners.
Please note! After creating individual body parts, the figurine is assembled using a thick sewing needle or the same hook.
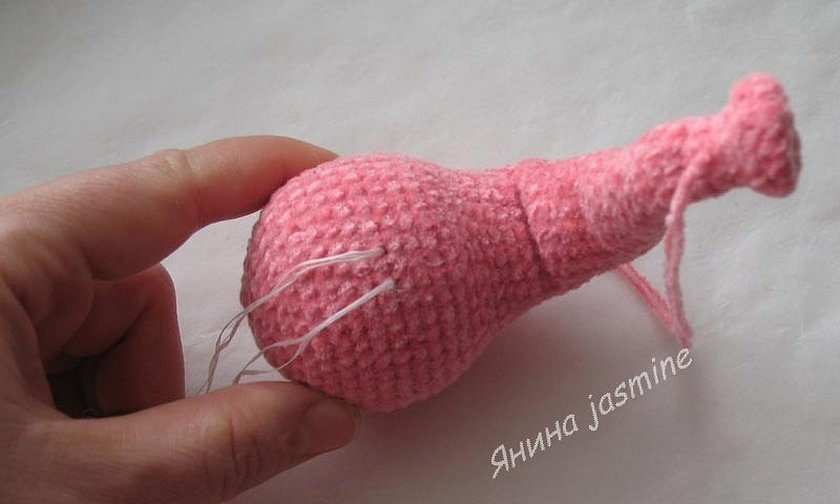
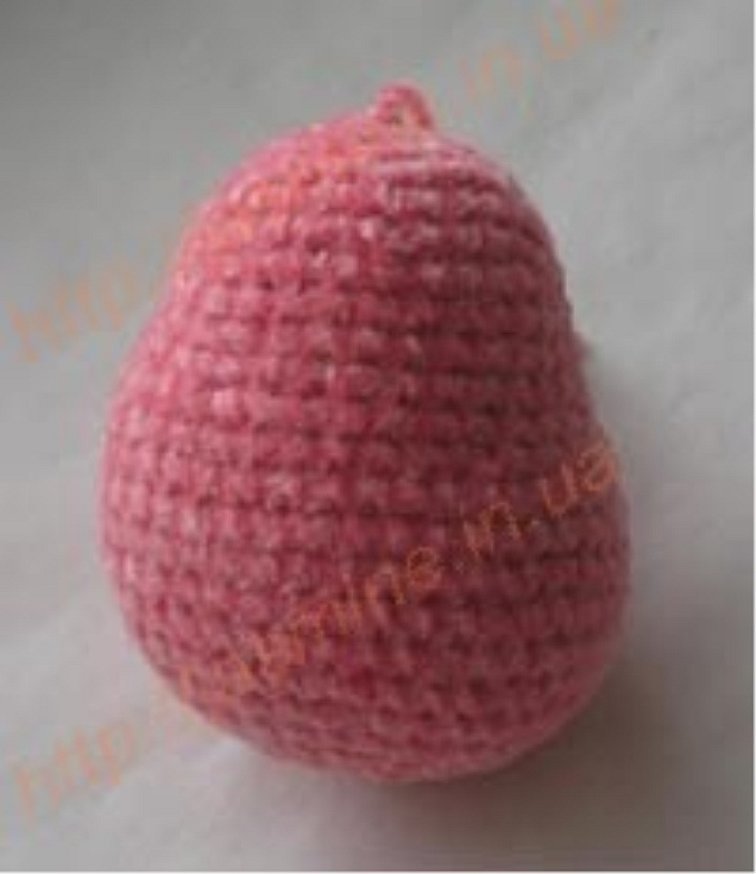
Head, trunk, eyes
In this step-by-step tutorial, the elephant's head and trunk are knitted together. The sequence of actions is as follows:
- Form a small ring and knit 6 sc from it.
- Next, knit in a circle for 6 rows, simultaneously adding 6 sts in each row. The result should be 42 sts.
- Knit 7 rows without any increases.
- In the next 3 rows, perform decreases at equal intervals, i.e. after 5, 4 and 3 sc respectively. There should be 24 sc remaining.
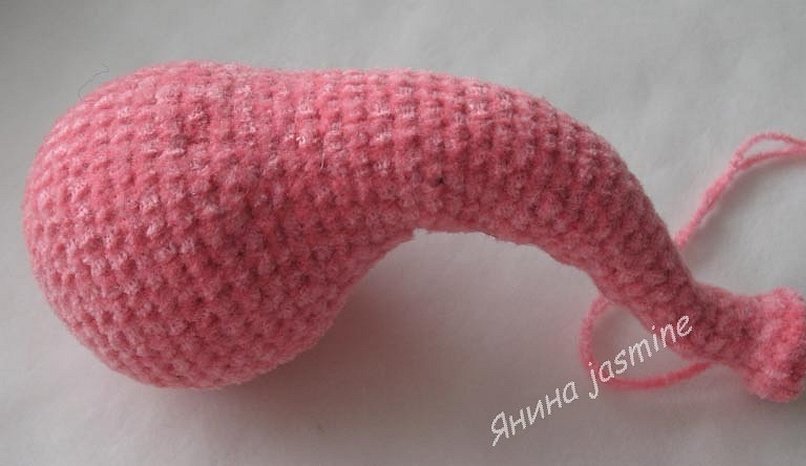
- The stuffing is placed inside the finished head, and a wire is inserted into the base of the nose. Then the stuffing should be done as you knit, giving shape to the parts. The stuffing around the wire should not be too dense.
- Knit 2 rows without any decreases. Then in every 2nd row, decrease by 2 sc until there are only 8 columns left.
- Knit a row without changes, then increase 8 sc once, and then in the last 2 rows decrease 8 sc.
Small indentations should be made in the place where the eyes are located. To do this, insert the needle with the thread in the place where the eye is located and bring it out where the head is attached to the body, but do not tie it. Additional tightening can be made between the indentations themselves.
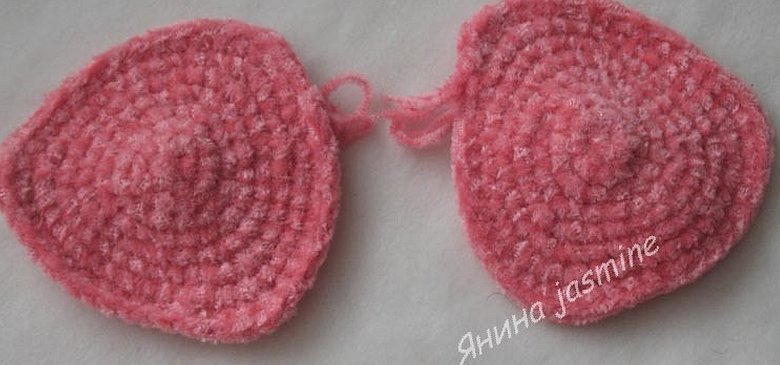
Ears
When creating ears, do not forget that they are knitted in mirror image. To do this, you need:
- Form a small ring and knit 6 sc from it.
- In the next row, make 6 increases, and then in each row add 3 sc at equal intervals. In total, you should get 48 sc.
- Cut the thread, leaving a 15-20 cm end for attaching to the head.
Please note! The second eyelet is made in a similar manner.
Torso
The beginning of work on the body resembles the first steps of creating the head. To do this, you need:
- Form a small ring and knit 6 sc from it.
- Next, knit in a circle for 6 rows, simultaneously adding 6 sts in each row. The result should be 42 sts.
- Knit 6 rows without changes.
- In the next row, knit as follows: 3 sc, decrease, (1 sc, 2 decreases) x 2 times, 1 sc, decrease and finish the row without changes.
- Knit 1 row evenly.
- In the next row, perform 6 decreases at equal intervals.
- Knit 3 rows without changes.
- Repeat step 6.
- Repeat step 5.
- Repeat step 6 twice.
- Perform decreases on all columns, completely closing the piece.
The stuffing is done gradually, as the elephant's body is created.
Legs
The elephant's hind and front limbs can be made the same or slightly different. The basic steps will be similar:
- Form a small ring and knit 6 sc from it.
- In the next 2 rows, first make 6 and then 4 increases. The result should be 16 sts.
- Knit 3 rows without changes.
- In the next row, make 3 decreases in a row, and knit the remaining stitches without changes to get 13 sts.
- Knit 9 rows without decreasing or increasing.
- In the next row, alternate 1 sc and 1 decrease to get 9 sc.
- Perform decreases on all columns, completely closing the piece.
- Cut the thread, leaving a 15-20 cm end for attaching to the body.
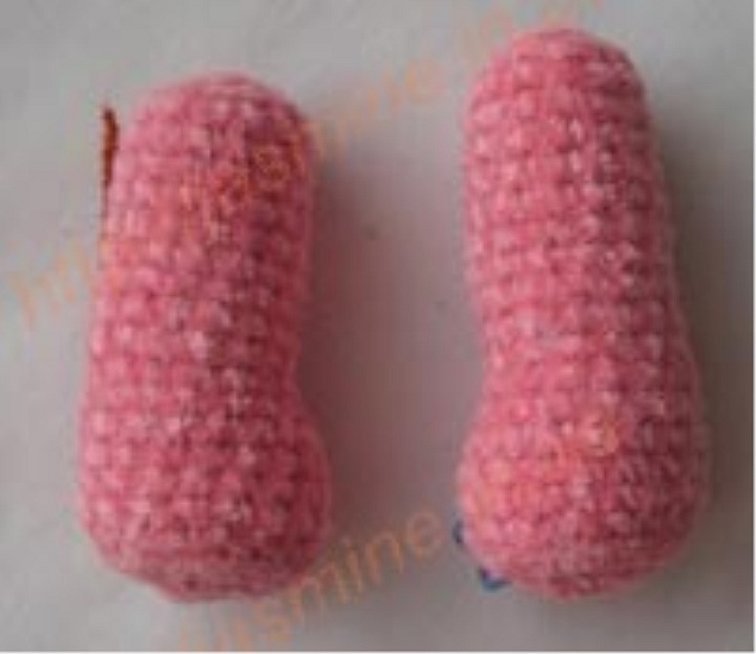
The remaining limbs must be tied in a similar manner.
Please note! To make the front legs thinner and shorter, in step 2 add 6 sc twice, and in step 5 knit a total of 7 rows without changes.
Assembling the toy
When starting assembly, all the parts are first pinned together. This allows them to be arranged symmetrically and changes to be made if necessary. It is important that the areas with decreases are adjacent to other parts of the toy, hiding the changes in the fabric.
After the toy is completely sewn, you can attach the eyes with eyelashes and eyebrows in the previously prepared recesses. The cheeks can be shaded with regular blush or acrylic paints diluted with water. The remaining decorations - bows, beads, embroidery - are done at the discretion of the master.
Knitting patterns
There are other ways to crochet an elephant. The easiest way to do this is to use a diagram with a detailed description.
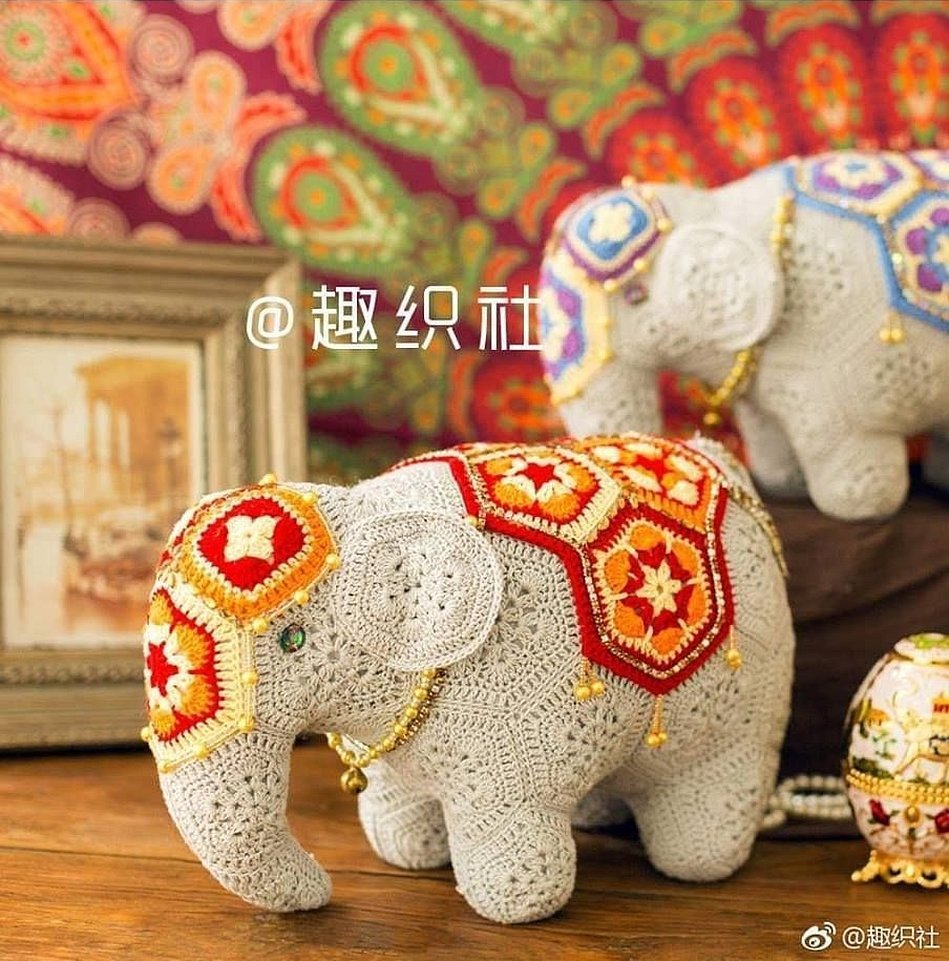
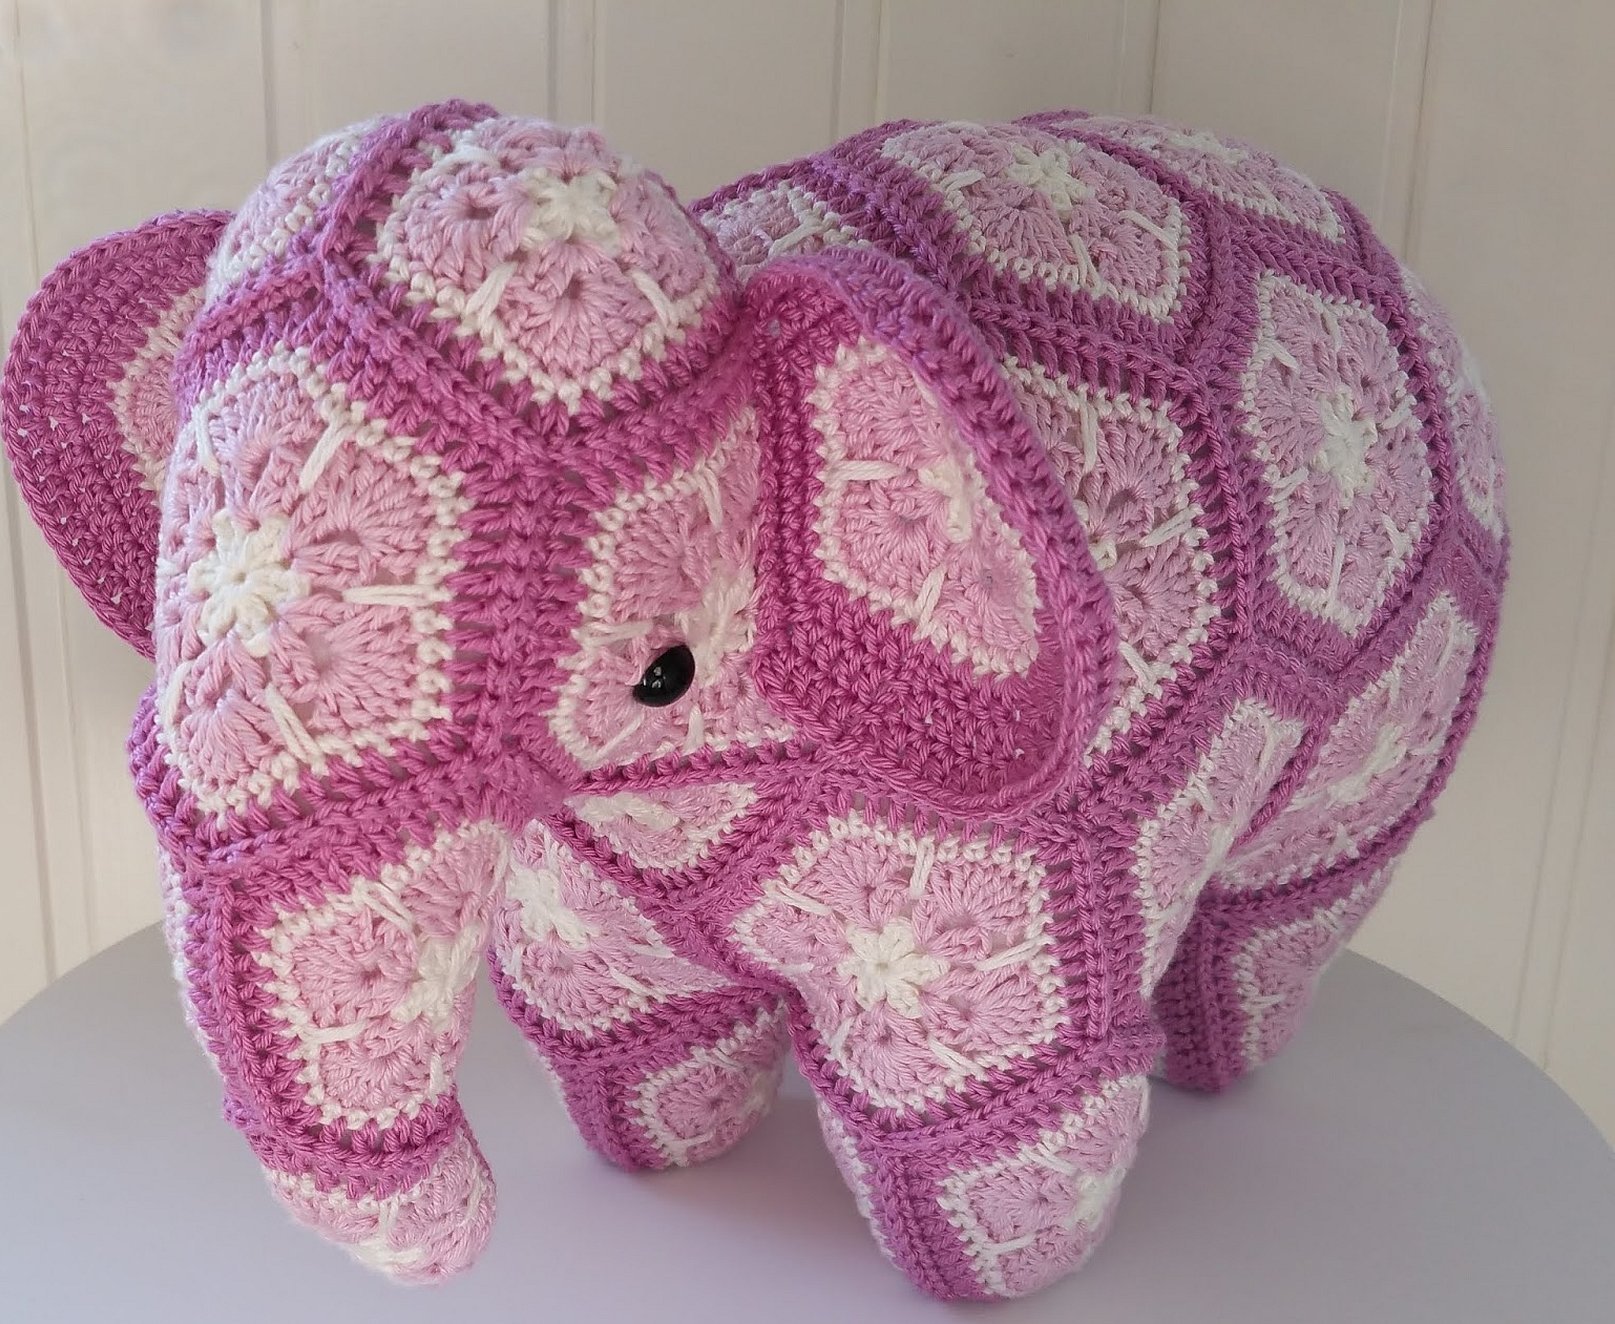
Indian Pink Elephant
This toy can be used to decorate the interior. It is knitted from several circular motifs and assembled according to the pattern. The parts are arranged symmetrically on the right and left sides. The combination of brightly colored threads conveying the Indian flavor will be original.
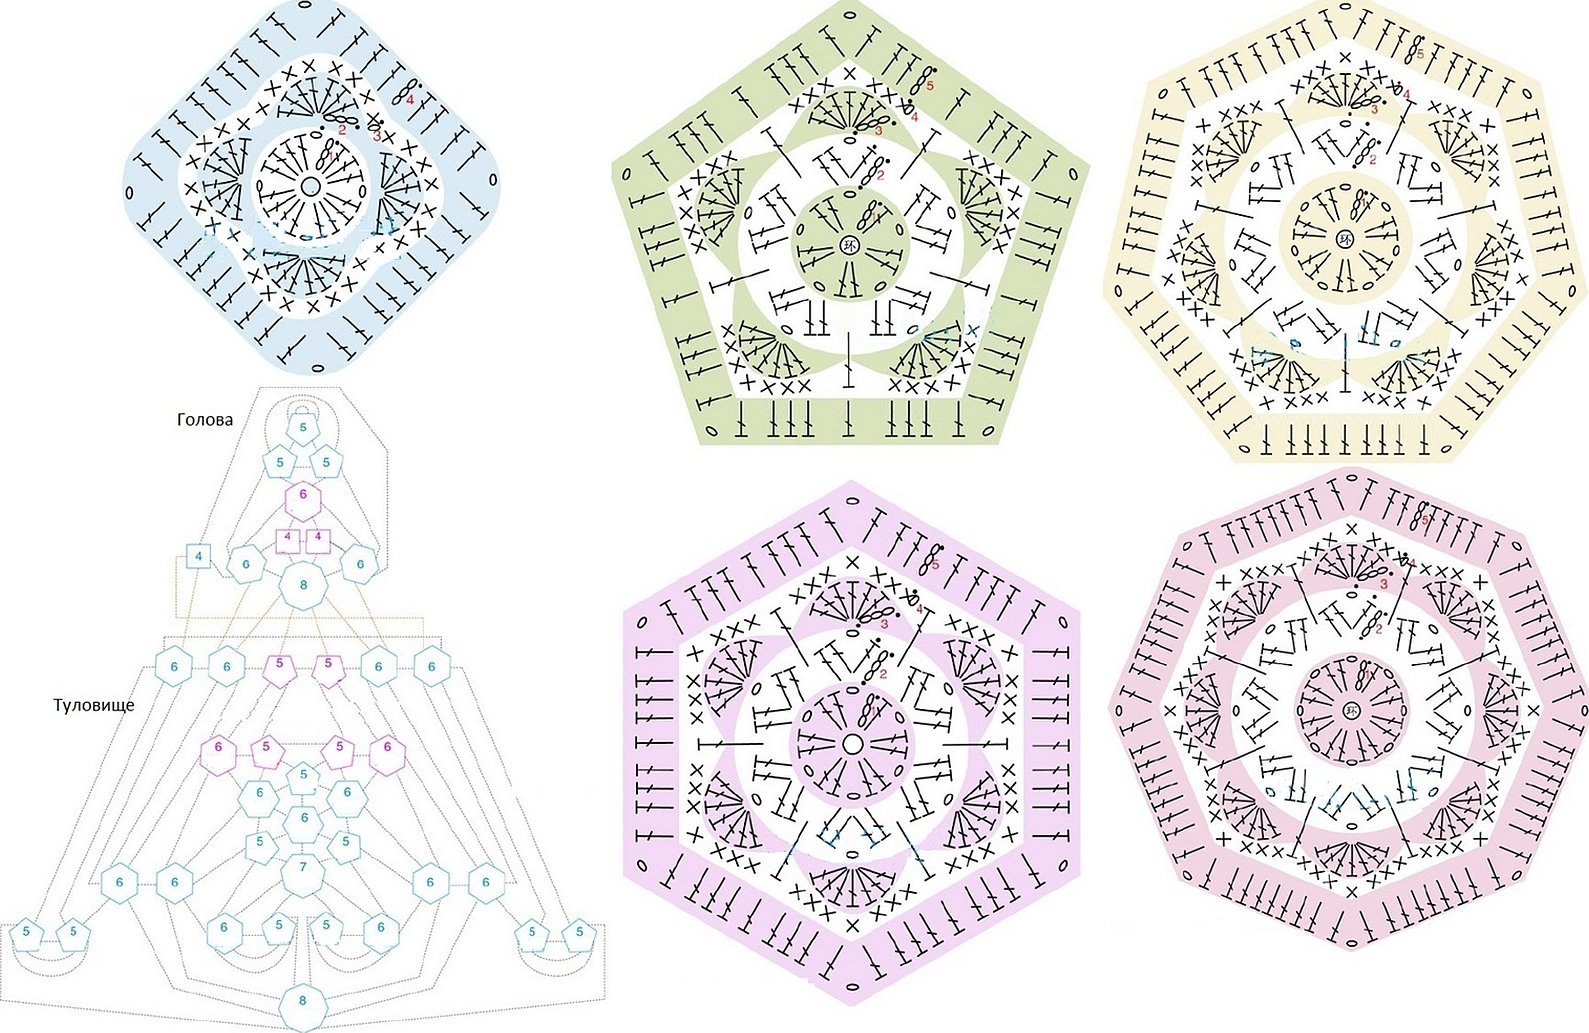
You can support the oriental theme with a cape made of colored elements. Embroidery with shiny beads and rhinestones will look especially advantageous.
Little elephants
Tiny toys, called amigurumi, are crocheted from thin threads with a corresponding hook. But such a painstaking little thing will require more patience and attention. The smaller the tool and the thinner the yarn, the more miniature the elephant will be.
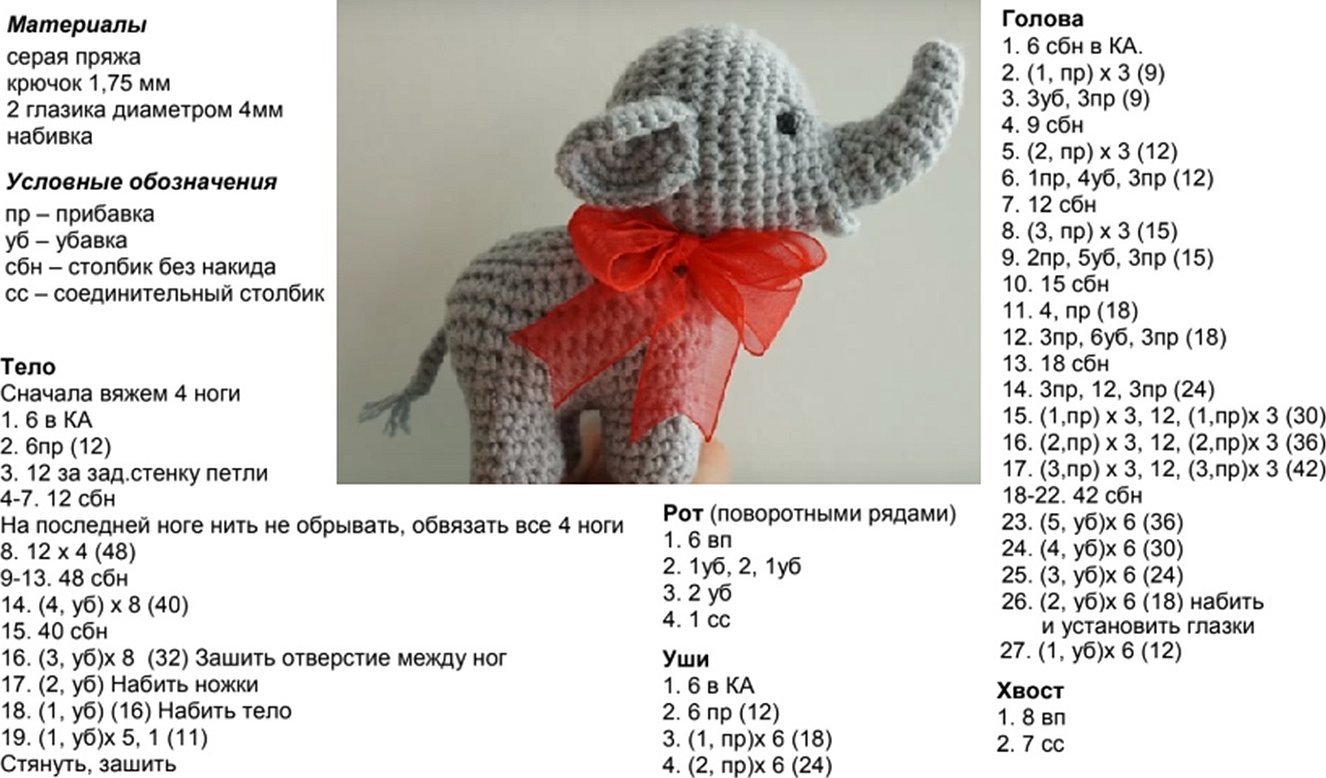
In your work you can use one of the descriptions given in the article or another scheme. Another option, how to knit a simple gray elephant, is described in detail in the scheme below with all the rows indicated.
The finished soft figurine has one drawback - you don't want to part with it. But knowing how to crochet an elephant using the steps described, you can create not just one funny toy, but a whole collection of different colors and sizes.


