A jacket is an elegant and at the same time formal garment that every man has in his wardrobe. Some prefer classic double-breasted styles, while others have switched to modern casual styles. Regardless of the model and style, a jacket helps you look stylish, formal and at the same time elegant. Today, stores offer a wide range of suits and jackets for every taste and budget. Not everyone wants to pay an unreasonably high price for a product that, according to some men, is even completely uncomfortable and restricts movement. That is why some people make clothes of this type with their own hands. In this article, you can find the following information: how to sew a jacket correctly, what is the technology for sewing a tunic, how to make a pattern for a jacket.
Selecting the style and shape of a men's product
The style is chosen according to the silhouette. There is such a rule: a correctly chosen size of the product will make the silhouette of the figure beautiful and elegant. This applies to all types of clothing. Regardless of the style, any jacket will suit a man if it fits him well and is tailored as if for him. This will hide all the flaws of the figure and noticeably highlight its advantages.
The silhouette determines how the future product will look: fitted, with natural or wide shoulders, with narrow or classic lapels, longer or shorter.

Materials and tools
Making a jacket is not the easiest thing, especially for beginners and tailors. This requires not only theoretical foundations and a large practical base, but also a lot of tools and materials. Using the example of sewing a single-breasted jacket, a list of things that will be needed for successful cutting is compiled.
The main materials required for production are:
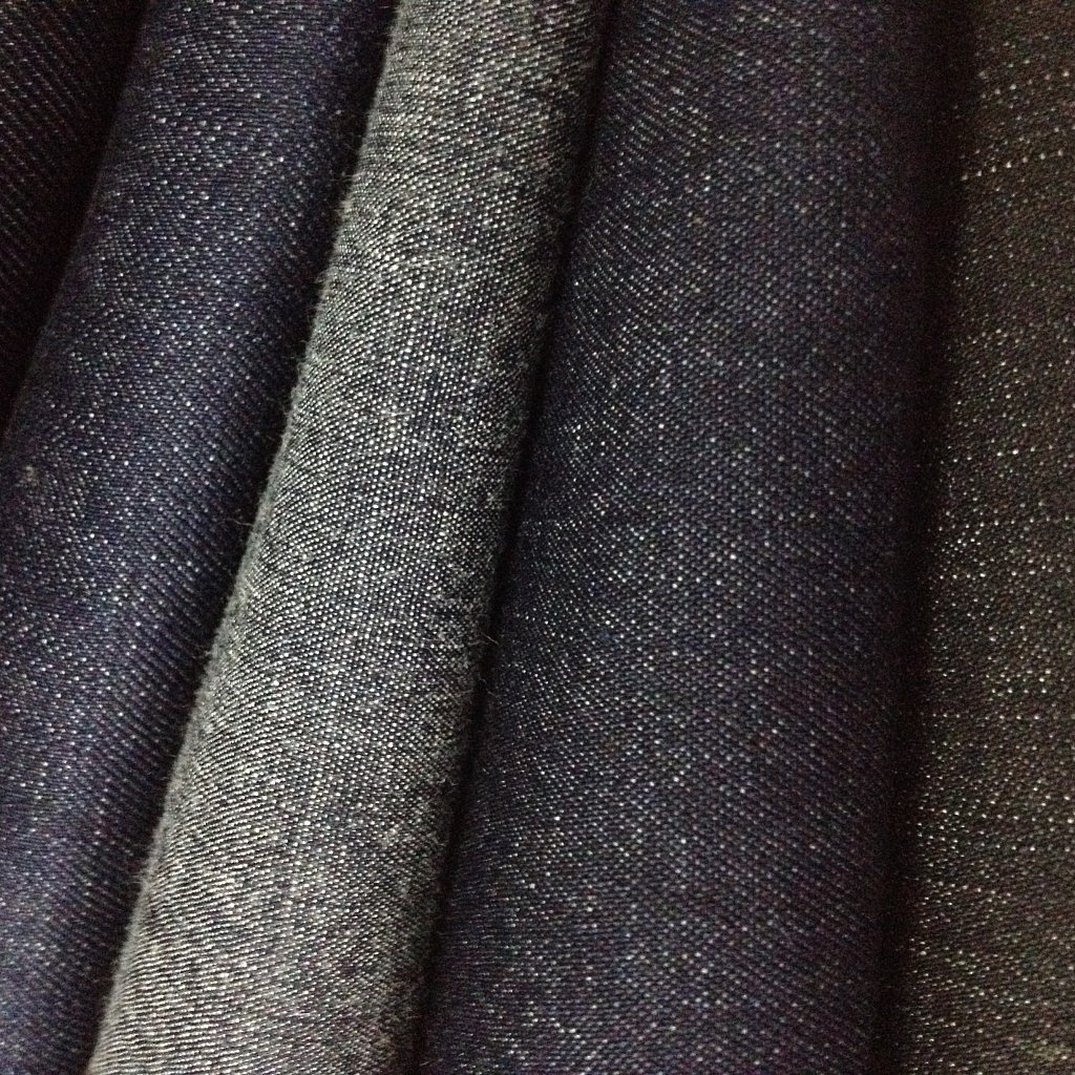
- Special suit and lining fabrics;
- Fabric for the inside of the pockets. Most often, satin or cotton are used;
- Interlining for making breast pads;
- Duplicating materials;
- Soft shoulder pads. Their presence depends on the style;
- Buttons that match in color, size and style;
- The same suitable quality threads.
You will also need the following equipment:
- Sewing machine;
- Overlock attachment;
- Iron for ironing fabric;
- Ironing board or table;
- Tailor's scissors;
- Pins and an awl;
- Needles for hand sewing and machine stitching.
Important! The set of materials and tools may differ depending on the type of product and its style, and the methods the seamstress uses to make the jacket.

Necessary measurements
To sew a jacket, you first need to take the following measurements from the person for whom this product is intended:
- Product length (PL);
- Waist length at the front and back (WL and LB);
- Sleeve and shoulder lengths (SL and SL);
- Half-girths of the neck, waist, hips and chest (OH, OT, OB, OG);
- Armhole depth (AHD);
- Back width (BW).

Building a drawing grid
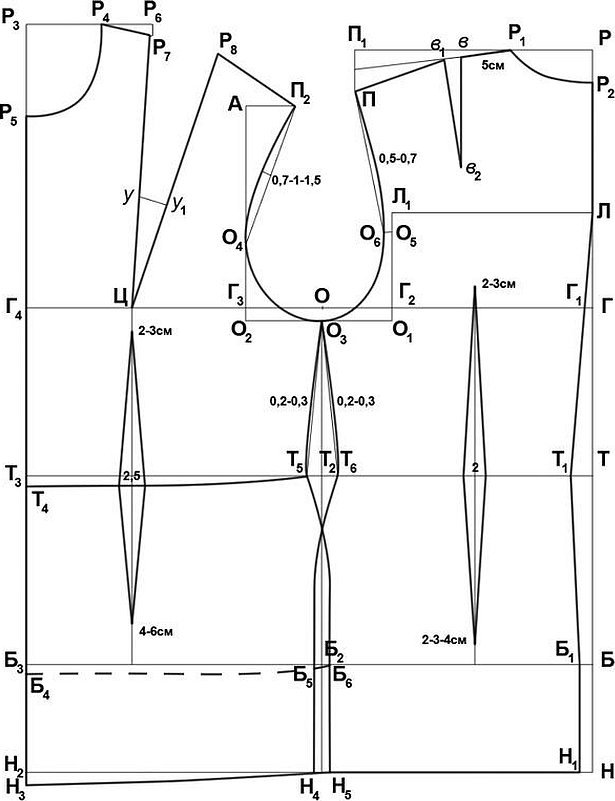
First, draw a rectangle, the horizontal sides of which are equal to the half-circle of the sternum from the measurement and 5 cm added for additional dimensions. This is how the width of the product is determined. Its length is equal to the length of the vertical sides of the rectangle - according to the measurement or as desired.
The depth of the armhole is determined as a third of the semi-circle of the sternum according to the measurement taken and 4 cm for additional sizes. The waist line is measured from the left upper point of the rectangle by the length of the back measurement. From this point, a line is drawn to the right vertical side of the rectangle.
The hip line is measured 18 cm from the point where the back length intersects with the right side of the rectangle. A straight line is drawn from this point to the intersection with the right side.
Further actions are performed similarly to the drawing to determine the width of the back, the width of the jacket armhole, the rise of the front and the descent of the armhole line and side.
Construction of the back of the jacket
The back is created as follows:
- From point A, a vertical line is laid out along the length of the product D;
- From point A to the right, a horizontal line of half the chest girth is measured + 3 cm;
- From point B, length C is also measured downwards;
- The armhole is formed. To do this, divide the OG into three and add 5 cm and set aside from point A. From the resulting point, set aside a segment to BC;
- The waist is formed. From A down the length of the waist is drawn along the back. From the resulting point a horizontal line is drawn to BC;
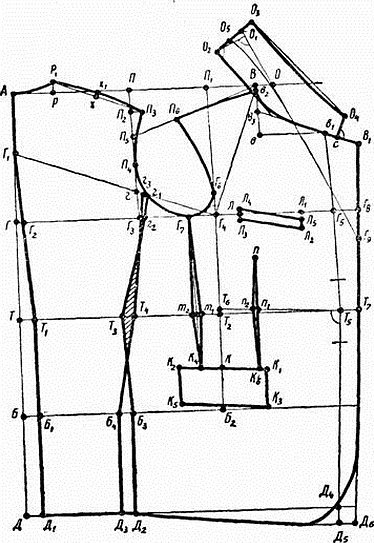
- From the armhole to the right, measure the width of the back + 1 cm. From it, also to the right, measure the depth of the armhole, divided by 4 + 1 cm;
- The neckline is formed. From A to the right, put aside the half-girth of the neck, divided by 3. From the resulting coordinate, go up another 1.5 cm;
- The shoulder line is formed, as well as the side and center seam on the back, and the neckline is drawn in a curved shape.
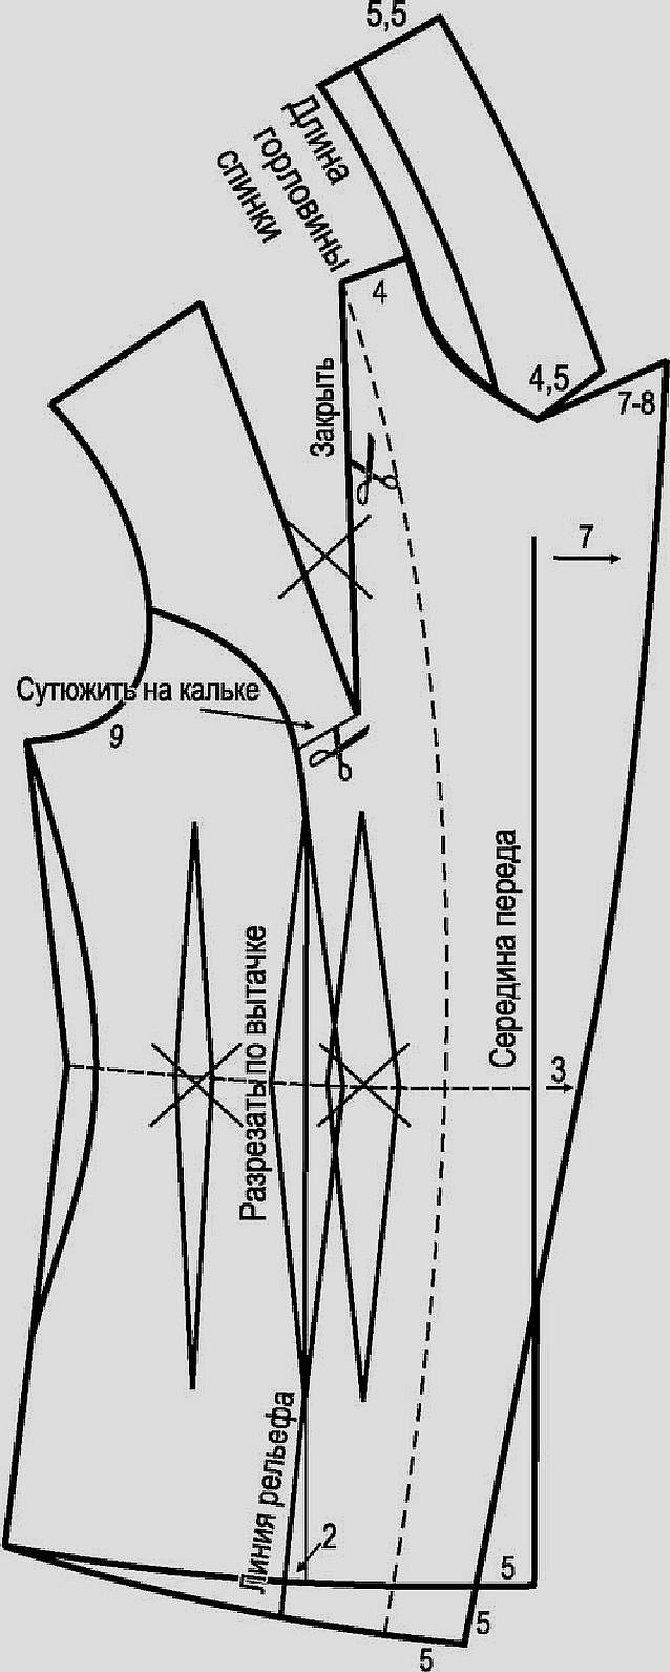
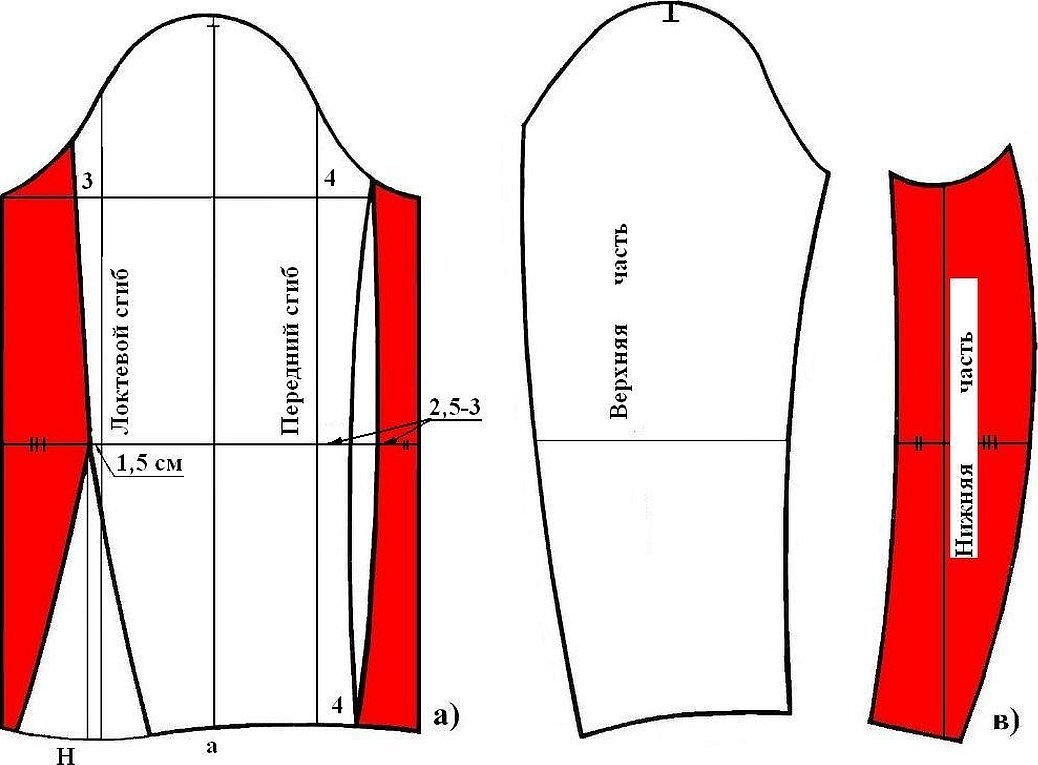
Construction of the collar and sleeves
The pattern for the turn-down collar and sleeves is a separate task. The process is performed separately, as is the layout. For the base of the collar, the configuration of the jacket model is taken along the shelf with the lapel. To do this, mark the location of the upper loop, measure the height of the stand and the fold axis along the lapel. A tangent to the throat runs parallel to them. Then the ledge is formed, which on one-piece collars smoothly passes to the flight.
To make one-piece sleeves, take a classic pattern on a rectangle, in which the upper and lower edges are the width of the element, and the left and right. - the length of the sleeves. The width is defined as a third of the half-girth of the chest + 2 cm. The height (length) is ¾ of the depth of the armhole + 2 cm.
Step-by-step instructions for joining parts
Step-by-step sewing of the jacket and instructions for sewing all the parts together are as follows:
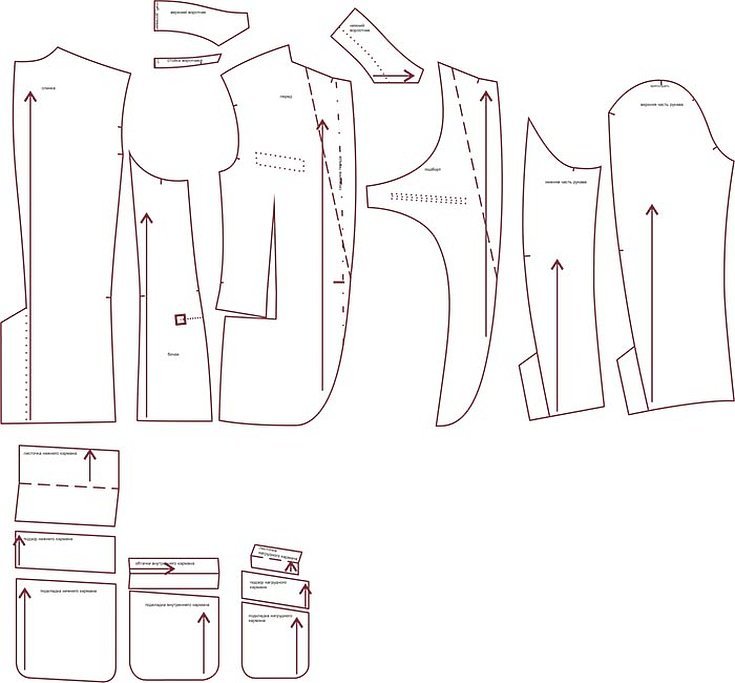
- Lay out all the pieces on the base and lining. Cut out with seam allowances;
- Gather the pad onto the sleeveless chest;
- Assemble the shelves and back from the base;
- Cut out the sleeves and sew in shoulder pads;
- Sew the lining material to the bottom;
- Sew buttons on the basting marks;
- Make buttonholes.
Important! As already mentioned, the pattern of sleeves and collar is a separate process that should be done on a separate layout. It is also worth assembling the chest pad at the initial stage without sleeves.
Thus, it was analyzed how to sew a men's jacket. The technology of its sewing is not much different from sewing a men's and women's jacket. It is quite difficult to make a pattern yourself, so you can use a resource such as Burda Style and other sites that provide ready-made and simple drawings. After mastering simple patterns, even a beginner will be able to make something similar using a master class.


