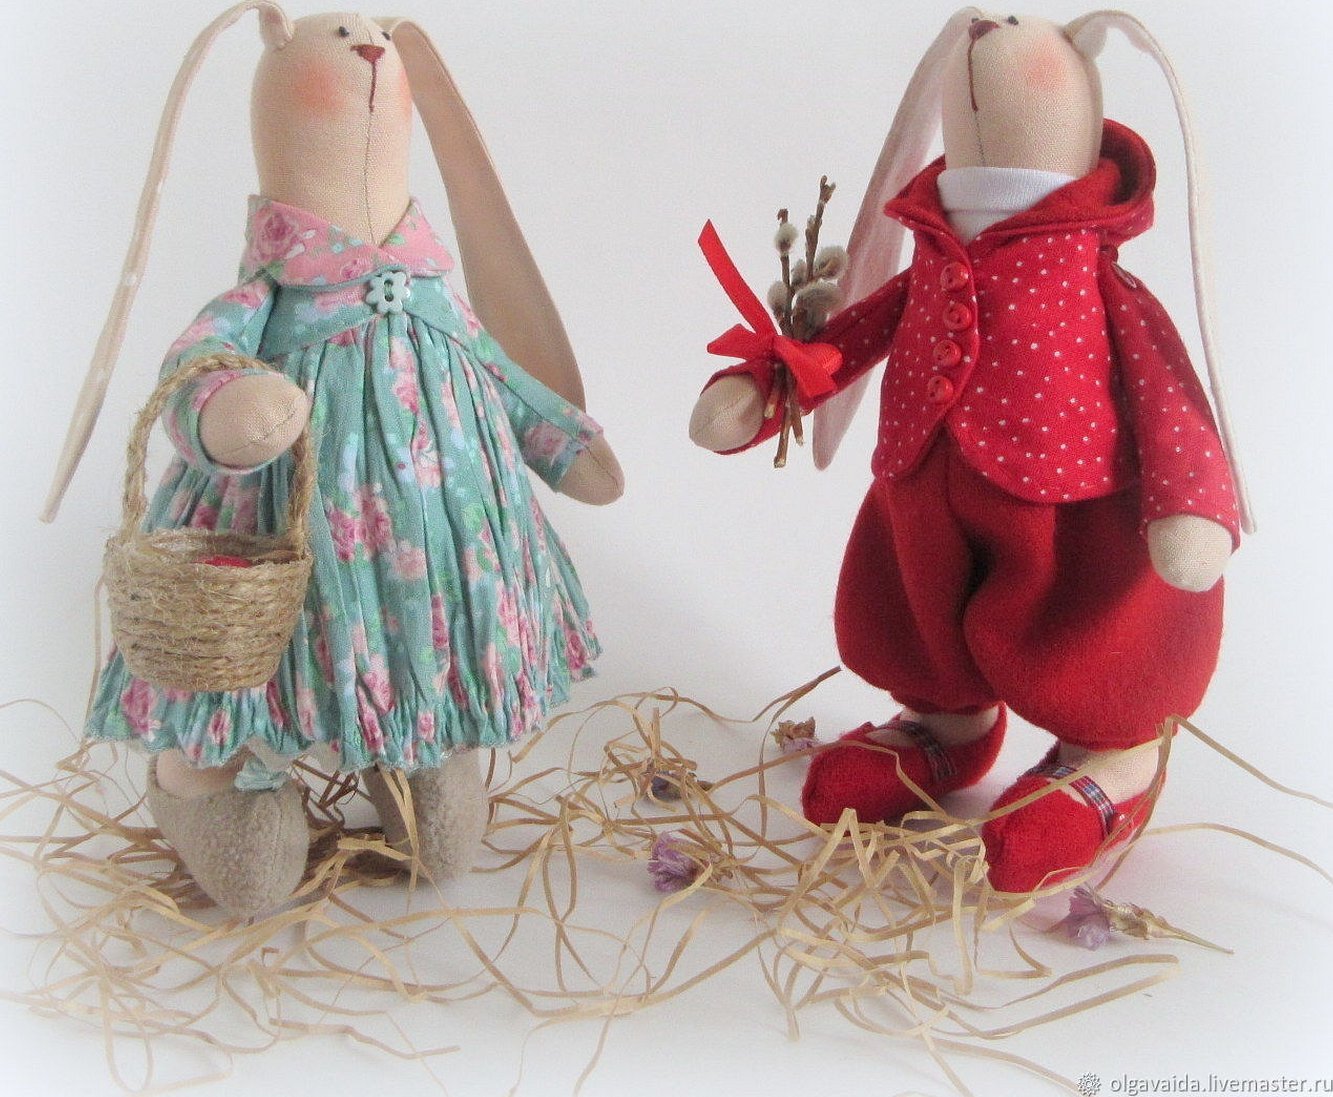
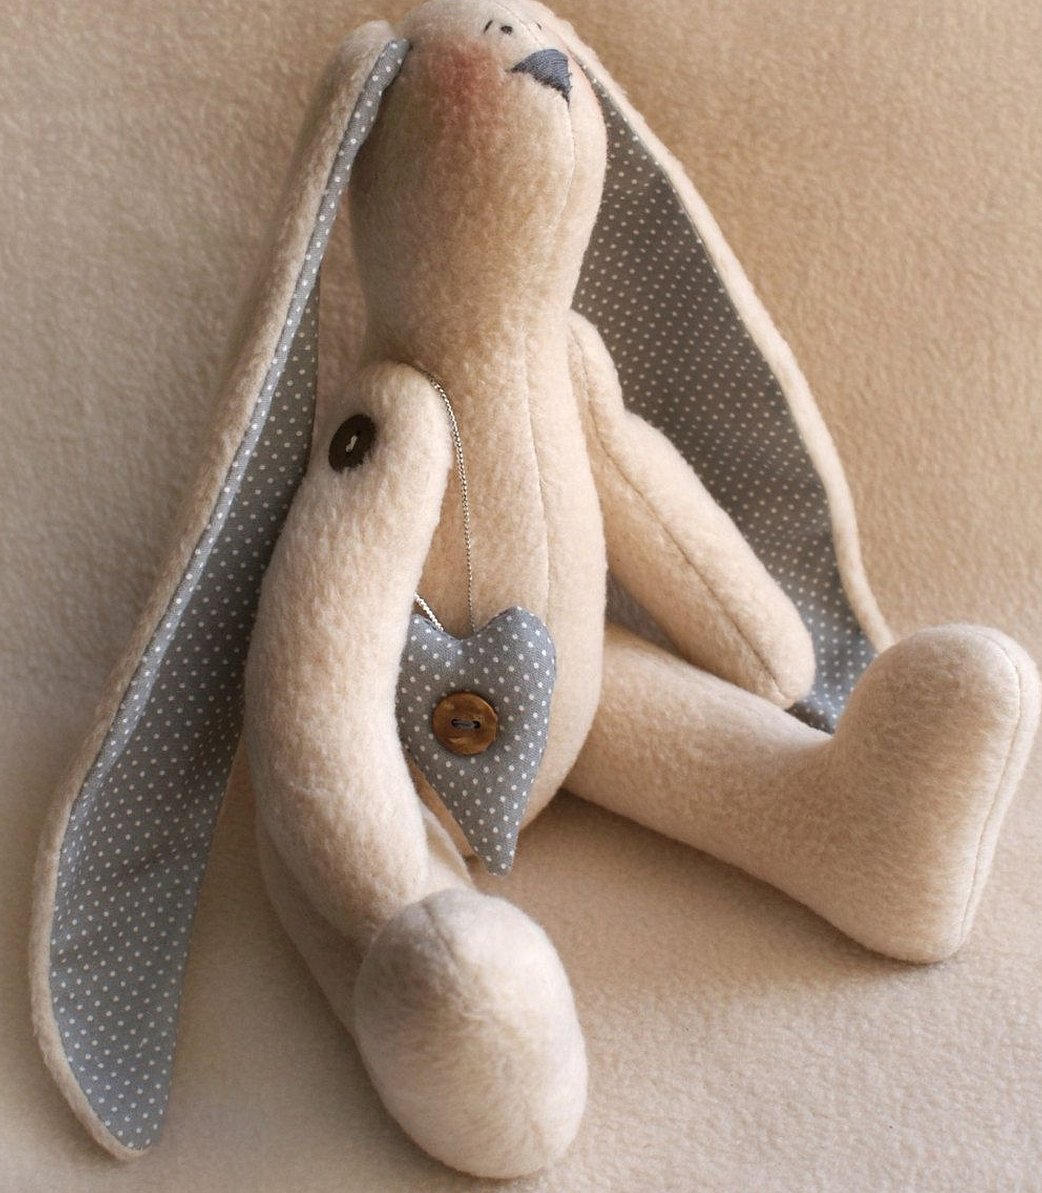
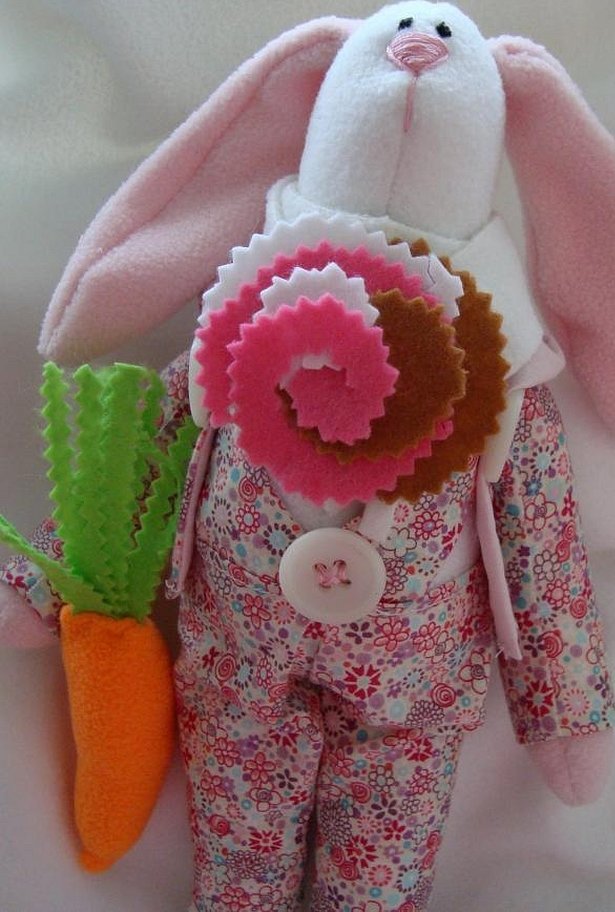
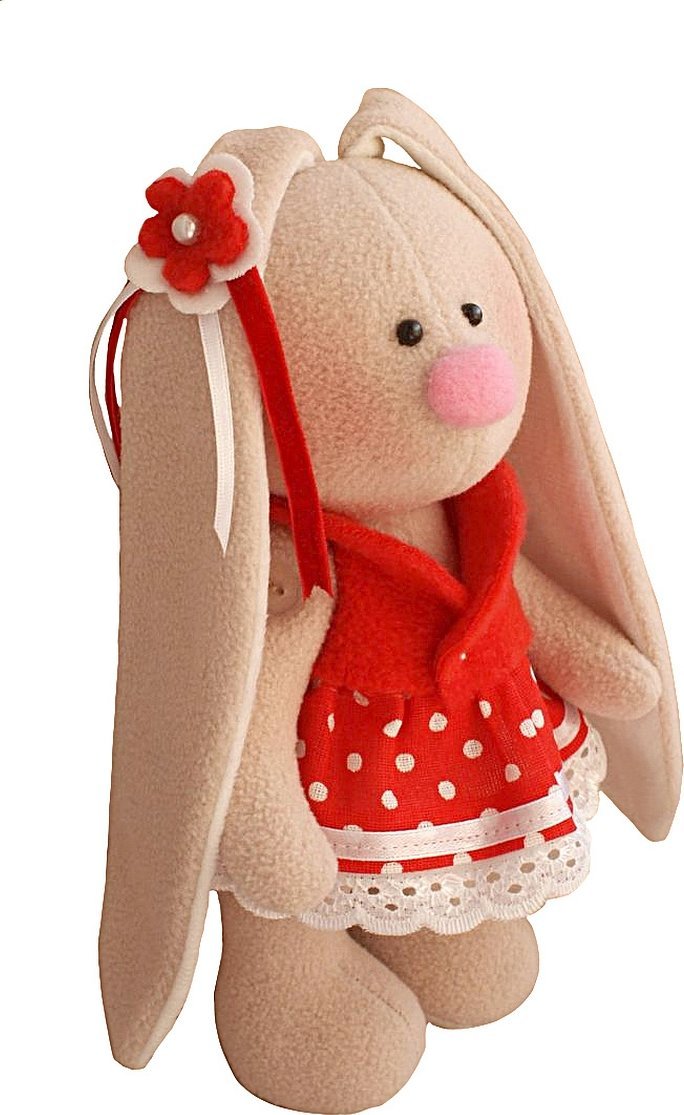
The Tilda hare is a toy that became popular several years ago. Today, it is made by craftsmen all over the planet. What is the Tilda hare pattern, how to sew it yourself, how to create a hare's body and clothes for it? More on this and more below.
Tilda the Hare
Tilda the Hare is a variation of the first doll that appeared in 1999 in Norway. The first model was invented by Norwegian resident Toni Finnanger. She not only made the first best-selling model, but also prepared a pattern for it. After that, other patterns appeared. Thus, a whole store with textile models, accessories and patterns appeared, and also its own production was created with novice craftsmen. After the first doll was released, a little time passed, and such a hero as the Hare appeared.
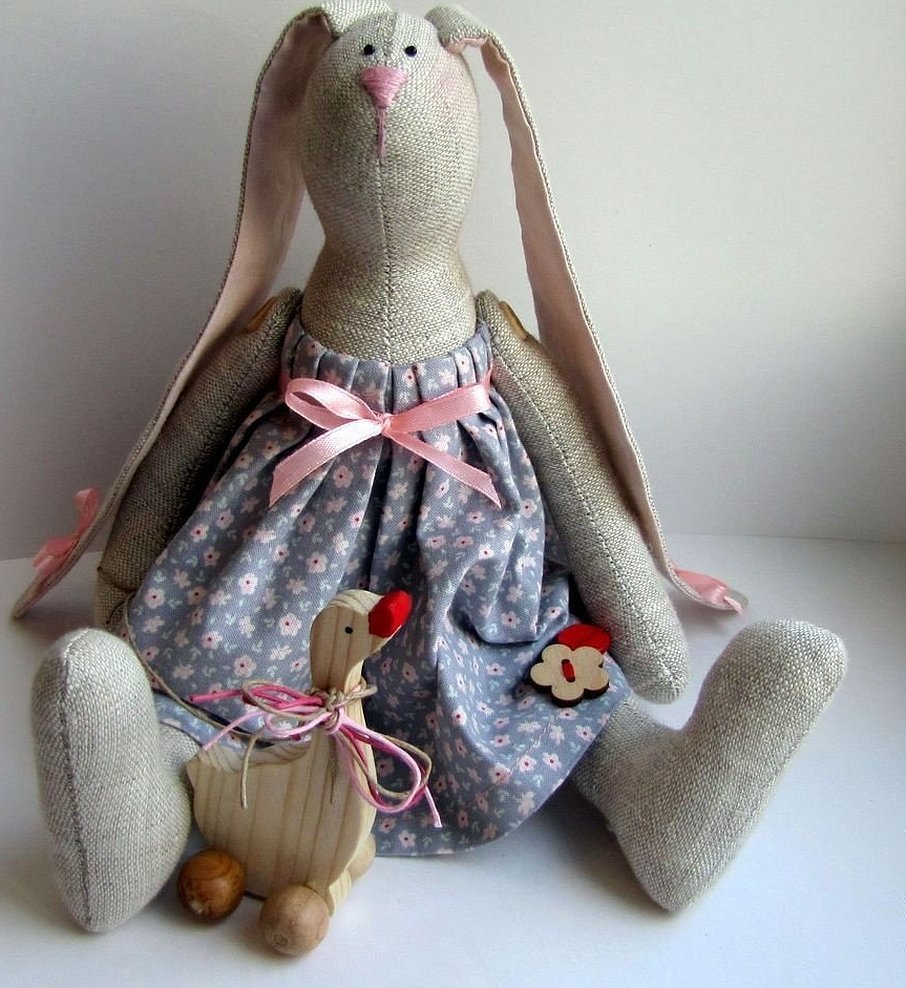
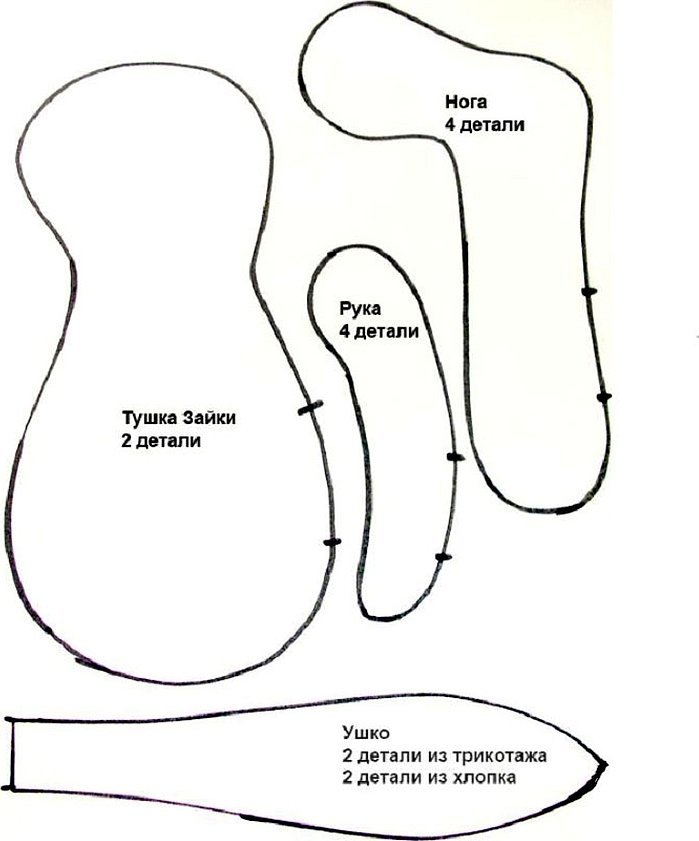
The classic life-size Tilda hare pattern was a diagram of an animal with an elongated body and a flattened head with an elongated muzzle. Its nose and mouth were clearly visible. The eyes were represented by two dots. The characteristic features were long ears, occupying 80% of the length of the entire body, long paws and elongated legs, similar to human ones. The model is distinguished by its laconicism and some asceticism, since only the nose remains drawn. The paws and body are not always proportional.
Choice of fabric
The Tilda hare made with your own hands has distinctive features that are hard to miss. Today, many craftswomen around the world use only natural fabrics in the form of high-quality cotton, practical calico, thick linen, aesthetic poplin and beautiful staple to create it, since the toy was originally intended for children. The colors of the fabric are discreet, but not faded.

Fleece and flannel are often used for the base. Silk and jersey are used as fabric for sewing bunny clothes, along with terry cloth. As for the coloring, these can be canvases with rustic and country motifs. For stuffing, synthetic padding with holofiber is used. Some needlewomen also resort to regular cotton wool. As for decoration, lace, textile elastic bands and satin are additionally used.
Necessary tools
In order to sew a Tilda hare yourself, you need to take textiles for the base, stuffing material, fabric for decorating the ears and muzzle, and fabric for clothing. You will also need blush or paint to create a blush.
It is worth mentioning that since Tilda is often decorated with various accessories, the following will be additionally needed in the work: beads, buttons, ribbons, openwork Swarovski beads, feathers, artificial flowers, clips, smooth and machine embroidery, sculptural products made of polymer clay, knitted inserts, miniature floral elements and other materials. Naturally, all of the listed decorative items can be used at will.
Scheme and master class
To embroider a Tilda hare using a ready-made pattern, you need to take cotton as a base, knitwear as an addition, synthetic filler for stuffing, scissors, cotton threads, blush, buttons and lace. You will also need a sewing machine, an iron and a pencil.
Algorithm of actions:
- First, you need to redraw the finished pattern onto flesh-colored fabric folded in half.
- Next, sew the outline on a sewing machine and cut out the finished pattern with scissors.
- Turn the resulting parts inside out and stuff them with synthetic padding.
- Carefully sew on the legs and arms by hand.
- Make the ears of a hare. To do this, fold the knitted fabric with the right sides facing each other, make a pattern and stitch it.
- Then secure with a blind stitch and iron.
- Sew the ears to the head by hand.

Bunny face
The Tilda hare's muzzle is an integral part of the body. It is created at the stage of creating the first drawing and forming the pattern. After passing the described stage of creating the model and stuffing it with padding polyester, all that remains is to make the muzzle. To do this, you need to schematically mark the location of the eyes, nose and mouth on the finished product, and then embroider them using floss. The type of embroidery in this case is a regular stitch. You can learn how to embroider a hare's nose or ear in another way by browsing through all sorts of formats on the Internet in natural size.
Please note! Beads or buttons can be used as eyes, but in the classic model the eyes are also embroidered with floss. The blush is created with a cotton swab and cosmetics. The mouth can be embroidered with black threads. This is optional.
The body of a bunny
The bunny's body is assembled. First, the head and body are created using one pattern. Then the upper and lower paws are sewn onto the body. The last step is sewing on the ears. Some craftswomen create one pattern for two ears, while others create two. The classic model uses the first option. The paws, like the ears, are sewn on only by hand. This is a characteristic feature of the model. They are also created using a straight and simple stitch of a sewing machine. Alternatively, you can try to make the entire product yourself or make an unusual double stitch for the body and paws.
Making clothes
It is not difficult to create original clothes for the Tilda bunny, since all you need is to make patterns and sew them according to the sample. They are widely distributed on the Internet and are sold in well-known handicraft stores. They are often released as a ready-made sewing kit.
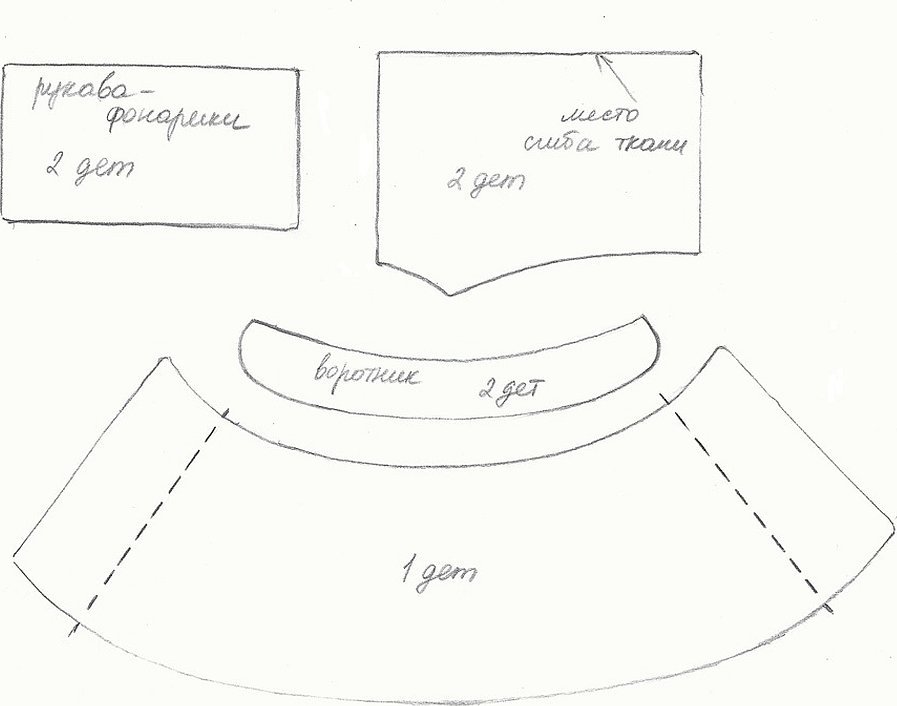
Sewing a dress for a bunny
Making any clothes for a girl bunny or a boy rabbit is not difficult today, since hundreds of patterns for every taste can be found online. All that remains for a novice craftsman is to redraw the drawings on the fabric, cut them out and correctly connect them using a sewing machine.
Important! If the pattern requires it, you also need to make darts so that the finished product fits the body according to the silhouette and is not asymmetrical.
Below is an example of a classic dress with a long lace skirt and pantaloons:
- To make trousers, you need to prepare a pattern on cotton gauze fabric with an allowance of 1.5 centimeters.
- Each leg should be folded in half and pinned to match the seam lines.
- Next, you need to make the internal seams and process them with an overlock.
- Fold back the bottom and iron.
- Sew lace to the ends along the very edge.
- Then place one leg inside the other, right sides together, and pin them together, matching the seams.
- Sew the product and process it with a zigzag stitch.
- Turn inside out and smooth out.
- Insert the rubber bands.
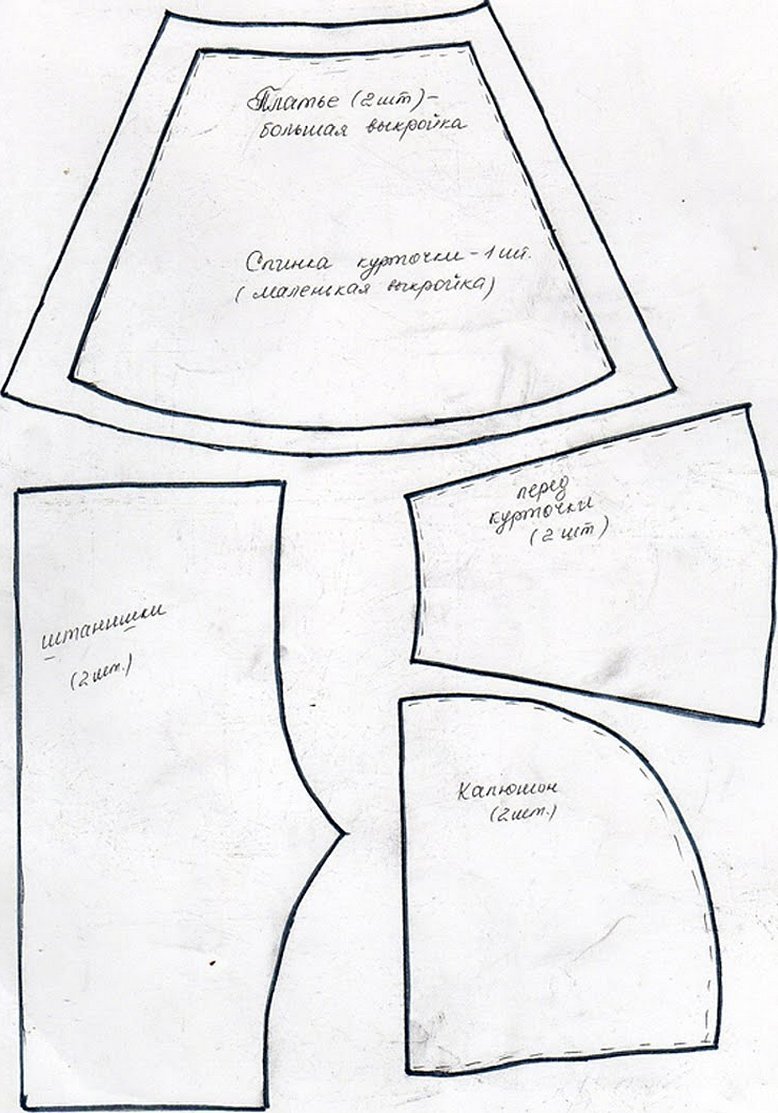
Next you can start making the skirt:
- Cut the fabric according to the finished pattern and sew.
- Treat the ends with a zigzag stitch.
- Sew lace or any other decoration to the end of the product.
- Insert the elastic band, tucking in the corresponding edges.
To make a topic you will need:
- Cut out the product according to the finished pattern.
- Leave a length allowance.
- Make a hole for the arms and sew elastic into the neck area.
- When ready, connect the top to the skirt. This can be done by hand or using a sewing machine.
Please note! The bodice and skirt should be sewn on the back side. If you can't do it neatly, you can come up with a belt made of fabric or fittings.
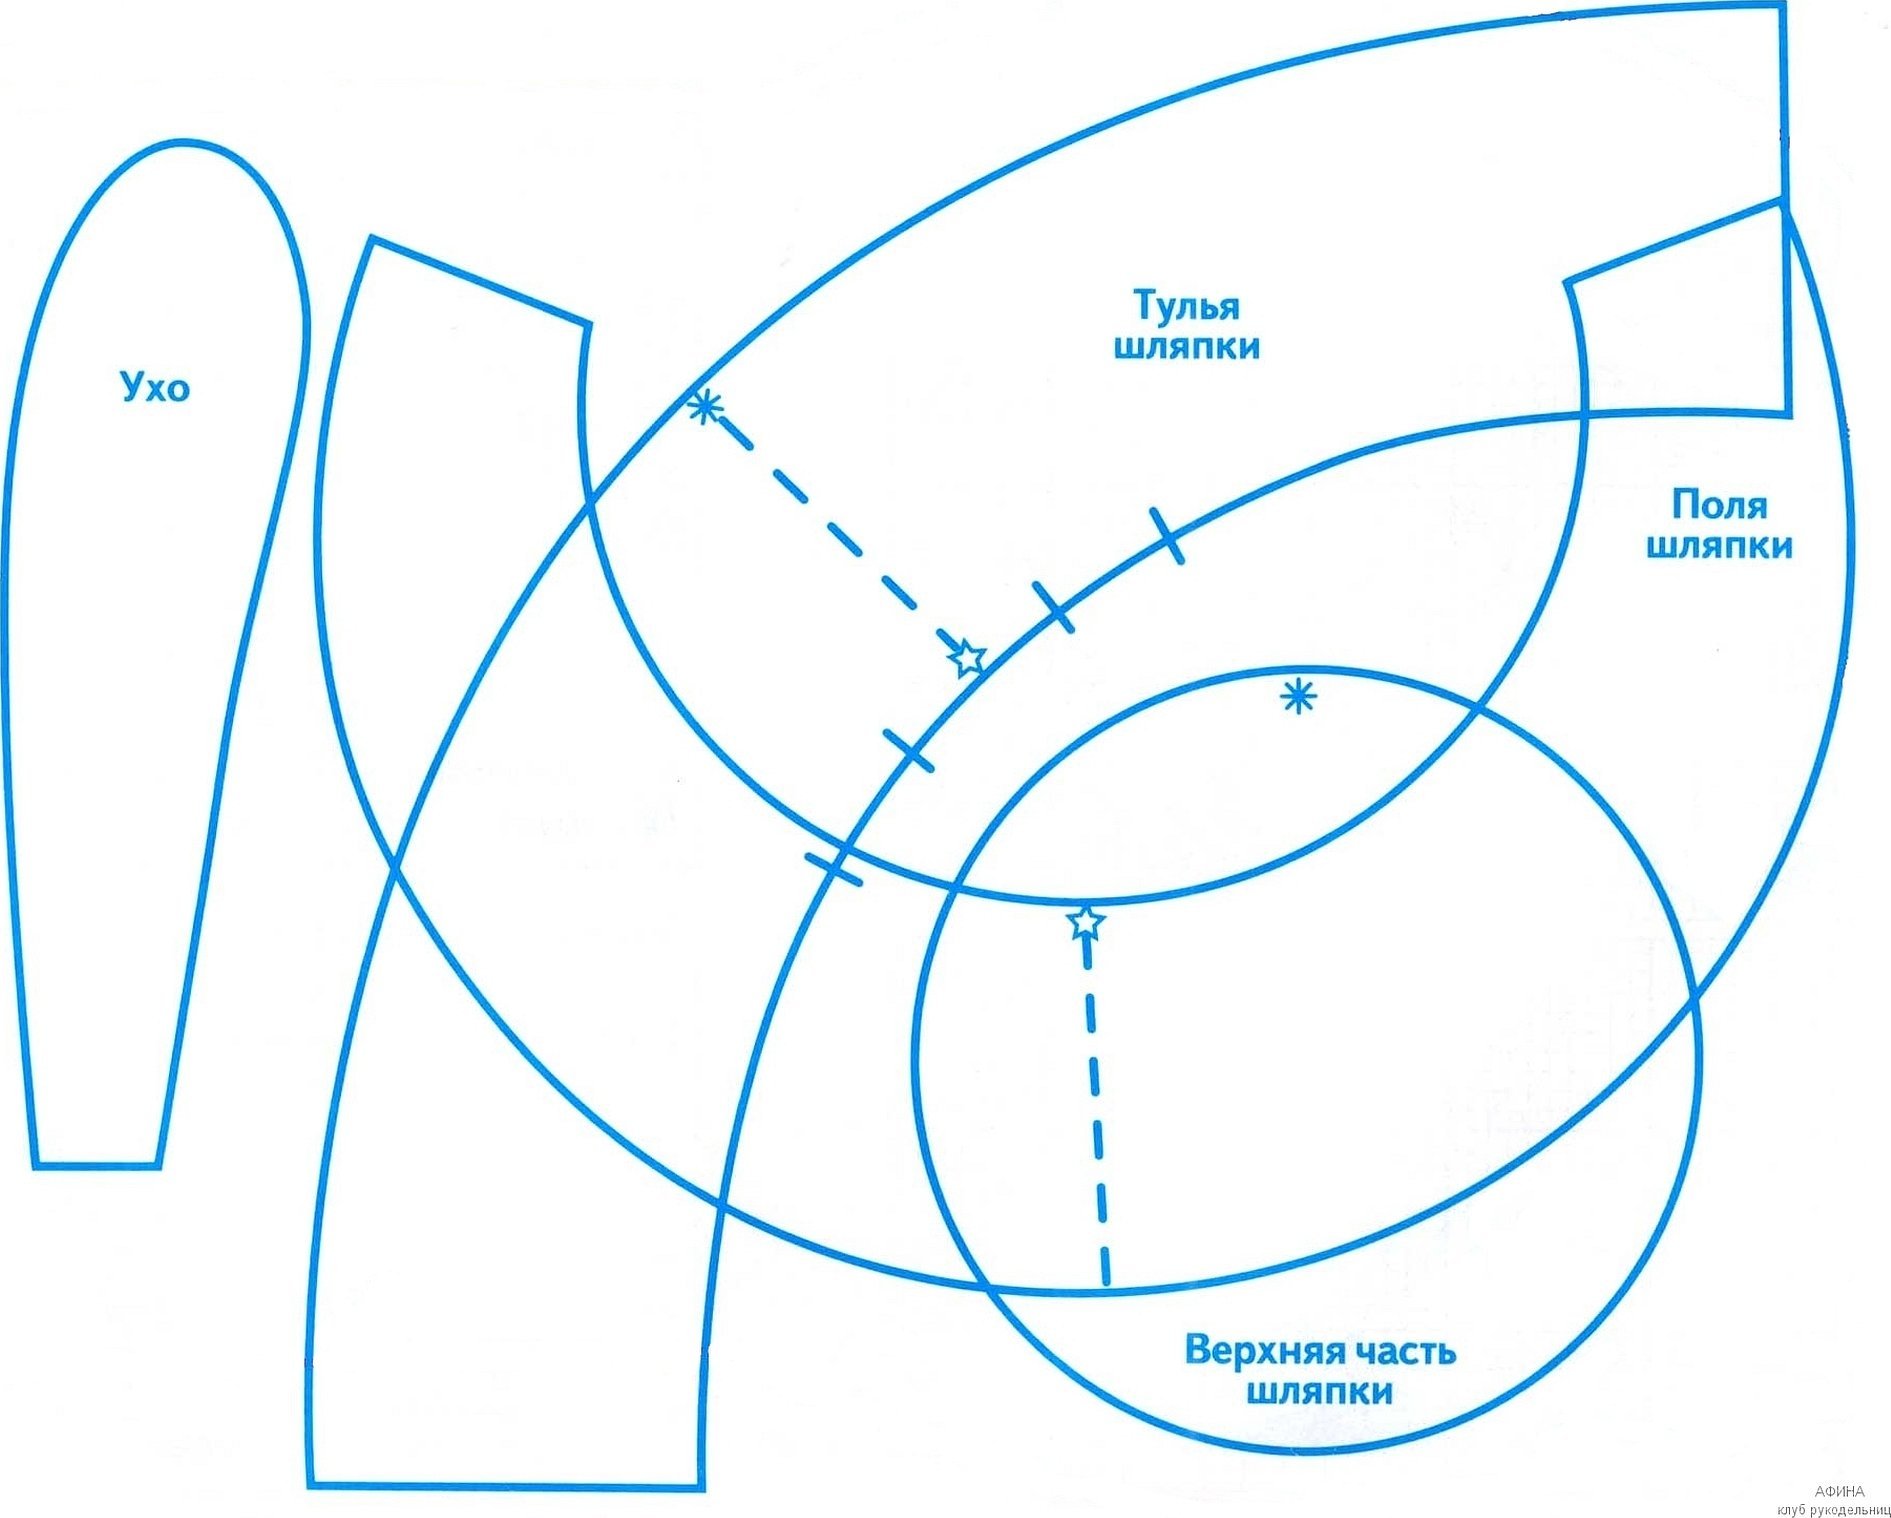
Panama hat
Making a Panama hat for a Tilda bunny is easy. Below is an example of a standard model of a headdress:
- In order to construct the product, it is necessary to take cotton textiles. It is desirable that the headdress matches the suit or dress.
- Next, you need to redraw the crown, bottom and brim from the finished scheme onto the prepared fabric and create the future pattern of the product. The number of crowns is 2 pieces. The number of brim pieces is 4 parts, 2 of which are folded.
- After drawing the details, you need to carefully iron the blanks and start sewing.
- From the back side, you need to connect the two crowns together.
- Then attach the bottom to them.
- After that, turn out and sew in the brim. All the details are sewn from the inside by hand or using a sewing machine.
Please note! To create a more interesting image, after finishing the design of the model, you can add a textile flower and sew it to the side of the product, capturing part of the crown.
In general, the Tilda Hare is a cute creature that can be made with your own hands today. It is not difficult to make a stuffed model yourself using the above schemes and step-by-step instructions. In cases where it is not possible to use schemes from the Internet, you can use schemes from ready-made kits. After creating the base and clothing, you can decorate the finished product with accessories.