A teapot warmer is a product aimed at reducing the amount of heat removed from boiling water and increasing its cooling time. How to sew a teapot warmer, how to sew a smart young lady, a bunny, an owl, a pig and a granny for a samovar for a beginner craftswoman according to the description? What material should the product be sewn from? More on this and more below.
Sewing a heating pad
To sew a simple hot water bottle or cover, you need to take the main fabric of any color, lining insulated fabric, scissors, an awl, threads, paper for the pattern, a pencil and cardboard. First, you should decide on the size of the future product. To do this, take measurements using paper. Make fabric samples according to the created paper patterns.
After they are formed, create a warm lining under the finished product. At this point, the product can be considered complete. At the end, you can decorate the warmer as you wish. For example, you can add stripes or a voluminous toy to it.
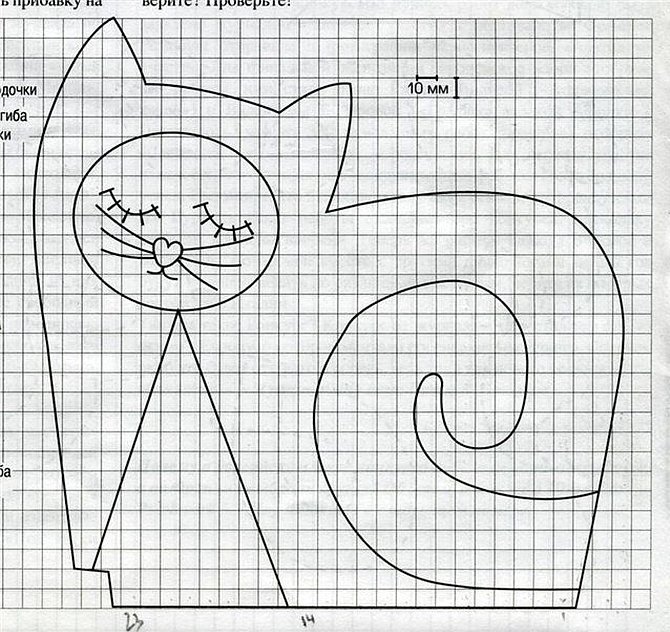
Tabby cat
To make a cat, you need to take the main part of the heating pad, lining, insulation, tail, muzzle in the amount of two pieces, and then fabric for the paws in the amount of four pieces. Then you should take the details of the heart, nose and cheeks.
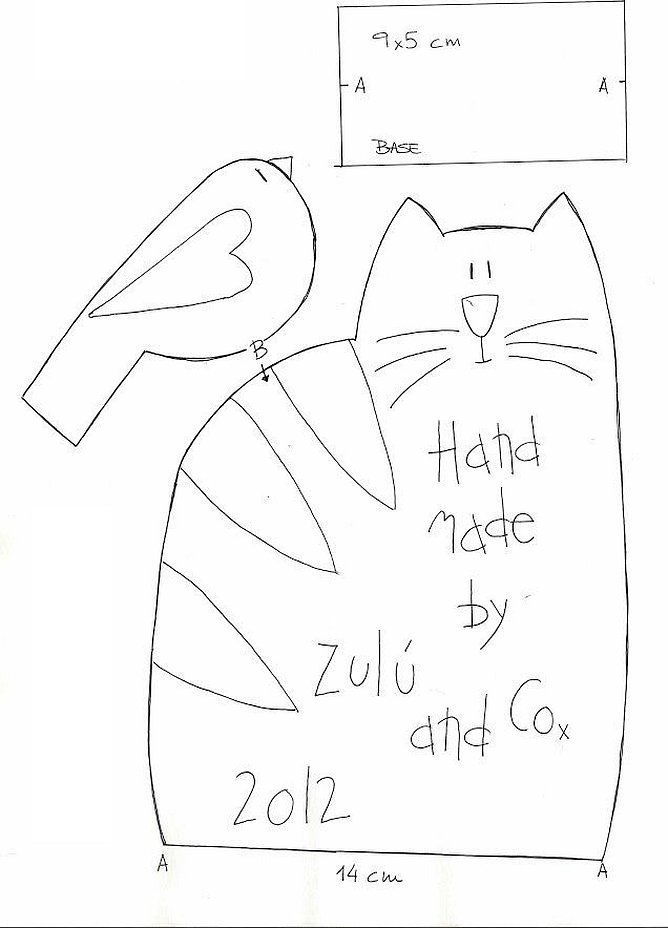
First, you need to sew the main parts of the warmer together and make an edging. Then sew the lining to the product and start constructing the cat. To make a voluminous cat, first you need to sew the tail parts together and iron them. Then stuff the tail with padding polyester.
The next step is to sew the muzzle parts and stuff them with padding polyester, just like the nose. Then you should make the paws and sew the tail to the edge of the warmer. At the end, you can make a loop, ears and somehow decorate the product.
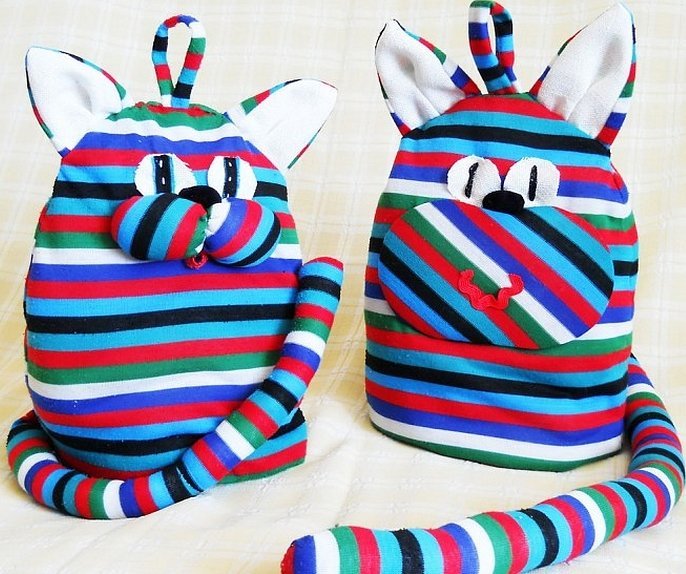
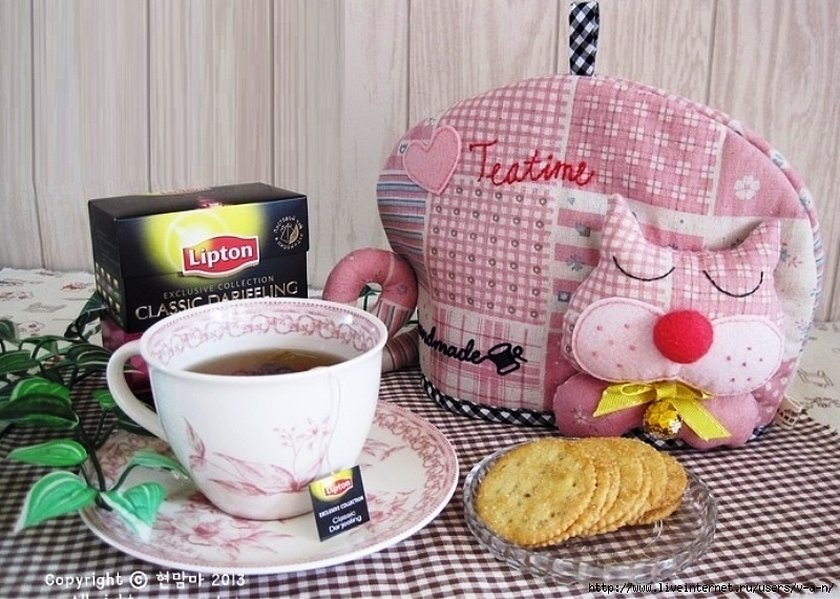
Pink kitty
A pink cat is a modern kitchen accessory that can be made by hand. It is constructed in the same way as a regular hot water bottle. Two types of materials can be used for this. Then the animal's muzzle and corresponding darts on it, a curved tail, paws and back are created. The muzzle is created in two layers: the first is a lining made of calico, and the second is made of knitwear or other fabric.
German and Korean cotton, Russian flax and Belarusian calico are perfect for this. The ears are complemented with openwork braid. After attaching the muzzle to the created warmer with lining, the paws are sewn on. Then the back of the cat's body is made and at the end the tail is sewn on. At the very end, the decor is created: eyes, nose, mouth and whiskers are sewn on.
How to sew a smart young lady
A charming doll-warmer can be made from all sorts of fabric scraps. A textile souvenir with its own hands is a fashionable handicraft trend.
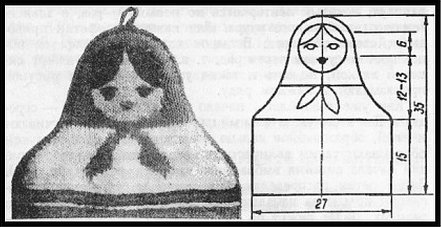
A hot water bottle made in the form of a girl dressed in a fluffy dress is a traditional kitchen attribute. Previously, it was made based on the Russian folk peasant and merchant costume. To obtain such a product, it is necessary to make a base, and then connect all the patterns together.
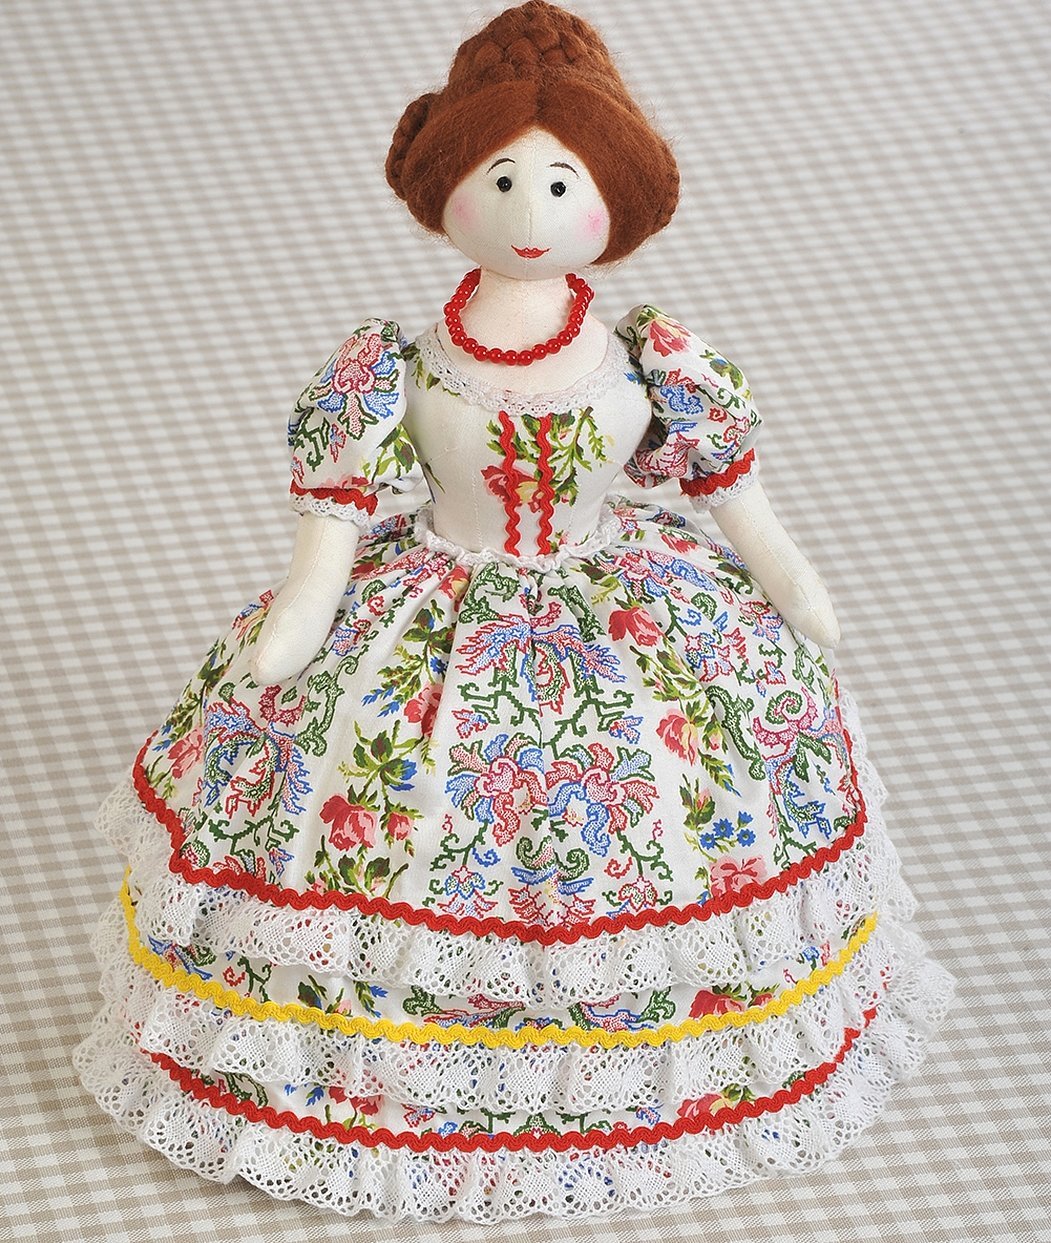
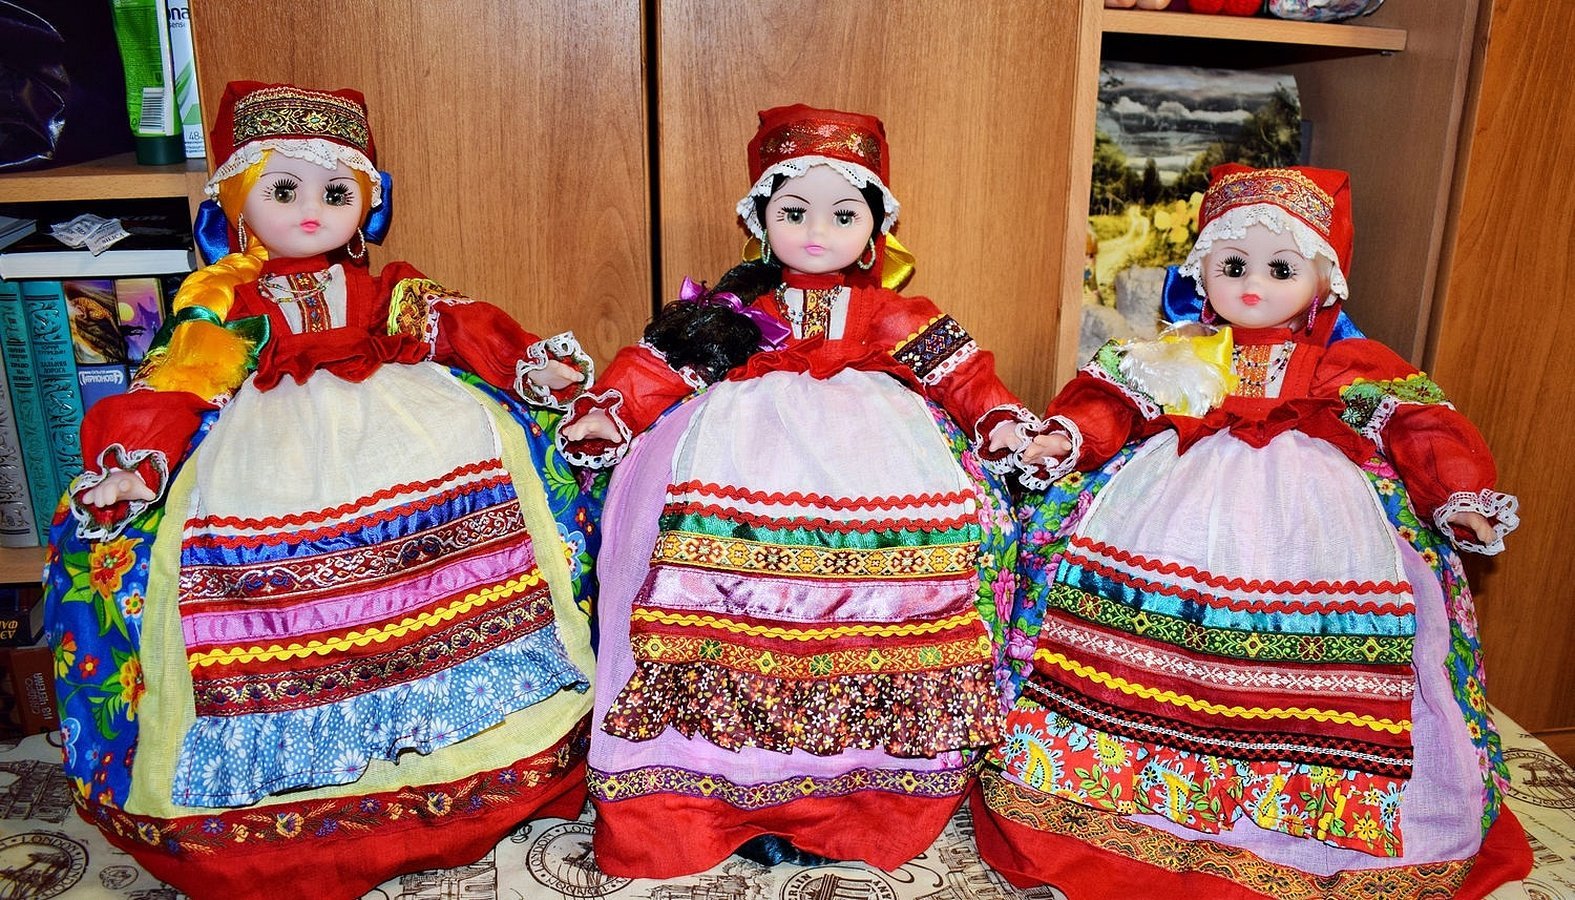
Baba on a samovar
According to the culture of Russian tea drinking, a teapot was placed on a teapot with a warmer in the form of a woman or a doll, a rosy beauty with a lush, bright skirt. Today, many people make such a thing using standard step-by-step instructions, a pattern, and parts of the hand and head of a Barbie or baby doll. The upper part of the body should be sewn from fabric and stuffed with cotton wool or synthetic padding. A lush skirt with lining insulation should be sewn to the waist.
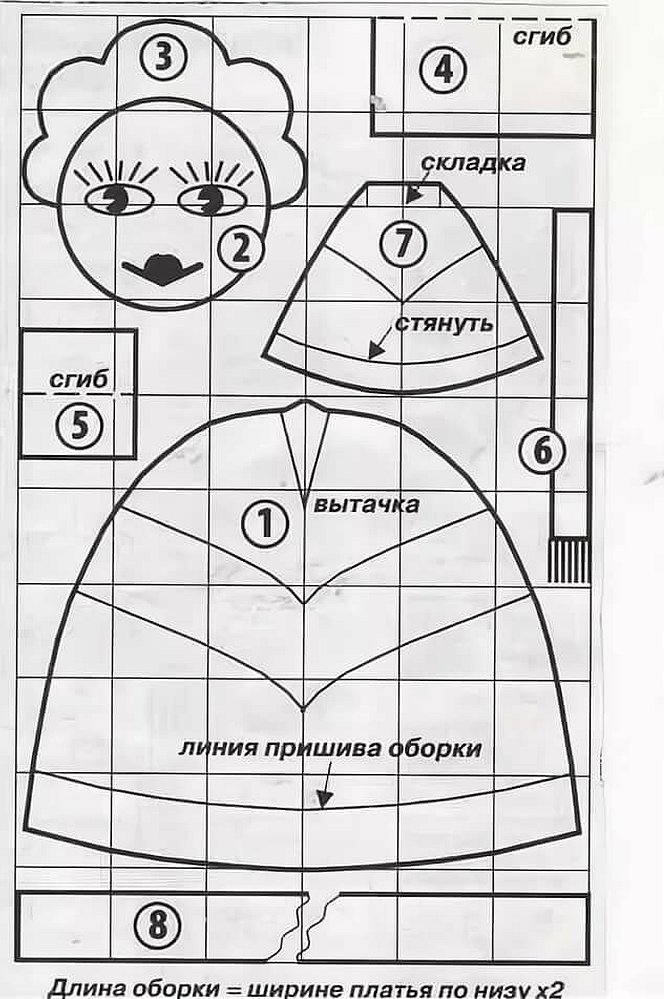
A life-size teapot doll pattern can be represented as a traditional Russian folk beauty, complete with a sarafan and kokoshnik, or as an old man Hottabych, wearing a striped quilted robe.
Tilda teapot warmer
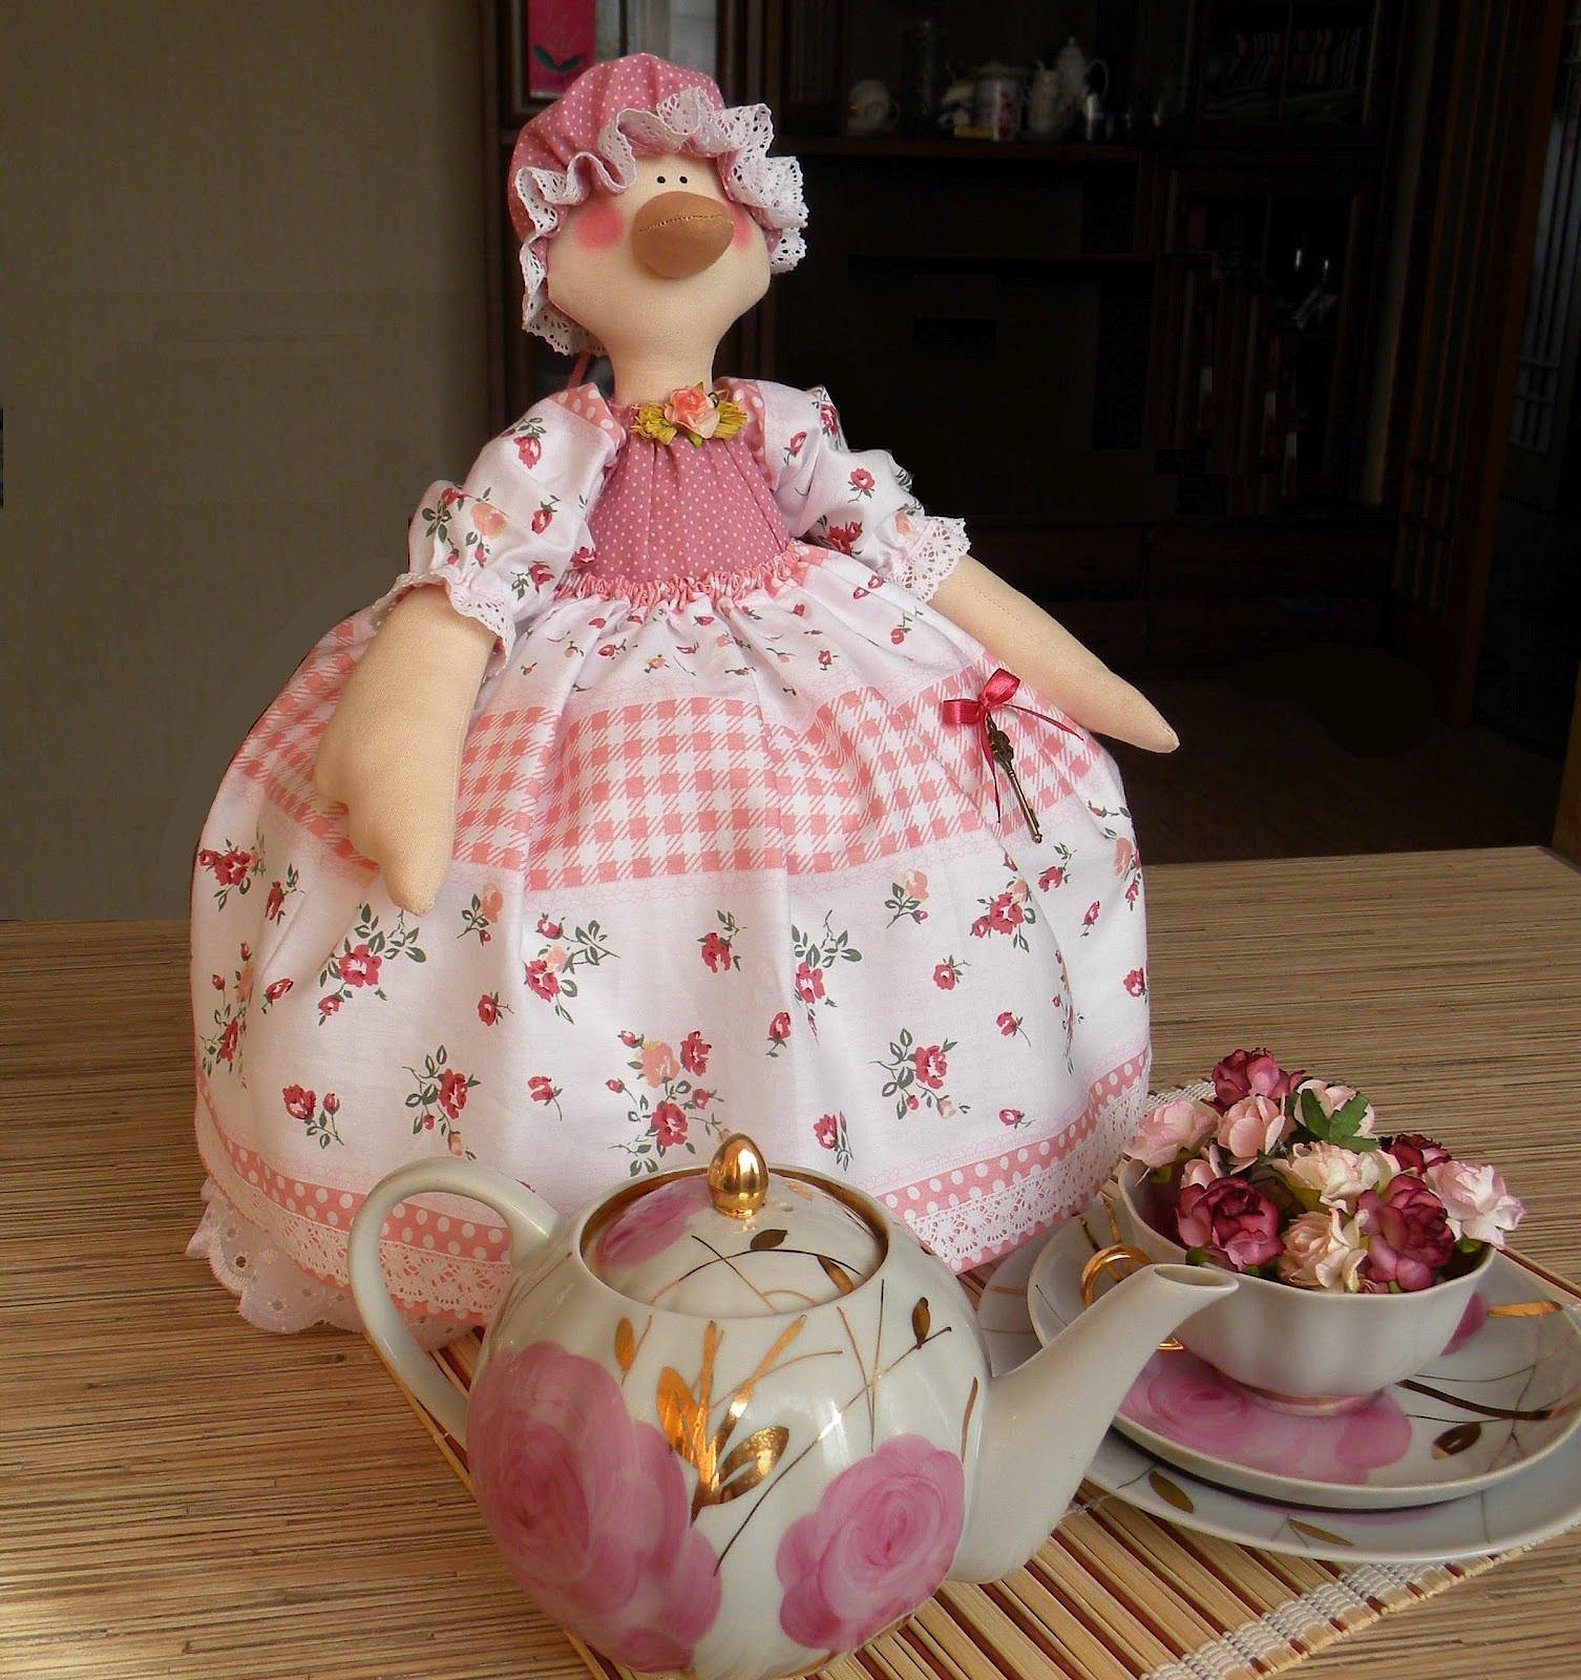
Tilda is a Scandinavian doll created by Norwegian doll maker Tone Finanger. It has its own unique structure: a small head, large hips, a small chest and a small waist.
In response to the question of how to sew a doll on a teapot, it is worth pointing out that creating a Tilda teapot warmer is no different from any other warmer with a doll. First, you need to cut out the fabric with insulation, and put a layer of insulation into the fabric.
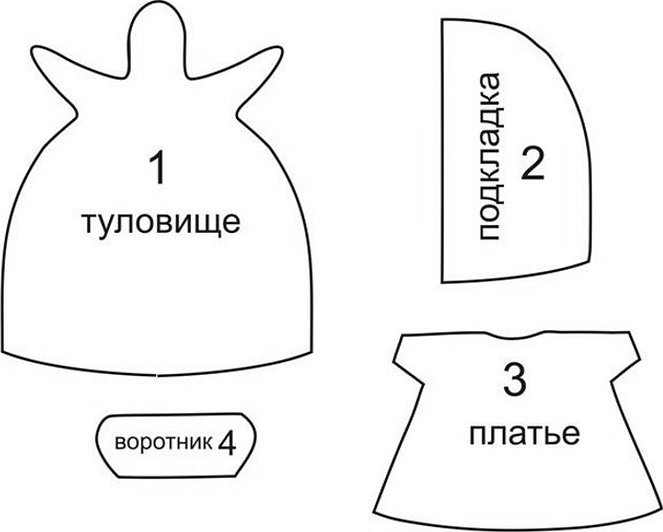
Next, quilt the layer and join the edges together. Make a mark on the top edge and leave room for the body. Then cut out the body and arms according to the available template. Sew all the darts using a sewing machine. Turn the pieces inside out and stuff them with cotton wool. Sew on the bottom of the body. Cut out the skirt with sleeves and blouse.
Next, connect the arms and body, sew the skirt sides. Gather the top of the skirt edge and process it with a zigzag. Then connect the skirt with the warmer and the body, sew the lace on the sleeves with the neck. Make eyes and hair. Draw blush with makeup or a pencil. Then decorate the doll, if desired. For example, you can complement her dress with flowers, fittings and any other items.
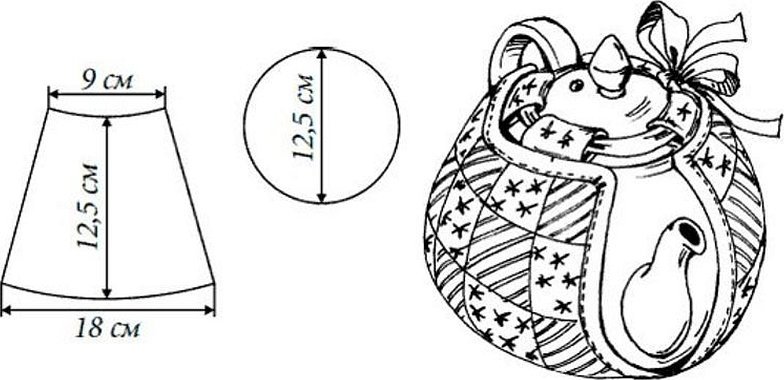
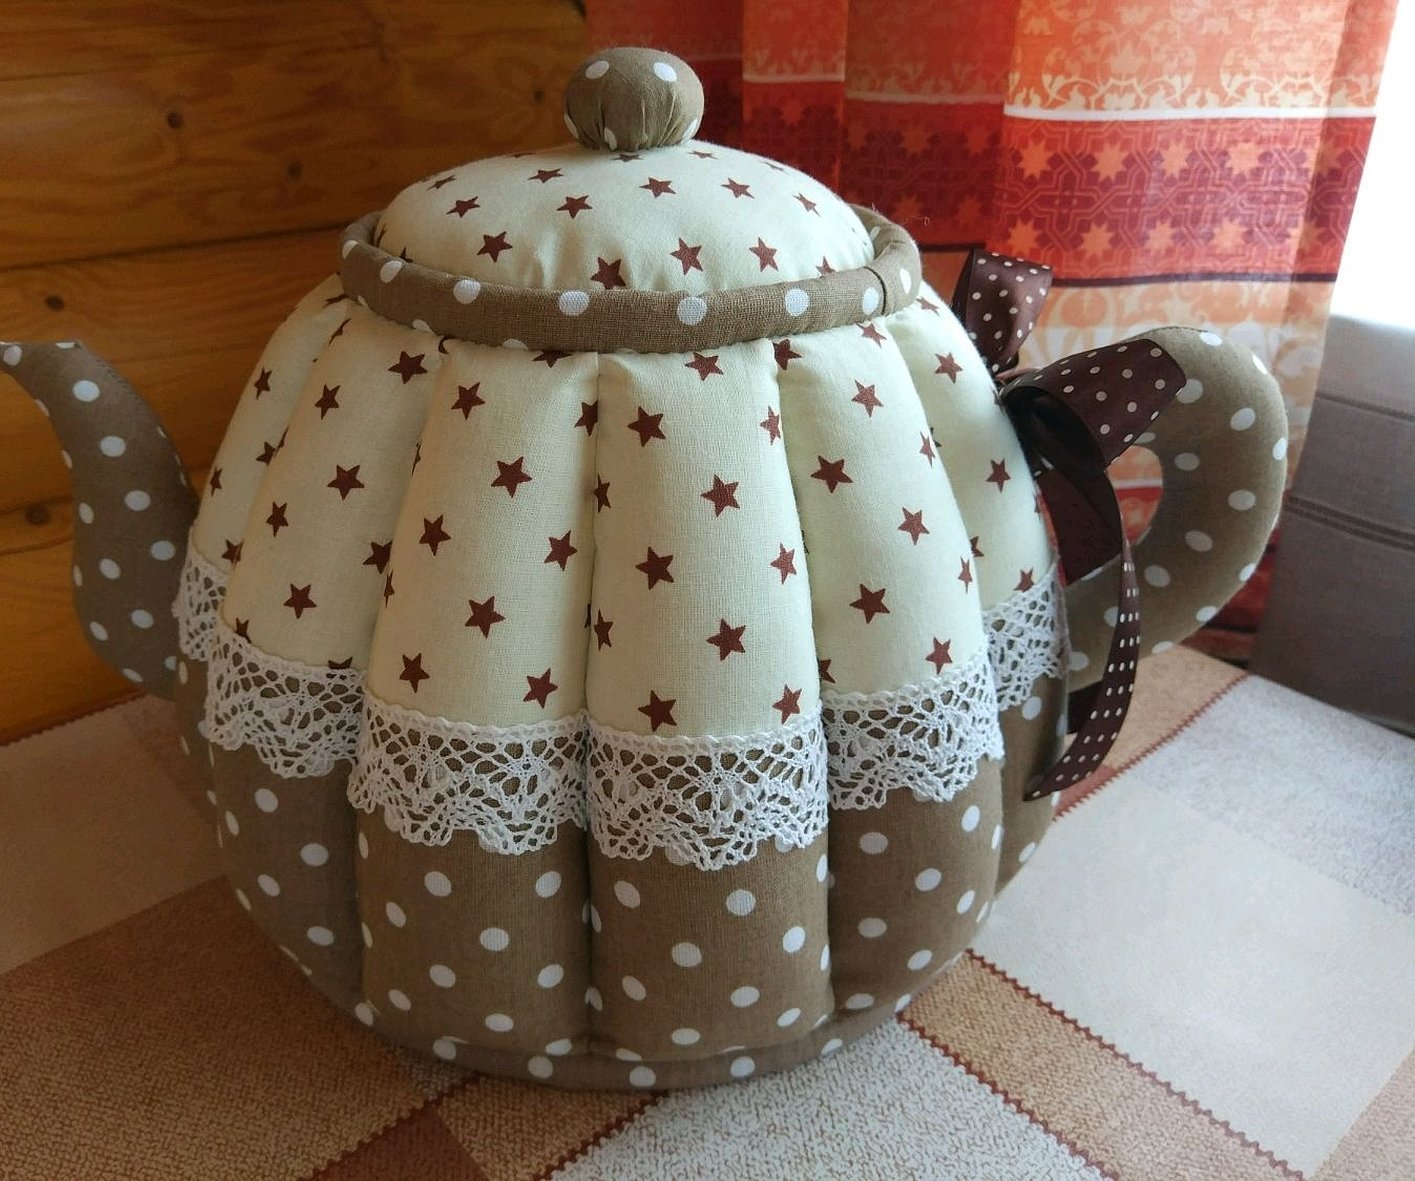
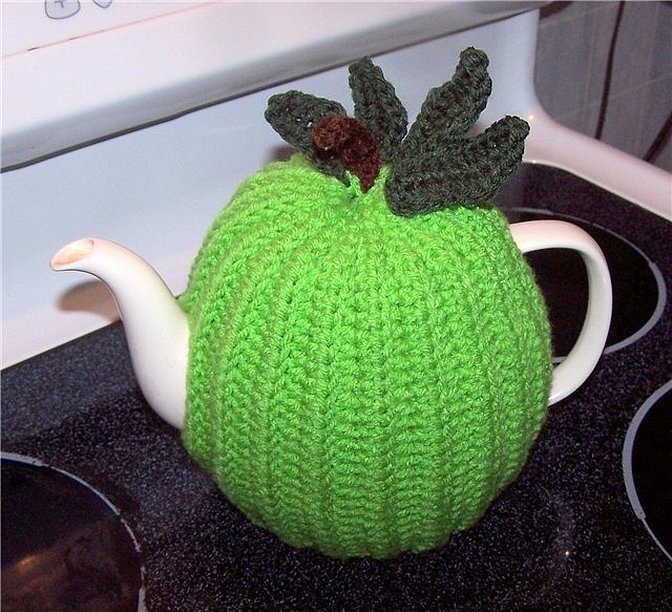
In the form of vegetables and fruits
You can sew a teapot warmer with your own hands, patterns and designs in the form of an orange, tomato and apple. The spherical shape can be made from parts designed in the form of symmetrical petals, the bottom of which is cut straight. First, you need to build a pattern according to the corresponding dimensional parts. Then cut out several paper parts and connect them with a pin or stapler. Then put it on the teapot. If necessary, the template can be adjusted.
Please note! Next, you should lay out the fabric blanks, trace them, taking into account the allowances, and cut out the details in a sequential manner, using colored decorative material that will serve as an insulating layer and a lining that will touch the teapot.
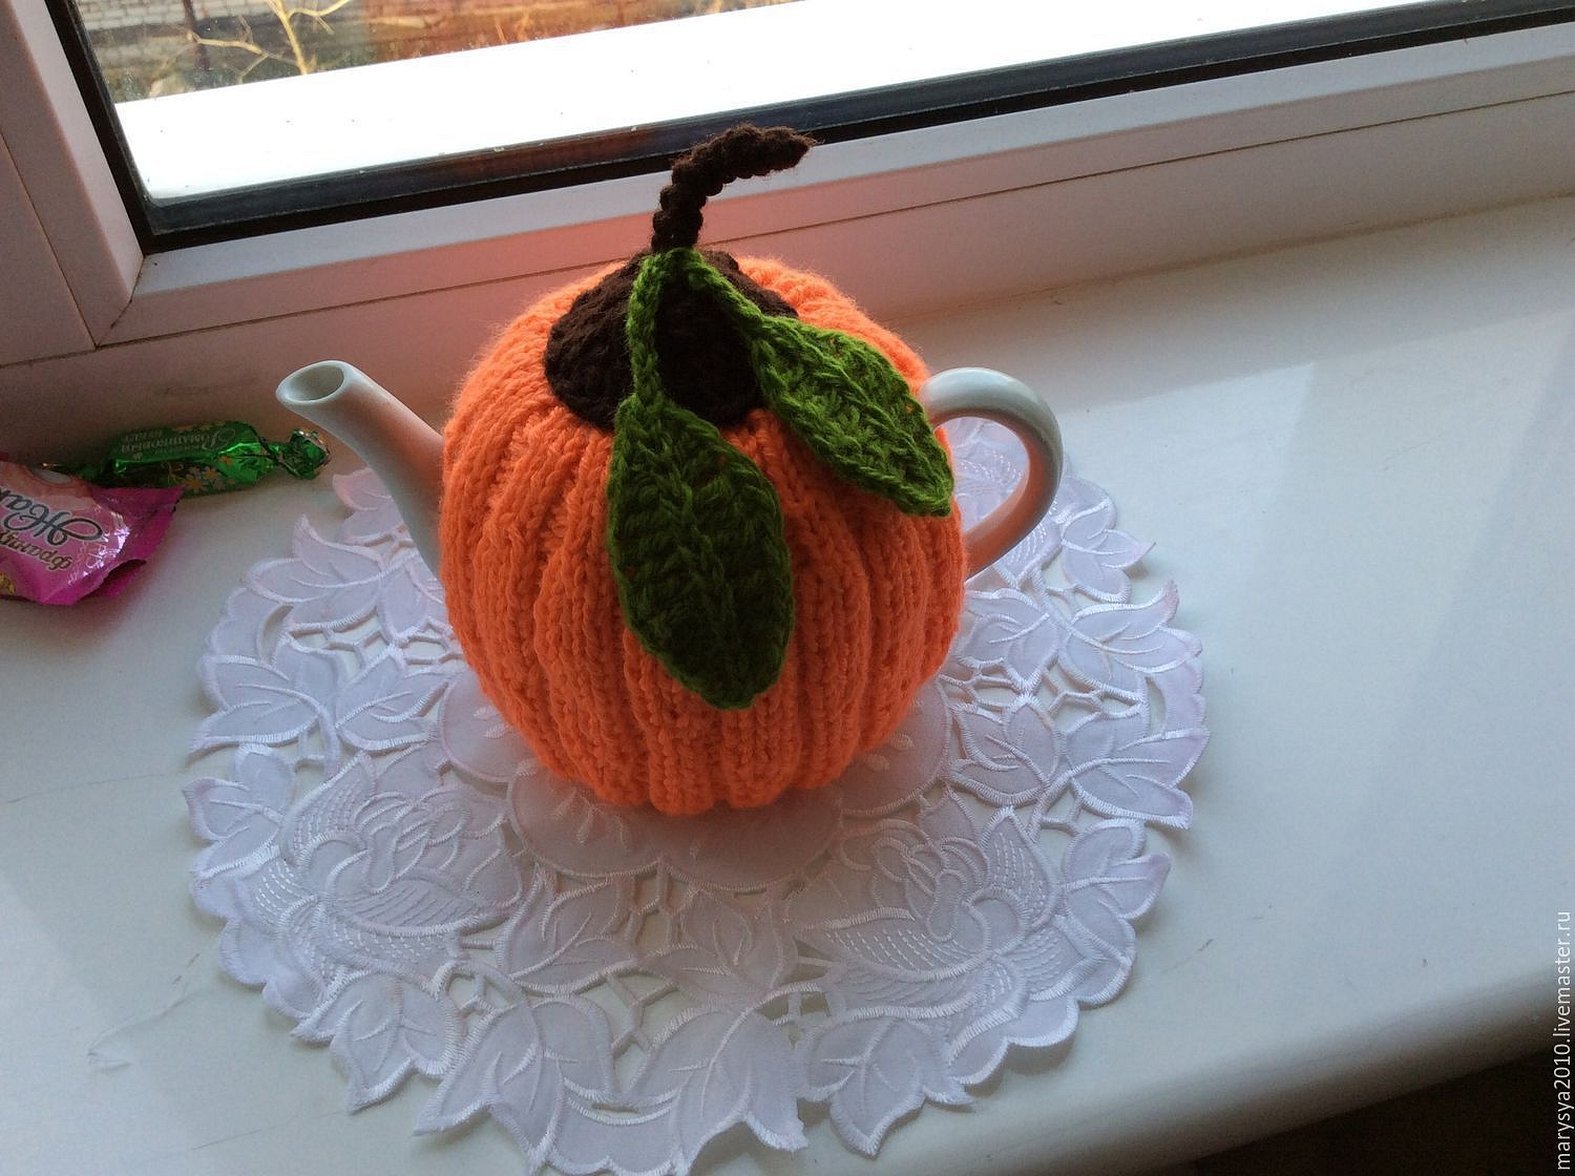
Then you need to sew the parts. If they do not have a very dense structure, they should be folded in the desired surface one on top of the other with the right side inward. Stitch the hem, and then the main seam along the contour. Finally, turn the product inside out and iron it.
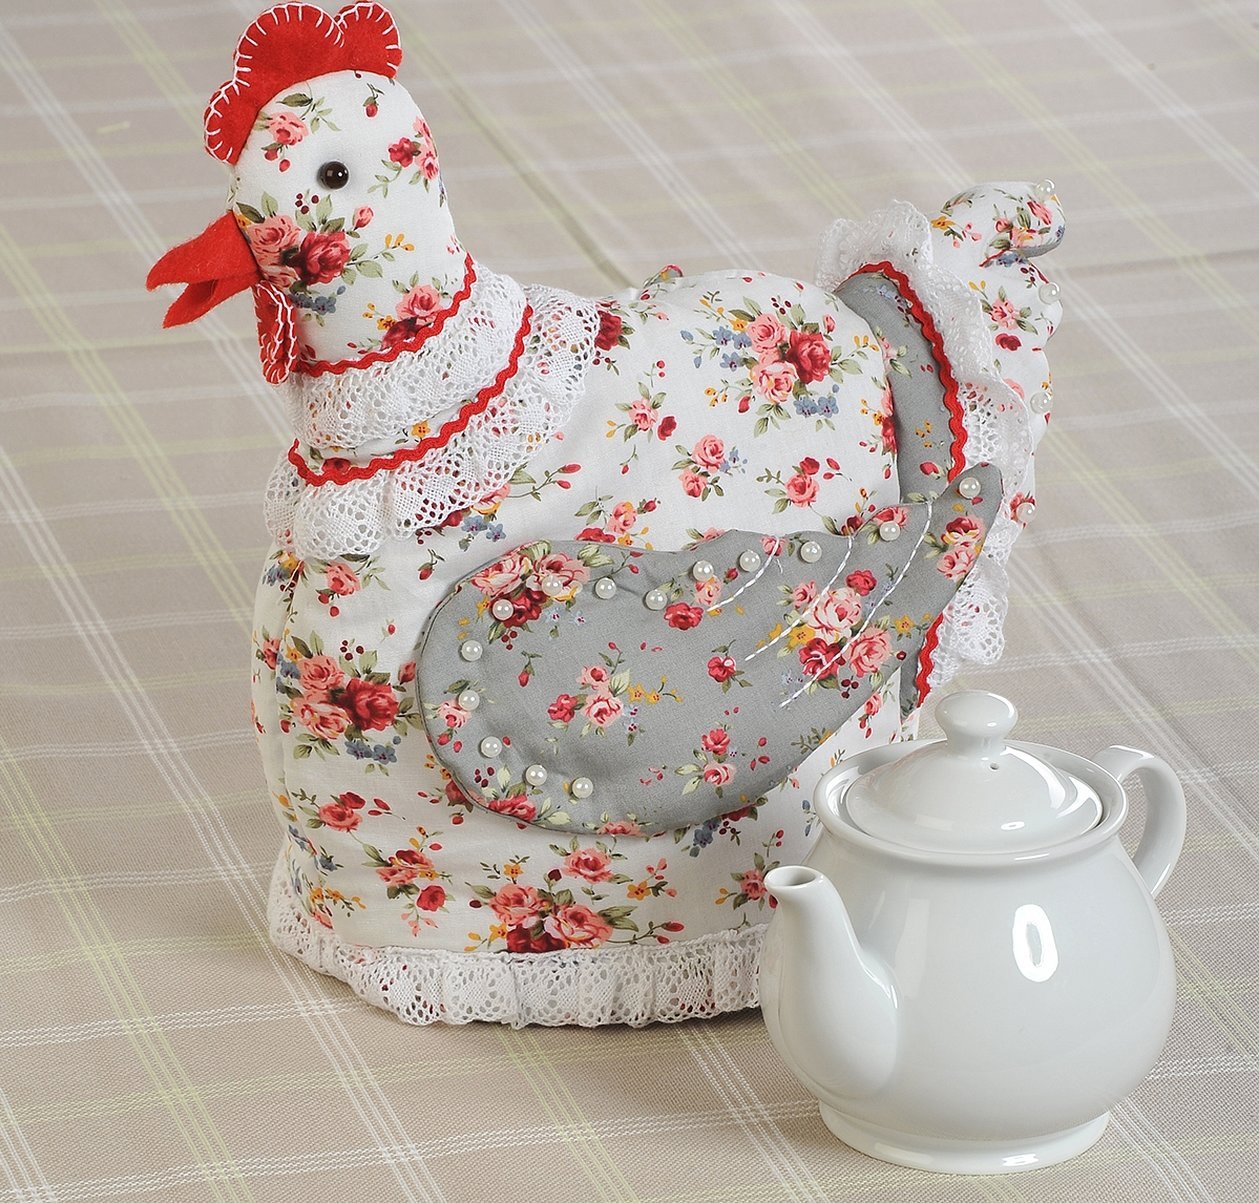
Hen
You can make a hot water bottle in the shape of a chicken. It is difficult to construct, since you will need to make a couple of parts. The bird's beak with a comb, wings, head and body will be cut out and embroidered separately. And then the whole chicken should be assembled. An experienced seamstress will make a masterpiece with her own hands. Although it is worth creating a more simplified version, making a pattern with a two-part hot water bottle. Only here you will need to build a pattern with a round cap on the teapot, not taking into account the nose and handle. Then additionally build parts for the handle and nose, where the teapot will be placed.
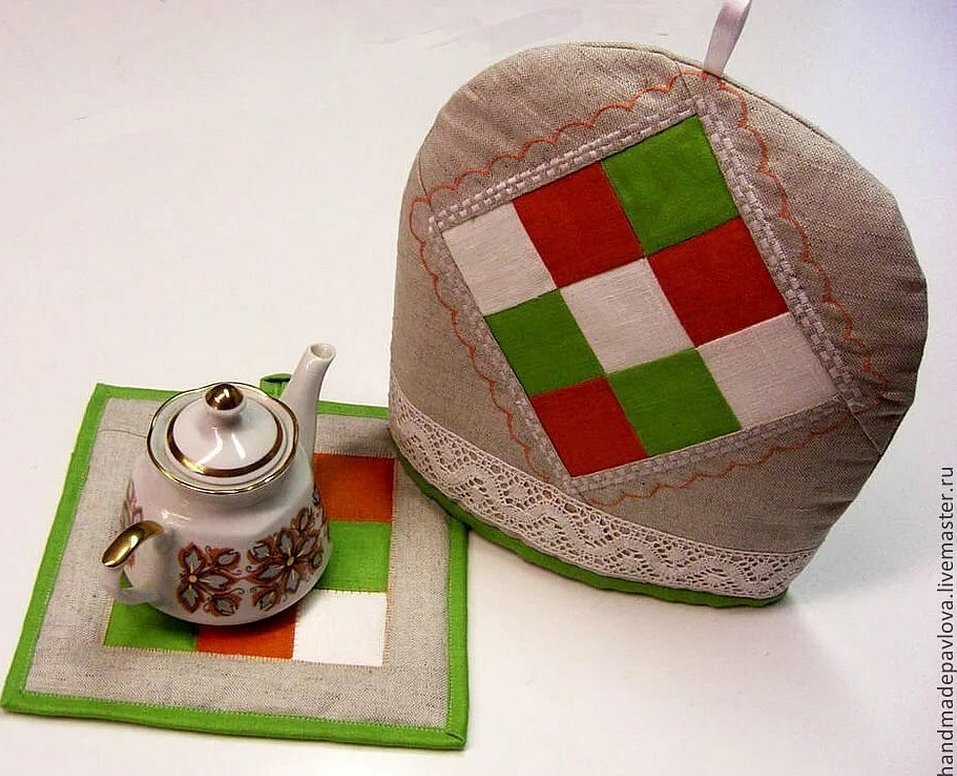
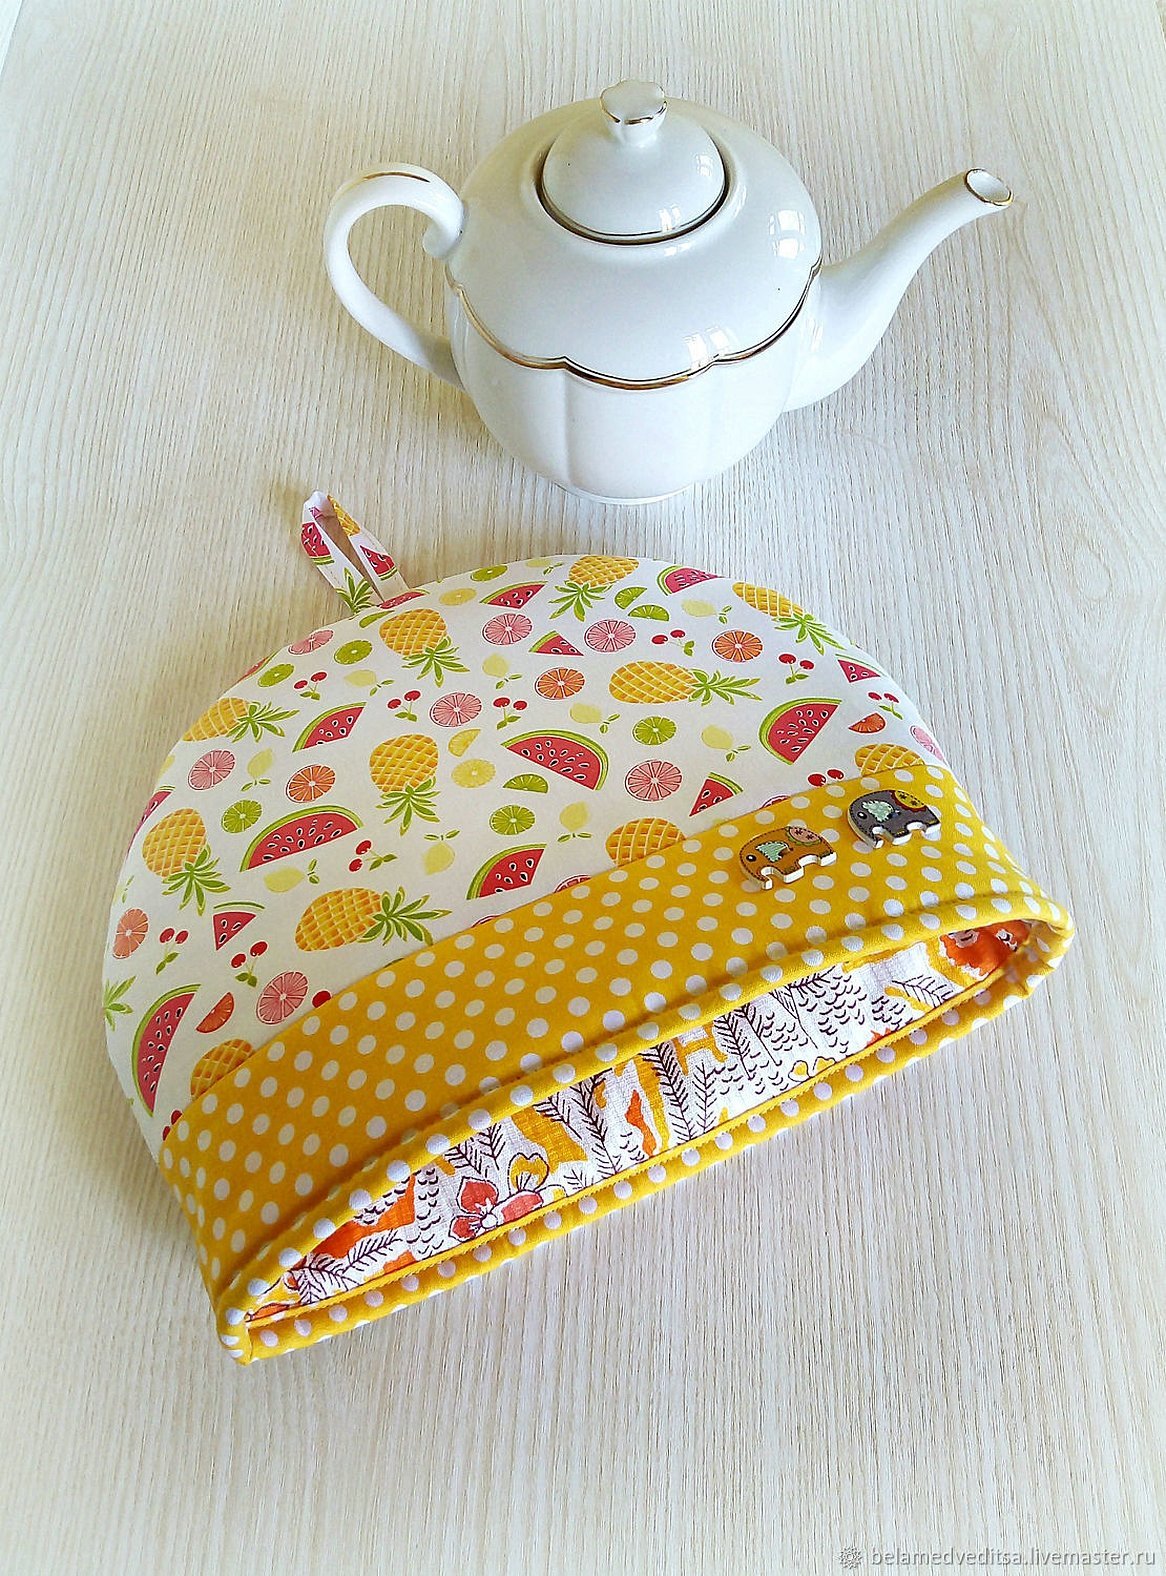
Hot water bottle cap or bell
A hot water bottle in the form of a cap or bell is the easiest option to make. But this does not mean that such a hot water bottle cannot be beautiful. A couple of decorative elements can make the craft interesting. The inner surface of the cap should be made of cotton fabric. As an insulating material, synthetic padding with batting or felt should be taken. The main thing is to ensure thermal insulation. The outer layer can be any. Everything will depend on the desire of the author with his creative idea.
If you wrap paper around the teapot, you can figure out the width of the fabric cut. Then all that remains is to measure the height by connecting the paper from the spout to the handle. The resulting triangle will be the size of the inner walls of the cap. The outer cut should be made a little larger. The fabric should not stick to the insulation and squeeze it. All layers should be cut with seam allowances.
After creating the pattern, you need to assemble the parts. First, you should put the insulation face down on the cotton fabric and fold its edge by a centimeter. Then fold the top a few centimeters and also stitch it, putting the cord inside. Then the line will remain behind the seam on the side. The main thing is not to stitch the cord, since you need to tighten the top of the bell as much as possible. The base for the warmer will be ready.
The author can decide for himself how the outer part of the cap will be decorated. He can decorate the product with embroidery, beads, applique or drapery. It is possible to take a waffle-type towel, which has its own pattern or use the patchwork technique.
Please note! The assembly principle will be the same, but the main laces and the face layer should be tied so that the fabric does not move during use. A loop can be sewn into the crown to make it convenient to use the warmer.
In general, a teapot and samovar warmer is a product that helps preserve the taste and aroma of freshly brewed tea or decoction and prolongs its cooling time. Today, it can be made in the form of a striped and pink cat, a smart young lady, a woman on a samovar, a regular and tilde doll, a vegetable and fruit, a chicken and more. The most important thing in its formation is to choose a durable fabric, make the right pattern and stitch the edges well.


