All women in the household face such problems as sewing and mending. Sometimes it is urgently necessary to mend something or repair it. For some, this is a hobby: people like to make things for themselves and their relatives at home. Not every time a hand stitch will be of high quality and presentable. In many cases, it may be necessary to use a sewing machine. Today, the market offers a great many different models that differ in price, functionality and quality of performance. Brother machines have also proven themselves. How to work with such a device and how to change the feet for a Brother sewing machine is described in that material.
Operating instructions
The instructions for the Brother sewing machine are no different from the instructions for other portable devices and include an explanation of how to set up the machine and how to use it. Before using it directly, you should carefully set up the machine.
How to set up a brother sewing machine
To turn on the machine before setting up, proceed as follows:
- Prepare the power cable of the device;
- Check if the sewing machine is turned off by looking closely at the switch;
- Insert the cable with the power connector into the socket on the right side of the machine;
- Insert the cable plug into the electrical network;
- Press the switch and set it to the "on" position.

Important! As soon as the power supply is supplied, the switch backlight will light up, indicating that it is ready to start working.
After a person has figured out how to turn it on, there are a few more steps to take:
- Winding the bobbin. To do this, wind the thread onto the bobbin with the machine turned on. The bobbin is placed on the shaft, which is moved to the right until it clicks. The spool pin turns upward and takes the spool of thread. After threading, the shaft is moved back to its original position;
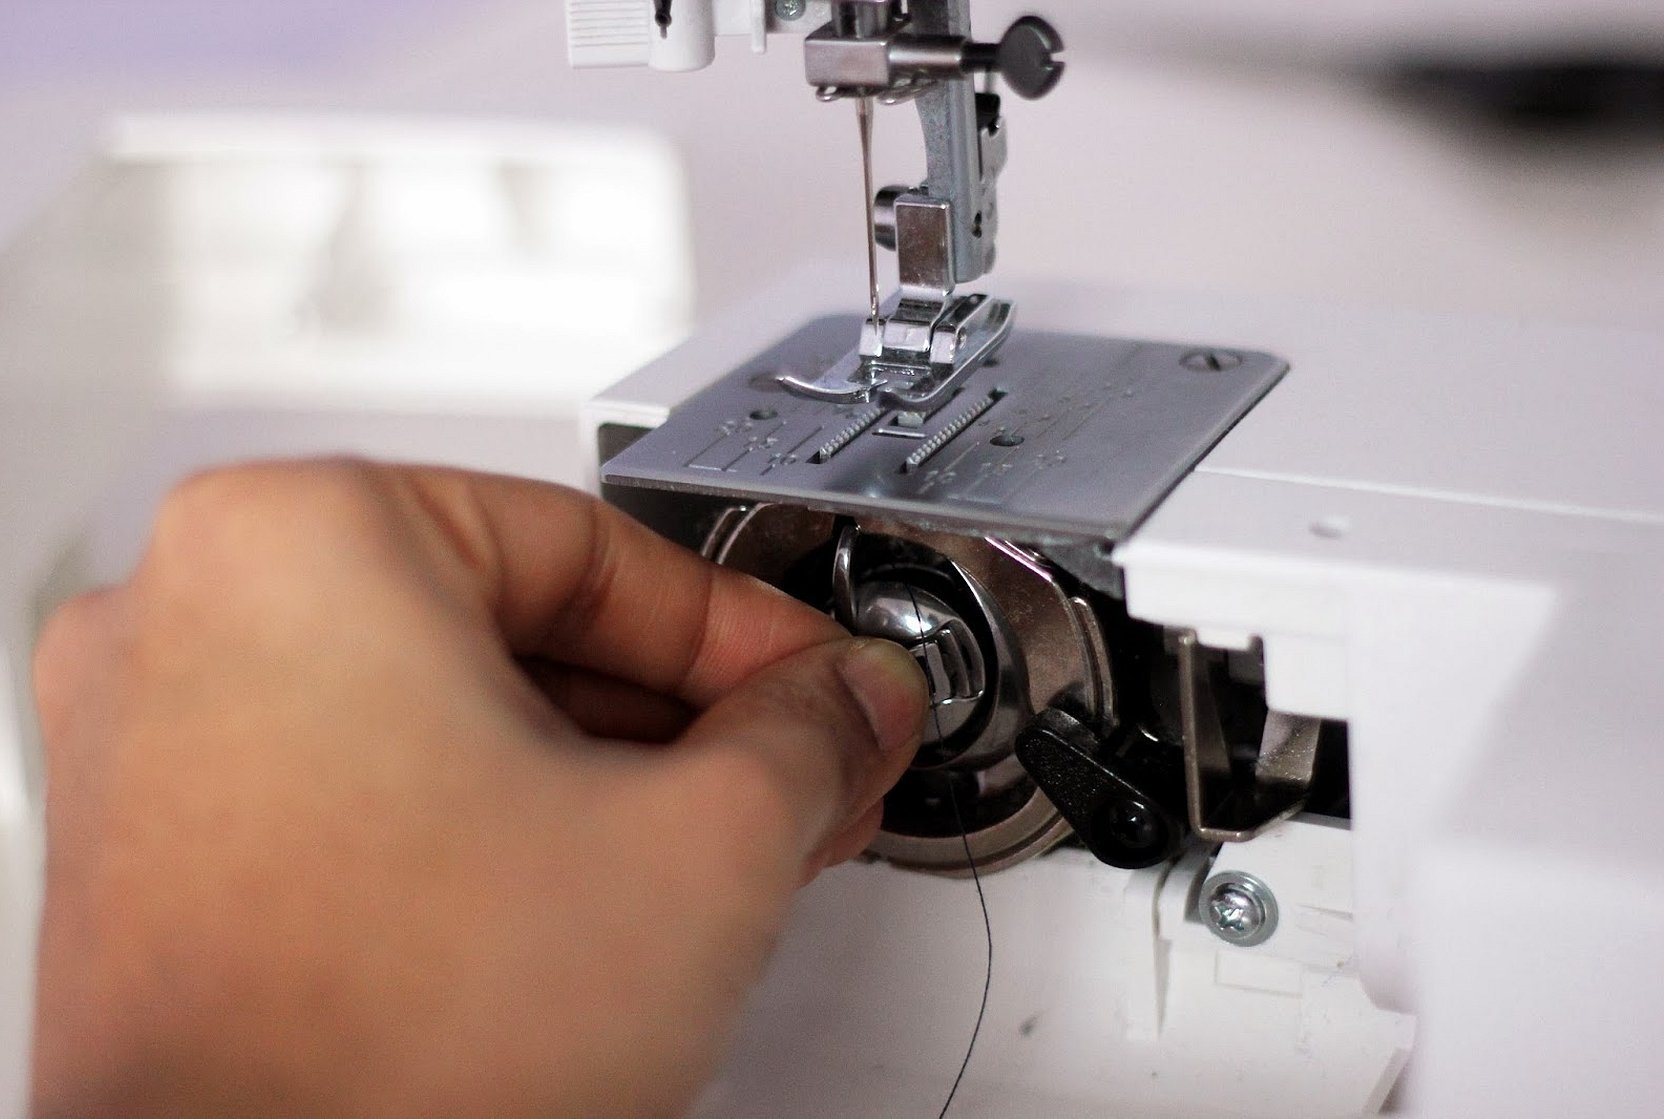
- Installing the bobbin. Press button "1" - lifting and lowering the needle to lift the needle and raise the presser foot lever yourself. Turn off the machine and remove the shuttle cover. Insert the bobbin so that the thread is wound to the left and pull the thread under the tongue. Install the shuttle cover;
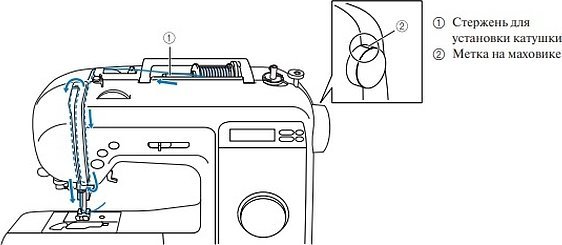
- Threading the upper thread. The spool with the upper thread is installed and then threaded into the needle. It is necessary to turn on the machine, raise the presser foot, raise the needle with the corresponding button, turn the spool rod and remove the cap from it, install the spool with thread on the rod. Then the thread is simply passed under the thread guide and threaded into the machine according to the pattern indicated on the device;
- Threading the needle. It all depends on what model a person has: with or without a thread guide disk. In the first case, everything is automated, and in the second, you will have to do the process yourself: thread the needle, pass the thread through the eye of the needle from front to back, and pass the thread through the foot after lifting it.

Important! After completing these setup points, you can start working and avoid problems. Additional points in the user manual for each individual machine include explanations on using a twin needle, replacing the needle, replacing the presser foot, and so on.
How to use a brother sewing machine
The following instructions will tell you how to use your Brother machine correctly:
- Place the machine on a work table, which should be stable and solid. It is recommended to use special stands;
- Insert the needle securely into the device with the flat side facing back to lock it in place and tighten the retaining screw;
- Install the spool. As it has already become clear from the instructions, such devices use two sources of thread: lower and upper;
- Thread the machine. The thread from the top is unwound and threaded into the needle;
- Remove both threads. To do this, pass a flat object under the presser foot and release both ends;
- Connect the machine's power supply to the home electrical network and turn it on using the corresponding button;
- Choose the stitch type and size and practice on scrap material. This will help you understand the machine and develop your hand;
How to change the foot
Often seamstresses have to change the presser foot on sewing machines. In order for the process to follow all the rules of the user manual, it is necessary:
- Press the needle lift and lower button to remove the needle from the material or the “down” position;
- Turn off the device using the switch;
- Raise the presser foot lever;
- Press the black button on the back of the presser foot holder;
- Place a different type of presser foot under the holder so that the pin on the foot is exactly under the grooves of the holder;
- Lower the lever so that it is fixed in the groove;
- Lift the lever and make sure everything is OK.
Important! The foot is changed because it is selected based on the stitch type you need to work with. If the foot type does not match the stitch type, the needle can simply bend or break. It is also important to use feet that are suitable only for this machine model.
Interchangeability of spare parts for sewing machines
Sometimes parts from one machine fit another, and the difference may be not only in the model, but also in the manufacturer. Often in user manuals and instructions you can find a clause that tells about spare parts that can be replaced from another sewing machine. Various parts from such machines as Janome, Juki, Bernina, and Elna fit Brother.
Thus, Brother sewing machines are a popular solution for Russia and other CIS countries. Instructions for use or setup are available in many languages of the world, including Russian, and are not particularly complex compared to other manufacturers. Almost anyone can set them up.


