Many needlewomen have a need to learn and understand how to make a bird from fabric. First, you should choose the technique in which the craft will be made. Then, a sketch and materials are prepared.
The stitching work can be done by hand or on a sewing machine. Additionally, decorative elements can be used: beads, sequins, feathers.
How to Make a Fabric Bird: Step-by-Step Instructions
A fabric bird can become a wonderful basis for a larger composition, which will become an interior decoration, a craft for a kindergarten. Many people think that making such a craft is difficult, it takes a lot of time. But there are many options for making a fabric bird that will be beautiful and easy to make.
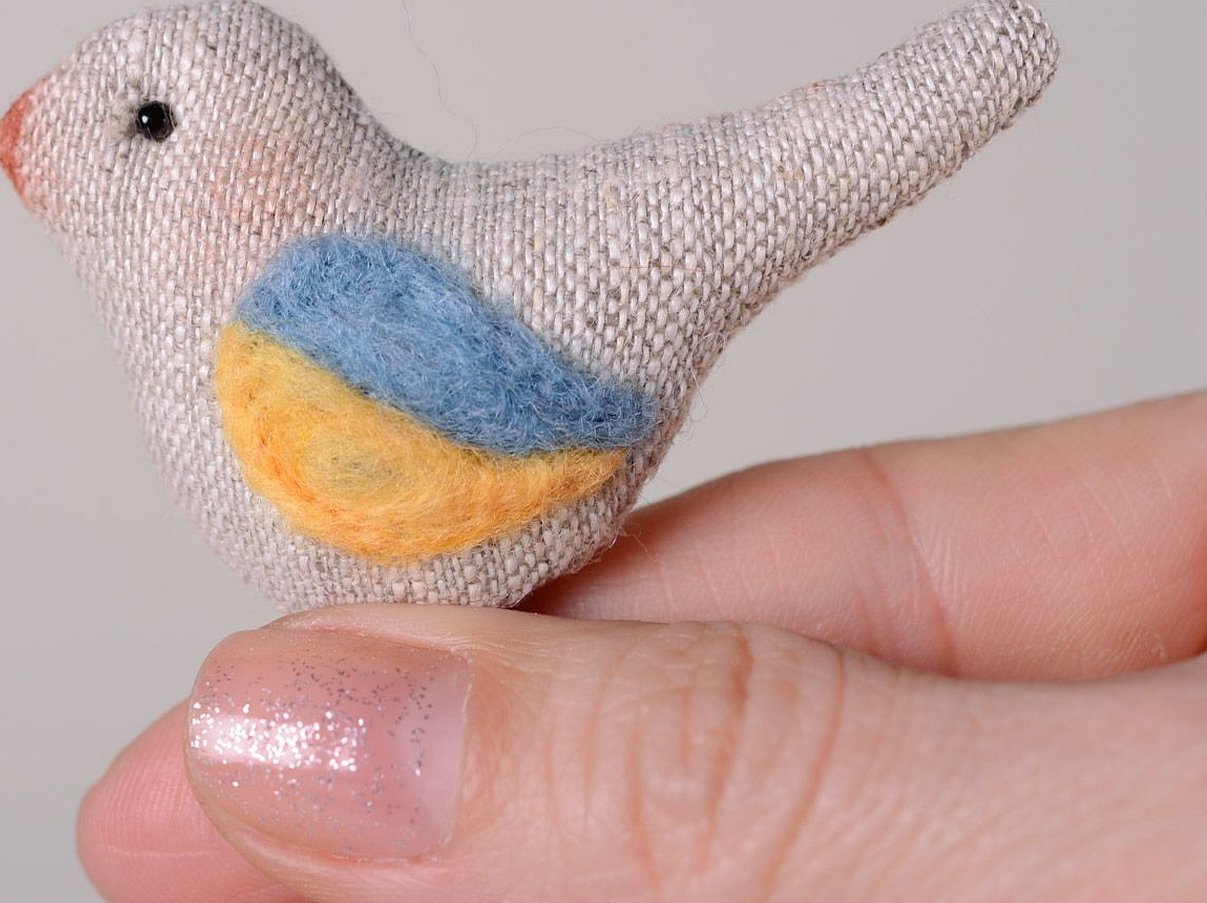
Please note! It is advisable to choose a fabric that is easy to process. If the edges are unraveling and the fabric itself is falling apart into threads, the product will not work.
The step-by-step principle of making a bird consists of the following stages:
- Determine the external type of the bird.
- Select tools and materials for manufacturing.
- Make a sketch, a pattern.
- Make a mark, fixing the elements of the craft.
- Next, sew the parts together and decorate the craft.
Sometimes it is difficult to do some stages of the work. A good textbook can be a children's manual for making paper appliques. Training on paper is a great way to improve your skills.
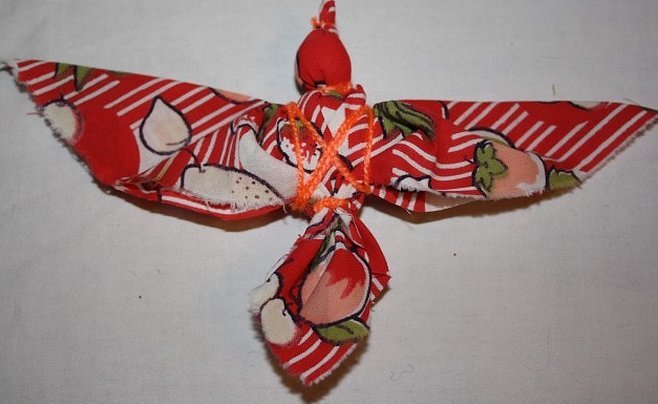
Scheme for making a spring bird from fabric
A spring bird made of fabric can be multifunctional: it can decorate the interior, be a toy for a child, or become a talisman for the home.
Interesting to know! In the process of making crafts according to this technique, you will not need to use a needle. An ideal option for working with children.
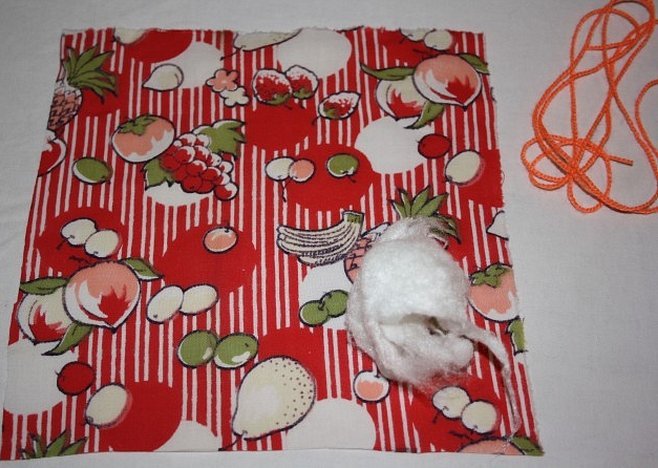
To make it you will need the following items and materials:
- A square of colored fabric with a side of 20 cm. It is advisable to choose a print reminiscent of a spring motif.
- A floss thread in a contrasting color to the textile.
- A small amount of synthetic padding.
- Scissors for trimming edges.
- 2 invisible pins or clothespins that will act as fasteners when assembling the figure.
A specific scheme is used to form the product:
- Fold the square diagonally. The fold should be precise and neat – each corner should fit evenly against the opposite one. You will get a two-layer triangle.
- Place the workpiece so that the triangle lies down with the corner in front of the needlewoman. Attach the side corners to the bottom one. The result will be a rhombus figure.
- Repeat the assembly of the side corners to the bottom one more time. In this case, fix the folds with clothespins or invisible pins.
- Remove the clamps and fold the rhombus in half along the central fold of the previous figures. Hide the folds inside.
- The first part of the bird, which will define the shape of the entire figure, is the beak. You need to tie the corner with a thread, stepping back from the edge literally 1 cm.
- Place the workpiece on the table and unfold all the previous folds. In this process, it immediately becomes clear where the wings, tail and body of the craft are formed.
- Open the very first fold so that you can see the back of the fabric and put some padding polyester there, having previously rolled the material into a sphere. Place the element as close as possible to the beak – this is the head.
- Roll an oval of the filler that is approximately 2 times larger than the previous element. Place it in the fabric, pushing the side corners aside. This will help make the bird's body voluminous. Tie it with a thread, forming a cross pattern on the bird's back, tying the wings and tail.
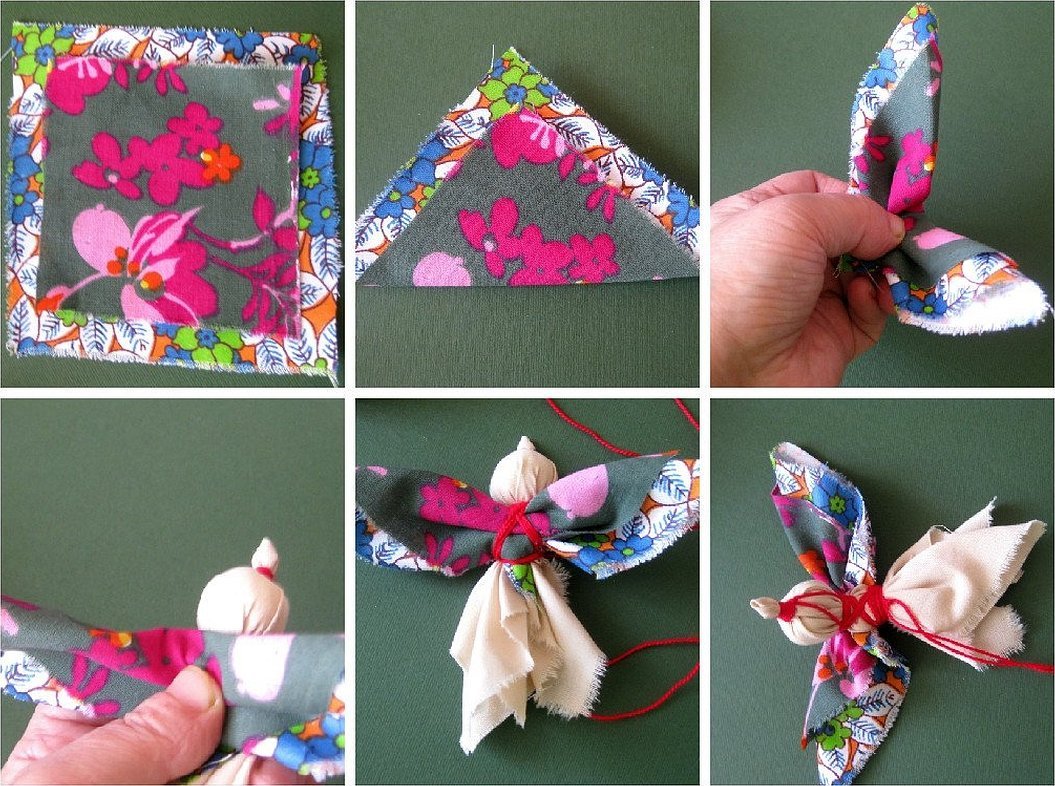
Spread the wings, tail and the entire figure. Depending on the functionality, further decoration of the figure is determined. You can hang the bird by fixing the loop in a cross-shaped winding on the back.
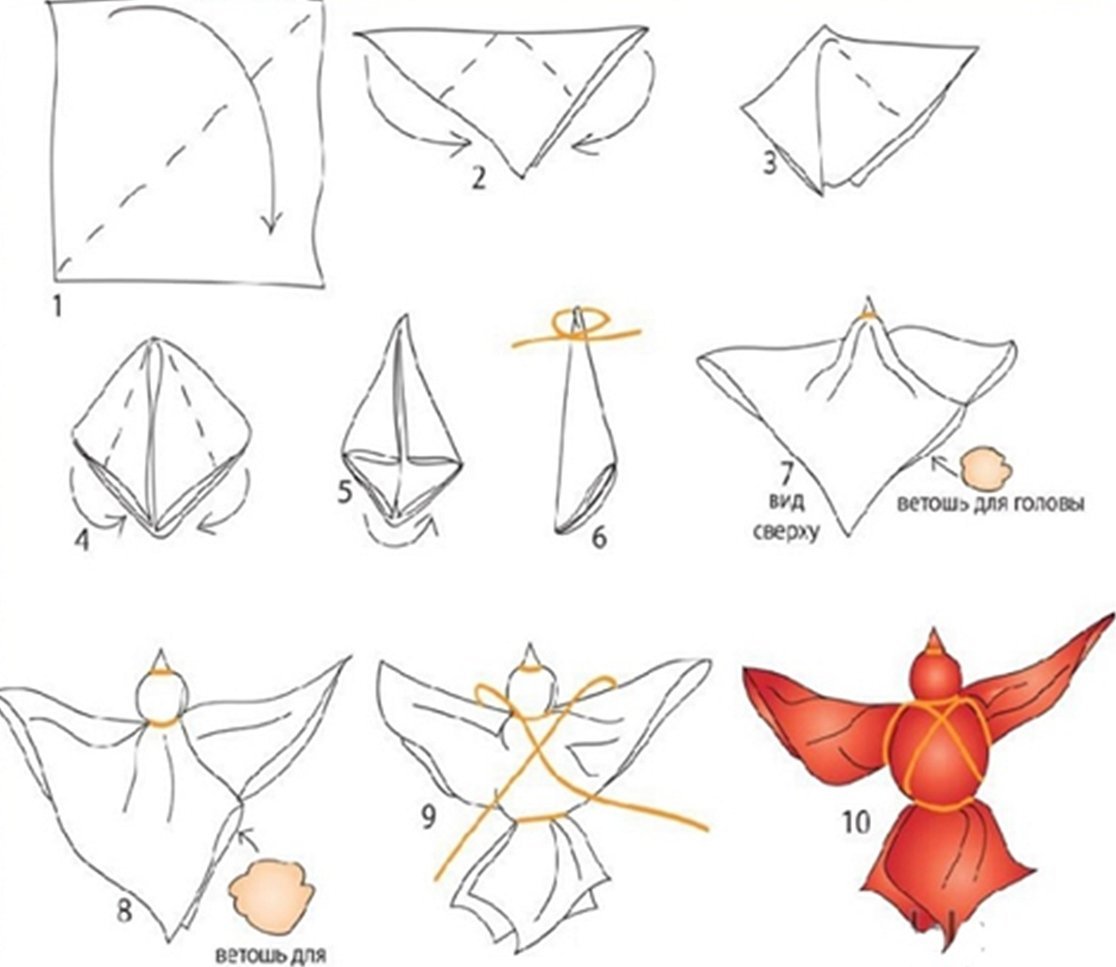
Spring in the craft is determined by the lightness and color of the fabric.
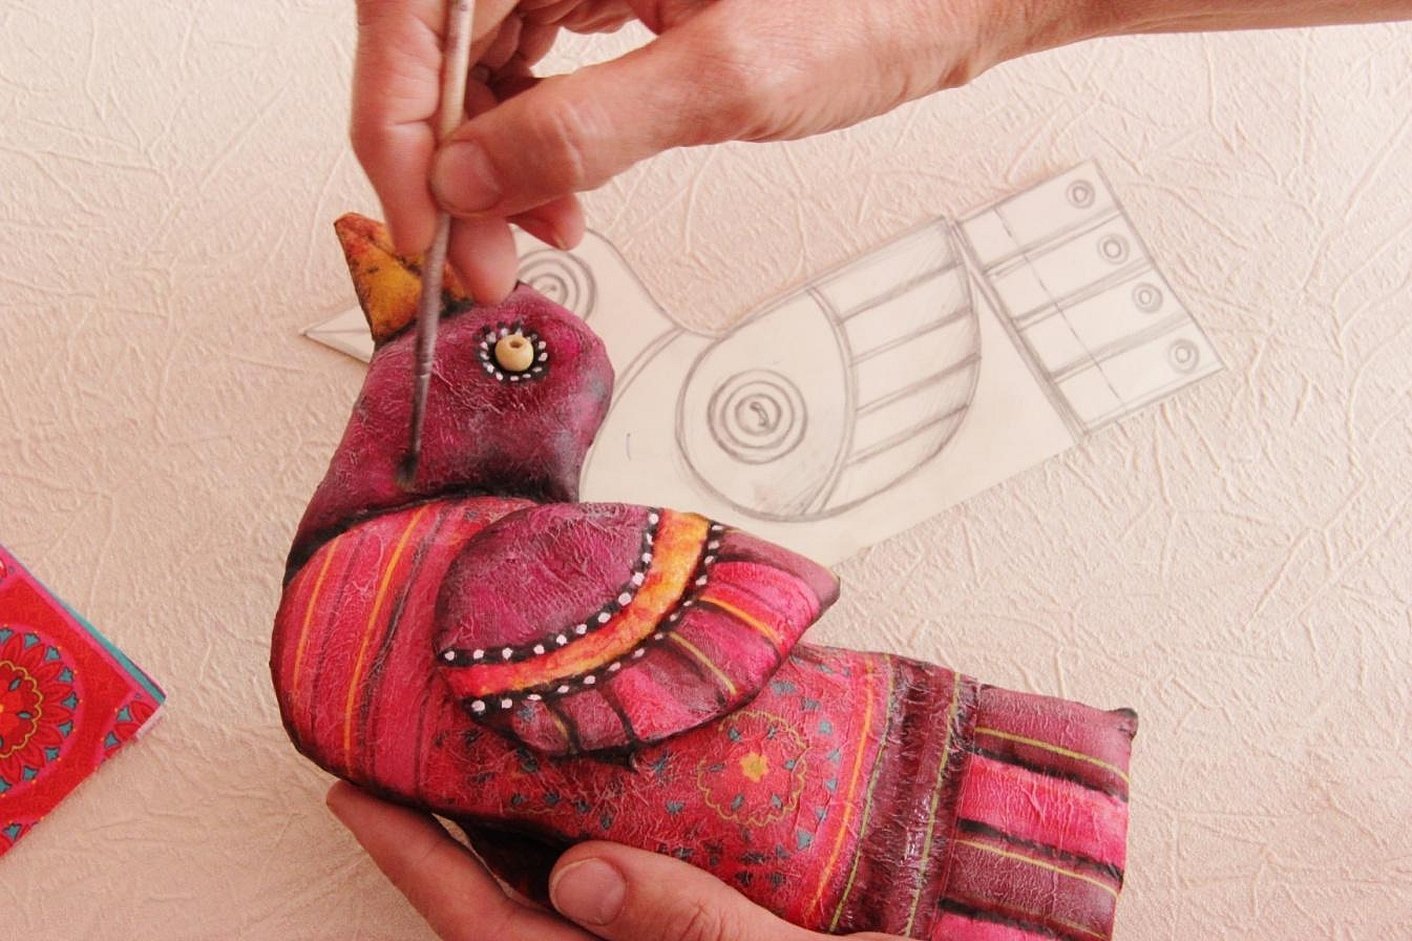
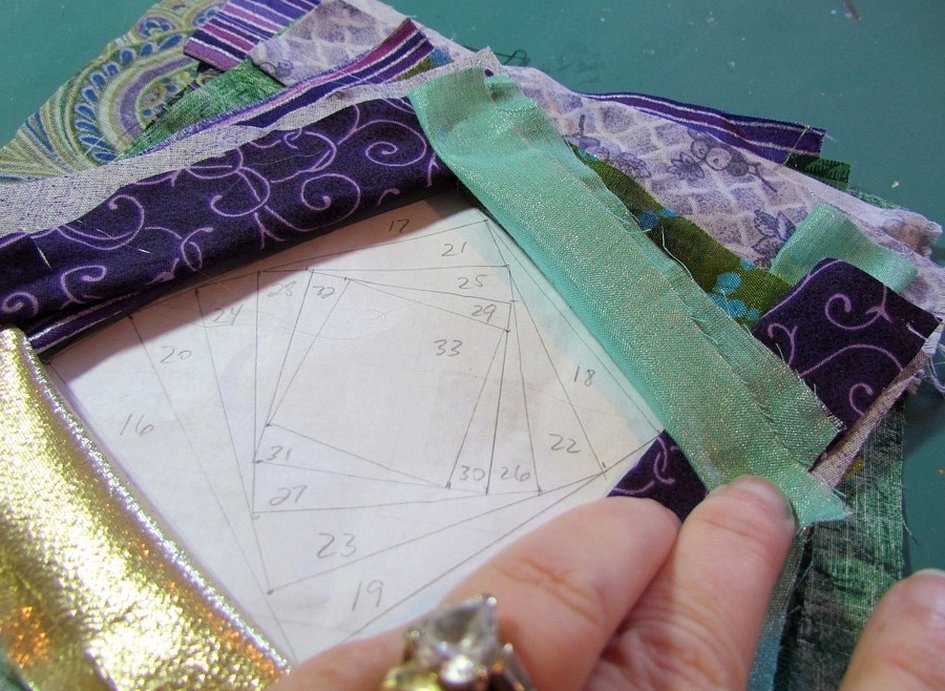
Sewing patterns
It is impossible to sew a bird without preparing the necessary tools and materials. But it is also impossible to do this without a pattern. There are many options for patterns of varying complexity and type. You can get a flat or volumetric figure.
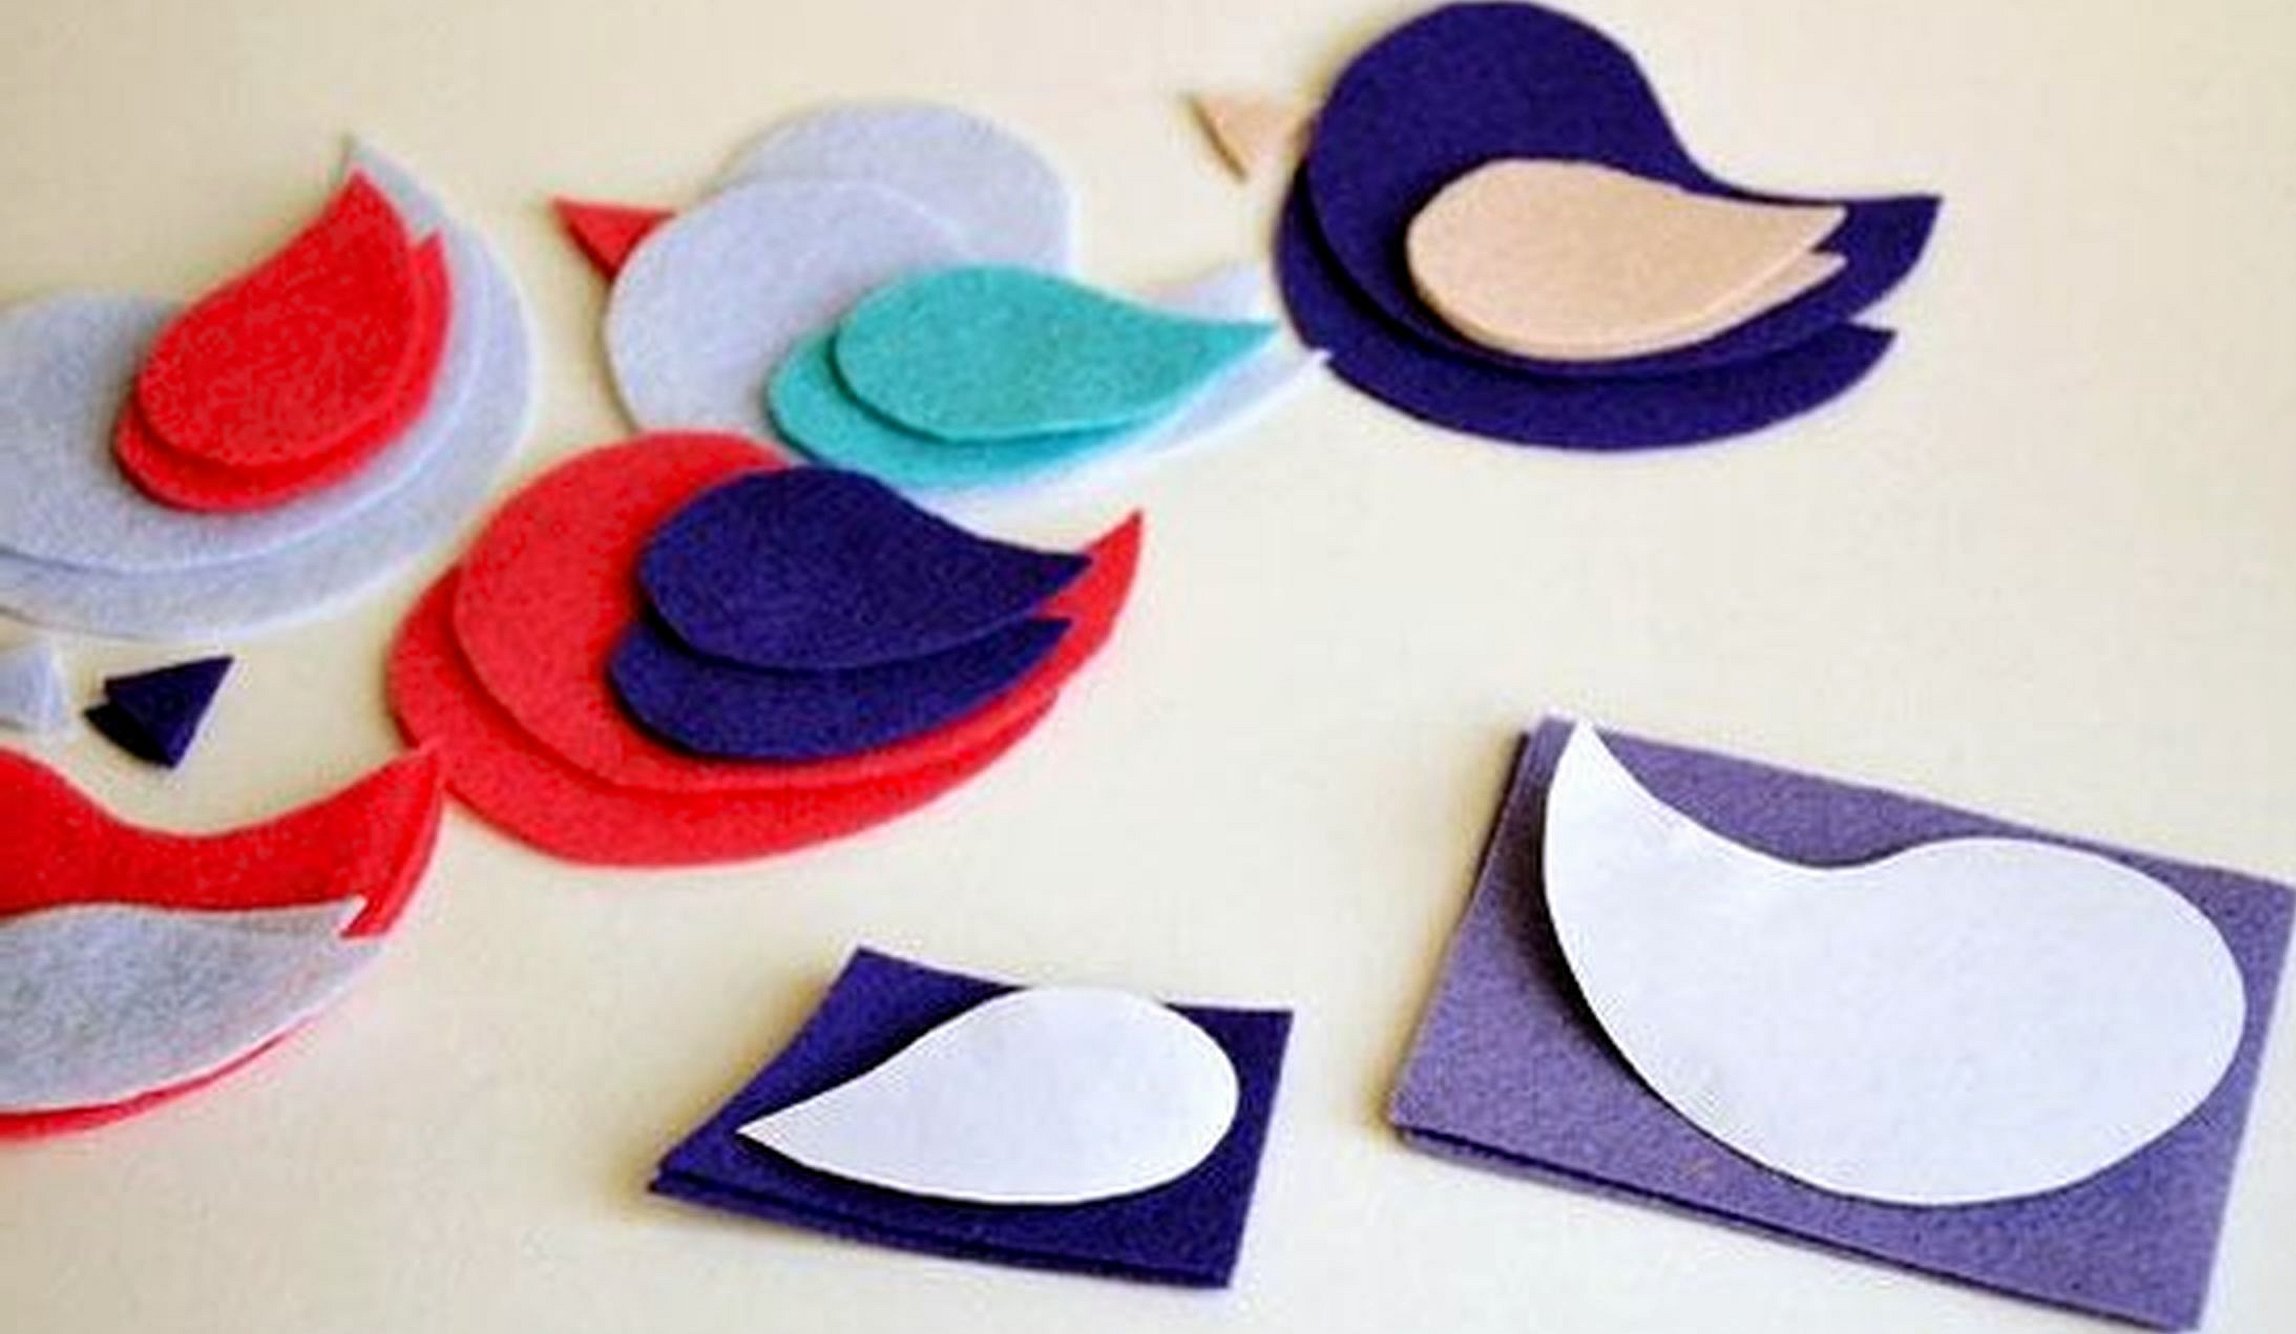
Sometimes the product consists of only two elements. More complex options involve more than 3 parts that are sewn together. Additional decorative elements must be used.
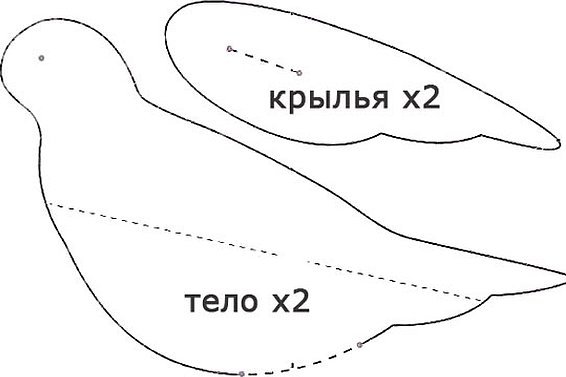
First, you need to decide on the type of bird. Then create a sketch on paper. If you don't have the talent of an artist, you can use a template. Cut out the patterns, place them on the fabric and make a pattern of the figure.
How to make a panel with a bird
If the master's hand is already "filled" in terms of working with various textiles and there are several mastered techniques in the "piggy bank of skills", then you can try to create a panel from fabric. This version of the product can replace a picture, become a wonderful bedspread or rug in the room. Let the main character be birds, although the theme can be varied.
Important! This technique will be relevant for those who know how to work on a sewing machine.
First you need to prepare the tool and materials:
- A piece of material that will become the basis of the “painting”.
- Fabrics with different textures and patterns.
- Threads that will match the textile.
- Scissors, measuring tools, chalk.
- Sewing machine, textile paints, scissors.
General principle of making panels with birds:
- The edges of the main cut should be aligned, folded and stitched on the fabric in the same way as on the sheet. The seam should be even, thin and neat so as not to stand out from the general background.
- From other types of textiles, cut out figures of birds, twigs and other elements to form the overall figure.
- Place all the pieces of the panel on the main piece of fabric. Secure all the pieces with safety pins. Then sew the pieces to the fabric with a sewing machine, choosing a nice stitch type.
- Use paint to finish off the elements that are small in size.
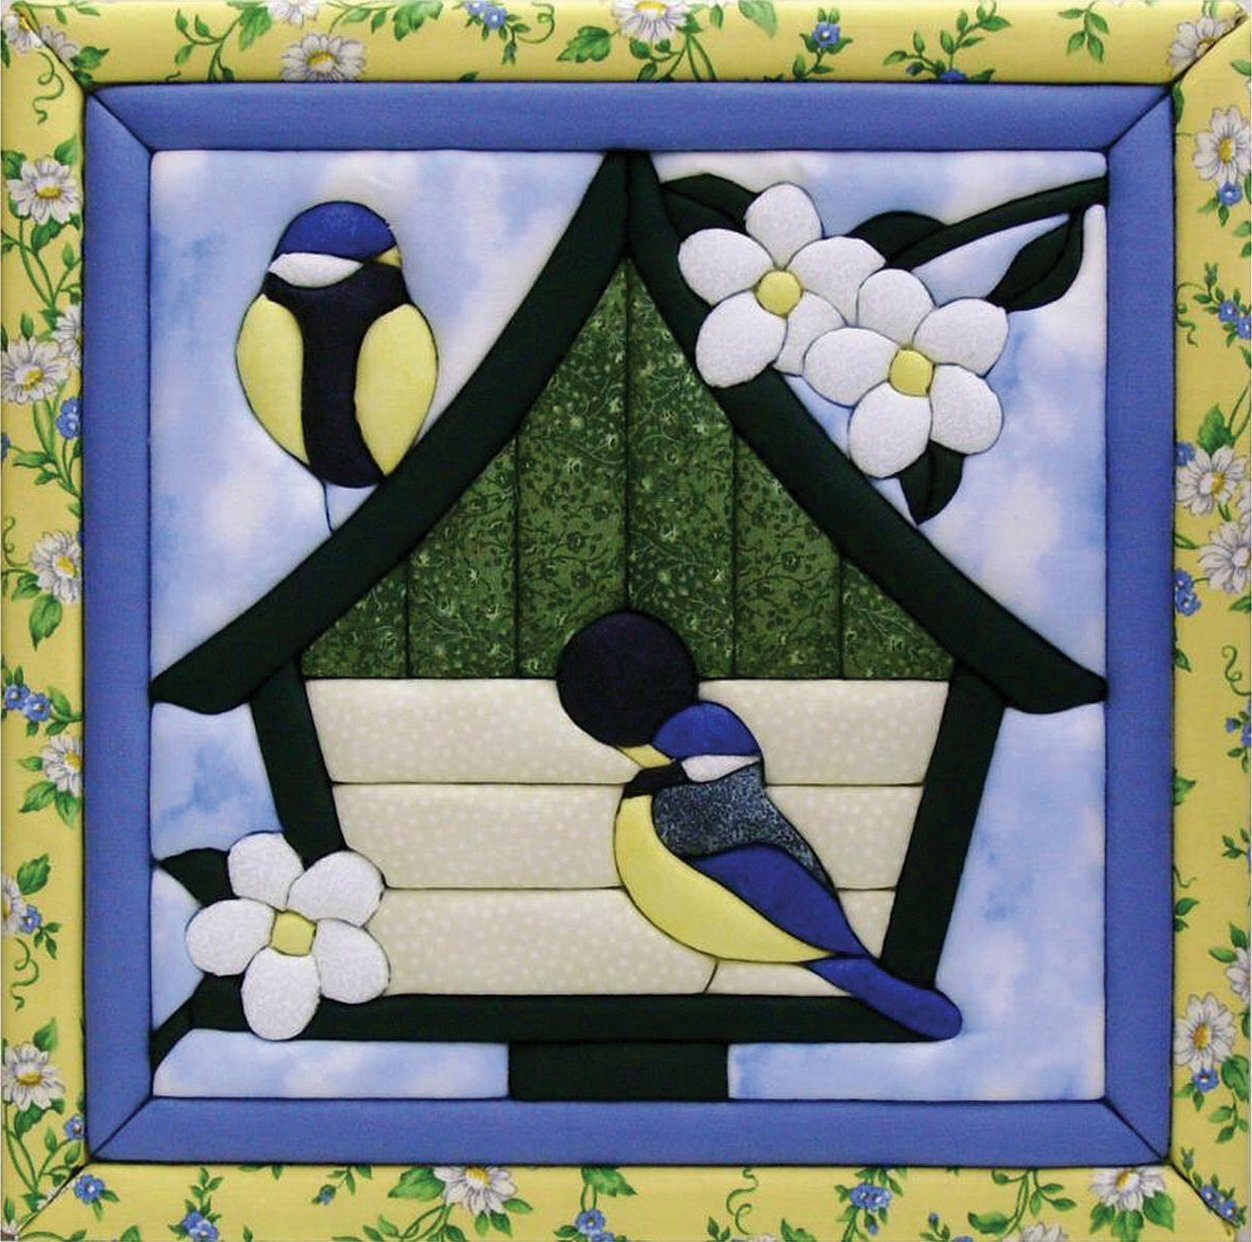
This is the simplest version of making a panel. You can stitch all the parts with additional seams along the entire canvas. This type of finishing is considered a sign of mastery.
There are many technologies for making birds from fabric, each of which is different in complexity and result. A bird made of textiles can be multifunctional, so each version of the figure is unique. Sewing is one of the options for making crafts from textiles, which can also be used to form birds. A popular technique is one in which the figure is formed by tying the fabric with a thread.


