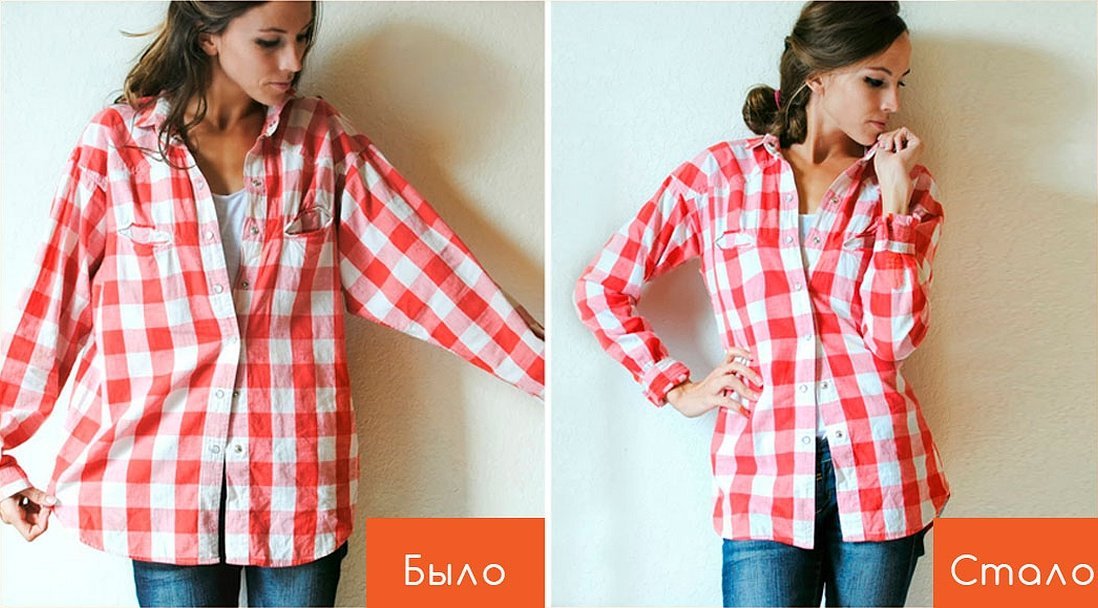
There are cases when a person has bought clothes, but over time they have become too big. In such cases, you can contact a studio or do the work yourself. This article talks about how to take in a shirt with your own hands and what you need for this.
- Tools and materials for work
- Tailor a shirt to size
- How to take in a men's and women's shirt at the waist
- Shortening the sleeve
- Sewing up the armhole of a shirt sleeve
- Shoulder stitching
- How to shorten a men's and women's shirt in length
- Collar reduction
- Secrets to visually hide the fact that your shirt is too big
Tools and materials for work
Before starting work, it is necessary to prepare all the necessary materials and properly equip the workplace. In order to take in a shirt, you must have:
- needles of different thicknesses;
- yarn to match the shirt;
- pins for fixing on the product;
- centimeter for measurements;
- textile roller;
- fabric marker.
It is recommended to perform all actions on a flat and well-lit surface. This will help to avoid defects when sewing. Before taking in a product for several sizes, the shirt with the outlined contours for new seams must be tried on. This is necessary to avoid mistakes after finishing the work.
Important! It is recommended to place cardboard or some paper under the item to make it easier to insert pins.

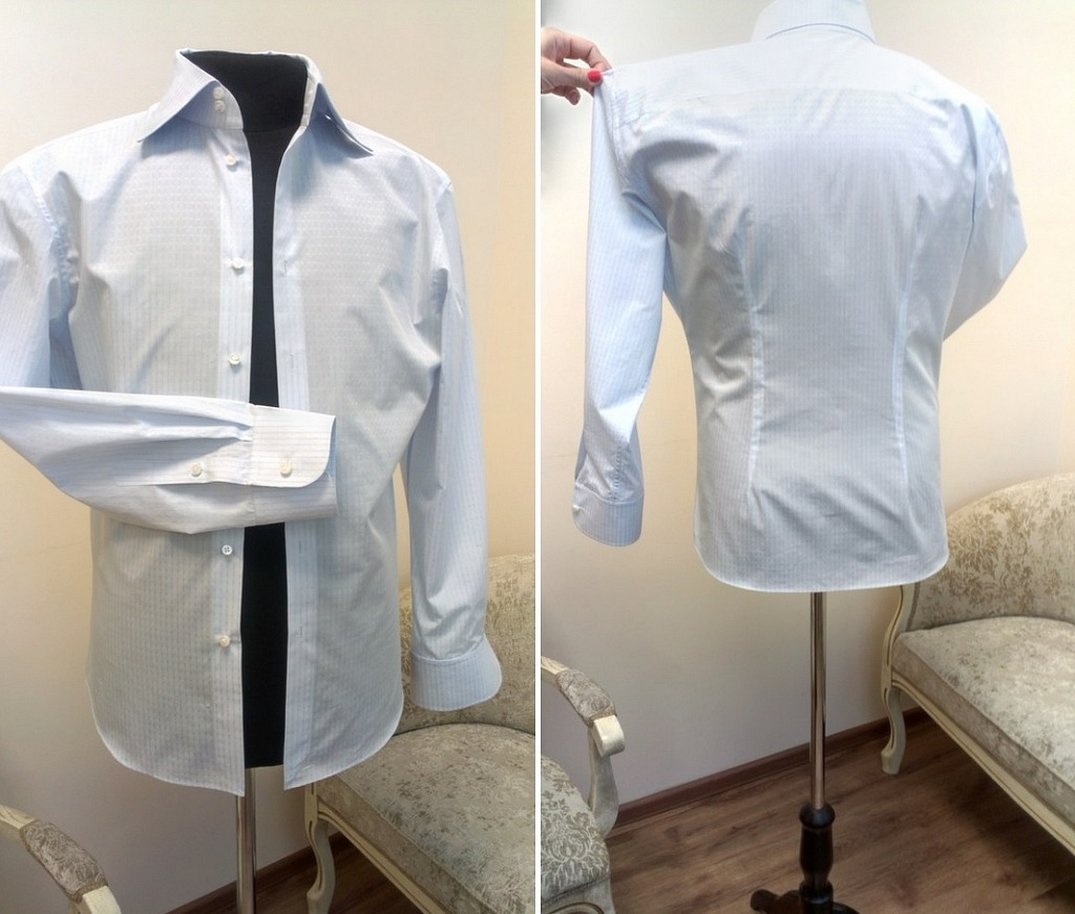
Tailor a shirt to size
The sewing process is actually simple. Even a woman with no experience in tailoring can handle the job. Below is how to sew a men's or women's shirt with your own hands. In fact, there is no difference between them, only for women's parameters you have to cut off more fabric.
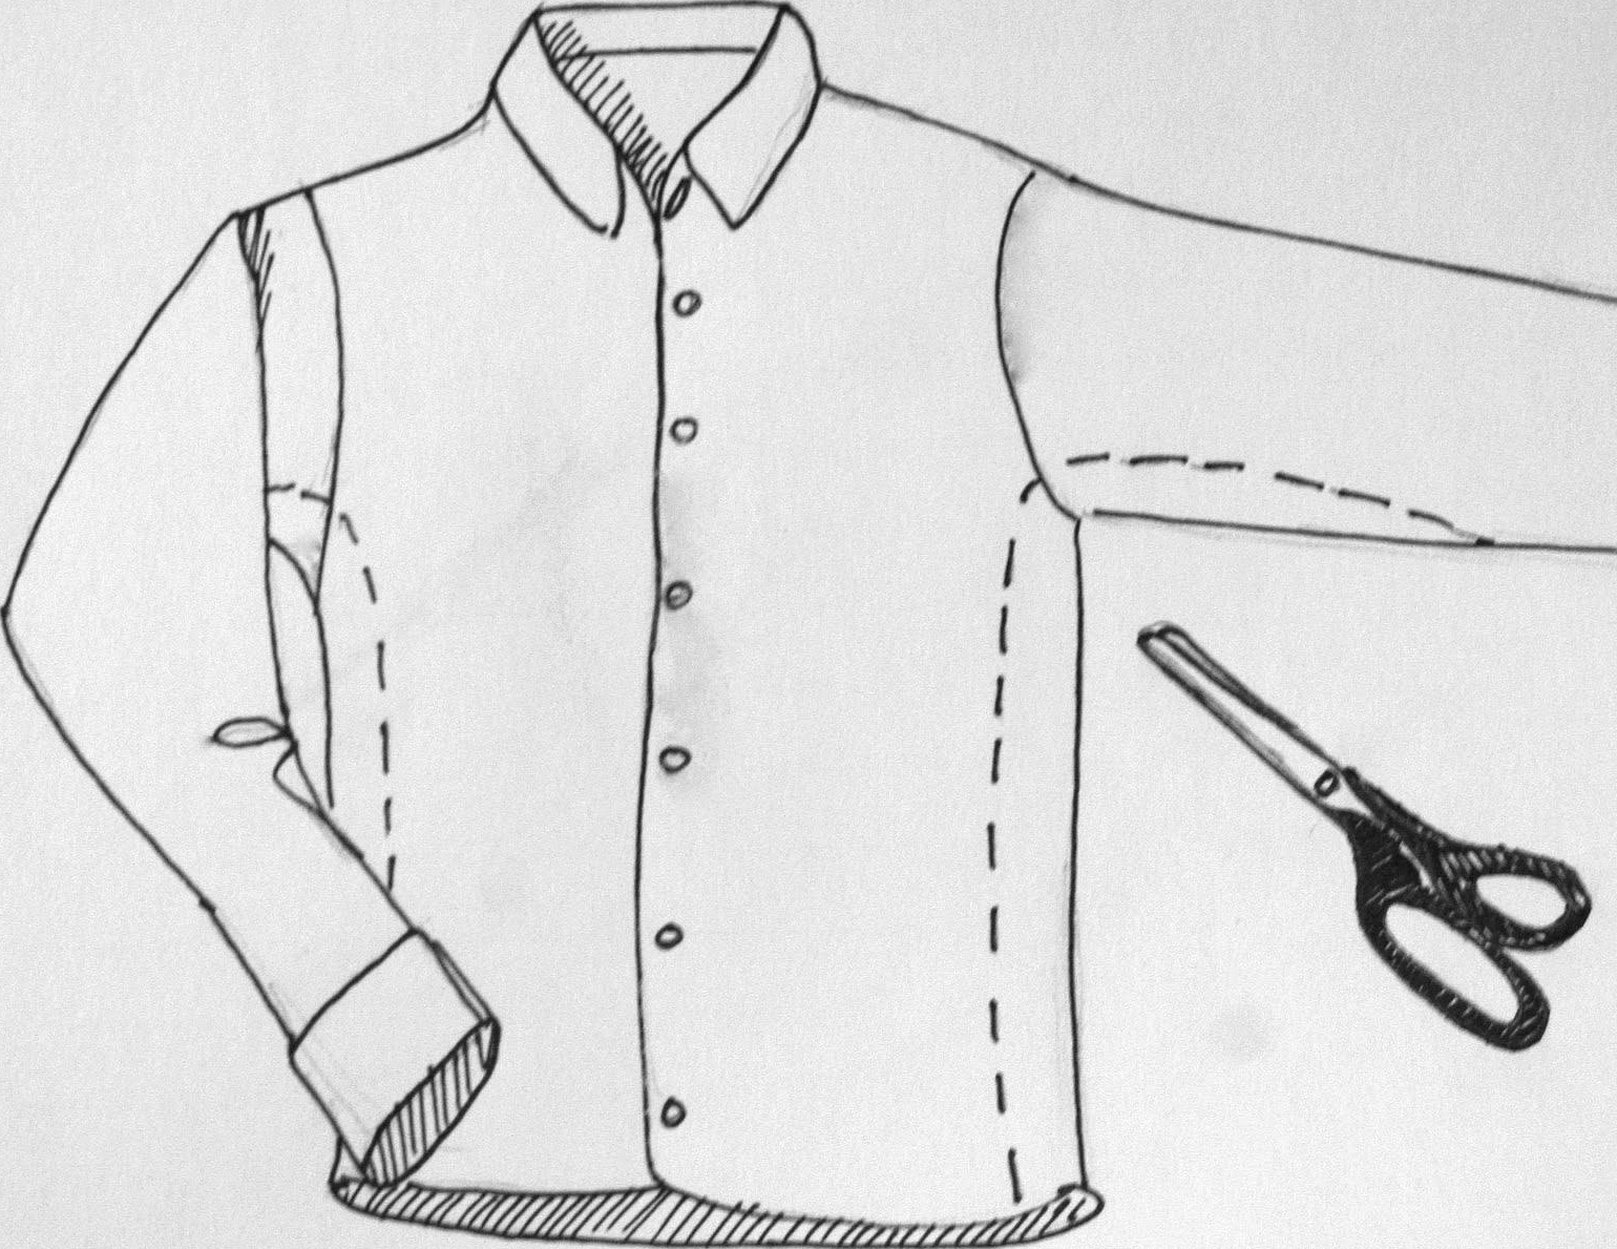
How to take in a men's and women's shirt at the waist
There are two options for taking in the product at the waist. If the product is from a European factory with a seam in the middle of the back, then the sides need to be taken in. In this case, the seam needs to be done to the edge of the sleeve, but it itself will remain uncut.
The new seam does not need to be even and straight. If the shirt is to be fitted, the seam will be slightly circular.
Step-by-step work process:
- turn the shirt inside out and try it on yourself or the person who will wear it;
- work begins with the bottom seam, it is necessary to pin the material in such a way that a barely visible rounding is formed in the waist area;
- pin the shirt using this method approximately 10-15 cm above the waist mark;
- you need to pay attention to the fact that a slow transition from the new seam to the old one is formed at the top;
- sew on a machine and cut off the remaining fabric.
Below is a description of how to hem shirt sleeves from long to short yourself.
Shortening the sleeve
Sometimes there are cases when the product fits really well, but has insanely long sleeves. You can hem the sleeves of a shirt yourself by re-sewing the cuff.
To do this, you need to rip two cuffs and cut the sleeve to the required length. You also need to change the side seam line of the cuff. It is important to remember that the sleeve width should be the same as the cuff length. Before you start sewing the product, you need to take accurate measurements and carefully sew the cuff, because the sleeves are an important part of the shirt and people can see it all the time.
Sewing up the armhole of a shirt sleeve
To take in the sleeve width by a few millimeters, first you need to turn it inside out and lay it out so that there are no folds on the material. The required distance is measured with a centimeter and a contour is built along the entire sleeve, along which the lap seam will be stitched.
It is also important to remember that if you need to take away only 3 mm from the sleeve of the product, it means that you only need to measure 1.5 mm from the finished seam. This is easy to explain - the fabric will be trimmed on both sides by 1.5 mm, so the result will be 3 mm. After constructing the line and securing the material with pins, the line is sewn using a sewing machine or manually.
If you need to take in the sleeves more than 5 mm, you need to cut the side seam next to the armhole under the sleeve, trim off the excess fabric, and then carefully sew it up.
Attention! This type of work is one of the most labor-intensive, if you take measurements incorrectly, the item will turn out asymmetrical, which will be very noticeable and uncomfortable to sit on the body. Therefore, if you have no experience in working with armholes, it is better not to take it on.
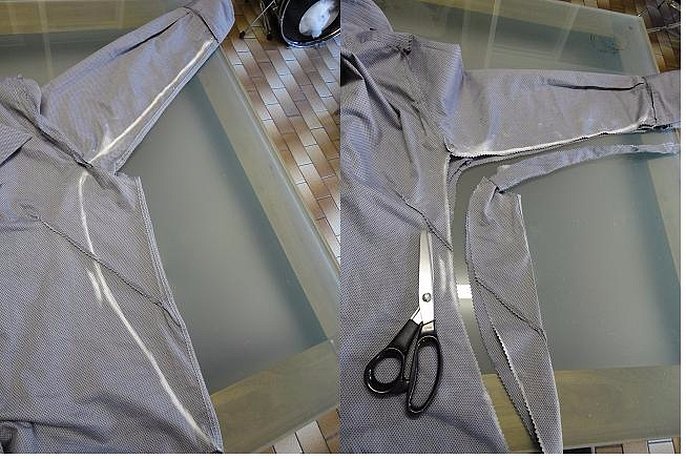
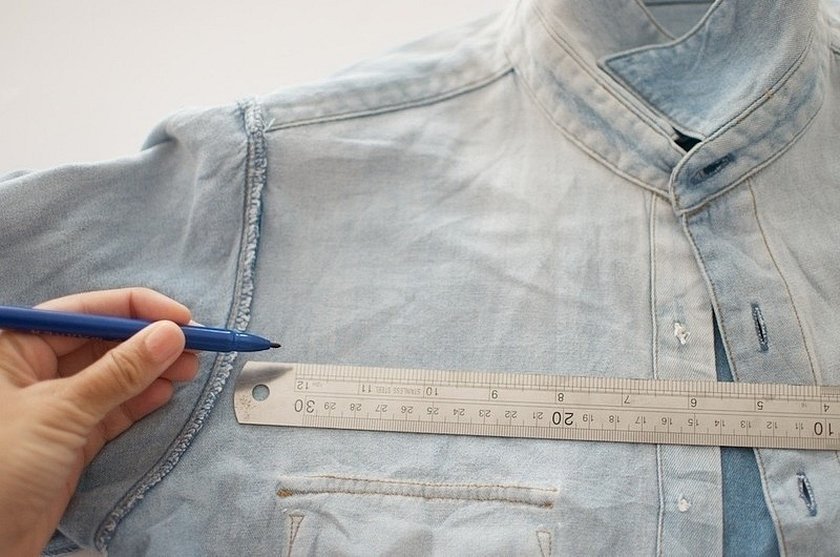
Shoulder stitching
If the shirt has become a size larger than necessary, it is quite possible to take it in by shortening the armhole, shoulders and side seam. The step-by-step work is described below:

- First, you need to decide how many centimeters you want to reduce each part of the shirt. It is better to write down all measurements to avoid errors;
- turn the product inside out, be sure to mark the outline of the future stitching location with a marker, indicating it through the entire existing side seam and armhole;
- All constructed marks must be secured with pins;
- the old armhole and side seams of the shirt need to be cut, then the excess material needs to be cut off;
- It is advisable to sew new lines using a sewing machine, if you have one. And all edges must be processed manually or using an overlock.

Attention! The lines on both sides of the product should be symmetrical. If a new shirt is being sewn in, it should first be washed so that it shrinks.
It is more difficult to work with oversized items; there are special patterns for hemming them.
How to shorten a men's and women's shirt in length
Shortening the product in length is easier than all the manipulations described above. If desired, in this case you can even not use a sewing machine, but use only needles and threads. There is no need to rip the seams or cut the fabric, you just need to fold the bottom of the product, iron and stitch with any convenient seam.
Work process:
- try the shirt on the model and measure out the required amount of fabric for hemming;
- use a marker to indicate the location of the length;
- remove the product and lay it out on the surface;
- measure with a centimeter how much fabric will be cut;
- subtract 2 cm from the obtained parameters and draw one dotted line along the entire bottom side of the product;
- trim off excess fabric and secure the line with pins;
- stitch and iron the shirt.

Sometimes the question arises, how to hem a shirt with a rounded bottom? Everything is done the same way, only the bottom line will be arched.
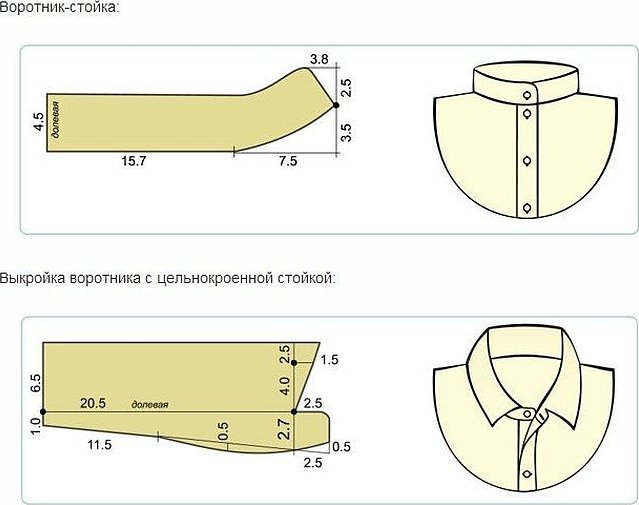
Collar reduction
Unfortunately, it will be very difficult for a beginner to reduce the collar size at home. Many seamstresses in the studio can take in its circumference, but most likely, a new vertical line will form on the back of the product on the collar. Re-sewing the button will make the product look less attractive. The only correct method to solve this situation will be a complete replacement of the entire collar on the product.
Therefore, experts recommend not to make changes to the collar, only in very rare cases when there is no way out of the situation.
Secrets to visually hide the fact that your shirt is too big
If there is no way to somehow take in the shirt or turn to specialists, then you can visually reduce it. There are many options that will help hide the large size of the product:
- For example, you can wear shirts with different jackets, blazers or coats.
- The product can be hidden by wearing an office sweater on top.
- You can also tuck the item into your pants or roll up the sleeves. This will create a casual style.
It is necessary to remember about proper care of things after sewing. If a sewing machine was used, then washing of the items is the same as before all manipulations. But if the work was done by hand, then it is better to finish with washing in the machine, as the seams will be less strong, may fluff or shine. It is recommended to use only gentle care products, such as liquid powders and conditioners. Rinse the items until the water becomes completely clear. The optimal water temperature should not exceed 30-40 degrees. If not very high-quality threads were used for the work, then it is not advisable to dry the items in the sun. The threads can become very dry and brittle. Otherwise, it is necessary to follow the instructions on the product label.
The process of sewing a shirt at home is very simple. The only thing you need is to correctly mark the fabric cut so as not to accidentally remove excess. Before starting work, it is recommended to watch several video tutorials on how to sew things correctly.


