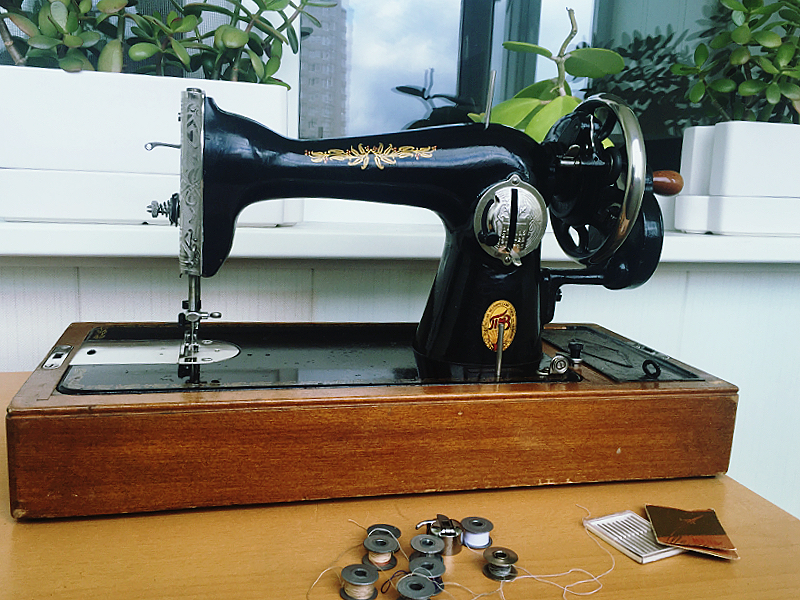
People are increasingly giving preference to sewing machines and moving away from hand sewing. The latter is often used by professional craftsmen only in cases where it is necessary to sew thick material with an awl or a thick needle. Sewing units consist of a large number of moving parts, so it is necessary to know how to properly care for them so that the work process brings maximum pleasure. Among such elements, there is a most important element - a bobbin. This material will tell you how to thread a bobbin into a sewing machine and what it is.
What is a bobbin
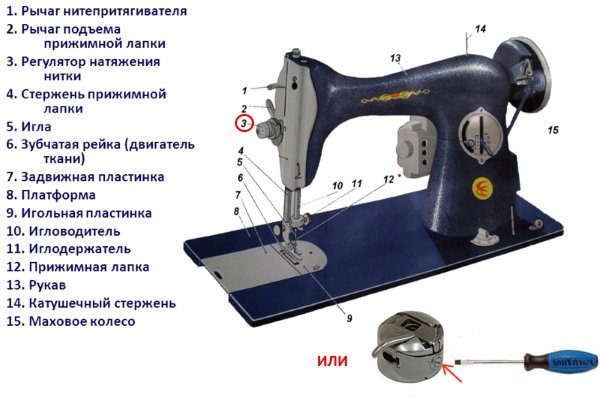
A sewing machine bobbin is a miniature spool on which thread is wound to create the bottom stitch. Accordingly, the thread used in it is called the bottom. The winding process is performed automatically by the machine itself. To do this, you just need to fix the spool on top of the sewing machine. Then the bobbin is inserted into a special compartment - a bobbin cap, which is put on a horizontal or vertical shuttle.
The bobbin and bobbin case are among the main parts of the sewing machine. They should always be in good condition. The surface of the case should be smooth, because even a small defect can distort the stitching and lead to incorrect operation: from skipped stitches to a broken lower thread.
Important! During sewing, the upper thread pulls the lower thread, which is in the bobbin case. After they intertwine, a stitch is formed. The tension of the thread depends on the weight of the bobbin, as well as on the material it is made of. Plastic will move faster than metal.
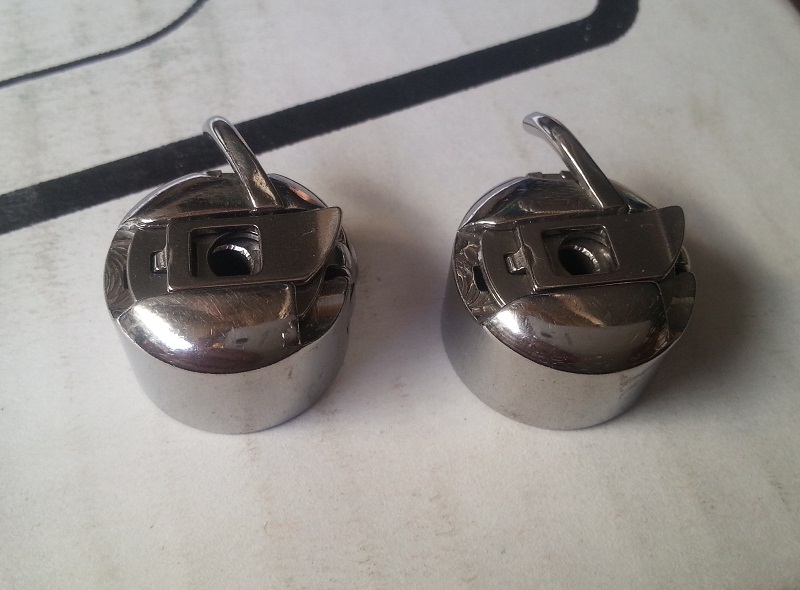
It is worth saying that sewing bobbins, as well as bobbin caps, differ significantly from each other. Almost every machine is suitable only for those bobbins and caps that are produced by the manufacturer of the equipment. Bobbins differ not only in their radius and width, but also in the material they are made of. Usually, metal and transparent plastic parts are made.
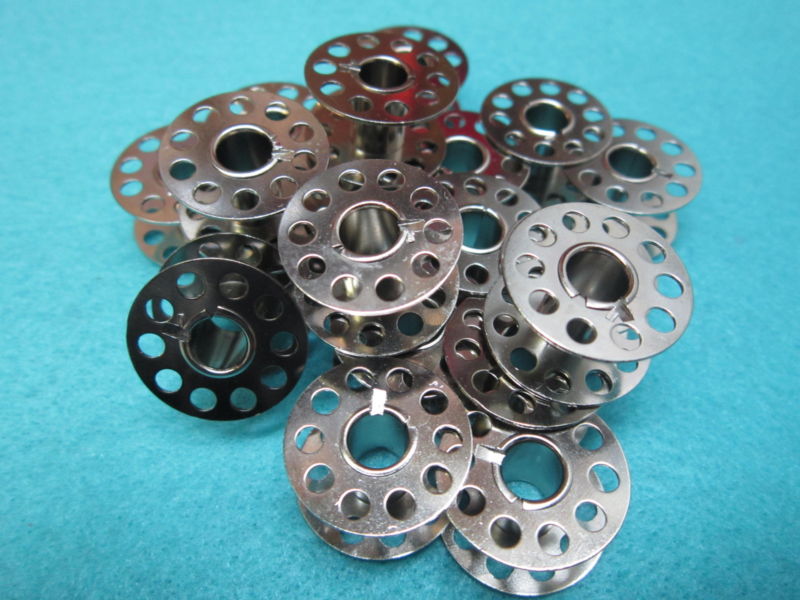
Metal bobbin
Such elements are intended for several types of shuttles: vertical swing and vertical double running. Naturally, a metal bobbin is heavier than a plastic element, but at the same time it will have increased strength and wear resistance.
For your information! Metal parts of this type are considered the most reliable. They are common not only in household sewing machines, but also in production units of the "economy" or "premium" class.
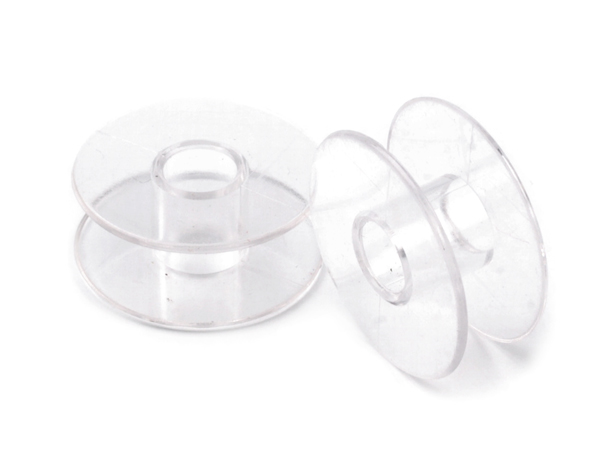
Plastic bobbin
A plastic bobbin is most often used by Japanese sewing machines with a horizontal shuttle. Usually, machines with a horizontally oriented shuttle have transparent needle plates through which the threads are visible. The bobbin in such devices is also made of plastic and transparent. The advantage of such a part is its weight, and the disadvantage is its durability.
How to insert a bobbin into a sewing machine: Singer, Brother, Janome
Before installing the part, it is necessary to check whether the spool width corresponds to the cap width. The bobbin should be "conveniently" located inside the cap. Nothing should prevent it from rotating. At the same time, its width should not go beyond the edge. If chips, cracks and nicks appear on the surface of the part, this will sooner or later lead to snagging and thread breakage during stitching. Even if the thread does not break, this can have an extremely negative effect on the quality of the work.
In addition to insertion, a number of additional operations for winding the thread should be performed. If the process is unfamiliar, then you should use the step-by-step instructions:
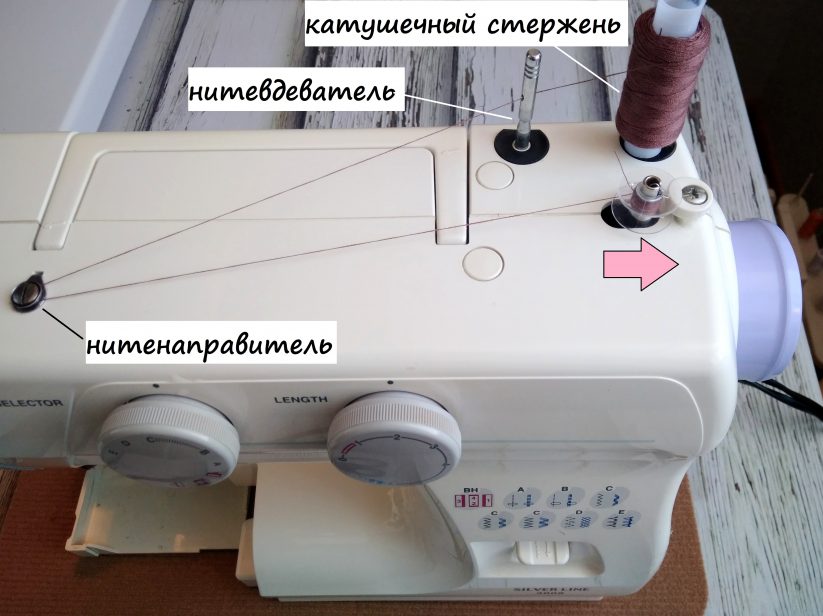
- Place the spool on a special pin, which is located on the top of the sewing machine body.
- Unwind a little thread and wind it onto the bobbin by hand. If the part is made of plastic, it usually has a special hole for inserting the thread and subsequent winding.
- Place a small spool on the winder and secure it securely.
- Press the pedal of a manual or automatic machine to start the winding process.
Important! It remains to wait for the winding process to complete automatically. If necessary, you can stop the machine after filling the bobbin with thread, when the wound amount is sufficient.
Next comes the installation itself, but before that it is also important to check what type of shuttle mechanism is used in the sewing machine. With a horizontal shuttle, the order of actions is as follows:
- Remove the cover. It all depends on the model. It is detached differently in different machines. You should read the operating instructions.
- Take the threaded part and unwind approximately 10-20 centimeters of thread. This action is necessary to bring it out through the needle, single, double or upper thread.
- Insert the threaded bobbin into the cap.
- Return the lid to its place.
- Bring the lower thread out.
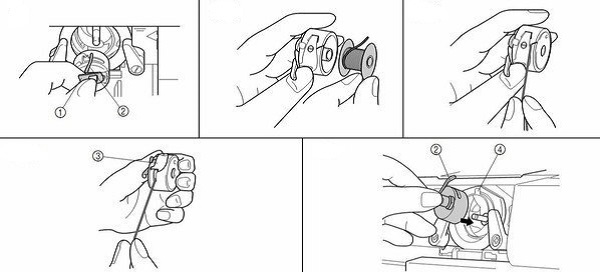
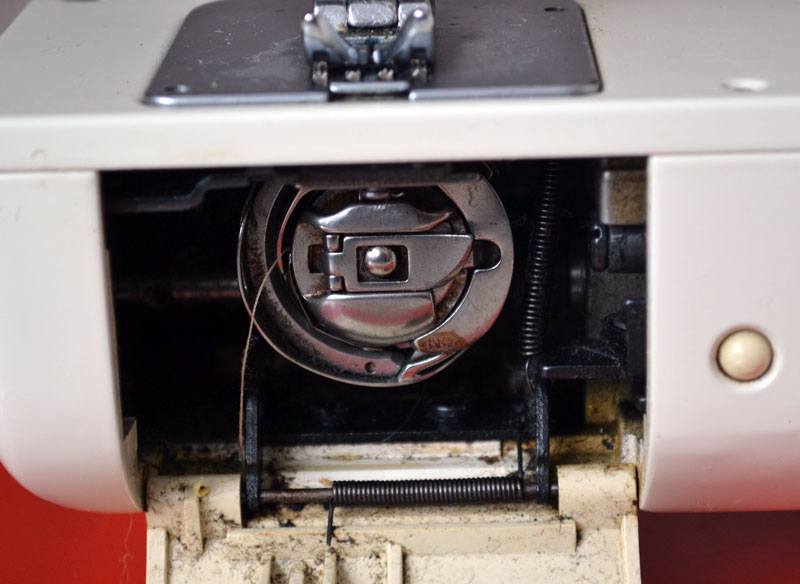
If the machine shuttle is directed vertically, then the step-by-step process of threading it looks like this:
- Remove the lid. To do this, as in the previous case, it is best to read the instructions for using the device.
- Unwind 15-20 centimeters of thread from the spool and place the part in the holder (cap).
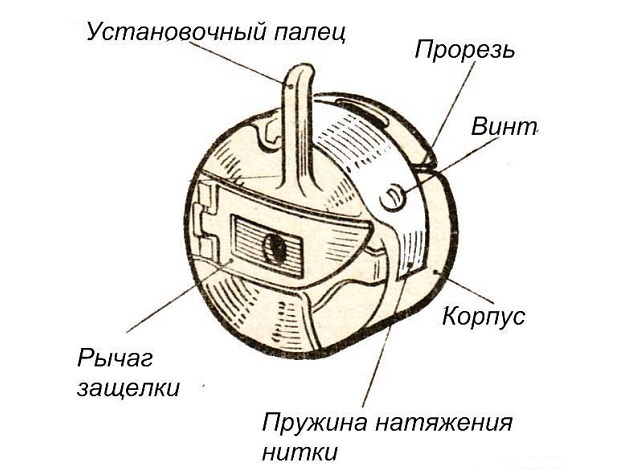
- Pull the end of the thread through the tension regulator. It is important that the direction of the thread matches the position of the spring.
- Insert the cap into the shuttle, holding it by the designated tongue or latch.
- Install the cap and press the latch until a click is heard, indicating that the part is in place.
- Check the correctness of the actions. The tail of the cap should be in a special groove of the shuttle device.
- Close the lid in the usual way.
- Bring the bottom thread out.
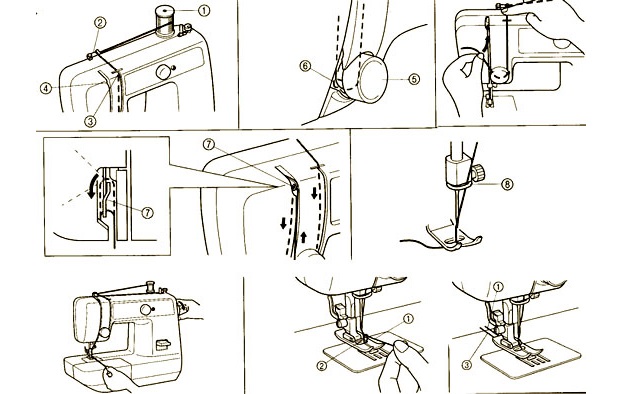
How to thread a shuttle into a sewing machine
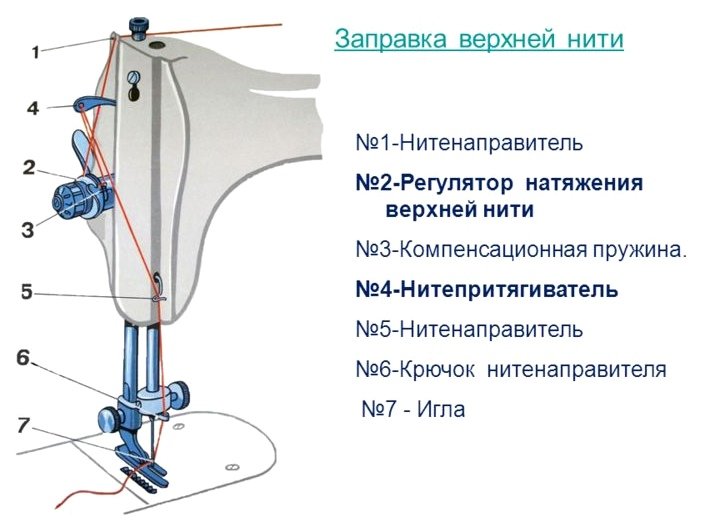
Before working on a sewing machine, you need to correctly thread the upper and lower threads, as well as adjust their tension. It is also important to determine the size of the stitch step and its type. You can’t do without threading the shuttle either.
As an example, it is worth taking the common vertical shuttle. It is used on large factory machines and inexpensive home machines. The instructions look like this:
- The thread is wound onto the bobbin. To do this, it is passed through a special mechanism and secured to the bobbin. All that remains is to perform a couple of manual winding cycles and switch the device to automatic winding mode.
- When there is enough thread, the process is stopped and the bobbin is inserted into the bobbin case so that the thread goes clockwise in it.
- Pull the thread through the hole in the cap and pass it under the leaf spring. As a result, it should come out into the eye at a length of about 10 centimeters.
- If necessary, increase or decrease the thread tension by tightening the special screw on the cap.
- The shuttle is inserted into the vertical shuttle device with the tail facing up so that it fits well into the grooves.
- Turn the flywheel so that the upper thread catches the thread from the shuttle.
- Pull both threads towards the machine foot.
Important! The thread tension must be adjusted most carefully. There should be no situations where the thread hangs loosely or is too tight. In the first case, this will lead to a crooked stitch, and in the second, to a broken thread.
How to thread a sewing machine shuttle
If the sewing machine has a horizontal shuttle, then it is much easier to insert the thread into it. In this regard, such a device is more convenient than a vertical one. The whole point is that the bobbin will simply need to be inserted into the already built-in shuttle. Usually, it is equipped with a transparent window through which you can see how many threads are left on the bobbin. The same can be said about the tension of the upper and lower threads. It is done automatically here.
All you have to do to thread the horizontal shuttle is open the transparent cover, insert the bobbin and close the cover. The thread winding is automatic. You don't even have to remove the material from under the foot or remove the thread from the needle.
Important! During operation, the thread will be unwound from the bobbin. This will prevent it from getting tangled, and the machine itself will work quieter and smoother.
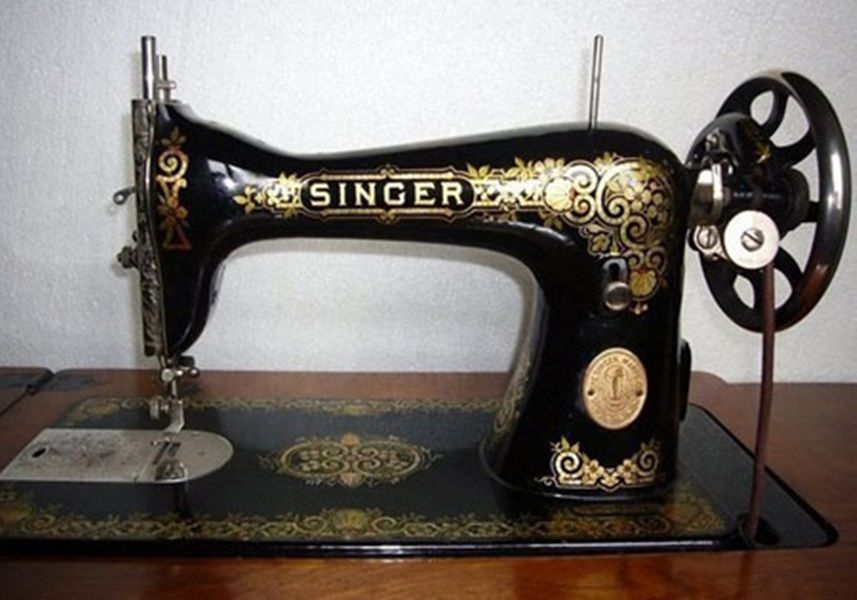
Threading the lower thread in a sewing machine is not the most difficult process. It is much more difficult to clean or repair the machine, replace certain moving parts or drip oil into it. Working with threads and bobbins in modern technology is as simple as possible. Even on old models such as Zinger, Podolsk or Singer Tradition, the process is not particularly difficult.


