Sometimes, when you go to the store, you can't find the right thing for yourself, either the size doesn't fit, or the color or style doesn't suit you. In this case, you can sew the thing yourself. For example, you can get a great raincoat with a hood if you strictly follow all the instructions.
The hood will be a great addition to any outerwear. It will look great on a raincoat, jacket, sports jacket and sweatshirt, and many natural fur coats have a beautiful hood, and how to sew a raincoat will be discussed below.
Preparation: fabric and taking measurements
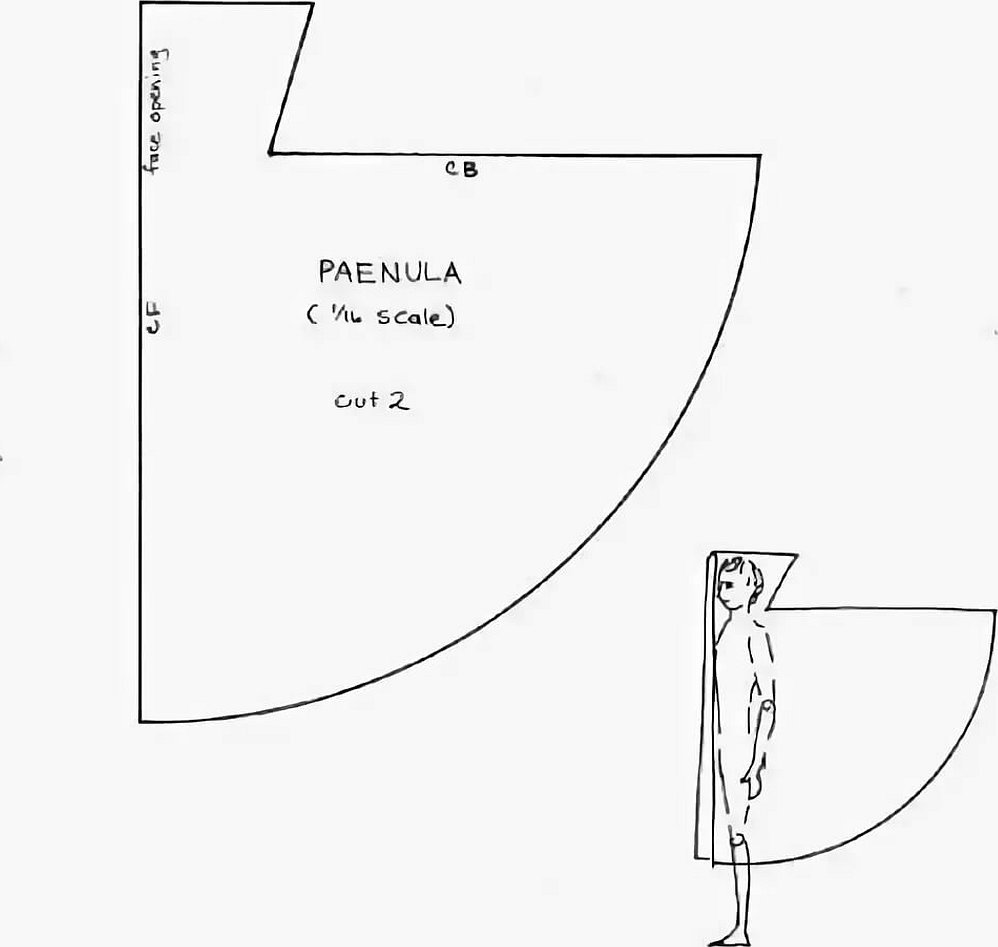
The pattern of a cloak with a hood should begin with taking measurements. It is worth remembering that the hood is sewn exactly according to the head size, so that later it does not fit on the forehead or, conversely, does not fall back.
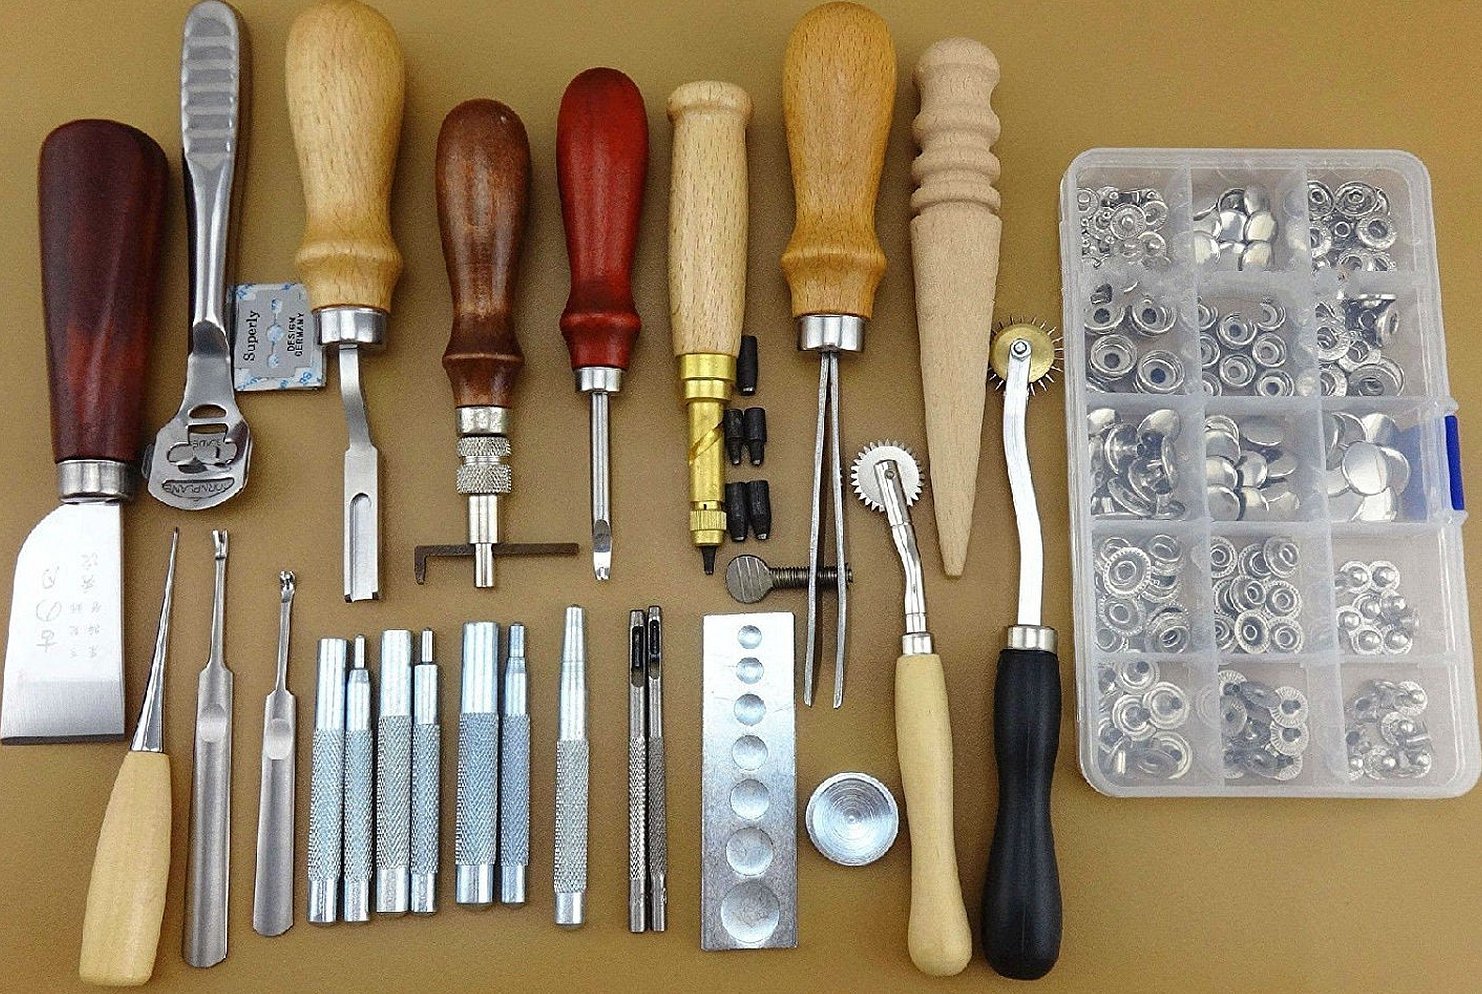
To make a pattern for a hooded raincoat and then sew it, first of all you need to prepare everything you need. The most common hooded raincoat is a poncho. To sew it you will need:
- centimeter. It will come in handy for taking measurements. If a person sews a raincoat for himself, then in order to take measurements, you need to ask another person. Because in this case, you can measure your parameters incorrectly, which will subsequently affect the product;
- pen to write down dimensions;
- ready-made pattern of a cape with a hood;
- paper for creating a pattern;
- chalk to transfer the design onto the canvas;
- fabric for sewing;
- thread and needle;
- sewing machine.
How to sew a cloak with a hood
To sew a cloak with a hood, you should choose the material. Usually, to sew a cape cloak, they use paraffin or Teflon fabric, as well as membrane material. If you decide to cut out a regular cloak, you can use not only windproof and water-repellent fabrics, but also leather, velvet, corduroy, suede, raincoat, cotton and others.
Pattern and sewing of a raincoat
After preparing everything you need, you can start working. Many people wonder how to sew a hood on their own. All the work on sewing a raincoat can be done in several stages:
- take measurements;
- transfer the pattern onto paper and then onto fabric;
- make separate fragments, baste them, and sew them on a machine;
- sew all the parts together into a single whole.
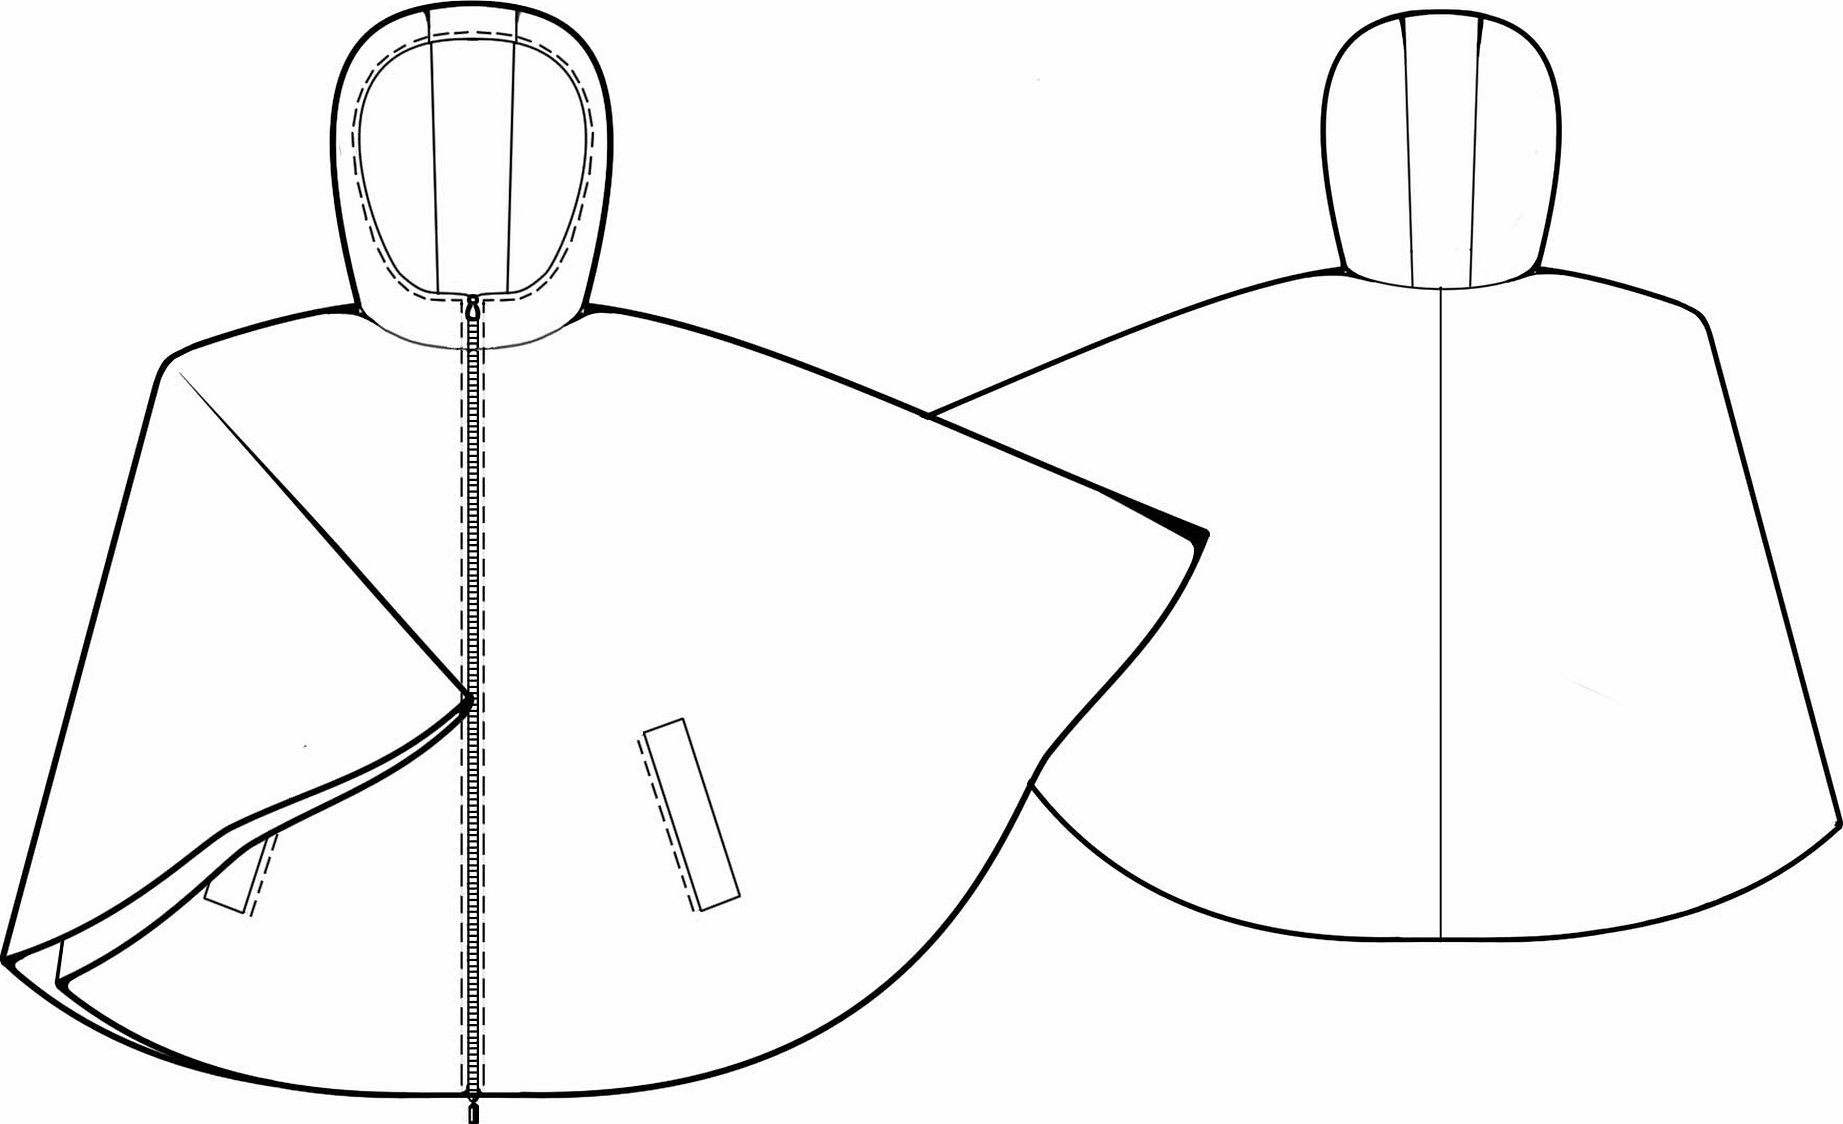
The women's poncho coat has several fragments. Its main parts are: the front, back and neck. There are also sleeves, but they belong to the main part. In addition, ready-made models can be decorated.
First, the main part is made, the front and back, then the sleeves and hood are made. The next step will be processing the neck. And then you need to sew on the sleeves and sew in the hood.
The cloak is sewn almost the same way, with the exception of some details.
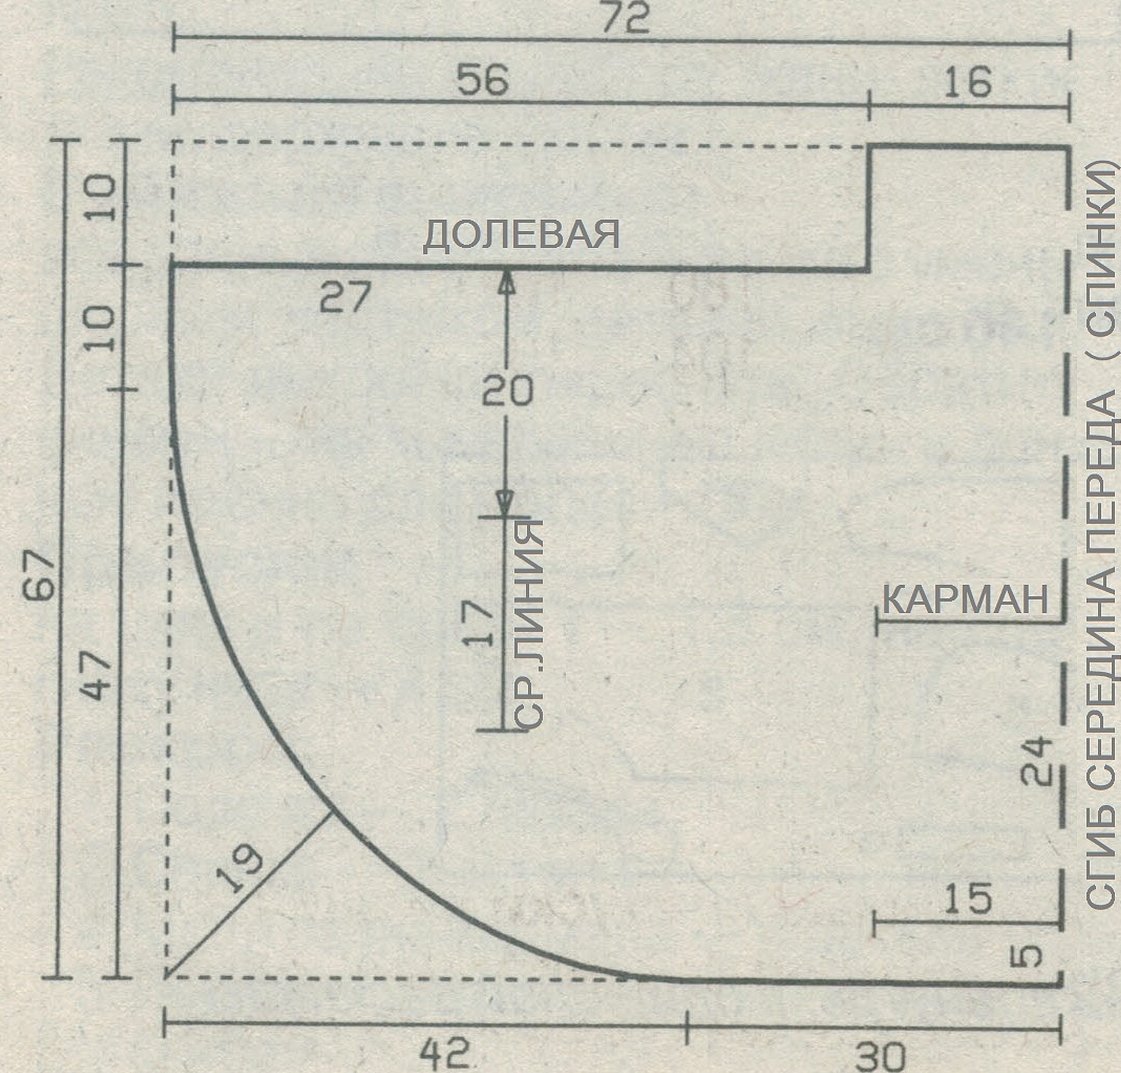
Lay the fabric on a flat surface and cut out a rectangular piece of the required dimensions, the measurements of which are taken in advance. Do not forget to leave indents for allowances.
Attention! To give the cloak its shape, you need to trim the corners of the fabric, having previously folded it in half. Then the edges will be rounded.
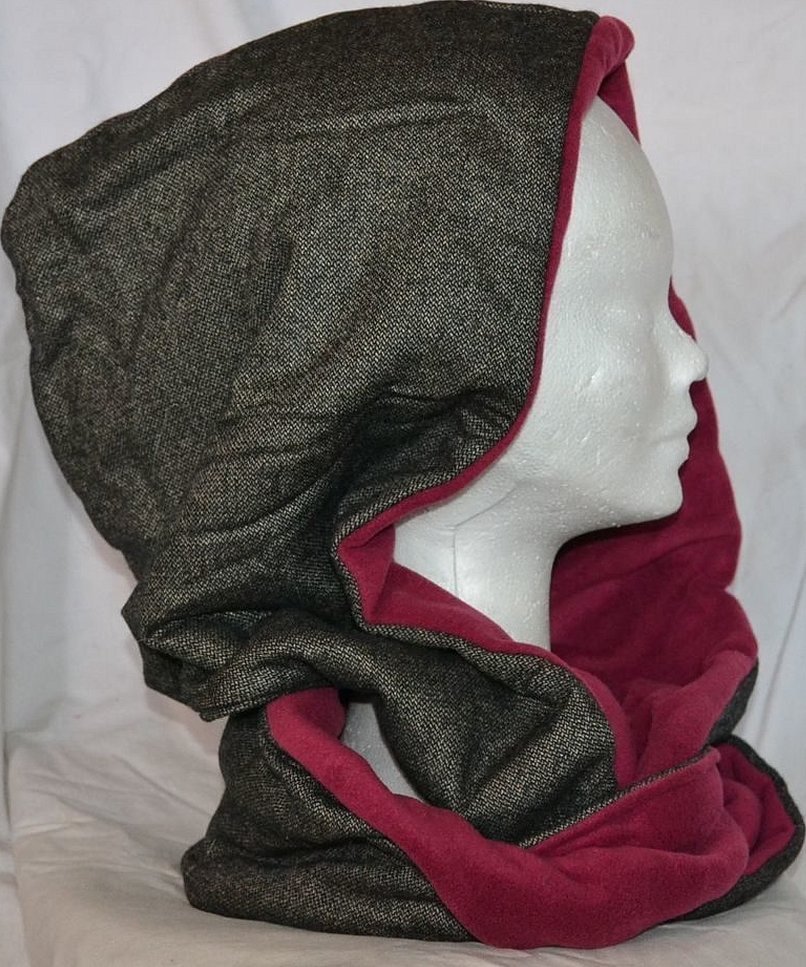
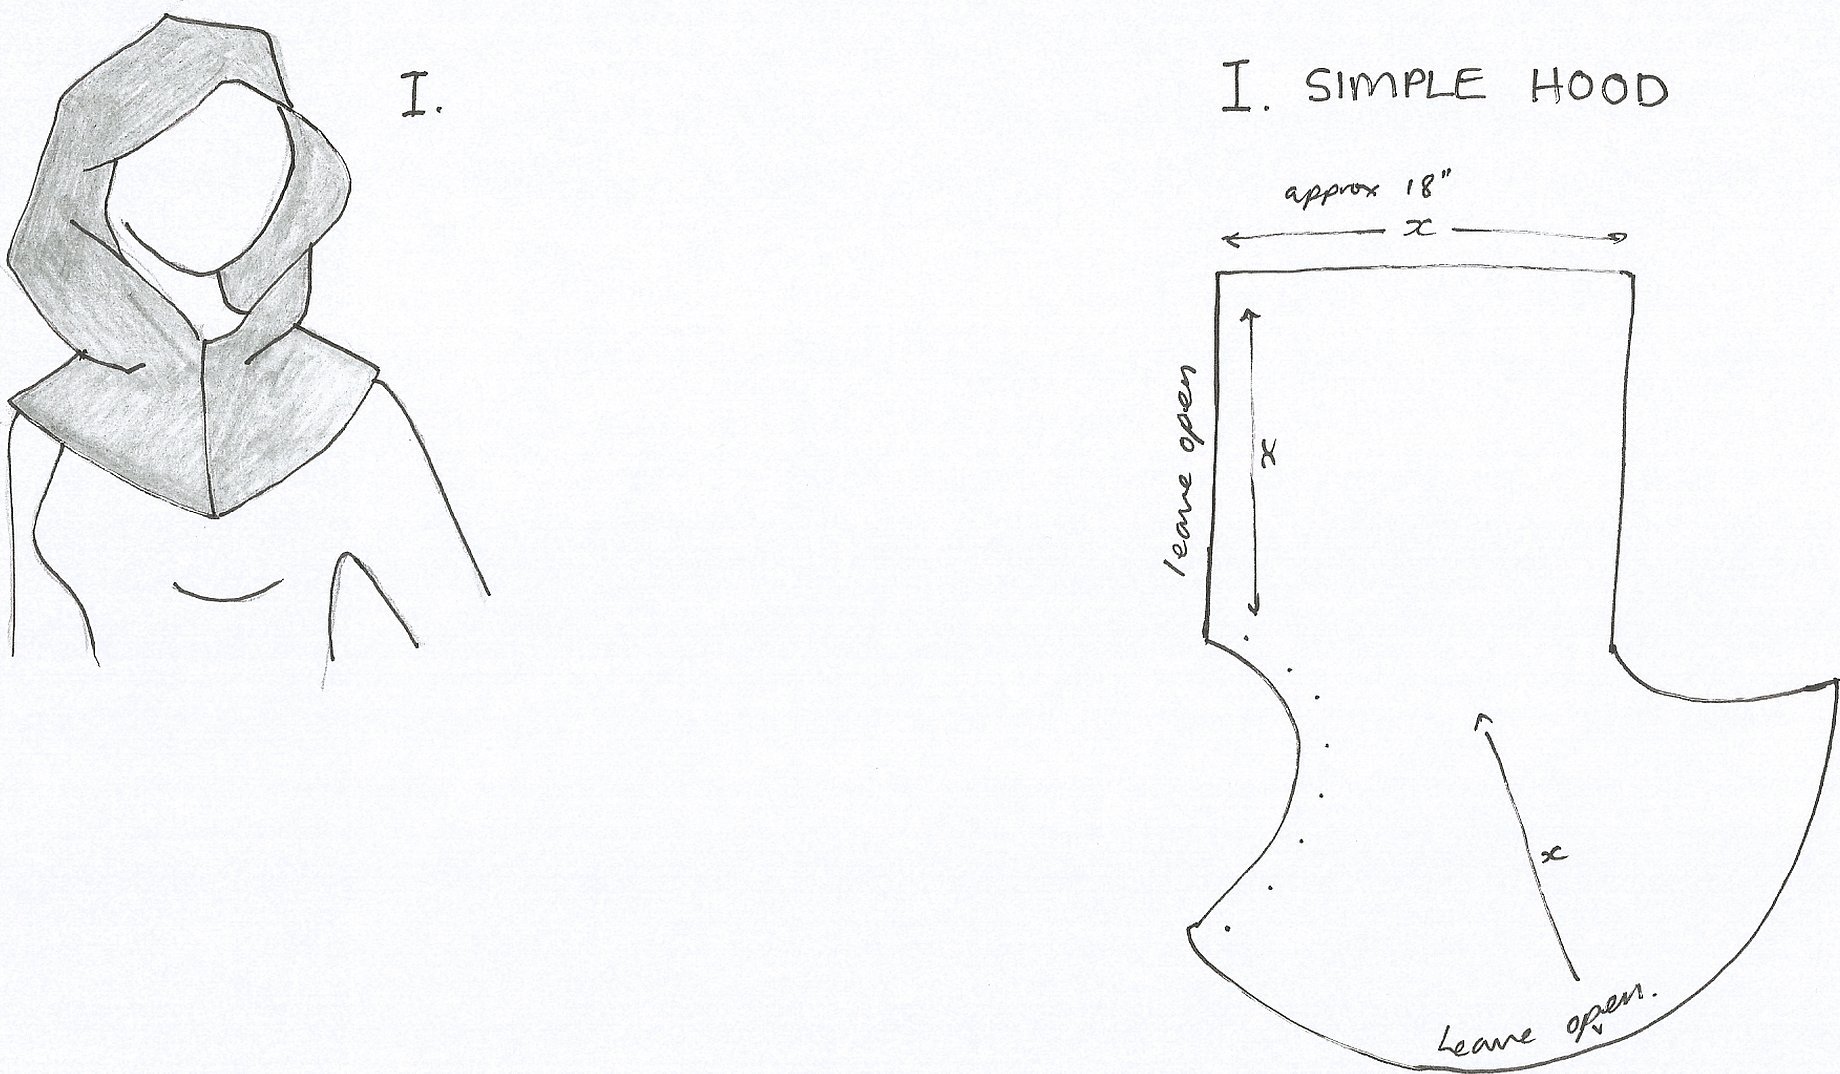
Pattern and sewing of a hood
How to cut a hood so that it fits perfectly on your head. After all, in cold weather, a hood will be a great alternative to a hat.
Take any sewn hood and mark the center point of the front. And from that point, draw a measuring tape around the face. When you start cutting out the hood, you will need to add 820 cm to the resulting value, depending on the style of the hood. To calculate the height of the front edge of the hood, you need to divide the resulting number in half. Then, on the paper pattern, draw the front part according to that measurement.
The width of the hood is also selected individually. To get a tight-fitting hood, you need to measure the distance from ear to ear. To make the hood wide, measure the distance from the brow ridges on the outside. Then add 510 cm for the allowance and divide the resulting number in half.
Having made a preliminary pattern, it is necessary to apply it to the neckline of the garment in order to adjust it to the neckline.
After taking measurements, you need to draw a pattern on paper or cardboard and cut it out. Then apply the pattern to the fabric and trace it. Don't forget to leave a few centimeters for the allowance and seam. Cut out the resulting fabric pattern.
When sewing a product with a hood, you need to remember the basic rules: when sewing in the hood, you need to carefully ensure that the shoulder seam of the pattern matches the shoulder seam of the product. And the middle of the back of the product should match the occipital seam. Before sewing in the hood, you must first sew the shoulder seams.
Interesting! If the product consists of 2 or 3 parts, you need to fold them with the right sides together and sew the seams. If the hood consists of one part, you need to fold it so that the right side is inside, and sew its back part.
How to sew a hood with your own hands: patterns
A hood can complement not only a raincoat or coat, but also a jacket. To choose a hood for a jacket, you first need to understand what types there are. There are several types of hoods:
- low-volume;
- volume;
- close-fitting;
- falling on the neck;
- There are also many models that combine several of the listed types.
The simplest version of a women's jacket with a hood is the hoodie model.
The pattern for such a jacket will include the following elements:
- back;
- shelf with a hood;
- pocket details;
- sleeve pattern.
To sew a hoodie model, you can use fleece, velsoft, footer and faux fur. You can also combine it with knitwear, which will give an imitation of hand knitting.
To determine the material consumption, you need to decide what the size of the jacket and the width of the fabric will be. For example, with a fabric width of 180 - 200 cm (footer and velsoft), you will need 180 to 200 cm of material. The width of fleece and faux fur is 140 - 160 cm, you will need 170 - 220 cm of material. When buying fabric and making calculations, you need to add a few centimeters to align the cut, or if there is a defect.
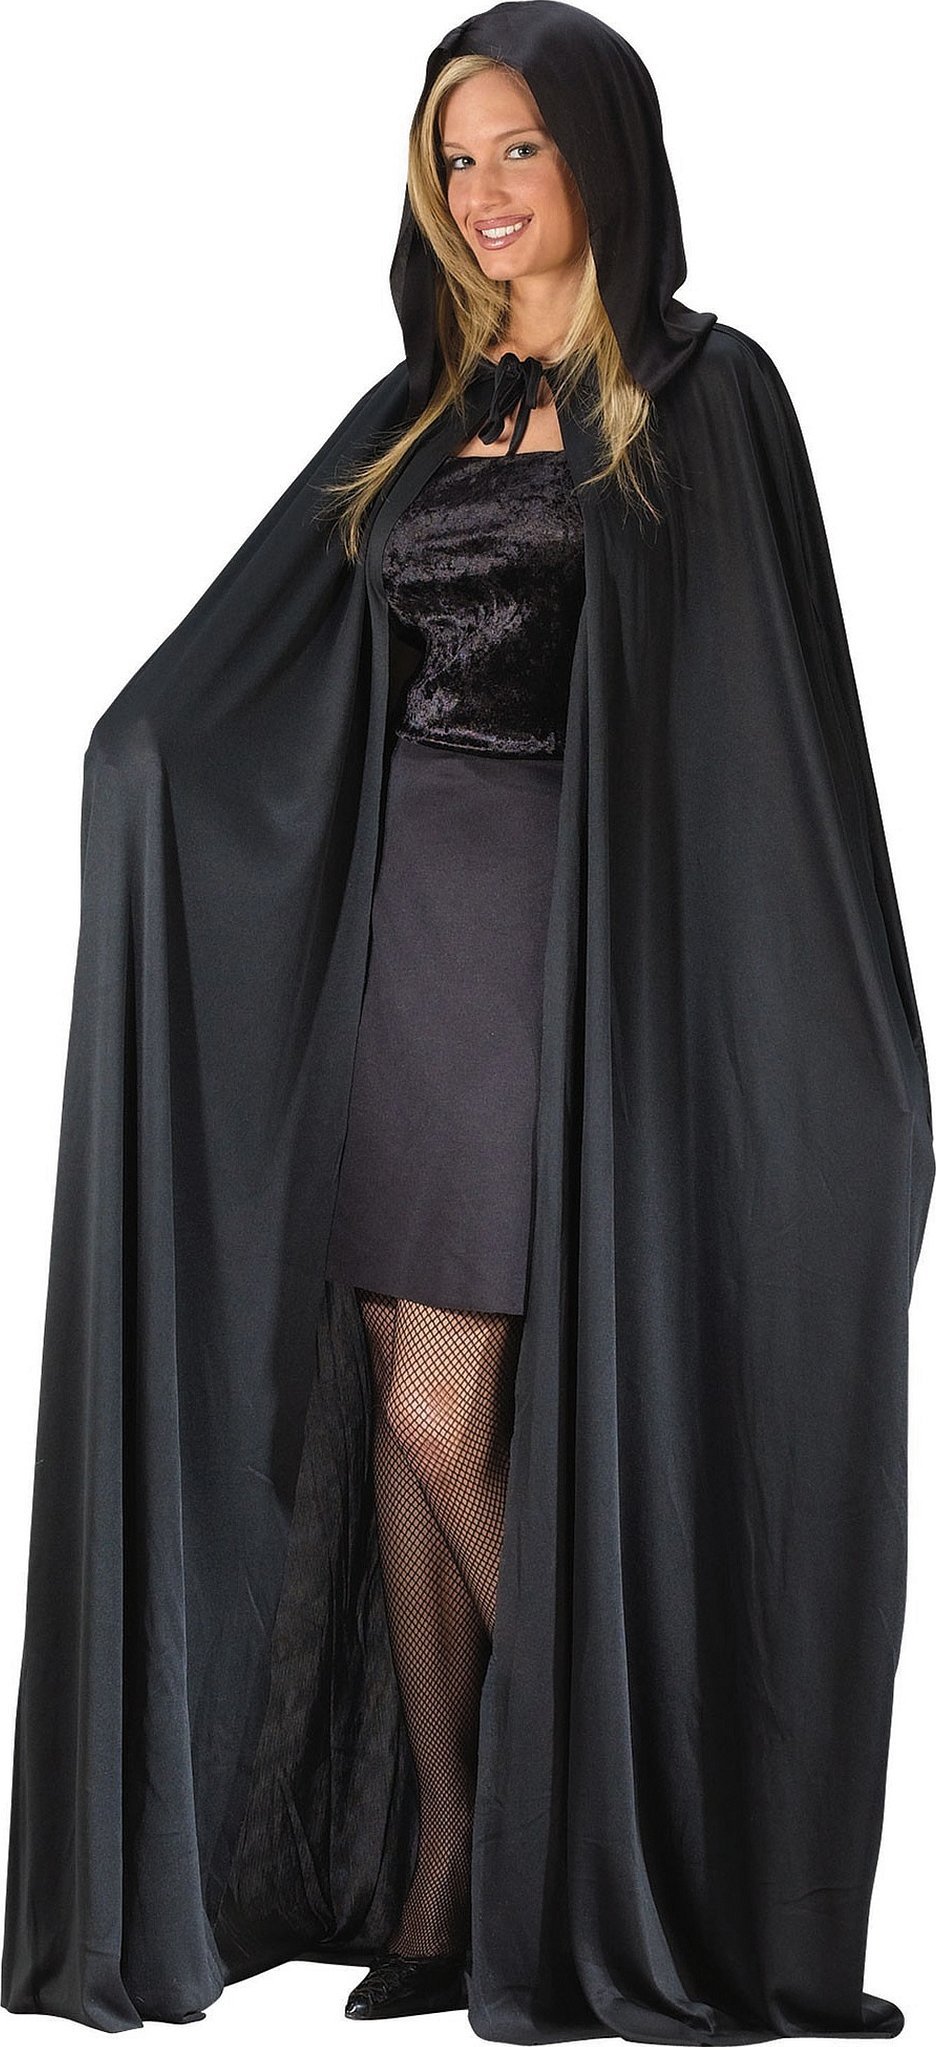
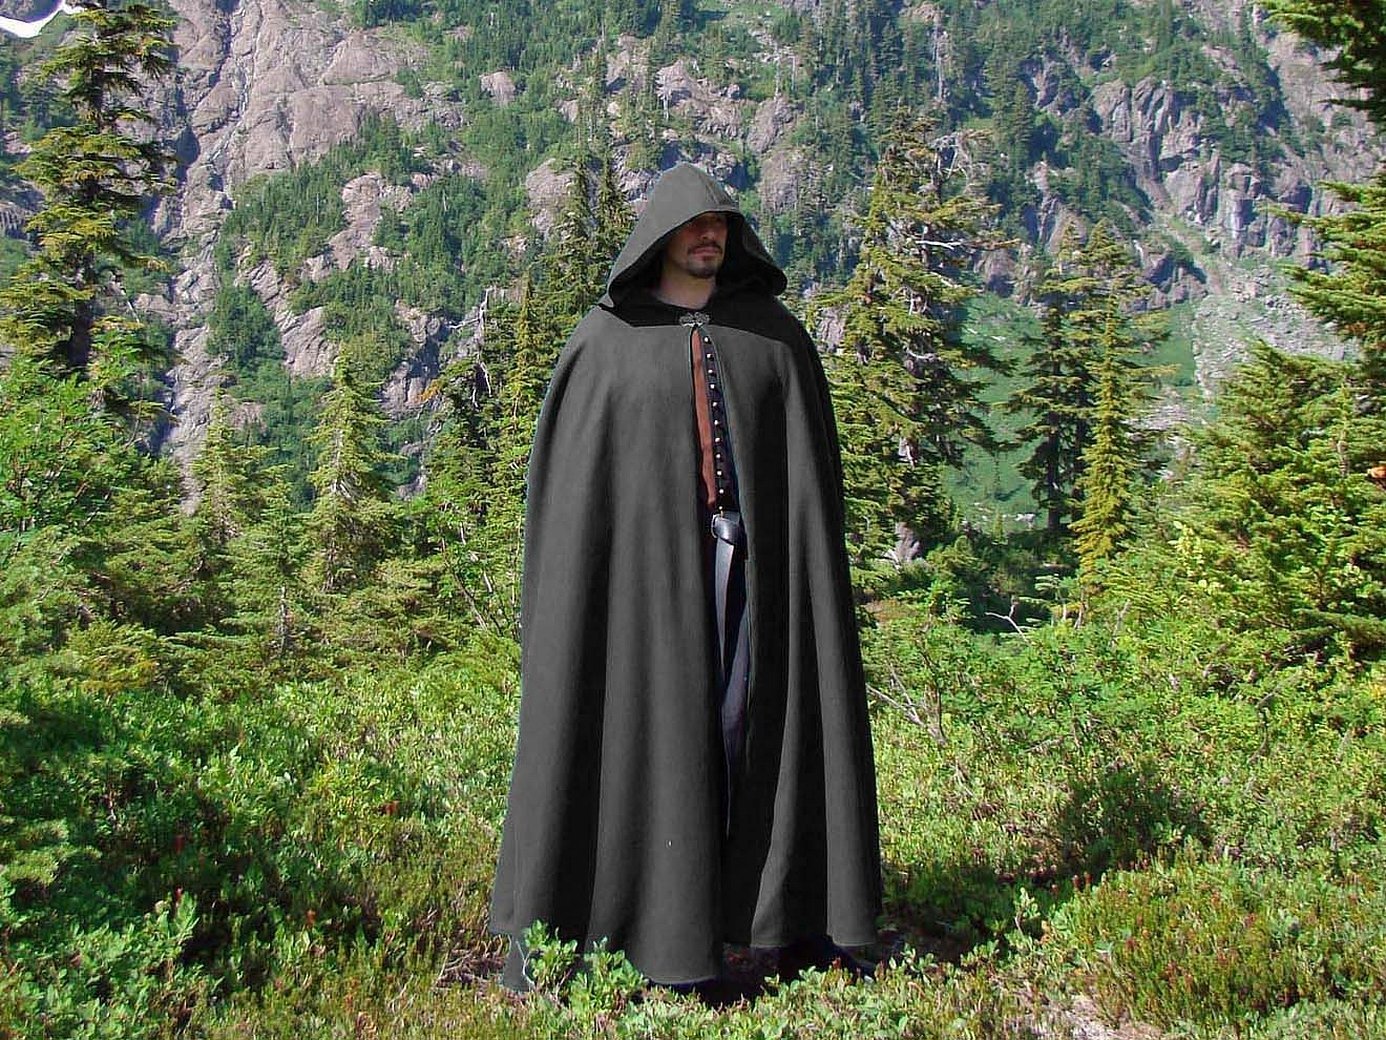
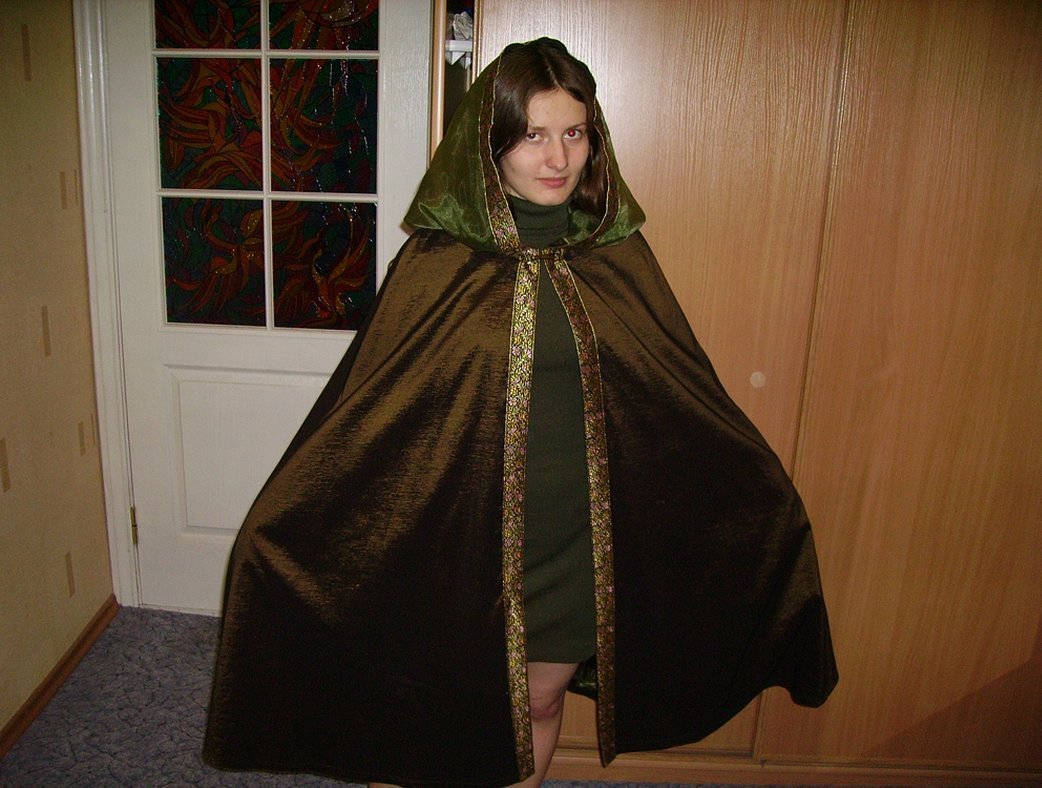
Medieval Hood: Cloak Pattern
A cape is a great addition to a carnival or fashion costume. This item of clothing has been used since ancient times to keep warm, to indicate one's status or simply for beauty.
In general, the hood will also fit on a jacket:
- The first step is to choose the fabric. Wool, satin, flannel and cotton are suitable for such a cape. It is necessary to purchase fabric of two shades. One for the outer side, the other, lighter, for the lining.
- The next step is to measure the neck circumference and choose the length of the cape. The neck should be measured at the base. Then measure the distance from the shoulder to the expected desired length. Write down all the measurements on a piece of paper. The length of the product may also depend on the style. The style resembling a robe is usually made to the ankles or calves. The style resembling a cape is made to the elbow or slightly lower.
- Then measure the neck circumference to calculate the radius. To calculate it correctly, divide the circumference by two, then divide the resulting number by Pi. Round the resulting number to a larger whole number, which will be the radius.
- Take the fabric and fold it in four layers. First fold it in half crosswise, then in half again, you should get a square. Turn the fabric, the corner of the central point should be in the upper left corner.
- Draw a neckline on the fabric. Take a piece of string and pin it to the left corner of the folded material. Put chalk on the other end, you should get a kind of compass. Draw an arc with this compass from the top to the left edge.
- Draw the bottom line. Add the length of the cape you want to get to the radius. If the string is not enough, you can extend it and draw another one, which will mark the bottom.
- Proceed to the pattern. You can start making the pattern, adding 1.5 cm for seams. After the pattern is ready, you can cut out the lining. You need to do the same as described above, only with the material prepared for the lining.
- Make a front cut on the cape. Unfold the main and lining parts and place them on top of each other. Then fold them in half to form a semicircle. Cut the fabric along any fold. Do not touch the other fold. This is how you get the front cut.
- The material is folded and pinned with the right side facing inward. The resulting semicircles need to be unfolded, one piece placed on top of the other so that the right side is inside. Carefully check that all the cuts are exactly aligned, and they can be pinned.
- An allowance of 1.5 cm is laid along the entire perimeter. One of the straight sides does not need to be stitched to the end, leave space so that the part can be turned inside out later. As you stitch the material, you need to secure the thread at the beginning and at the end, so the product will be securely sewn.
- Turn the product inside out and iron it.
- Sew up the hole left. You can use a sewing machine or stitch it by hand.
- To sew, lay the piece out with the wrong side facing you. Hem one side, just like you would hem a cape.
- Fold and sew along the back seam. Fold again with the wrong side out. After the piece is folded, the hood length should be 45 cm.
- To assemble the product, the upper edge is stitched with two lines, so it can be assembled. Here you can also sew by hand or use a machine.
- How to sew a hood to a garment. The hood and cape are fastened together with the right sides facing inward. You need to make sure that all the edges are evenly placed. Sew the pieces together, remembering to leave some space for the seam allowance. You also need to secure the threads so that the seam does not come apart.
Important! To prevent the fabric from fraying, it can be treated.
Once the cape-tent is ready, you can decorate it. For example, you can use ribbons instead of fasteners. Or use a needle with an eye to knit a loop and sew on a large button. You can try to trim the hood with fur. Just make sure that when buying fur, it has no smell.
You can make a superhero cape for kids using the same principle. You just need to take a little less material. Take the child's measurements and proceed from there.
A raincoat is an excellent and convenient thing that protects a person in wet weather. Moreover, sewing such a thing does not take much time. The pattern of a raincoat with a hood is also quite simple.
To sew such a raincoat, you need to stock up on waterproof material. If you make a raincoat of average size, you need to take about 2 meters of material. When sewing a raincoat, like any other raincoat, you must follow the following sequence:
- You need to connect the side seams using a sewing machine or by hand, using thread and a needle.
- The hood should be sewn to the neck. The bottom edge of the hood should match the bottom edge of the neck.
- To give the product strength to the sleeves, the edges and bottom should be finished with piping.
- If there are fasteners, the choice of material depends on personal preference.
- Can be decorated with drawings, appliques or rhinestones.
It is worth noting! The raincoat can be made in one piece by simply cutting out a hole for the neck. You just won't be able to make a hood on it.
From all of the above, we can conclude that any product is easy to sew yourself. The main thing is to have desire, be patient and have the right material.


