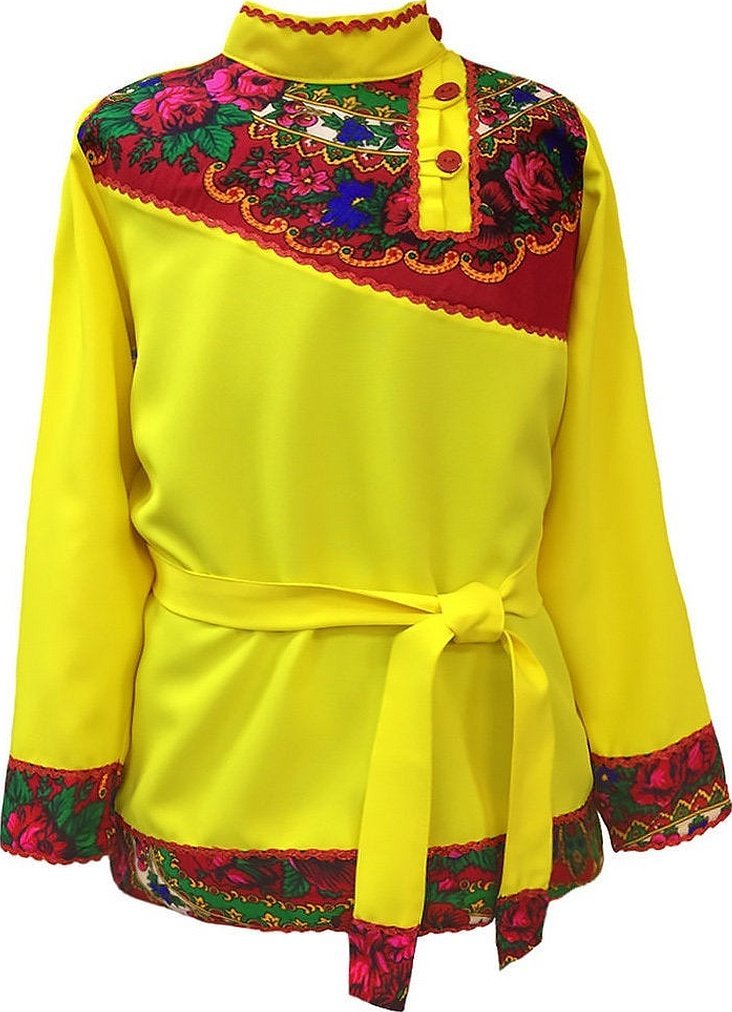
Men's shirt is a Slavic, originally Russian type of clothing that was worn in the old days. Today, such a product is again in fashion and directly emphasizes folk rituals. Men's kosovorotka, pattern, step-by-step instructions for sewing the product - further in the article.
History of the men's shirt with a slanted collar
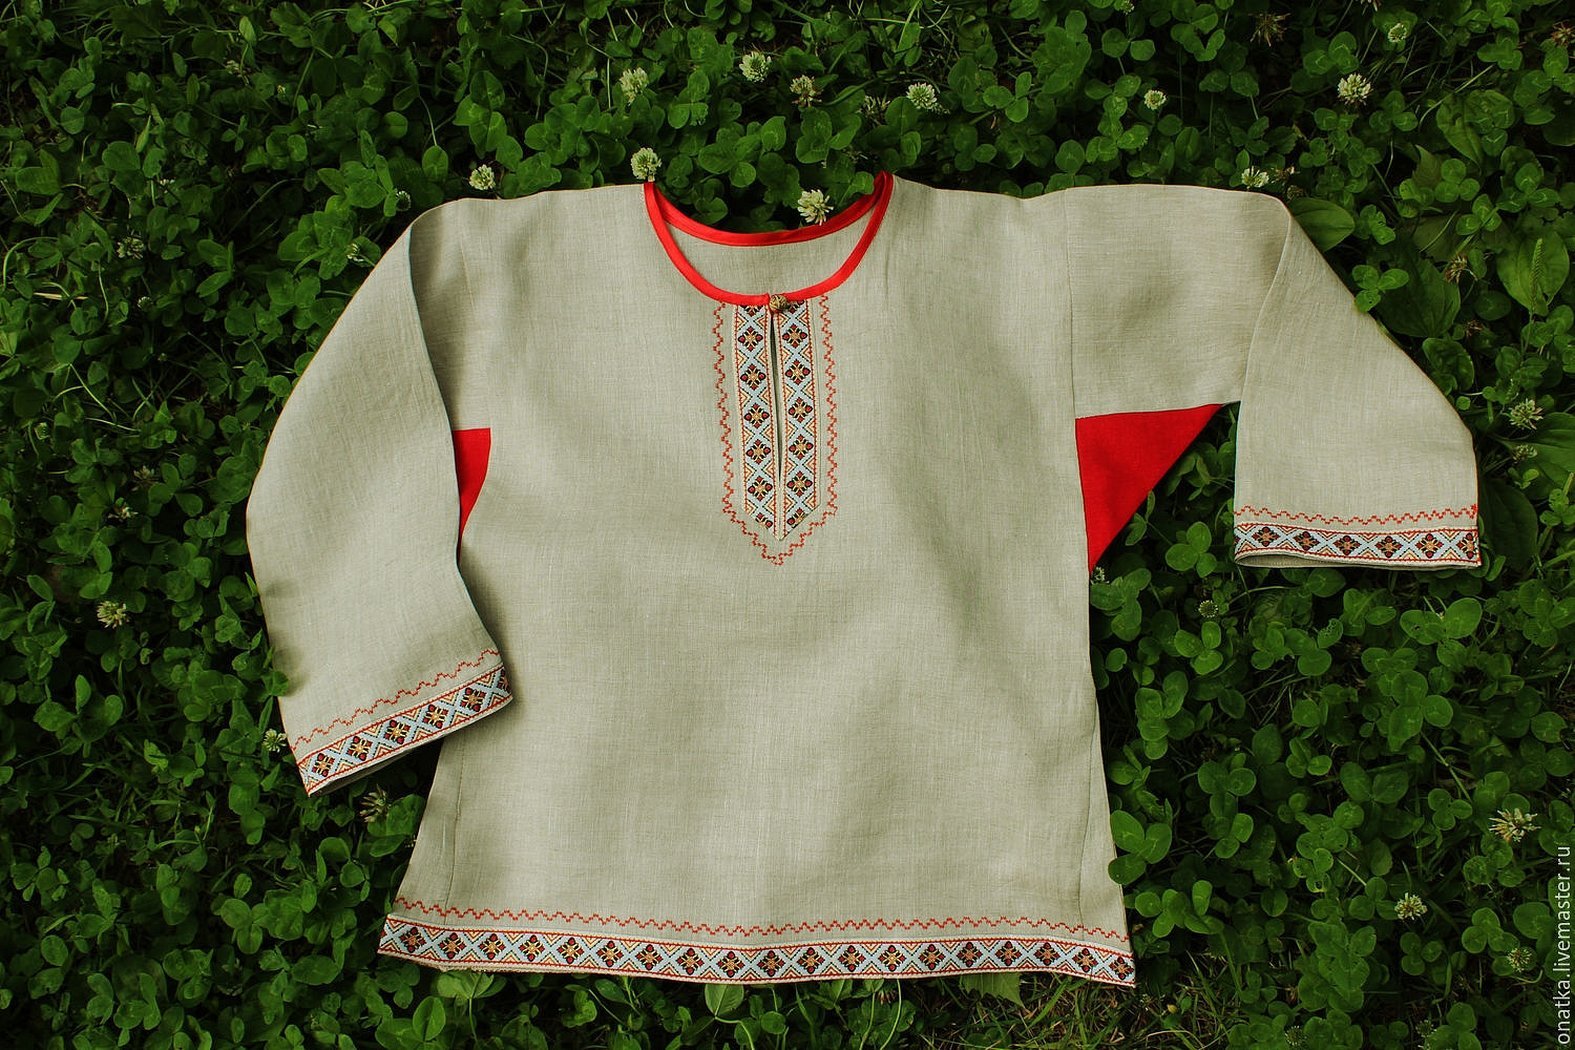
The name of the product comes from the word "skew collar", that is, not sewn straight, but diagonally. Previously, shirts were sewn exclusively from hemp cloth, although modern ones can be made from any fabric, preferably natural ones - cotton, linen. The kosovorotka was worn as underwear, outerwear, decorated with tassels and belts and used as festive attire.
Please note! The pattern of a Slavic men's shirt is so simple that even a beginner can make it. It is enough to take the measurements correctly.
Today, this type of product is used both in everyday life and on national holidays. The main advantage of the shirt is its convenience. It is loose-fitting, not fitted, due to which it does not restrict movement. It is for this reason that back in 1880, the kosovorotka served as a soldier's uniform.
Initially, the collar was cut straight, not obliquely. But later they decided to move it to the side so that during work and bending over the pectoral cross would not fall out (according to historical data). Since then, the name kosovorotka has come about, and the style of the shirt has survived to this day and is very popular among people regardless of age and gender.
Nowadays, the classic shirt pattern is used to sew many items: sarafans, women's and men's shirts, underwear, pajamas or Ukrainian embroidered shirts. It can even be used to sew women's nightgowns made of satin or silk.
Measurements for sewing a shirt
To sew a men's kosovorotka yourself, you first make a pattern, but for this you need to take measurements:
- back width;
- sleeve length (to measure correctly, bend your elbow and place a tape measure from your neck through your shoulder and elbow);
- hip circumference;
- head circumference (to cut the neckline correctly);
- length of the product.
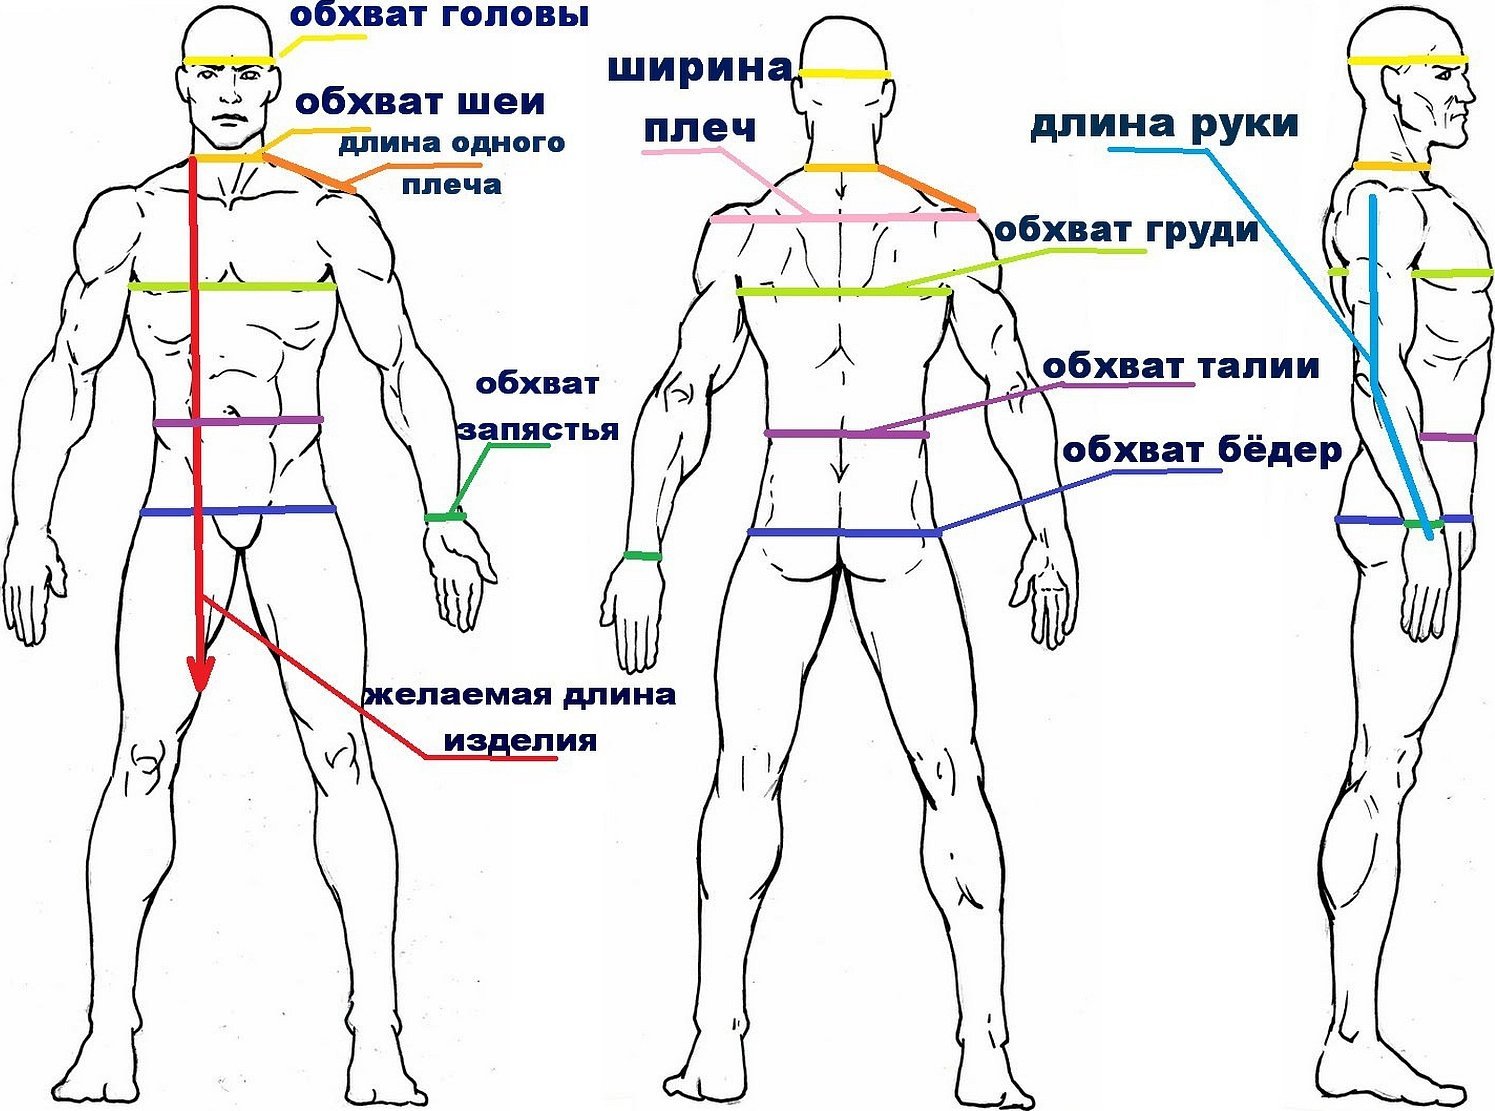
You can add a few centimeters to all measurements, because a folk shirt should fit loosely on the figure.
Cutting and elements
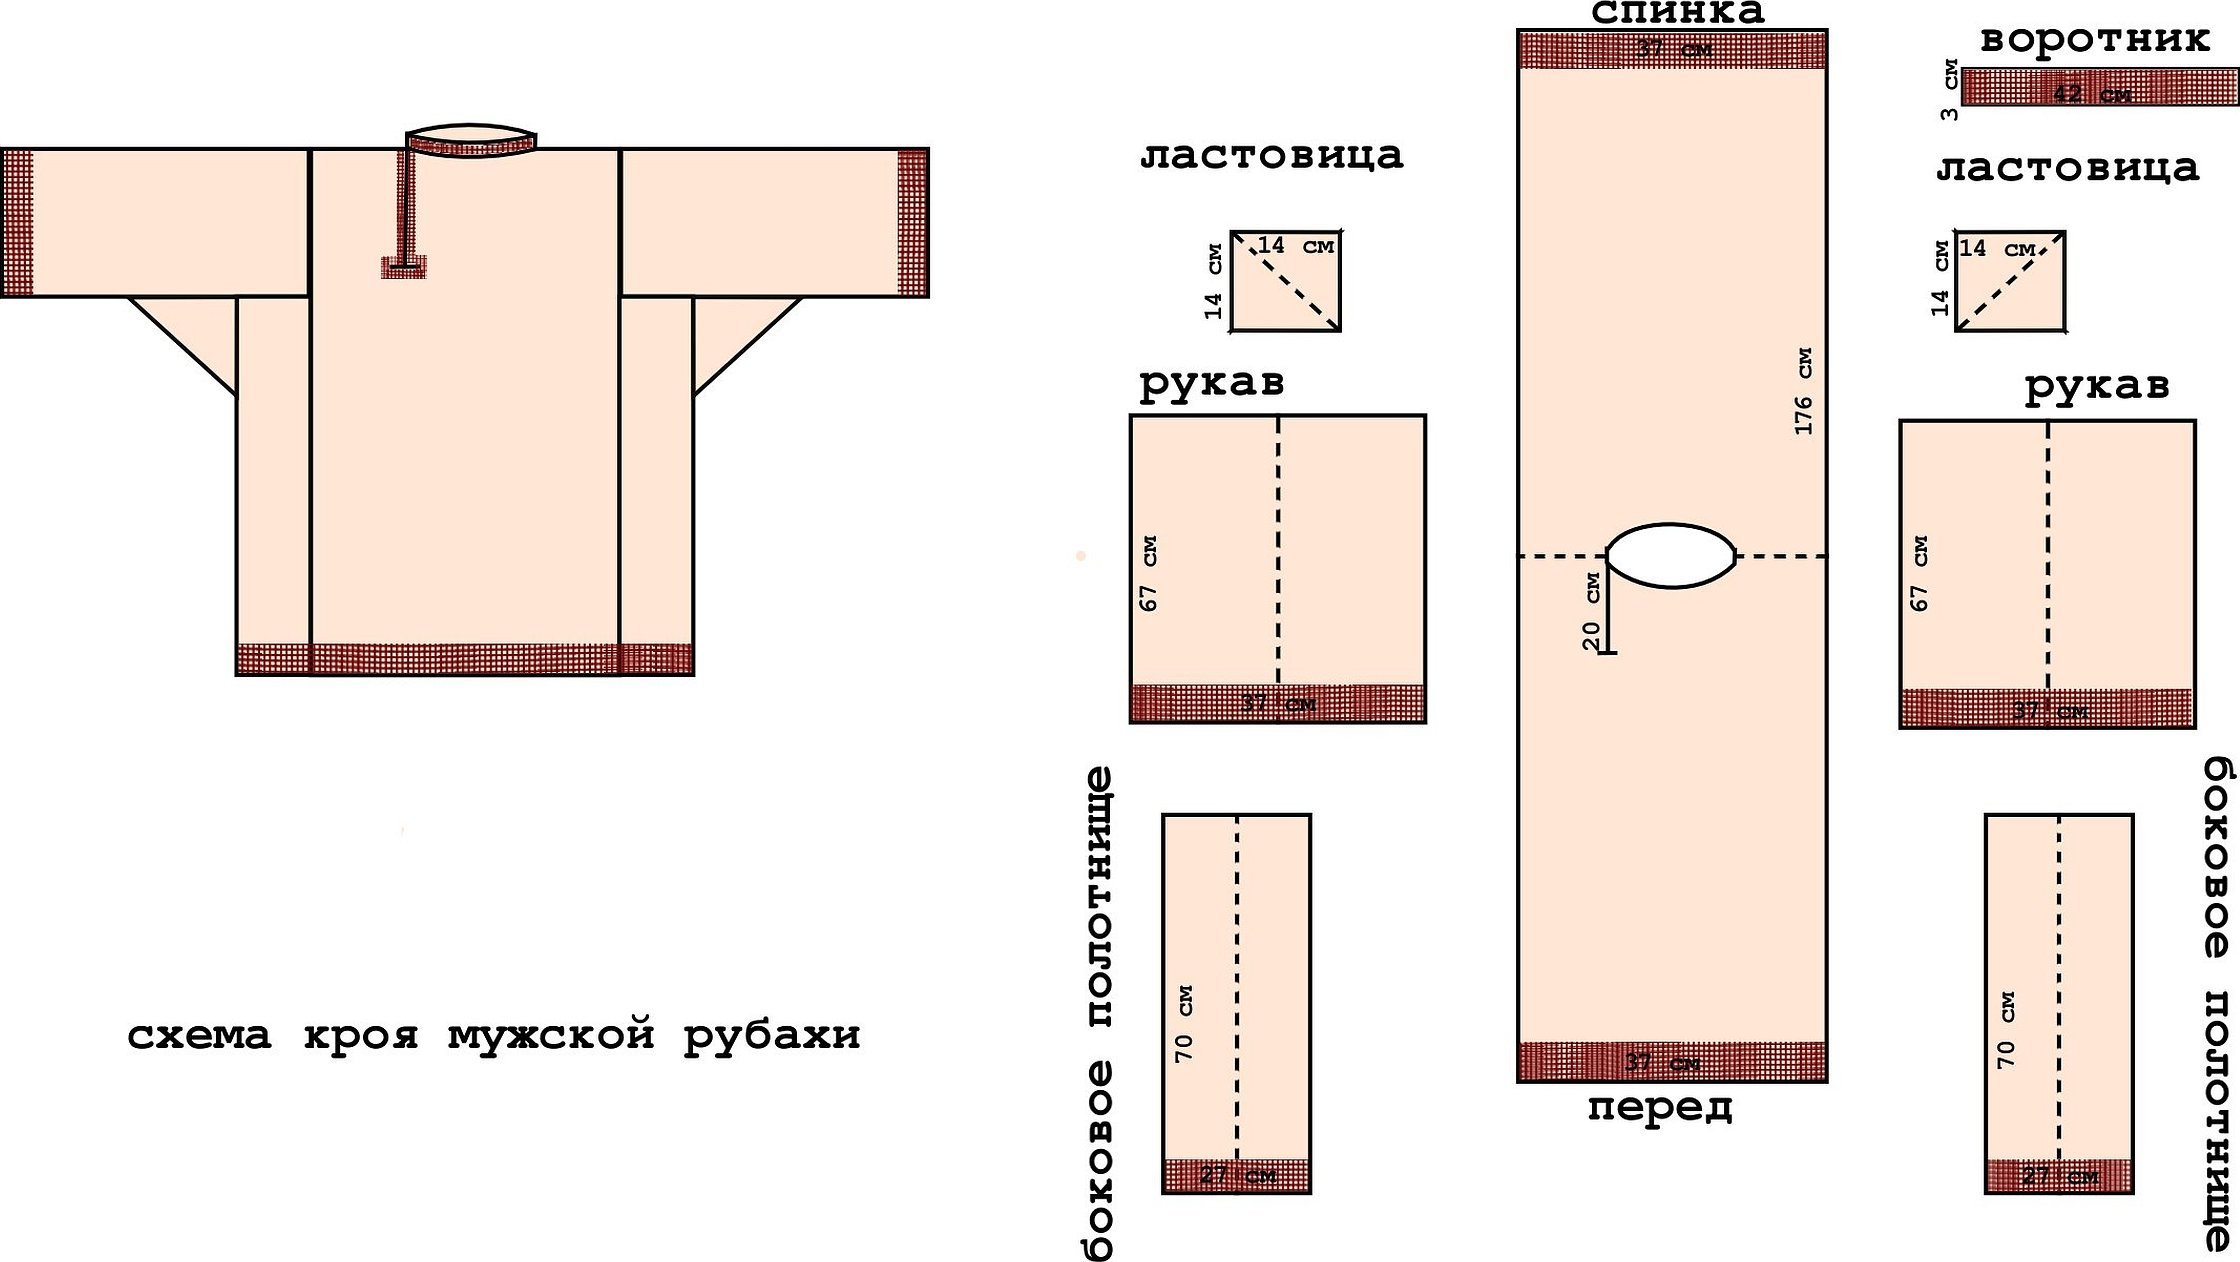
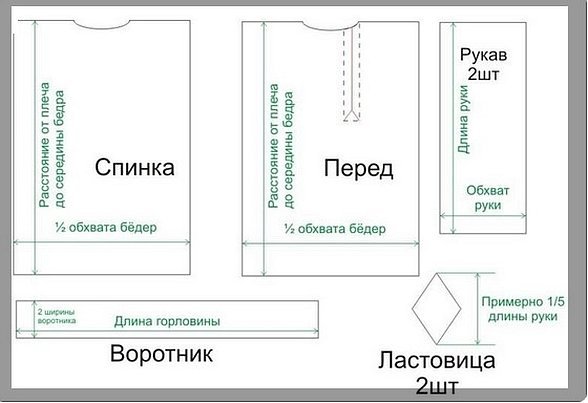
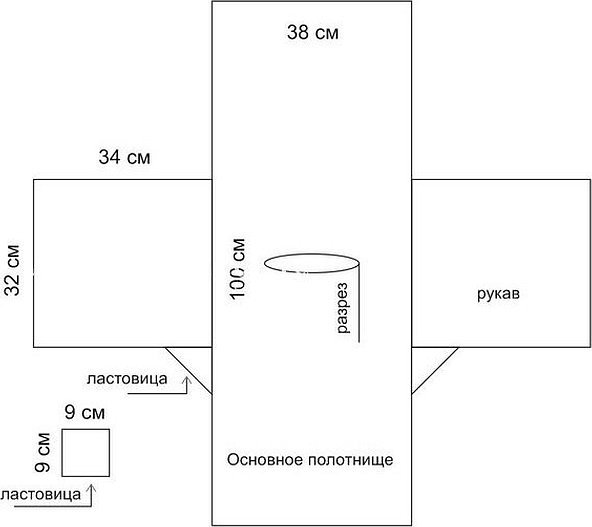
The Russian shirt, the pattern of which is presented below, is sewn in several stages: taking measurements, pattern, sewing. Before sewing, you need to cut out all the elements of the shirt. They are all rectangular, so there should be no difficulties. It is enough to calculate the width and length of the products:
Decorative elements are used to decorate the product: this could be a ribbon, braid, embroidery, a belt with tassels, etc.
In addition to the classic method of cutting a kosovorotka, where all the elements are rectangles and squares, there is another way to sew a product of this type. The main difference is that in the first version, the main part is cut out as a single rectangular piece, and in the second - in two parts - the back and the front. As a result, the product will be the same, only from the neck to the sleeve there will be an additional seam. The differences can be seen in the picture below.
For beginners in sewing, it is recommended to first draw a pattern on paper and then cut it out of fabric. Experienced craftsmen can immediately transfer everything to the canvas and cut out the details for sewing. Unlike other products, the Russian shirt does not have darts and the style is quite loose, so it can be sewn oversized, that is, in one size. When wearing, you can tie the kosovorotka with a belt, which will emphasize the waist, and the product will fit the figure, and not look baggy.
Main part
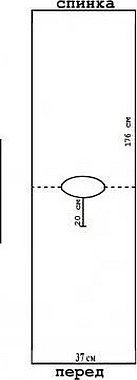
The standard pattern of a kosovorotka for a man of size 54 - it needs to be drawn from the main part. The stanovina (this is the base of the shirt, it is sometimes called the torso) - it is cut into a rectangle of size 2 of the length of the product. To do this, first take a measurement of the height of a man or boy, transfer it to the fabric folded in half, and cut out the main part.
The main panel should correspond to the width and length of the future shirt. According to the classics, the width should be 36 cm, because this is the width of the homespun fabrics from which clothes were sewn. The remaining volume is added by side panels.
Attention! When taking measurements, you need to add 2–3 centimeters to the figures obtained for seam allowances.
Sleeve pattern
The kosovorotka, the pattern of which is made almost the same for men and boys, has several features in the pattern of the sleeve. Unlike a regular shirt, the sleeve pattern also looks like a rectangle, like the stanvina.
The side panels are calculated using the formula: the length of the side seam must be subtracted from the length of the armhole. As a standard, the average width of the product is 1 meter, but if the customer wants a more fitted option, then the shirt is cut out according to individual measurements.
When cutting out the sleeves, it is important not to forget about the gusset. These are underarm inserts. They are usually cut out in the form of a square, approximately 15 × 15 cm or 20 × 20 cm.
The gusset is not the most important element of a shirt and you can do without it. But its presence is considered a sign of quality of a good product. The gusset can be triangular, square, in the shape of a diamond and serves to strengthen the side seam connecting the front and back. Beginners who are sewing a shirt for the first time can not focus on the gusset and sew the product without it.
The sleeve width should be equal to the width of the frame and equal to 36 cm. But the length is determined individually. The sleeve can be short, to the elbow, 2/4 or completely long.
Neck
You can use any braid for the neck. To make the product look elegant, you can sew on an embroidered border. Before sewing the sides, you need to process the clasp of the kosovorotka. The collar itself is sewn on after all the details have been stitched together, that is, at the very end.
Sleeve cuff - pattern
The cuffs are cut out as desired, depending on the intended model. The sleeve can be left loose or the cuffs can be cut out so that they fit the wrist. Another option: an elastic band on the edge of the sleeve.
Master class on cutting out and sewing on a cuff:
- The cuff is cut out (4 pcs.).
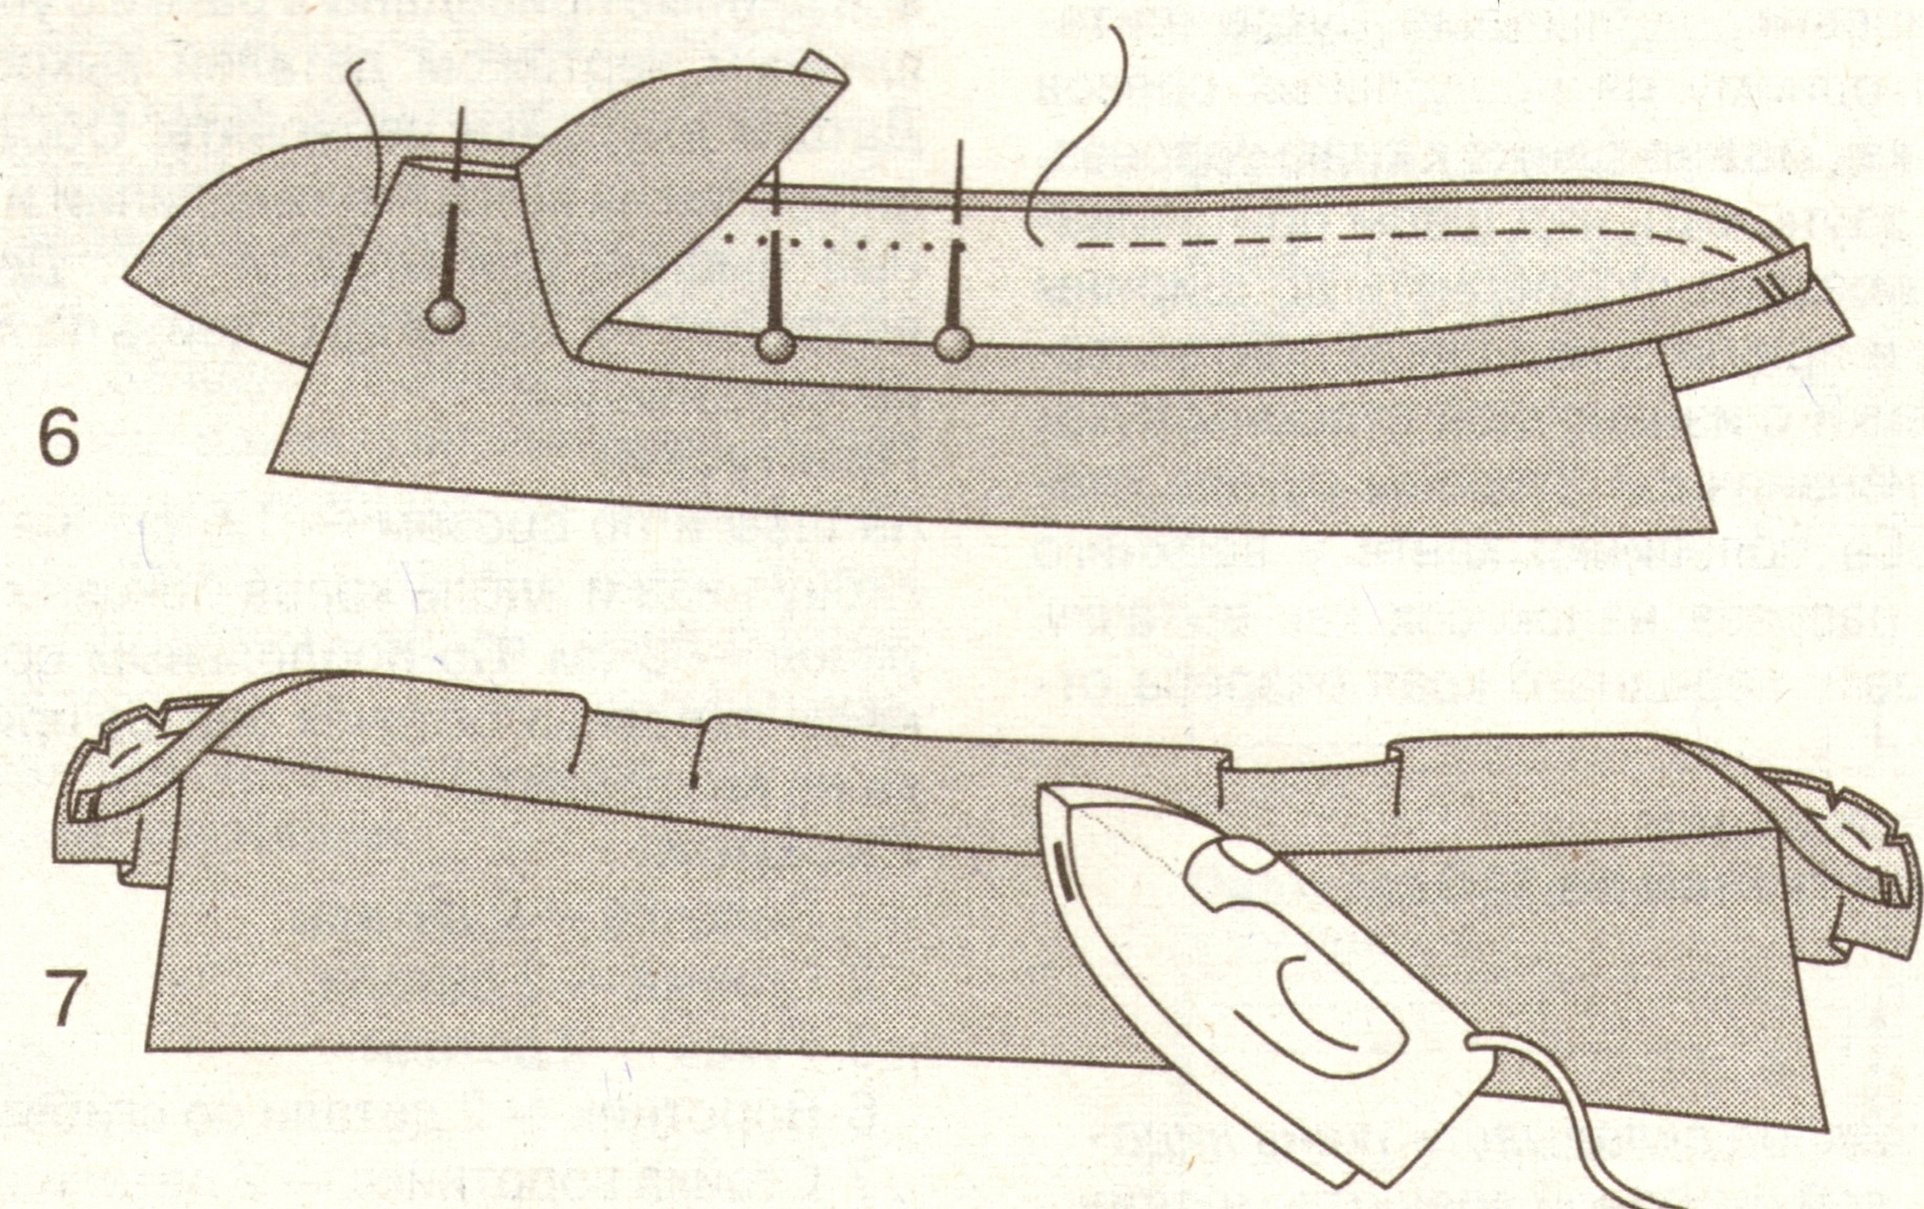
- To make it thicker, you can use interlining, which is ironed on the inside of the mantle.
- Next, the 2 pieces are placed face to face and basted with stitches, ironed and sewn with a machine, leaving 1 cm to the end so that the piece can be turned inside out.
- The length of the sleeve at the bottom and the length of the cuff should match. Due to the free cut of the kosovorotka, the sleeve according to the pattern will be wide, so it is adjusted using one-sided folds.
Assembling a product for men and boys
Once all the pieces are cut out of the fabric, you can begin assembling the shirt. It consists of several steps:
- The side panels are sewn to the base. It is initially a rectangular piece of fabric, two lengths of the future product. It needs to be folded in half, find the middle and cut out the neck.
- The next step is to sew the sleeves, not forgetting to leave space in the armpit area for the gusset. The base is sewn onto them, after which the sleeves are attached to the side panels, and the gusset insert is sewn in.
- The neck can be turned up and stitched or finished with bias tape. Often, red or blue tape is used for this to decorate the product. The sleeves and bottom of the product are finished with the same tape.
Finally, sew on the cuffs (if any) and decorate the shirt as desired. As decoration, you can choose ready-made ribbons with embroidery, which are sewn along the bottom edge of the product or around the neck. You can also embroider the cuffs or belt.
For your information! Before machine stitching the garment, you need to try it on to make sure it is the correct size.

Now everyone knows how to sew a kosovorotka. There is nothing complicated about it, but beginners make mistakes by taking measurements incorrectly, due to which the entire product is then sewn out of size. You need to remember the wisdom of "measure 7 times, cut 1", carefully take measurements, do not forget about allowances, and then a homemade thing will turn out no worse than a store-bought branded product.


