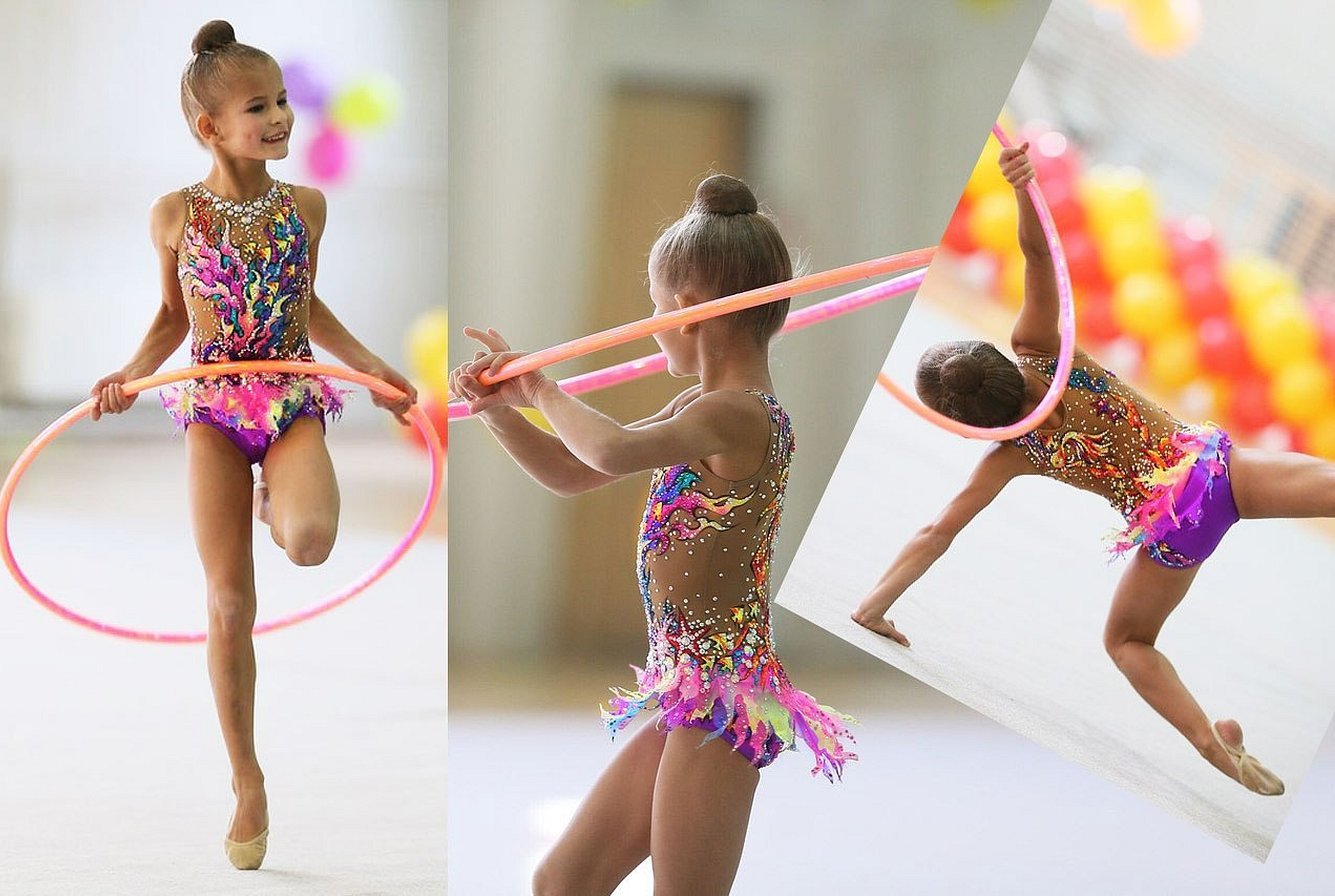
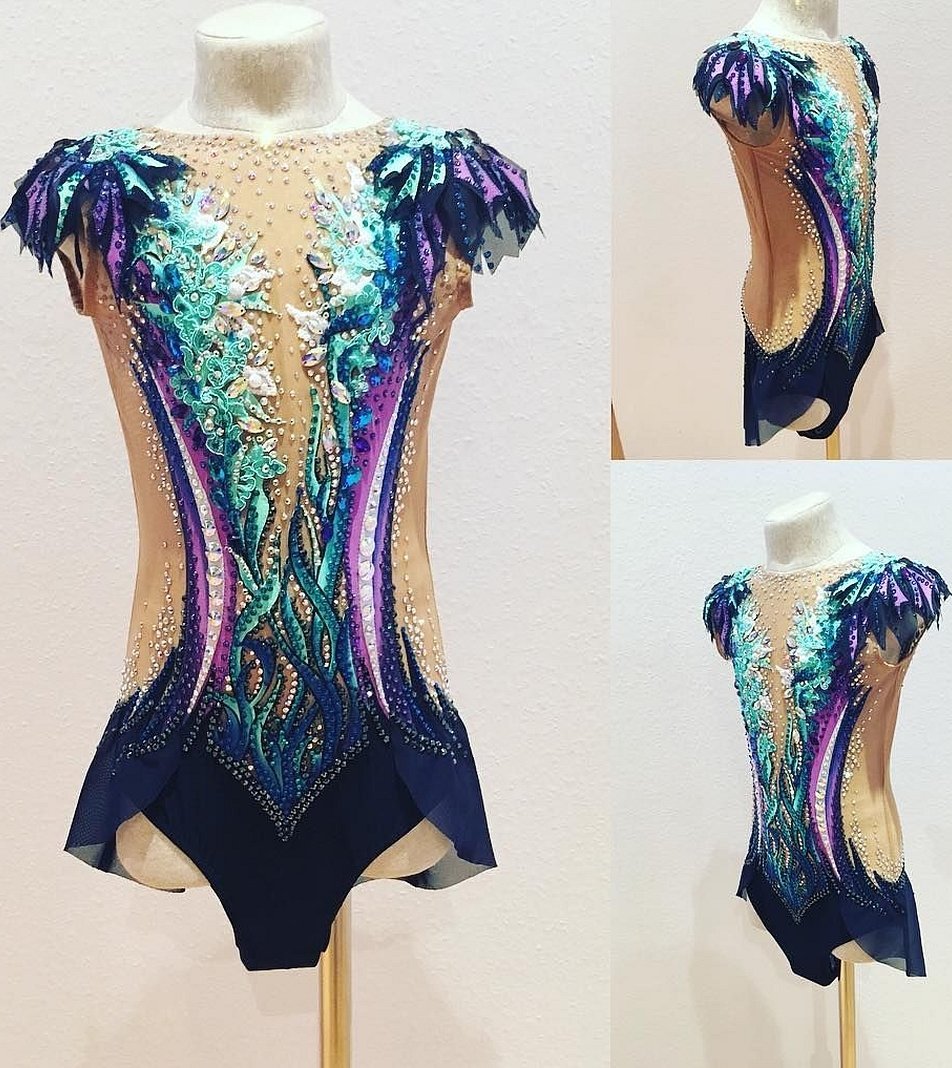
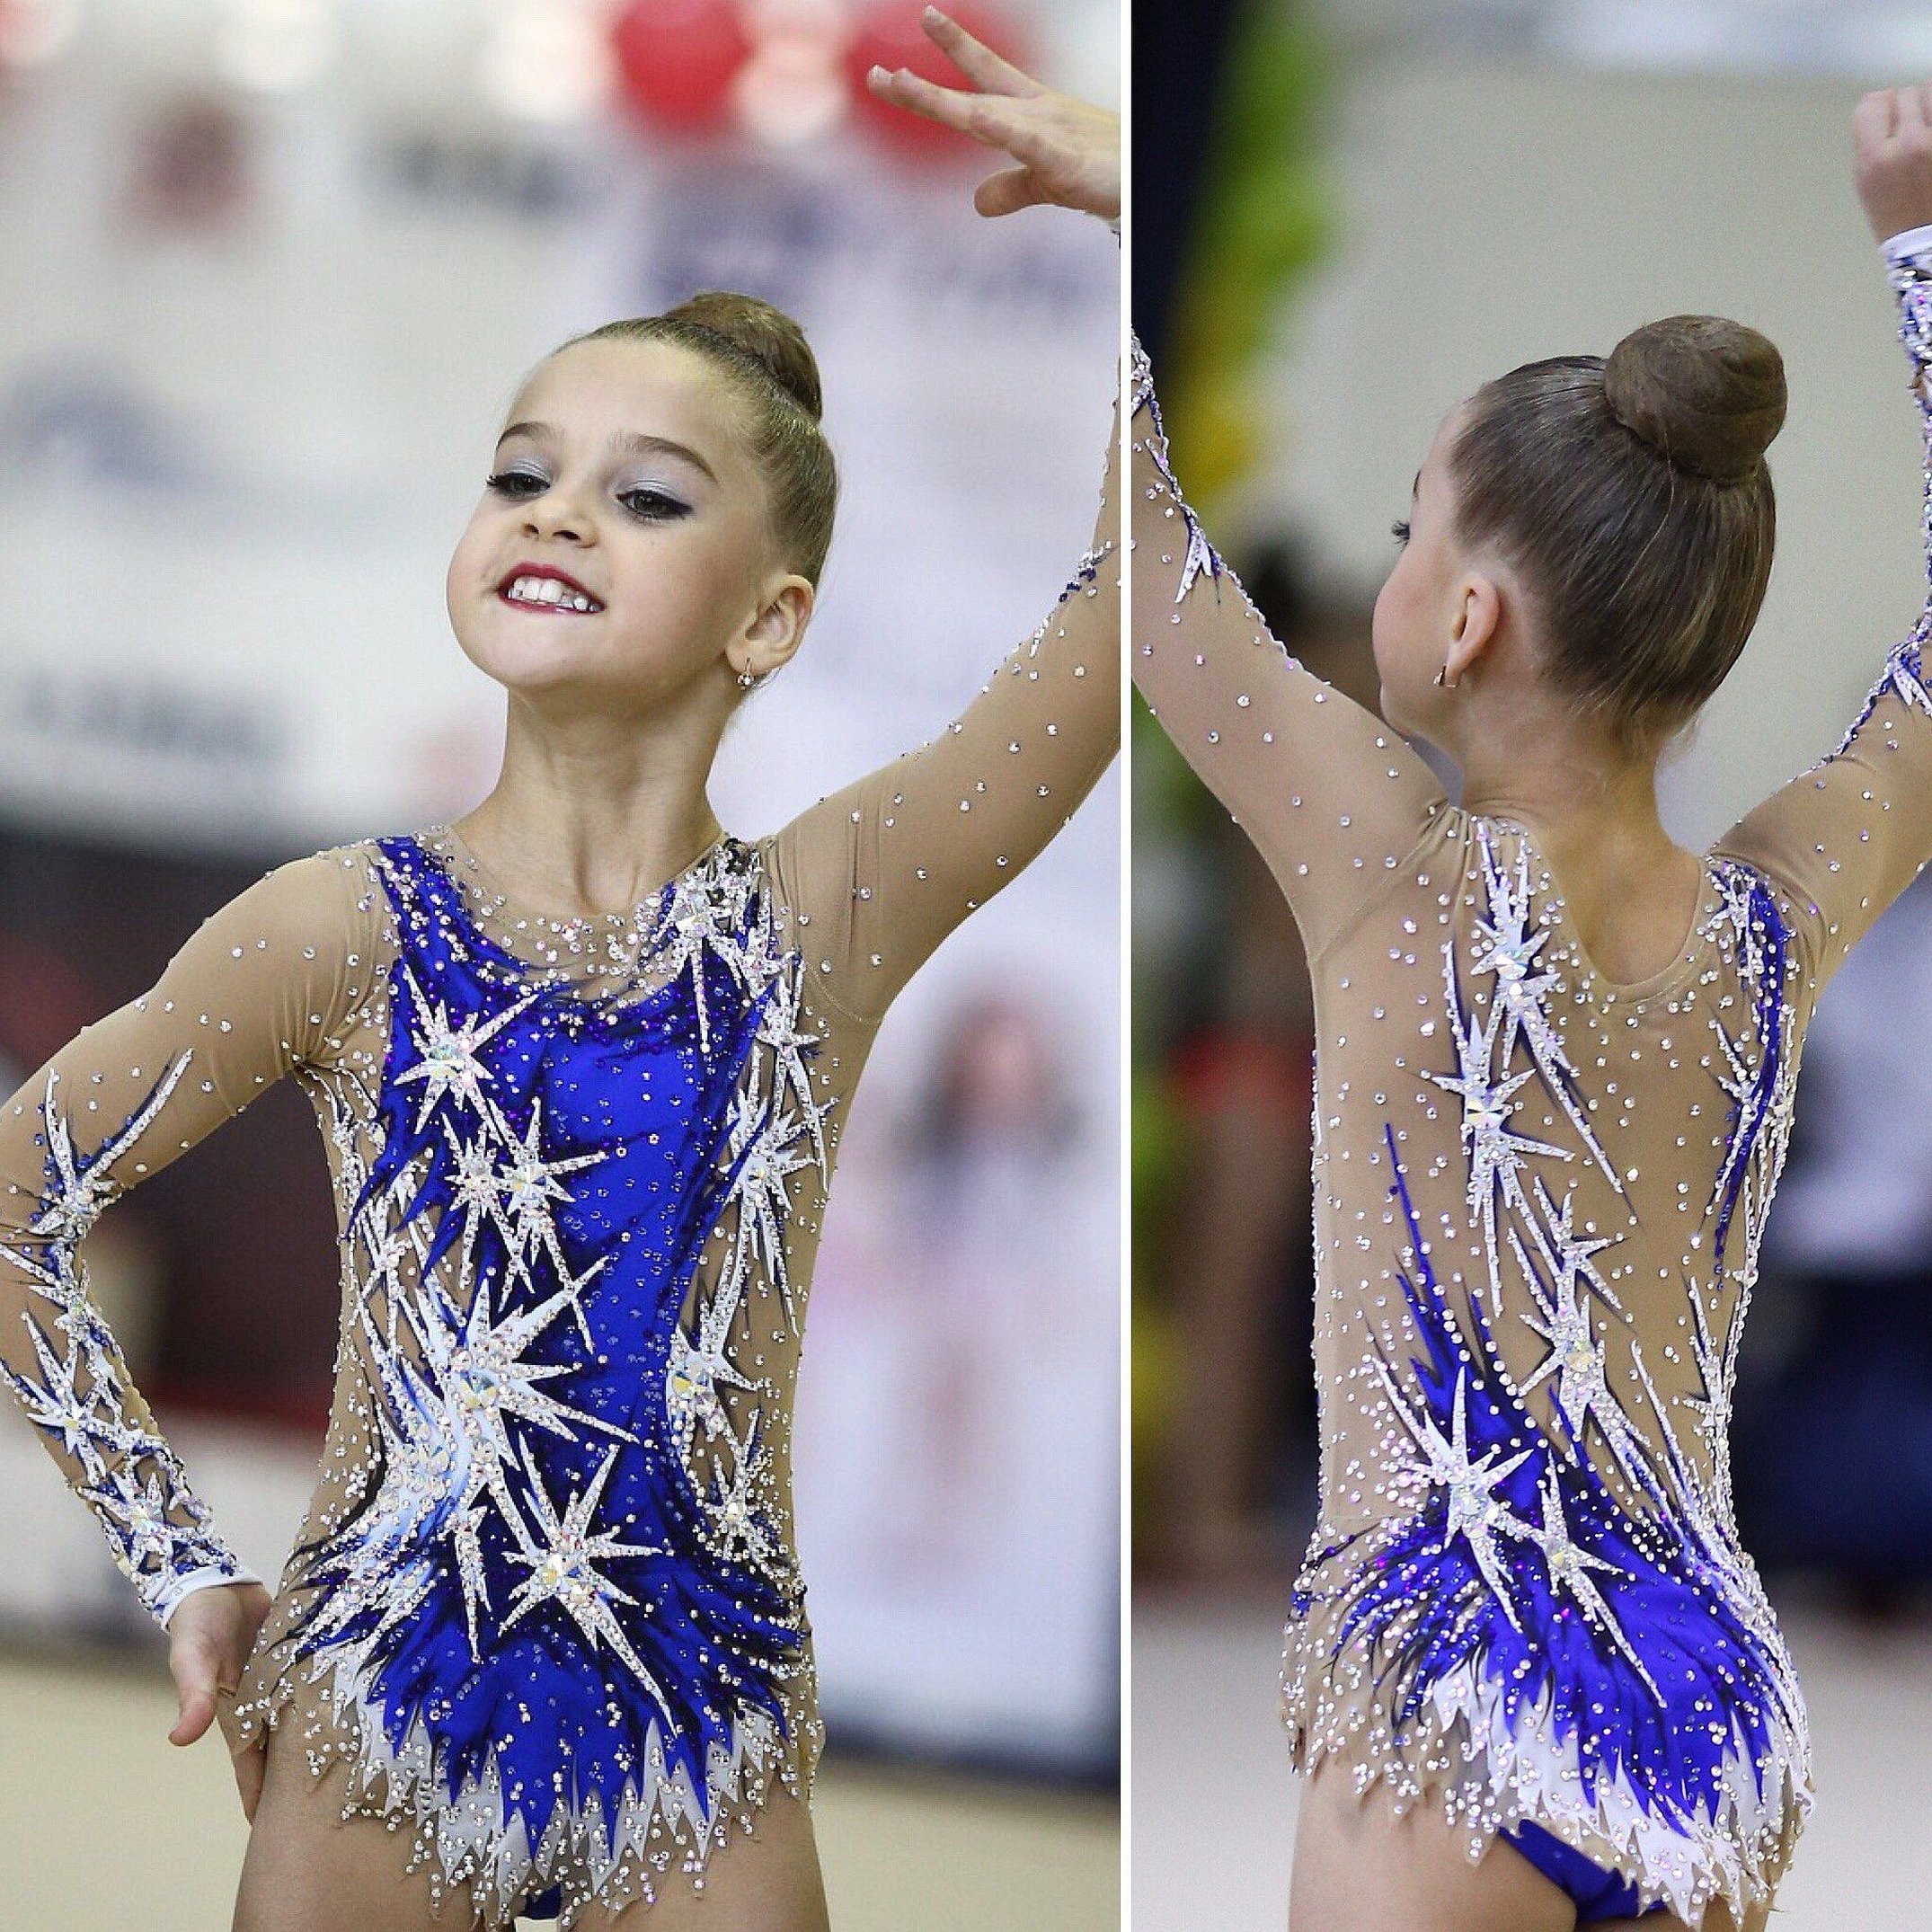
Rhythmic gymnasts' costumes are colorful, bright, and individual. Looking at an elegant performance, you want to look closely at every detail of the composition. It is a well-known fact that such outfits are very expensive, and often performers have to resort to the question of how to sew a leotard for rhythmic gymnastics themselves, what material to choose, and how to decorate it so that it is comfortable and beautiful.
Choice of fabric
Sewing the perfect leotards for rhythmic gymnastics begins with the selection of materials and individual decorations. The fabric for gymnasts' leotards must have a large number of suitable characteristics: the material should not wrinkle during active exercises, quickly take its original shape when stretched, be elastic, the athlete's body should not sweat, the fabric should be breathable.
There are a number of fabrics that are particularly popular for sewing these suits:
- Guipure;
- Velvet;
- Microfiber;
- Thermal fabric;
- Stretch velvet;
- Stretch-atral;
- Stretch mesh;
- Biflex;
- Georgette.
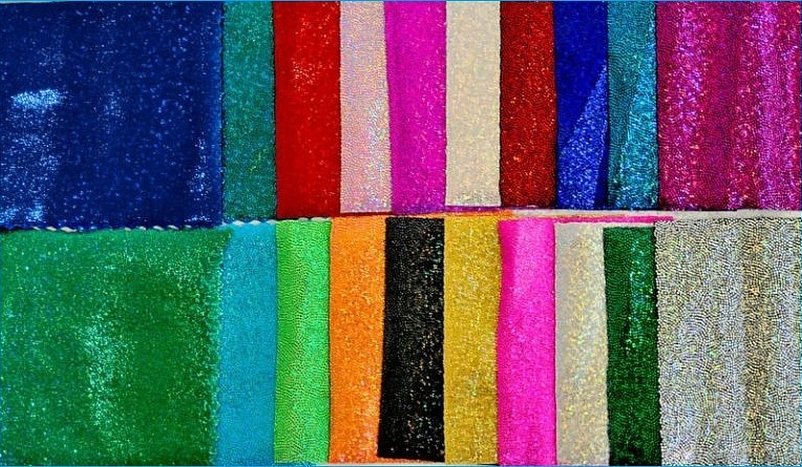
The listed fabrics stretch very well and are distinguished by excellent wear resistance and durability.
Note! These materials can be washed, ironed and without fear of damage or spoilage. They withstand the effects of salts released with sweat during training and performances. These materials have a huge color palette, shiny iridescence and texture, allowing you to firmly attach various decorations that do not fall off after washing.
The following accessories are used to decorate the suits:
- Feathers;
- Beads;
- Various applications;
- Rhinestones;
- Bows, ribbons and other decorative materials.
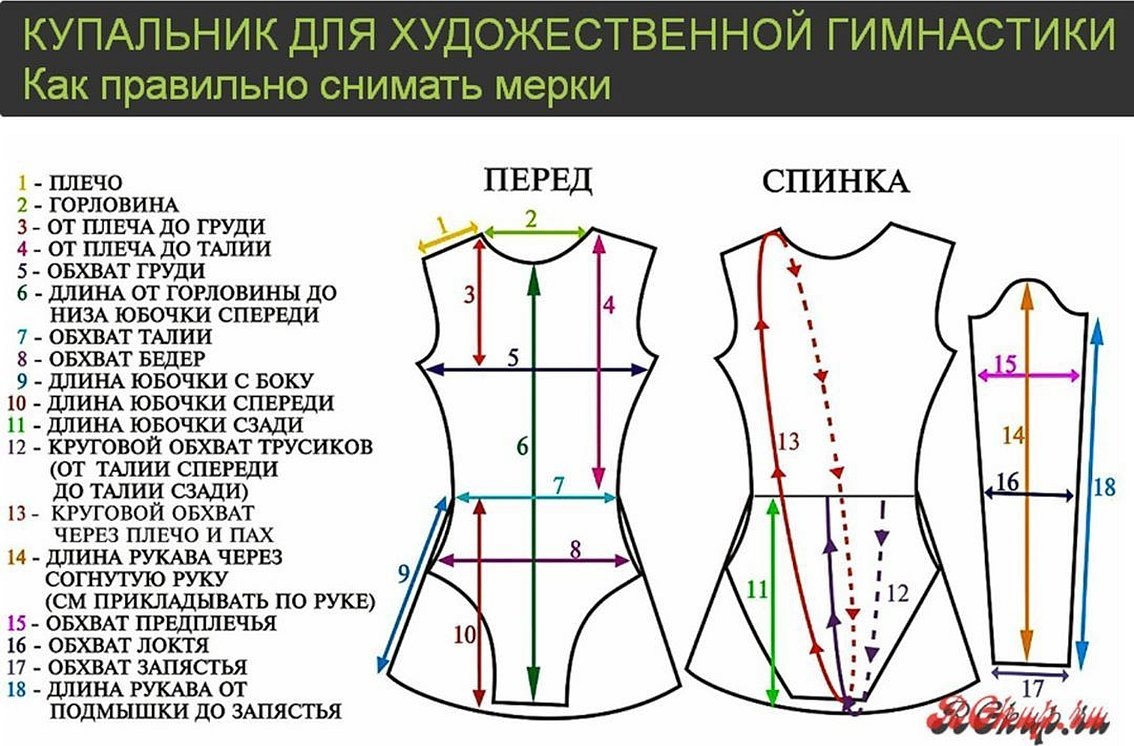
How measurements are taken
Before taking measurements, you should tie a ribbon around the girl's waist, at the narrowest point, and start recording.
- You should start from the very top and go down. Shoulder width - you need to measure at the outermost shoulder points.
- Shoulder length - from the edge of the shoulder to the neck. If there is no neckline, then 1.5-2 cm should be subtracted from the resulting measurement so that the fit is looser.
- Neck circumference - the measurement should be taken so that the tape measure does not fit tightly to the neck, allowing free breathing without causing discomfort.
- Back width - measurement is taken at the points of the armpits.
- Chest Width - The measuring tape should be drawn across the upper chest, from armpit to armpit.
- Chest girth - measurement is taken during inhalation along the shoulder blades and chest.
- Pelvic circumference (not hips) - the circumference is measured with a measuring tape at the place where the bottom point of the panty seam is usually located.
- Waist circumference - the measurement is taken along a previously tied ribbon in the middle of the waist, at the narrowest point.
- Body circumference - a centimeter should be passed between the legs and the ends should be connected at the transition from the shoulder to the neck.
- Arm circumference - the measurement is taken opposite the armpit area.
- Wrist circumference is the measurement point above the hand.
- Sleeve length - measurement is taken from the lowest point of the shoulder to the wrist.
- Back length - from the highest shoulder point to the waist line.
- Front length - this measurement is often the same as the previous one, but you can check it in a similar way, only from the front.
- The width of the panties is from the side point of the bottom of the panties to the other side of the same point. The same measurement is made in the front as well.
- Hip circumference - the measurement is taken around the buttocks, the tape should not fit tightly to the body.
- Side seam - from the waist to the armpit.
- The height of the panties is from the bottom point of the side seam of the panties to the tape at the waist.
- The length of the skirt is from the bottom of the panties to the waist.
- The length of the skirt at the back is from the waist to the lower fold of the buttocks, so that the skirt covers the butt.
- Chest height - from the convex point on the chest to the top point of the shoulder.
- Width of the center of the chest - this measurement is taken to evenly place the pattern when decorating the swimsuit. The measurement is taken at the top points of the chest.
- Second waist circumference - you need to step back from the tape on the waist down by 5-6 cm and take a measurement. These indicators are needed to fix the skirt in this position.
- The height of the sleeve cap is from the bottom of the shoulder to the armpit, the measurement should be taken with a ruler.
Pattern
You should start by preparing the necessary auxiliary elements:
- Two large sheets (you can use sheets of newspaper), graph paper works very well;
- Pencils or a bright marker to clearly see where to cut the template;
- Scissors.
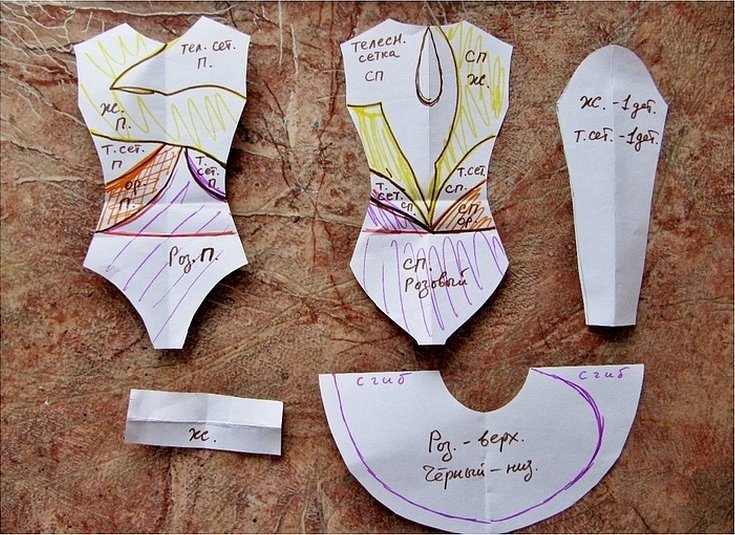
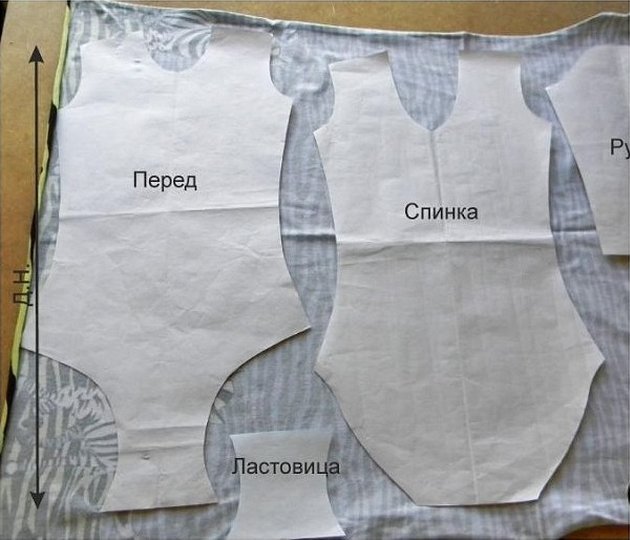
Transfer all the measurements taken onto sheets of paper, which must first be secured with a paper clip so that they do not move apart. And cut out the resulting figures. Two sheets are required so that on one you can draw patterns and a dotted line along which the fabric will be cut, and in another way you can put together a mosaic from the cut out elements and have an idea of how it will turn out and whether all the points have been taken into account when cutting out the patches. An example is shown in the picture below.
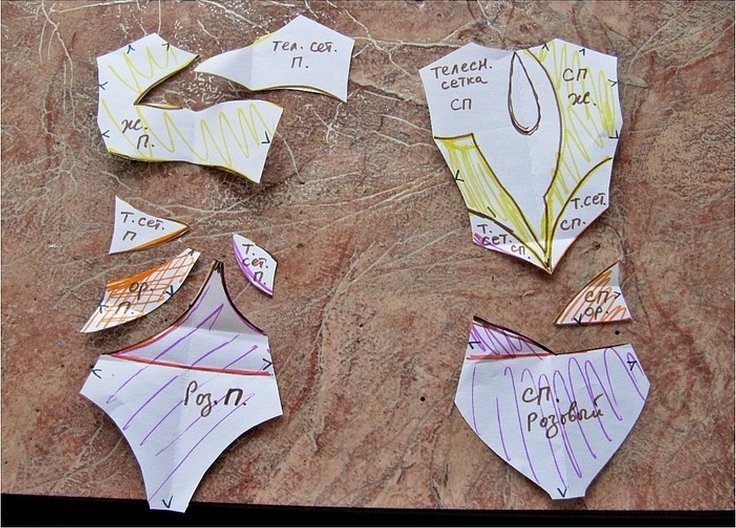
The pattern is cut out first from the back, the second from the front. You need to be very careful when cutting the neckline, experienced craftsmen do it by eye, smoothly rounding it off, and the center of the chest should be marked here, according to the measurement taken "width of the center of the chest".
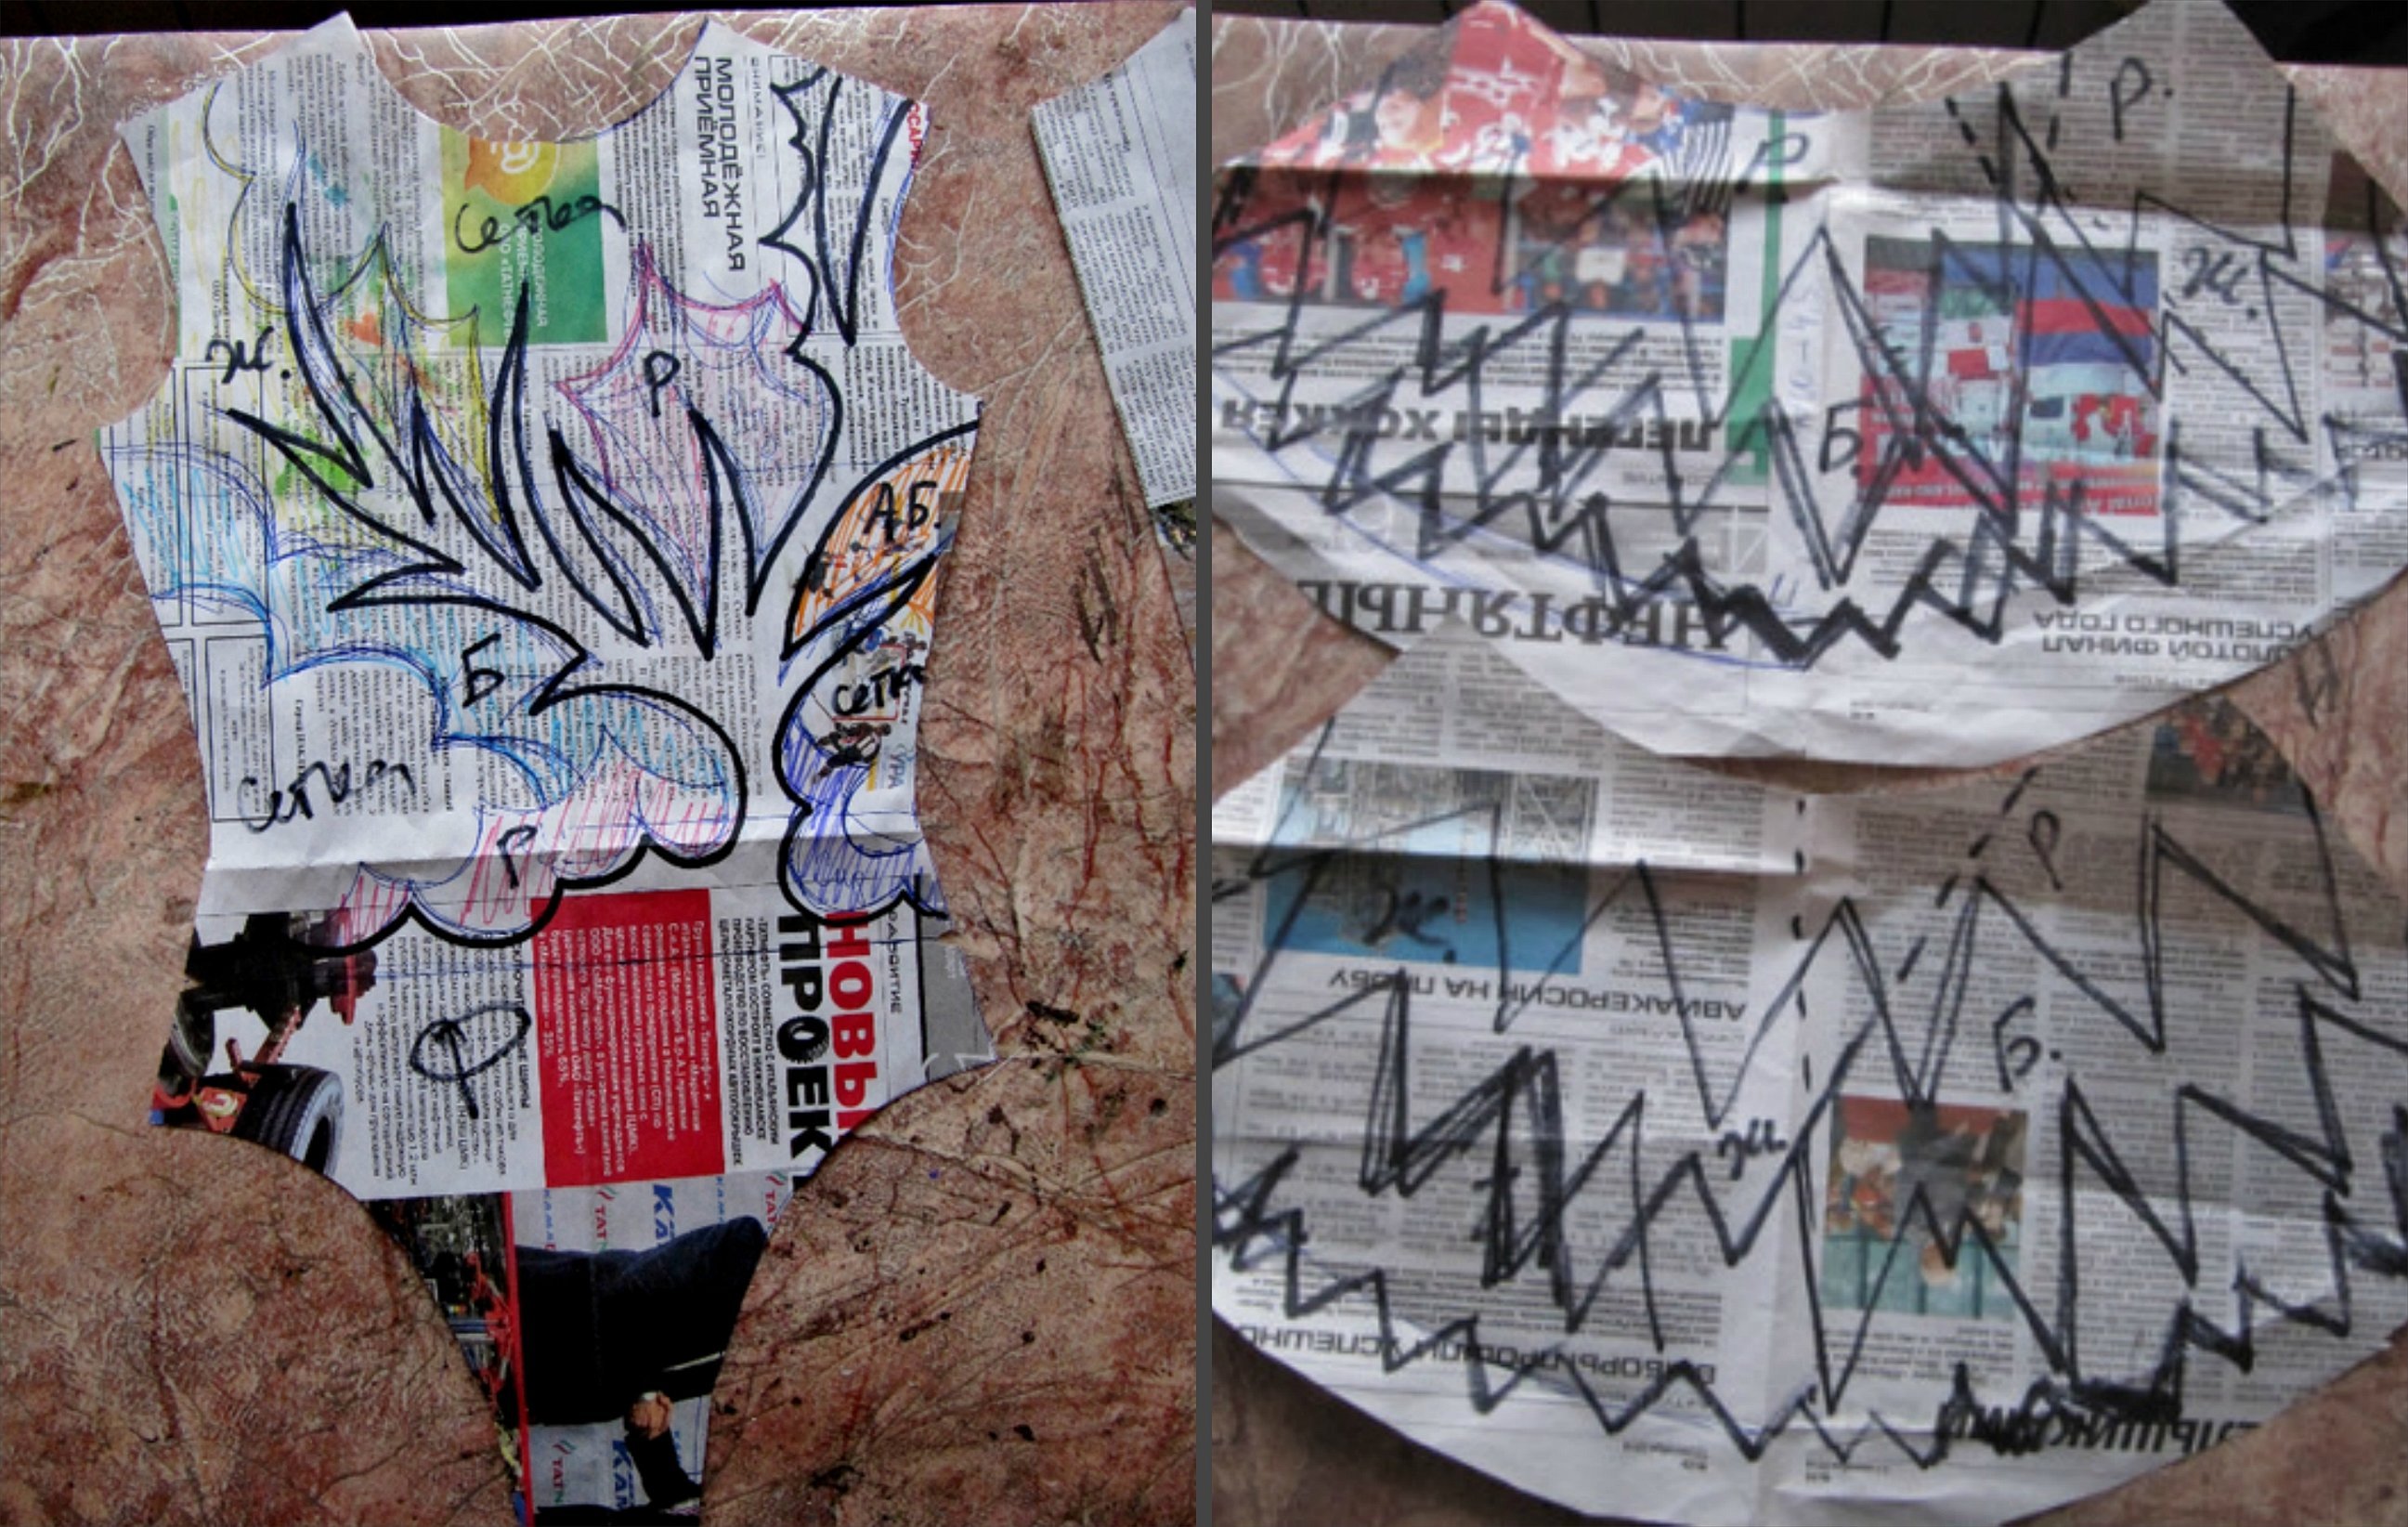
For beginners, it is best to make a pattern using a ready-made template, shown in the picture below.
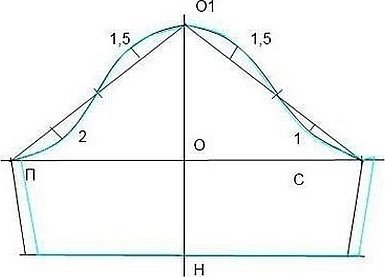
Construction of the sleeve and its pattern
The sheet should be folded in half, the length of the sleeve +1 cm should be measured along the bend. Then the wrist circumference is indicated horizontally at the bottom of the sheet (wrist circumference +1.5 cm) should be divided by 2. From the top point of the drawn sleeve, a section of the armhole should be measured. Next to it, a line should be displayed equal to the measurements from the armpit to the wrist. After that, visually divide the sleeve into three parts, and gradually mark the deepening of the seams by 1 cm for narrowing.
Plotting a drawing for a skirt pattern
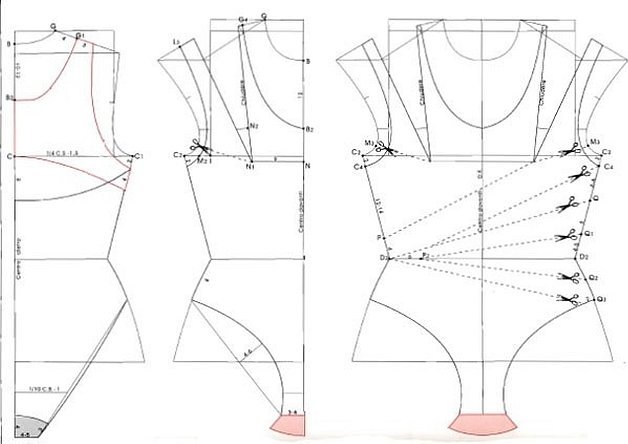
You can sew a skirt for a gymnast of any style, its main task is not to interfere and allow you to freely perform all the elements. The pattern shown in the picture shows the classic version of the skirt, narrowed at the top and diverging towards the end.
On the sheet, draw a horizontal line and put aside a measurement equal to half the hip circumference and add 0.5-1 cm. Then, draw a perpendicular line equal to half the value from the waist to the back and draw a horizontal line.
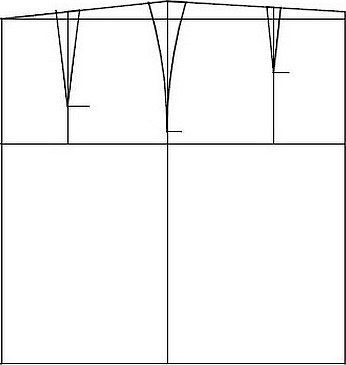
In order to mark the darts, you should make a calculation and find out the number K:
K = (hip circumference + 2 cm) / 2 - (waist circumference/2)
Dart formulas:
- Dart for the front part of the skirt: Kx0.25;
- Dart for the back of the skirt: Kx0.3;
- Side part: Kx 0.45.
After the sheet is turned, the side dart should be set exactly along the bend line. Half the width of the dart is set back from the center of the line in both directions. We mark these points and connect them with the point where the horizontal intersects the bend.
The pattern for the gymnastics leotard is ready, now you can cut out the resulting elements from the fabric.
To sew you will need:
- Sewing machine;
- Textile,
- Sewing accessories
- Pins, needles and scissors.
The details are applied to the wrong side of the fabric in the direction of the grain line. Leaving allowances for the seams, all elements should be outlined.
First, you need to fold the pieces in the gusset area. The back and front pieces should be folded with the right sides facing inward. The gusset should be on top, with the wrong side facing out. After that, all the pieces should be fastened together.
Using pins, seams are created on the shoulders of the swimsuit, they need to be placed from the edge of the fabric at a distance of 0.7-1.1 cm. This trick will allow you to sew the product without touching the pins and without removing them. After that, the seams are processed with a 4-thread overlock.
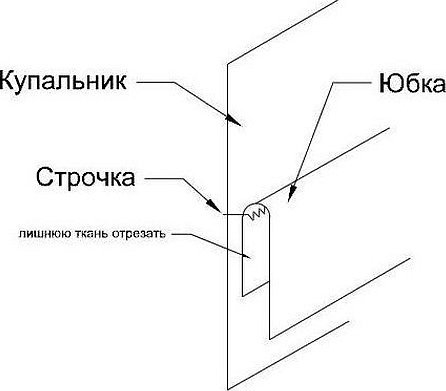
The cutouts of the swimsuit should be processed; any method convenient for the performer can be used.
Fringe as decoration for a gymnastics leotard
Fringe is used to trim the skirt of rhythmic gymnastics leotards. During the gymnast's movements, it beautifully shimmers, shimmers and looks spectacular during the performance.
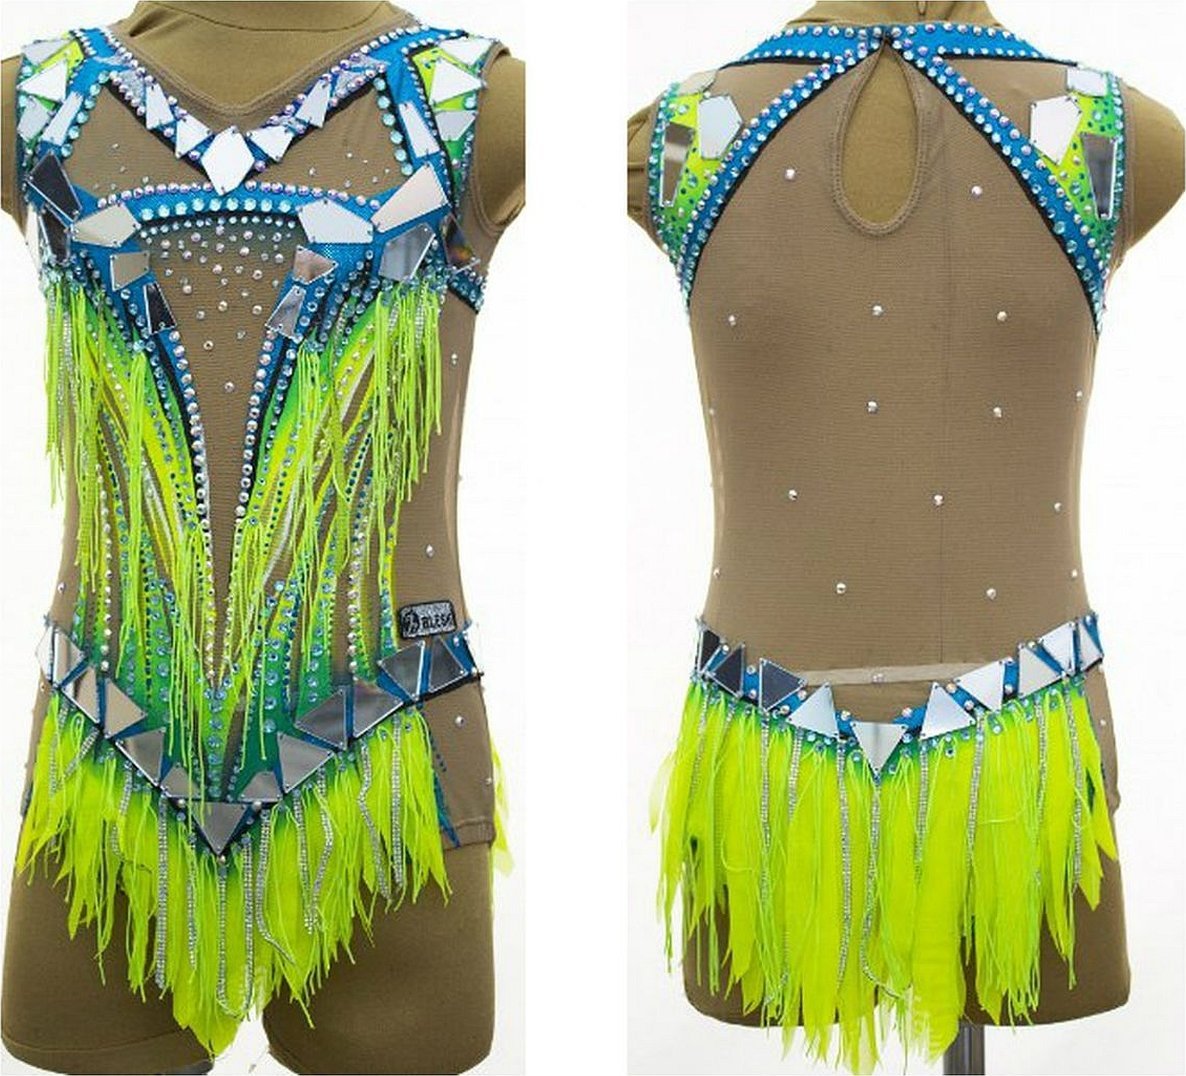
The fringe should be chosen to match the color of the suit, its texture goes well with any chosen fabrics. Sewing is done in separate bunches or ribbons.
Other types of finishing and decoration
Often, applique is used to decorate costumes, this is a more budget option, and it is much easier to sew it than to highlight the swimsuit pattern with expensive rhinestones. But multi-colored stones are also used for decoration. For shine, special crystals are often used, which shimmer in different colors when moving, reflecting the light around, they are also called rhinestones with AB effects. Rhinestones should be glued before the parts are sewn together, i.e. at the cutting stage. You can use both white and transparent glue, it must be applied to the fabric.
There are rhinestones with an already adhesive surface, but they are not durable enough and will only remain on the fabric for a short period of time; when washing, the likelihood that they will fall off is high.
If the design needs to be completely filled with shiny elements, it is best to use large sewn-on rhinestones, and the empty areas should be covered with small rhinestones.

How to sew a gymnastics leotard for a girl for performances with your own hands and not spend a fortune on it, may not be difficult at all if you follow all the step-by-step instructions, delving into the process using sketches and templates. Correctly removed marks are the key to a good final result. A ready-made pattern for a leotard for artistic dances can help a novice master get his hand in and then independently construct drawings for any height.


