Felt panels have recently become very popular. They are used to decorate children's rooms, and are given as gifts for the birth of a child. Children can also be involved in creating panels. For this, you will need sheet felt - a relatively new material in handicrafts.
Preparatory stage
A panel is almost a painting, but more original. Recently, panels have become frequently used in interiors. There are many styles of panels, so they will suit any type. Many people try to create such paintings themselves, and some of them do it very well.
It is very easy to make a felt panel yourself. To do this, you only need to select the necessary materials and tools, as well as find suitable patterns. Step-by-step execution of simple processes will help to achieve the desired result and make a beautiful original panel.
Please note! Any panel will be unlike any other, even if it is made strictly according to the scheme.

How to cut and sew a felt panel yourself
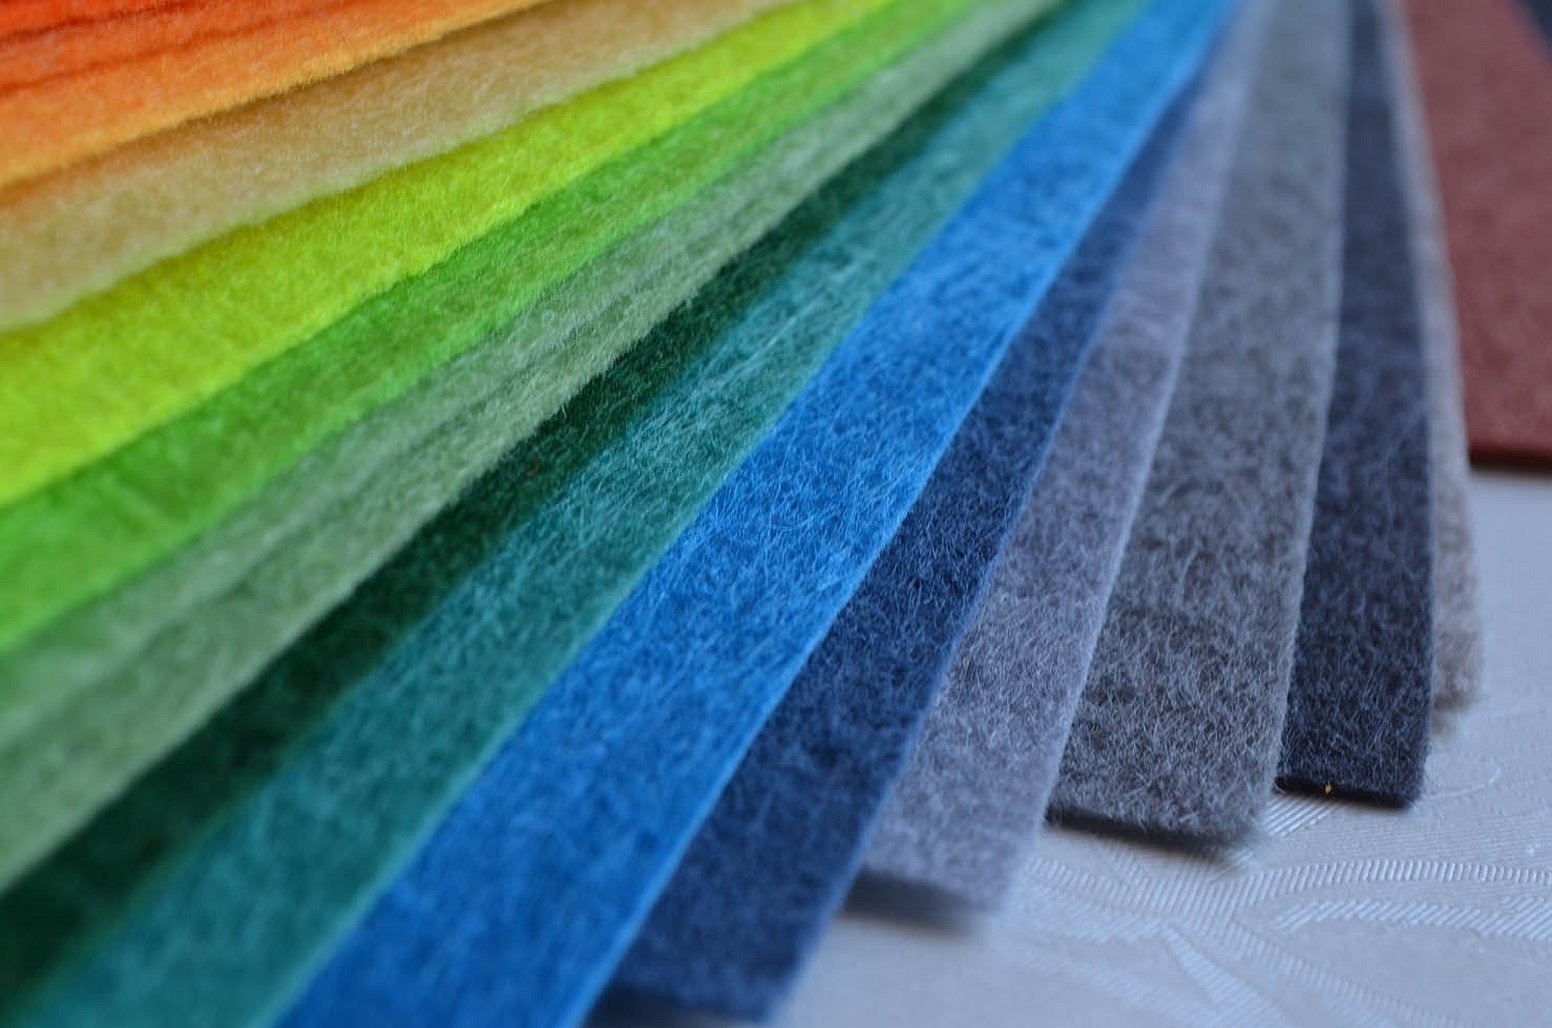
Sheet felt has appeared on the market recently, but is already enjoying great success. People who do handicrafts have appreciated it. It is dense, holds its shape well and has various colors, and will be the same shades on both sides. Felt does not wrinkle or deteriorate, so when creating a picture, you do not need to waste time deciding which material to choose.
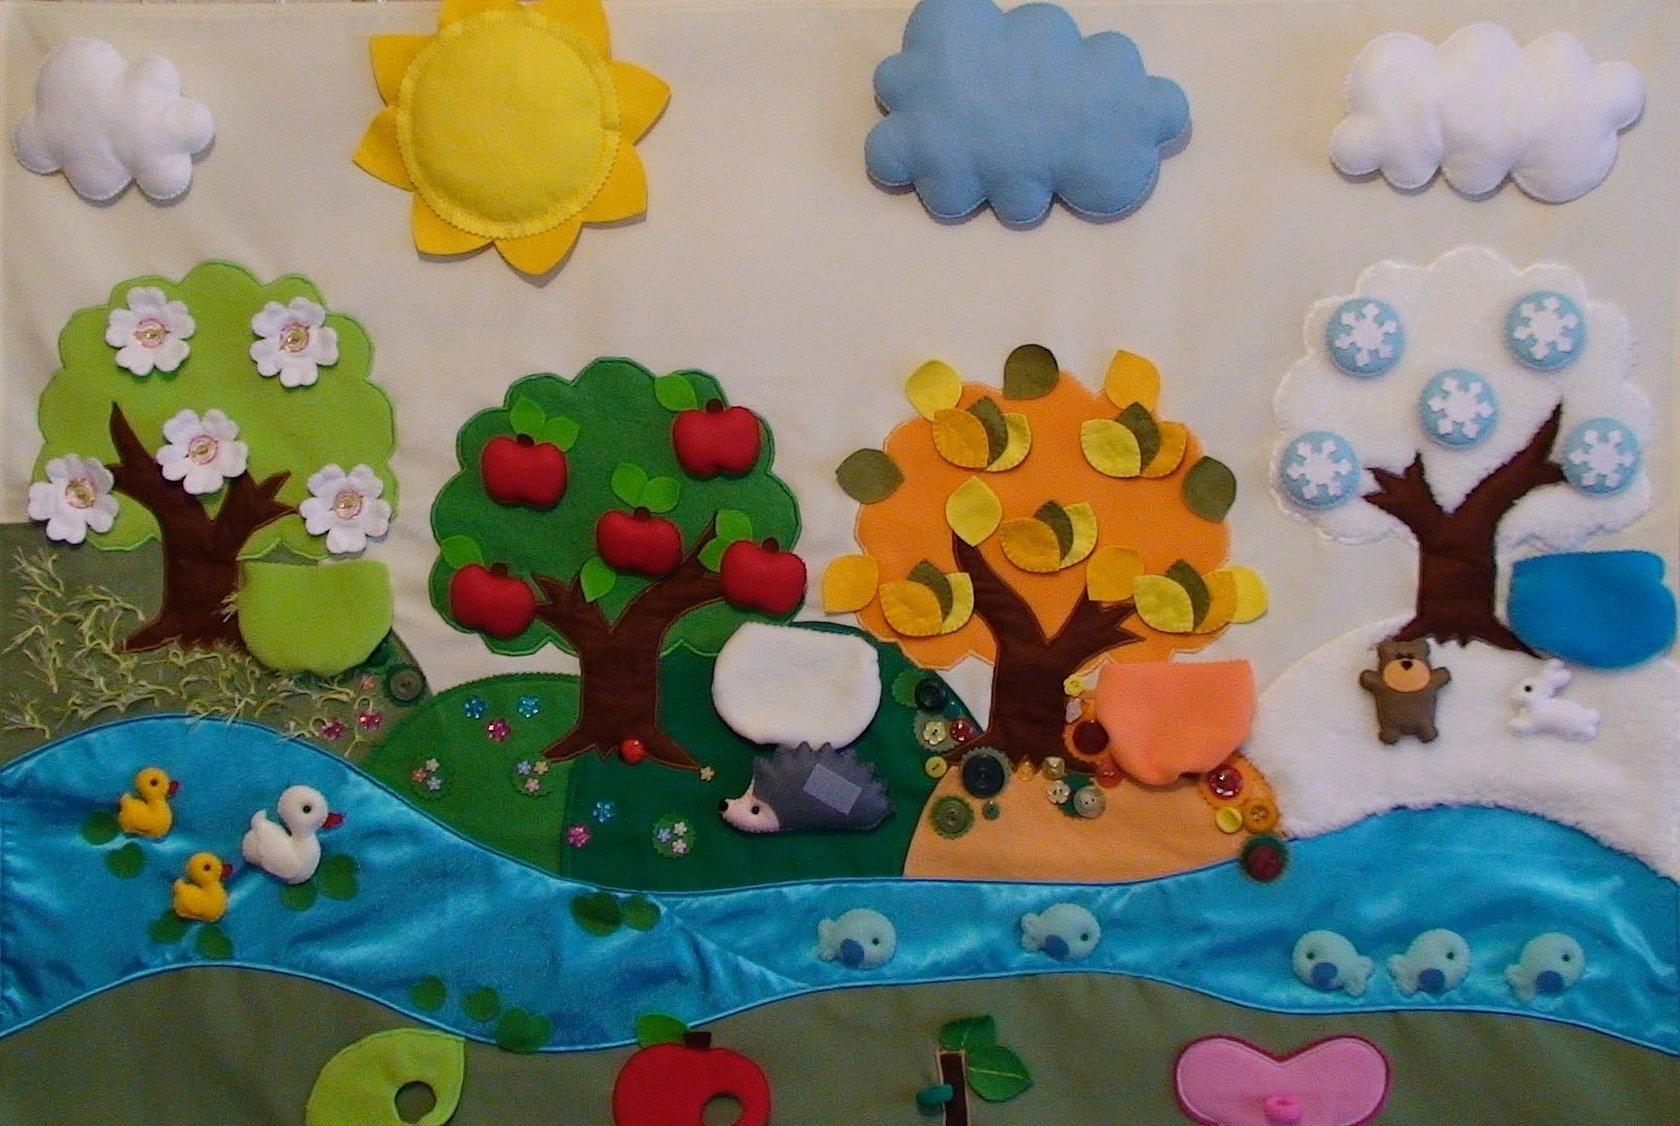
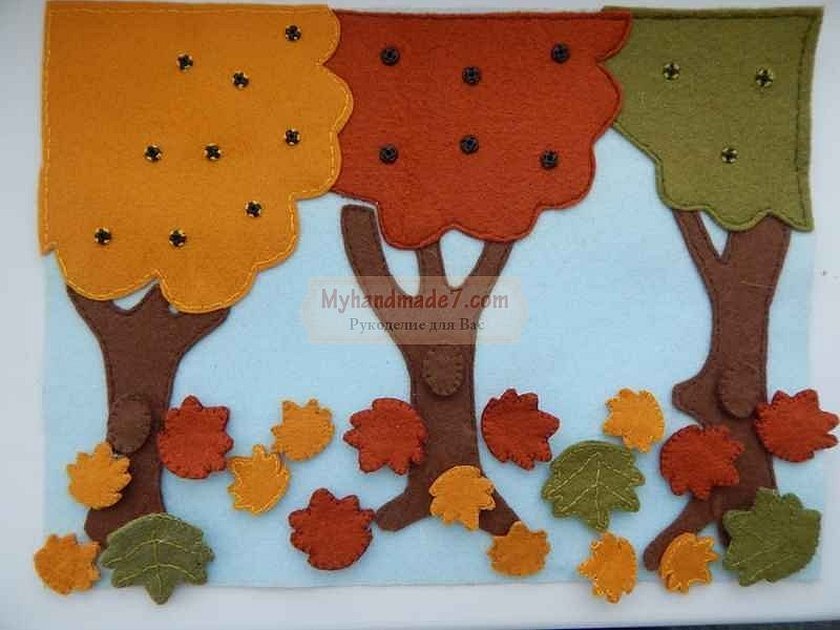
Felt panel "Seasons"
A DIY wall panel made from fabric is easy and quick to make.
Materials for work:
- cotton;
- upholstery fabric;
- velveteen;
- double sided tape;
- pressed seal.
The elements will require:
- sheet felt;
- flannel;
- household napkins;
- synthetic padding;
- decorative braid;
- buttons and yarn;
- scissors, threads, needles, a regular pencil.
Draw tree trunks on the upholstery fabric and cut them out. Glue double-sided tape and cut to shape. Also cut out the tops of the trees. To create the ground, you can take velveteen and cut out small hills, each corresponding to one of the four seasons (summer, autumn, winter, spring). The details should be stitched with a zigzag stitch on a machine and padded with synthetic padding.
For the edging of the panel, strips 6 cm wide and 50 cm and 60 cm long are cut out. They need to be sewn together at a right angle and sewn to the base. Four strips 2 cm long, 45 cm and 55 cm long, are cut out of the sealant. This is necessary to form the frame. Sew the strips so that the seam is inside, after which the frame should be turned inside out. Then you can insert the cut sealant. The side is sewn by hand, and loops should be sewn to the back side.
White and pink flowers, orange, yellow and green leaves in the amount of 8 pieces, red apples 5 pieces, green and yellow 1 piece each are cut out of sheet felt. Then it is worth cutting out white circles - these are snowflakes.
Please note! Apples are glued to the finished picture. The sun is cut out of several layers of napkin and glued. Clouds are made of blue felt or flannel. The picture is ready.
Decorating a children's room
This is a simple fabric wall hanging for a child's room.
Materials required:
- felt of different colors (pink, white, beige, coral);
- synthetic fluff;
- satin ribbons in the same colors as felt;
- rhinestones;
- buttons, needles and threads;
- scissors;
- hot glue;
- fabric glue;
- self-disappearing marker.
Please note! First, you need to make a pattern. You can draw it by hand and make the ball blanks.
There should be six yellow balls, seven light yellow, seven light pink, seven beige, eight pink and seven coral. A total of 42 pieces.
It is recommended to start sewing the balls from the right edge using an overcast stitch. The tail of the ball does not need to be sewn.
Please note! When most of the part is sewn, the element is filled with synthetic fluff.
Once you reach the end, make two stitches with a simple basting stitch to the place where the ball was originally sewn and tighten. You need to make two turns around the base and finish.
The balls should be laid out by color. The same colors should not be next to each other. Next, you should glue the balls together. You need to start gluing from the top so that the balls are in layers on top of each other. But you can't squeeze them too much so that they don't lose their shape.
For the cloud, cut two pieces out of felt. Sew them together and fill them.
Next, you need to cut out the letters of the name from felt, the color is taken to match the tone of the balloons. The size of the letters is 3 cm. If the name is long, then the size can be reduced, but then the craft will be lost in the interior.
Using glue, attach the letters to the cloud.
To cut out the booties, you need to draw them by hand. Carefully sew the back of the slippers, and sew the sole with an overcast stitch. For volume, the booties need to be filled with synthetic fluff.
Now everything is put together (balls, cloud and slippers). This can be done with satin ribbons, sewing a bow of them at the base. You can add rhinestones to the booties. The product is ready.
Named felt ring panel
This felt panel is a little more difficult to make yourself. First, you need to cut out a ring with a diameter of 45 cm, and then, using the same pattern, two rings of fabric with an allowance of 5 cm. The example describes a panel for a boy, so cars, ships, etc. will be used. To do this, you will need to cut out templates of the corresponding toys.
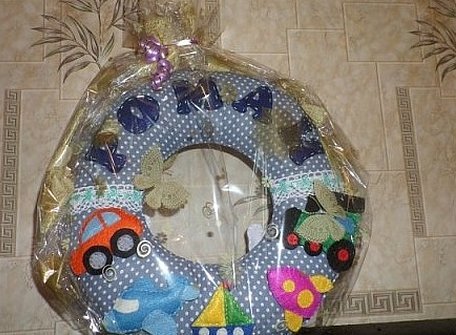
Now the base is made - a ring. The fabric cutouts are folded from the wrong side, and a decorative braid is laid between them. First, you should sew around the inner circle, and then turn it to the front side. Then put a cardboard ring inside and sew the remaining sides, also filling the ring with fluff. At the end, sew on the letters of the name and the toy. The panel is ready.
Step-by-step description of making a felt panel "Autumn" with children
Materials required:
- wooden frame;
- blue felt for the background;
- felt in red, green and yellow colors for leaves;
- colored paper in yellow, brown and green colors;
- rhinestones;
- glue (since children are involved in the work, it is better to use PVA glue).
Step-by-step description of the work.
- Draw and carefully cut out the leaves using a stencil. If you don't have one, you can trace and cut out live leaves that you've collected with your children outside. This will increase interest in the work.
- Attach the leaf templates to the colored paper. But they should be slightly larger in size than the felt leaves, because in the next step you need to glue the paper leaves to the felt in layers.
- For the background, cover the cardboard with felt and secure it with a frame. It is advisable to entrust this work to an adult.
- Glue a felt sheet of the same shape, but smaller, to the paper sheet. Draw the veins of the leaf on the felt.
- Place the leaves on the background as you wish: around the perimeter, in the center, in a circle, after asking the children how it will look best in the picture.
- Finally, decorate the picture with rhinestones. The panel is ready.
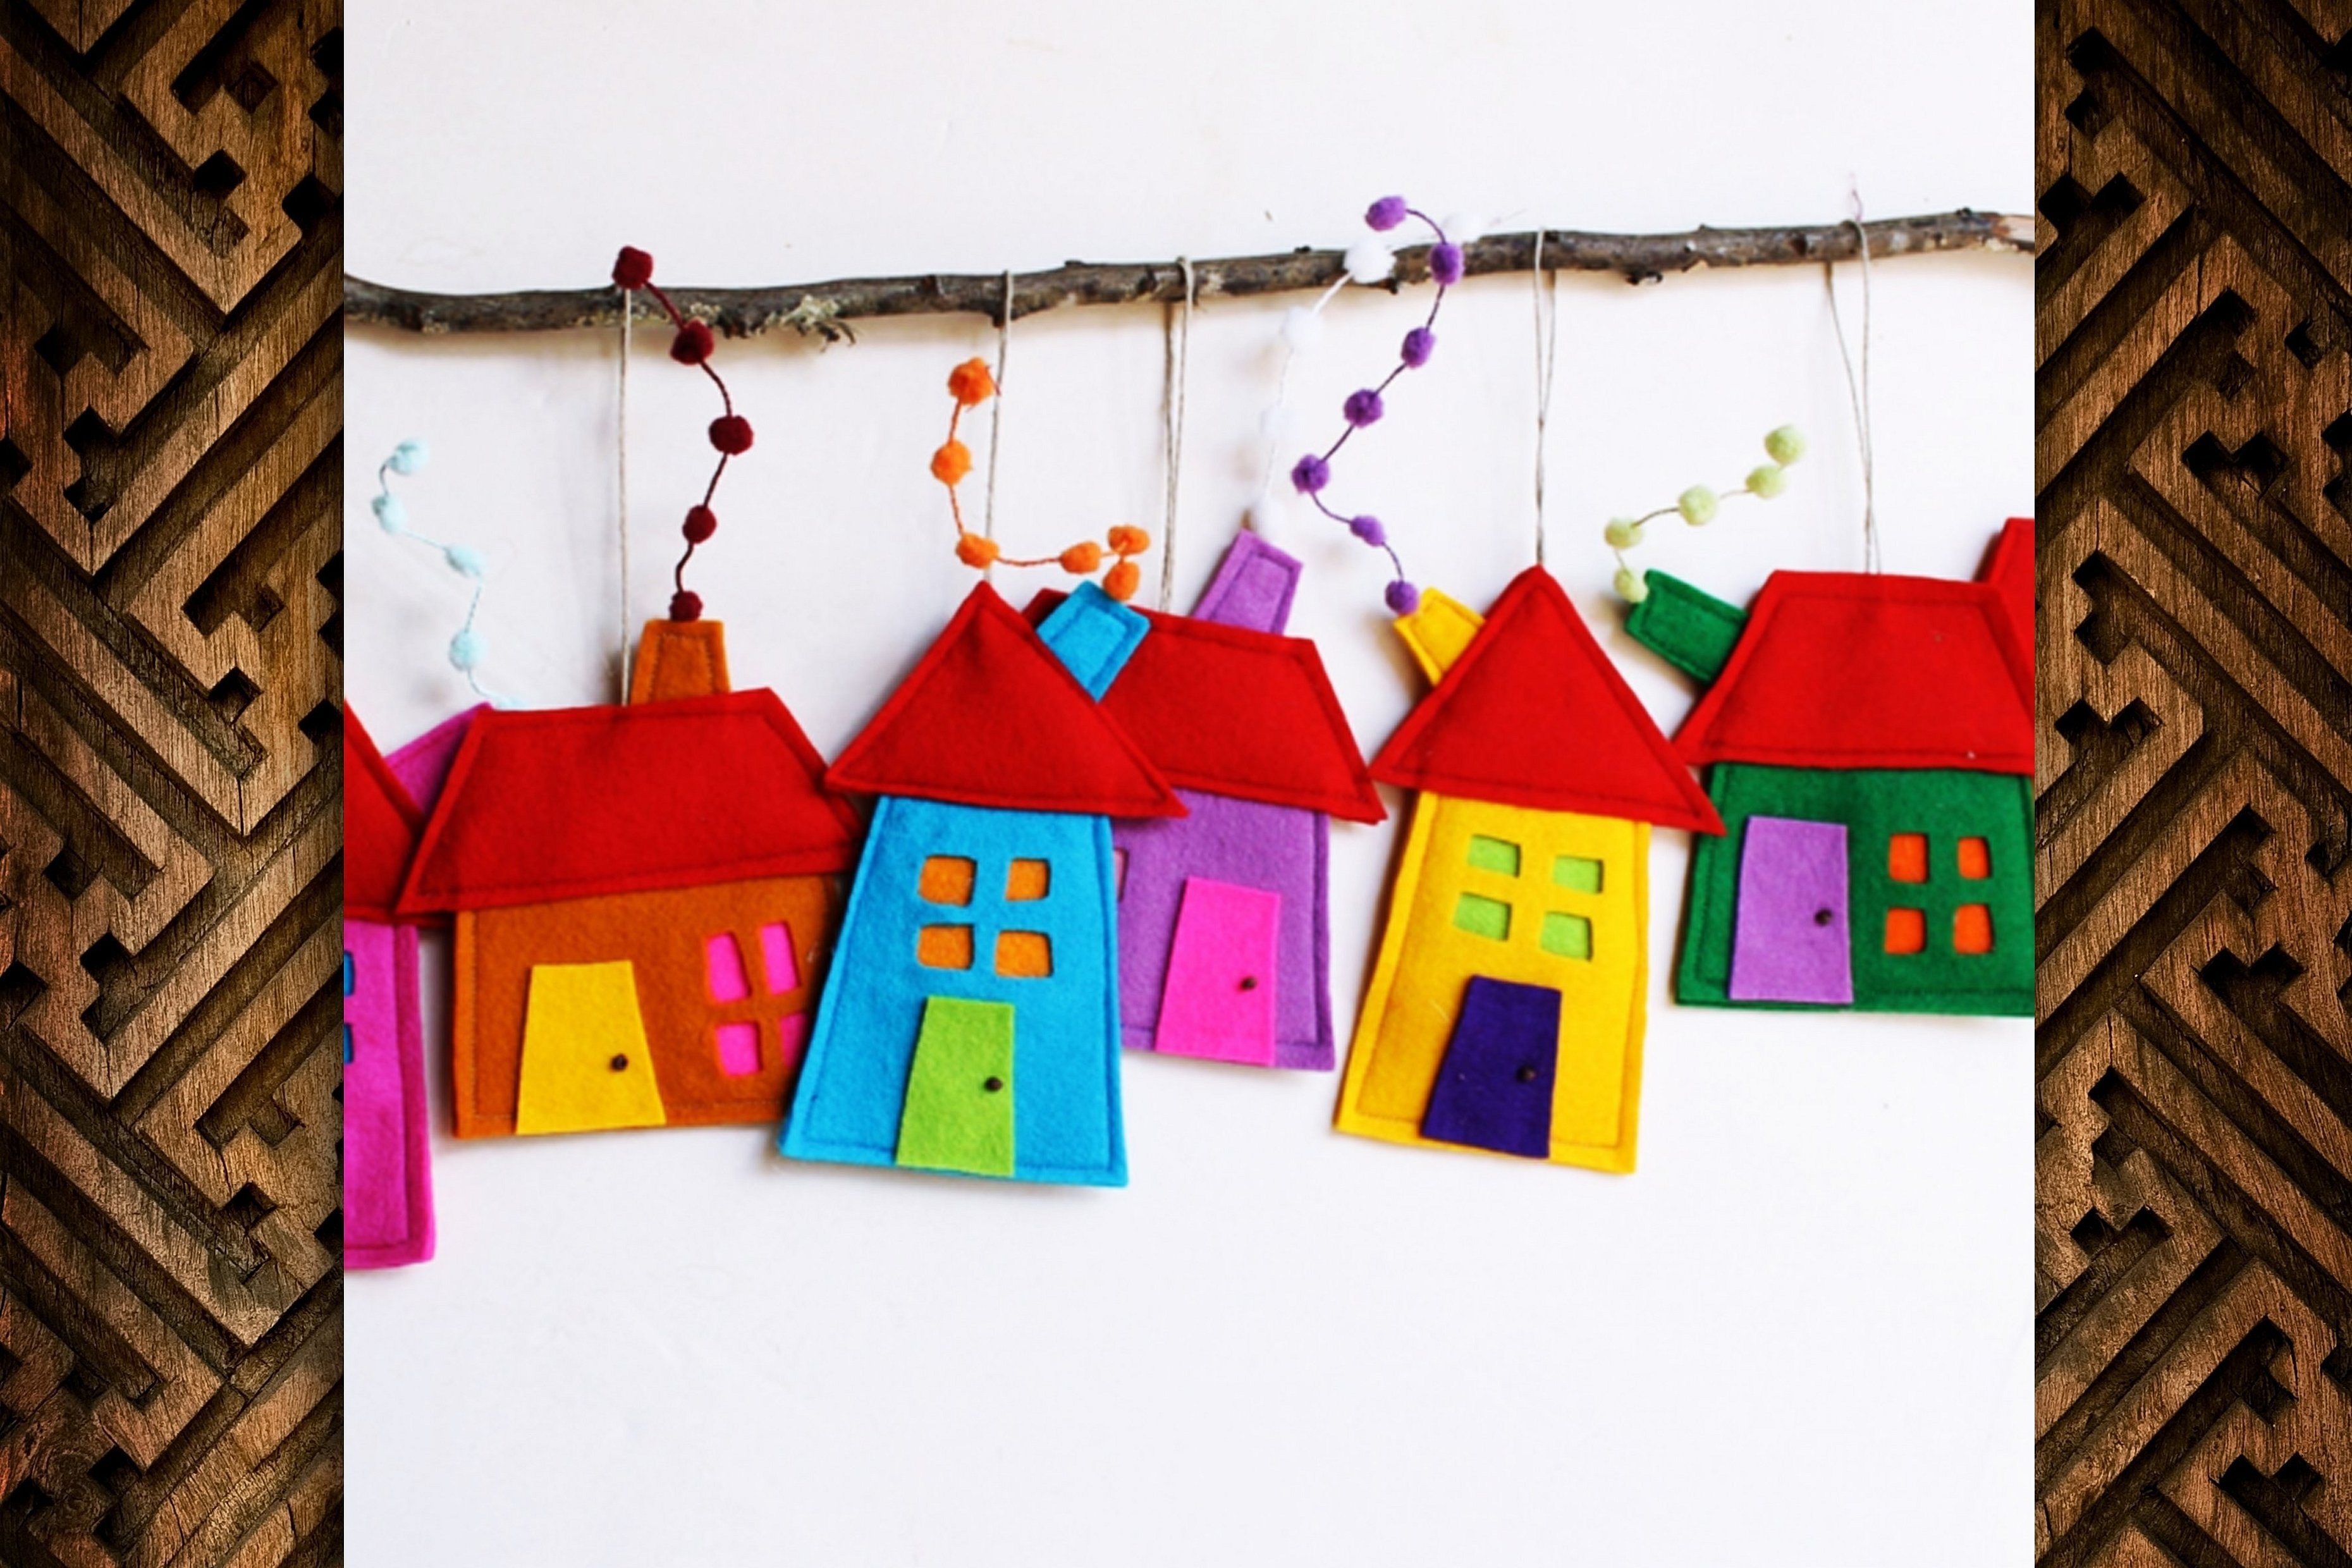
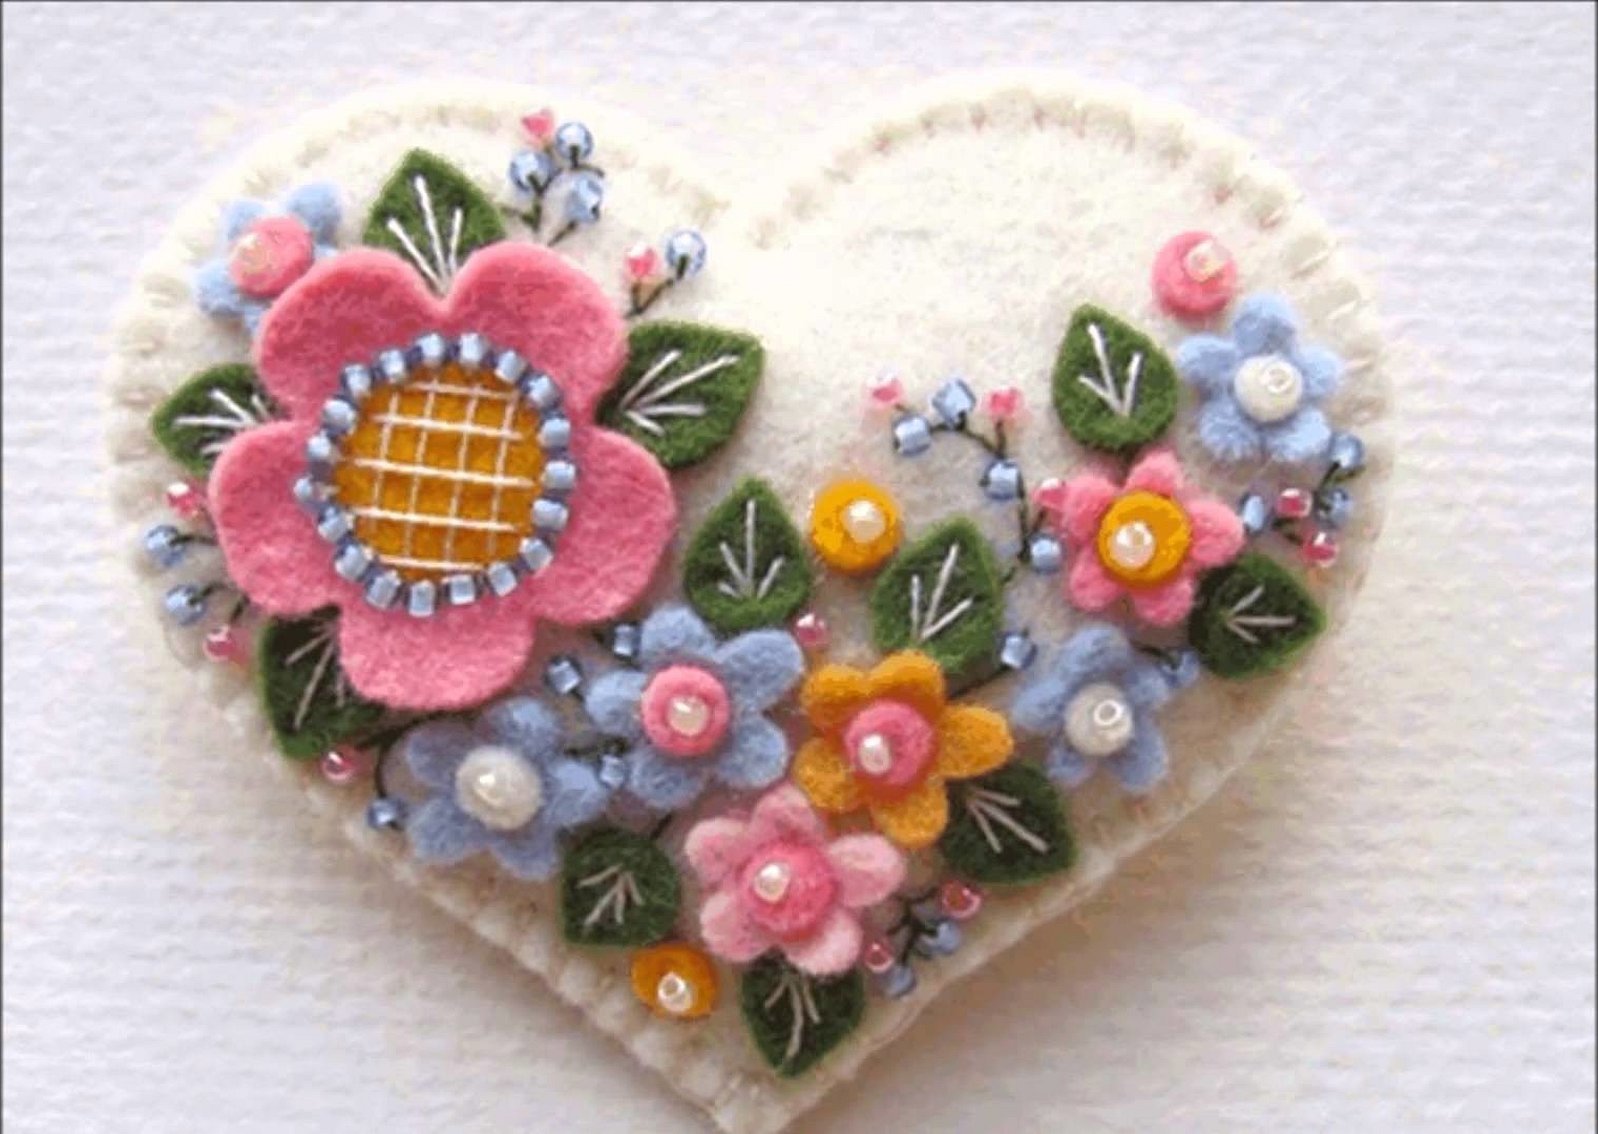
Felt panels-pictures
Materials required:
- felt;
- fabric glue;
- pins;
- needle and thread;
- decorative details (beads, rhinestones);
- embroidery threads, preferably in the same color range, but a slightly different shade to achieve contrast with the color of the fabric.
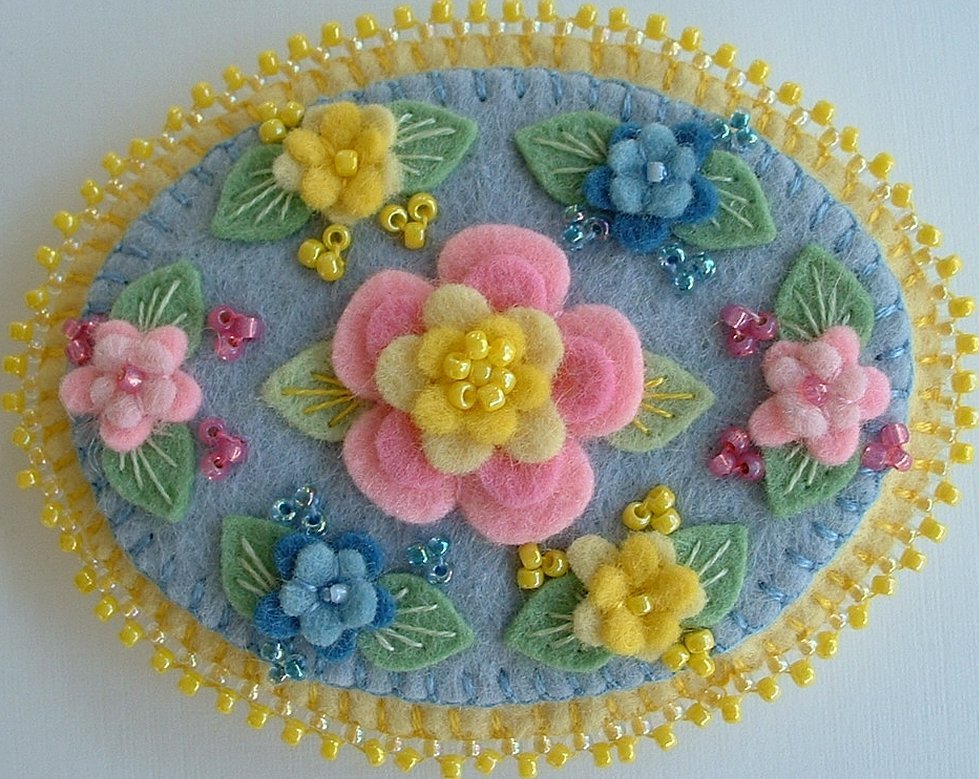
To cut out flowers, you first need to make patterns. You can find them on the Internet, choosing any template, or make them yourself.
Please note! If you make flowers using several layers of felt, the same or different colors, they will look even more original.
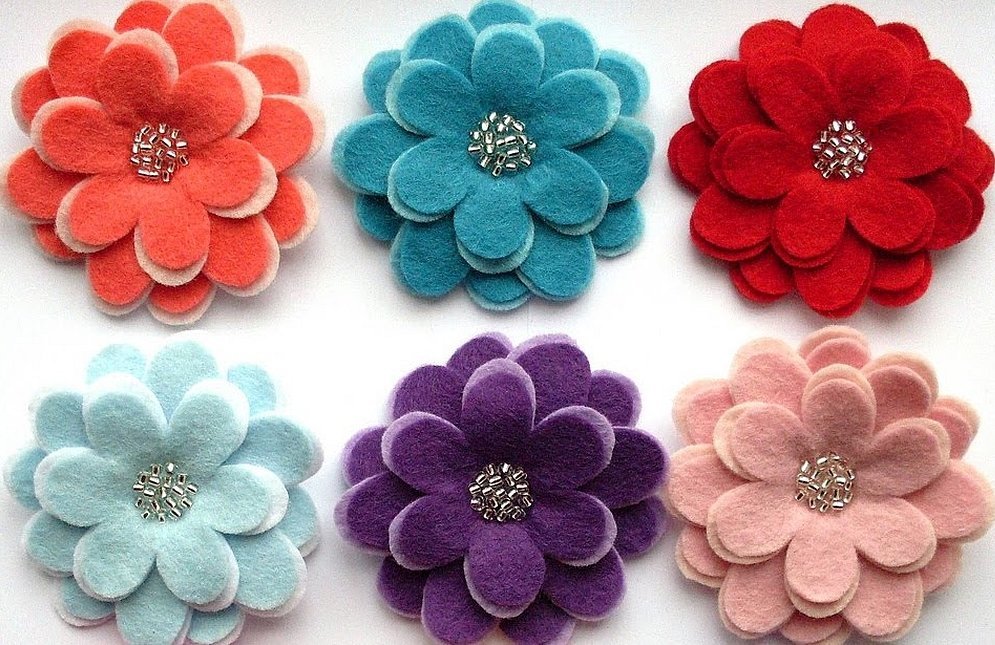
The edges of the leaves can be decorated with a beautiful stitch from embroidery threads or left as is. Each flower part is folded, starting with the largest, making a bud, and the center is pulled together to make a core. For this, cut a small circle out of felt and glue it to the center. A bead can be glued to the middle of the flower. Leaves should be cut out of green felt and glued to the flower.
How to Decorate a Teenager's Room
Materials required:
- colored paper;
- scissors;
- PVA glue, brush;
- thin felt for the base;
- big heart template.
A large heart is glued to the base. Next, three hearts of different sizes need to be cut out of colored paper and glued to the felt. First the large ones, then the medium ones, and finally the small ones. The decoration for the teenager's room is ready.
How to make a hanging loop
There are cases when it is necessary to sew a loop into a felt product, and many craftsmen try to make an invisible seam.
Here's an example of how to sew a loop into a felt toy without it being visible:
- Take the toy and use scissors to make a depression in it.
- Insert the ribbon into a thick needle and pierce the toy from below.
- Bring the needle up. If it is difficult to get out, you can pull it out with pliers. When the tape is pulled out, a tail remains at the bottom.
- Insert the needle from top to bottom next to the already prepared hole. The end of the tape is pulled out at the bottom.
- You get a loop, and at the bottom there are two ends of the ribbon, which you need to tie and pull the loop so that the knot is hidden in the hole. The loop is ready.
Thus, it is easy and simple to make a panel with your own hands. There are quite a lot of master classes on creating appliques, starting from personalized paintings and ending with landscapes. The main thing is to follow the instructions, and then everything will definitely work out.


