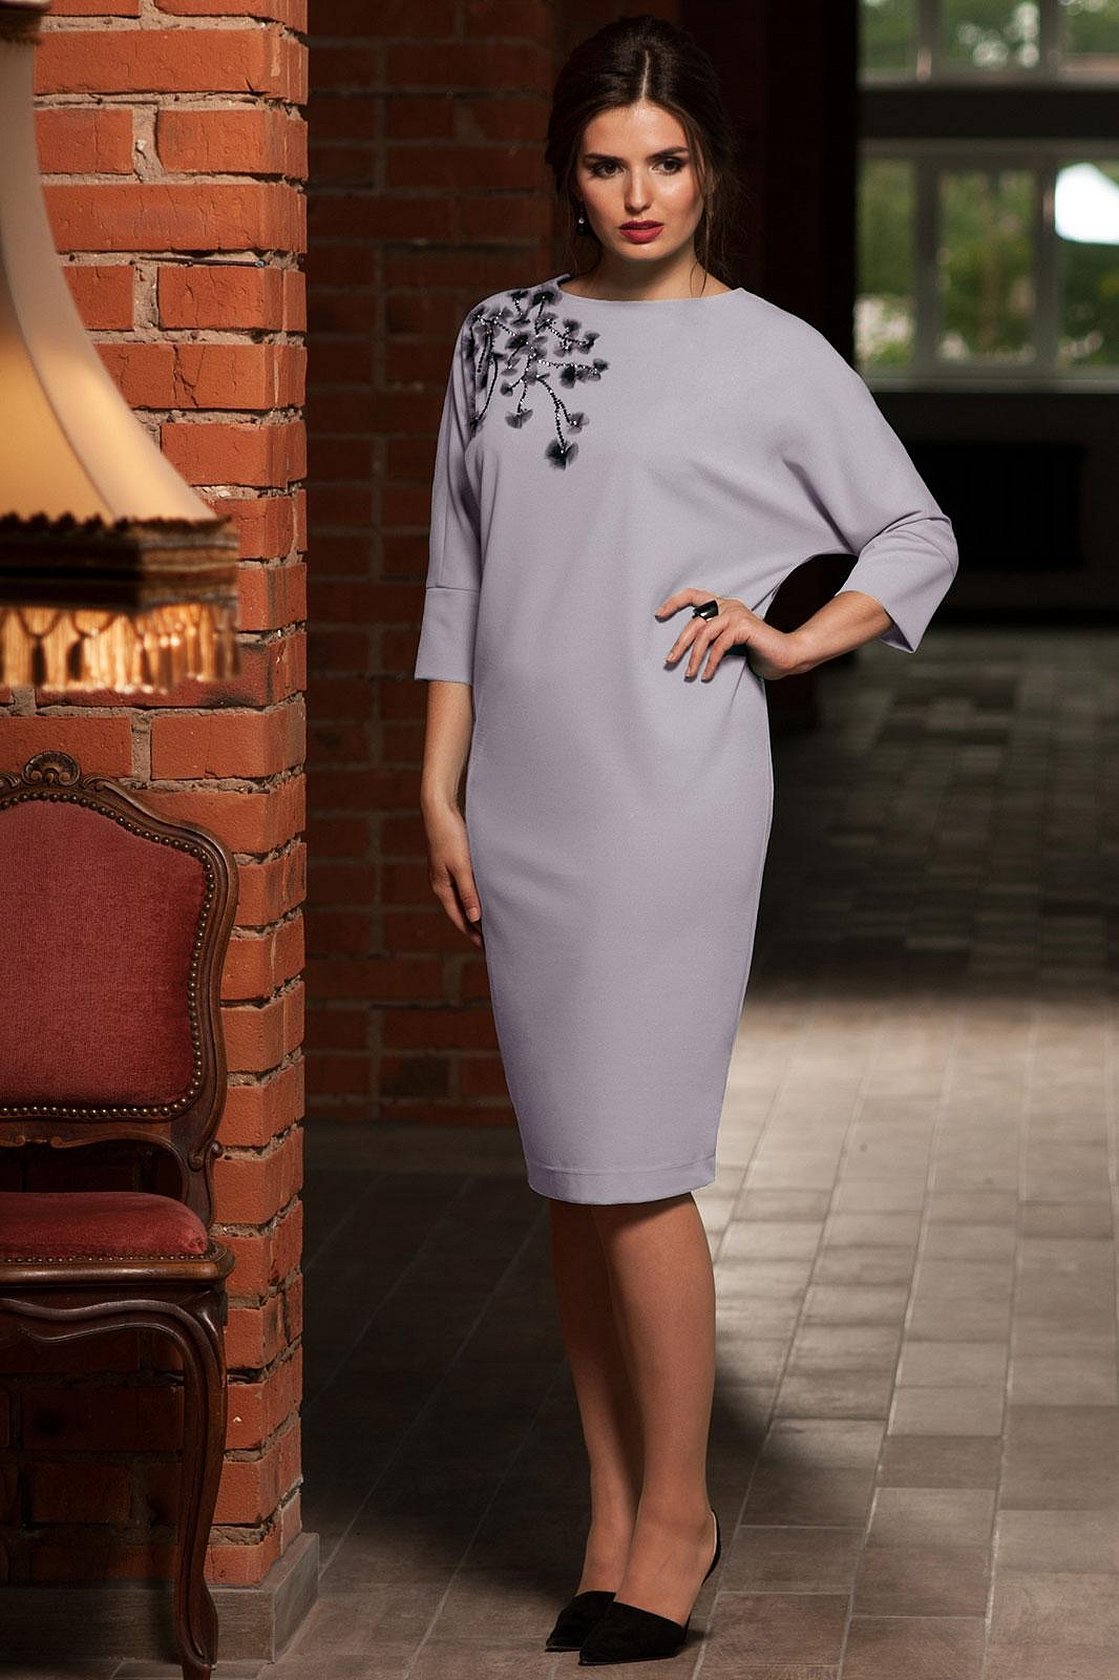
The type of cut that has been relevant and trendy for several decades is the batwing. Almost every designer was able to get inspired by this type of product and use the style in clothing collections. The model will help to hide the flaws and emphasize the advantages of the girl's figure.
- The history of the appearance of airy and flowing sleeves on the world catwalks
- Choice of fabric
- Pattern construction options
- How to Build a Classic Sleeve
- How to model a sleeve for a large bust
- How to construct a pattern for a sleeve with a rounded shoulder
- How to make a sleeve without a side seam
- With short sleeves
- Patterns of products with such sleeves
- Batwing Sleeve Blouse Pattern
- Batwing Sleeve Dress: Pattern
- Batwing sweater: pattern
- Batwing Tunic: Pattern
- Pattern of a pullover with batwing sleeves
- Cutting and sewing
- Facing
The history of the appearance of airy and flowing sleeves on the world catwalks
The period of the Second World War, the 1940s marked the emergence of the batwing cut. It became popular for a number of reasons:
- ease of sewing;
- use of a coarse type of fabric.
Additional information! Fashion historians pay attention to the appearance of the outfit, naming the source of the change as the Japanese kimono dress.
Initially, the product was a tunic with wide sleeves and a belt.
In the 1980s, the dress gained particular popularity among the fairer sex. Wide, flowing sleeves were loved by girls of all ages and body types. During this period, designers developed a style that emphasized all the advantages of a woman and masked her flaws.
In 2019, the style is used for sewing dresses, tunics, blouses, sweatshirts. Media personalities often wear items of this cut.
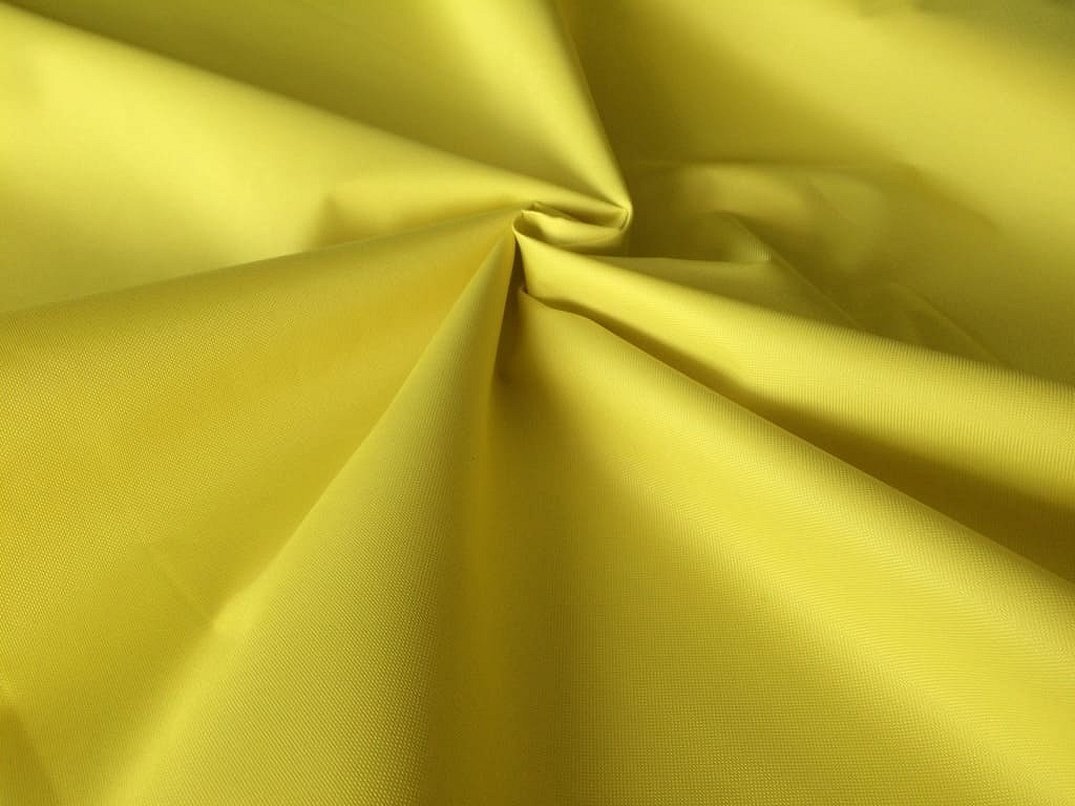
Choice of fabric
When sewing the product, you can use any type of fabric. However, it is not recommended to use thick material, as this can make the image heavier and does not allow the fabric to fall down. For this reason, it is better to pay attention to the following properties:
- softness;
- elasticity;
- well draping material.
Pattern construction options
When constructing a pattern, the seamstress most often chooses one of the following methods. It is important to strictly follow the sequence of actions, since the quality and style of the future product depend on this.
How to Build a Classic Sleeve
The classic type is a loose fit without any additional darts on the chest. The product can be modeled on a standard back pattern.
Important! The exception to this method is large breasts. In this case, it is recommended to use the method below.
When constructing, the neckline is 2.5 cm deep. When constructing the pattern for the neckline, the formula R=1/6*Osh+1 is used (Osh is the neck circumference).
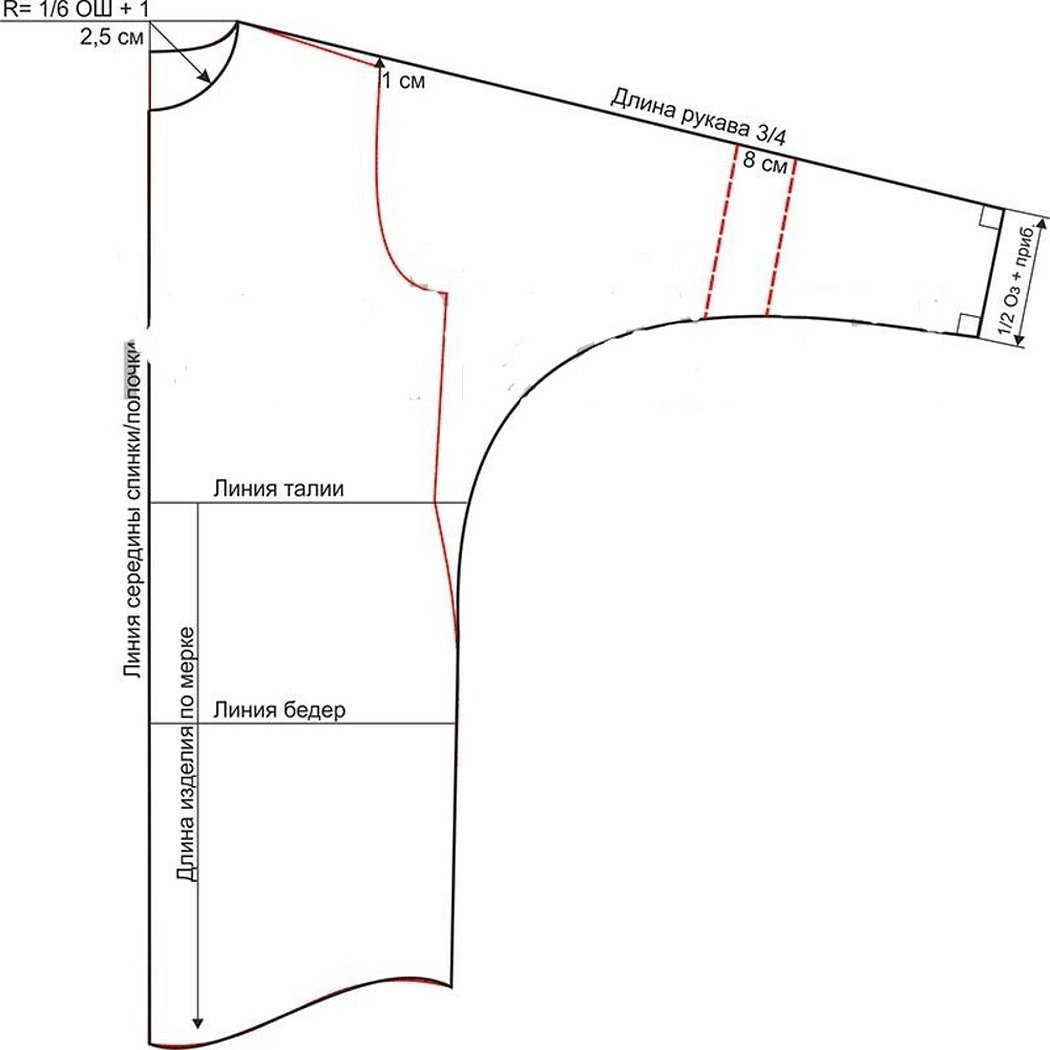
When creating a pattern, the seamstress must independently model the item according to the style.
Step by step instructions:
- Measure vertically upwards 1 cm from the last mark on the shoulder.
- Draw a shoulder line passing through the point from step 1.
- Extend the line.
- Put the measurement Shoulder Length + Sleeve Length along the line from point 3.
- Draw the bottom line using the measurement Wrist circumference*1/2+ seam allowances.
- Add an increase.
- Draw a rounded bottom line that flows into the side line.
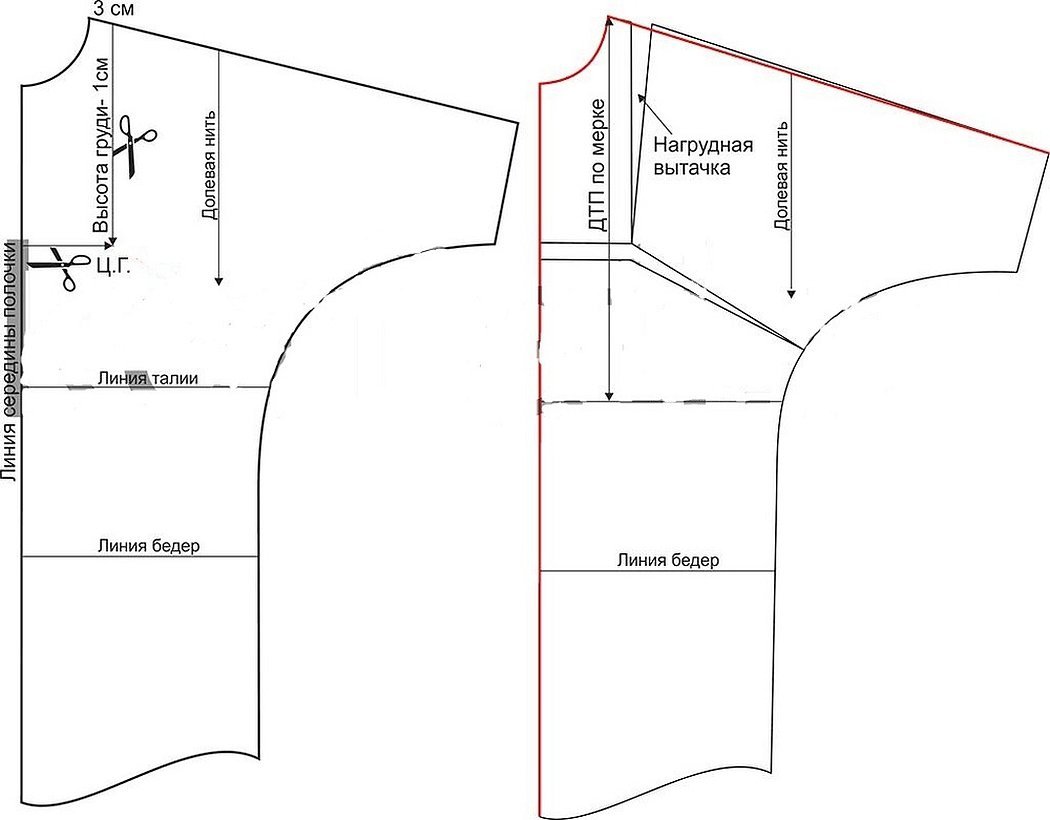
How to model a sleeve for a large bust
In some cases, a girl has a large difference between the DTS and DTP measurements, and it is recommended to adjust the pattern of the shelf.
Instructions:
- Take measurements: chest height, center of chest.
- Find the top point of the shoulder on the shoulder seam.
- Step back 3 cm to the right from it.
- Draw a vertical line down, the length is equal to “Chest height” - 1 cm.
- Place a horizontal measurement equal to ½ of the “Center of the Bust” to the right of the center of the shelf.
- Draw a dotted line to the bottom seam.
- Cut the diagram along the line, move the accidents apart according to the measurements.
Afterwards, a bust dart is formed on the shelf. It can be made either on paper or with the help of folds and tucks.
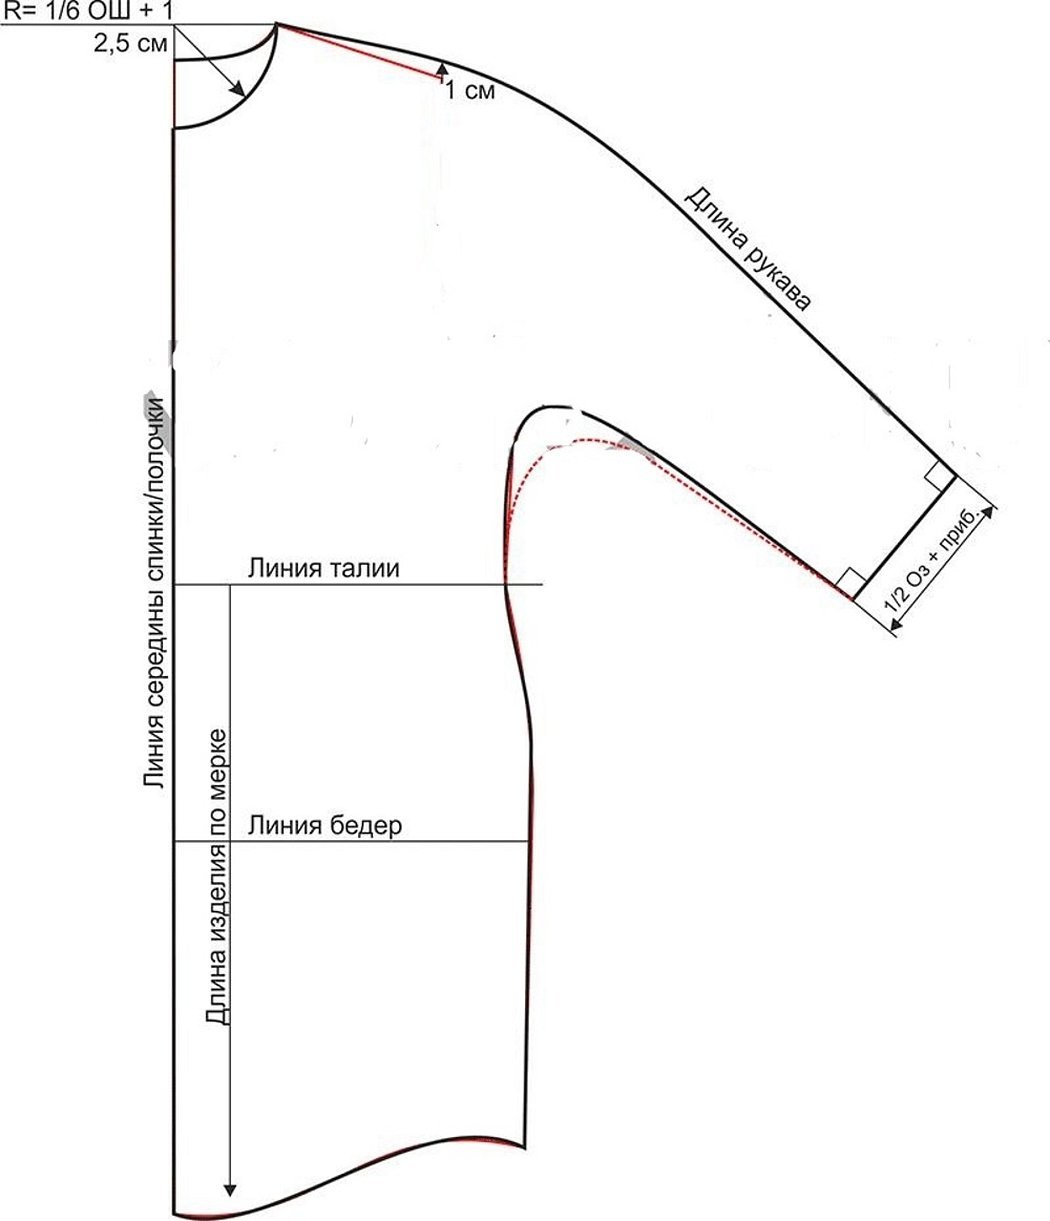
How to construct a pattern for a sleeve with a rounded shoulder
This model has a significant slope to the shoulder seam, it is looser near the armhole and resembles a seamless raglan sleeve. The basic back pattern is used when constructing the pattern.
Instructions:
- Determine the extreme point of the shoulder.
- Measure 1 cm vertically upwards from the point.
- Draw a line through the point and extend it upwards.
- Plot DP+DR along this segment.
- Measure the 90 degree angle.
- Draw a line of the sleeve bottom equal to ½ OZ + allowance. The allowance size depends on the item model and type of fabric.
- Determine the bottom point of the back armhole.
- Measure 4-10 cm vertically down from this point, depending on the model.
- Draw the bottom line of the sleeve, which will flow into the side line.
How to make a sleeve without a side seam
The large amount of material in the armhole is the main difference of this style. This model has a seam at the waist.
Instructions:
- Determine the point where the waist and side lines connect.
- Draw a line at a 45 degree angle.
- Put aside "Shoulder Length" + "Sleeve Length".
- Determine the extreme shoulder point.
- Draw a curved line.
- At the bottom, the sleeve width is equal to ½ OZ + allowance.
Additional information! It is important not to forget to leave 1.5 cm for seam allowances when cutting out the product.
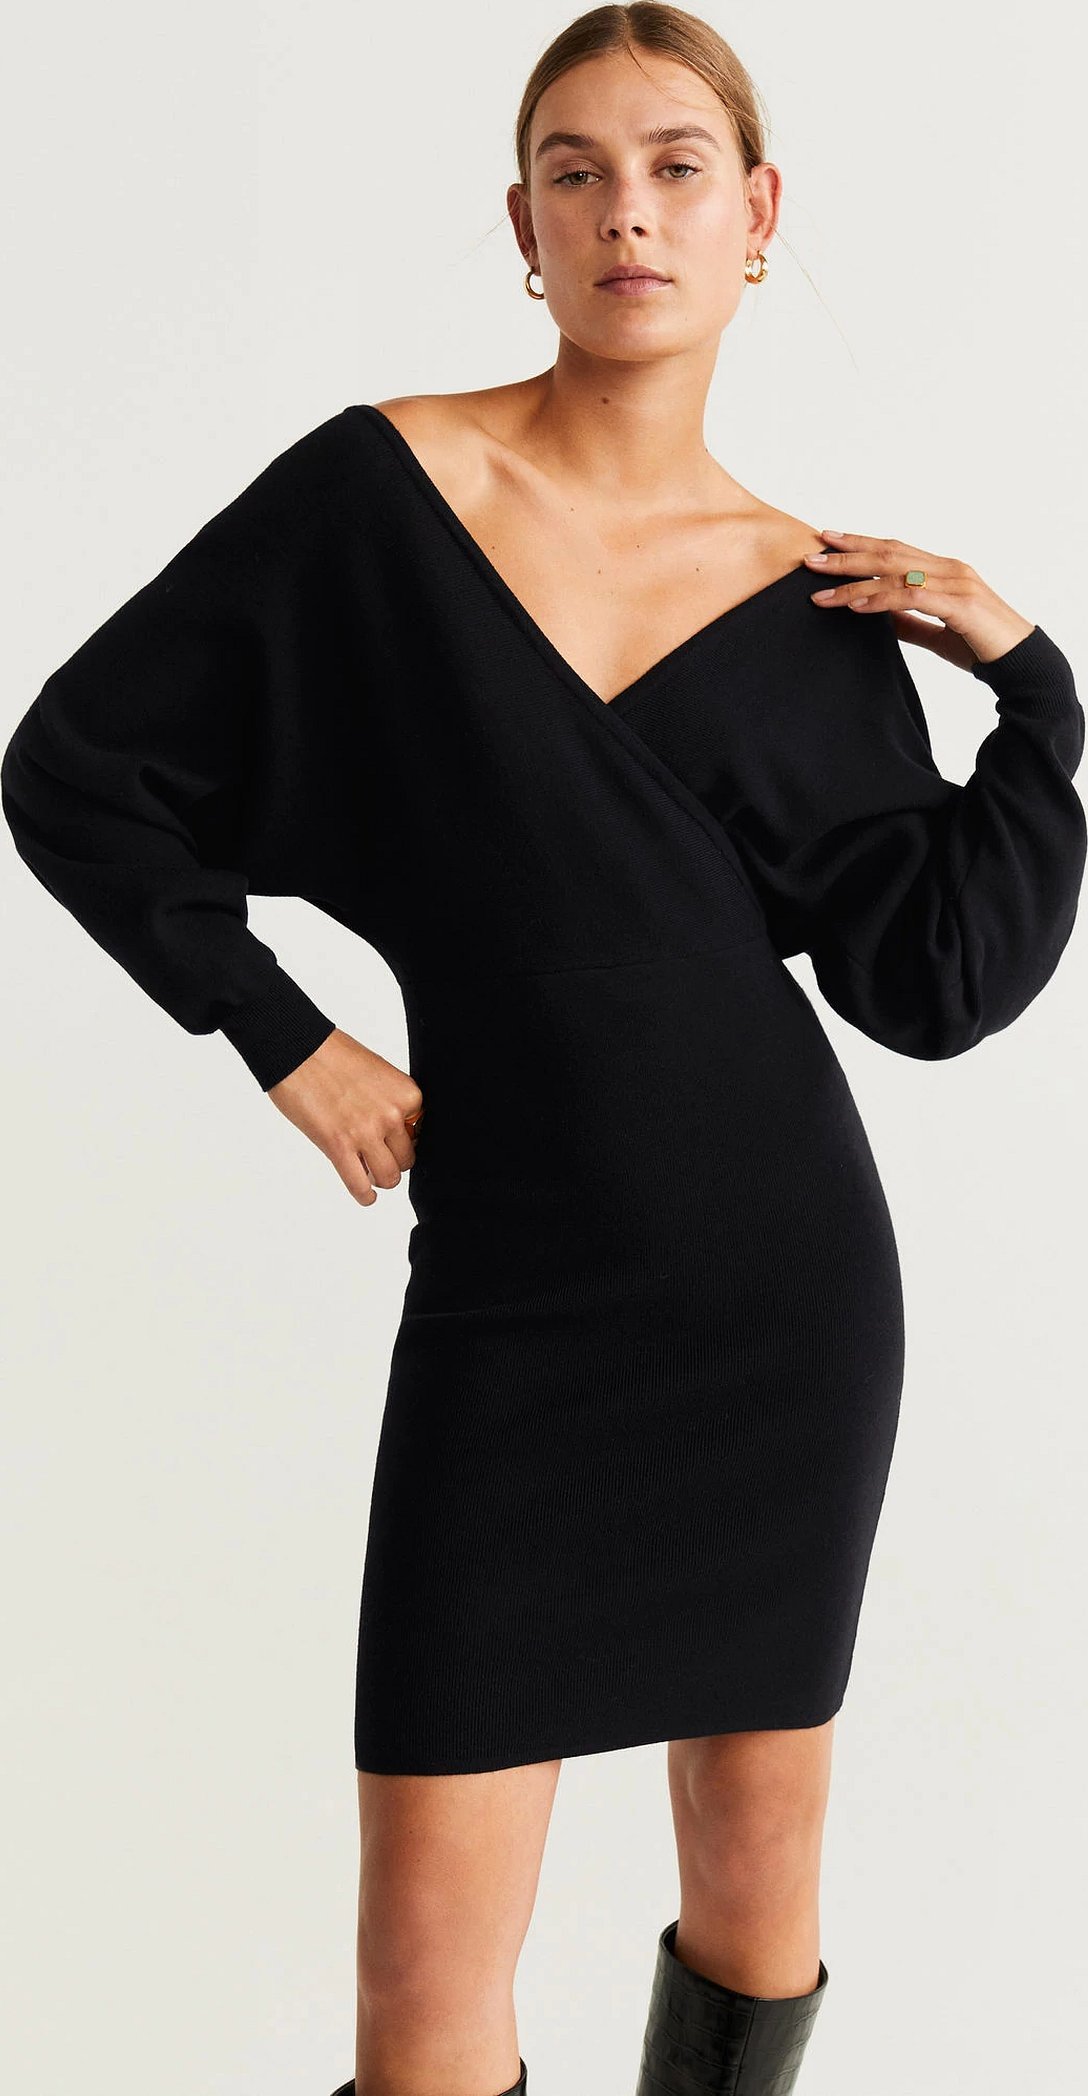
With short sleeves
Girls don't need to hide their arms behind long sweaters. The warm season is a great occasion to sew a garment that has a shortened batwing sleeve.
Since this style does not provide for a dart, the fabric should be dense and elastic.
Patterns of products with such sleeves
Material:
- stretch fabric;
- thread of a similar shade;
- special marker;
- simple pencil;
- paper;
- scissors;
- ruler.
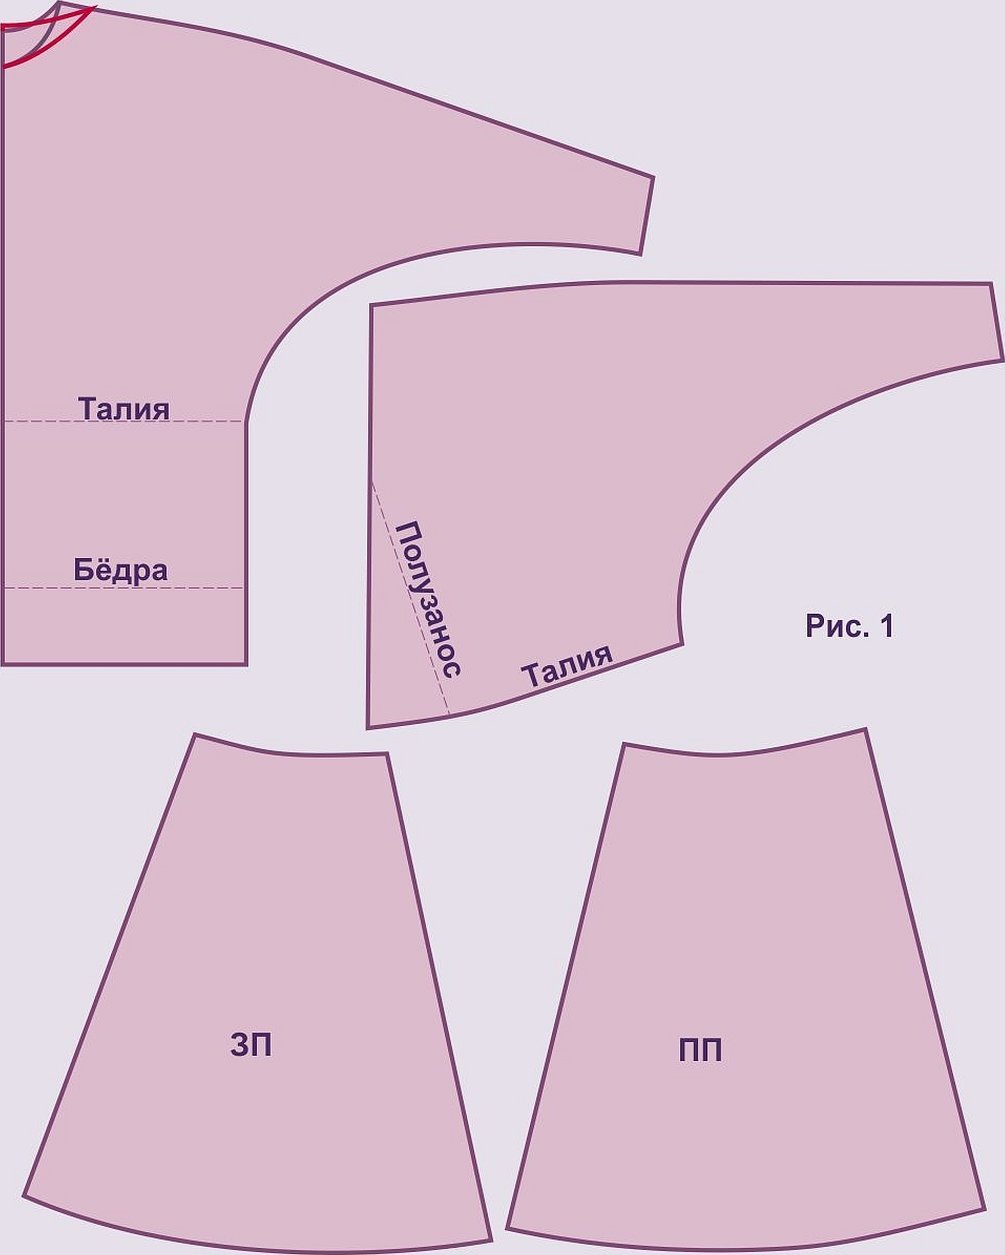
Below are patterns for items with the sleeves shown above.
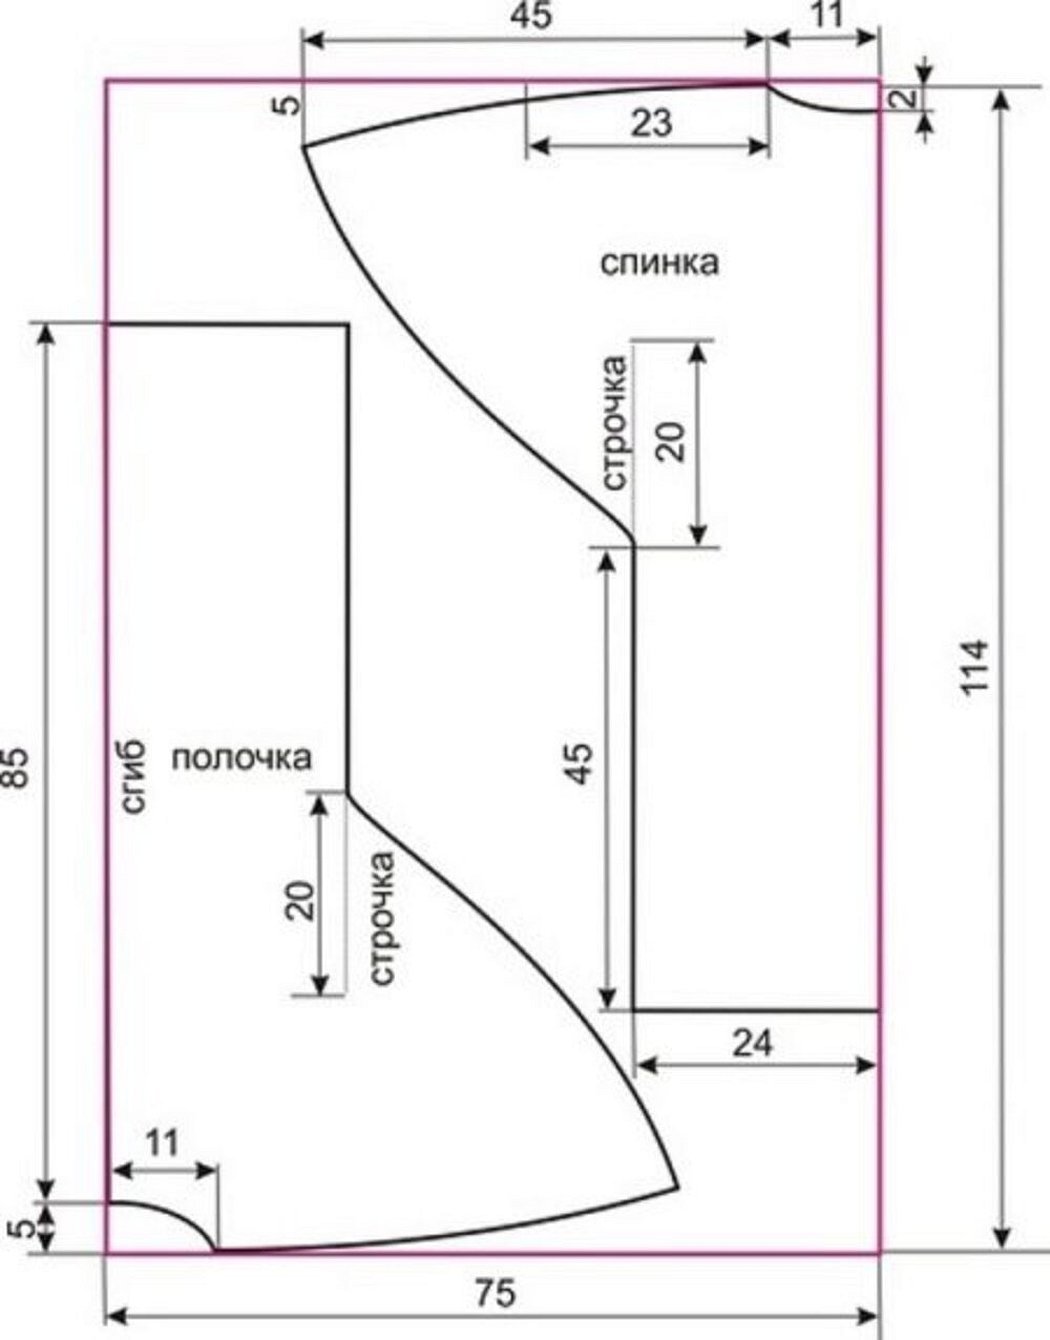
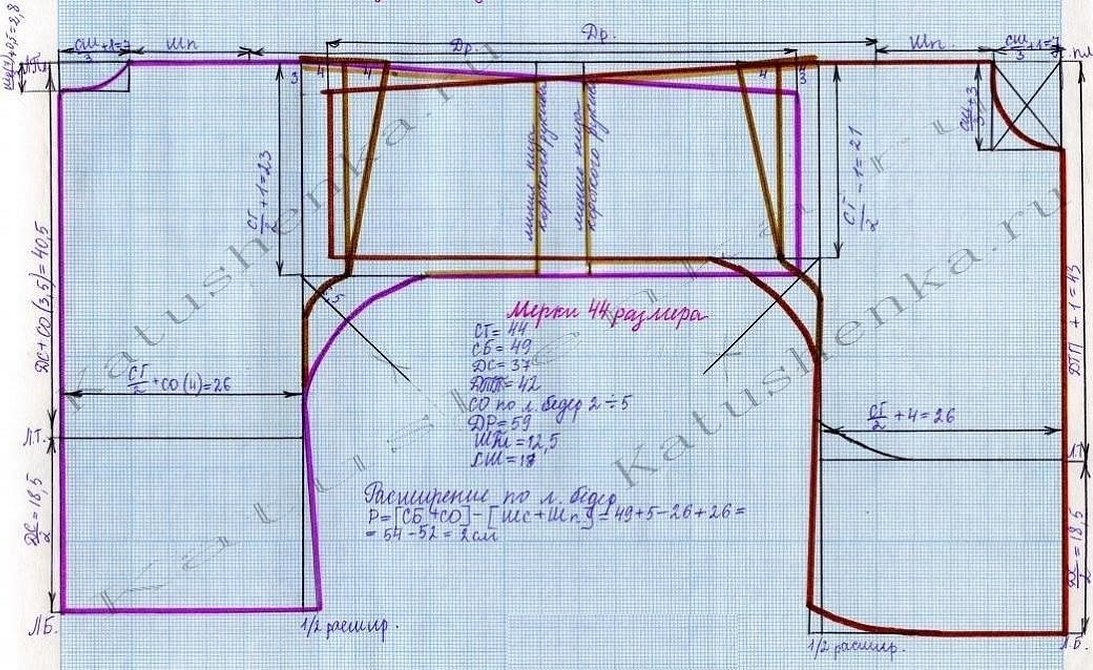
Batwing Sleeve Blouse Pattern
The pattern is designed for a girl with a clothing size of 44-46, so when constructing the pattern drawing, you need to change the measurements.
It is recommended to start building the drawing from the top left.
Instructions:
- Put aside the measurements shown in the figure.
- Build a foundation.
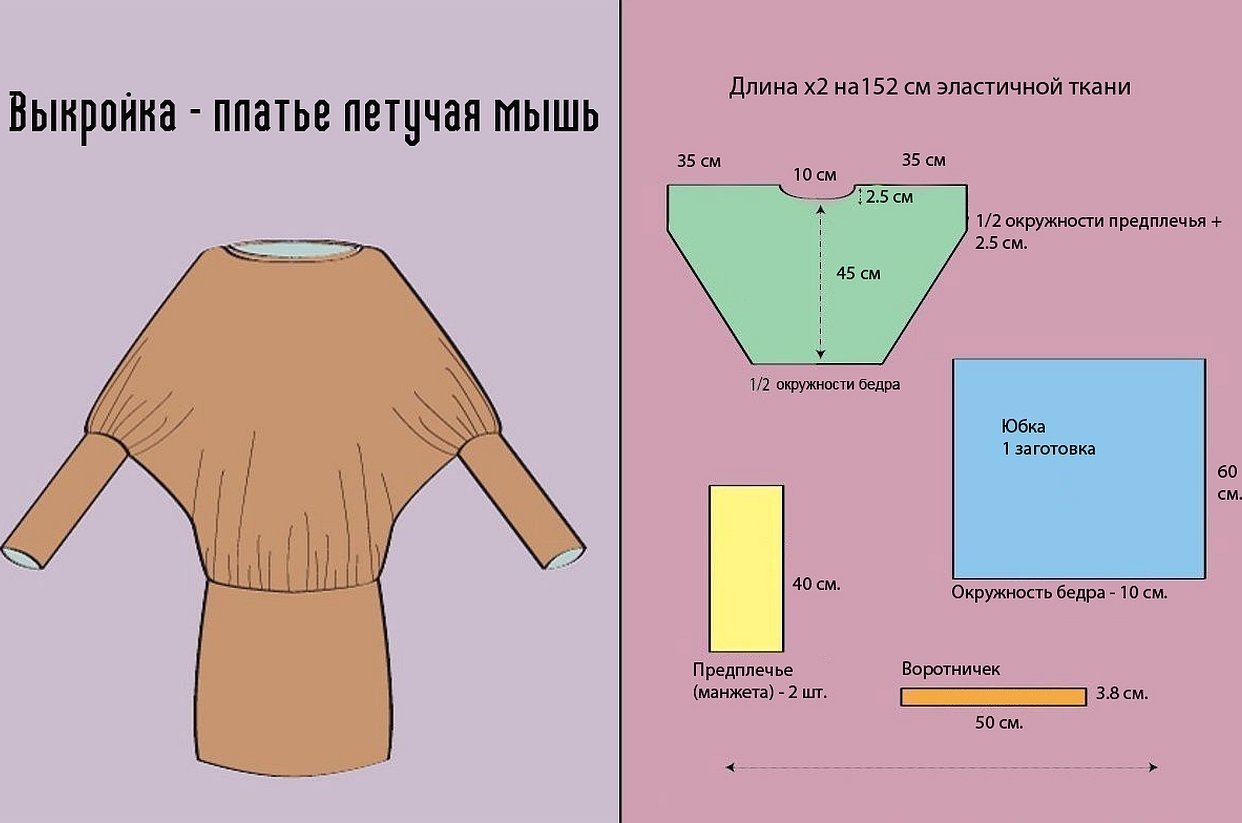
Batwing Sleeve Dress: Pattern
For an accurate result, you need to accurately measure the length. The main advantage of the product is the flying sleeves. A beginner can easily sew this model.
Batwing sweater: pattern
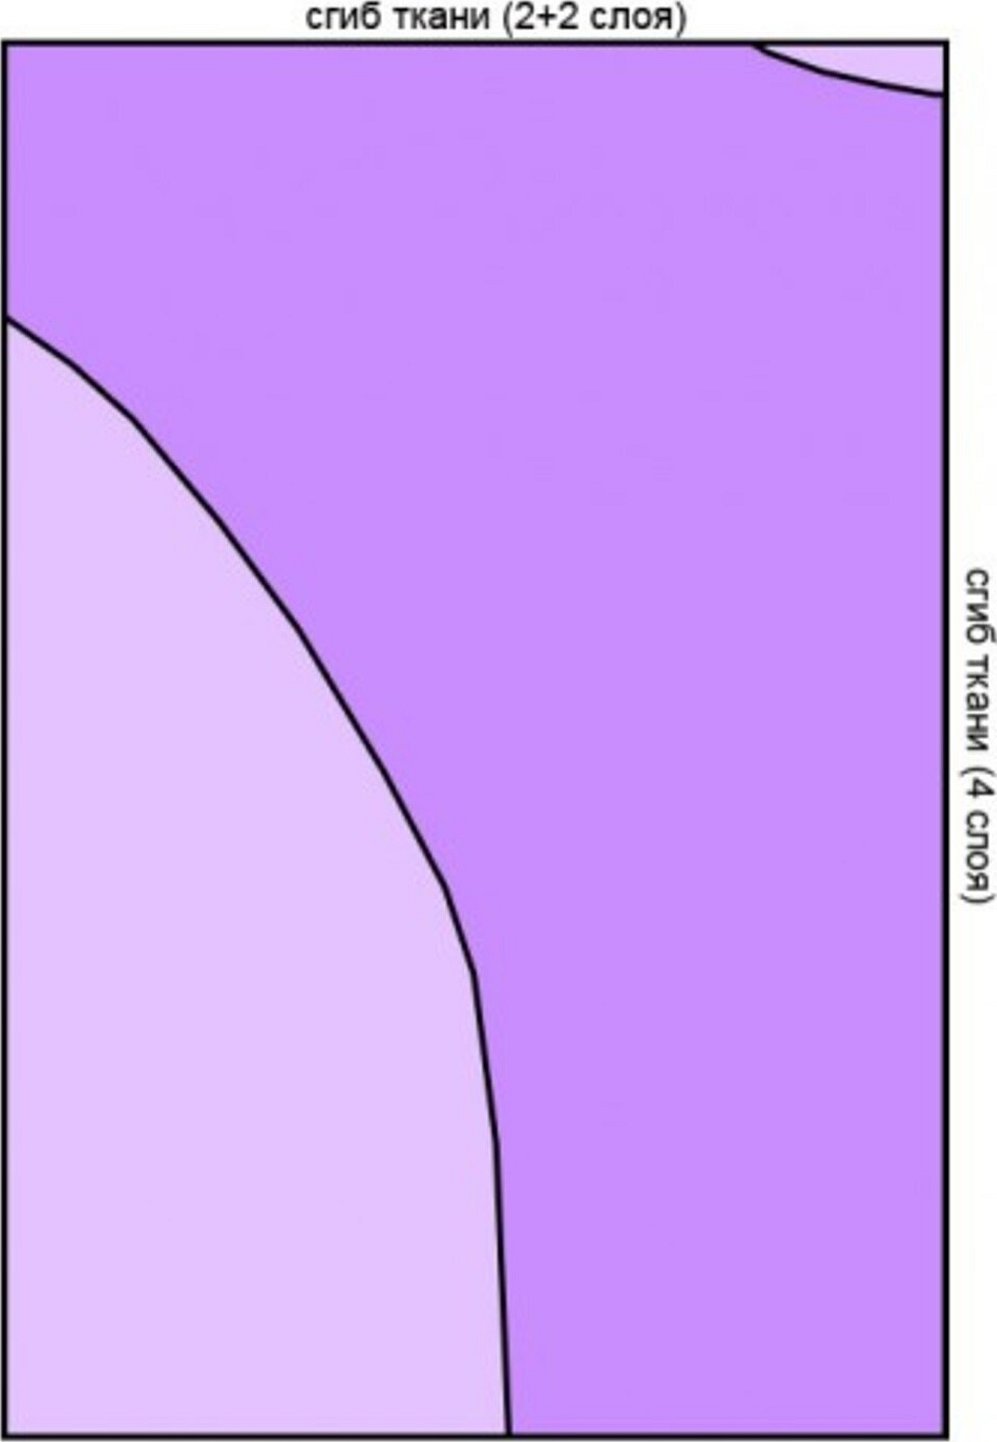
Craftswomen recommend drawing a diagram on the inside of the fabric arbitrarily when constructing a pattern. To obtain a symmetrical item, it is necessary to fold the fabric in half.
Batwing Tunic: Pattern
When constructing a pattern, you need to take a sweater of the appropriate size.
Instructions:
- Fold it in half and trace it on paper.
- Change the sleeves to a batwing style.
- Lengthen the pattern.
- Add seam allowances.
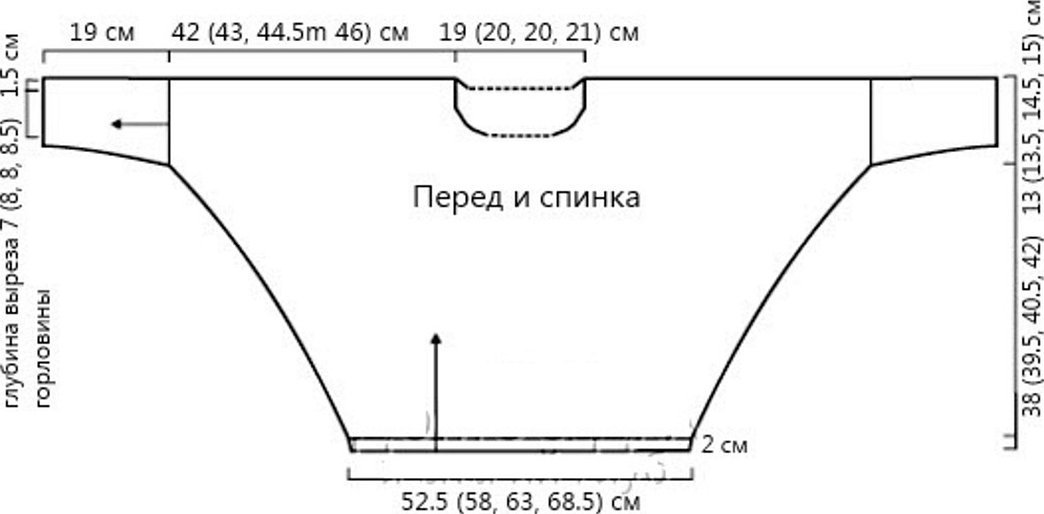
Pattern of a pullover with batwing sleeves
When creating a pattern for a pullover, it is important to first take the correct measurements of the client.
Cutting and sewing
Instructions for cutting and sewing the product:
- Fold the fabric in half with the right side down.
- Pin the pattern to the fold of the fabric.
- Trace the outline.
- Add seam allowances.
- Remove the pattern.
- Connect the parts with a hand stitch.
- Try it on.
- Correct inaccuracies.
- Sew on a machine.
Facing
For piping you will need:
- Cut out the facing from fabric or interlining.
- Transfer the neckline to the back and front.
- Sew the facing parts.
- Overcast the edges.
- Pin the facing to the neckline.
- Sew on a sewing machine.
- Iron the piece.
All patterns are suitable for both adults and children. The style is distinguished by the ability to combine practicality and uniqueness in one image. When using knitwear, you can sew a coat with a sleeve of this type. The Burda magazine presents many patterns for knitting and sewing products. If you have experience, you can even sew a children's jacket of this style.


