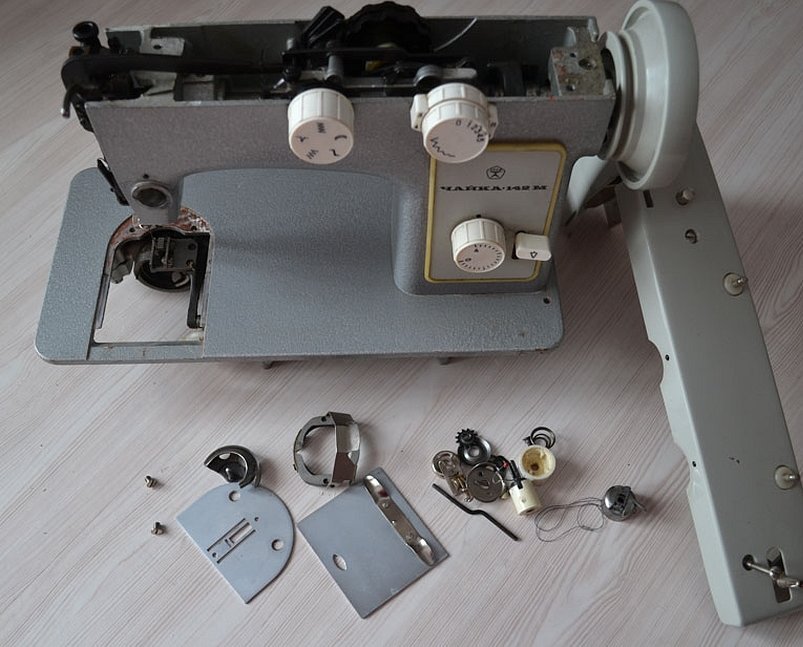
Repair of the sewing machine "Chaika" may be required after many years of operation. If you follow the rules of care and set up the device correctly, then malfunctions rarely occur. You can cope with simple problems at home.
- Modifications of sewing machines "Chaika"
- Instructions for use
- Care and lubrication
- Use of needles
- Types of fabrics for sewing
- The needle at the entrance to the needle hole
- Threading the upper and lower threads
- Winding the thread
- Machine control
- The transverse position of the needle in the "Seagull" can spontaneously become displaced
- Setting and adjustment
- Setting the shuttle position
- Interaction of the shuttle and the needle
- Sewing Machine Models
- Cost of repairs
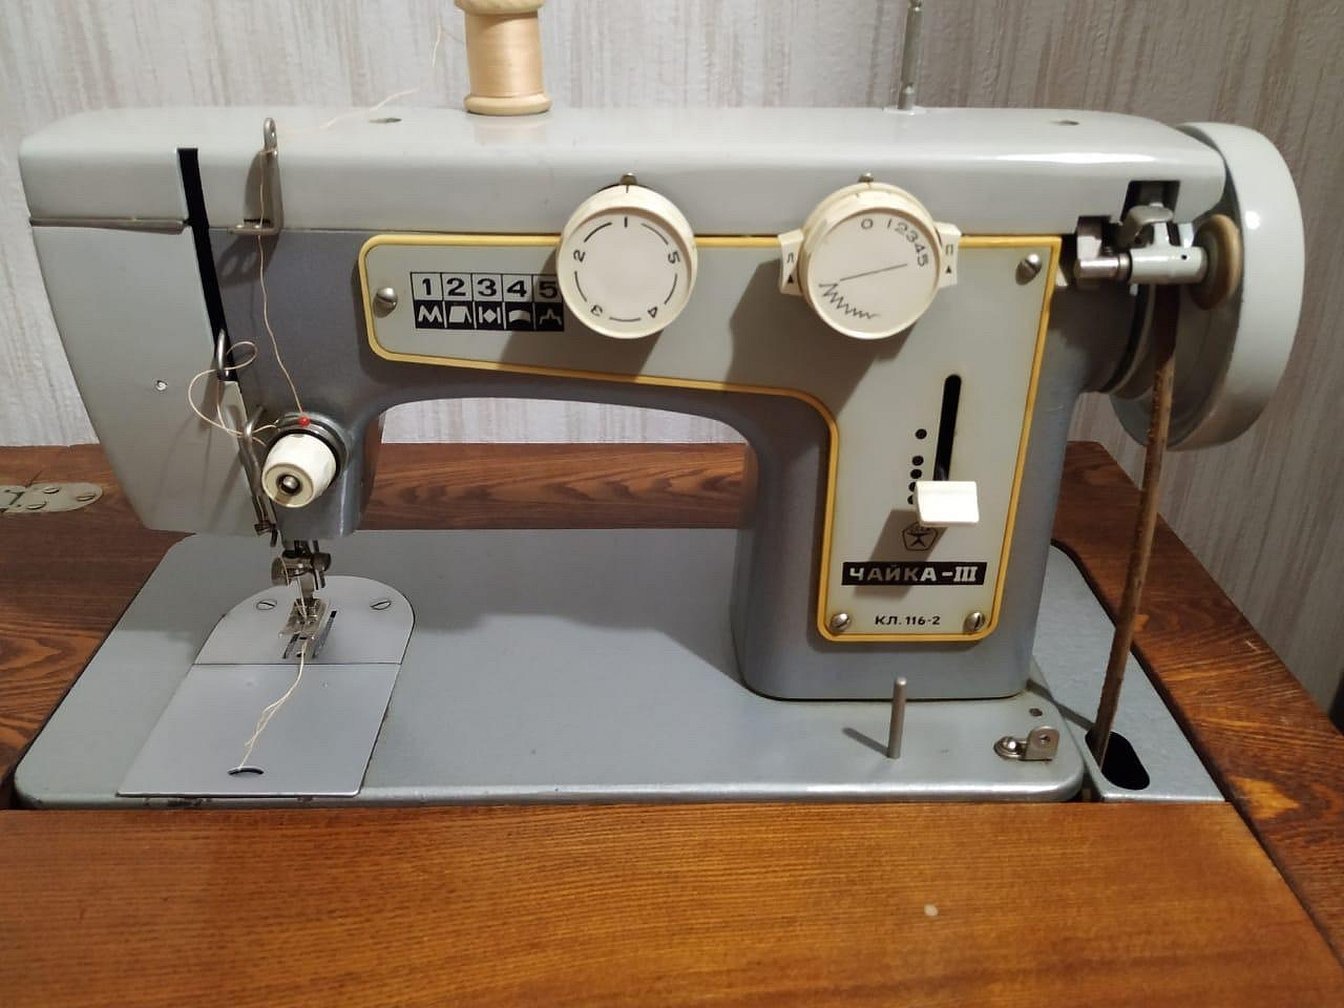
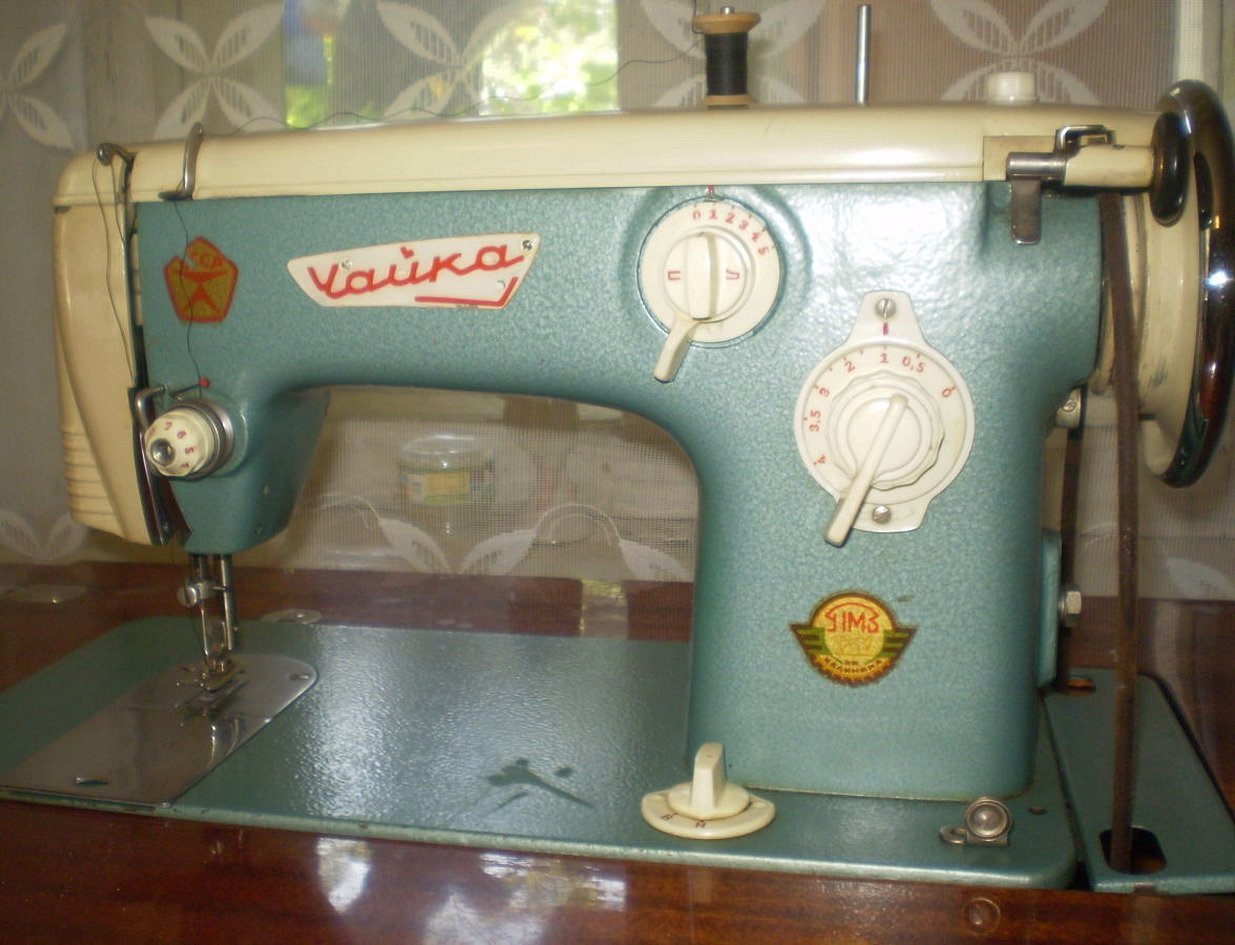
Modifications of sewing machines "Chaika"
Basically, all varieties of "chaikas" are designed the same. They perform zigzag, as well as skips and other actions for sewing high-quality fabric products. "Chaikas", like "Podolsk", work the same way. The operating, adjustment and repair instructions are no different.
Repair and installation of the shuttle device may vary depending on the features of the mechanism. More complex problems are solved by a master. And the adjustment of lines and basic functions is similar.
The most popular machine variants are 142-34. It is also difficult to find differences in the design of the Malva machines.
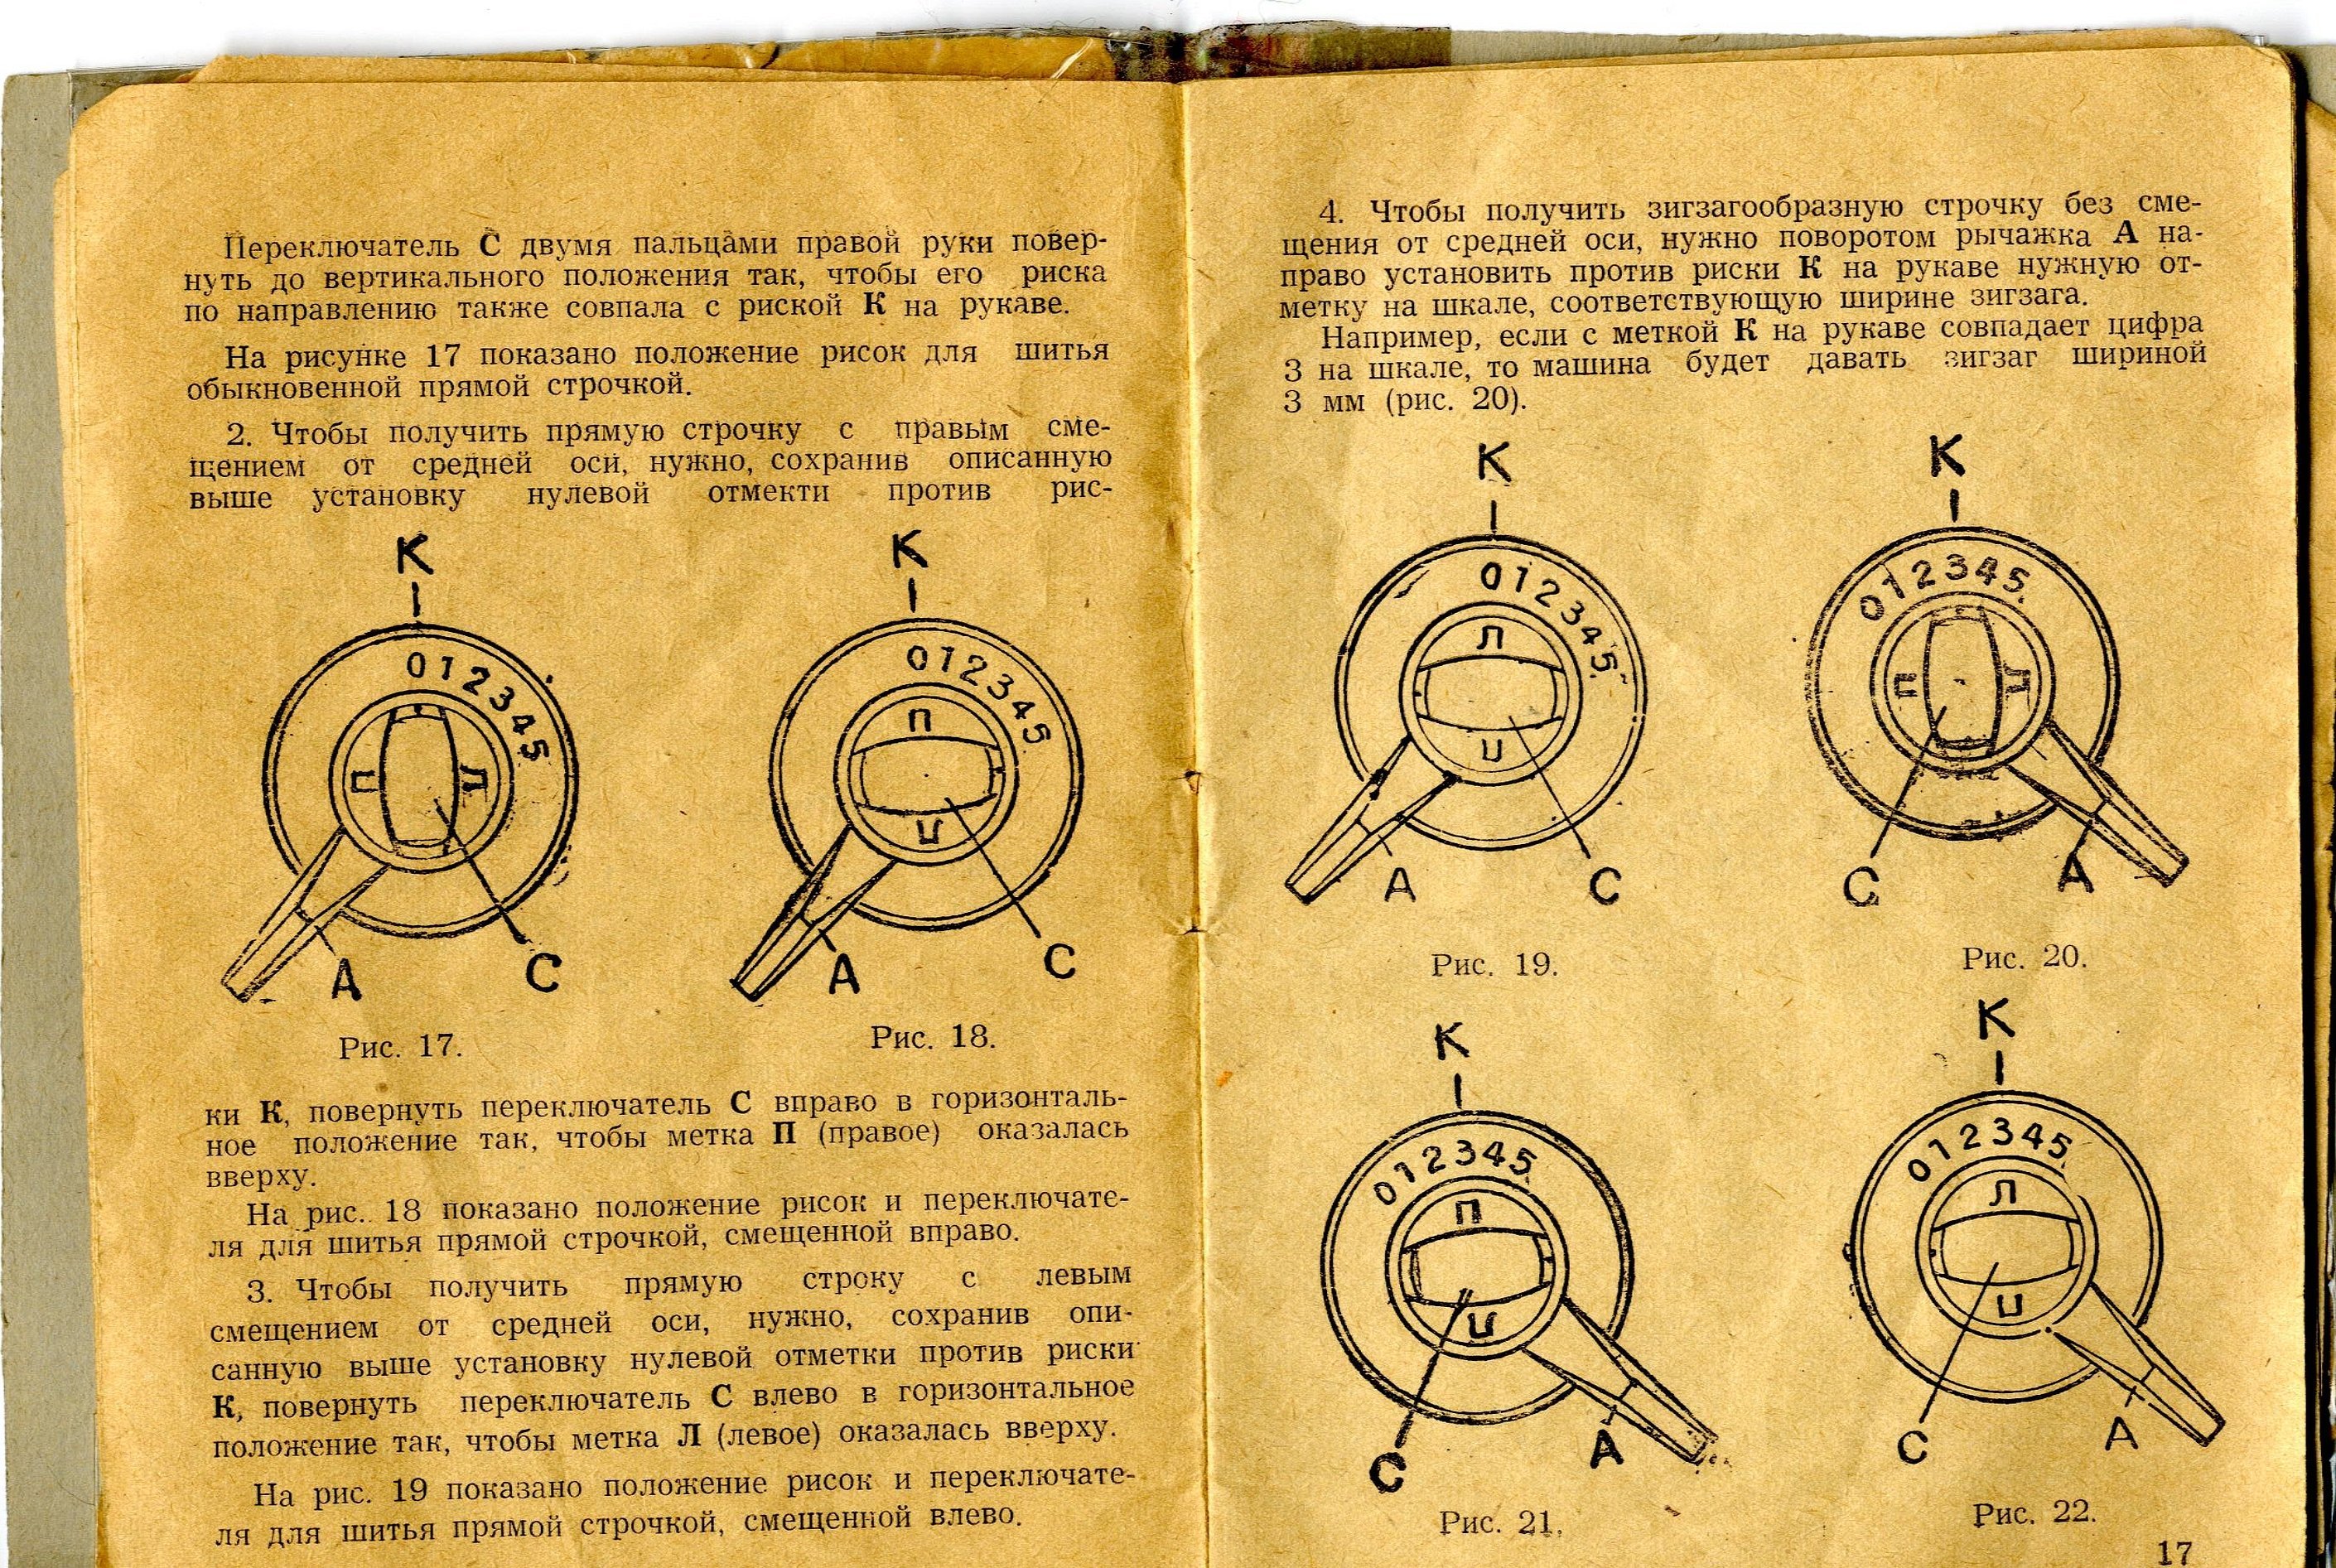
Instructions for use
The operating instructions contain basic information that will help users adjust the settings, maintain the mechanisms and use the machine. What is described:
- care and lubrication;
- rules for selecting and using needles;
- selection of materials for sewing, as well as threads for a specific machine;
- parameters that must be set and checked before starting sewing;
- rules for threading and winding;
- device management rules.
Before using the machine for the first time, please read the operating instructions.
Care and lubrication
Lubrication of mechanisms is necessary to extend the service life of mechanisms. Due to friction, they become unusable and wear out quickly. Therefore, they should be lubricated periodically. It is recommended to take a special oil. But often they use a vegetable product or even butter. However, they oxidize.
Before lubricating, all mechanisms are cleaned from a layer of dust. The remains of threads and fabric are removed. Then light dirt in the compartment with the shuttle is lubricated. For convenience, use a syringe of any volume.
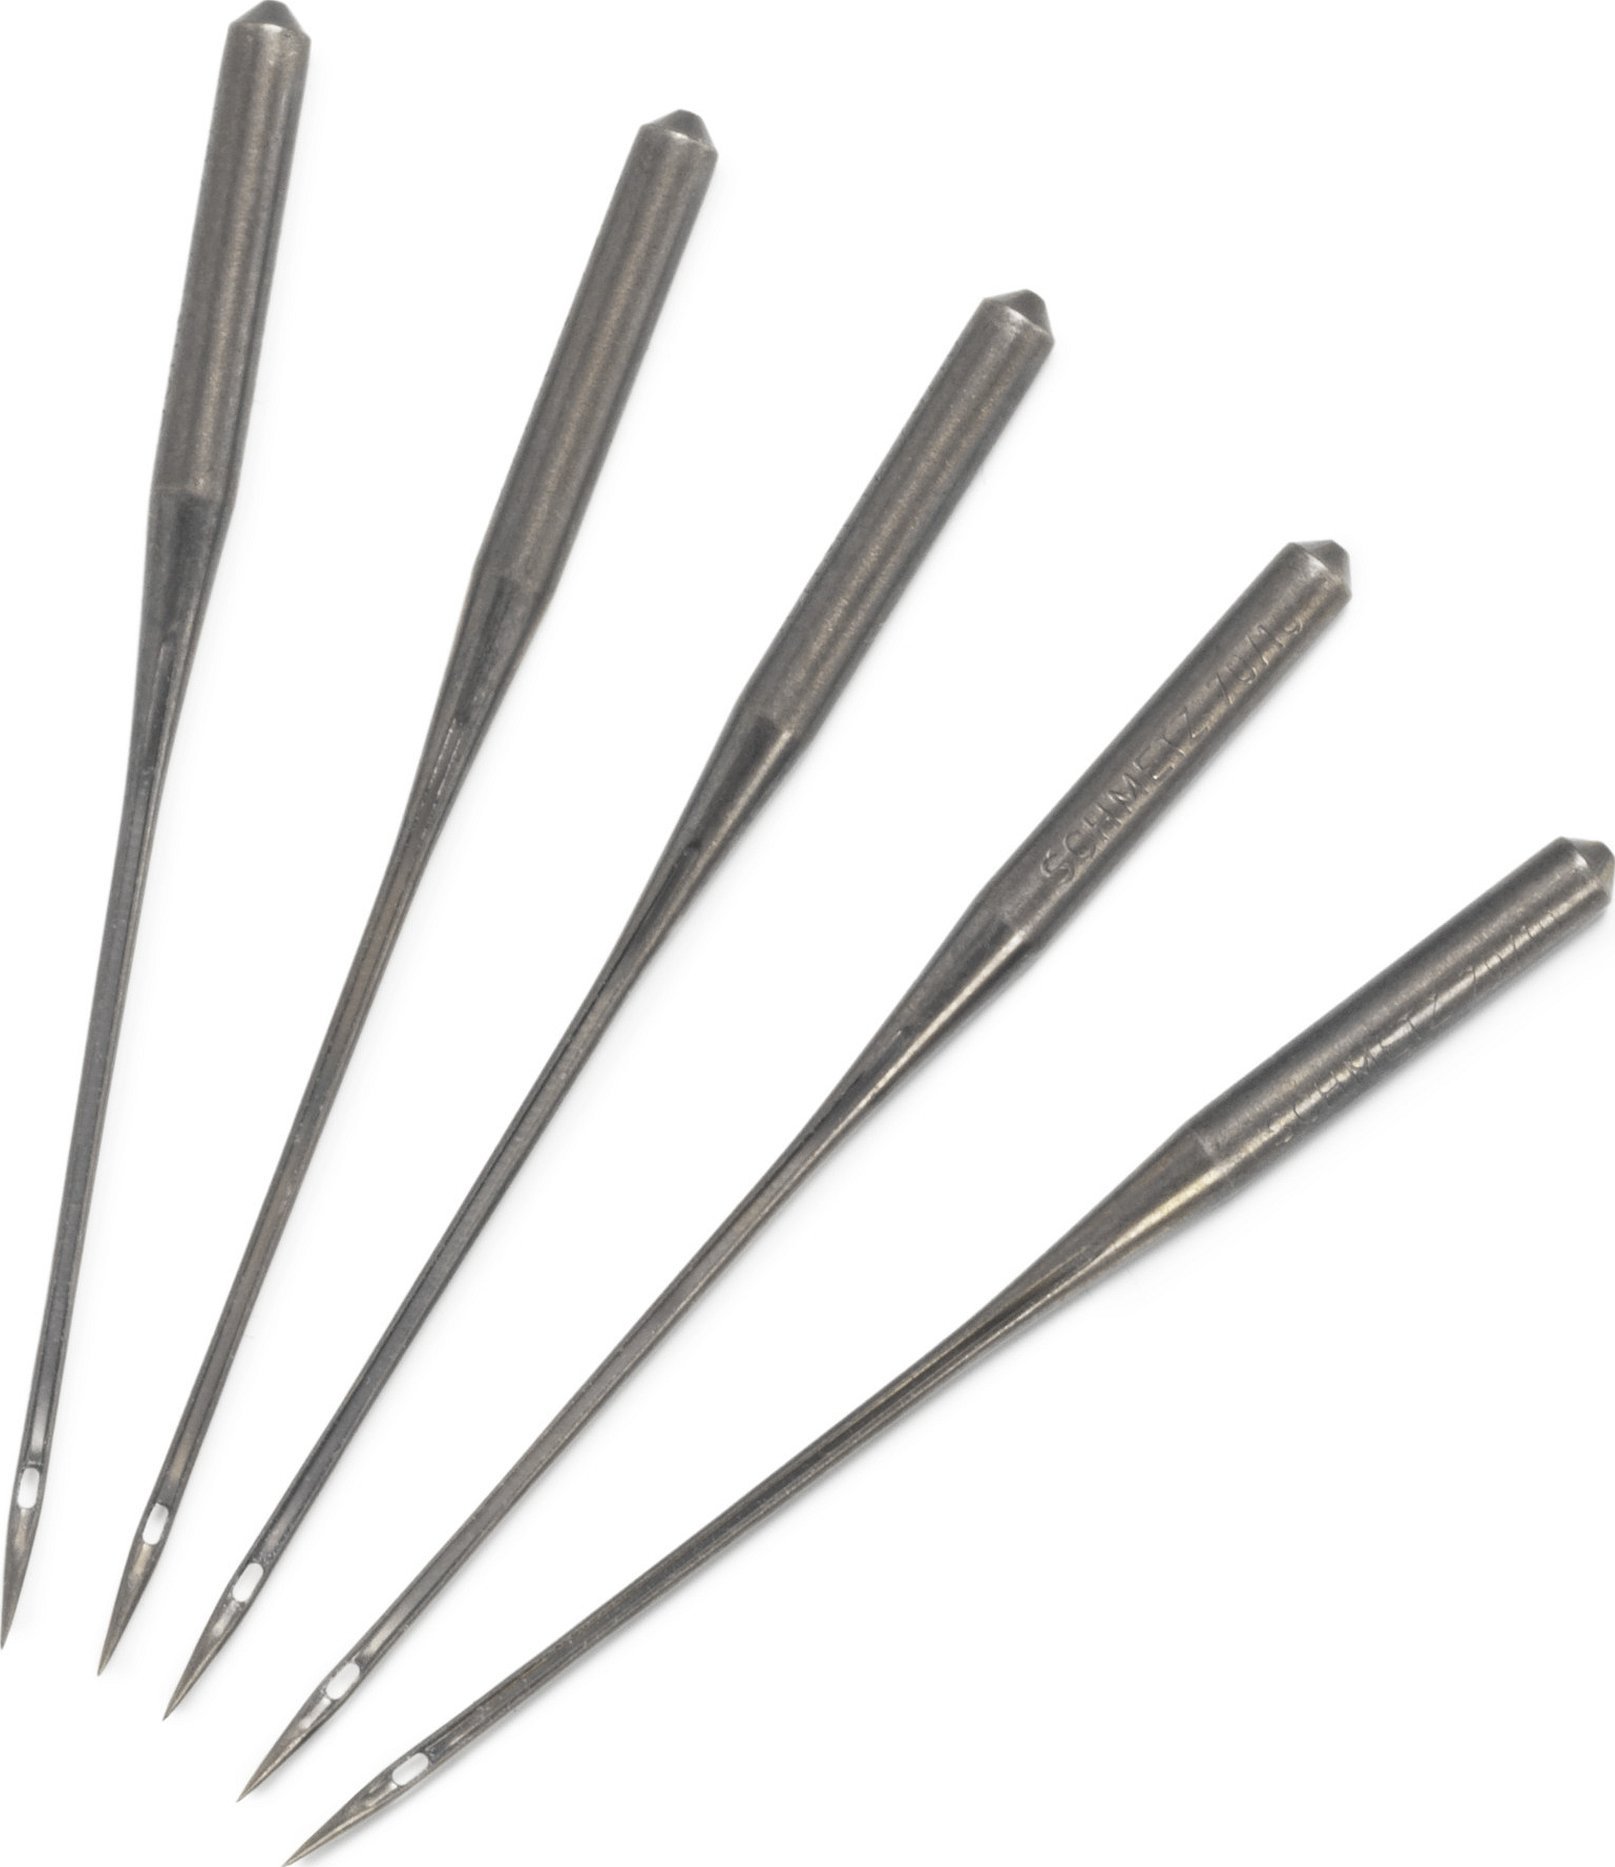
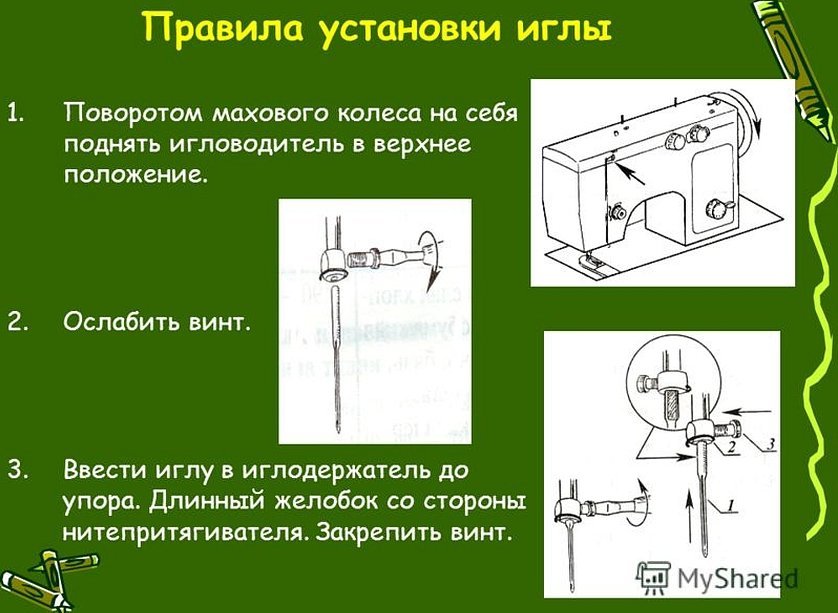
Use of needles
The main part of the sewing device is the needle. Its condition affects the quality of sewing, the service life of the entire mechanism. The most common malfunction is thread breakage, skipped stitches. The culprit is a bent, blunt needle. You can check the condition of the tip with a magnifying glass.
Important! It is strongly recommended to use parts for household sewing machines only.
The needle itself should be replaced periodically. And also selected depending on the type of base for sewing. For leather, one number is used, knitwear is sewn with another. The choice is also influenced by the threads. All recommendations are described in the official instructions. You cannot use options for industrial use.
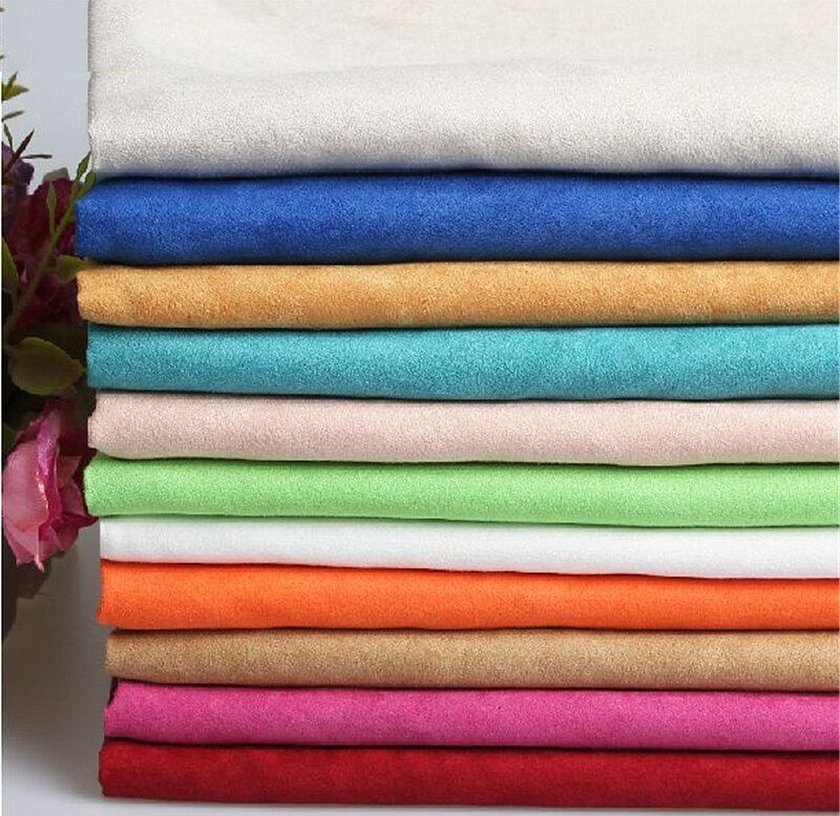
Types of fabrics for sewing
It is important to select the type of needle according to the type of fabric. Old-style mechanisms "take" medium and heavy materials. The selection rules are described in the tables of instructions. Thin leather is also within the capabilities of "seagulls". However, for it, it is necessary to select special options with a tetrahedral tip.
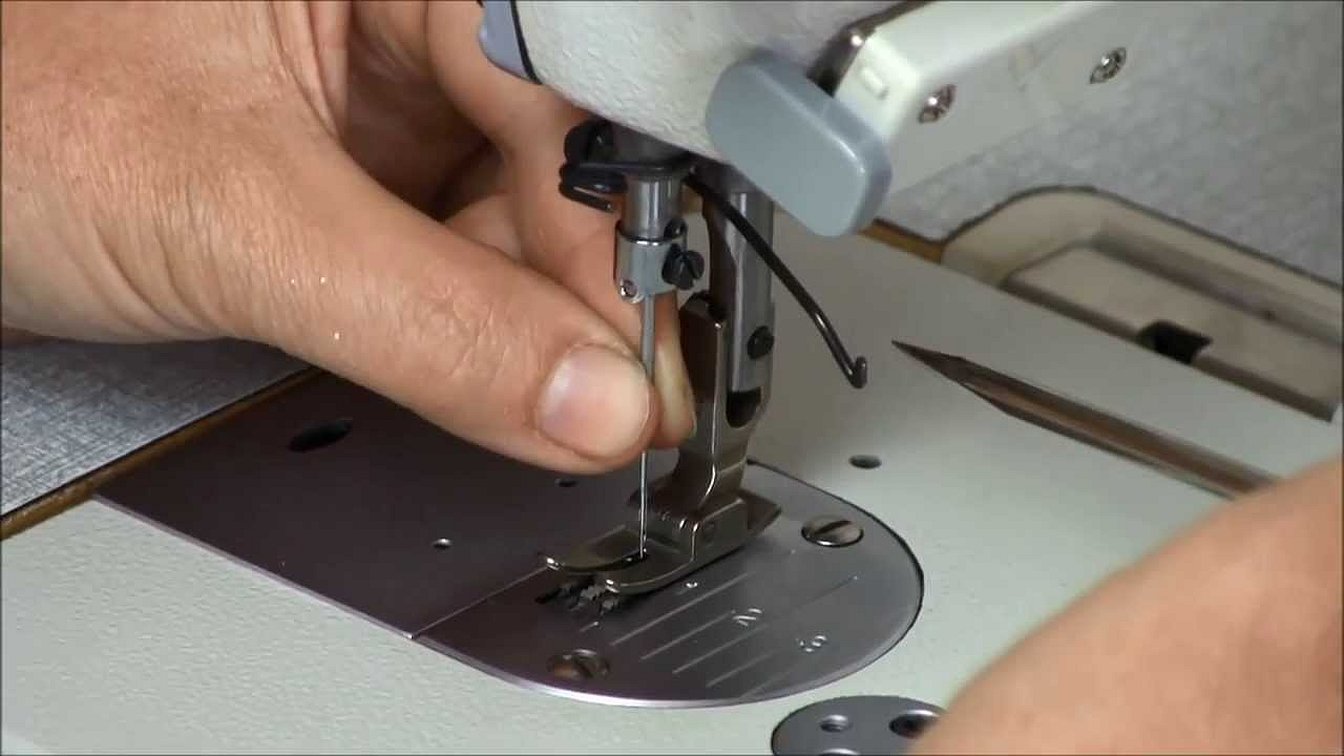
The needle at the entrance to the needle hole
The first thing you need to make sure of before you start working with the fabric is the position of the needle. It should not move too close to the needle hole when entering it. Thread breaks often occur. The seam of the product is uneven and breaks. You can forget about quality. And the work at the machine is interrupted.
When a row is sewn, the needle should be in the center position in the hole. The distance from all sides should be uniform. This is especially important when using zigzag. To adjust the parameter, shift the needle bar frames by loosening the screws.
Important! If the tip touches the edge at the widest zigzag, this is a reason to contact a sewing mechanism repairman.
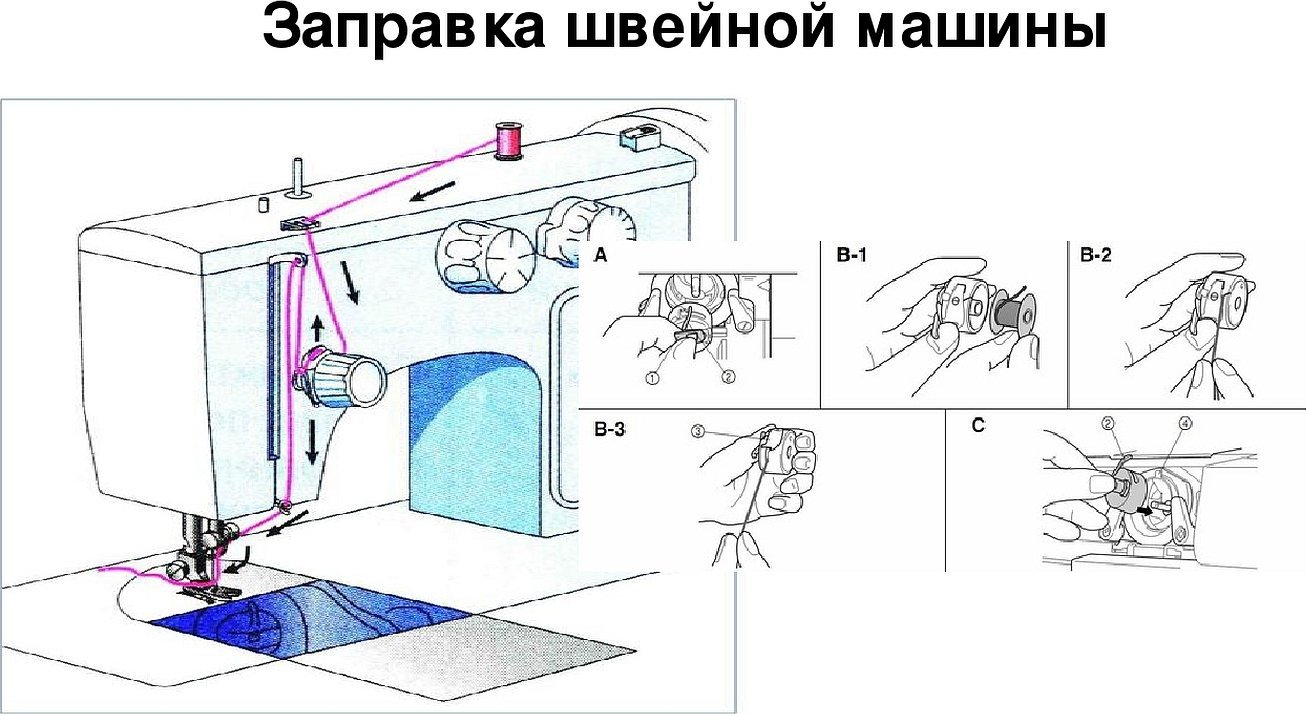
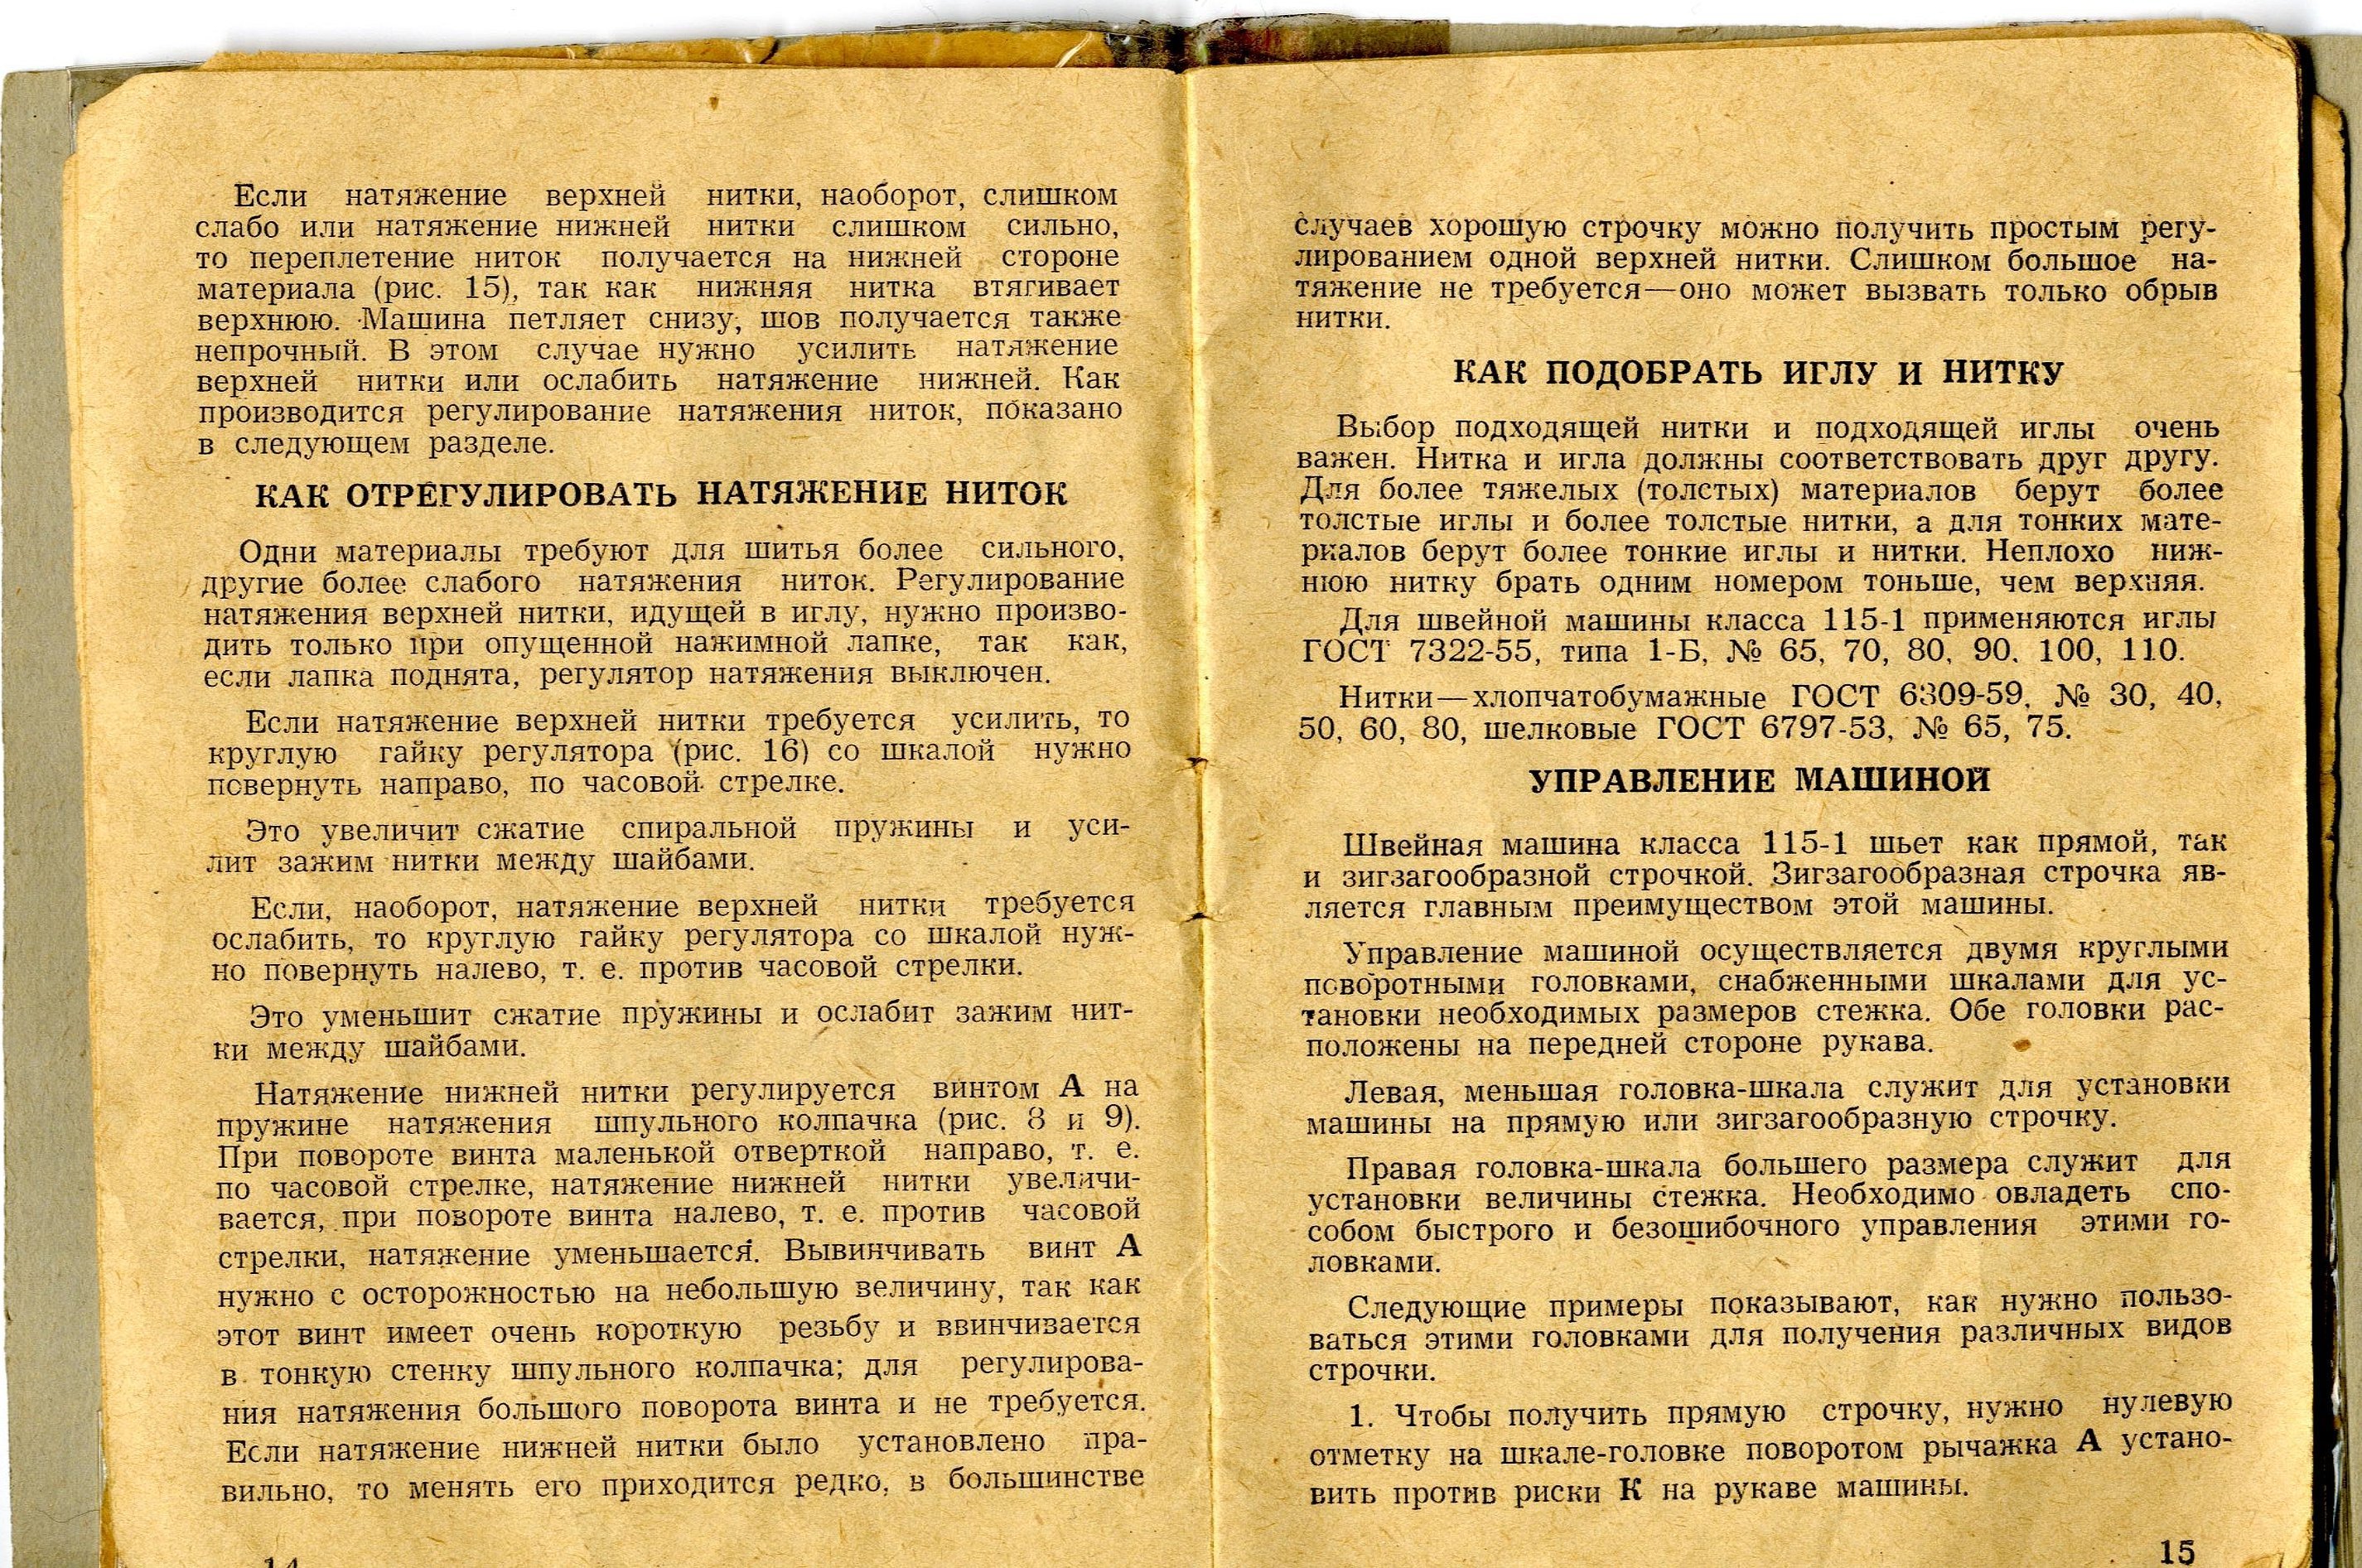
Threading the upper and lower threads
The thread is threaded in all machines according to the same algorithm. Preparation is done as follows:
- pull the rod upwards until it reaches the stop from the sleeve;
- prepare the eye of the thread take-up at the top by rotating the wheel;
- put the paw up;
- adjust the coil and rod;
- thread the upper thread according to the same instructions for all models.
Before threading, thread it into the bobbin case, then set the needle to the upper position using the wheel. Then grab the bobbin case lever and remove it.
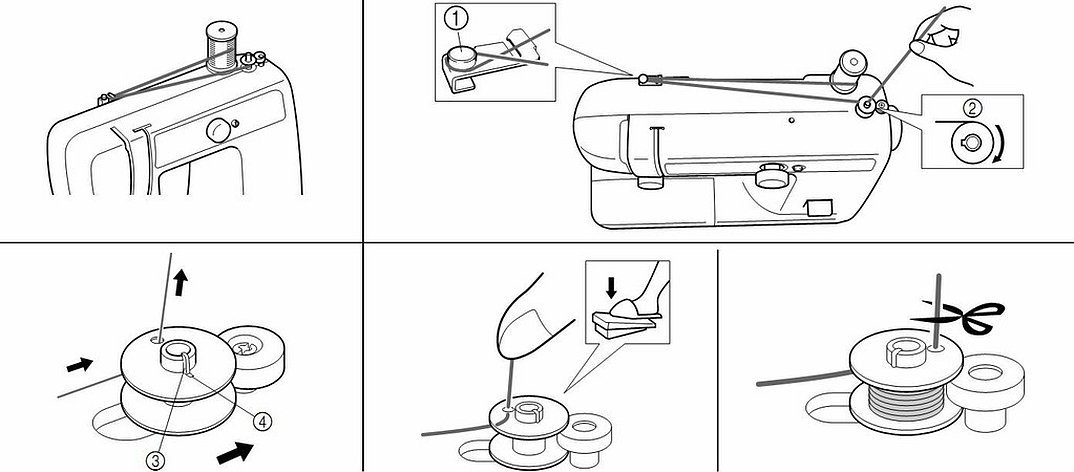
Winding the thread
The thread is wound with a bobbin winder. The flywheel is moved idly. The spindle is put on the bobbin, the spring enters the place provided for it. The spool is put on the rod intended for it. The thread is threaded and wound first with your hands. Then the bobbin is pressed against the rotating wheel. Then the winding is done with the help of the wheel.
The process is stopped when the rubber ring does not touch the wheel. The bobbin is removed by moving the winder to the side. Then the cap is threaded and the thread is inserted under the spring. The cap is inserted into the shuttle device. The needle is set in the desired position.
Machine control
An important part of working with a machine is preparing it for the sewing process. It is important to follow the sequence.
Preparatory stage:
- Throw back the lid, if there is one;
- Install the head on the hinges;
- Attach the visor to the base;
- Close the valve;
- Pass the straps through the holes in the visor;
- Provide lighting;
- Turn the friction screw;
- Adjust the flywheel;
- Tighten the friction screw.
Sewing settings:
- Turn the wheel to set the thread take-up upward.
- They insert the needle and strengthen it.
- Turn the flat side of the flask towards the base of the foot.
- Raise your paw.
- They take out the stand and put the reel in.
- Thread the thread.
- They open the record.
- Loosen the screw fastening.
- They pull the threads.
- Adjust the thread and needle settings. They must be inserted correctly.
- Adjust the height of the foot.
The transverse position of the needle in the "Seagull" can spontaneously become displaced
The needle position can change arbitrarily. This affects the quality of the work on the product. Therefore, it is important to periodically check and adjust it.
It is important to have experience for proper adjustment. It is not recommended to start working on your own if you do not have the skills in this matter. Only an experienced master will bring the needle to the correct parameters. Sewing without adjustment according to the rules will result in incorrect operation of the main parts.
Setting and adjustment
Setting up any Chaika sewing machine should start with adjusting the shuttle device accuracy. The combined actions of the shuttle and needle are observed. The thread tension is adjusted. This affects the stitches and lines.

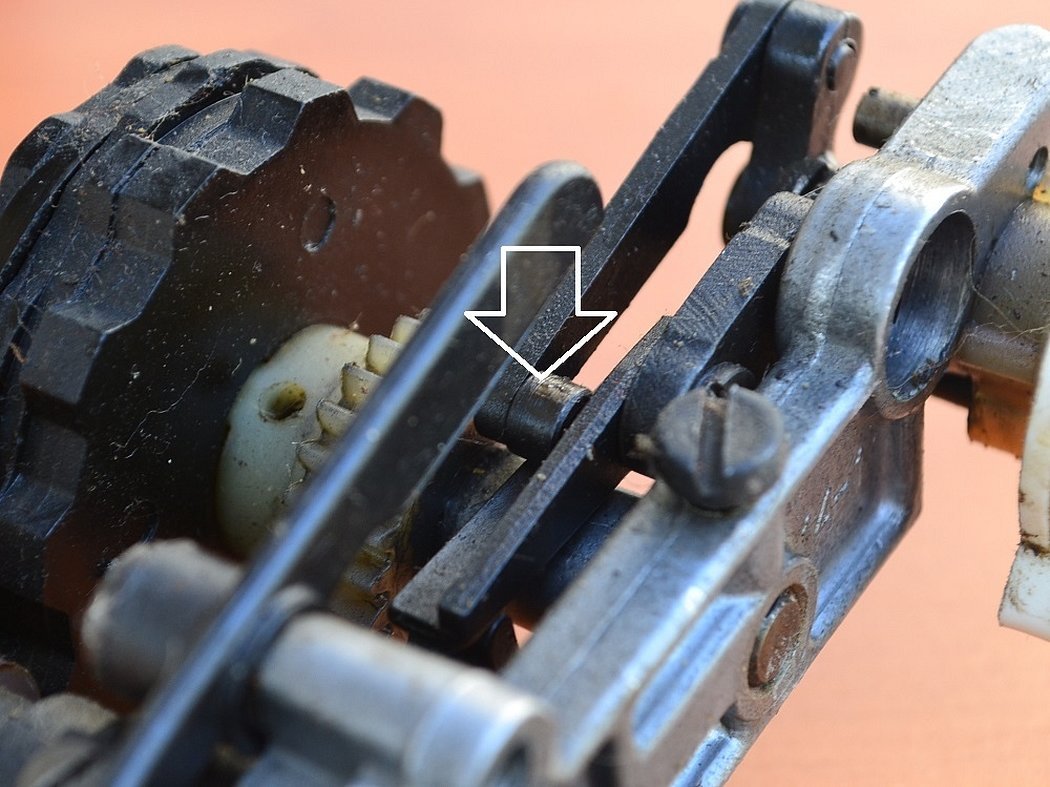
Setting the shuttle position
Thread and line breakage is the result of incorrect adjustment of the shuttle position. When a meeting with the needle occurs, gaps occur. Gaps should be avoided. To work, inspect the machine and find the shuttle movement fastening. The fastening mechanisms are unscrewed. The shuttle mechanism is moved. The shuttle movement is moved according to the needle position.
Important! There are no extra parts after assembly.
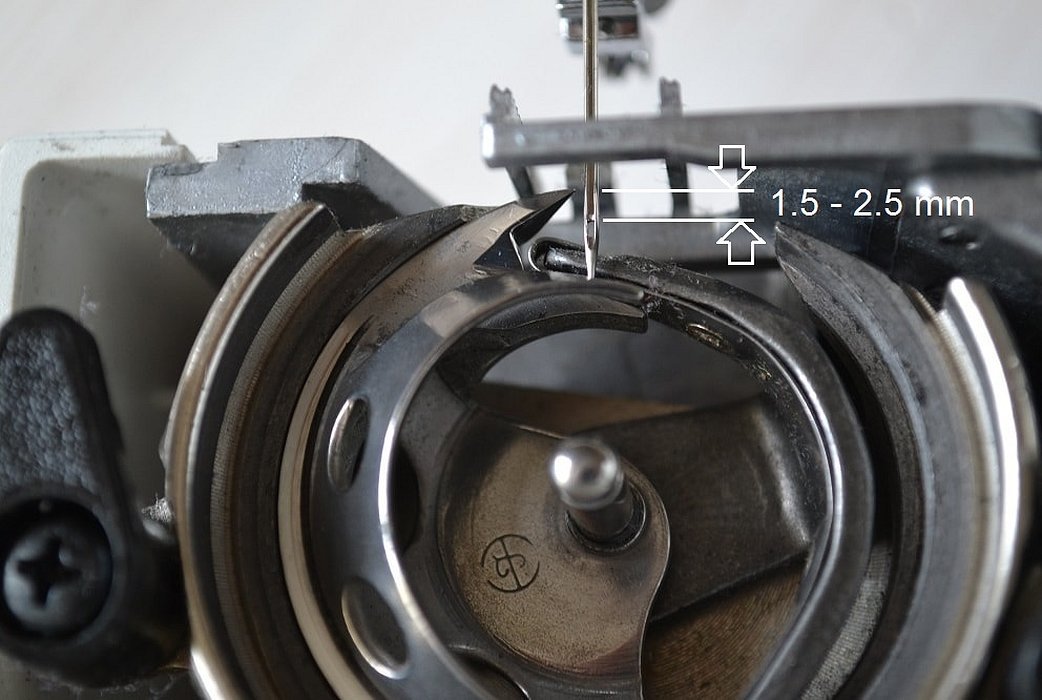
Interaction of the shuttle and the needle
The needle and shuttle must be correctly positioned relative to each other so that the work is made of even and beautiful stitches. The distance of 0.1 mm is observed. When the needle comes out from the bottom up - 2.0 mm. The nose under normal conditions fits above the eye by 2 mm.
Sewing Machine Models
Sewing, setting and adjustment of different "seagulls" are practically the same. Despite this, the manufacturer has thought out the positions of the shuttle mechanism for each of them. The adjustment is entrusted to the master. In this case, he chooses the positions individually each time.
Cost of repairs
Repair of sewing machines of any Chaika models must be performed by specialists. The cost depends on the complexity of the breakdown and the time spent. Parts may be required. Light work starts at 1.5 thousand rubles.*
It is recommended to give the device only to those masters who have a separate workplace, as well as reviews. There are no support centers for old models. It is not recommended to save. Setting a small price for work suggests that the master's qualifications are not enough for a good setup.
The Chaika sewing machine should be adjusted after studying the instructions. Complex work and repairs should be performed by a specialist. Prepare the device for work only in the established sequence. It is important to follow the rules for caring for the machine. And also do not disassemble it yourself if you have no experience in this.
*Prices are valid as of November 2019.


