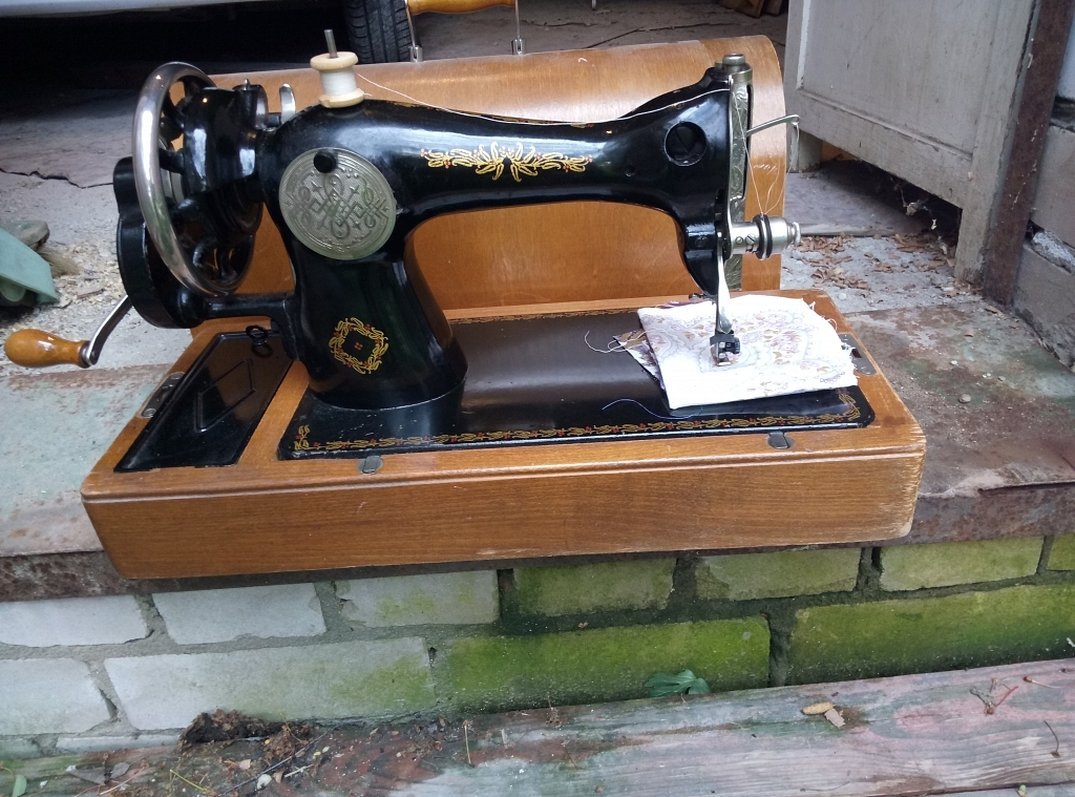
The Podolsk sewing machine is reliable equipment that can be used to quickly make a high-quality product from practical and dense fabrics. What are the advantages of this device, its technical characteristics, operating instructions, setup and adjustment? For what reasons can it break down and how is Podolsk sewing machines repaired? This and more below.
- Advantage
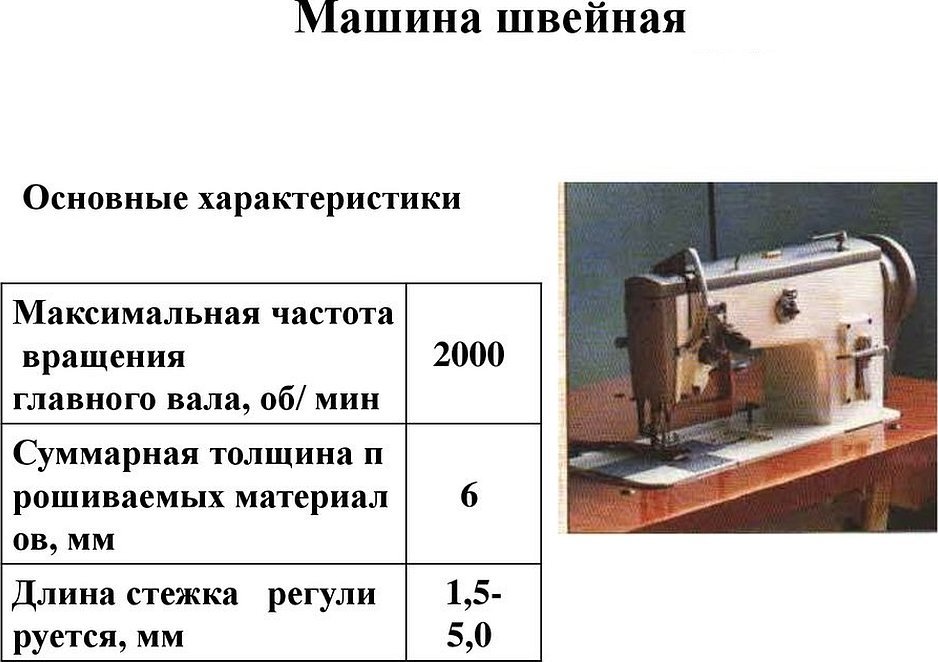
- Main characteristics
- Instructions for operation, setup and adjustment
- Inserting the needle
- Removing the bobbin case and bobbin
- Bobbin winding
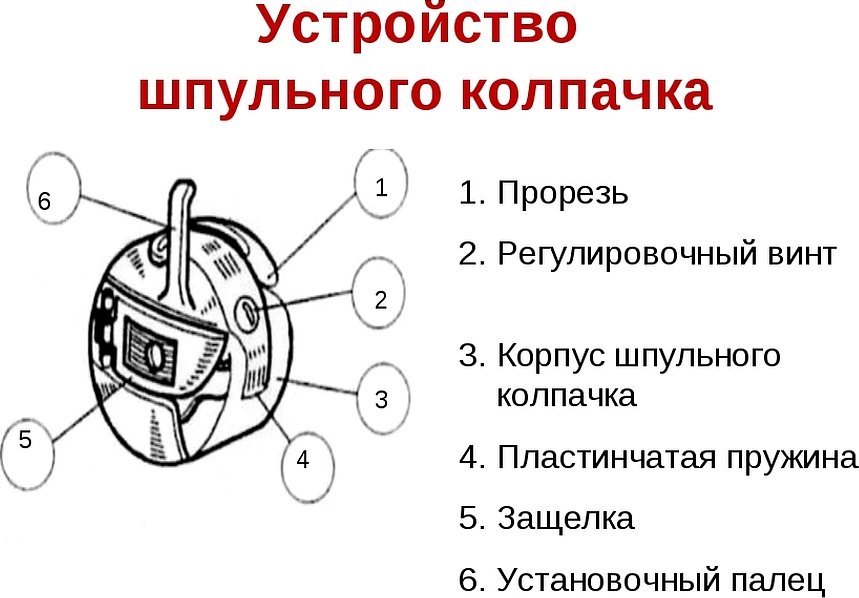
- Threading the bobbin case
- Installing the bobbin case
- Threading the upper thread
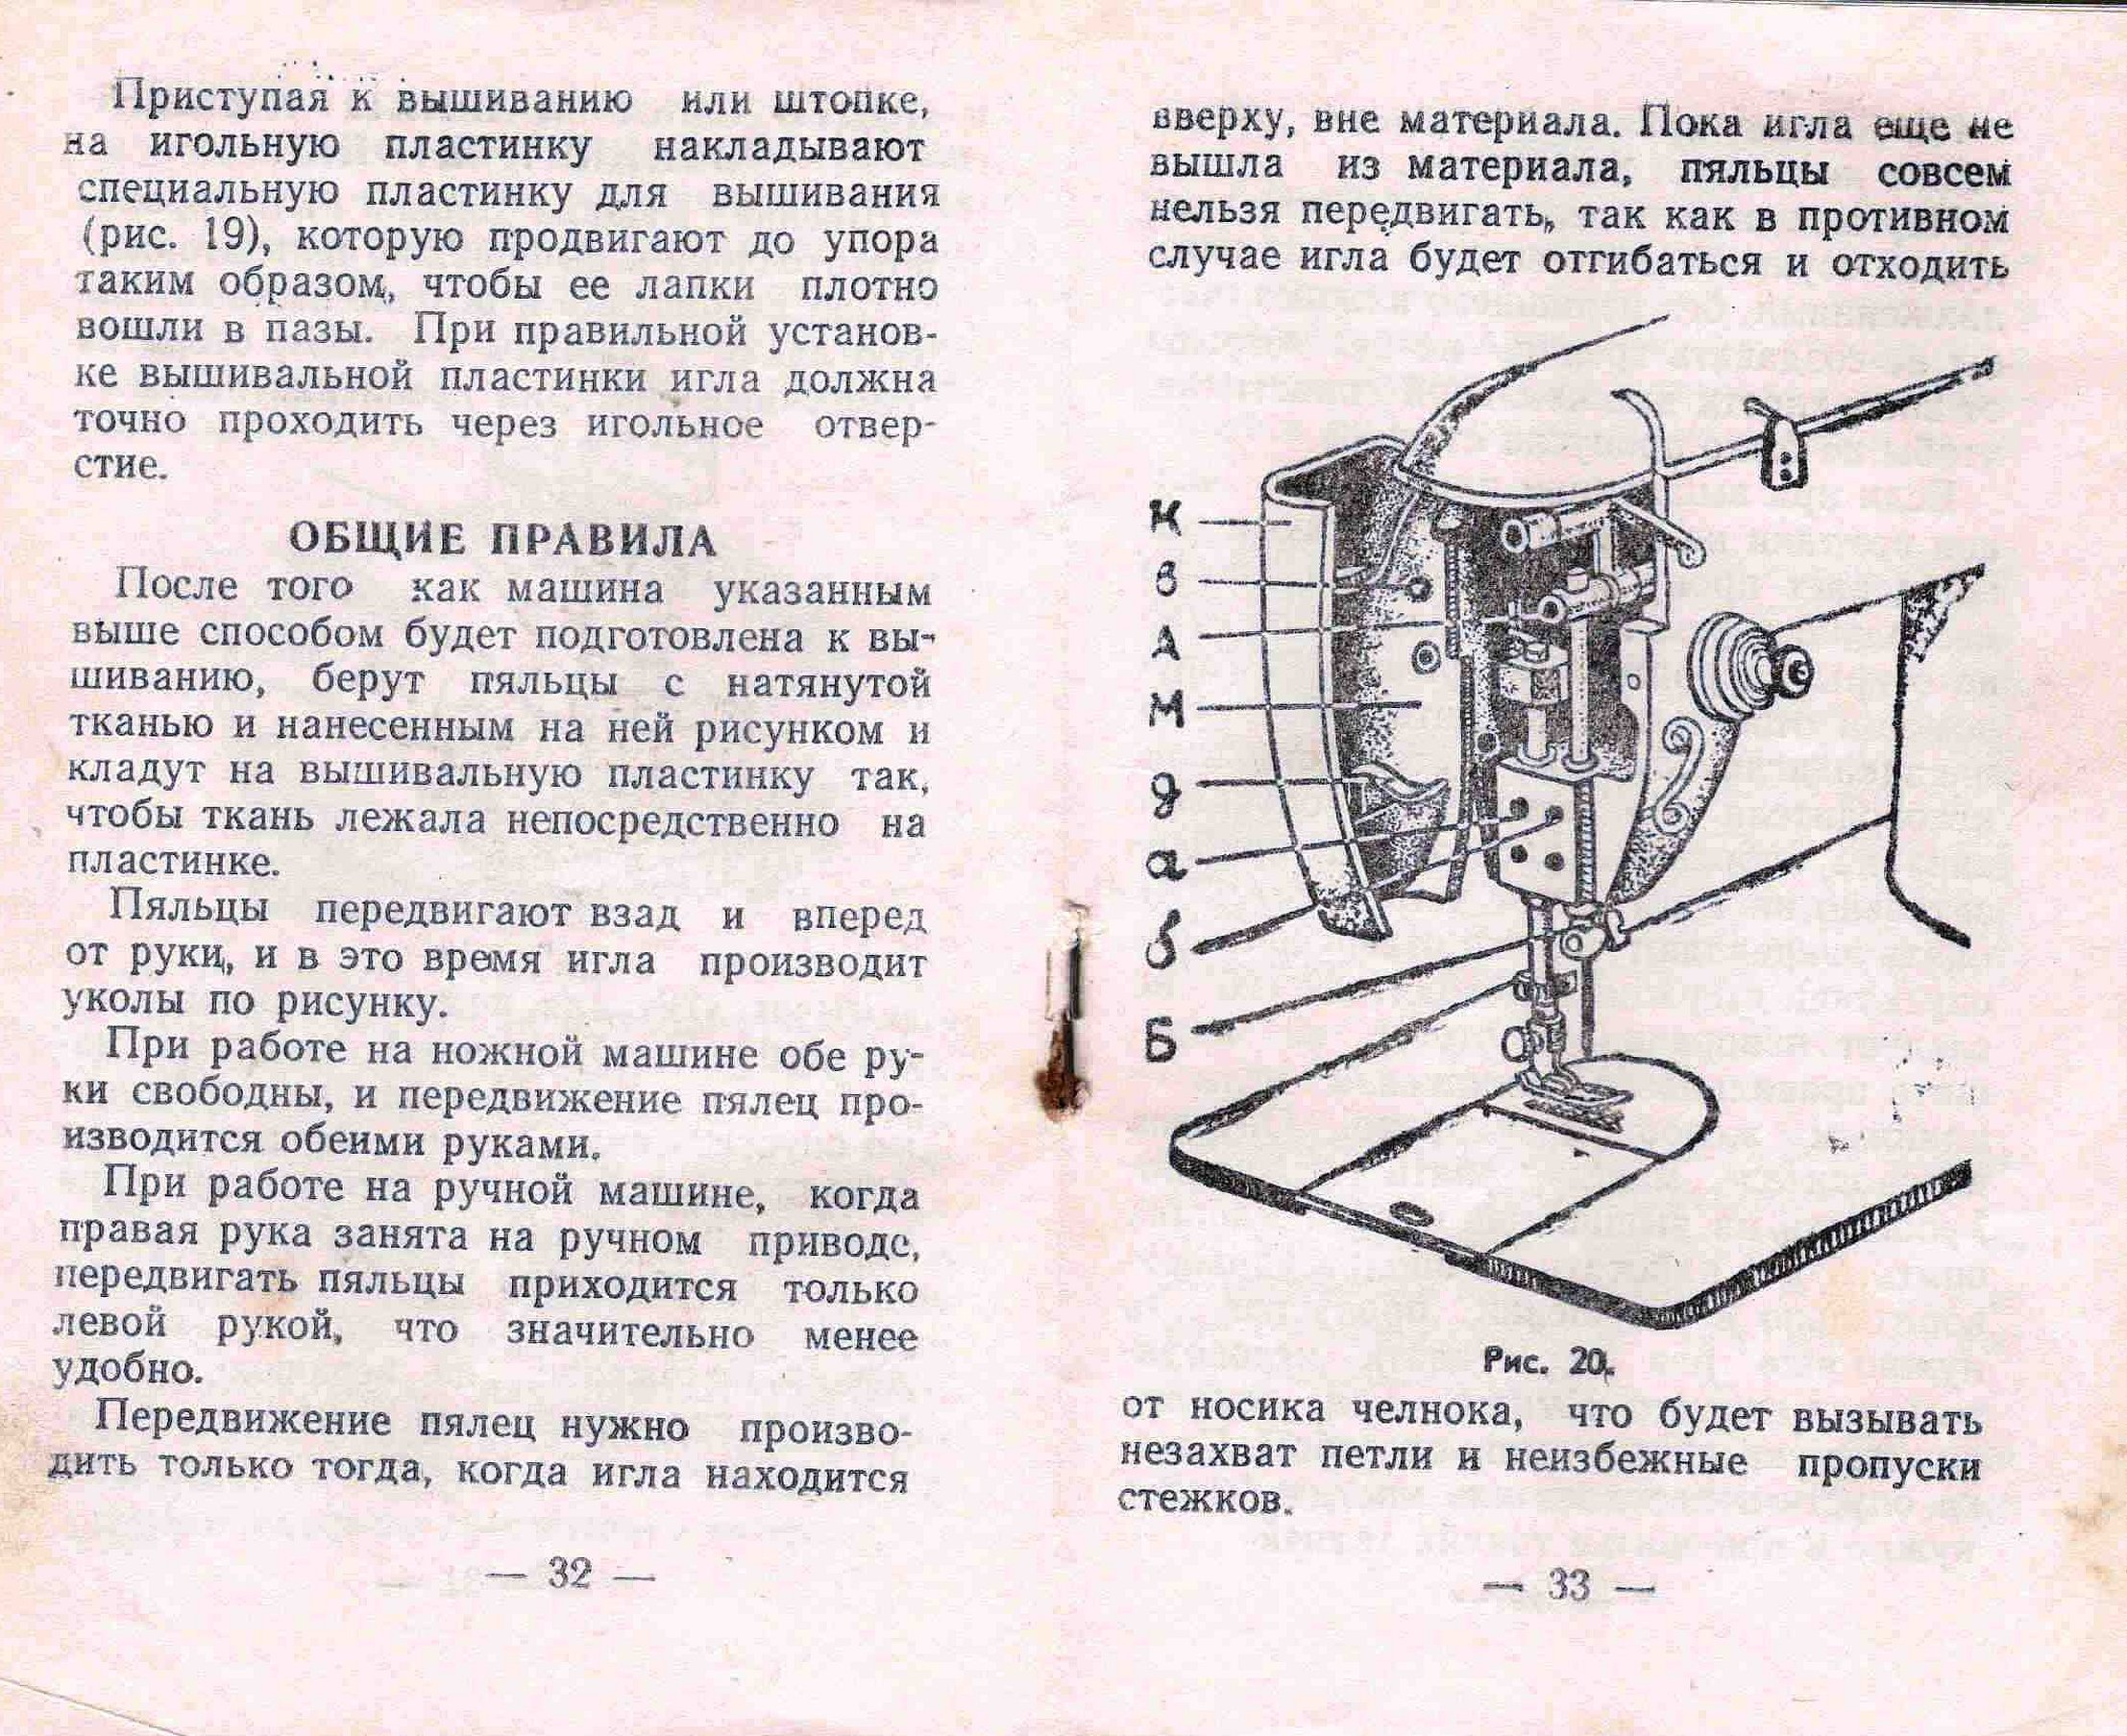
- Preparing for sewing
- Working on a manual typewriter
- Working on a foot sewing machine
- Finishing sewing
- Modifying stitch length
- Reverse feed direction
- Adjusting the presser foot pressure
- Thread winding device
- Lubrication
- Checking connections and fastenings of units
- DIY repairs
- Needle bar position
Advantage
"Podolsk" is an integral attribute of sewing high-quality and modern things. The main advantage of the device is its operational characteristics. In addition, such a machine is durable and long-lasting. Thanks to the aluminum body, the internal mechanisms are not damaged. All parts in it are made of durable metal. If necessary, it is very easy to repair and adjust their operation.
All units with fastenings are precise and reliable. Another advantage of such a device is that many malfunctions are related to the fact that the needle was installed incorrectly or the upper thread was threaded incorrectly. That is, it is not difficult to repair the Podolsk sewing machines with your own hands. You only need to carry out a preventive inspection with lubrication at home.

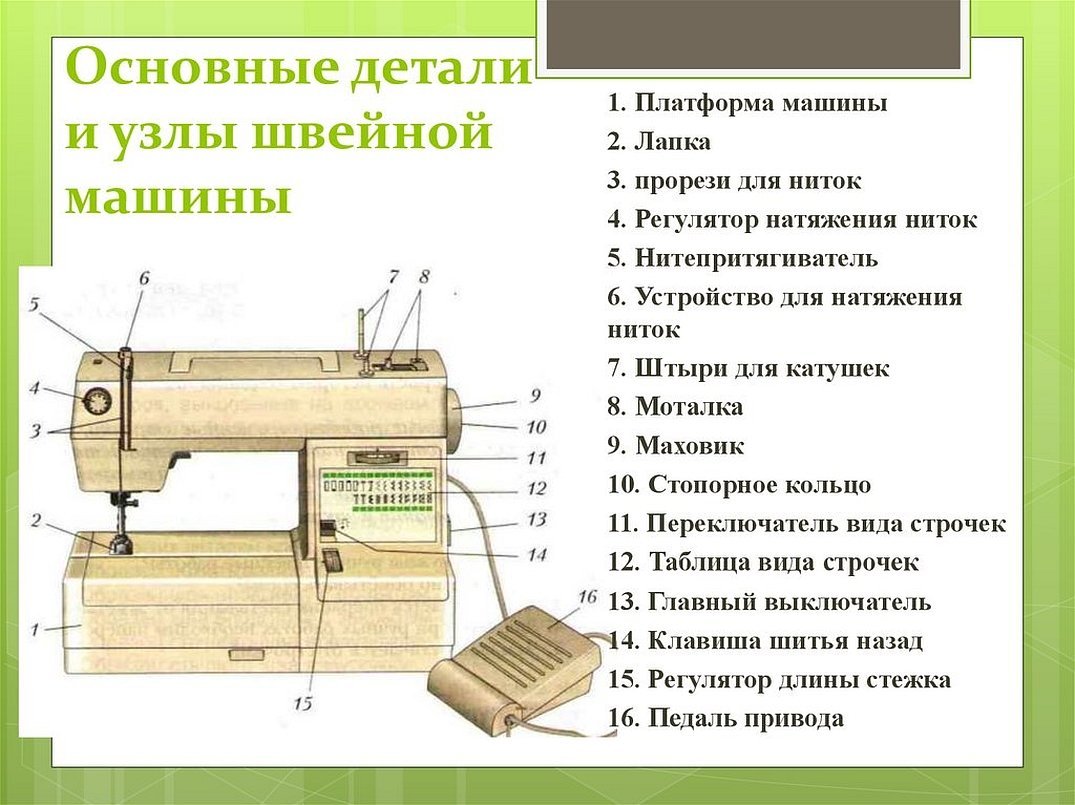
Main characteristics
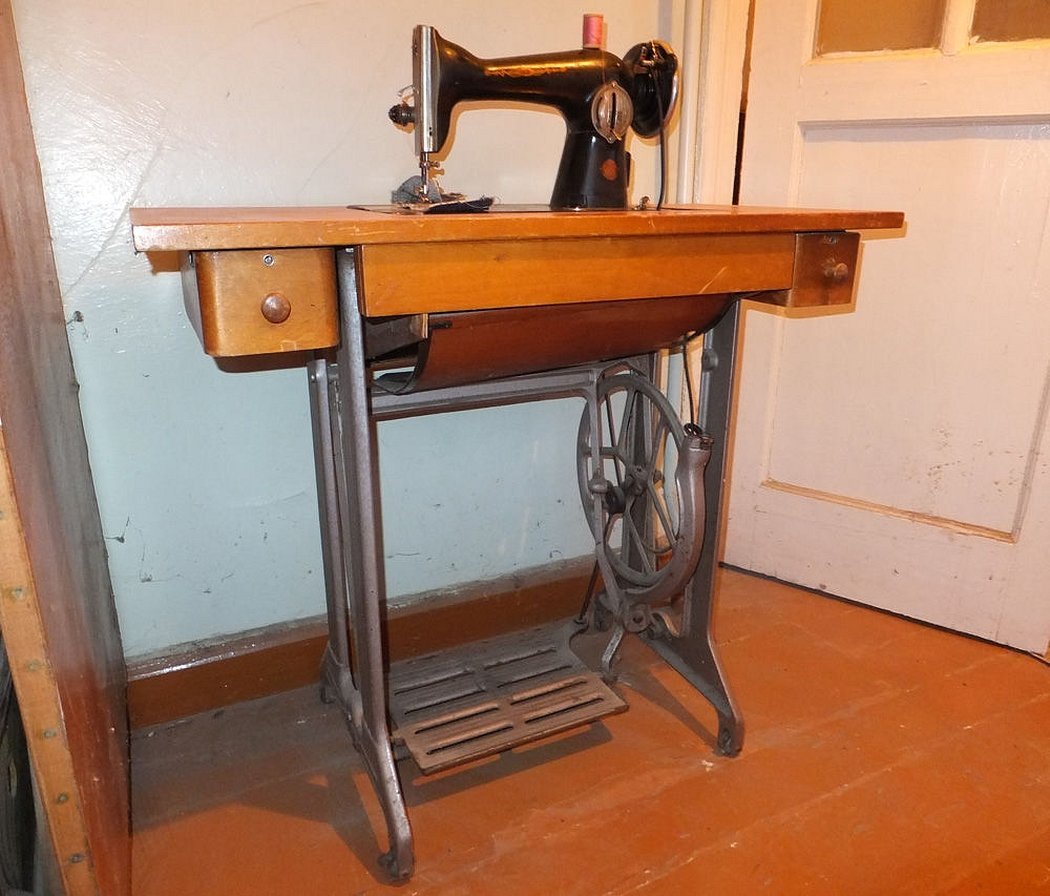
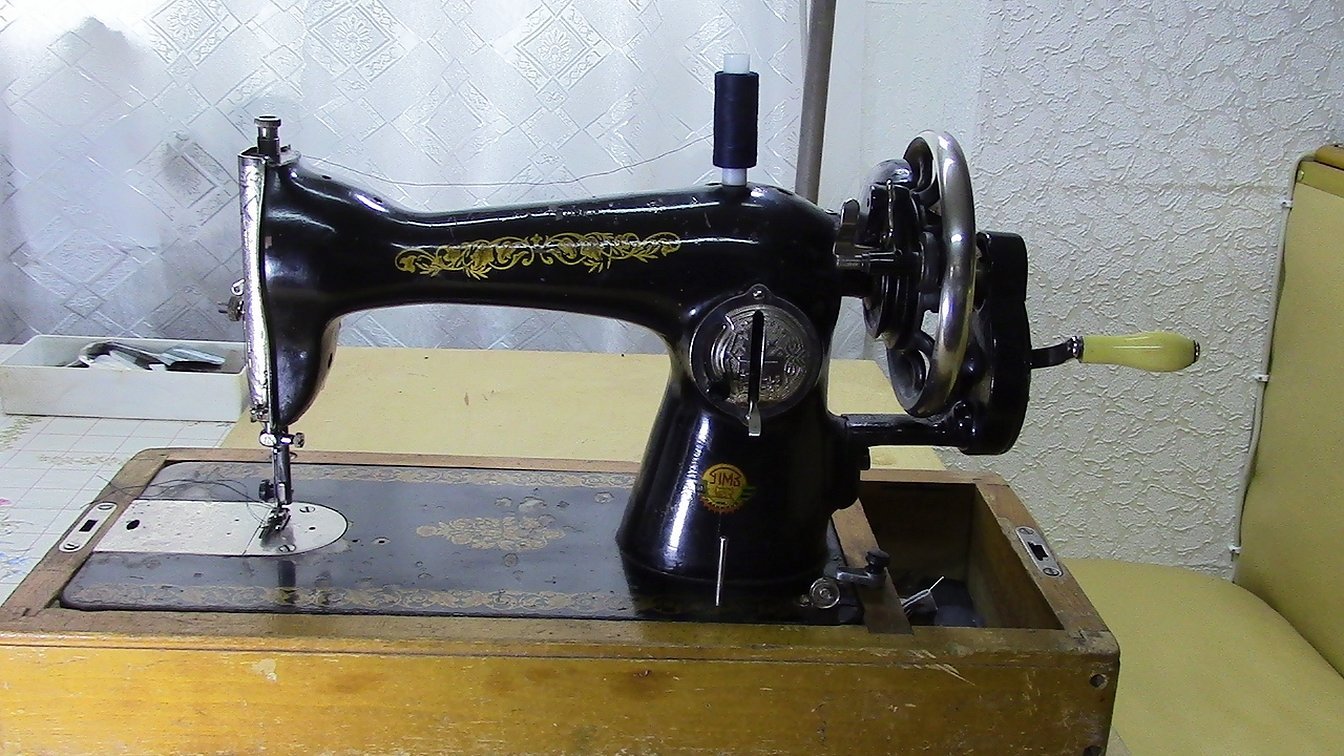
"Podolsk" is a common model, despite the fact that today electronic and electrochemical machines are gaining popularity. As a rule, "Podolsk" is a simple and old model, with a manual or foot drive. It has a swinging shuttle, a large number of operations, semi-automatic loop processing, overcasting stitch, blind and elastic stitch, sleeve platform.
Equipped with a reverse button and high-quality lighting. Complete with feet for sewing in zippers and buttons. Has a warranty period and a long service life, so adjustment of the Podolsk sewing machine is practically not required. Supplemented with a compartment for accessories and a soft cover.
The sewing machine has a presser foot adjustment screw. There is also a front cover, an adjusting nut, a thread guide washer, a thread cutter, a foot rod and screw, and more. These parts can be adjusted and lubricated for more efficient operation, if desired.
Instructions for operation, setup and adjustment
The manufacturer's instructions contain a basic list of recommendations for the operation, setup and adjustment of the machine. To prepare the device, it is necessary to place the needle in the needle holder upwards and secure it with a screw. The chamfer must go in the direction opposite to the master.
Inserting the needle
In almost all models of the company, the needle must be installed as specified in the operating instructions: the needle blade with the shuttle nose passing through must be on the left side, and the thread groove - on the opposite side. However, in the first samples of the company, the needle is installed the other way around.
To install the needle correctly in the machine, you need to remove the plate, turn the flywheel and look at the shuttle nose. Where the nose will pass in the needle, there will be a blade. Threading is necessary where the long needle groove is.
Please note! Next, you should stick a small diagram with tape showing how the needle should be positioned. This way, you can install it quickly and correctly next time.
Removing the bobbin case and bobbin
To remove these items, you must first move the sliding type of plate that closes the shuttle, and then grab the latch with a few fingers and remove the machine cap. It falls when the latch is released and the bobbin case turns downwards.
Bobbin winding
To wind the thread on the bobbin structure, you need to use a special winder, which is attached to the machine sleeve near the flywheel. Before winding, you need to release the flywheel, so that it rotates freely and does not cause movement of the entire machine mechanism. To do this, the friction type of screw should be turned by the knurled head, put the bobbin on the spindle, move it to the shoulder element and turn it so that the shoulder spindle pin goes into the hole near the bobbin. So the bobbin will be fixed on the spindle and turned during winding.
You need to put the spool on the platform spool, pull the thread under the washer, and then lift it up onto the bobbin through the left slot.
Press the bobbin winder frame down so that the rubber pulley rim on the spindle end touches the flywheel and begins winding, causing the flywheel to rotate, as in machine sewing.
The free end of the thread on the bobbin must be held by hand until it is wound enough to secure the threads. After this, the end is torn off. When the bobbin is filled with threads, the winder will automatically turn off.
Please note! If the friction is not sufficient to rotate the rubber rim of the winder pulley, it is necessary to adjust the winder pressure. To do this, unscrew the adjusting screw, press the winder against the flywheel part, hold it in this position and tighten the screw again with a screwdriver.
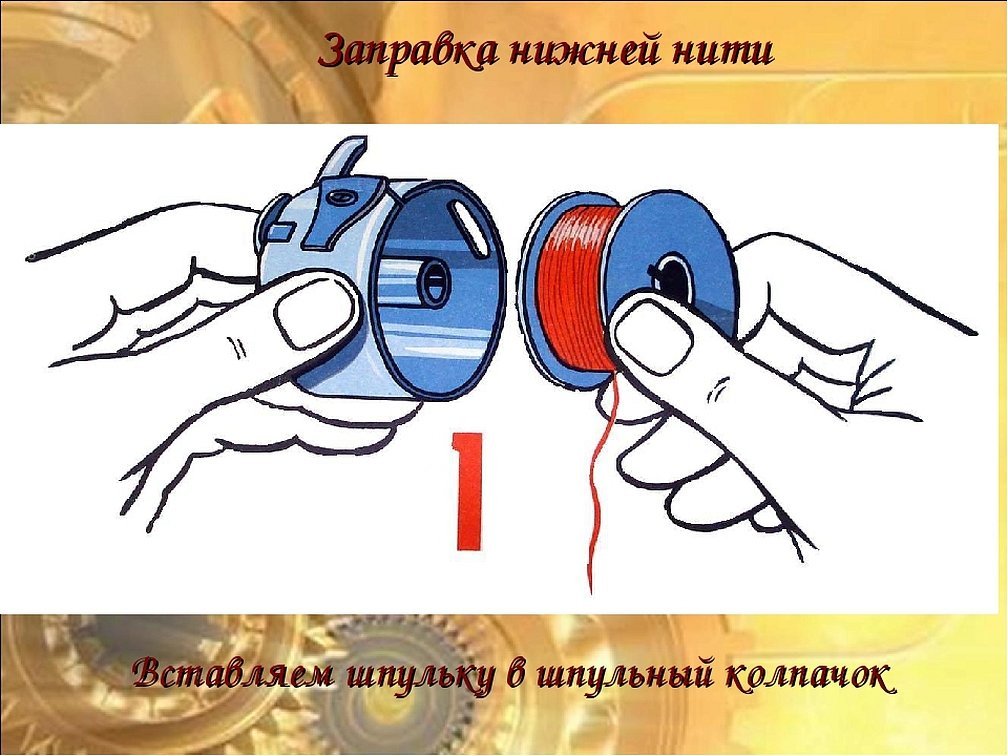
Threading the bobbin case
To thread the bobbin case, take the bobbin with the thread wound from right to left and the bobbin case with the thread in the oblique slot. Then connect the two elements so that the slot is on top and the thread is at the end of the cap.
Installing the bobbin case
After the bobbin case is installed, the shuttle central rod must be put on it. To do this, insert the cap into the slot in the plate and lower the latch until it locks in the shuttle. The free end of the thread remains hanging.
Threading the upper thread
To thread the upper thread, turn the flywheel clockwise until the thread take-up lever with the eye for the thread comes to the upward position. Then place the spool of thread on the rod. Insert the thread between the washers, tongue and needle guide. Then leave the hanging end of the thread free.
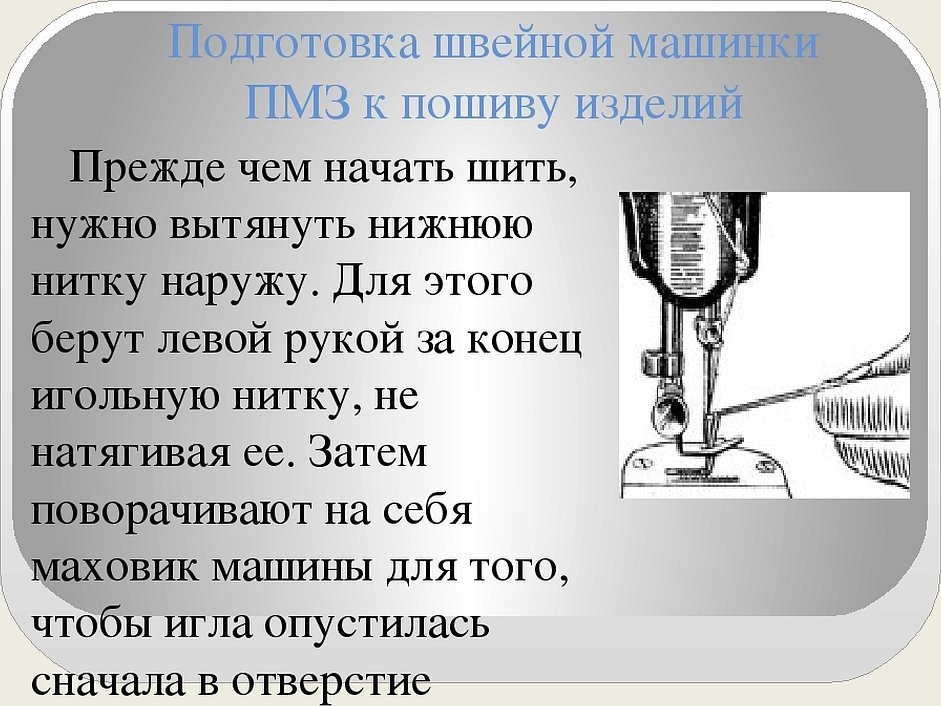
Preparing for sewing
To prepare the machine for sewing, you need to turn the flywheel until the needle drops into the plate, grabs the shuttle thread and returns it up.
Working on a manual typewriter
To start working on a hand-held machine, you need to install the hand drive on the ledge, which is located under the flywheel, turn it up, insert it into the tide socket on the gear, removing the locking latch and fix the position with the friction screw.
Working on a foot sewing machine
The foot machine is driven by the feet, namely by the uniform movement of the drive wheel towards the worker.
Finishing sewing
To finish sewing, turn off the sewing machine, put the thread take-up lever and needle up and lift the presser foot. Cut the threads in the thread cutter.
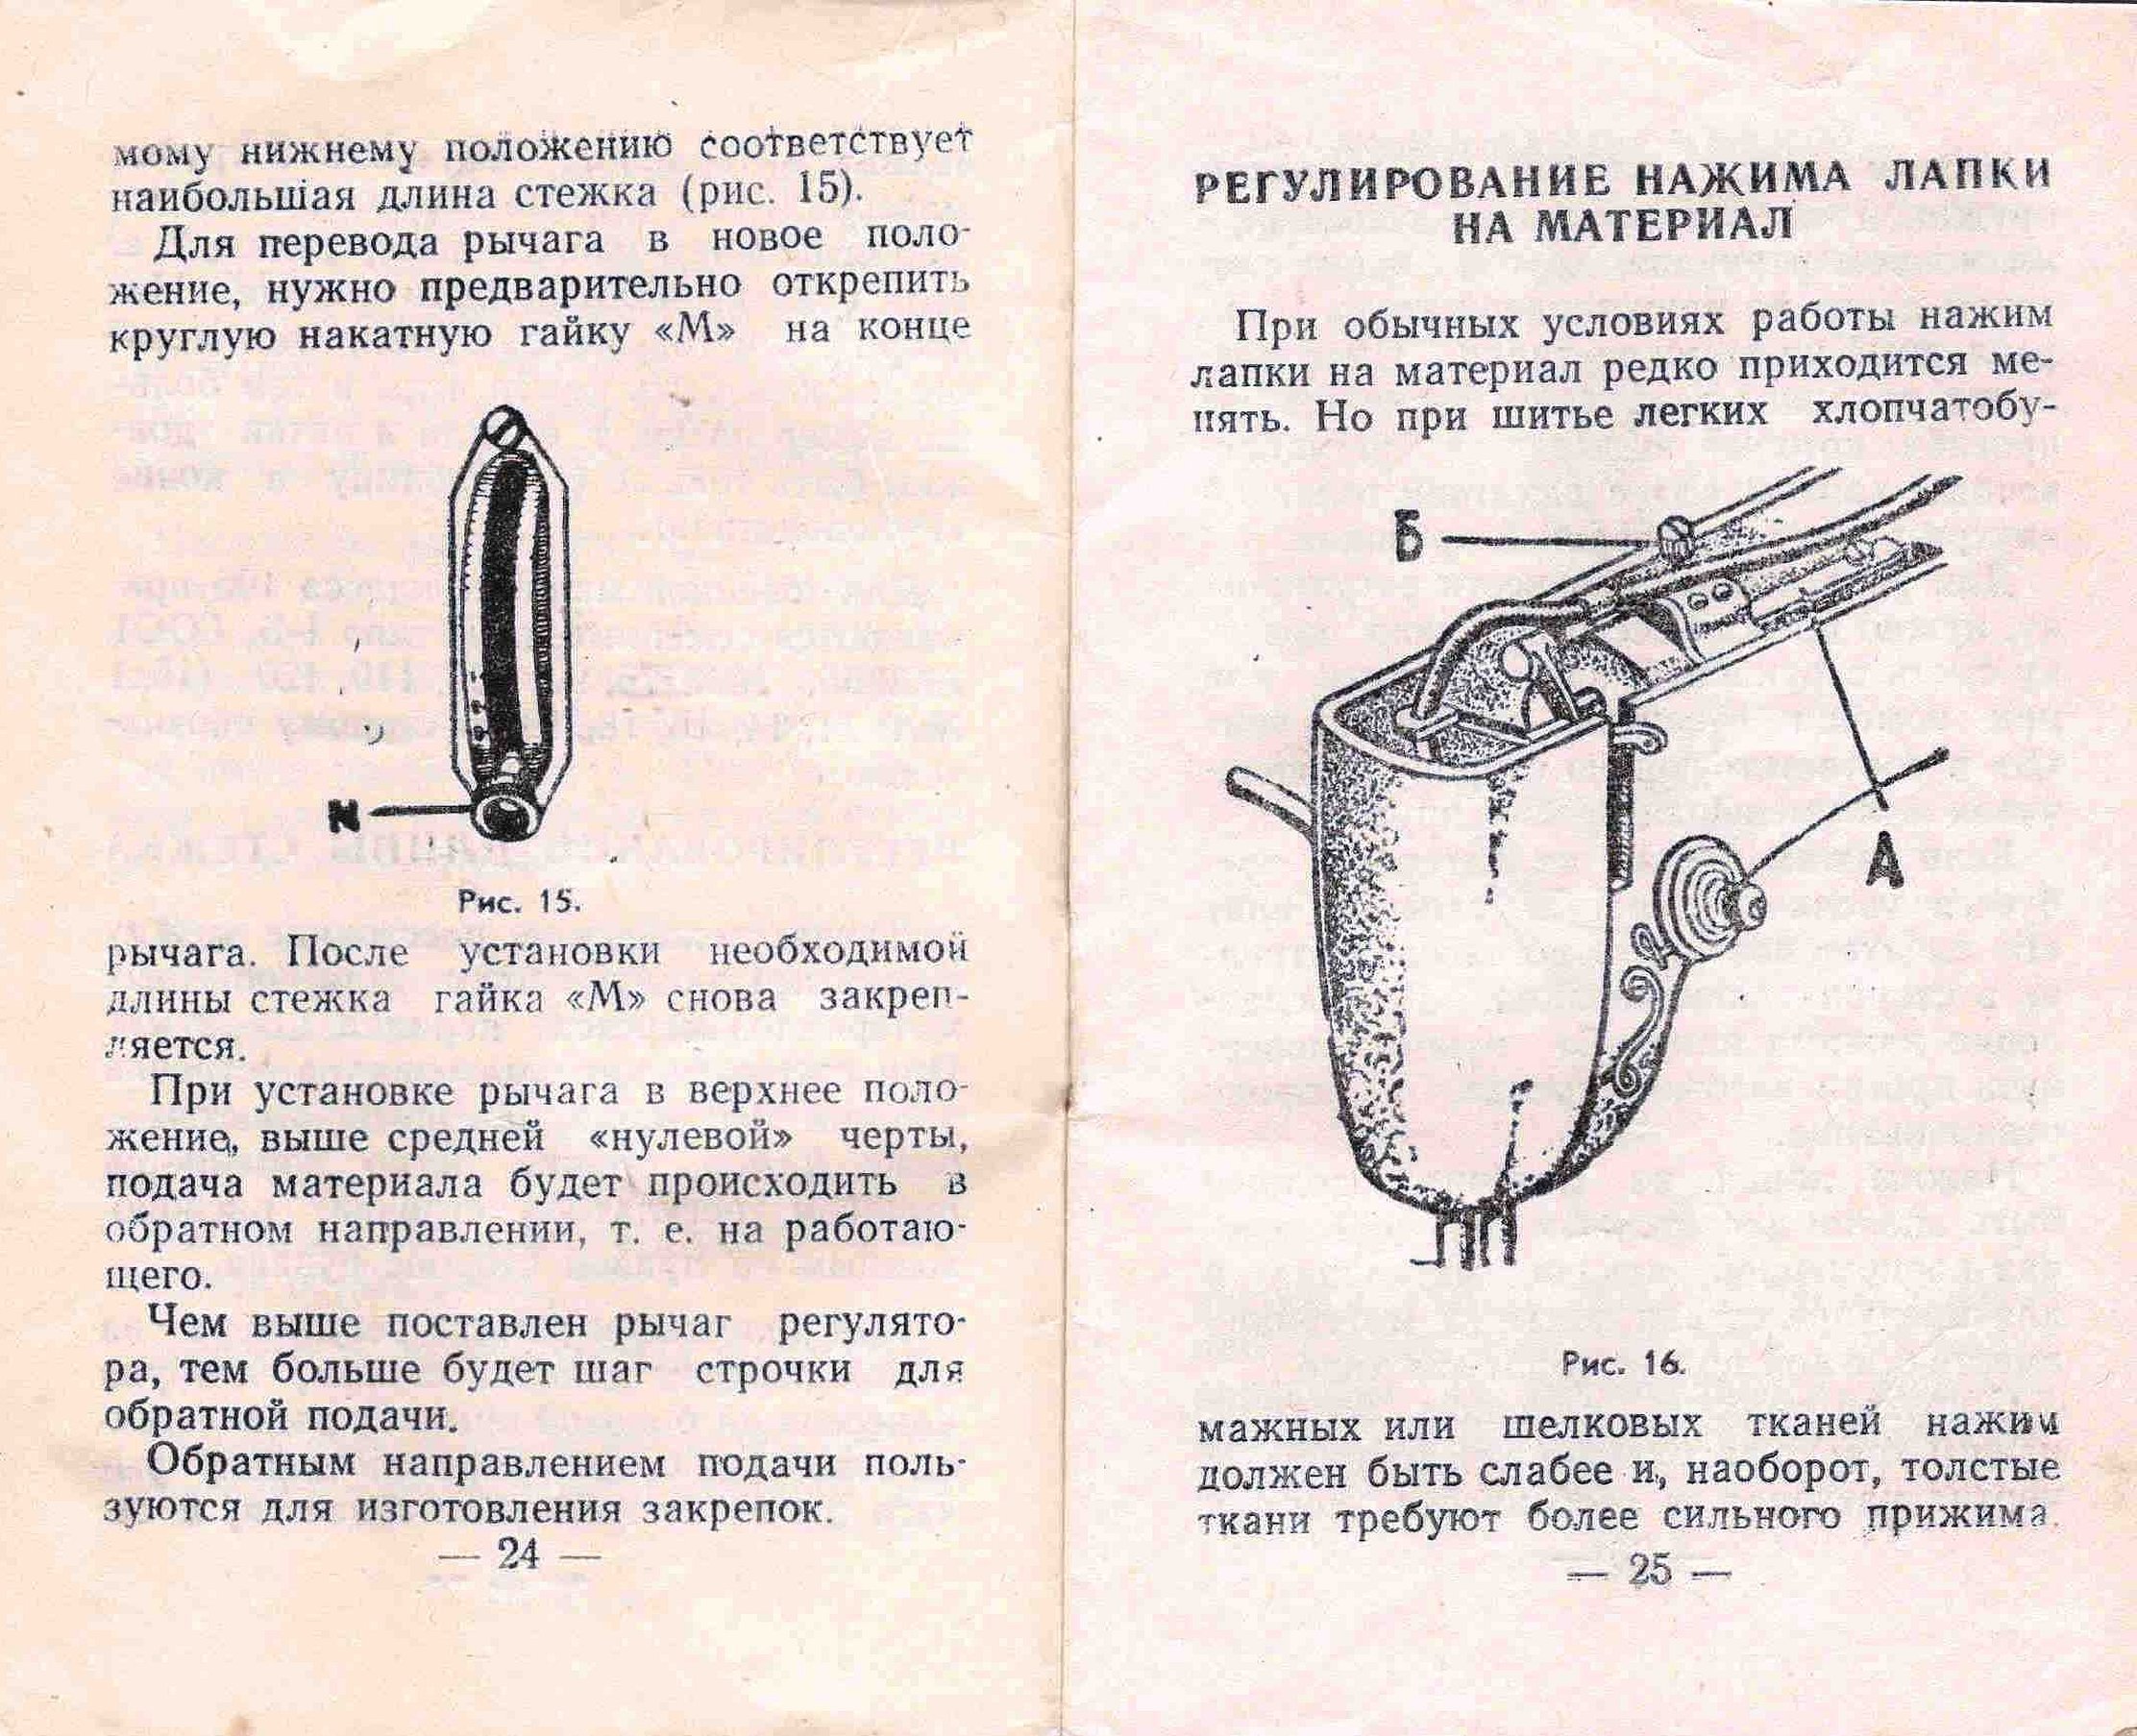
Modifying stitch length
To change the stitch length, you need to raise or lower the adjusting lever. In the first case, the stitch length will be shorter and the stitch will be longer, and vice versa.
Reverse feed direction
When the control lever is above the scale line stitch, the fabric is fed in the reverse direction. To switch the machine to reverse, the control lever must be moved up.
Adjusting the presser foot pressure
The amount of pressure on the presser foot rarely changes. To do this, turn the head screw counterclockwise.
Thread winding device
To remove the thread winder, turn the flywheel to bring the needle to a high position. Then remove the bobbin case cap, remove the screw and remove the spring with the front ring.
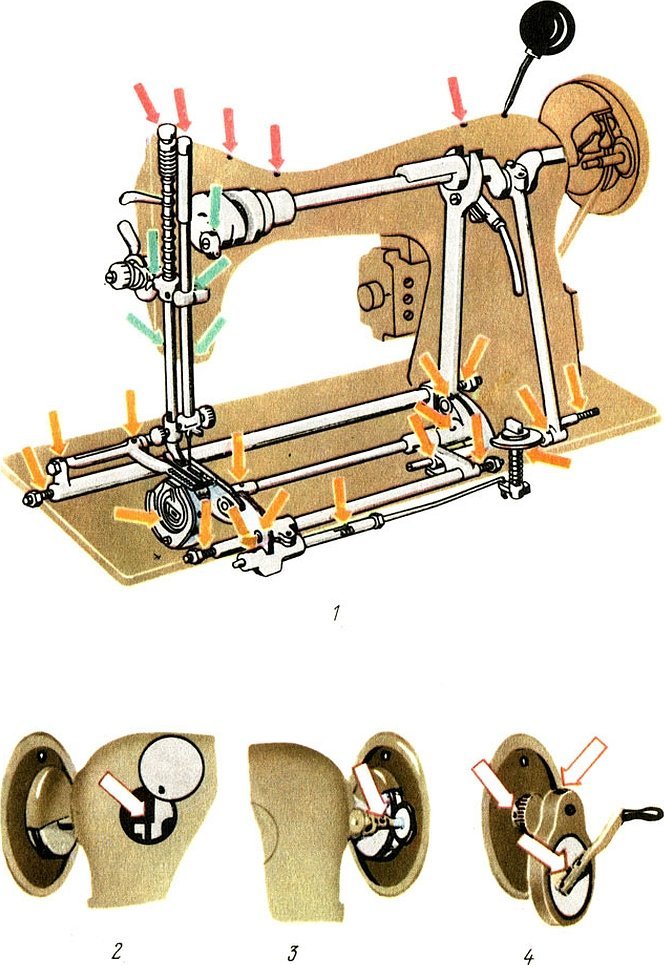
Lubrication
To ensure easy machine movement and prevent wear of places, it is necessary to lubricate all holes. To do this, first remove the front board, release the fastening screw and lubricate the shuttle.
Checking connections and fastenings of units
To check the connections and nodal fastenings, it is necessary to study the main malfunctions in the system and how to eliminate them.
DIY repairs
You can repair a sewing machine yourself if the needle breaks, the thread seam breaks, the stitches are skipped, the device runs hard, and the belt is not tensioned correctly from below. To do this, you need to refer to the operating instructions and follow them.
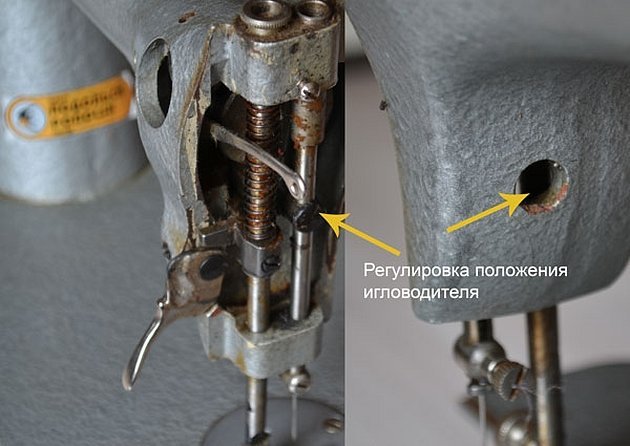
Needle bar position
To change the position of the sewing machine needle bar, you need to turn the shuttle nose toward the needle and make the eye 1.5 millimeters higher. After that, you can tighten the screw and continue doing your work.
In general, the sewing machine "Podolsk" is a modern electrical equipment with a large number of functions for sewing clothes, creating patterns, repairing products, etc. It has high-quality technical characteristics and corresponding advantages.
Please note! In order to use it for a long time for your purposes, it is necessary to read the operating, setup and adjustment instructions.
It is essential to learn how to install needles, remove bobbin cases, wind bobbins, thread bobbin cases, prepare the machine for sewing, change stitch length, reverse the material, adjust the pressure of the material foot, check connections and repair the device.


