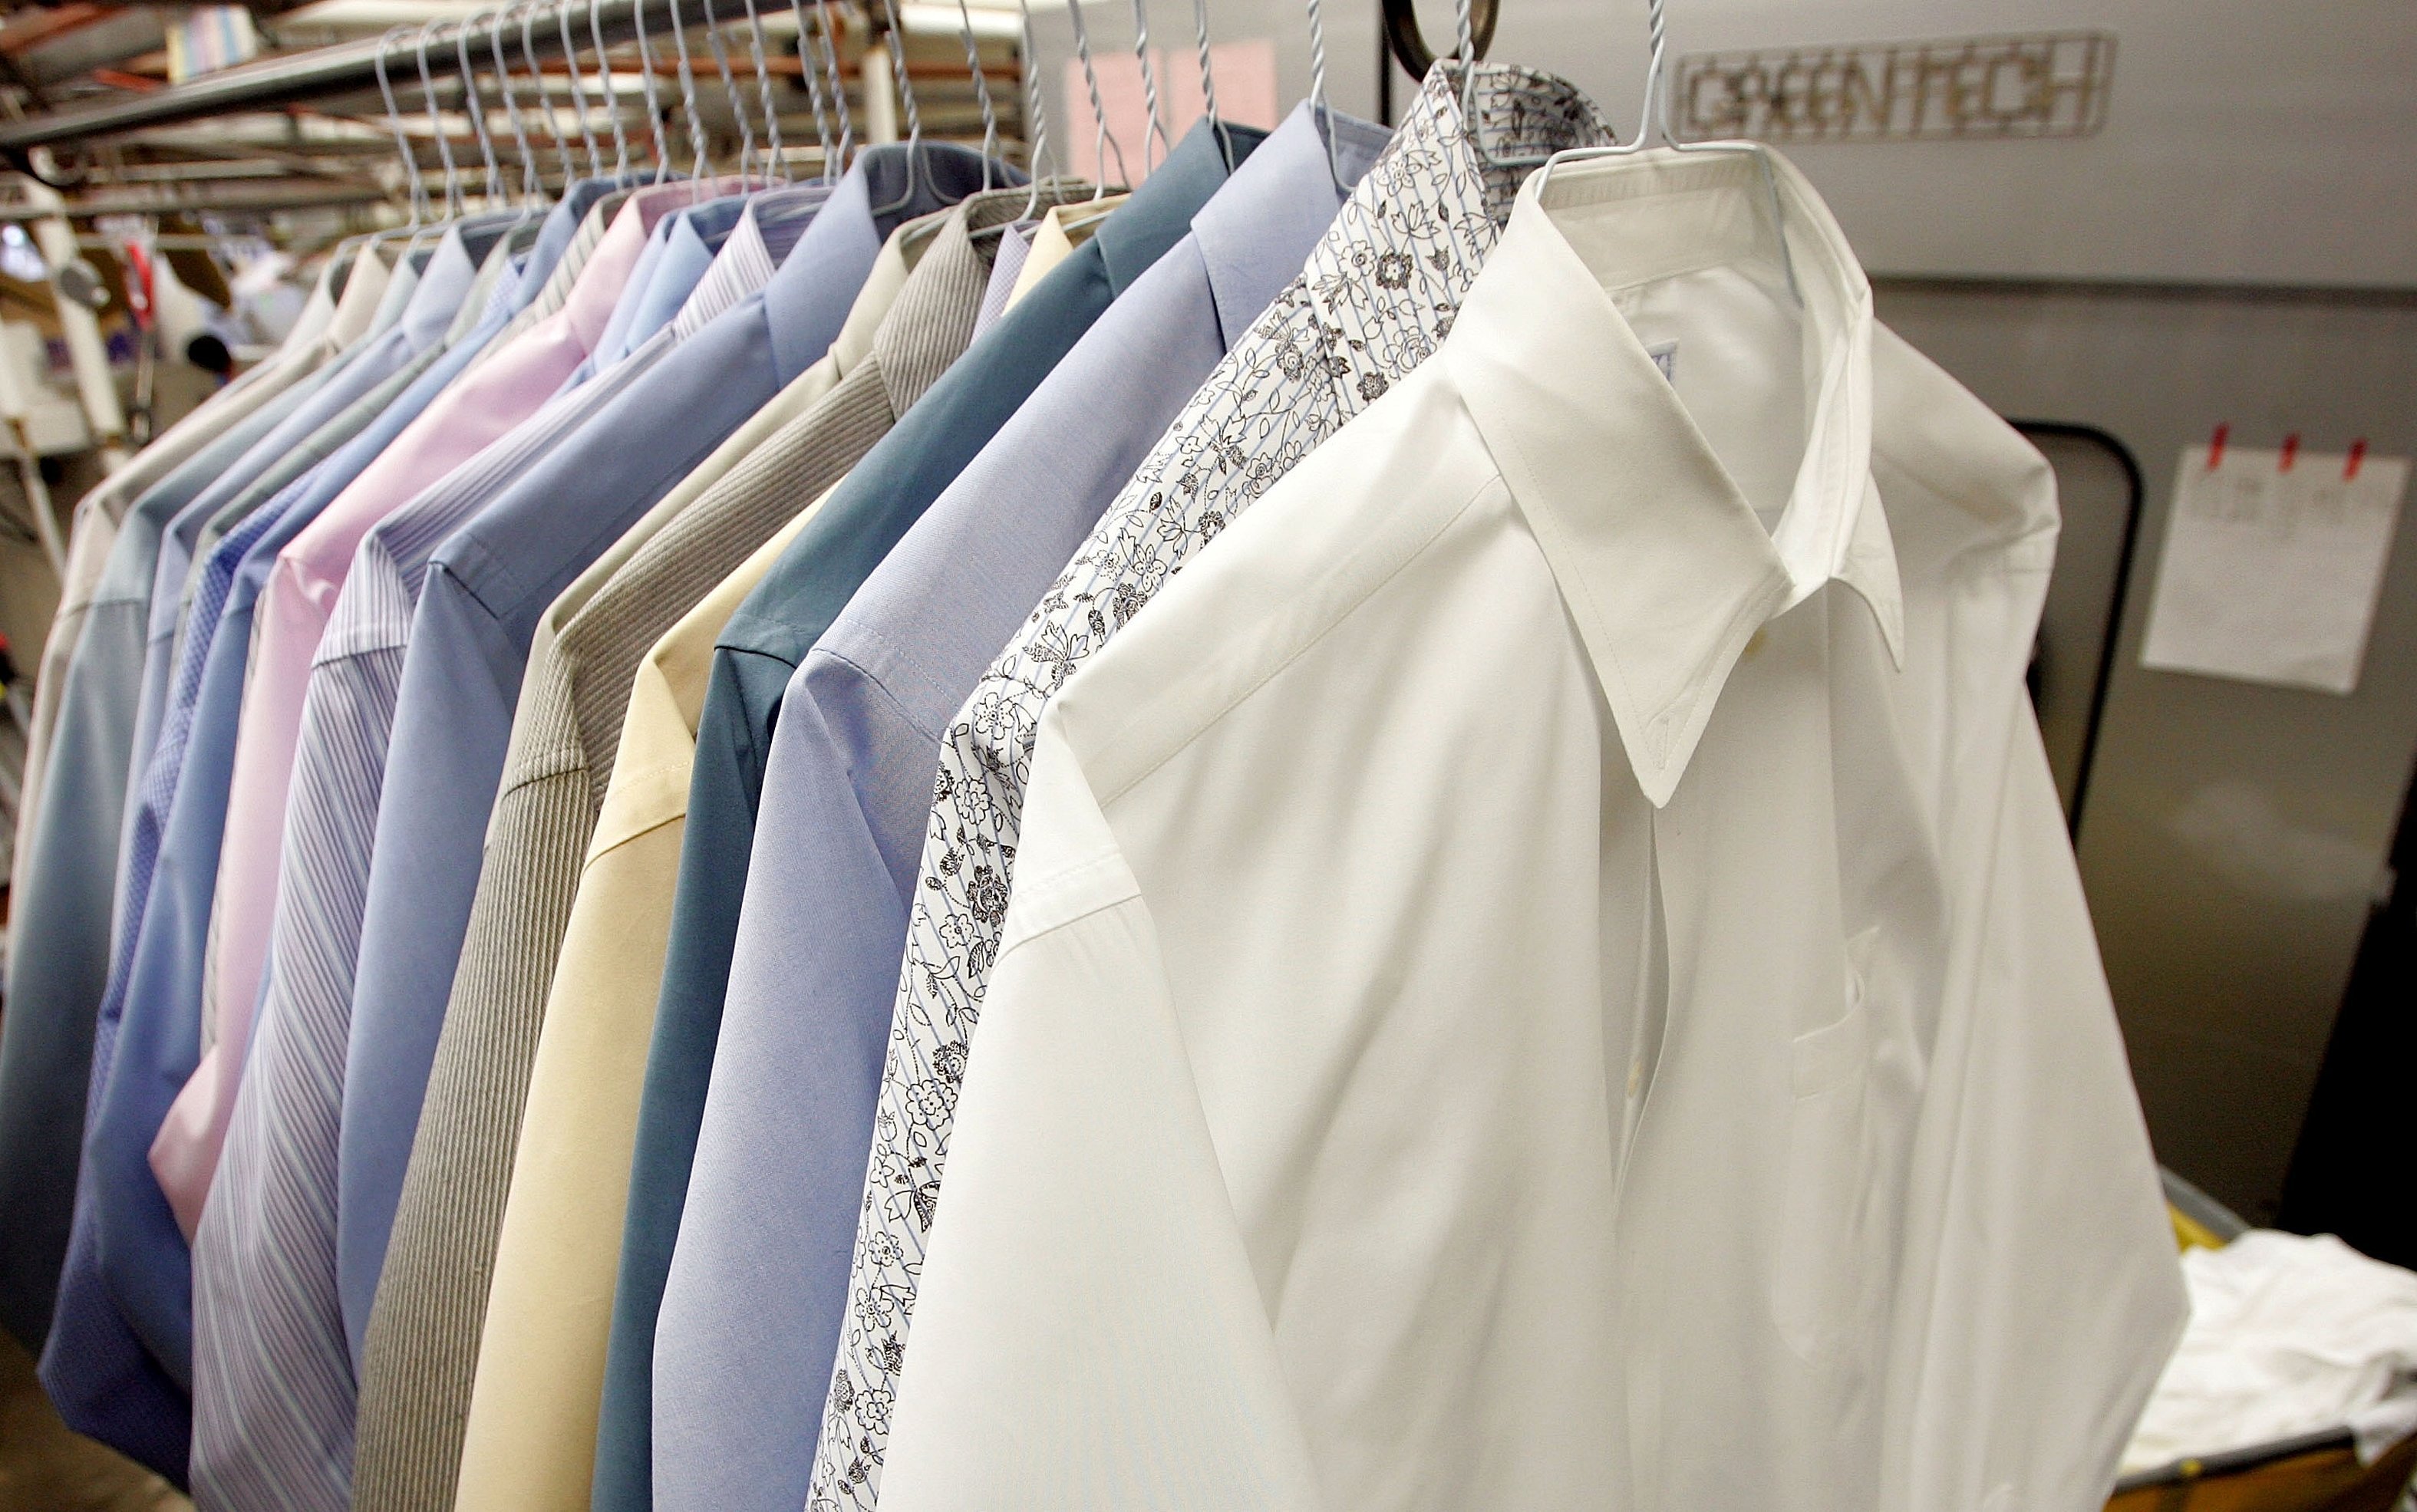
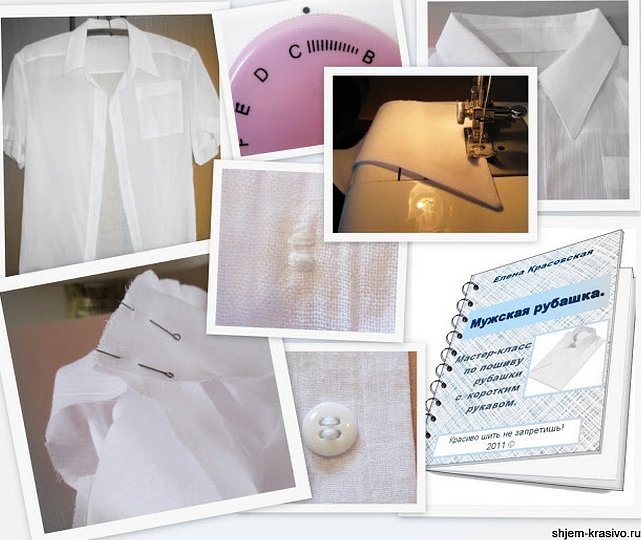
The best gift for a man or woman will be a shirt sewn by hand. In the process of work, you can create a unique sketch, take into account the individual features of the figure. Additionally, you can use any type of fabric, various accessories, cutting methods and processing of parts. A well-made detail will become an ideal detail of the office image.
Sewing nuances
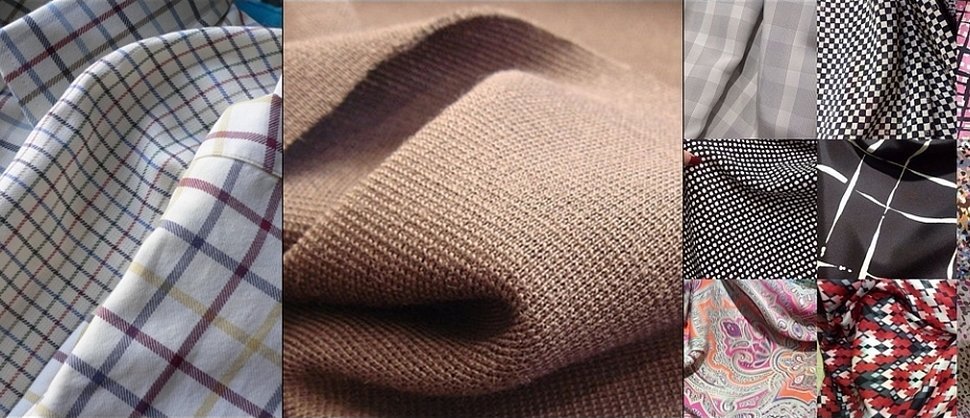
Before you start sewing an office wardrobe item for women/men, it is worth choosing the right fabric. Much depends on the time of year - there are special types of textiles for sewing warm shirts. If we take the standard, then the ideal options will be such fabrics as satin, poplin, cambric, cotton.
To sew a shirt for a woman/man, you need to choose the right model. There are many options - with long or short sleeves, with a turn-down collar or a stand-up collar, a fitted cut or loose. There are items that can be used to create an oversized look. The variety of models can be listed for a long time. But it is still worth paying attention to the points that will be distinctive for sewing men's and women's models.
For women
The pattern of a women's shirt will have several differences. The first is the presence of darts under the chest and a fitted silhouette. Additionally, decorative inserts of lace or other material can be used. Naturally, the size of the product will also be a distinctive feature. Other visual moments are little different from the male example.
For men
Before sewing a men's shirt, it is worth knowing a few of its differences from a women's. The first is the size. The second is a looser silhouette and simple cut.

The men's model has fewer darts and almost no decorative trim.
Measures
To ensure that the sewn shirt fits the size, you need to take the necessary measurements. All data must be written down so as not to mix up the data. The correct version of the pattern can be prepared with the following measurements:
- Neck circumference "OC". Place the measuring tape at the very bottom.
- Chest circumference "OG". The chest circumference should be determined under the armpits.
- Waist circumference "OT". Find the very place of the torso.
- Hip circumference "OB". Measurements should be taken approximately 20 cm below the navel.
- Chest width "Ch" and back width "B". Insert rulers under the muscular depression. Using a measuring tape, measure the smallest distance between these objects.
- Shoulder length "SL". Determined from the line measuring the neck circumference to the drop of the shoulder.
- Arm length, including the shoulder, from the neck line to the first joint of the thumb.
- Determine the circumference of the biceps.
- Wrist circumference.
- Back length. From the neck line to the tailbone.
- Length from shoulder to waist, front and back of torso.
This is a variant of taking measurements for sewing a men's shirt, but this pattern is also suitable for a classic type of women's shirt.
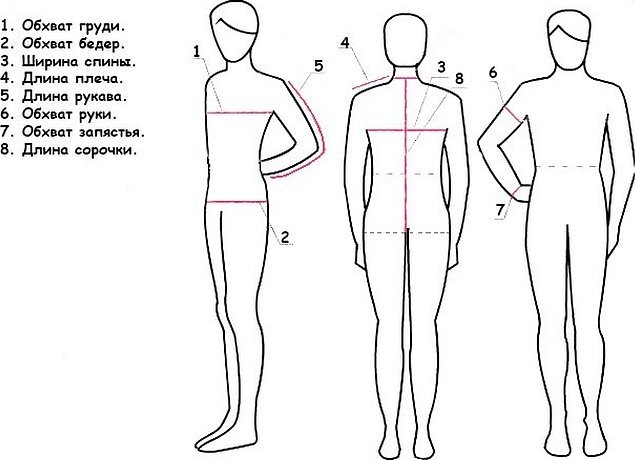
Additional information! When taking measurements, do not pull the measuring tape too tightly.
When taking measurements, it is worth considering some nuances of the model. For example, if you need to sew a tunic shirt for a woman, then the length from the neck to the bottom should be taken longer. At the same time, it is advisable to make an extension on the hips, gradually taking measurements along the entire perimeter of the buttocks.
Materials
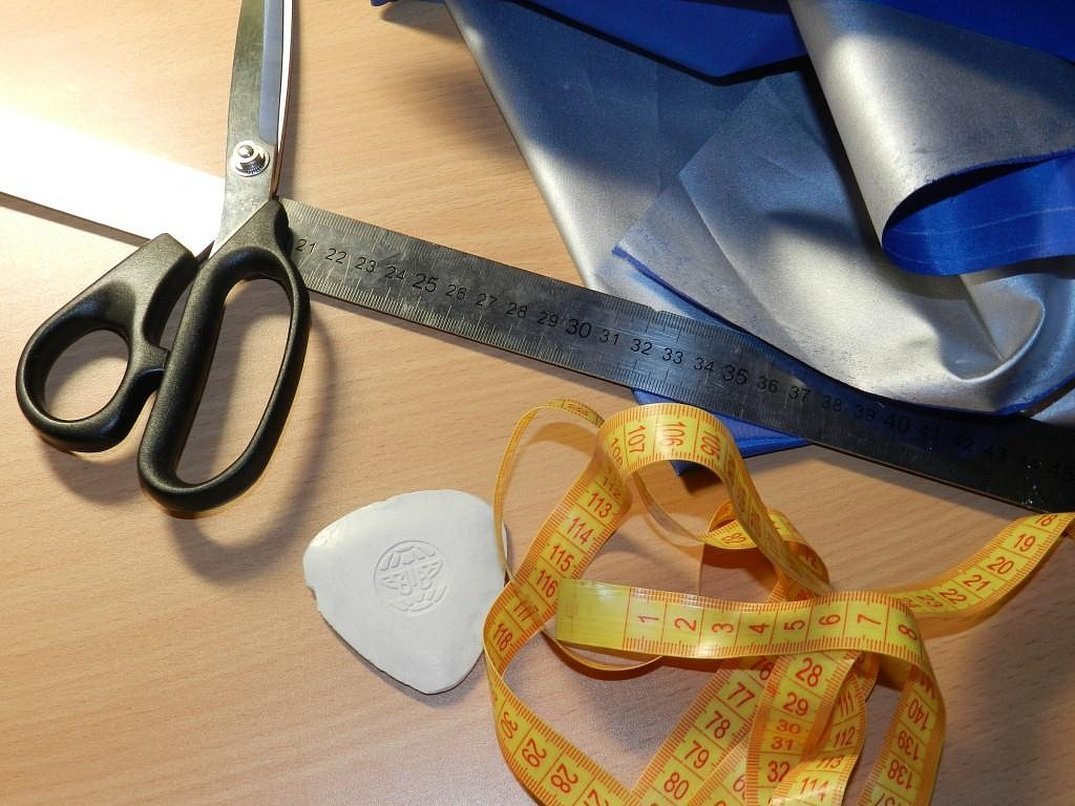
Before you start working on sewing a product, you need to prepare not only the fabric, but also the right tools. It is important to consider the quality of the selected tools, since the result and the appearance of the item depend on it.
To sew a quality item, you need to prepare the right set of tools:
- A sewing machine of any configuration. You need to select a needle that will match the selected type of fabric. There should also be a double needle, which will help to form a beautiful stitch.
- To leave markings on fabric, you can use chalk, soap, textile markers, a rotary cutter (cutter or copy roller). This tool resembles a wheel with jagged or smooth edges on the handle. After running it along the canvas, a dotted or continuous line remains.
- It is advisable to choose high-quality scissors. To model a shirt, you should use only carefully cut out pattern pieces. The blade of the tool should be sharp, and the handle should be as comfortable as possible to hold in your hand. You can buy special scissors with a shaped handle. This design allows you to cut the fabric without lifting it above the work surface.
- Sewing is usually done on a regular table. Later, you can buy a professional cutting table. An alternative to expensive furniture can be a cardboard cutting board. A comfortable workplace is especially important when modeling a shirt, since there are a lot of details in its cut.
- Sometimes you even have to use an awl, which will help in piercing particularly dense parts and details.
- A seam ripper would be a good idea, as some seams may turn out uneven or of poor quality.
- You will need centimeter tracing paper to create a pattern, and regular paper to sketch out the design.
- An iron is used at almost all stages of sewing—it is needed when smoothing seams during the assembly process.
- Small things you will need are safety pins, sticky tape. These tools are simply necessary for temporarily connecting the parts of the pattern.
Additionally, you need to prepare sewing threads that will differ only by a few tones from the color of the fabric itself. You need small buttons to decorate the cuffs and the front placket.
Step by step instructions
Beginner needlewomen often have difficulties with how to sew a shirt of the most ordinary cut. To make your idea a reality, you should go through several stages:
- Constructing a pattern in accordance with the measurements taken.
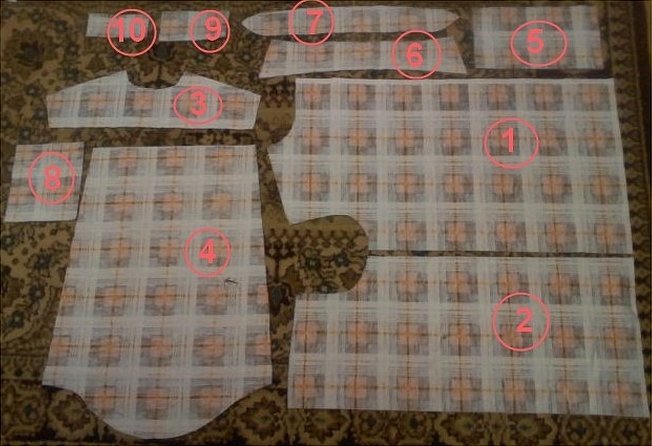
- Next, all the details are cut out from the fabric.
- The strips, yokes, and all cuts on the fabric need to be processed.
- Making the collar and sewing it in.
- Then the darts for the sleeves are prepared, and then the elements are sewn in.
- Finally, the side seams and cuffs are processed.
These stages of work are carried out regardless of whether a men's or women's shirt will be made. The difference will be only in the parameters and shape of the pattern itself. The principle of processing all parts is standard.
Preparing the pattern
There are several differences between women's and men's shirts, which are already visible when preparing the pattern. In order not to complicate the construction process, it is worth using the most basic options. What a pattern for a simple women's shirt might look like:
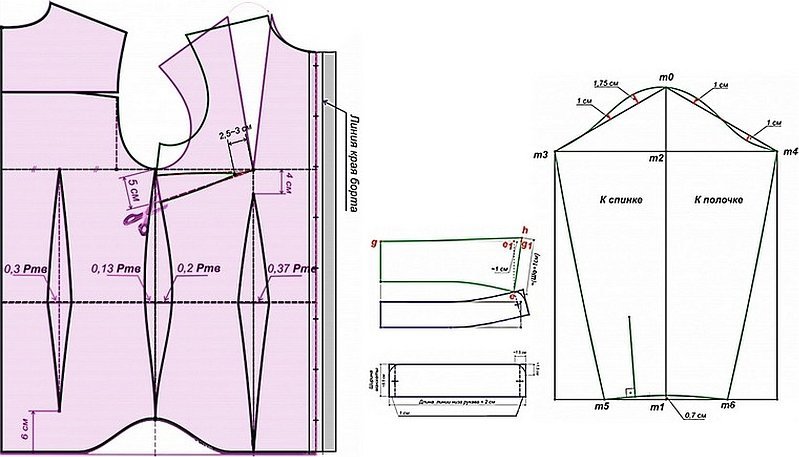
To create a men's shirt, you can also use simple cutting options. Usually, for this type of elementary models, you can use this pattern:
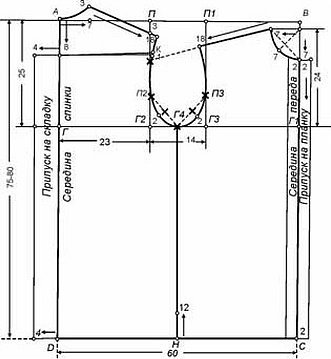
If it is difficult to create a pattern yourself or you have no experience in this matter, then you can use these examples.
Opening
When the pattern is completely ready, you can start cutting and preparing the patterns. The prepared layout, to which all previously taken parameters are transferred, is the basis for making the pattern parts.
The parts of the future product are cut out of the fabric. To do this neatly, you need to attach the paper parts to the canvas using safety pins. Use chalk, soap or a marker to outline the blanks.
Important! To prevent parts of the shirt from becoming deformed in the future, it is recommended to choose the same thread direction for all elements of the future product.
Using scissors, cut out the details. At this stage, it is worth repeating all the outline lines exactly. After such preparation, you can sew a men's shirt or a women's blouse in a men's style.
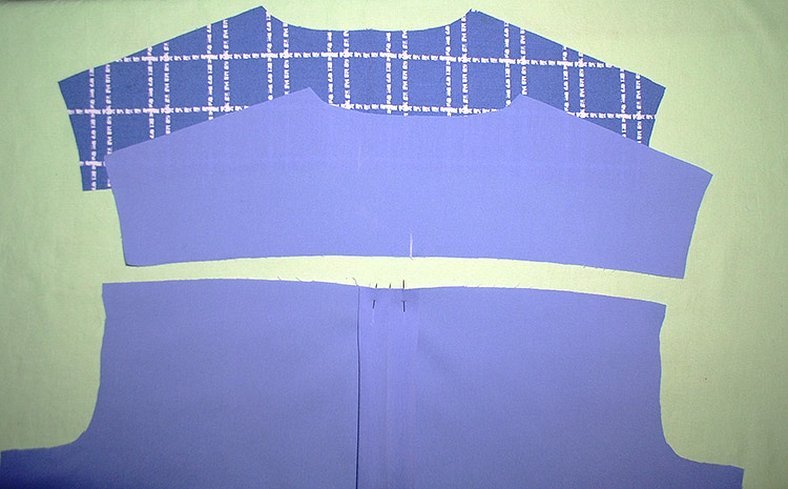
Processing of planks
Make a notch with scissors - baste the line of the strip departure and draw a chalk line down. Mark 6 cm to the left of the notch on the front side, draw a chalk line down, baste a 1 cm allowance to the wrong side. Mark 2.5 cm to the left from the notch and draw a chalk line parallel to the strip departure. Fold the 3.5 cm allowance to the wrong side and topstitch onto the shirt. Fold the fastener to the right side and stitch a decorative line along the strip. You will get a one-piece fastener 2.5 cm wide. On the wrong side you will get a 1 cm edging.
The advantage of sewing such a bar is that it is one-piece, which means there is no need to cut out extra parts and adjust them accordingly. There is no need to duplicate anything additionally. Such a fastener may seem very tricky, but if the fabric was taken in a cage or strip, such a bar is made quite easily and quickly. On this side of the bar, loops will be swept out.
For a woman, such a placket can be remade - instead of buttons or snaps, think up an interesting tie. Mixed types of placket fastening will look interesting.
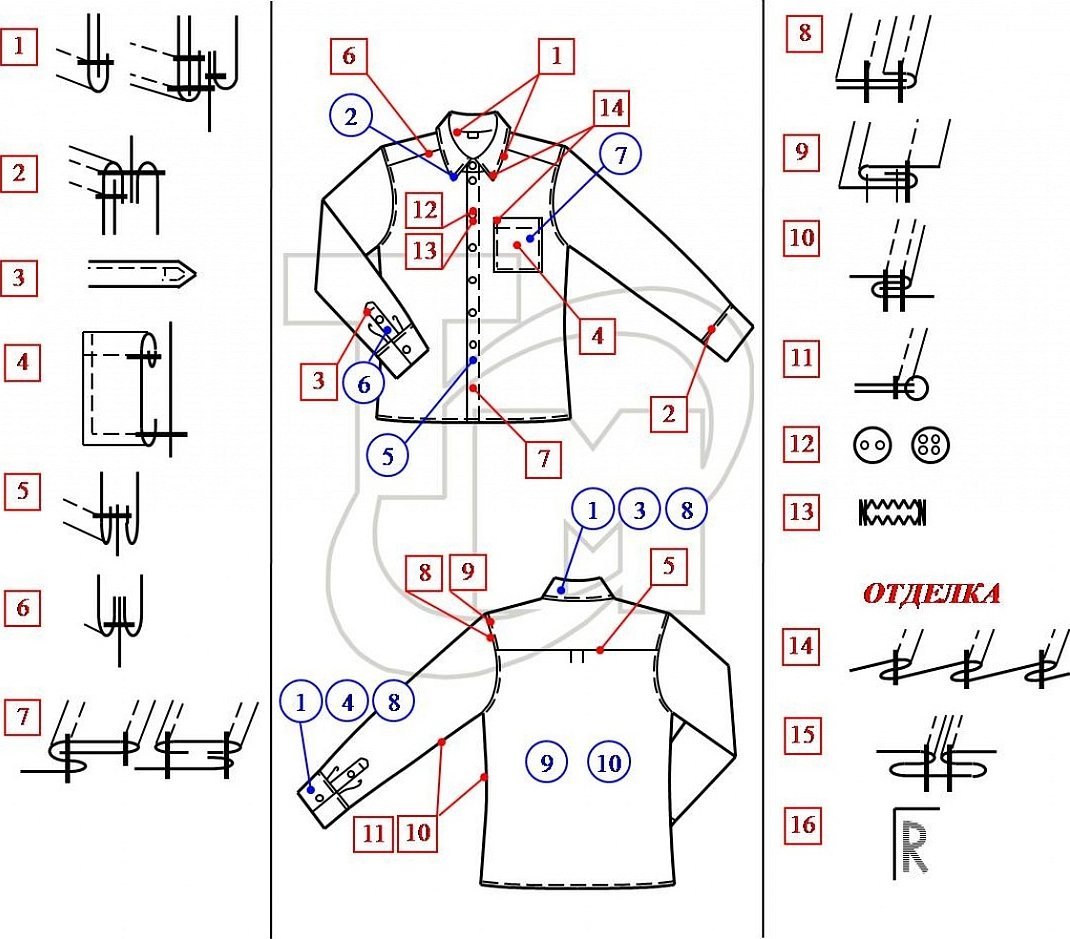
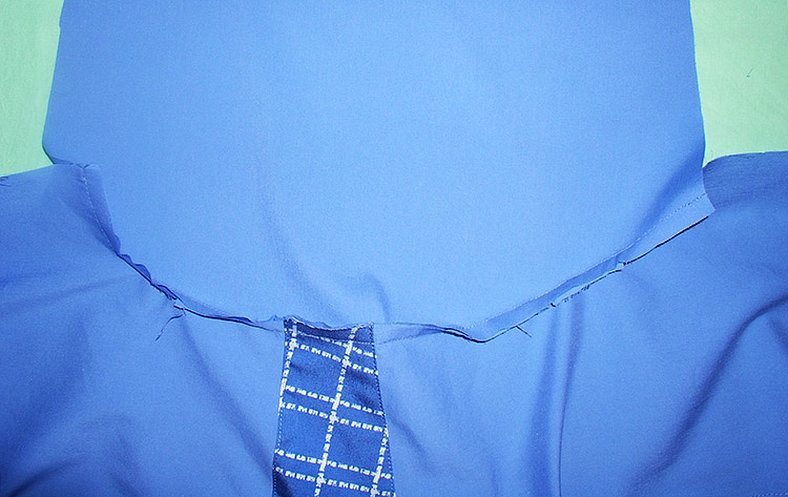
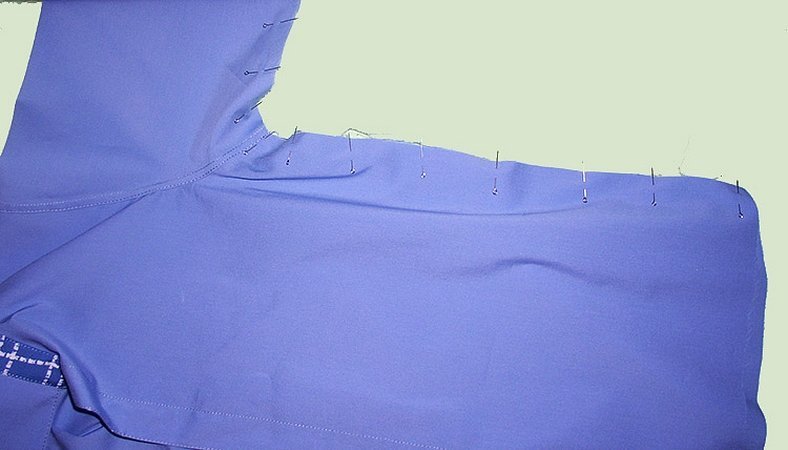
Processing of yokes
You need to sew the yoke to the back piece as follows: place the back piece between the two yoke pieces, namely the lower cuts, and place it between the upper cuts. Make notches in the center. Additionally, form stripes and cells. Use safety pins to align and fix them. Then sew a machine stitch. The seam width should be approximately 1.2 cm.
Please note! During the process of sewing and preparing patterns, it is worth carefully monitoring the alignment of the pattern on the fabric, if there is one.
After sewing the yoke, the seam is swept out and the piece itself is ironed. Now you need to sew the finishing line on the sewing machine. Sew a connecting line along the yoke. This will help connect the 2 pieces together. This should be done along the armhole, shoulder and neck lines. The seam width should be 0.5 cm.
Collar processing
The stand-up collar is the most popular model in women's and men's shirts. The stand-up collar consists of the following parts: upper and lower collars; outer and inner stand-up parts. The processing begins with duplicating the parts. It is necessary to glue the interlining strips. This is done by ironing the parts from the back side. Process the outer and inner parts.
Place the pieces with the right sides together, turn them on 3 sides, trim the seam allowances to 3 mm. Turn the collar right side out, sweep with edging, press and stitch a finishing line to the width of the foot.
Sewing in the collar
Sewing continues, which means it's time to sew in the finished collar. Attach the pattern to the finished collar and draw a line with chalk to connect the collar to the stand.
Attach the open edges with a machine stitch or hand stitches. Place the pieces on the shirt piece and stitch to the base piece.
Processing the shaped bottom of a shirt
Even a novice seamstress can handle the shaped bottom of the item. You need to make a 1 cm fold and iron it. Then make another 1 such fold and iron the part again. Then stitch the fold on the sewing machine. This is where the master class can be finished.
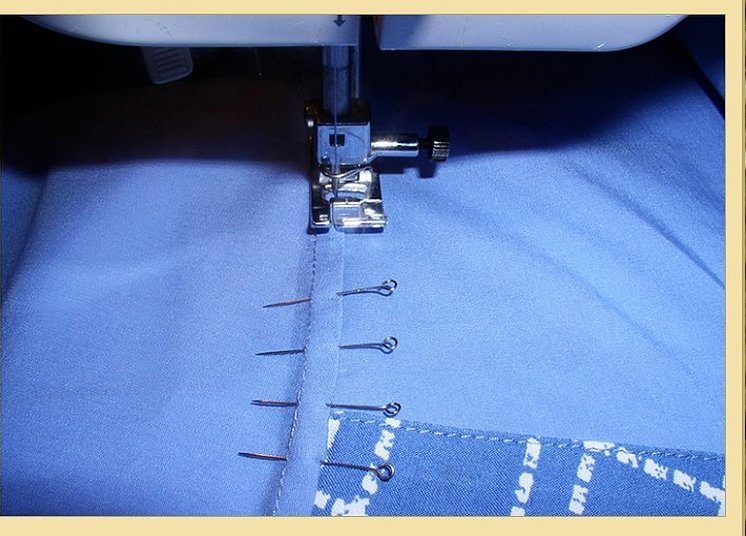
Sleeve slits
The shirt sleeve is difficult to finish in terms of making cuts. It is worth considering a small landing in the area of the sleeve insertion of about 1 cm. This applies to both long and short sleeves.
Sewing in the sleeve
Pin the highest point of the cap and the shoulder seam. Sew the sleeve into the armhole. In doing so, you need to distribute the fit evenly.
The procedure is carried out on a sewing machine. Seam allowances are overcast on an overlock or zigzag machine. The seam width is 0.8 cm. The seam along the sleeve of a men's shirt can be topstitched with a finishing stitch.
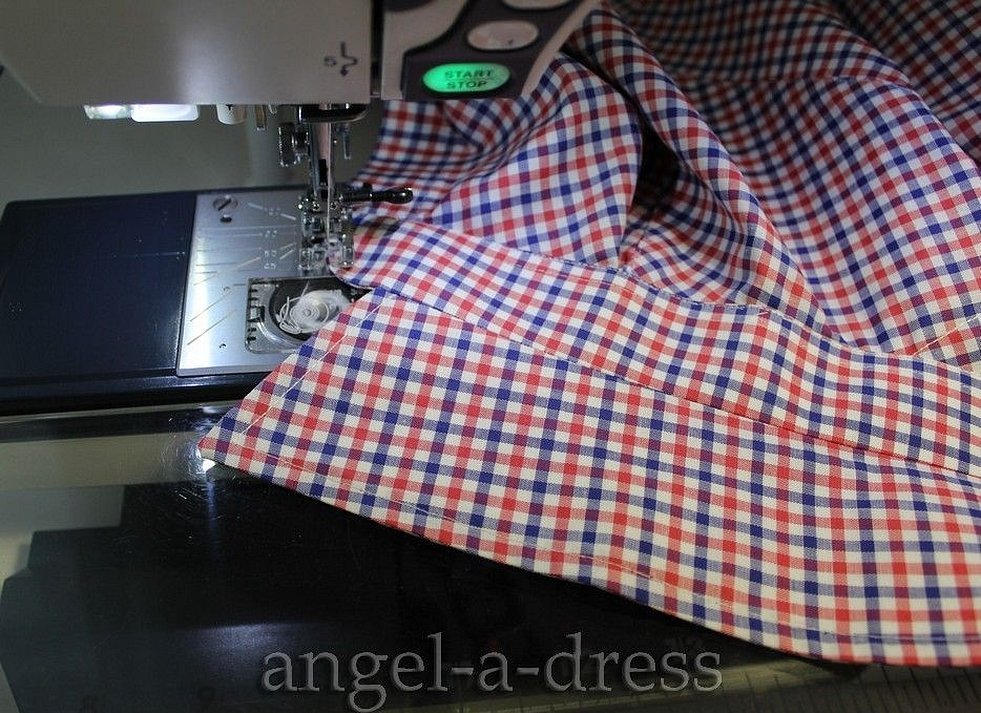
Side seams
Technology of preparing side seams. This is a distinctive feature of a men's shirt - the side cuts and sleeve cuts are sewn together with one line. Sweep the side cuts of the shirt and sleeves.
Try on the shirt. This will help you correct any cut inaccuracies and mark the exact length of the sleeve. Sew the side edges of the shirt and sleeve together. Seam width is 1 cm. Neaten the seam edges and iron them onto the back.
Cuff processing
A blouse or shirt is not possible without a cuff.

But there are several options for creating a cuff, and therefore the processing principle will be different - you need to look at the shapes and sizes.
Even a beginner can cope with sewing a shirt. It is quite easy to do if you use a step-by-step algorithm as a diagram. First, you should choose a simple pattern, and only then start processing individual parts. In the end, all the parts of one product are assembled.


