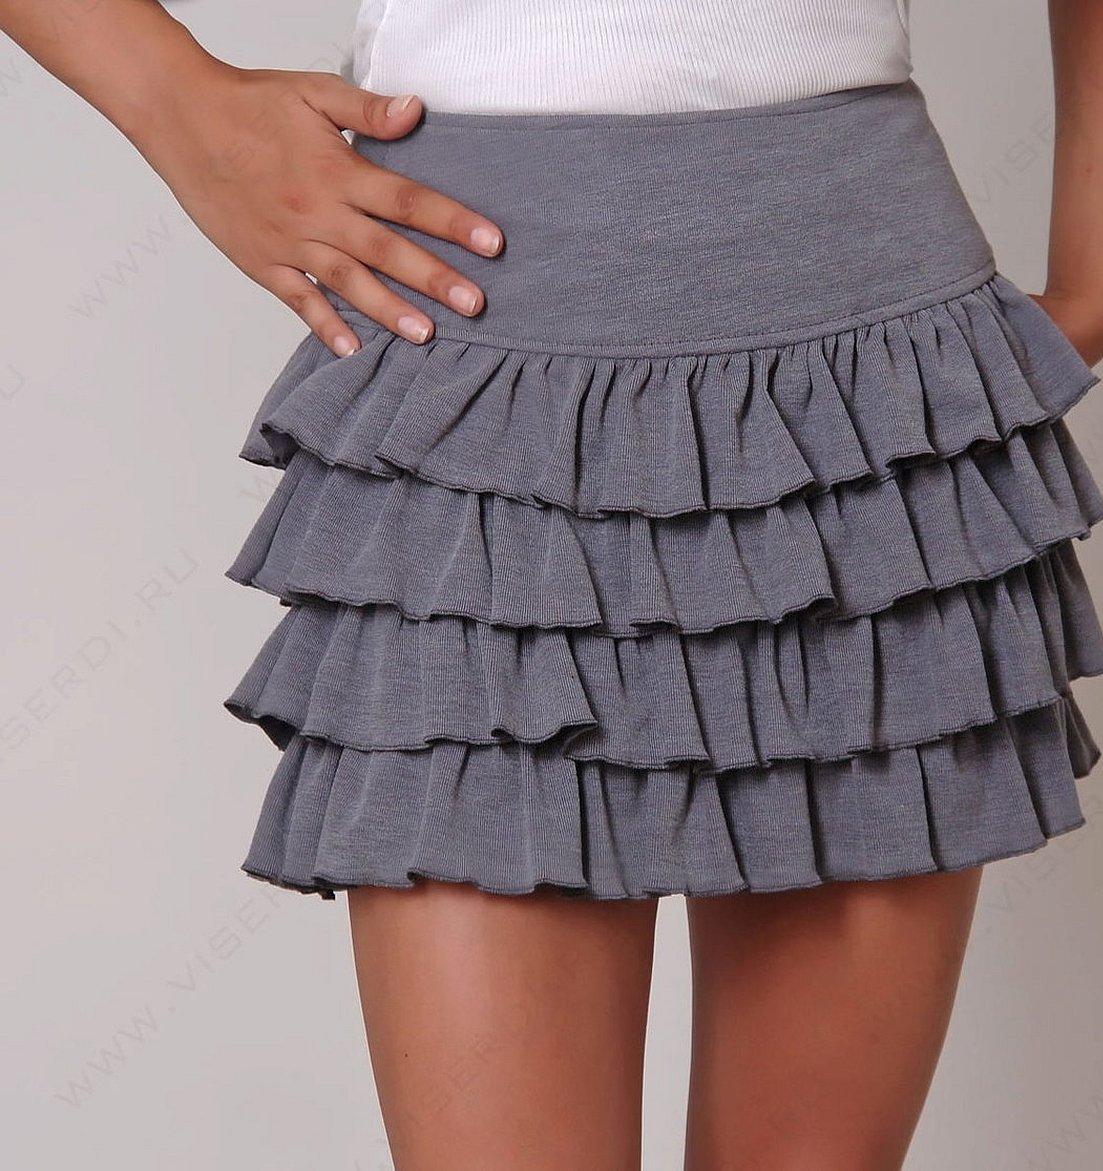
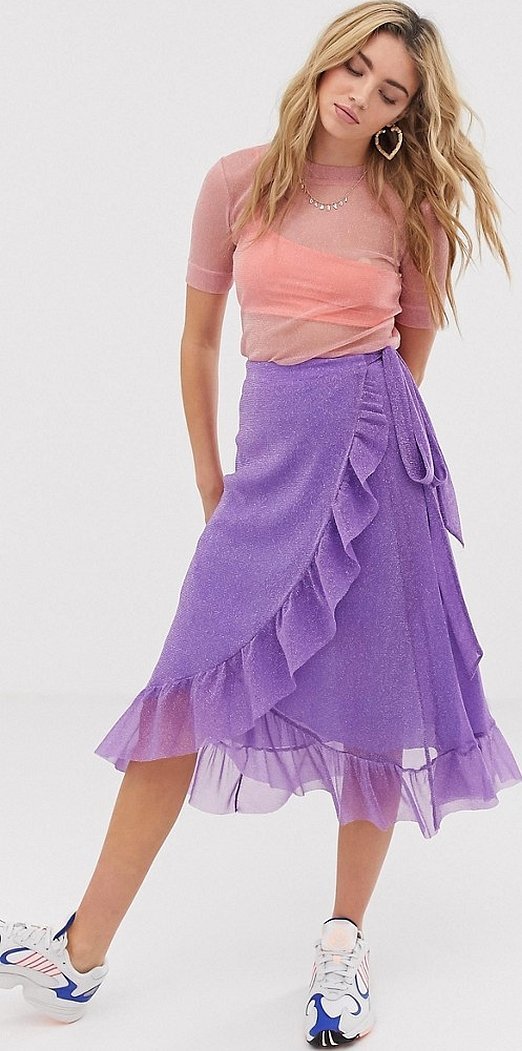
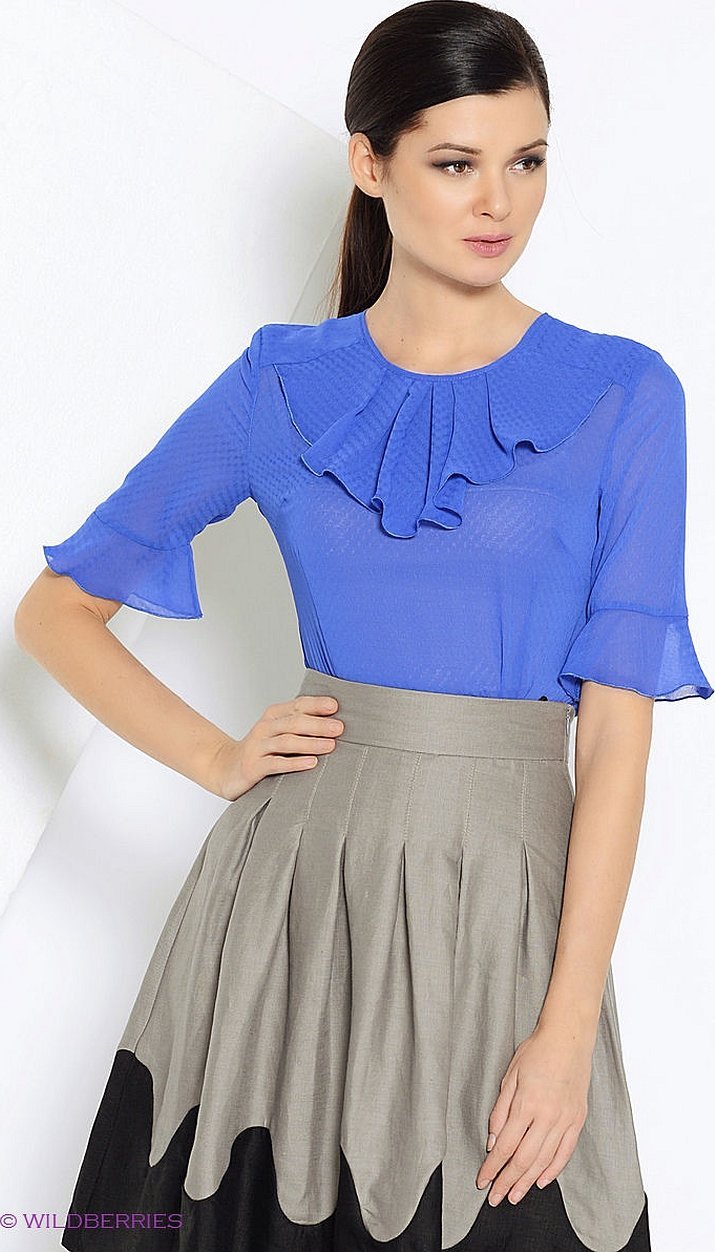
Romantic curls can completely transform a skirt and turn it into something feminine, luxurious and sophisticated. As an item of women's wardrobe, fluffy skirts are loved by both young girls and adult women. Skirts with these details are preferred to wear both to special events and to work in the office.
Most often, it is the mothers of girls who think about how to sew such a skirt before a holiday in kindergarten or at school, as well as those whose children are engaged in dancing. In such cases, Latin skirts are sewn. At the same time, sewing does not require special knowledge and skills. It is enough to have a basic set of tools and basic knowledge in the field of cutting and sewing.

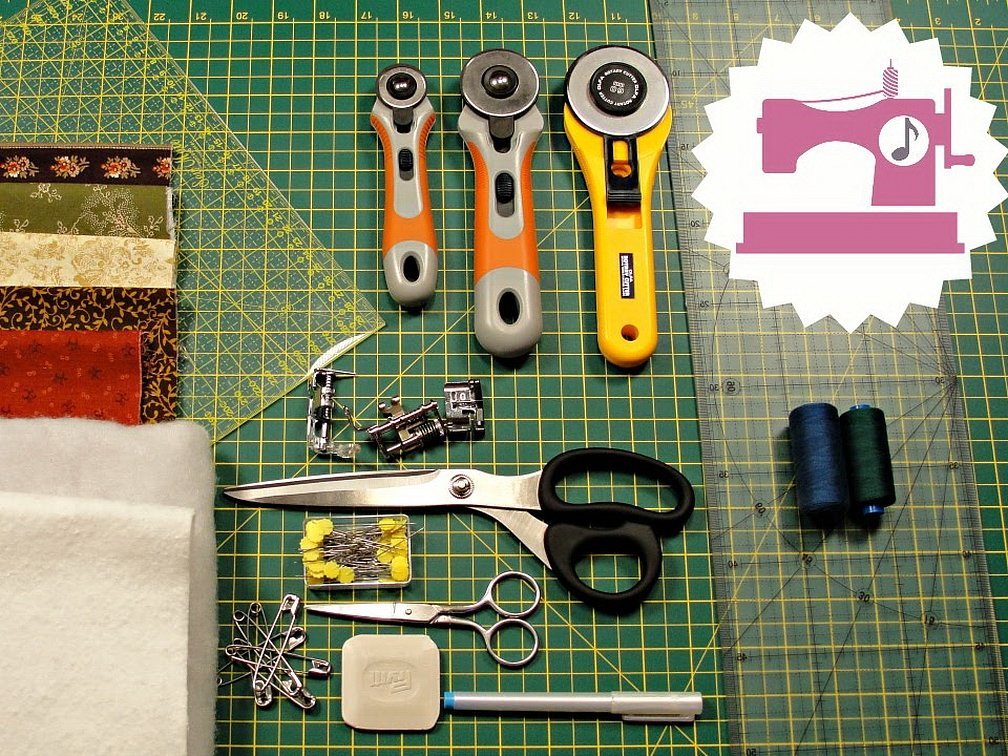
Necessary materials and tools
Before you start sewing, you need to choose a good material. First of all, it should hold its shape well, not stretch or shrink, not wrinkle, and also drape easily and form air waves. When choosing a material, special attention should be paid to the fact that they do not stick out or pull the lining, but form smooth lines. Light denim, organza, chiffon, tulle and cotton are best suited for these purposes. For cold weather, it is best to give preference to suede, wool or plush.
Please note! For sewing a skirt, it is best to choose plain fabrics. They will effectively emphasize the silhouette and demonstrate the sophistication of the cut. Ruffles themselves carry a semantic load, so in a set with drawings and patterns they will look tasteless.
The set of fittings will depend on the model. Before sewing flounces on a dress, skirt or blouse, you need to prepare the tools. You will definitely need paper, scissors, chalk, a sewing machine, threads, needles, a ruler and a measuring tape.
How to build a shuttlecock
You can decorate a finished product with such details or add them to a new project, even if the chosen model does not have a flounce pattern. Before cutting out the flounce, you need to decide on the method of modeling and cutting. They are modeled and cut in two ways - in a circle and in a spiral.
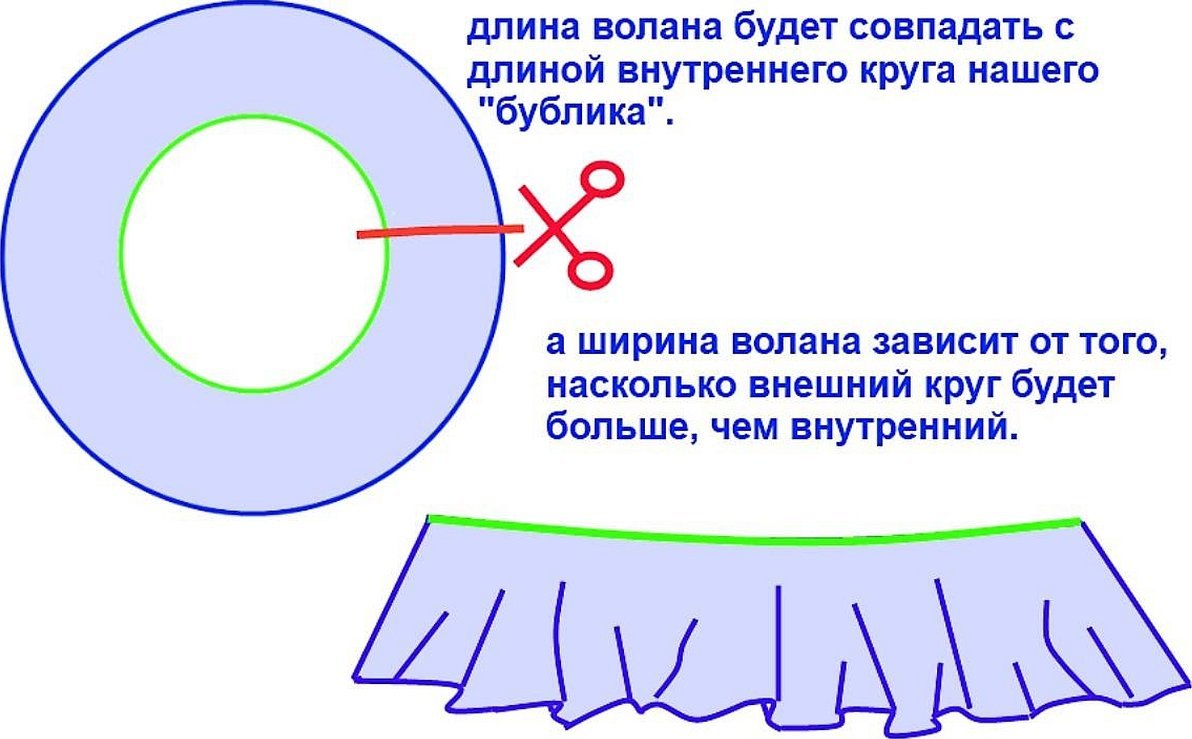
Modeling a pattern in a circle
You can model a pattern in a circle by following these steps:
- First of all, you need to determine its length. To do this, you need to measure the length of the cut of the product. It will correspond to the length of the inner circle of the pattern.
- Then you need to calculate the radius of the inner circle. To do this, divide the length of the circle by 2Pi.
- Using a compass, draw an inner circle on paper according to the dimensions.
- To form the outer circle, the radius of the inner circle is multiplied by 2.
- The distance between the circles is determined by the width of the shuttlecock.
- Once both circles have been drawn, they should be carefully cut on one side, best done diagonally.
- Cut out the pattern along the outer and inner contours.
- The resulting pattern should be pinned onto the fabric and the contours transferred, cut out and cut into strips.
The detail is ready. All that remains is to sew it to the product.
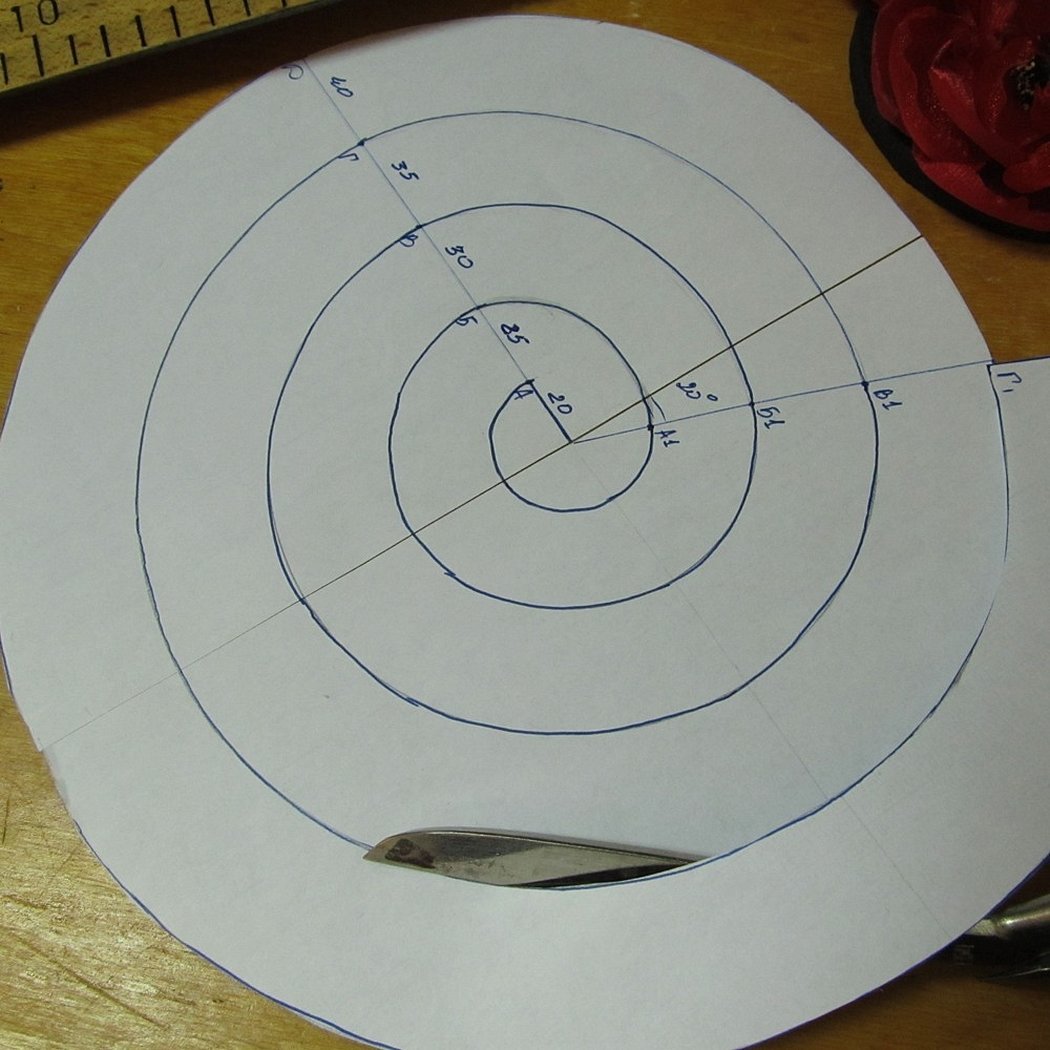
Modeling a pattern using a spiral
Every seamstress knows how to cut out spiral flounces. To do this, you need to do the following:
- Take a piece of paper and draw two crossed lines on it.
- Mark points at the same distance on each line. The distance will be the width of the shuttlecock.
- Draw a spiral using the marked points.
- Using a regular thread, determine the length of the shuttlecock and, starting from the center, lay it in a spiral. Where the thread ends, the shuttlecock will end.
- You need to cut out the pattern exactly along the spiral or transfer the diagram onto the fabric and cut it out.
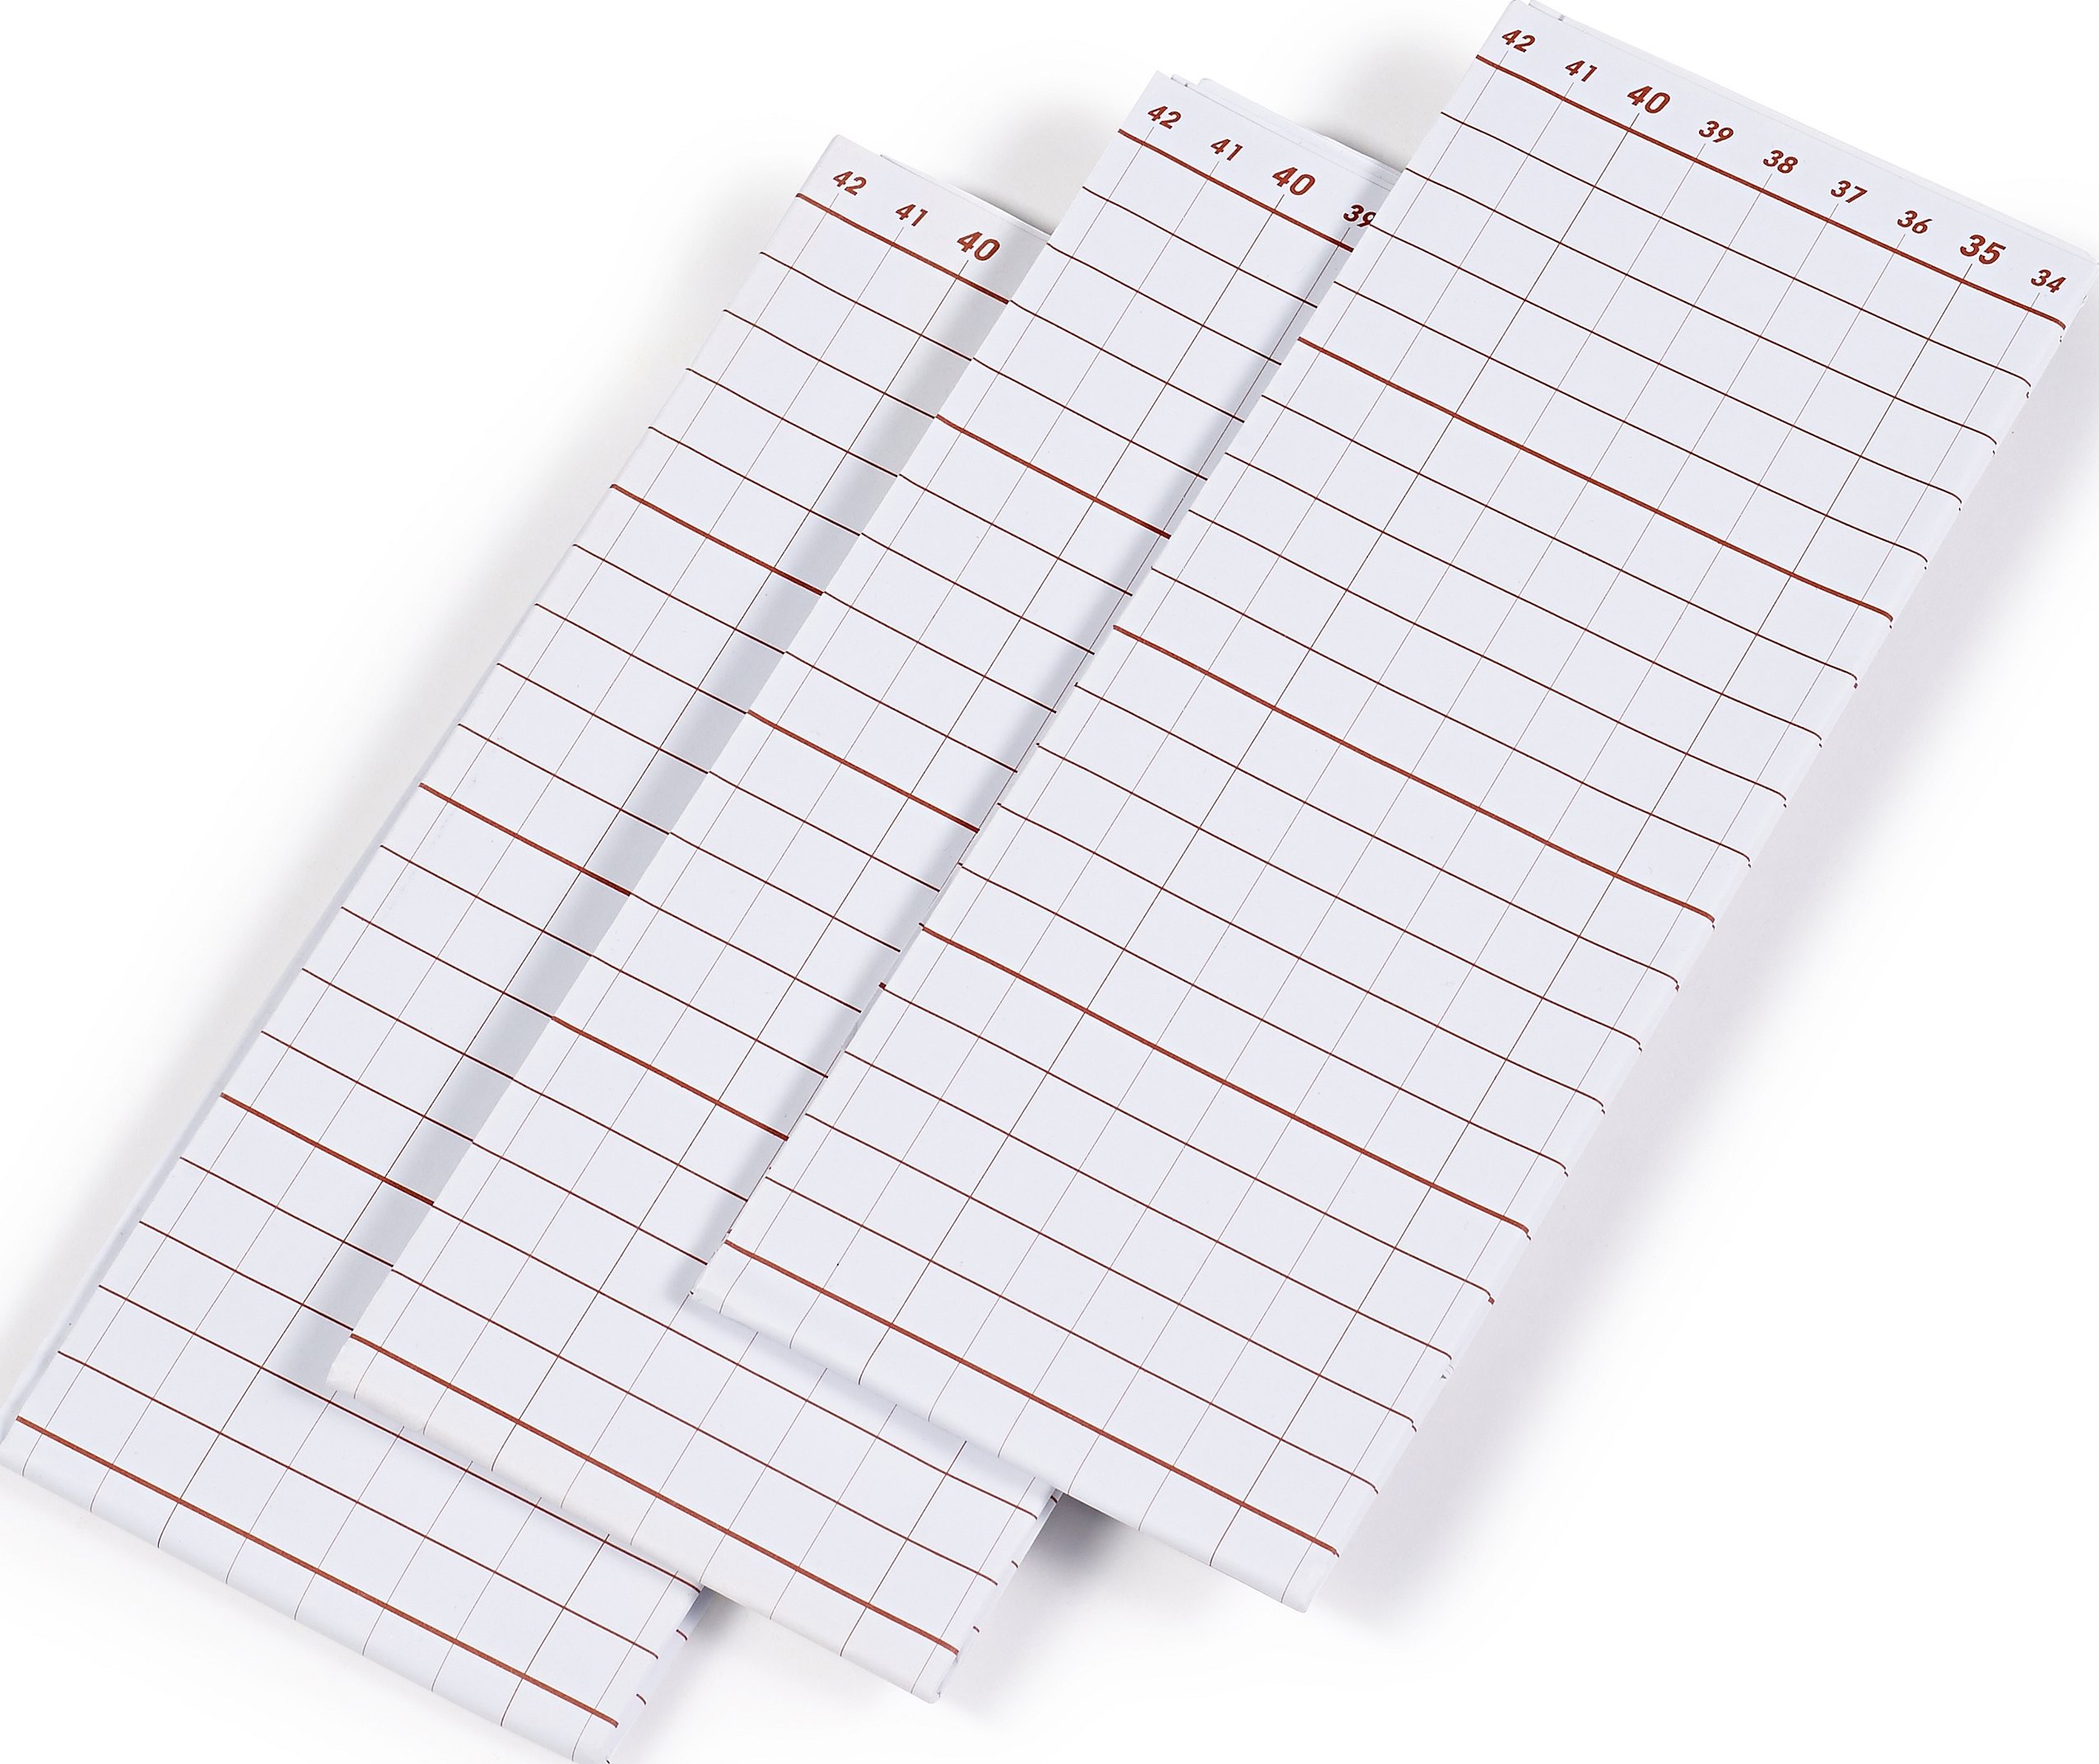
The spiral shuttlecock is ready, all that remains is to sew it to the product. Before cutting out the shuttlecock in a spiral, it is recommended to prepare all the necessary tools and materials. In order to make the task easier, experts recommend using tracing paper instead of regular paper, as it is lined in a cage, which will greatly simplify the creation of the pattern.
Sewing a skirt
For those who decide to sew such a skirt for the first time, it is necessary to understand the terminology before choosing a model and cutting out the fabric. It is important to understand the difference between flounces, frills and ruffles.
For frills and ruffles, rectangular pieces of fabric are used, gathered along the top edge or in the middle. Flounces are made from round or semi-circular blanks. Despite the difference, all three types are used to complement skirts. In this case, the skirt is sewn based on a classic pattern with elements of modeling the lower part or from a semi-circular or round piece of fabric.
Sewing sequence
Once the pattern is ready, you can proceed directly to sewing. To do this, follow these step-by-step steps:
- On the front and back panels of the skirt, baste, sew the darts and iron them towards the middle.
- Connect the front panel of the skirt with the front flounce with the right sides together. Do the same with the back panel and the flounce. Make a stitch, and overcast and iron the edges.
- You need to sew a hidden zipper into the left side seam and complete it.
- Sweep and stitch the right side seam, connecting the control points, and overcast the edges and iron them apart.
- Repeat the same steps for the lining, making sure to leave a gap where the zipper is located.
- Sweep the lining and skirt together at the waistline, wrong sides together.
- Finish the top edge of the garment with a sewn-on belt.
- Use a zigzag or overcast stitch to finish the bottom of the skirt.
- Fold the fabric along the bottom of the product by 1 centimeter and iron.
- Secure the bottom with a straight connecting stitch.
- On the lining, fold the fabric twice by 1 cm to make a double hem.
- Stitch and iron.
The straight skirt is ready.
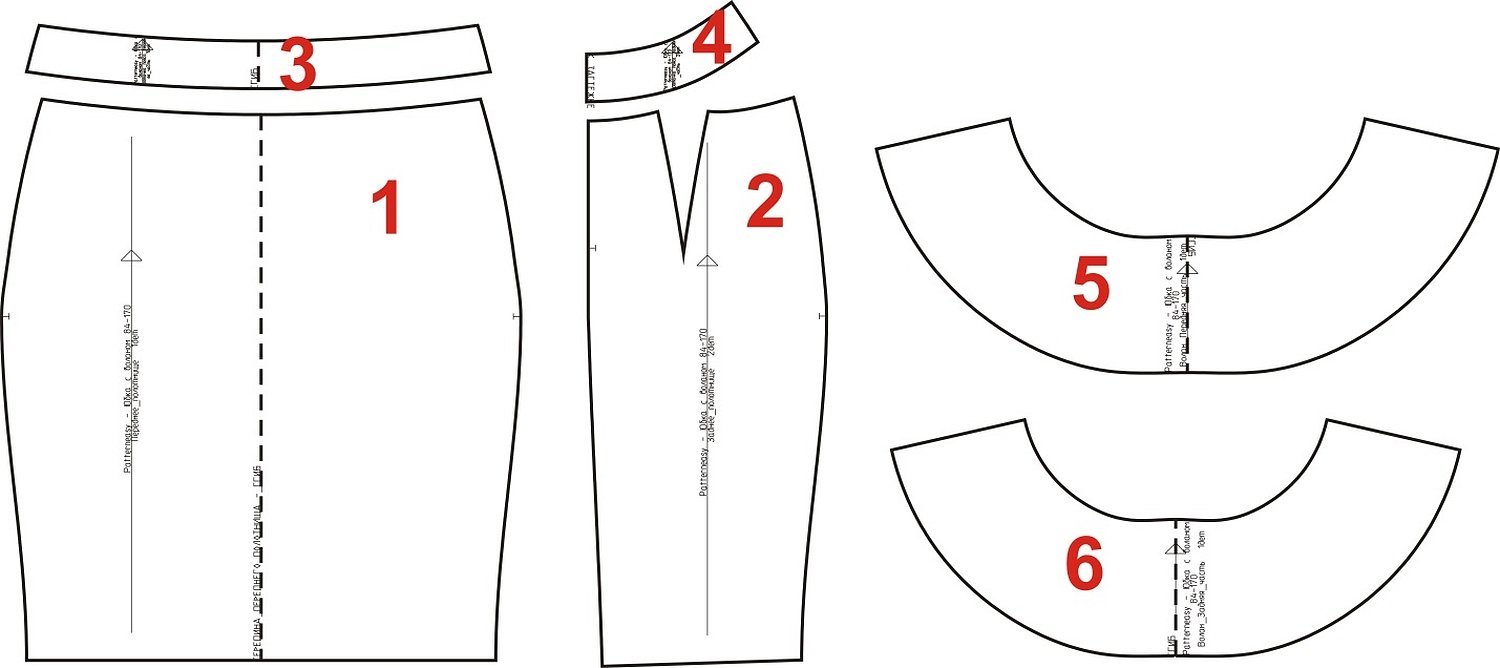
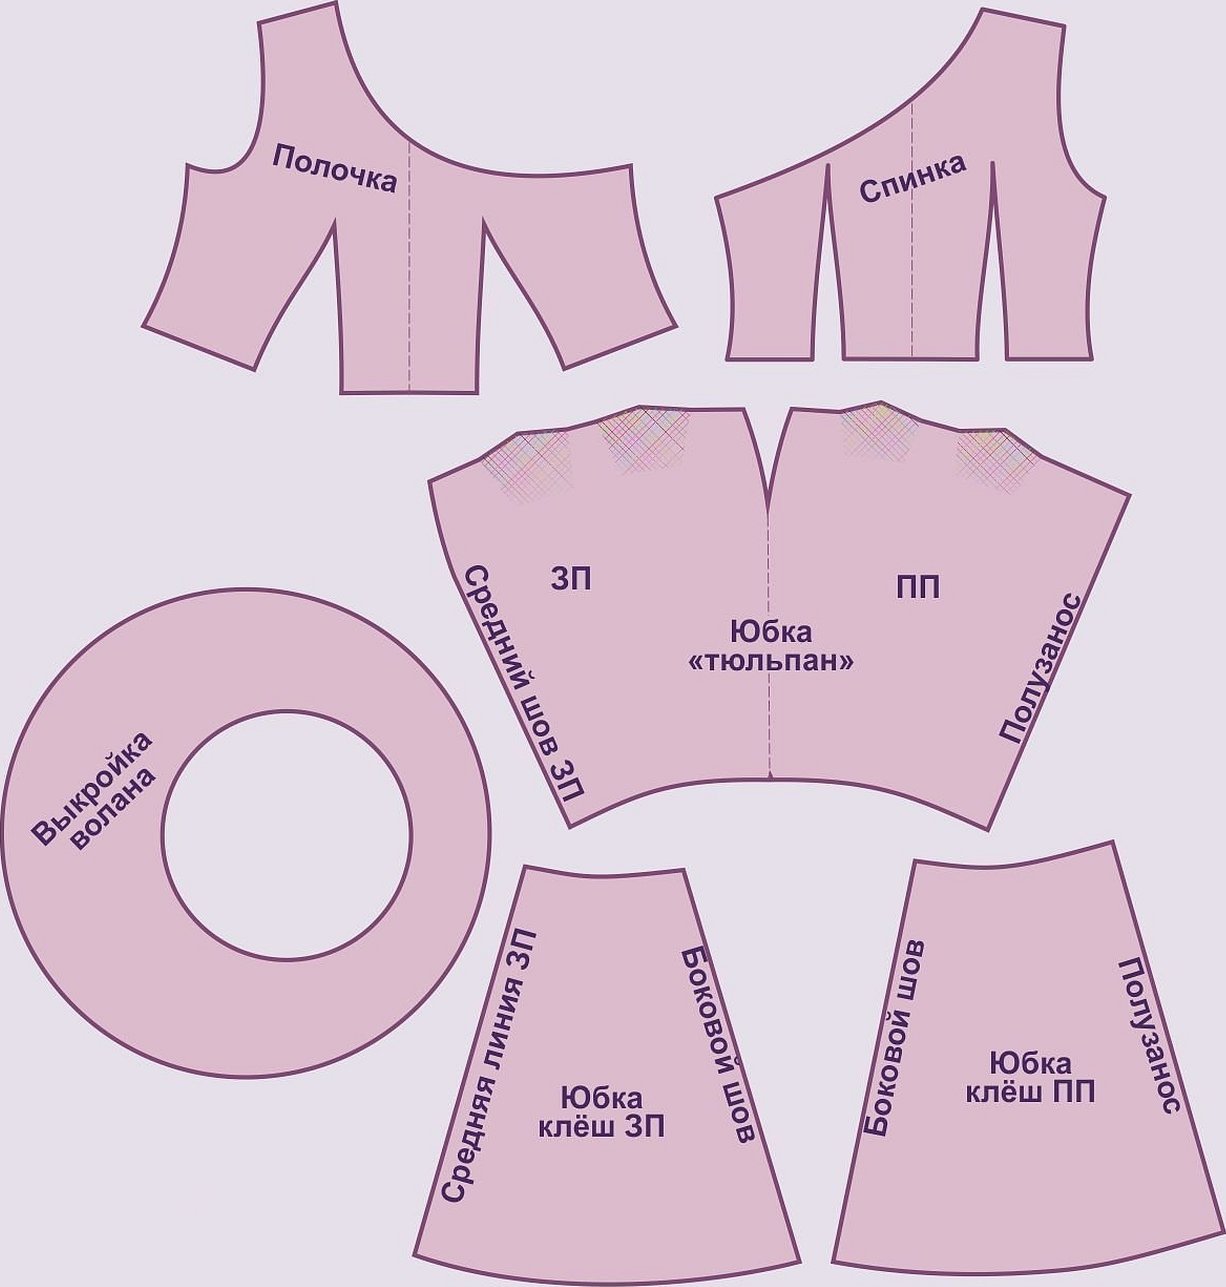
Pattern
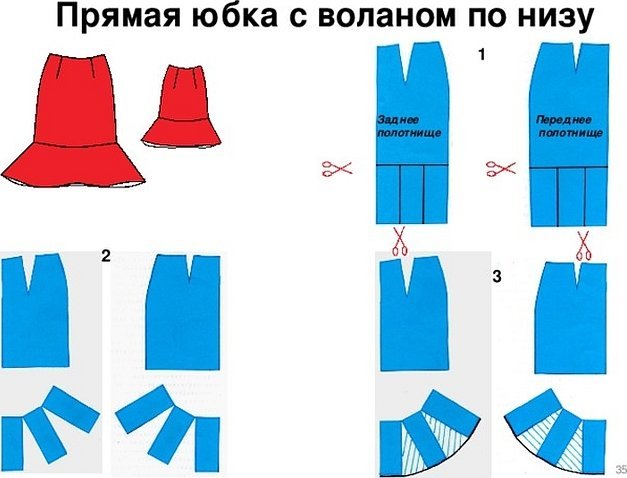
To sew a flounce on a skirt, the pattern must be prepared in advance. To do this, draw the front and back panels of a straight skirt in a spread. Along the side seam from the bottom line on the right side on the front panel of the pattern, you need to measure 24 cm. On the left side, mark 12.5 cm, and put down points that are connected by a straight line. Similar actions are carried out on the back panel of the pattern.
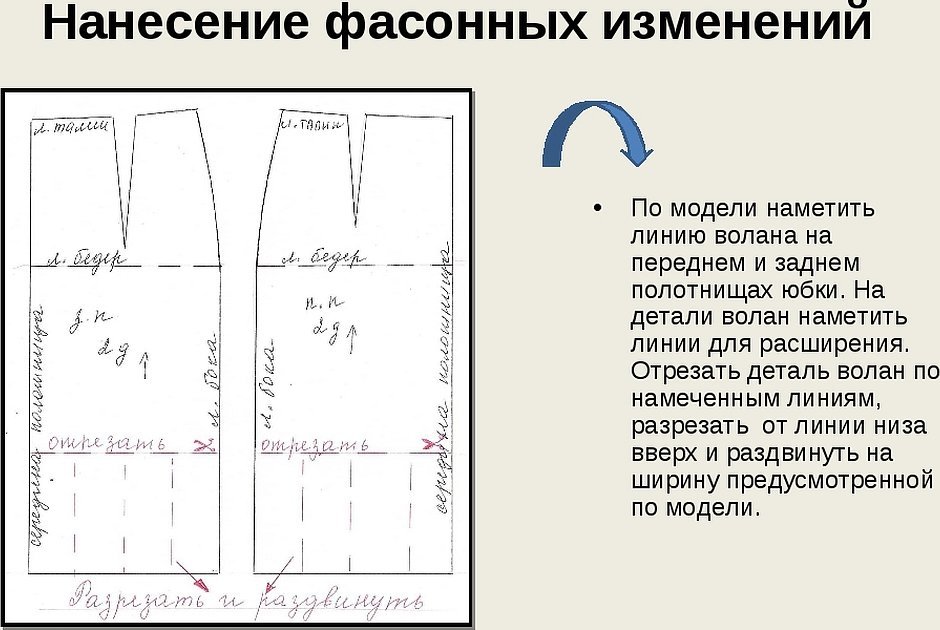
After the above steps are completed, the product details are marked. Direction lines are drawn on each detail. Then the flounce details are cut off, which are divided into eight parts. Before cutting them out, segments are drawn on them from the bottom to the top using a ruler. Along the marked lines, the details are cut, not cutting to the top edge by 3 cm.
The pattern is placed on a large sheet of paper and its parts are carefully moved apart to the same distance, which is equal to 7 centimeters. The resulting pattern is secured and cut out along the contour.
On a flat surface, the pre-prepared fabric is laid out in one layer face up and the pattern pieces are laid out on it so that the grain runs parallel to the edges. Darts are marked with chalk. After that, you can cut out the pieces, remembering to leave allowances for the seams. It is also necessary to mark the control points of the seam coincidence. If necessary, the same pieces are used to cut out the lining. When sewing a skirt with frills, the pattern is no different from the one that is sewn with a flounce.
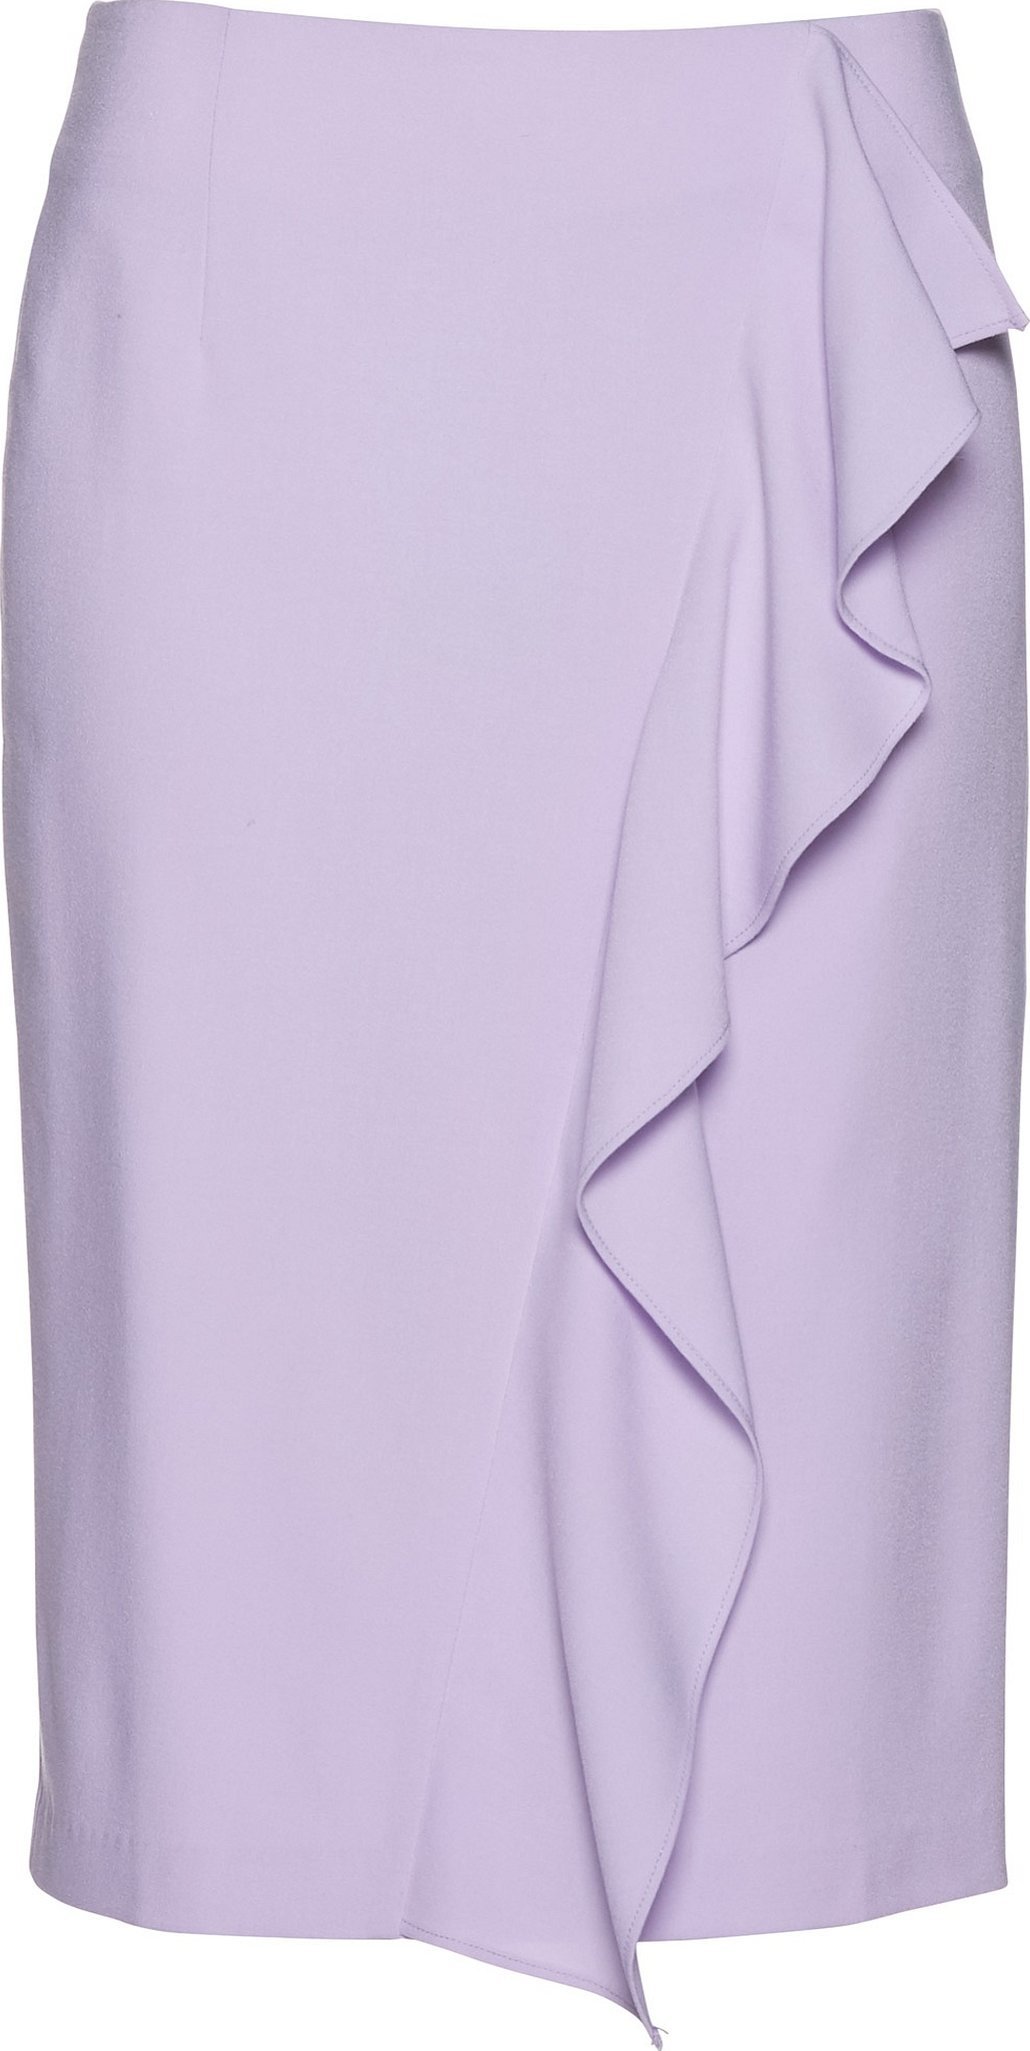
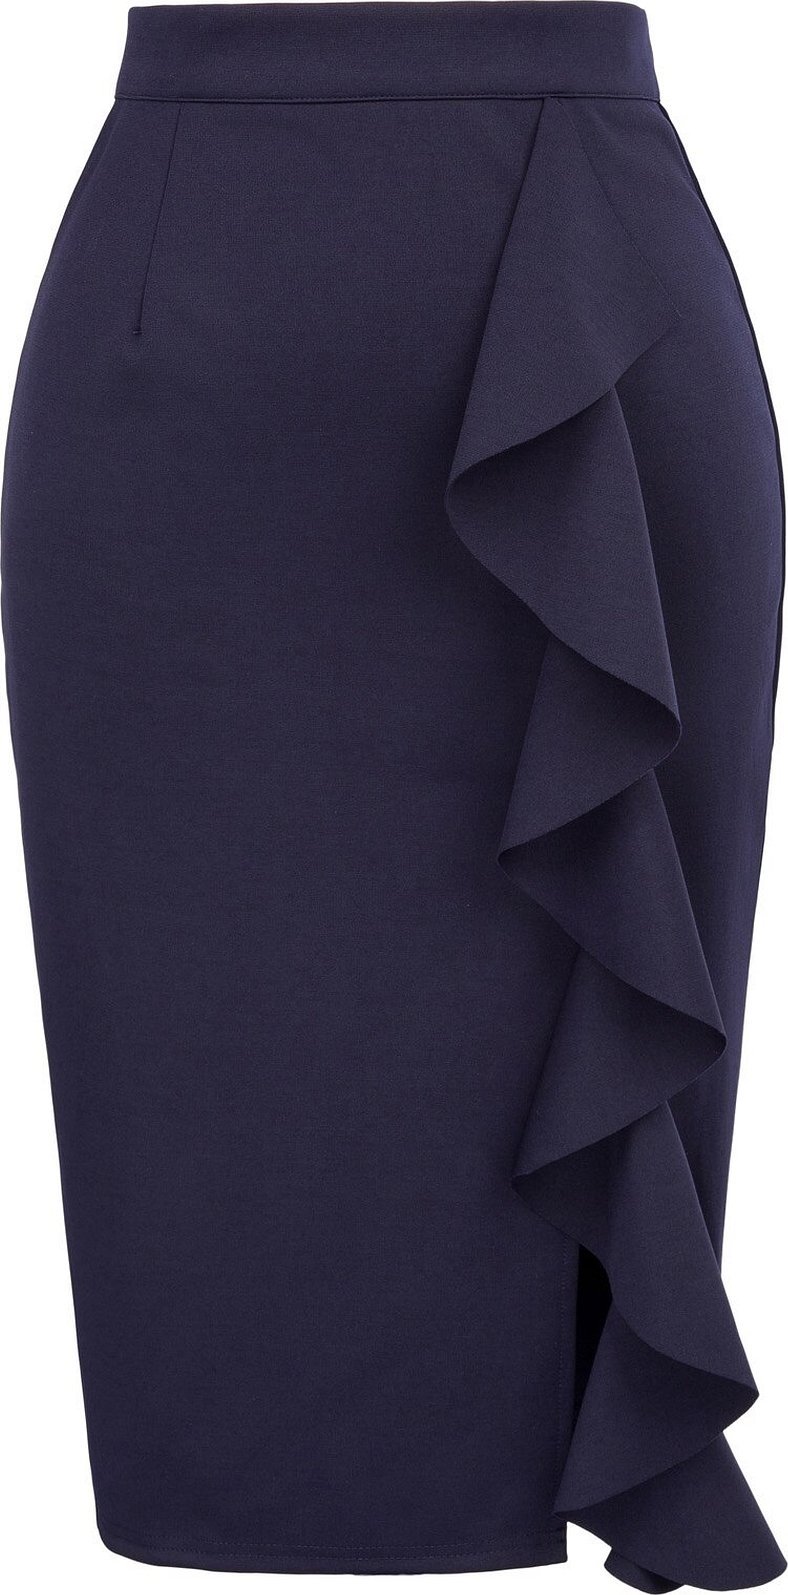
Modeling a pencil skirt with a frill
The pencil skirt has been in trend for several years. It helps to create a feminine and flowing image, makes the silhouette slimmer and more graceful. That is why it is present in the wardrobe of every self-respecting woman.
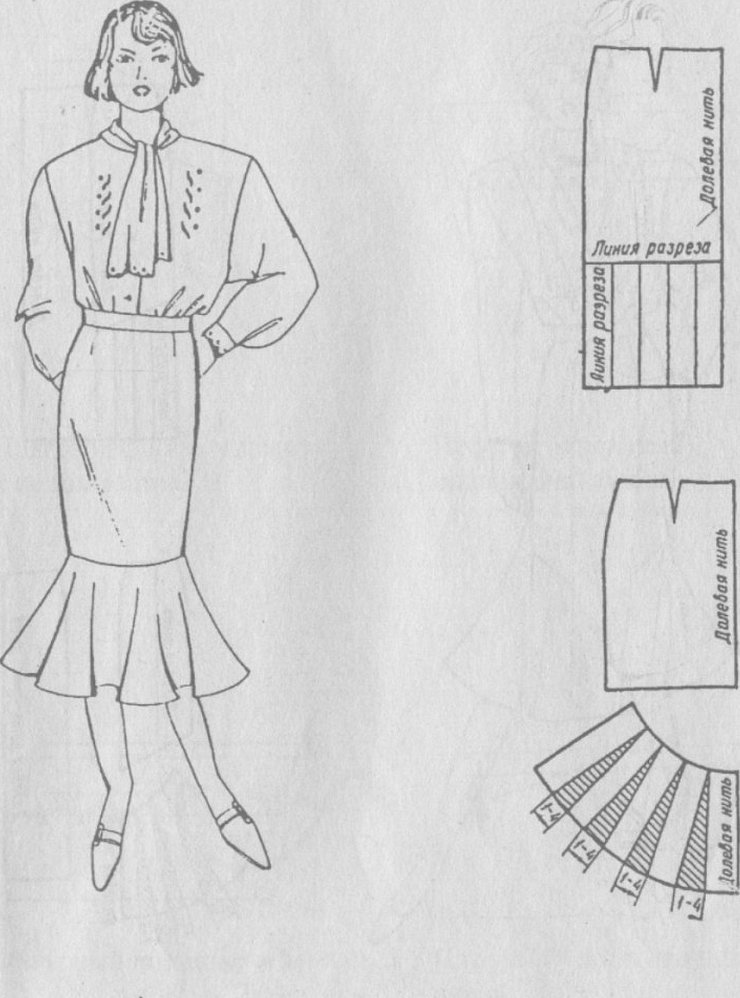
Modeling a pencil skirt is done in several stages and is based on the basic pattern of a straight skirt. To model a skirt with flounces, a pattern is needed first of all for a pencil skirt, with correctly taken measurements.
With such a pattern, you will have halves of the front and back panels. The back remains unchanged, and the front is assembled entirely for further work. Then the lines from the lower corners of the darts go down to the bottom of the skirt.
Please note! To visually narrow the silhouette, it is recommended to make the lines slightly slanted.
The next step is drawing the lines to which the detail will be sewn and constructing the pattern. It is constructed in the form of a circle. The process of constructing the pattern ends with cutting it along a horizontal or vertical line and opening it. This completes the process of modeling a pencil skirt.
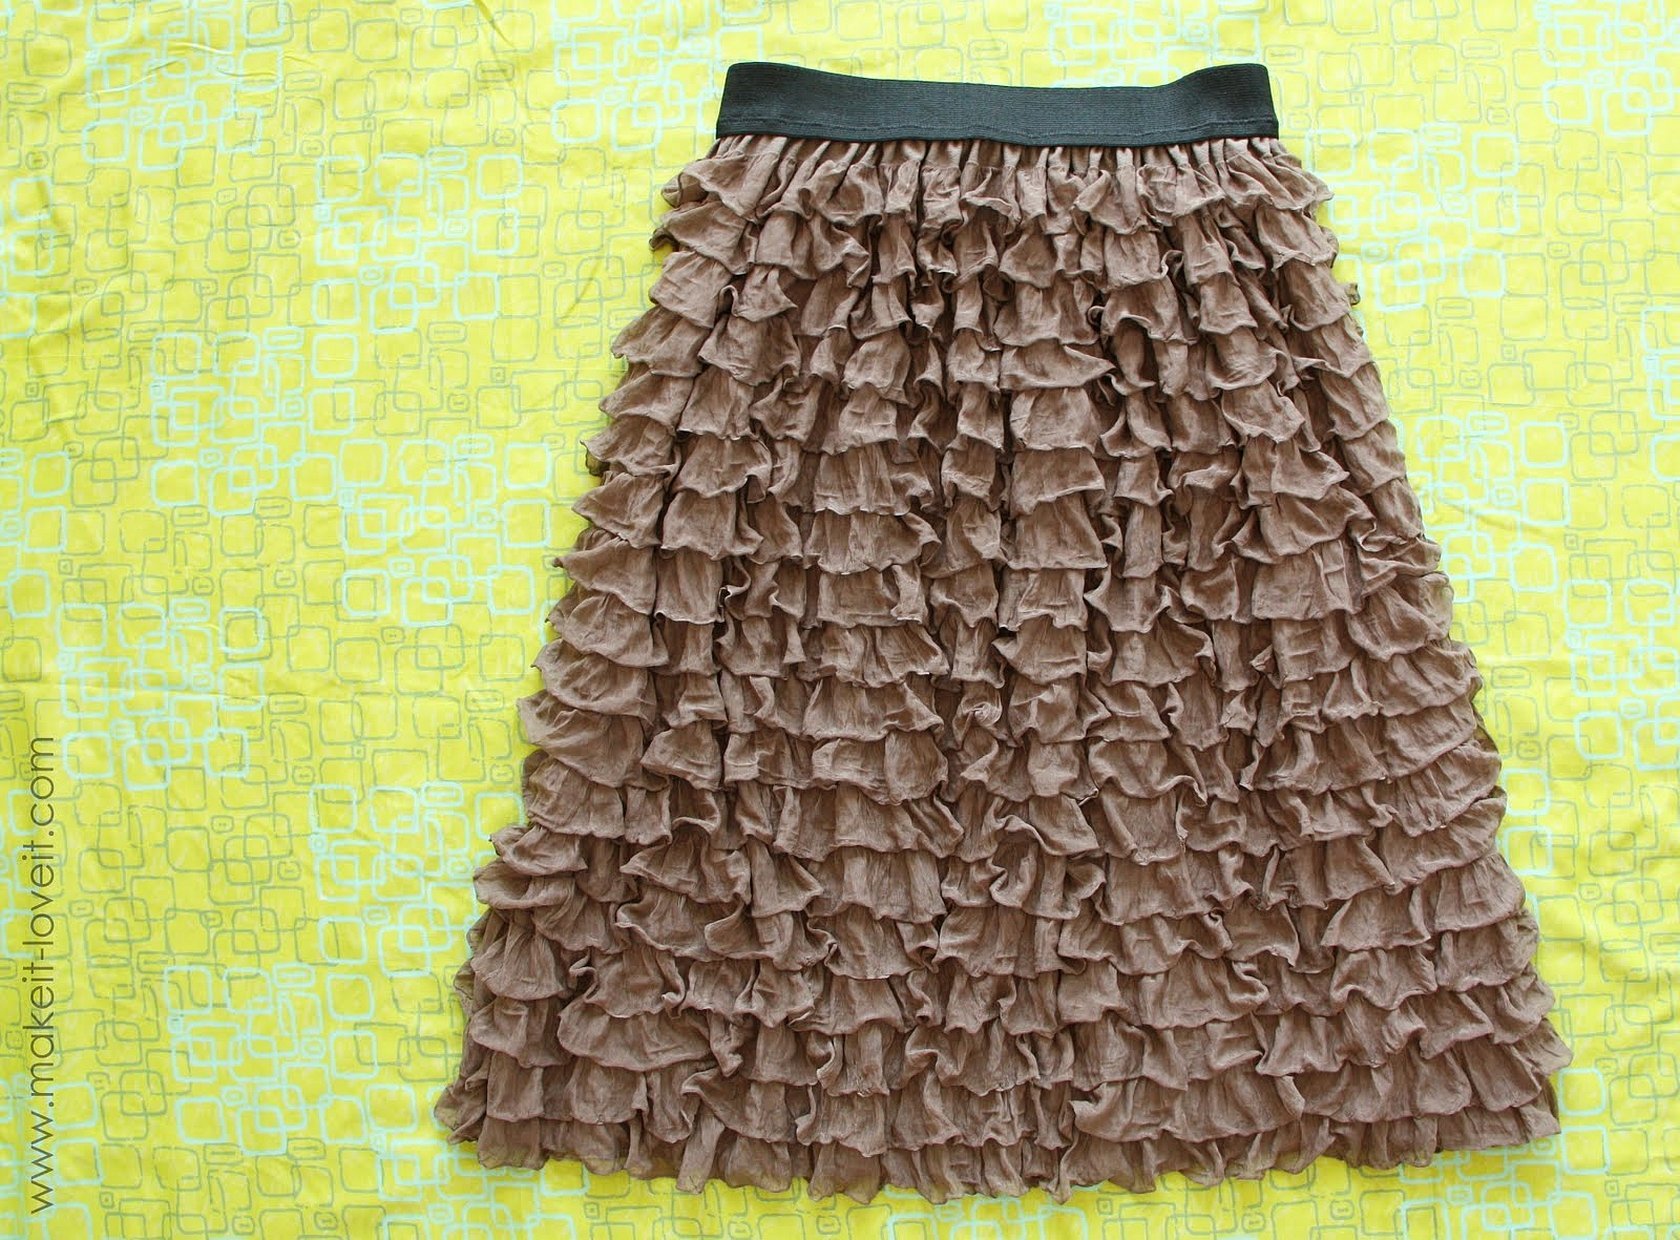
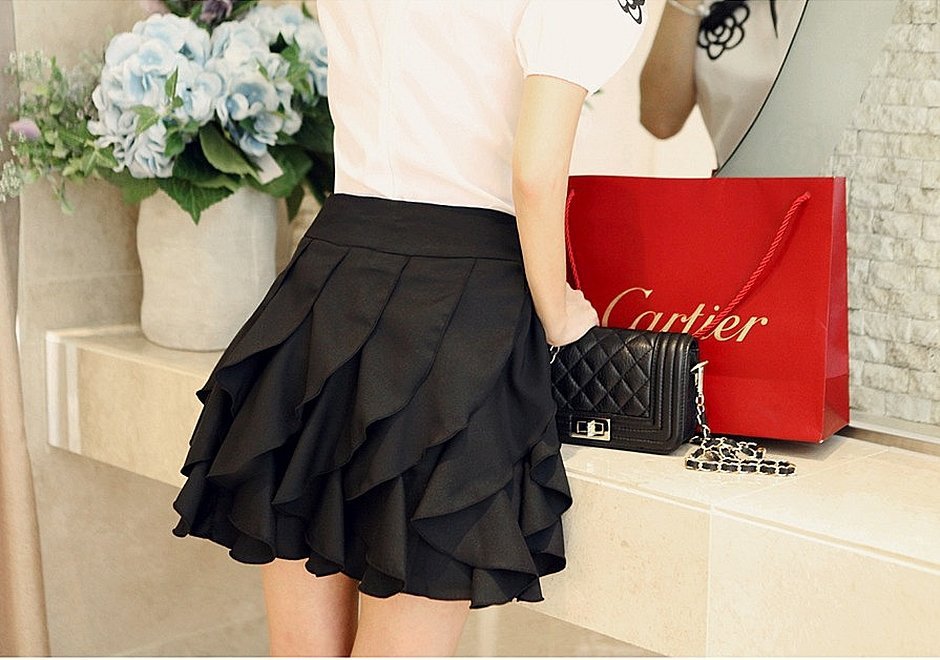
Skirt with spiral flounces
Ruffles offer unlimited possibilities for creating images. They decorate the hems of dresses, the necklines of blouses, skirts and even sleeves.
To sew a skirt with spiral details, you need to follow the following instructions:
- Measure 10 cm along the center line of the back panel of the skirt at the bottom line.
- Draw a line connecting the part to the panels from the obtained point to the middle of the upper edge of the front panel.
- Draw a vertical line and a horizontal line intersecting it.
- Draw a circle with the center at the intersection point of the lines with a radius of 3 cm.
- Draw a shuttlecock, gradually increasing its width counterclockwise from the inner circle.
- Measure the line connecting to the skirt and transfer the value to the line of the upper edge of the frill.
After completing the above steps, it remains to sew the detail to the skirt. Having processed the edge in advance. Any dress fabrics, viscose, crepe or satin are perfect for sewing the model.
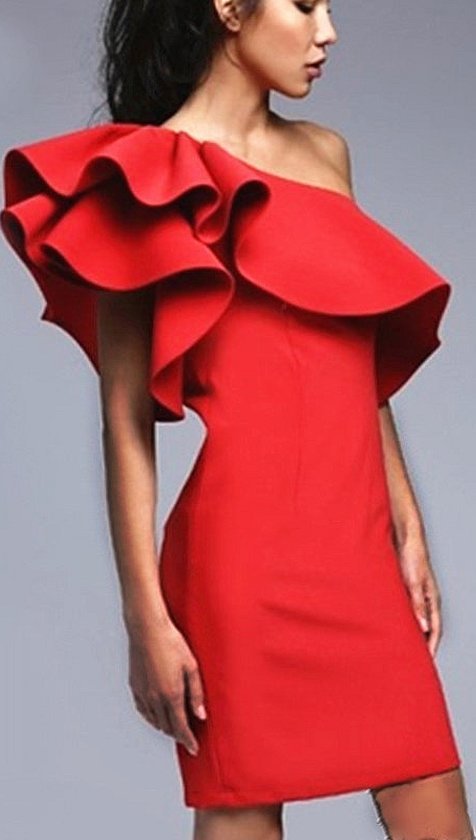
Skirts and dresses with shoulder flounces are perfect for shopping, special occasions, performances and office wear. Today they are presented in a huge variety, but this does not stop fashionistas from creating their own models, which after sewing remain unlike others. Before you start sewing, you need to take appropriate measurements and prepare materials and tools. If you have all of the above, sewing such parts and products with them will not be difficult.
Moreover, it is easy to make, flounces on a dress, the pattern is no different from those that are sewn onto skirts and blouses. Therefore, it is enough to learn how to sew two types - in a circle and in a spiral, and from things you can make modern and elegant models.


