Those who knit need to know how to sew a knitted product. There are many ways to connect parts with different seams. For this, you need a needle, a hook of your choice. Most seams are quite invisible and allow you to not leave extra ends.
- General information
- Loop-in-loop stitch
- Sew the two closed edges together
- Sew the two open edges together
- Connecting knitted parts
- Vertical seams "Mattress seam"
- On the front surface
- On the back loops
- For serrated edge
- How to connect transverse and longitudinal knitted pieces
- Seam for elastic
- Hand stitching
- Chain stitch
- Overlock stitch
- Method one - with a needle
- Method two - crochet
- Kitchener's seam
- Crocheting open loops
- Crochet joint - one end open
- Joining with half-columns without nakida
- Single crochet stitch connection
- Joining with single crochet stitches with a chain stitch
- Zig-zag connection
- Connection with a cord
General information
Those who are just learning how to sew knitted items on their own need to learn the basic instructions that concern working with parts. Finished parts of future clothing must be ironed before sewing. First, sew the shoulder seams, then the side seams.
Important! You cannot use a long thread when working, the optimal length is 45 centimeters.
Loop-in-loop stitch
The blind stitch "loop in loop" is performed by beginners. It is simple and allows you to qualitatively connect the details of garter and other knitting. A closed knitted seam can be used to sew a pocket or other part to a finished knitted garment. The open method is also often used when assembling material.

Sew the two closed edges together
The invisible row for closed edges is made similarly to the technology for the face and back. The thread is brought out from the back to the middle of the LP, after which they cling to the loop pull of the second part, bring the needle out to the middle of the front loop from top to bottom.
Important! You shouldn't use thick tools when working.
Sew the two open edges together
To make invisible stitching, insert the needle 2 front steps, skip the back ones. Repeat the action on the entire length of the fabric. Then turn the open material over and stitch the opposite side. It is important to stitch without tightening the thread too much.
Connecting knitted parts
Svetlana Kolomiets knows how to beautifully sew a knitted product. On her channel, she clearly shows convenient ways to work with a needle and a hook. It is recommended to pay attention to her master class on connecting parts using the "loop to loop" method. Watching the lessons of the knitting school will be useful even for experienced craftswomen.
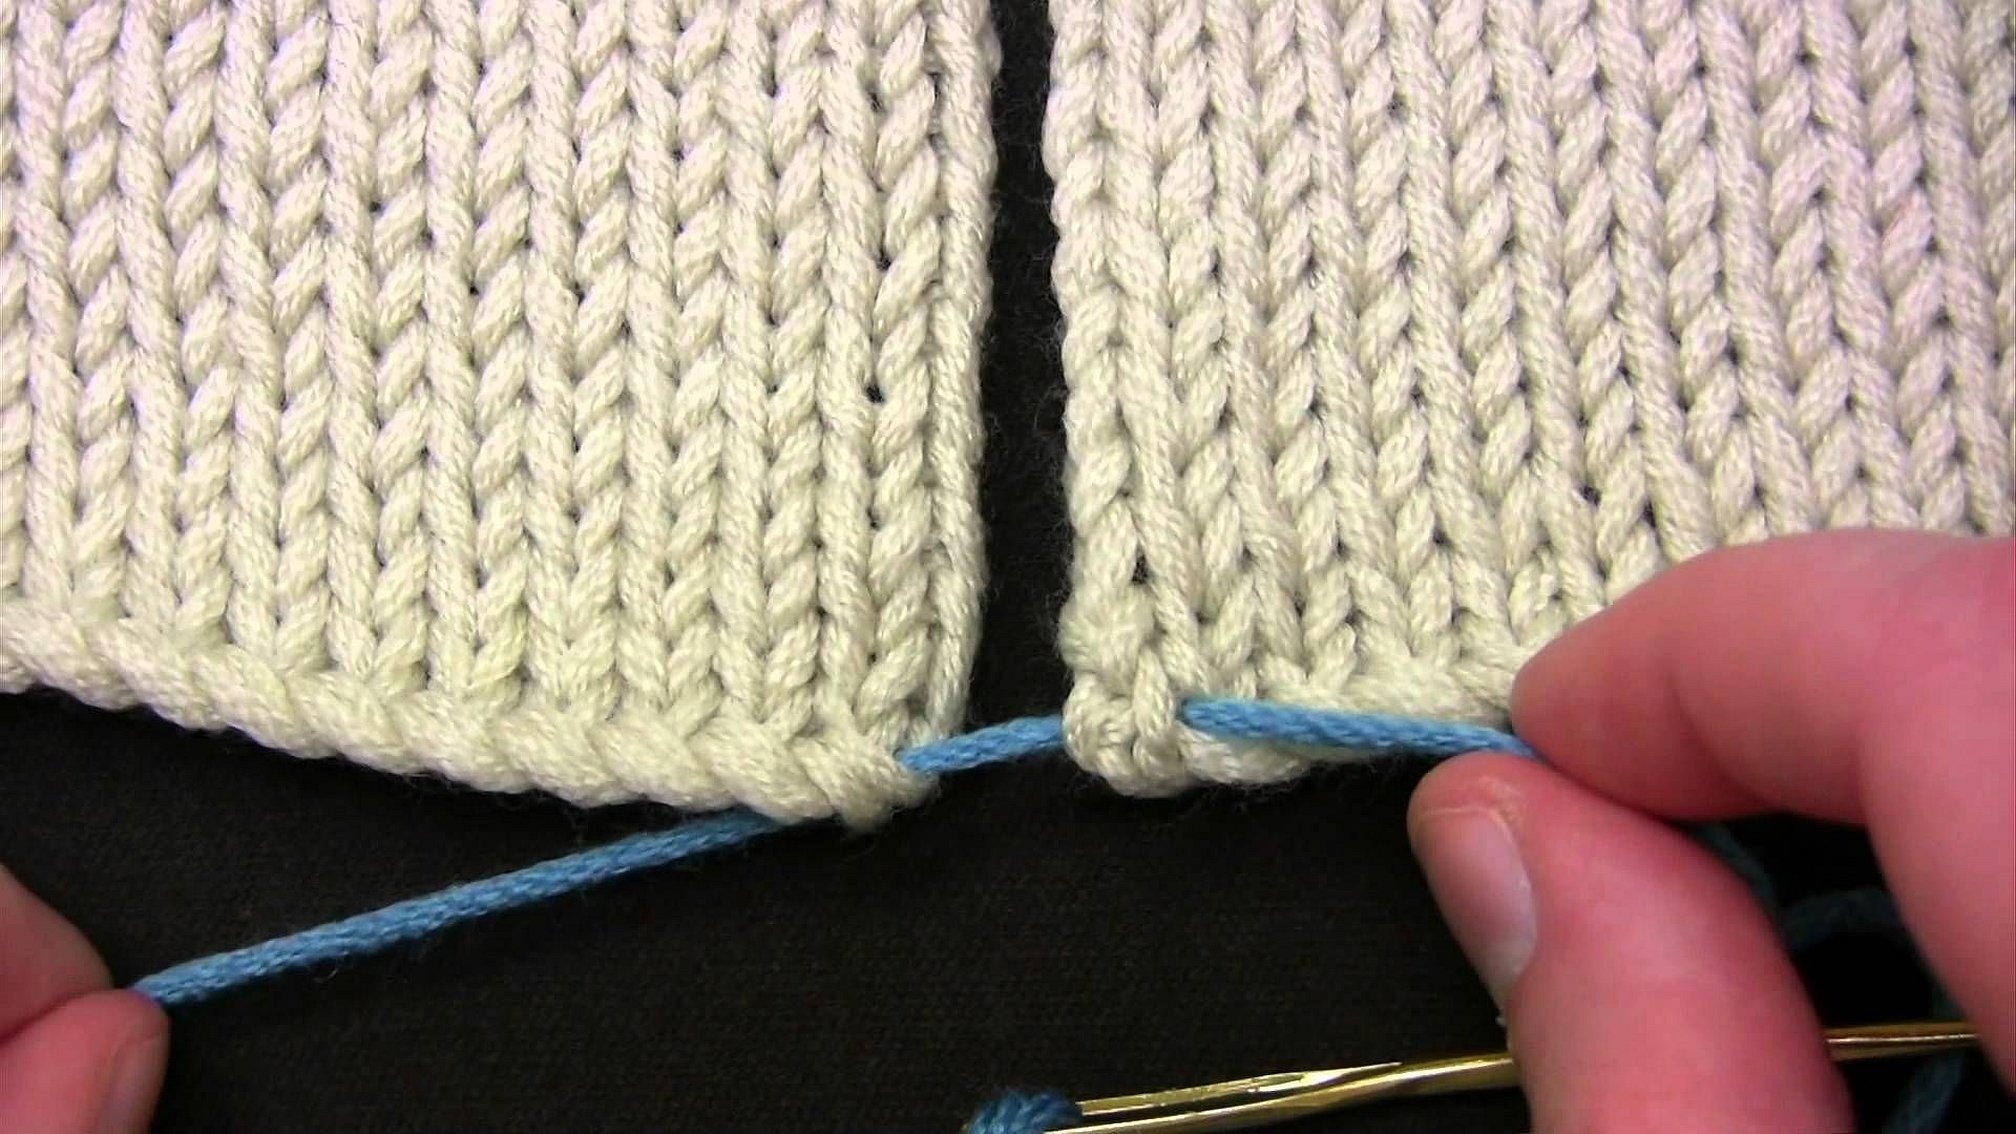
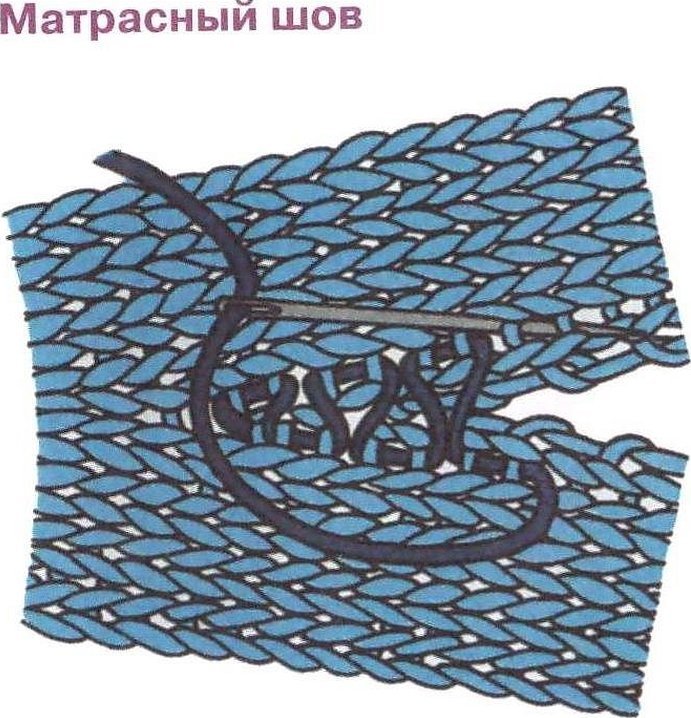
Vertical seams "Mattress seam"
The correct mattress step is made according to the same pattern as a simple knitted one. Knitted parts are placed close to each other row by row, and the same thread that was used for knitting is used for stitching. A hat, sleeve or other wardrobe item can be fastened with a mattress stitch.
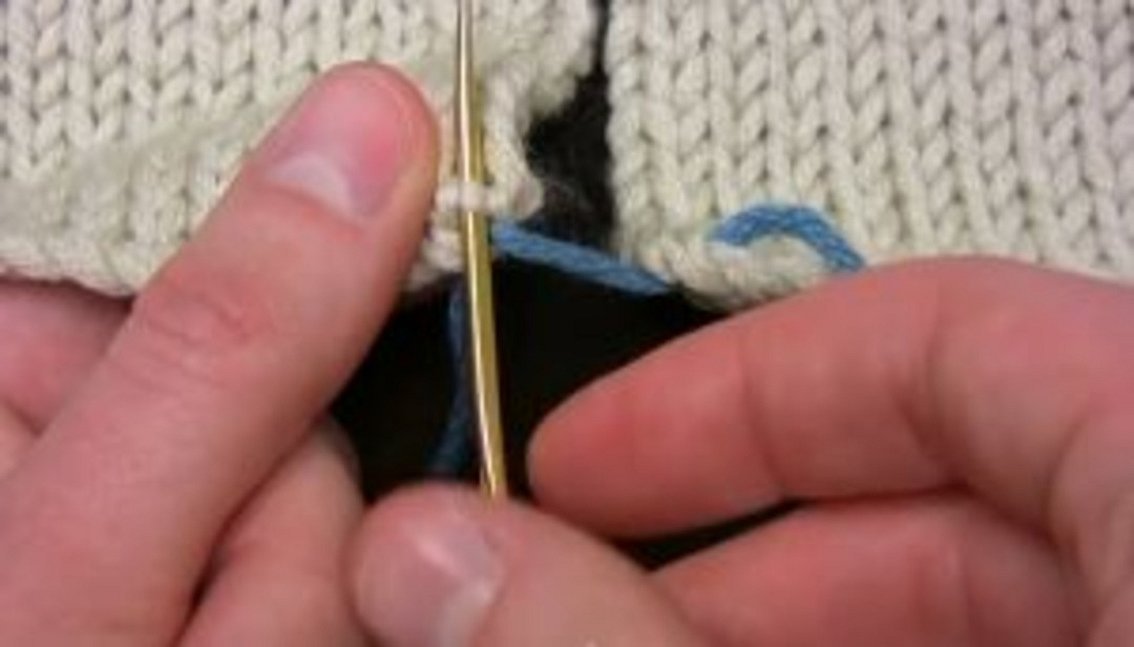
On the front surface
After knitting is finished, the pieces are ironed and then laid out on the table. The needle is inserted next to the edge and first loop, and the thread is pulled through. On the opposite side, the thread is picked up between the loops. Then the steps are repeated alternately and the thread is tightened.
On the back loops
The loop is made in a similar way. The tool is used to pierce the place between the outer and the next loop. Then it is stuck between the edge and the next hole. After 3 centimeters, the thread is pulled up.
For serrated edge
Knitting along a scalloped edge is more difficult, but the algorithm of actions does not change. The needle is passed through the thread between the edge and the next hole, and also periodically pulled up, observing the intervals.
How to connect transverse and longitudinal knitted pieces
To sew the back, shoulder part, sleeve or front panels, string a loop below the closed ones, pull the thread through. Then pull it between the outer and next loop. Repeat the steps, tighten the thread every 2-3 centimeters.
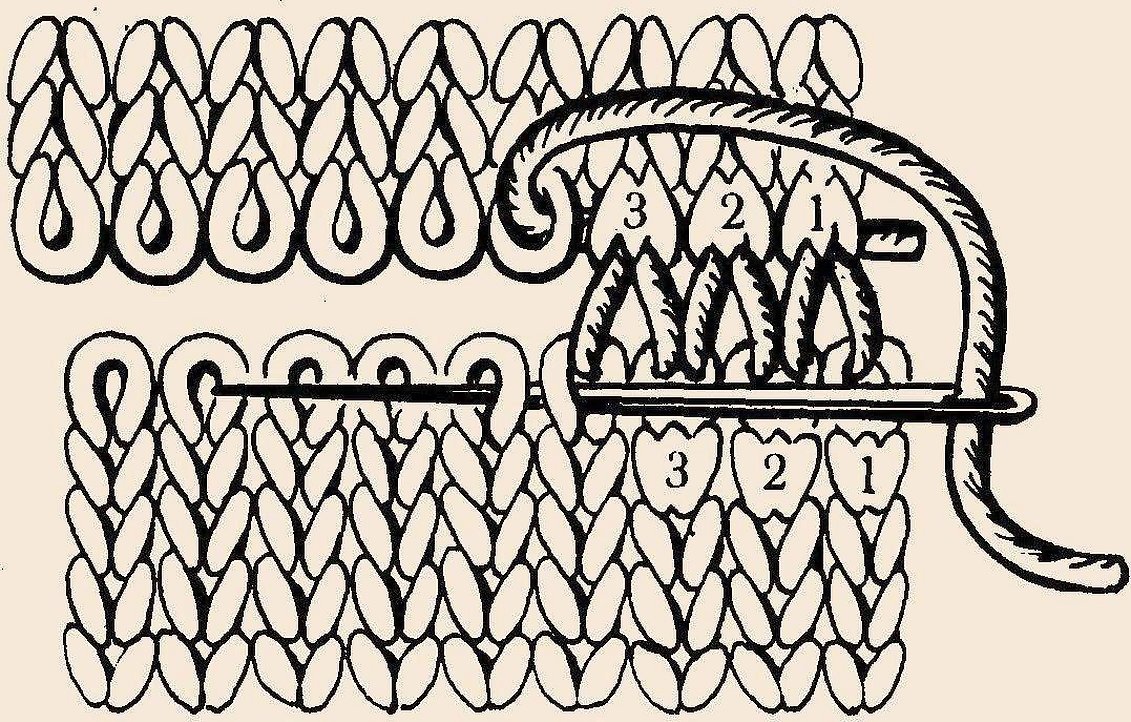
Seam for elastic
Knitting of this type is finished with a seam intended for this purpose. For this, additional rows are knitted, and then the finished part is steamed using gauze. And before sewing, a row of auxiliary thread is removed. The needle is pulled through two eyes from below, the thread is pulled and stuck into 2 upper parts. After the first side, the loops are closed with the second.
Hand stitching
If the yarn requires preparation, the item is ironed and then sewn. The advantage of the seam is that it will not tighten the item. It is important to pass the thread below the closed row. The stitches are led back, and the thread is not damaged.
Important! Periodically, you need to turn the piece over to the back side to monitor the quality of the stitches.
Chain stitch
When sewing the bottom of the garment, this type resembles a horizontal line of air loops. The thread is secured on the back and the needle is brought out to the front of the knitting. The base is thrown from right to left. The needle is pulled through and the thread is held, tightening the chain.
Overlock stitch
The overlock stitch connects the main parts of the product with pockets, piping, and strips. Before starting work, be sure to iron each component. Types of stitch:
- with a needle;
- crochet.
Method one - with a needle
The part is pierced with a needle from the inside at the second step. Then it is stuck into the first loop and pulled out through the third hole. Then the needle is led from top to bottom into the second loop and pulled through the fourth hole from bottom to top. The advantage of the product is that it holds its shape for a long time.
Method two - crochet
A needle is not always suitable for the job. Therefore, there is a way to knit the same seam using a hook. To do this, take a short tool, fold the parts face to face and knit them with a half-column.

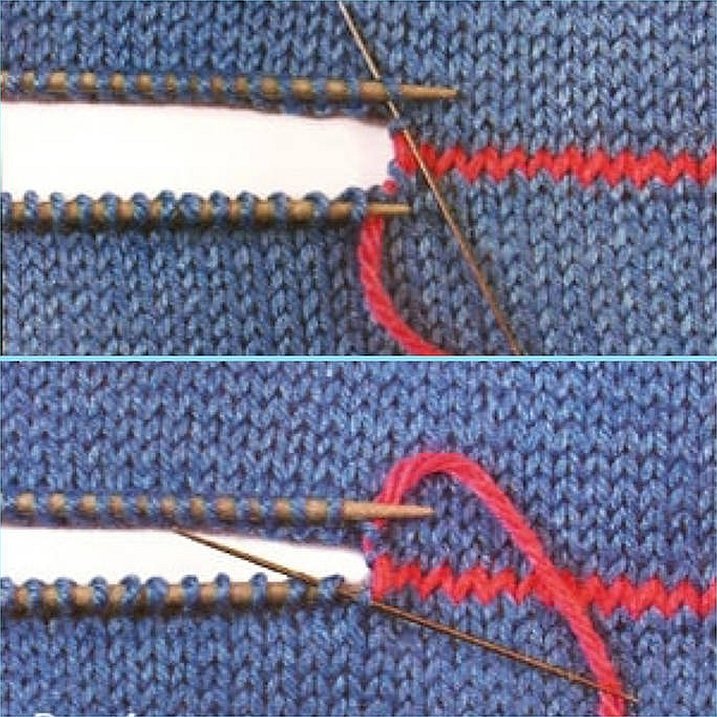
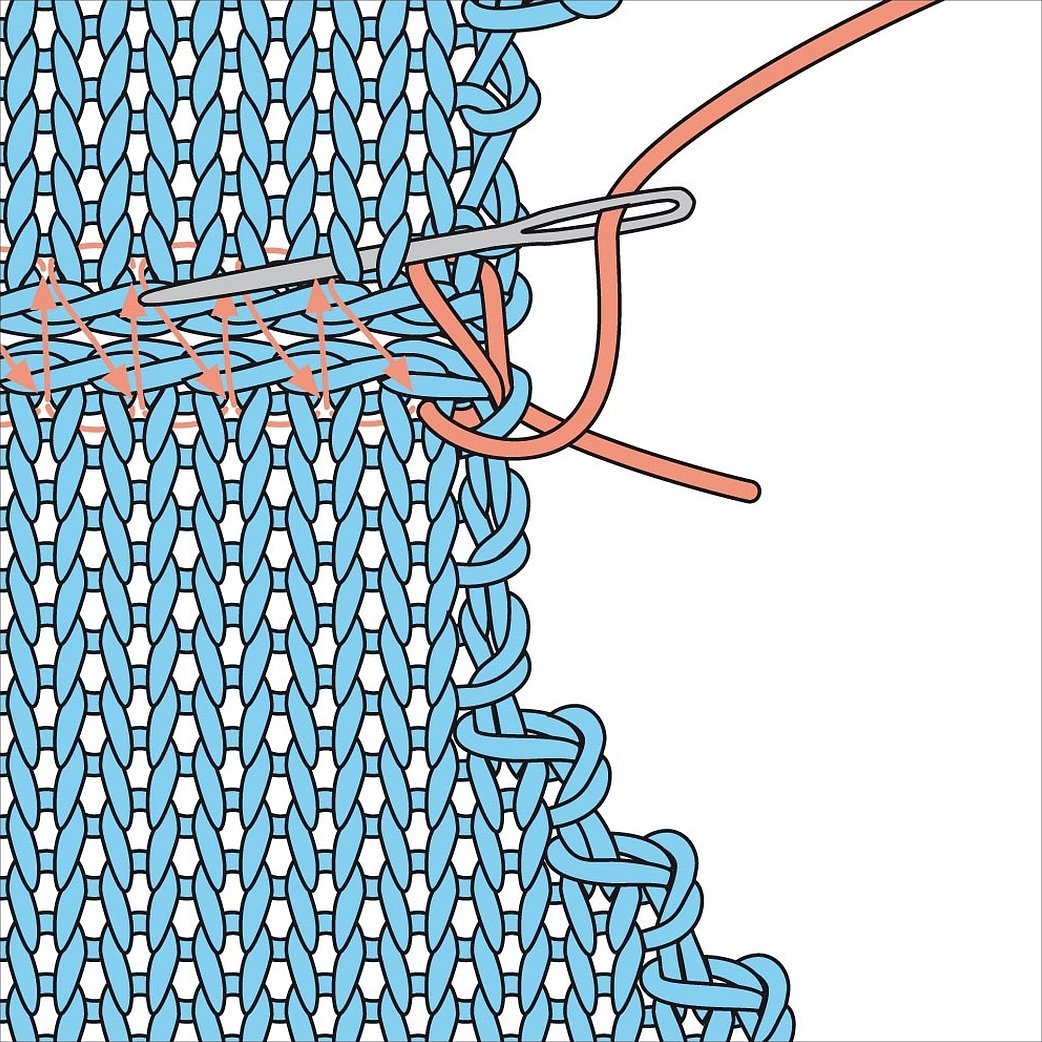
Kitchener's seam
This option allows you to connect parts qualitatively and beautifully. Procedure:
- Bring the needle out through the nearest hole on the knitting needle and remove as on the front side. Insert the thread into the second loop as on the back side. Tighten the thread.
- Insert the needle into the first hole on the second knitting needle from the front and drop the loop. Insert the needle into the second loop on the second knitting needle from the back and leave it. Tighten the thread.
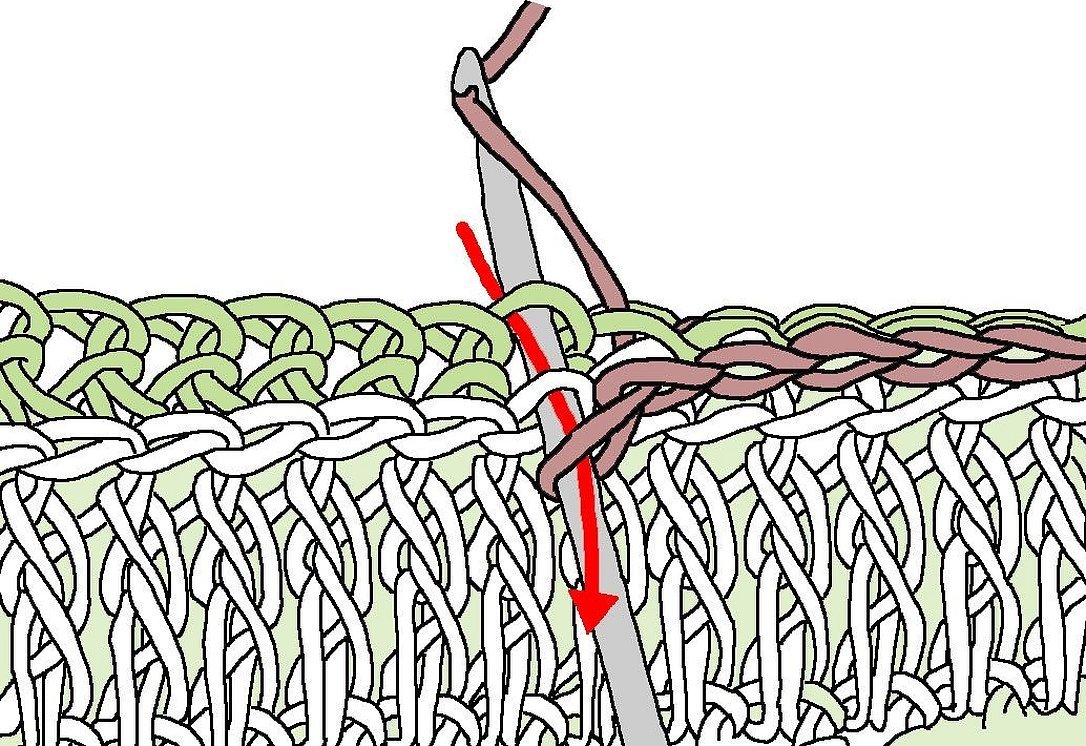
Crocheting open loops
Combine the parts face to face and pick up two steps with the tool. Make sure that there is 1 piece from each part of the knitted product on the hook. Then pick up the same number of the following loops and pull them through the loops on the hook. Work in this way along the entire length. The stitched row should resemble a braid.
Crochet joint - one end open
You need to unravel one edge and leave one open, then fold them inside out. Puncture the closed edge between the loops and pick up one piece from the open side, pull it through the "fabric". Then puncture and pick up by pulling it through the fabric and the loop on the hook.
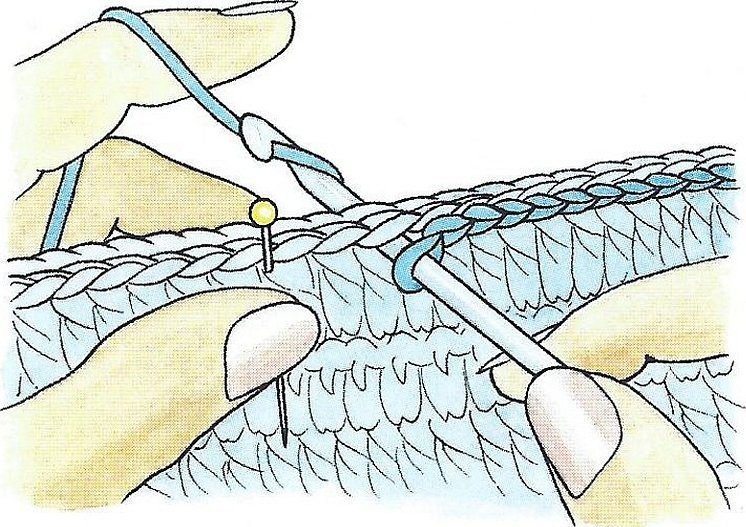
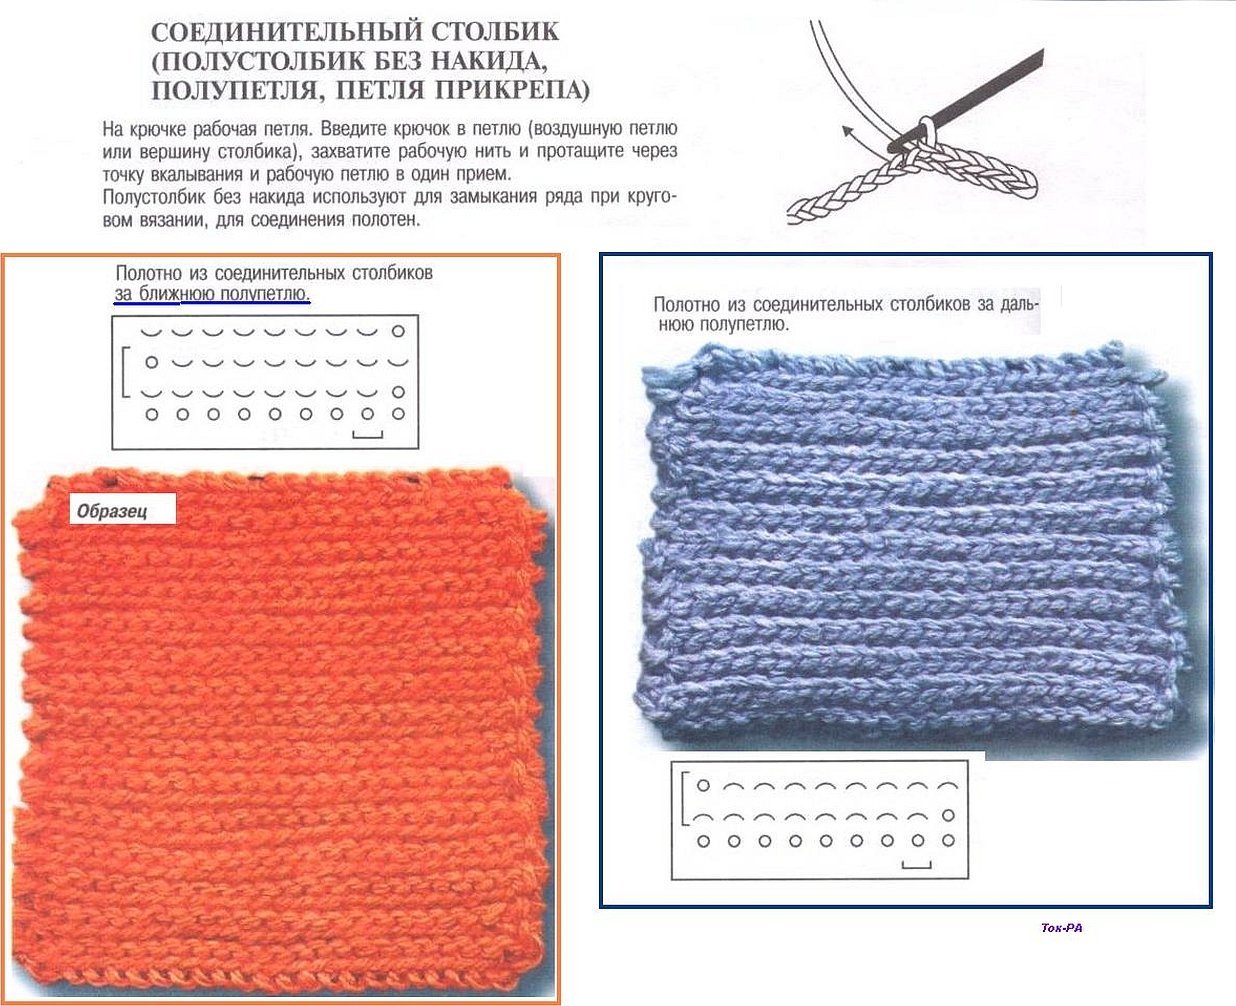
Joining with half-columns without nakida
To make the seam, you need to fold the two parts of the product face to face, pull the hook through them. Then take out the loop and repeat the first step, grabbing the thread. Then pull out the eye and pull it through the loop on the tool.
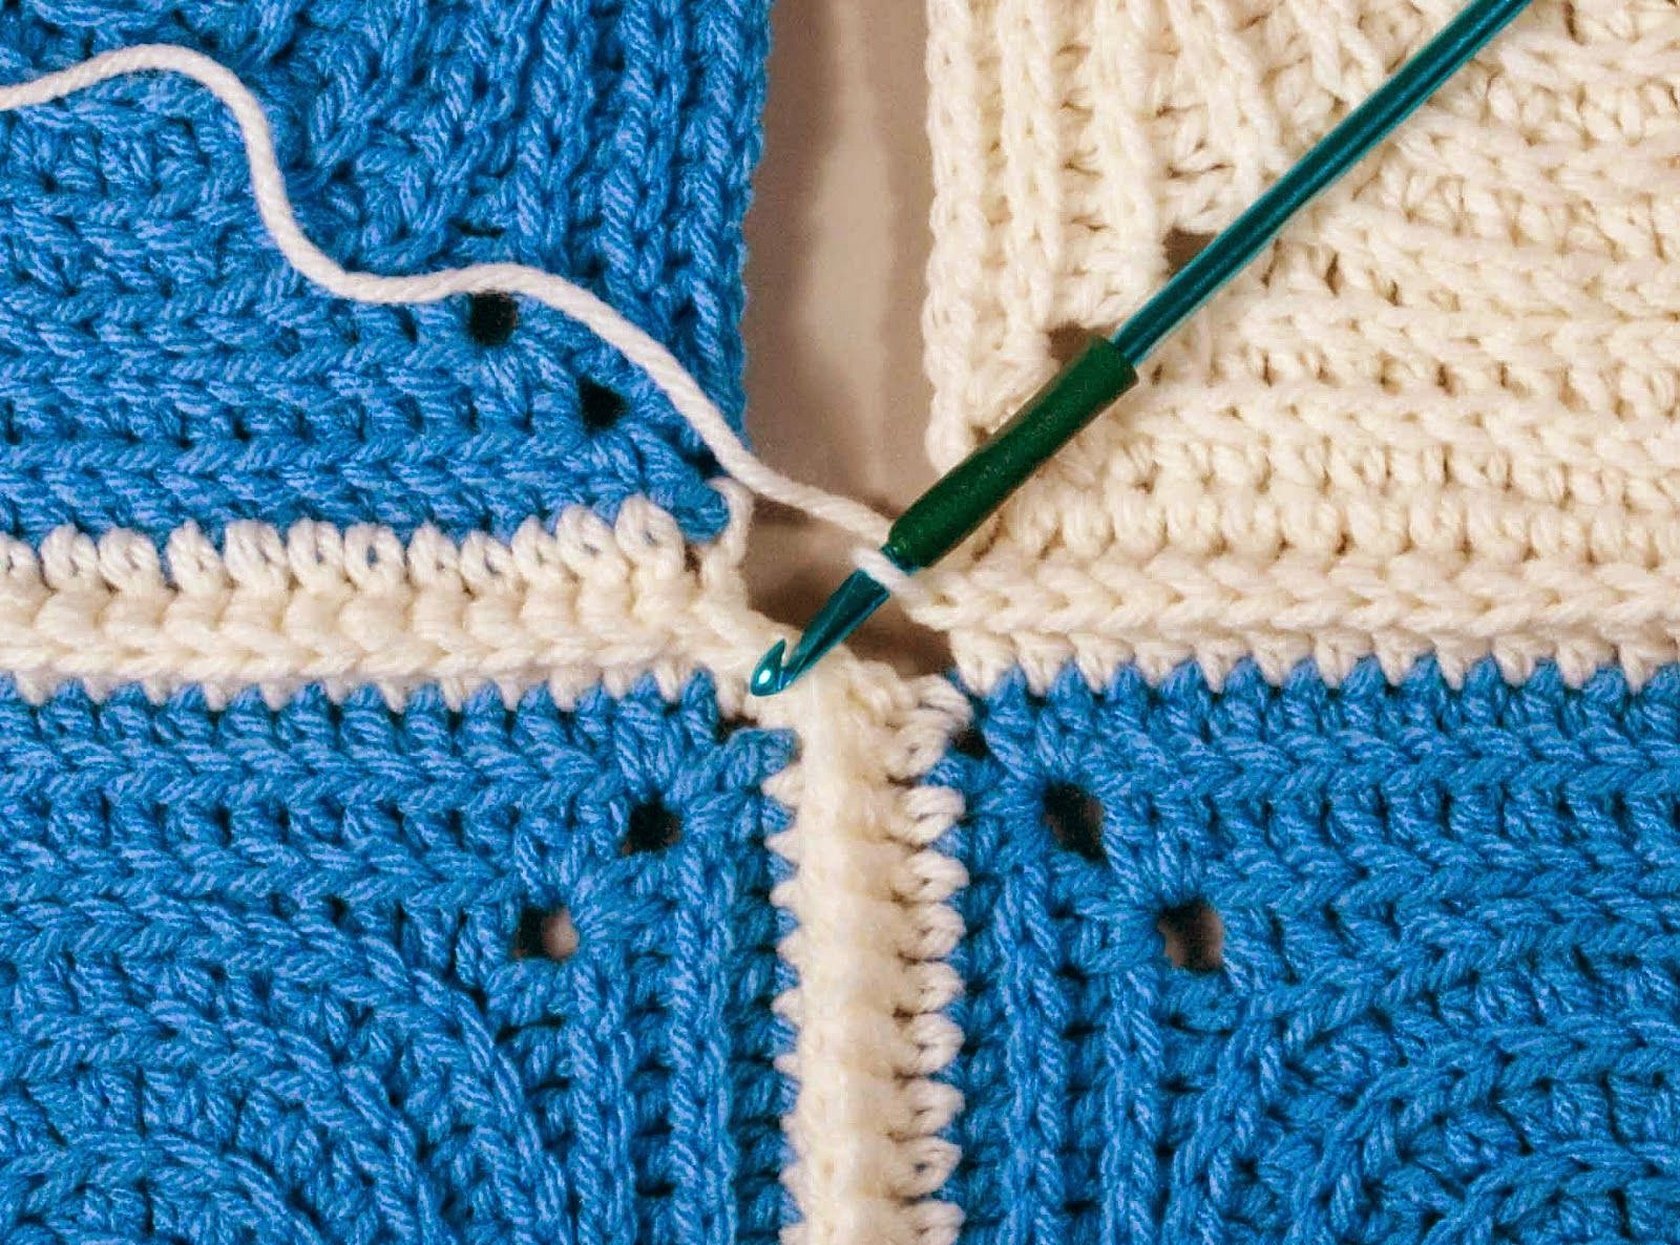
Single crochet stitch connection
The jacket can be sewn from knitted parts using single crochet stitches. They also decorate the clothes. To do this, fold two parts inside out and knit single crochet stitches, capturing only the edge holes of both sides. The actions are performed on the inside.
Joining with single crochet stitches with a chain stitch
If the yarn is not flat, but thick, then this type of connection is used. The parts are folded with the wrong side facing each other, then single crochet stitches are knitted with air loops, 1-2 loops are skipped in turn and another single crochet stitch is knitted.
Important! This method is recommended for connecting parts whose connection must be elastic.
Zig-zag connection
The idea is that the hook grabs the edge loops of one part of the product, then the other. The joint is not very tight, it is visible from all sides. The fabric is connected with a contrasting thread, or the same color is selected.
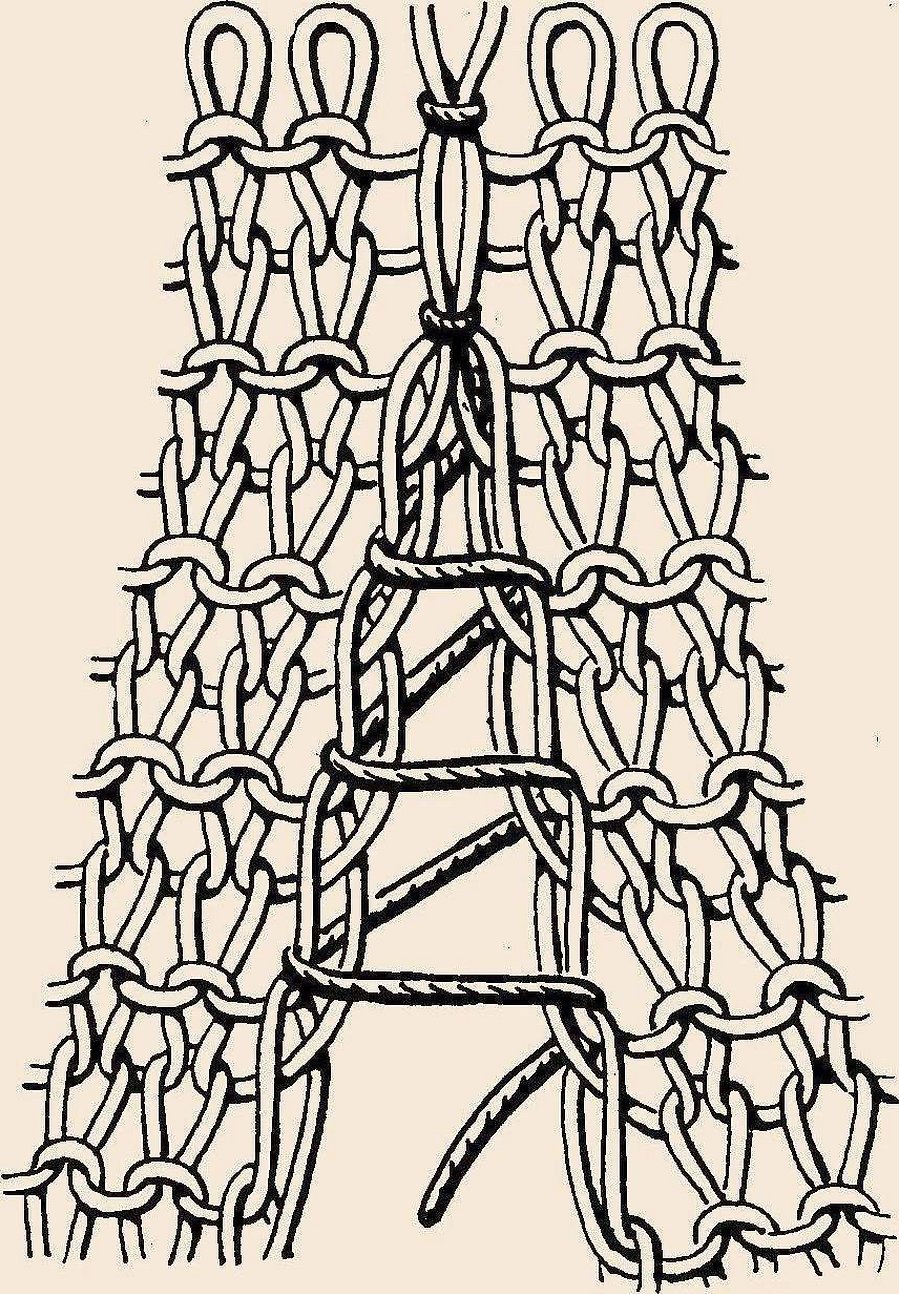
Connection with a cord
Sometimes needlewomen use a cord to help them. To sew, make 3 additional loops. The first loop of the right part of the product is thrown onto the knitting needle, it is knitted with the cord loop into the first front loop. The first front loop is knitted on the cord. The third and first loops of the left part are knitted into the first loop with a draw through.
When all parts of the future knitted product are ready, they are connected with a needle or a hook. For this, different types of seams are used depending on the place of connection, the type of yarn and the desired result.


