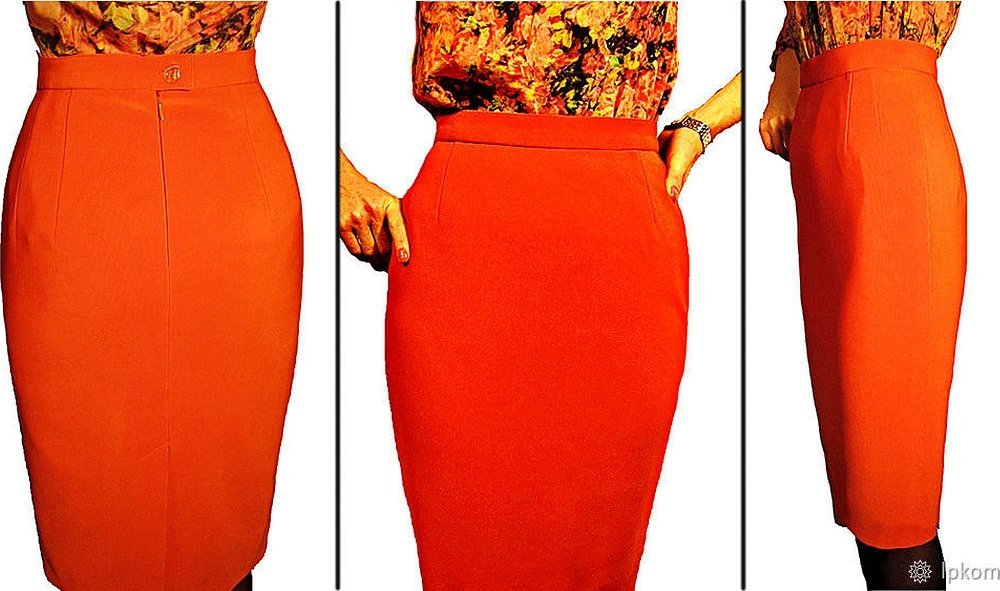
A skirt is an essential item of any woman's wardrobe. A straight-cut skirt can not only complement any look, but also highlight the advantages and, if necessary, hide the disadvantages of the figure. Representatives of the fair sex can buy a wardrobe item in a store, or they can make it themselves. The simplest pattern for a skirt for beginners will help you sew it at home. Step-by-step instructions will greatly simplify the process.
Taking measurements
The initial stage of making a straight skirt is taking measurements. It is necessary to correctly construct a drawing of the future wardrobe item taking into account women's parameters.
It is important to take measurements correctly. To make a skirt, you will need four parameters:
- waist measurement to be divided in half (WAM);
- the volume of the hips at their widest part, which must be divided in half (POB);
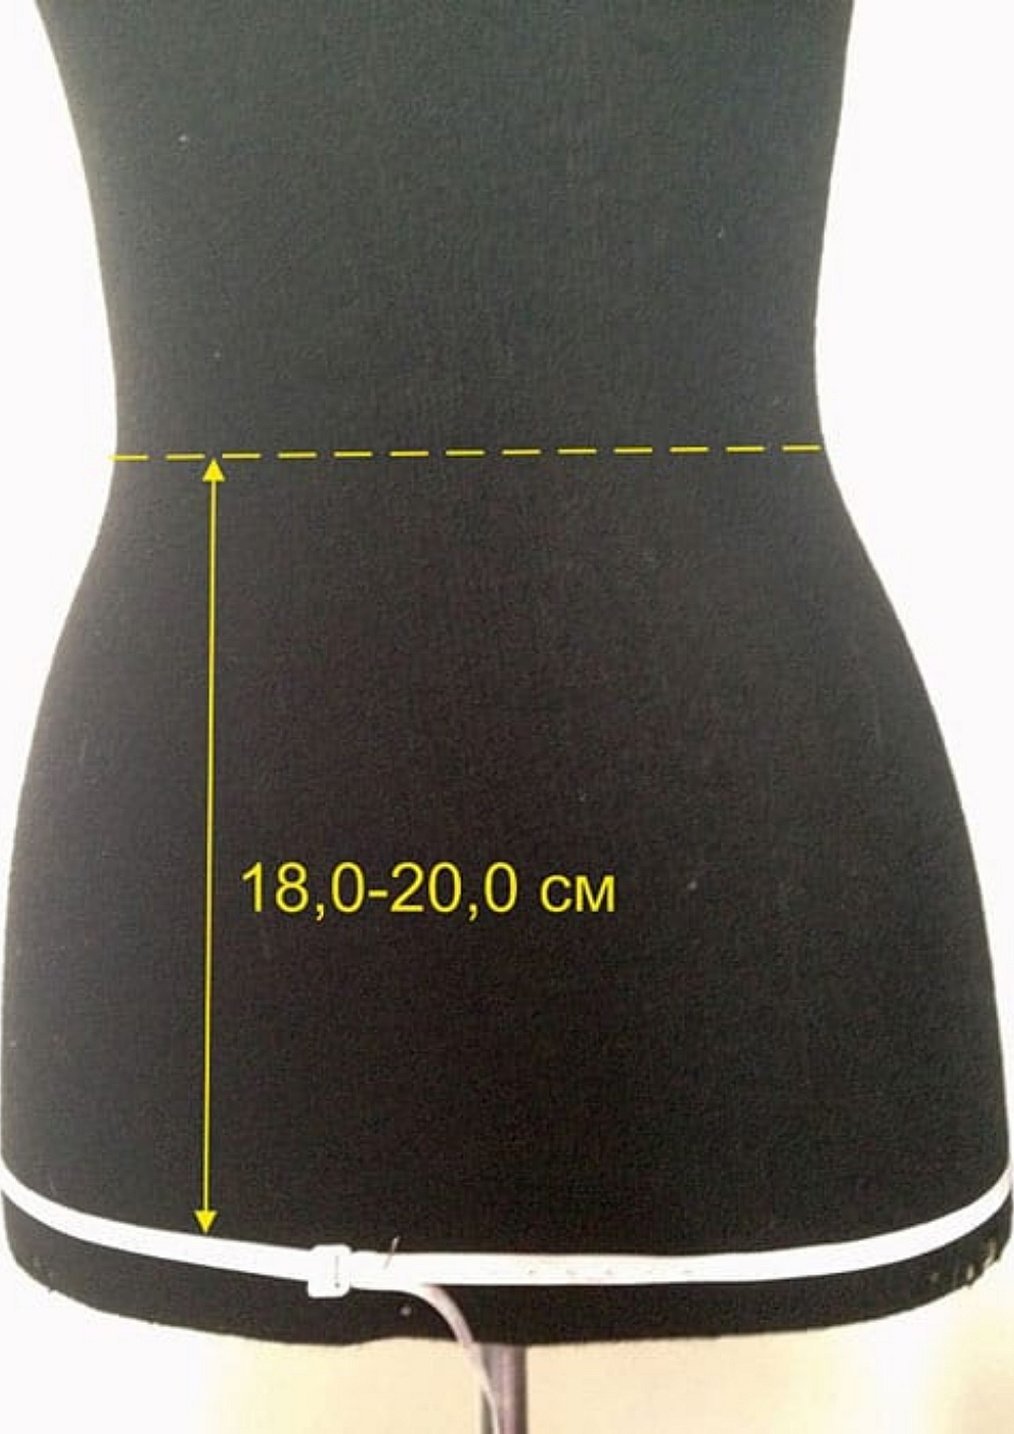
- seat height, which is the vertical distance from the hip line to the waist (W);
- back to waist length (BWL);
- product length (PL).
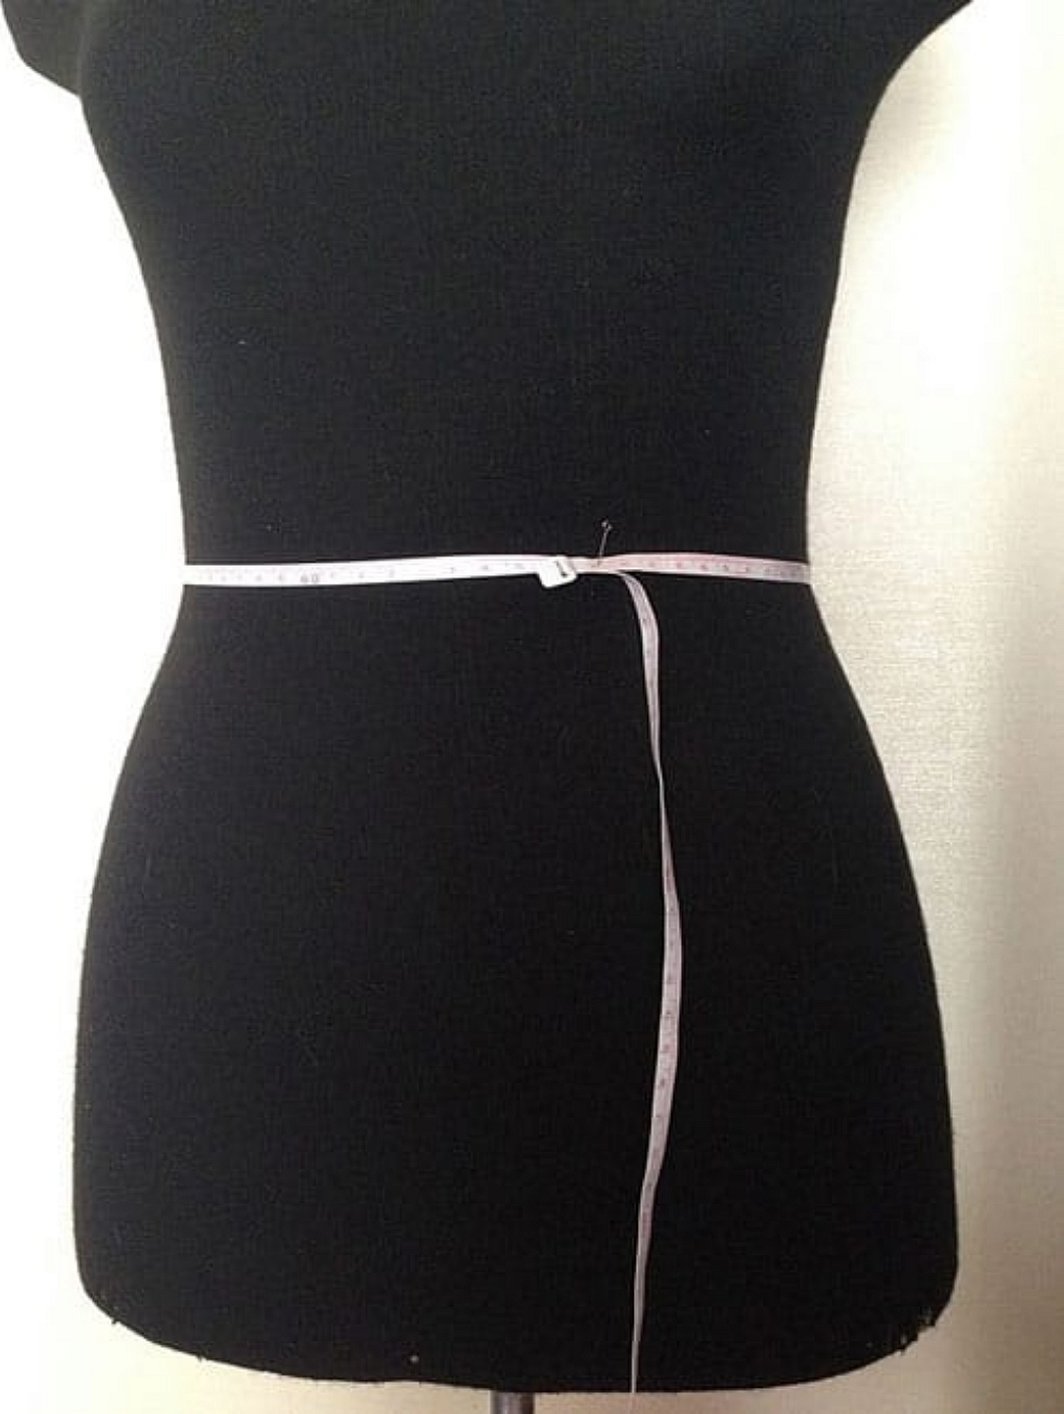
Waist circumference
One of the most important measurements. If you measure your waist incorrectly, the skirt will not fit. The waist is measured at its narrowest point. The tape measure should fit snugly around your waist.
Important! When taking measurements, do not wear tights. They have a tightening effect and can remove 1 to 3 cm of volume.
Hip circumference
The measuring tape should be placed on the most prominent parts of the hips. If a woman has a "breeches effect", it is necessary to measure it too. To do this, place the tape measure on its protruding parts. If the first measurement is significantly smaller than the second, the second should be taken into account.
Calculating fabric for pattern drawing
A correctly made pattern for a straight skirt will help you save material. If all the steps are done correctly, it will be possible to correctly distribute the skirt parts on the material and avoid unnecessary waste of fabric.
The main measurement for calculation is the width of the material. Accordingly, you need to focus on the width of the hips.
If the hip circumference according to the measurement does not exceed the width of the fabric minus 10 cm, then the fabric consumption is equal to one length of the skirt plus 20 cm, 10 of which is for the waistband and 10 for the hem and allowances at the waist.
For pleated skirts, the calculation is made depending on the number of pleats. If the skirt is in a circular pleat, you need to take three lengths of the skirt and add a few centimeters for the hem.
Instructions for constructing a pattern for a straight skirt
The next step is to create a pattern for a straight-cut skirt. A custom pattern will allow you to create a unique wardrobe item that will perfectly highlight all the advantages of your figure and hide the disadvantages. Store-bought items have one big drawback - they are sewn according to standard drawings. Therefore, such skirts will not suit women with a non-standard figure.
To construct the pattern you will need:
- graph paper;
- eraser;
- simple pencil;
- ruler;
- calculator;
- pattern.
The listed items can be purchased at any craft store and at an affordable price.
Features of grid construction
The construction of a pattern begins with the construction of a grid, which is an auxiliary five vertical and three horizontal lines. They determine the overall dimensions of the main parts of the product. Simply put, the grid determines the space in which the cutter will work.
The width of this indicator will be equal to the volume of the hips plus an allowance for free fit, the value of which is 2 centimeters. The length of the mesh is equal to the length of the product itself without allowances and additional increases.
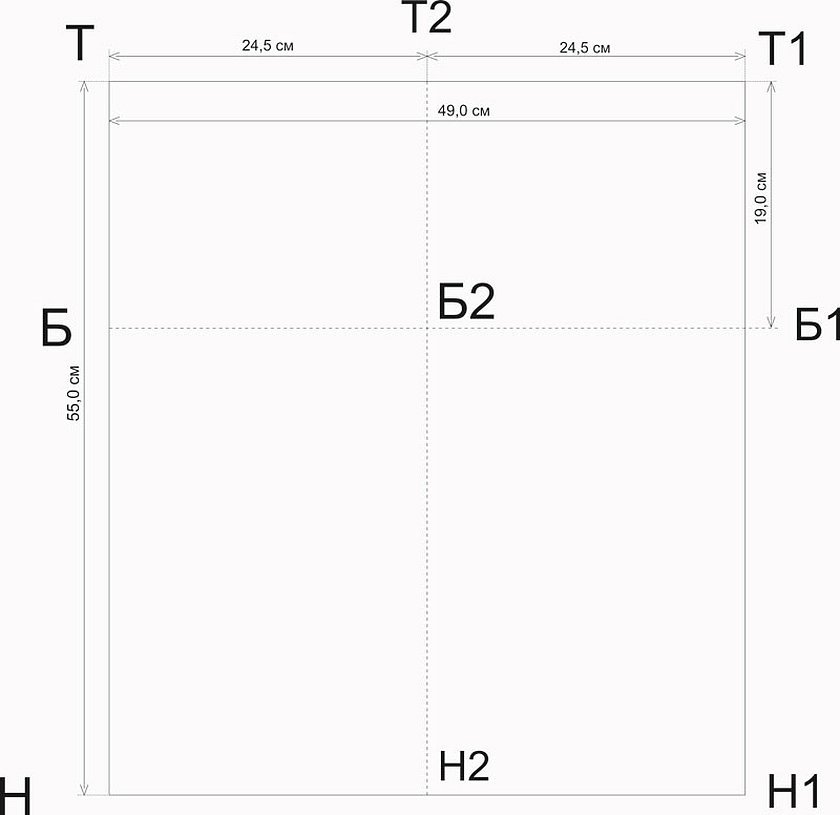
Once the main parameters of the grid have been determined, you can begin its direct design, which consists of several stages:
- First, you need to draw a horizontal waist line, the width of which is equal to the width of the grid.
- Then, from the left point of the waist line, you need to draw a vertical line downwards. It will determine the middle of the back half of the skirt, which is equal to the length of the mesh itself.
- The next step is to construct the front half of the skirt, which is also equal to the length of the mesh. To do this, draw a vertical segment from the right point of the waist line downwards.
- After that, you need to draw a horizontal bottom line, connecting the bottom points of the vertical segments.
- Finally, you need to draw a hip line, which is located from the waist line at the following distance: back length (BL)/2–1 centimeter.
- The hip line must then be divided into two equal parts and a point must be placed in the middle, through which an auxiliary line of the side cut must be drawn in the vertical direction.
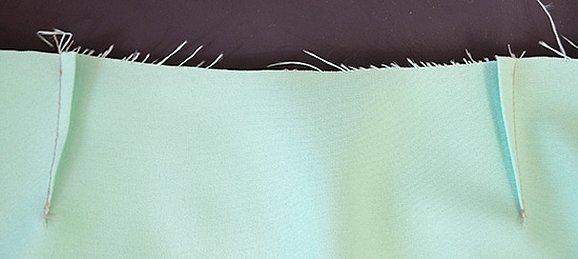
Darts
This stage plays an important role. Since the slightest inaccuracy will lead to the fact that the finished product will not sit tightly enough on the figure. It is especially important to correctly perform the calculation for owners of a non-standard figure.
The calculation of waist darts occurs in stages:
- First, you need to determine the total dart solution (TDS), which is equal to the mesh width minus the waist volume (WV).
- Then it is necessary to calculate the size of the notch along the side line, which is equal to half of the total solution, i.e. ORV/2.
- Then the dart solution on the back half of the skirt is determined to be equal to ¼ ORV + 1 centimeter.
- Finally, the dart solution on the front half of the skirt is calculated, equal to ¼ ORV - 1 centimeter.
Important! When calculating darts, the waist size is taken without allowances for free fit. Otherwise, the finished product will not fit tightly enough around the waist, and it will create the impression that the straight skirt is too big or cut incorrectly.
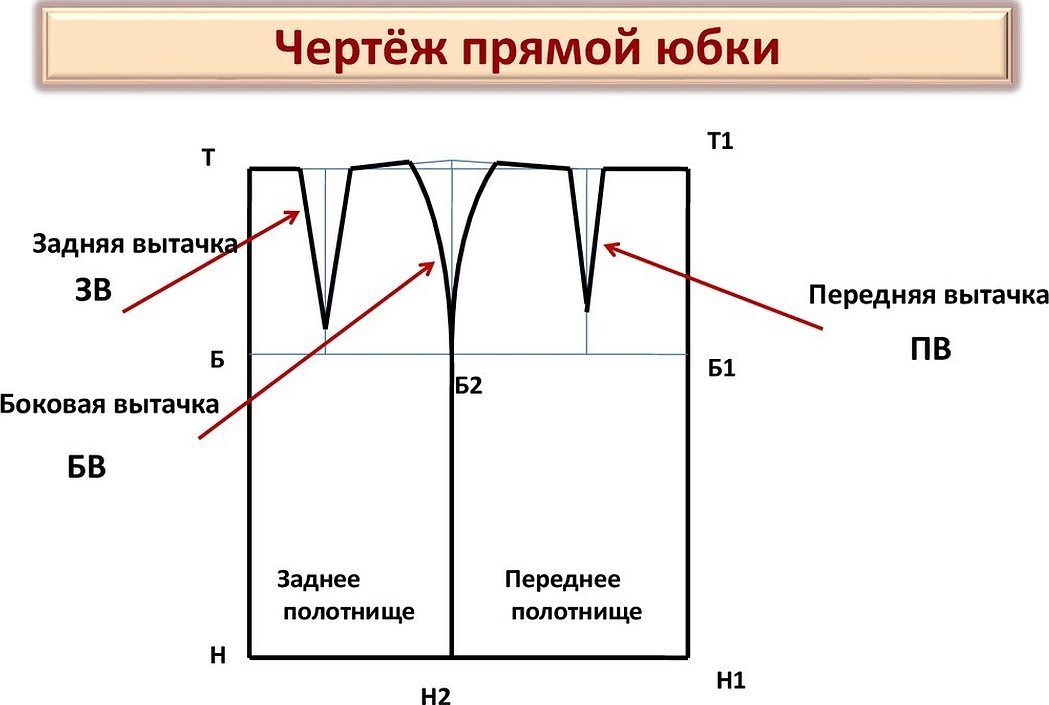
Back half of the product
It is necessary to draw a dart on the back half. To do this, measure a distance equal to ¼ of the waist volume along the hip line from the midline. From this point, draw the middle line of the dart with a dotted line. From it, measure half the solution to the right and left sides. The center of the dart is located 3 centimeters higher from the hip line. The sides of the dart must be drawn along inclined straight lines.
Then the side cut line is drawn. To do this, ½ of the dart solution is set aside from the auxiliary side line along the waist line. This point is connected by a convex curve to the middle of the hip line.
From the side line, the auxiliary line is set aside along the lower part of ½ of the accepted expansion. The calculated point is connected by a straight line to the middle of the hip line.
The side cut line is extended by 1 centimeter beyond the waist line. This point must be connected with a concave curve to the right upper point of the waist dart.
At the end of this stage, you need to draw the bottom line of the back half. To do this, the side cut line must be shortened by half a centimeter; a convex curve with the lower point of the middle of the back half of the skirt
Front of the skirt
First, you need to draw a dart on the front of the future product. To do this, measure a distance equal to ¼ of the waist circumference from the center of the front along the hip line. From the resulting point, draw the center line of the dart with a dotted line in a vertically upward direction.
From the shown line, measure in both directions along the waist line by ½ of the waist dart solution. The center of the dart is located 3 centimeters above the hip line.
Then the side cut line is drawn. To do this, from the auxiliary side line, ½ of the side dart solution is set aside to the right side along the waist. This point is connected by a convex curve to the middle of the hip line.
From the auxiliary side line, ½ of the accepted expansion is set aside along the bottom to the left. The resulting point is connected to the middle of the hip line. Then the side cut is extended beyond the mesh upwards by 1 centimeter. The point is connected by a concave curve to the left upper point of the waist dart.
At the end of the stage, you need to draw the bottom line. To do this, the side cut along the length must be equalized with the side cut of the back half. The line of the middle of the front is extended in the lower direction by 1 centimeter. The resulting point is connected by a convex curve with the point of alignment of the side seam.
Belt
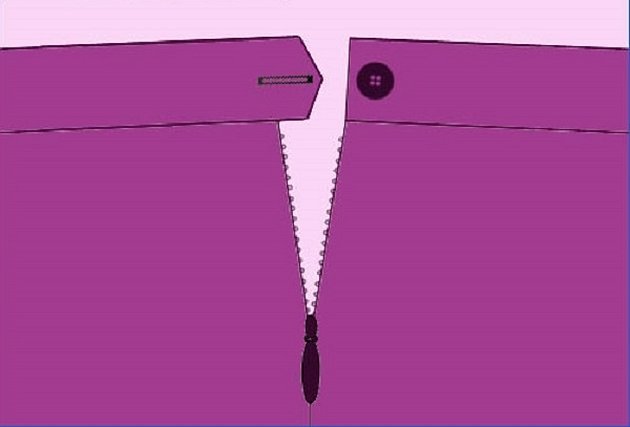
A straight skirt can be sewn without a belt. But if you plan to have one, you need to know how to make its pattern correctly. A straight belt of a straight skirt can be made with or without overlap. Without overlap is when the short transverse sides of the belt converge end-to-end, without overlapping each other in any way.
A belt without overlap is used if hooks or a zipper are supposed to be used to fasten the skirt. The latter can be located not only at the back, but also, for example, at the side or even at the front.
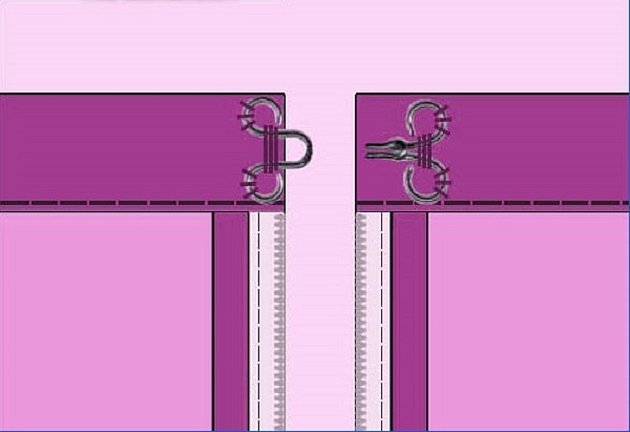
In these cases, the straight waistband of a straight skirt is a long rectangular piece with a fold. The width of the waistband is determined at will and can vary from 2 to 5 centimeters. The length of the piece corresponds to the length of the waistline on the skirt pattern. You need to add seam allowances - 0.7-1.5 cm.
An overlapping belt is when one side of the part overlaps the other. The allowance for the fastener is 3 centimeters. The shape of the allowance for the fastener on the side of the upper part can be rectangular, rounded, or with corners.
The belt can be replaced with an elastic band. In this case, additional details such as a zipper or buttons and hooks will not be needed.
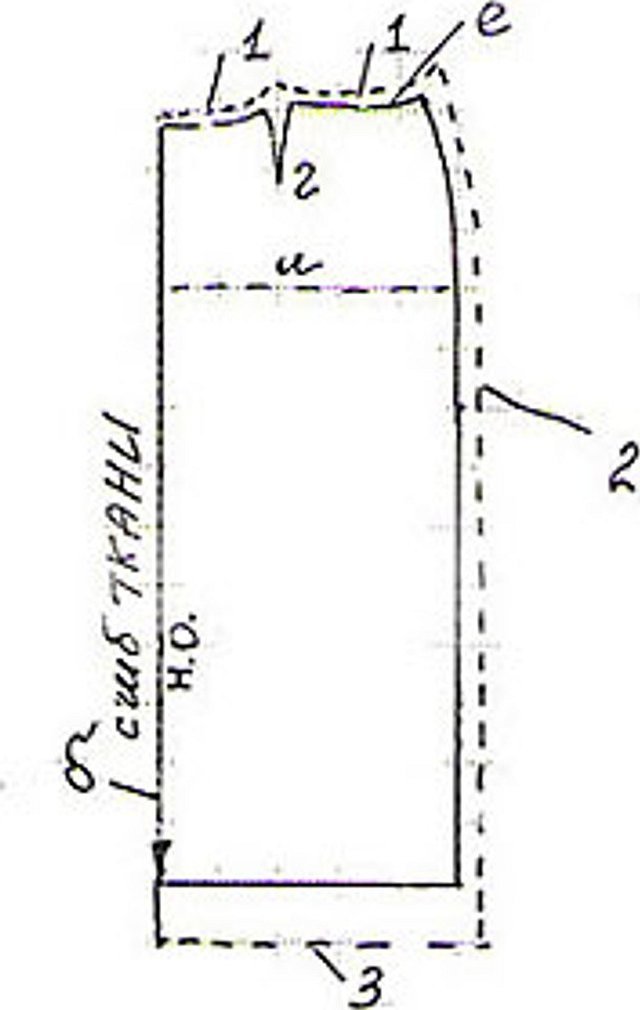
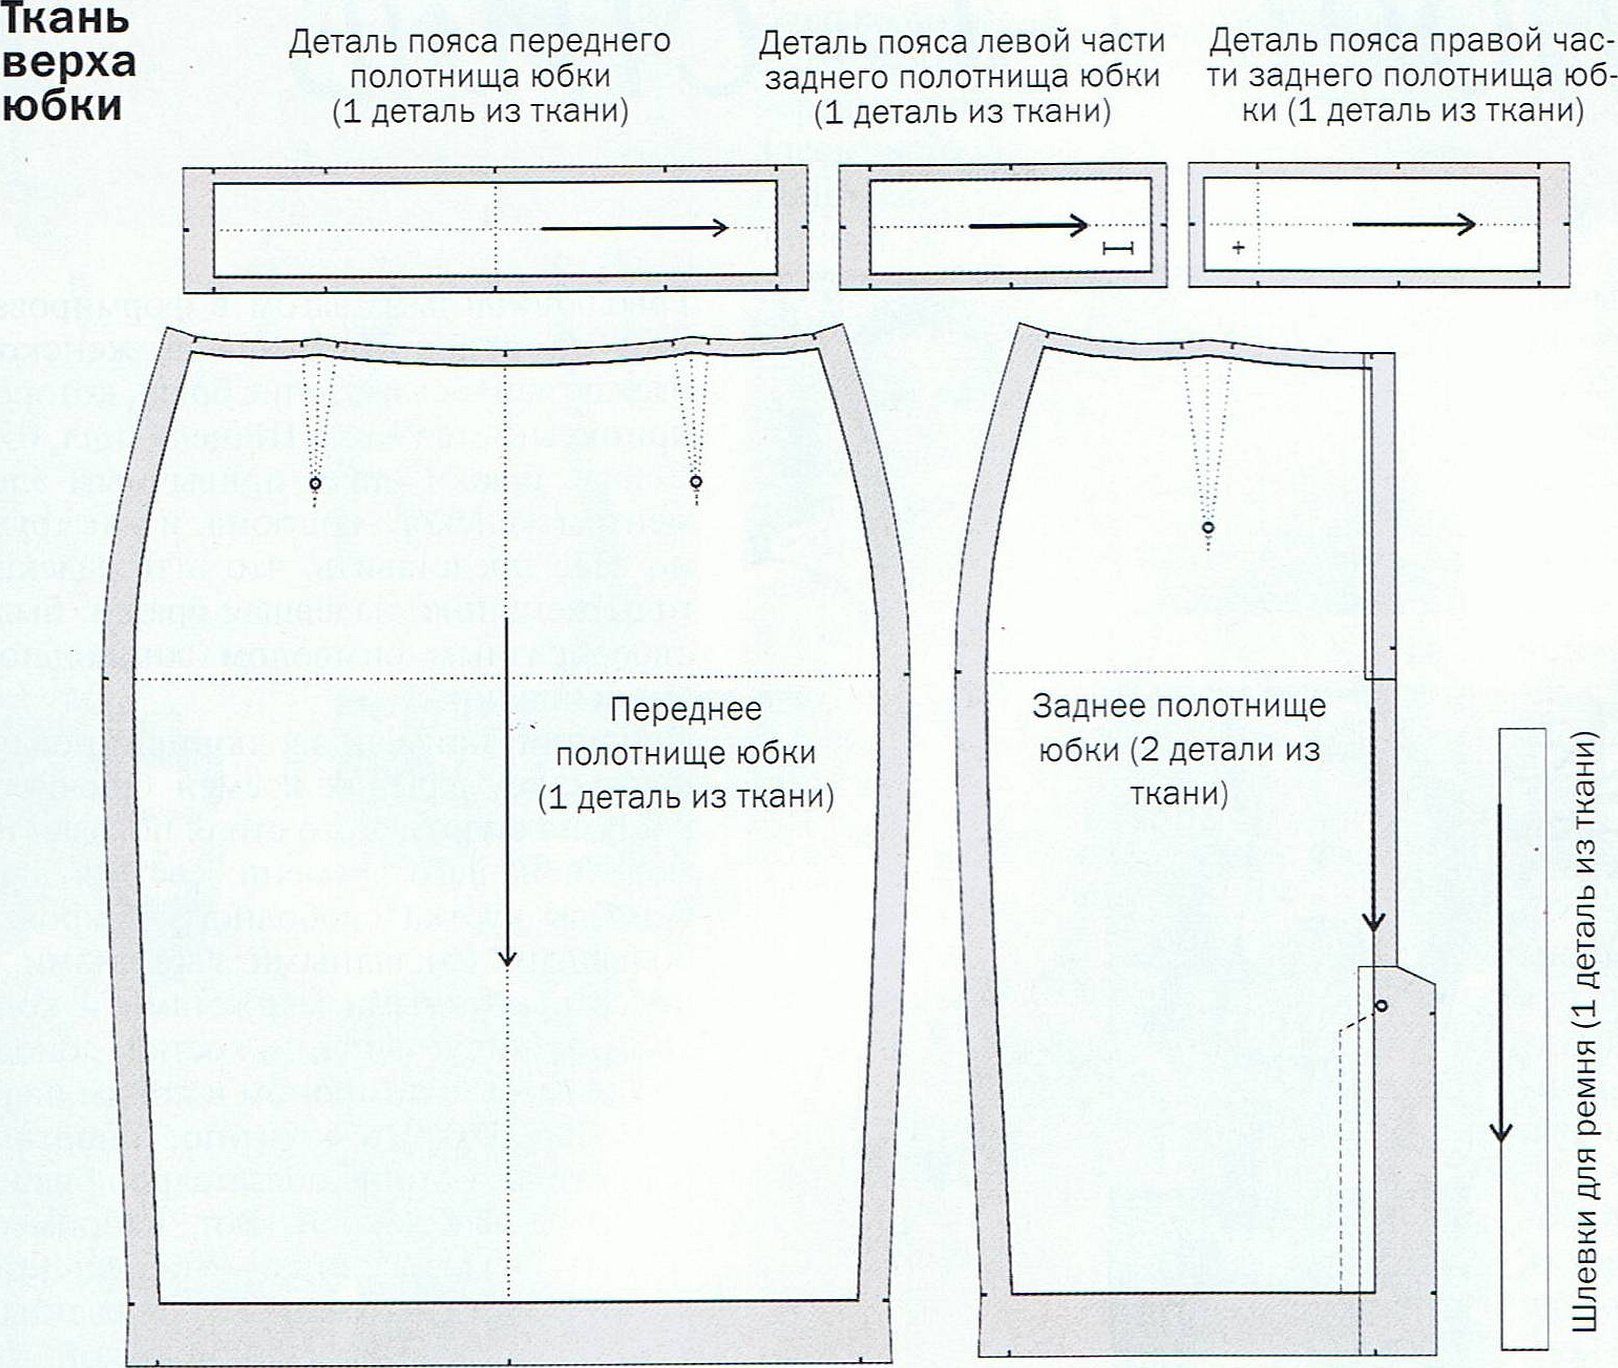
Cutting details
To make a classic straight skirt, you need to cut out several pieces. The front part is presented as one piece with a fold along the middle line.
The back panel consists of two parts. An additional part can be a belt. If necessary, it is necessary to cut a lining for the product from a special fabric.
Important! Before transferring the pattern onto the fabric, it is necessary to iron the material thoroughly.
Sewing technology
An important step is sewing the skirt pieces together, which happens in stages:
- First, you need to carefully process the side cuts and the cuts of the seam in the middle of the back on the overlock.
- Then you need to stitch the darts on the front and back panels. After that, they need to be ironed well towards the middle.
- After this, you need to sew the back seam on the machine up to the mark for sewing in the hidden zipper.
- The next step is sewing in the zipper.
- Then the side cuts are connected with a seam, the width of which is 1 centimeter. After that, fastenings are placed at the end and at the beginning of the lines.
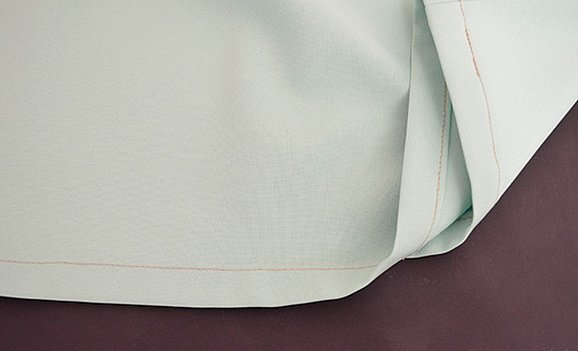
- The next step is to hem the bottom of the garment. The hem allowance is 3 to 5 centimeters. First, you need to fold the fabric over by one and a half centimeters, then by two more. Then you need to stitch the garment as close to the hem height as possible. The hem can be stitched manually or made using adhesive tape.
- Finally, you need to sew the belt to the skirt.
The choice of fabrics for a straight skirt is huge. You can use suit material, or thick knitwear. Even "noodles" will do for sewing a skirt. However, in the case of the latter fabric, you need to take into account some nuances. For beginners, the first two options are suitable. It is better to choose materials - natural fabrics. Since a large number of synthetic fibers significantly reduces the cost of the appearance of the finished product.
The production begins with taking measurements. After that, you need to transfer the measurements to special paper, make a drawing and cut it out. Then you need to cut out the details of the future wardrobe item. The final stage is sewing. For more experienced craftswomen, a wrap or half-sun model will be of interest, which has not lost its relevance over the past few seasons.
A straight-cut skirt is an essential item of any woman's wardrobe, along with a midi skirt. It will not only complement the image, but also advantageously emphasize the advantages of the fairer sex's figure. You can buy a skirt in a store, or you can make it yourself. To do this, just use the simplest pattern for beginners.


