Toys made by yourself will always be a priority. They are original and can be decorated to your taste. But very often when sewing products, craftswomen are faced with the construction of drawings. This article talks about how to sew an owl with your own hands, and also presents an owl pillow with a pattern.
What is needed to sew a toy
It is clear that without certain materials and devices it will not be possible to get a toy, so you need to stock up on everything you need, and then get to work.
Everything you need for work: tools and materials
There are not many of these things, but all of them will certainly be needed to make the toy bird beautiful.
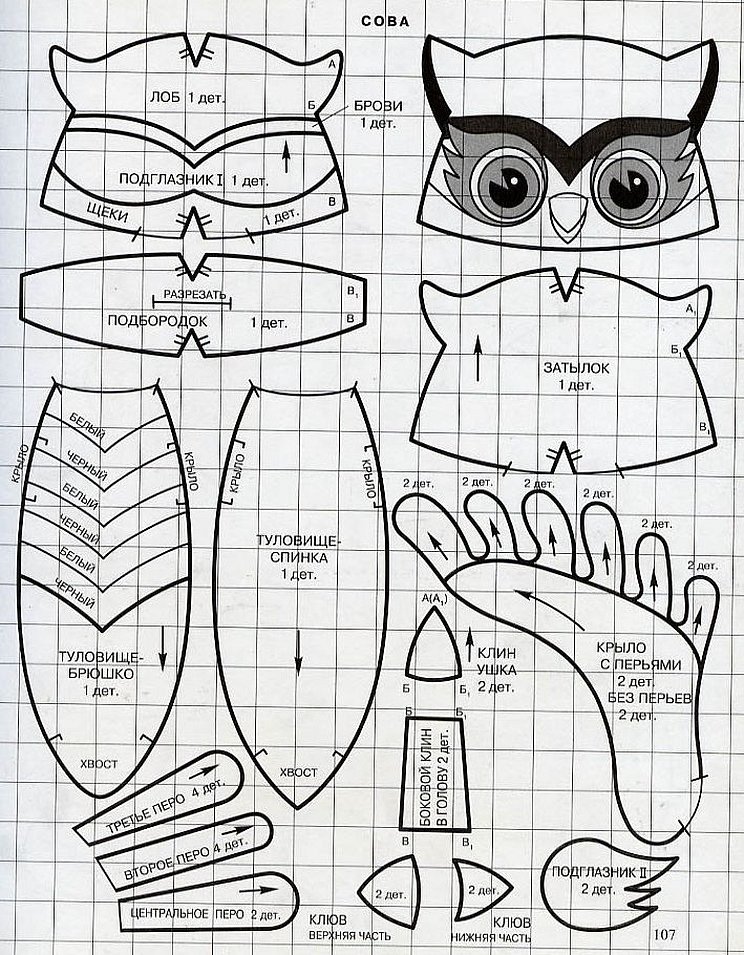
Pattern
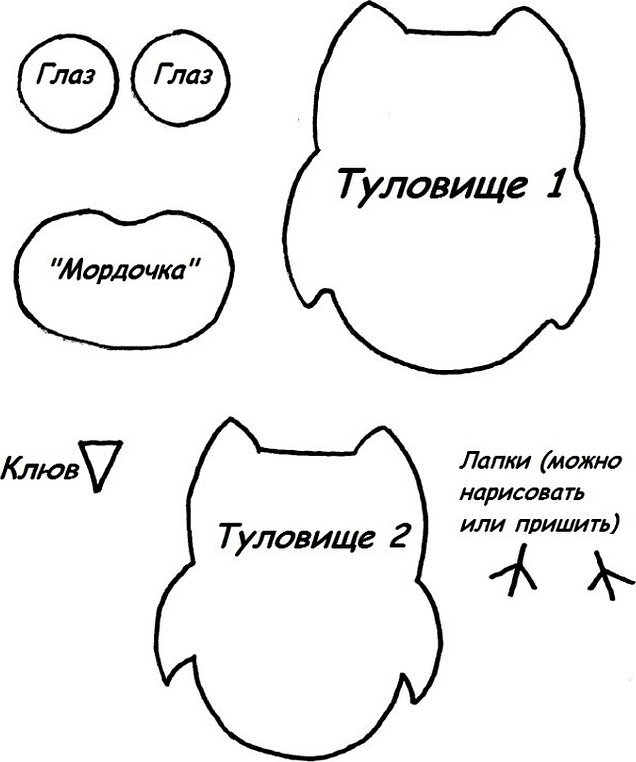
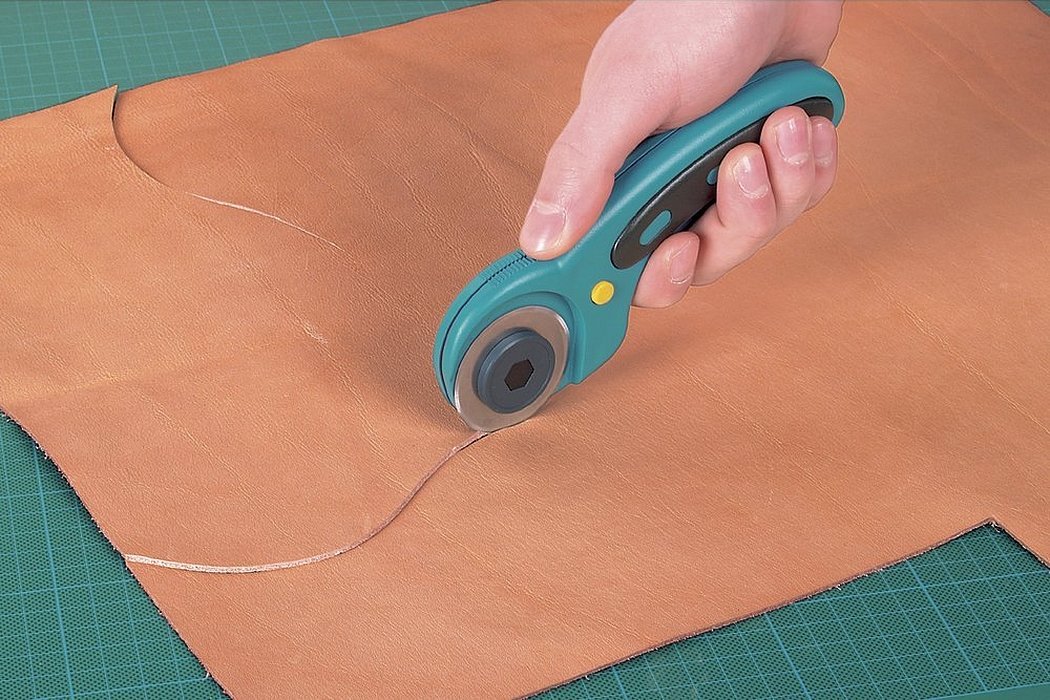
Any product begins with the construction of a drawing. It can be found on the Internet in any required format or you can try to draw it yourself. It is quite easy to make a pattern for an owl, usually it consists of two parts for the body, beak and paws. To transfer the drawing to the fabric, you need to use chalk or a disappearing marker. The cutting process is carried out with a textile roller. When constructing a template yourself, for ease of work, it is built in full size. Also, when transferring a drawing to the fabric, it is necessary to take into account seam allowances. So that it does not turn out that 2 centimeters are not enough.
Canvas
To save money on buying fabrics, you can take and rip apart an old sheet or knitted robe that is no longer used, the main thing is that the edges of the fabric do not fray, otherwise they will have to be processed on an overlock.
Attention! This way you can use unnecessary things and free up space in your home.
If toys need to be sewn not for personal use, but for sale or as a gift, then it is advisable to buy the material in specialized stores. It is recommended to choose only natural materials that will not cause allergies and irritation on the skin.
Decorating a toy
With the help of lace, satin ribbons or scraps of fabric, you can beautifully decorate the finished product, very often needlewomen use beads, sequins or rhinestones. This will give the toy a more luxurious and unique style. With the help of buttons or rivets, you can make eyes or a mouth for the owl.
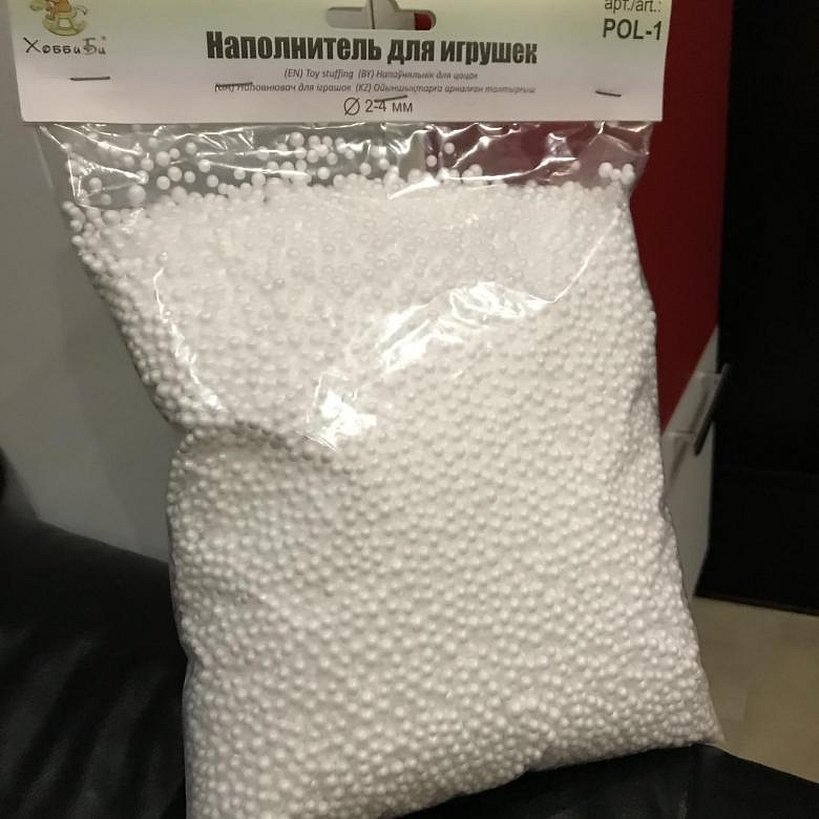
Filler
The filling for the toy is selected in accordance with the age of the child who will use it.
For example, for babies under one year old, you cannot use products with a filling of calcined buckwheat (it is very often used to weigh down various places in textile toys). Because the baby can accidentally swallow particles of the filler. For this age, it is better to use cotton wool or foam rubber inside the products. For older children, holofiber or synthetic padding is suitable. Sometimes old rags and scraps of fabric are used as a filler, then the product will be very soft. Perfect for children.
Sewing machine
To create a quality product, it is recommended to use a sewing machine. Since hand-made seams are not strong enough. This can lead to damage to the toy after the first wash, the threads will shine and stick out. If there is no machine, then you need to work only with a double seam, this will add strength. It is also necessary to process some materials on an overlock so that the cuts do not crumble. If it is not available, then you can use a zigzag stitch for finishing.
Necessary little things
What else might you need when making toys:
- needles and pins;
- textile roller;
- device for threading a needle;
- yarn of different colors;
- measuring tape.
Any tool for transferring the design to the canvas (marker, soap, chalk, etc.). Materials for decoration. This can be anything: pebbles, buttons, glitter (for the New Year's version), beads. You can also sew flowers and hearts separately and insert them into the owl's paws if you wish.
How to sew an owl with your own hands (for beginners)
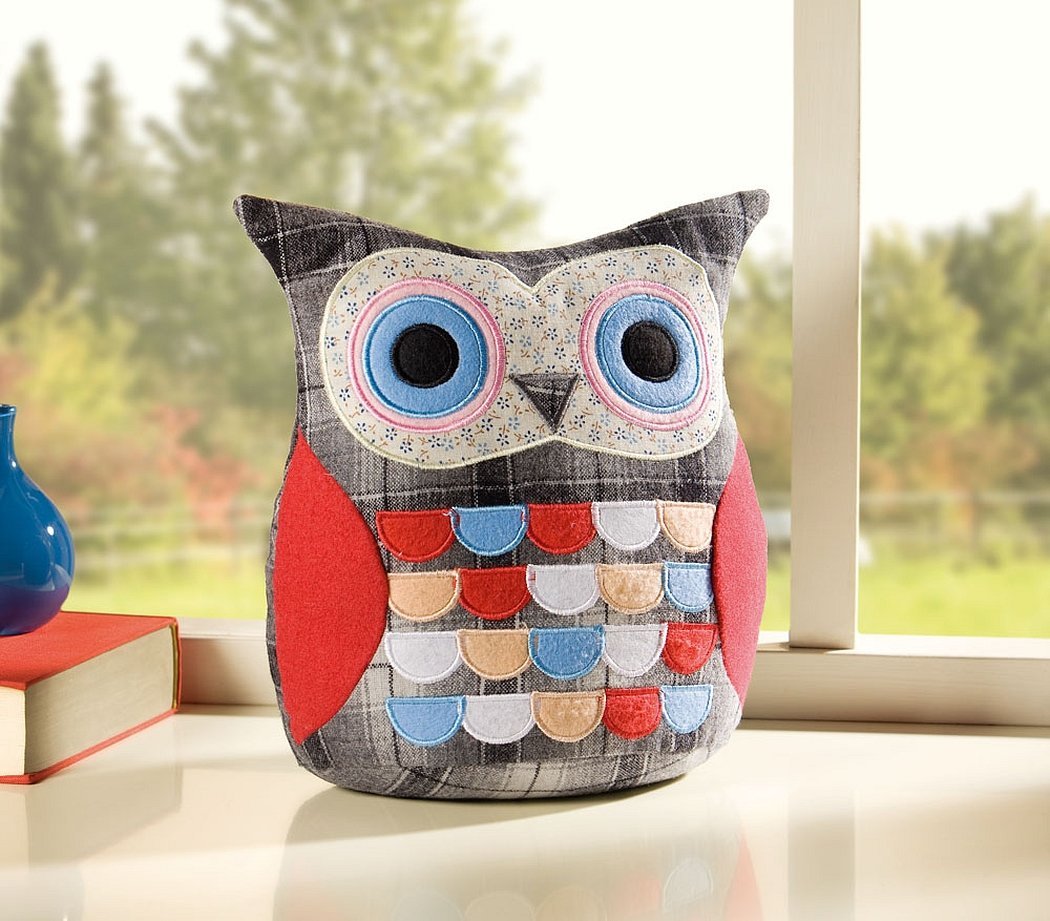
For creating soft toys, preference is generally given to hard fabrics, such as denim, felt, knitwear, and chintz. They hold their shape better, so they will serve the child longer. Before starting work, it is advisable to study the types of fabrics and buy what you like. For beginners, it is undesirable to take very expensive fabrics, since in case of failure, they will have to be thrown away. It is better to try sewing on cheaper materials, such as chintz, linen or cotton. In addition, they are natural, so it will be easier to work with them.
Sewing tools:
- Whatman paper or cardboard;
- pieces of old fabric (colors are chosen according to personal taste);
- synthetic fluff or foam rubber;
- buttons or beads for eyes;
- threads, needles and a fabric roller.
The operating instructions are described in detail below.
To work, you need a piece of paper with an angle of 85 degrees and another one with an angle of 30 degrees.
The radius of these circles of segments must be symmetrical. As a result, two triangles with a convex paper bottom are formed.
Next, you need to sew the parts together so that a cone is formed from the material. Cut off the top side of the cone with a pin (about one third). Fill the remaining part of the cone heavily with padding polyester and sew up the hole.
Sew the empty end of the cone to the body of the toy, thus creating the head.
Now you need to make a stable bottom for the textile owl. You need to cut a circle out of paper, cover it with material and sew it to the bottom. This way the toy will stand firmly on any surface. Now all that's left is to sew on the eyes and decorate the owl as you wish.
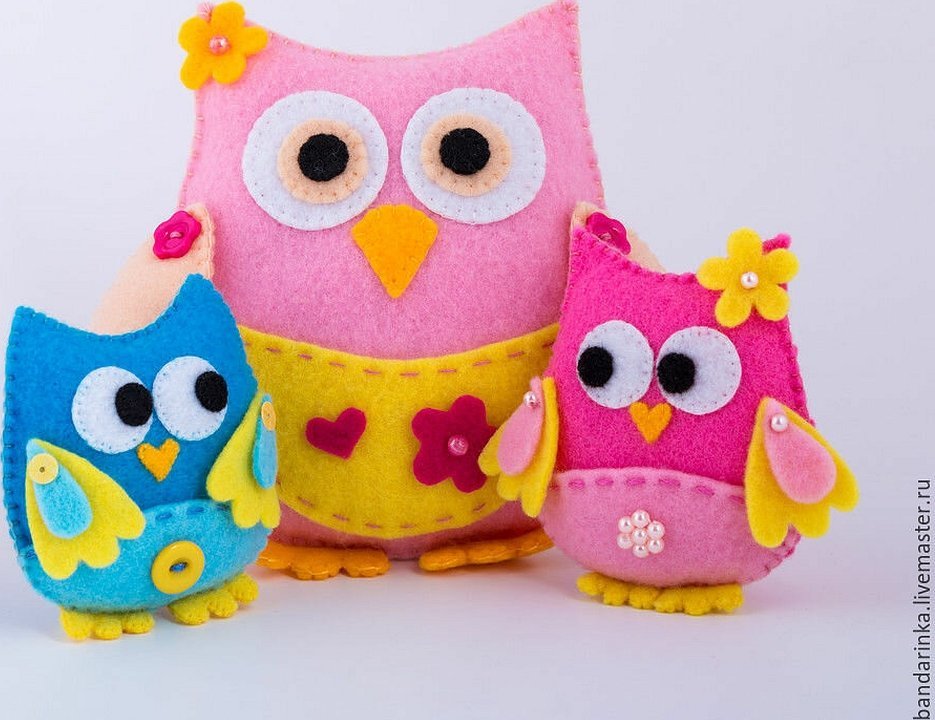
How to sew an owl from felt: master class
Materials and tools for work:
- sketch of a drawing;
- fabric roller;
- pins and needles;
- felt of different colors (white, black, red, green);
- fabric with patterns or ornaments for a more beautiful toy;
- filler.
Felt owl – the pattern is made up of several parts: the body base, beak and paws. Alternatively, you can find a template on the Internet, print it out and cut it out along the outline. Fix each part on a prepared piece of felt fabric, then cut them out and remove the pins.
Using a running stitch, sew the colored felt elements onto the fabric wing blanks. Hide the knot at the end of the finished seam between the material and the felt. Insert a pin to secure the patterned material in one spot.
Next, you need to check the pattern to make sure the pieces are positioned correctly and are the right size. You need to take the pattern of the front side of the owl's body and place the black eye pieces on it. Secure them with pins and sew them on. Do the same with the other eye.
There should be a distance of about half a centimeter between the eyes and the edge of the body. Sew the white and red parts of the pupils on top.
Attention! If you are making a toy with children, it is better not to let them sew it themselves; in this case, you can simply glue the eyes on using transparent PVA.
Using the toy pattern, correctly position and sew on the belly made of colored material, then sew on the beak and paws. You also need to sew on small black triangles-ears to complete the design of the front side of the owl. Using floss, embroider the tail on the back of the body.
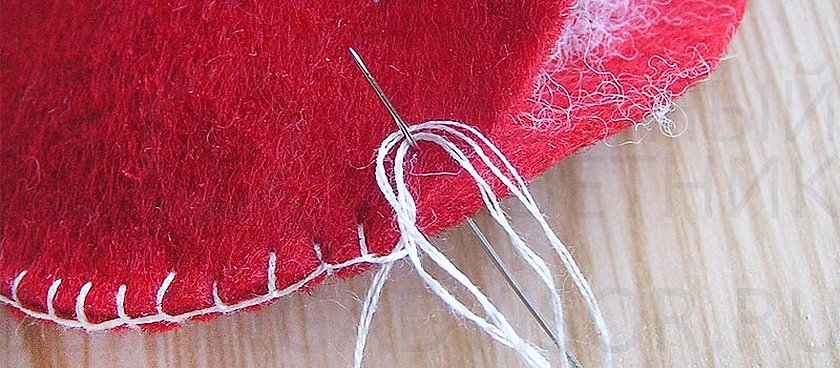
Place both pieces together, insert the wings between them and pin them in place. Start sewing from the bottom of the left wing around to the bottom of the right wing - this will leave a gap inside for the stuffing.
Fill the owl with foam rubber or synthetic padding, then sew up the hole.

You shouldn't stuff it too tightly, because the seams may come loose. The finished product should be fairly flat. At the end, you need to remove the pins from the owl. For felt products, you must definitely use a machine, since it is quite difficult to sew such a thick fabric, you need larger needles with a large eye. Therefore, when working manually, this will take a lot of time.
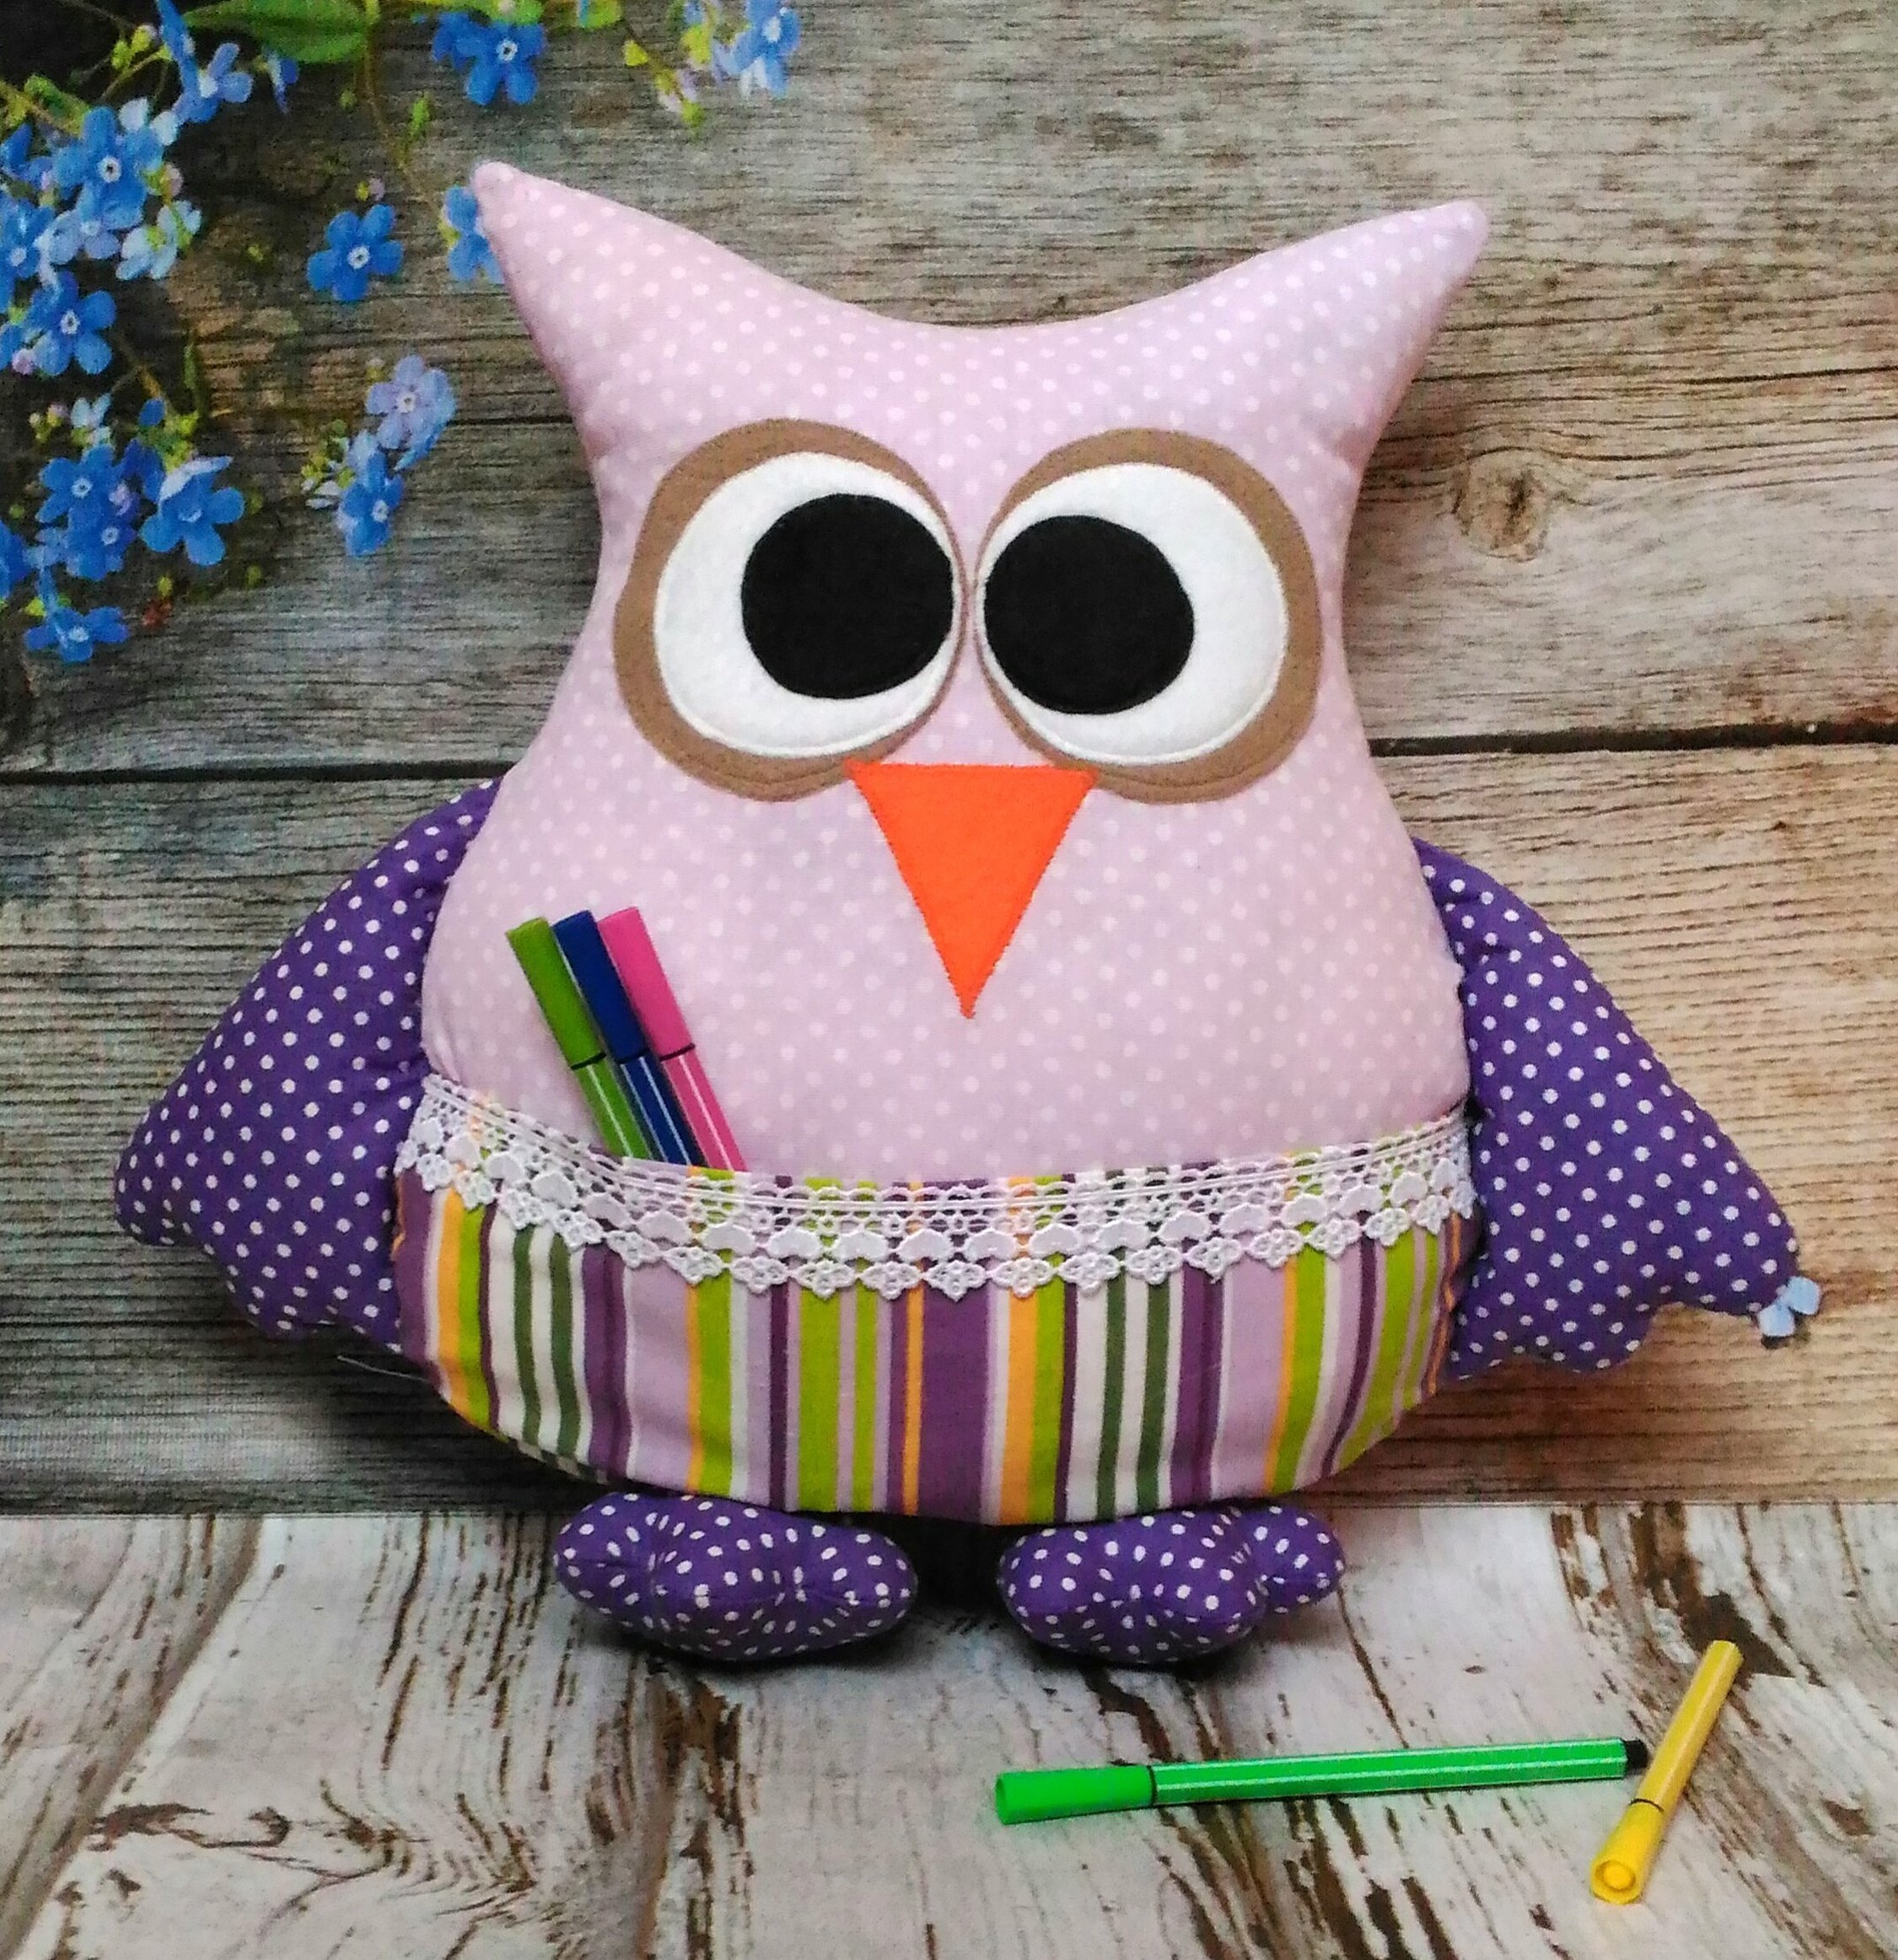
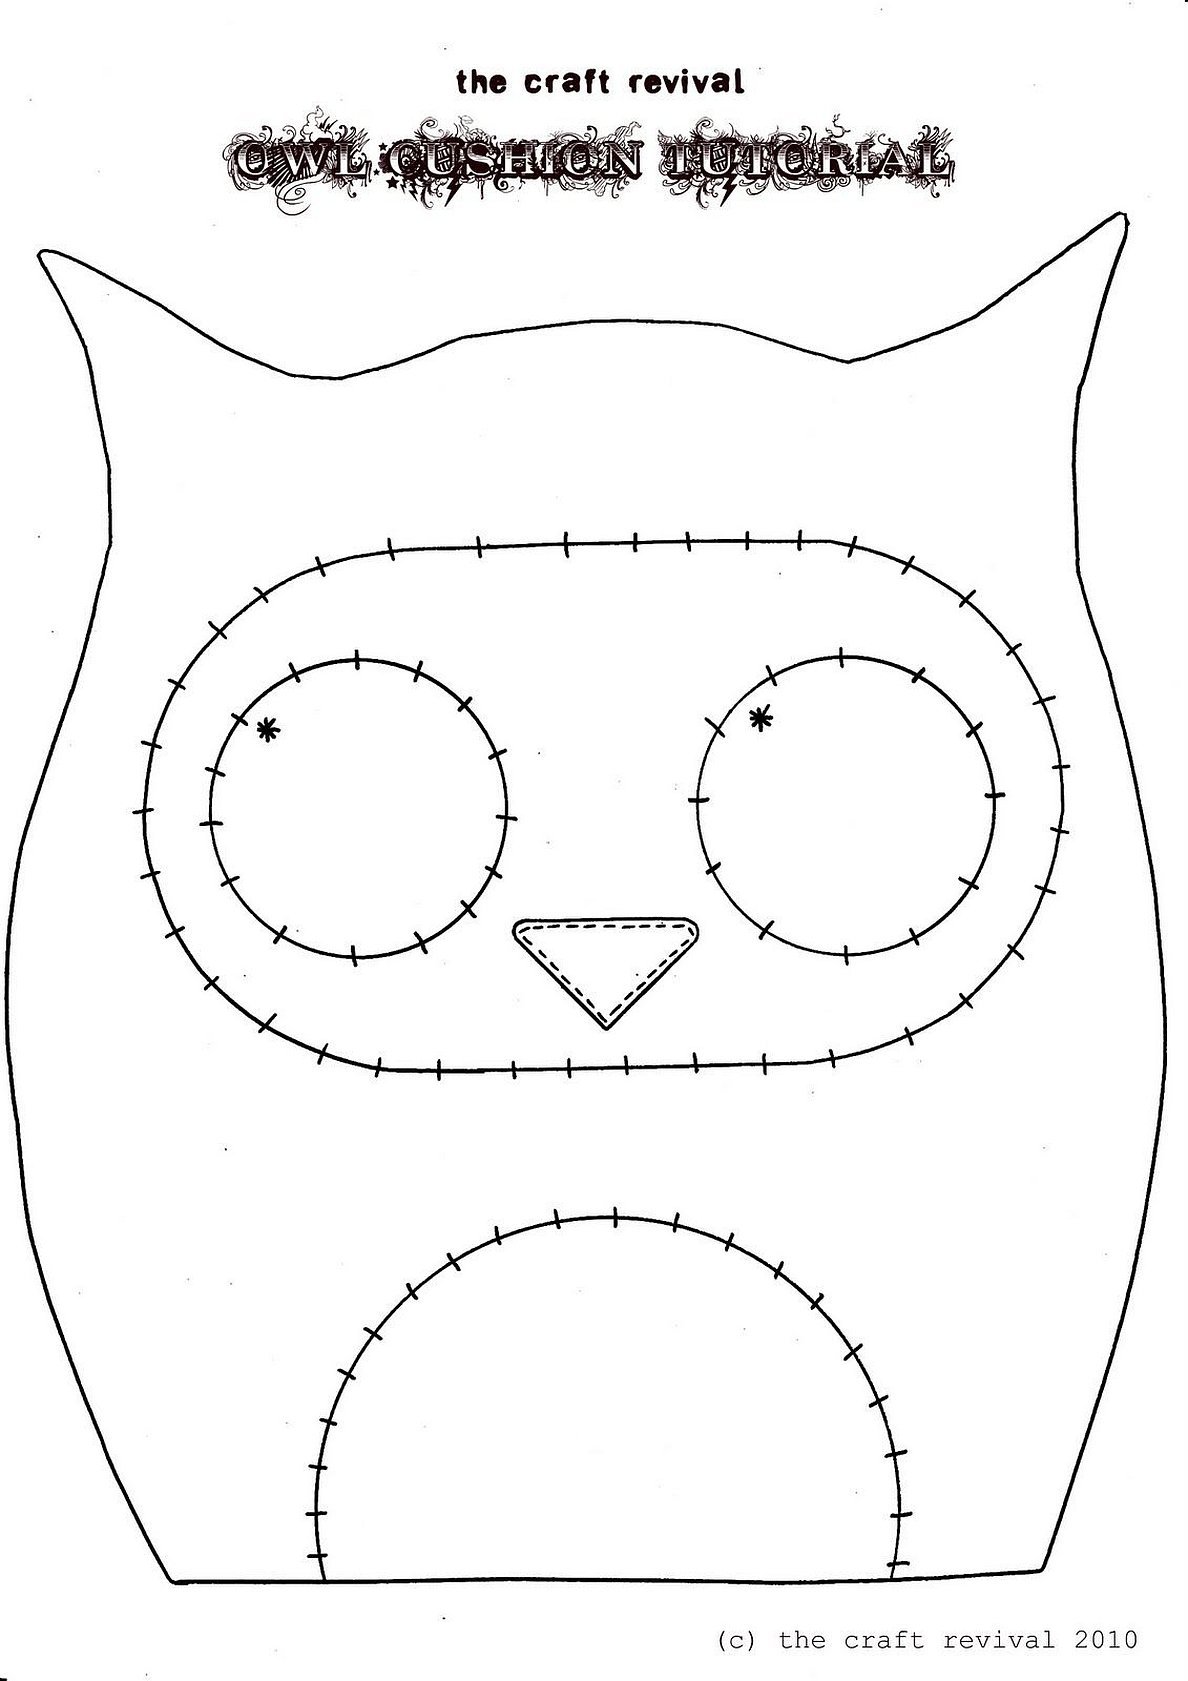
If desired, you can decorate it with fur, a fringe or ribbons, sew a pocket on the back for small items (this will make a bag for the kitchen), and you can also make several owls to get a set of toys. Also, if desired, you can sew an owl pillow with a pattern according to Figure 6.
Toys of this type require special care. If cotton wool or synthetic padding is used as a filler, it is not recommended to wash such products in a machine. High speeds can cause the filler to clump and shrink. For foam toys, only a delicate cycle and liquid powders can be used, otherwise large abrasive particles can remain inside. It is advisable to dry any toys in a well-ventilated place, but away from direct sunlight.
In conclusion, it should be noted that it is quite easy to make owls from felt with your own hands using patterns. You can involve children in the work, which will have a great effect on their psyche and hand motor skills. For beginner needlewomen, it is recommended to watch several master classes to make the work easier.


