Many women want their clothes to be unique and original, so they prefer to sew them themselves. But some people encounter problems at the modeling stage. This article talks about how to make a pattern for a size 50 dress and how to take measurements for it correctly.
How to determine your size
Clothing and shoe sizes can be found out using anthropometric parameters.
These measurements provide the opportunity to determine the degree and factors of physical development, the level of its relationship with gender and age, existing discrepancies, as well as the degree of increase in physical development during sports and fitness activities.
Simply put, anthropometry covers values such as circumference and other parameters. How is it used in everyday life?
With the help of anthropometric measurements, it is possible to observe the dynamics of physical development, the effectiveness of sports activities, and also to correctly determine the size of things.
Many modern computational and graphic methods for modeling clothing assume as initial parameters information about the body measurements (numerical characteristics of sizes) of a person and allowances for seams and a loose fit.
Size is a letter or digital indicator that characterizes certain linear volumes of a person’s figure, or a certain part of the body for which clothes need to be purchased.
In most cases, the size is indicated on a tag that is sewn into the item, or on the sole of the shoe.
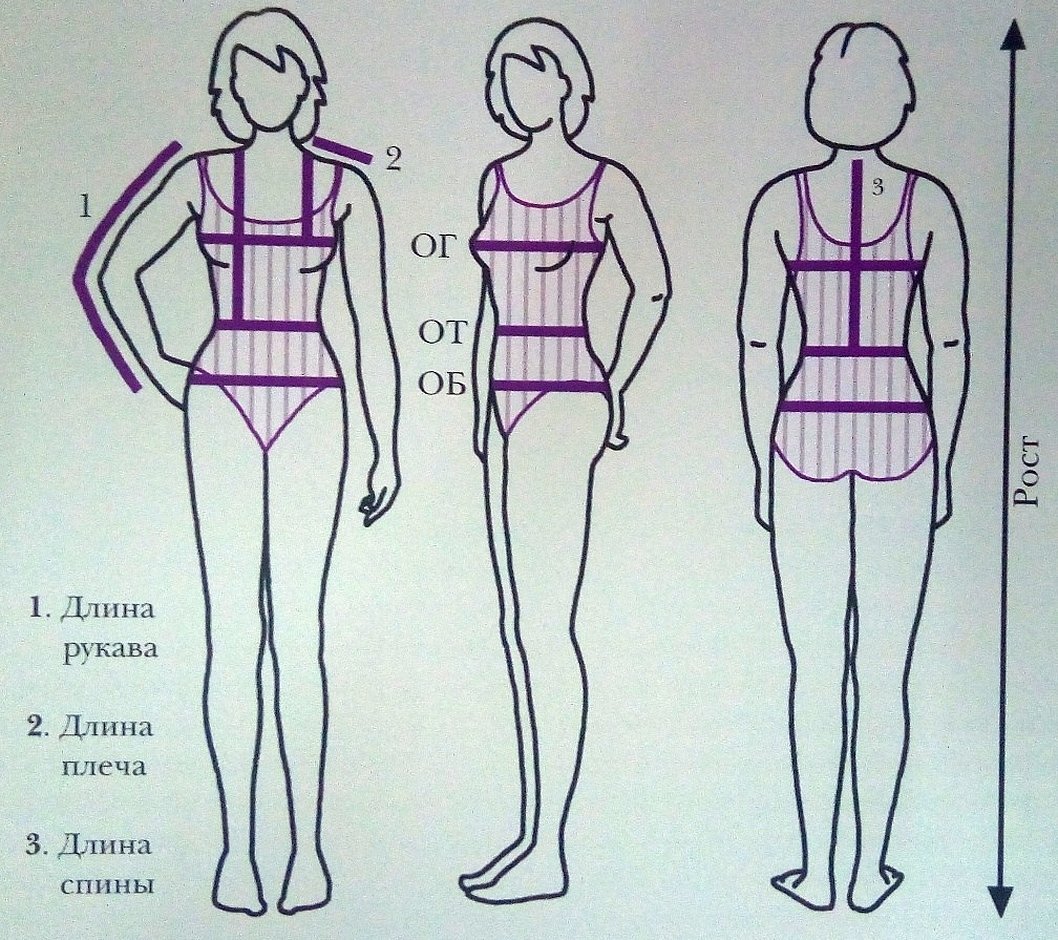
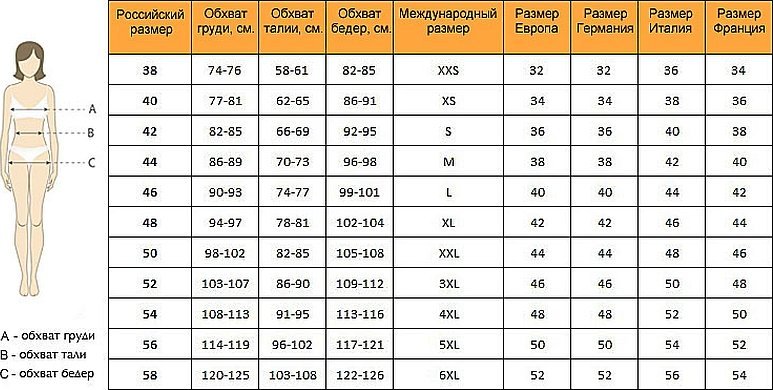
What anthropometric parameters are used to find clothing and shoe sizes
Height. To measure a person's height or your own, you need to use a friend's help, and also take a ruler and a pencil. You need to stand with your back to the wall, without slouching, and take off your shoes. The ruler is placed on your head, and a small even section is made on the wall (the starting mark). Now, using a ruler or a centimeter, count the distance from the floor to the mark. This way, you get accurate measurements.
Chest circumference. To do this, you need a measuring tape. You need to cover your entire chest with the tape so that it fits all the protruding marks on the body. To get an accurate parameter, you need to repeat the measurements several times. Waist circumference is measured using the same method.
Please note! When measuring your waist, you should not pull in your stomach or try to make it smaller, otherwise you will get an incorrect result.
Hip circumference. Measured approximately 17 centimeters below the waistline at the fullest part of the buttocks.
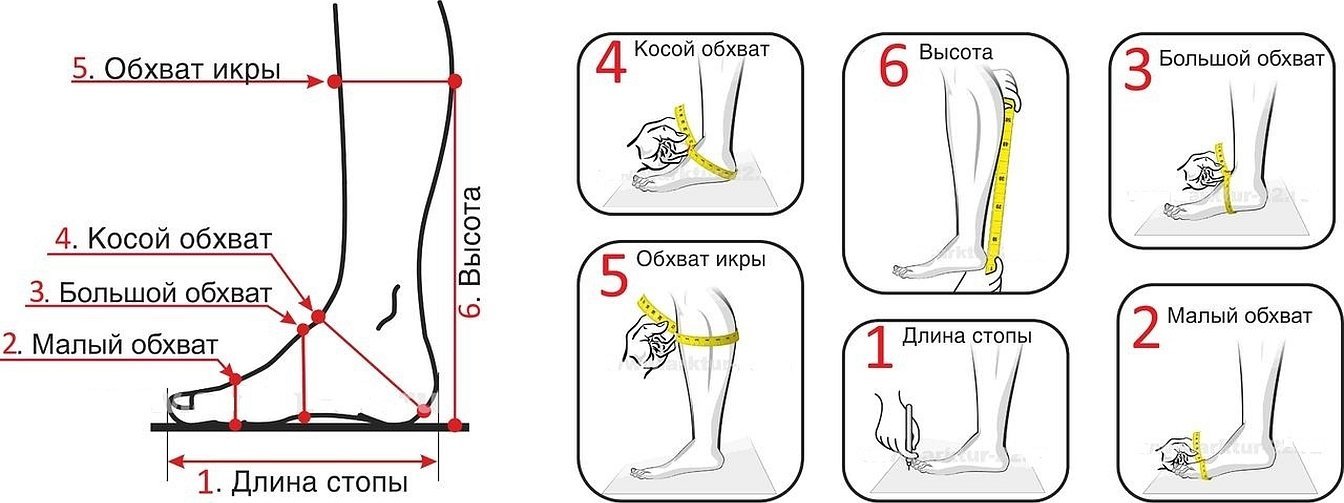
Shoe size. The human foot parameter is determined by two measurements - the length and width of the foot. First, you need to measure the length of the foot. It is advisable to do this in the evening, because the feet are trampled all over and swell a little. You need to stand on an A4 sheet and draw a contour of the foot. To determine the length of the foot, you need to measure the segment between the outermost points in the drawing.
If the two measurements are different, it is better to give preference to the larger measurement. Round the final parameter to 5 mm and determine your size according to the table.
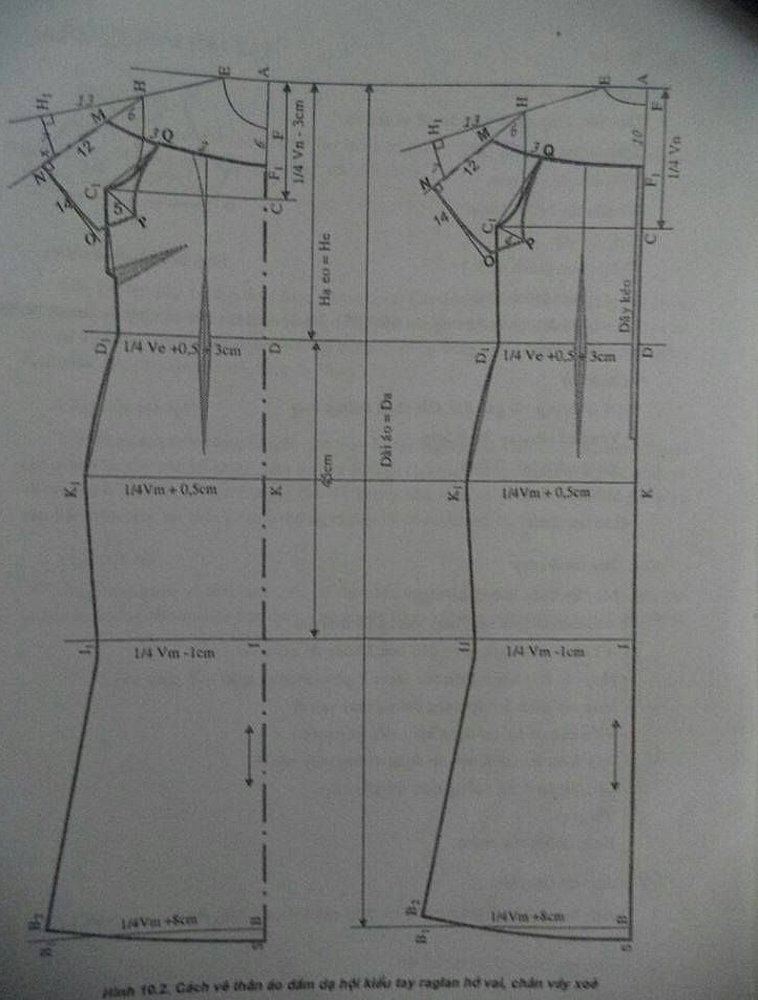
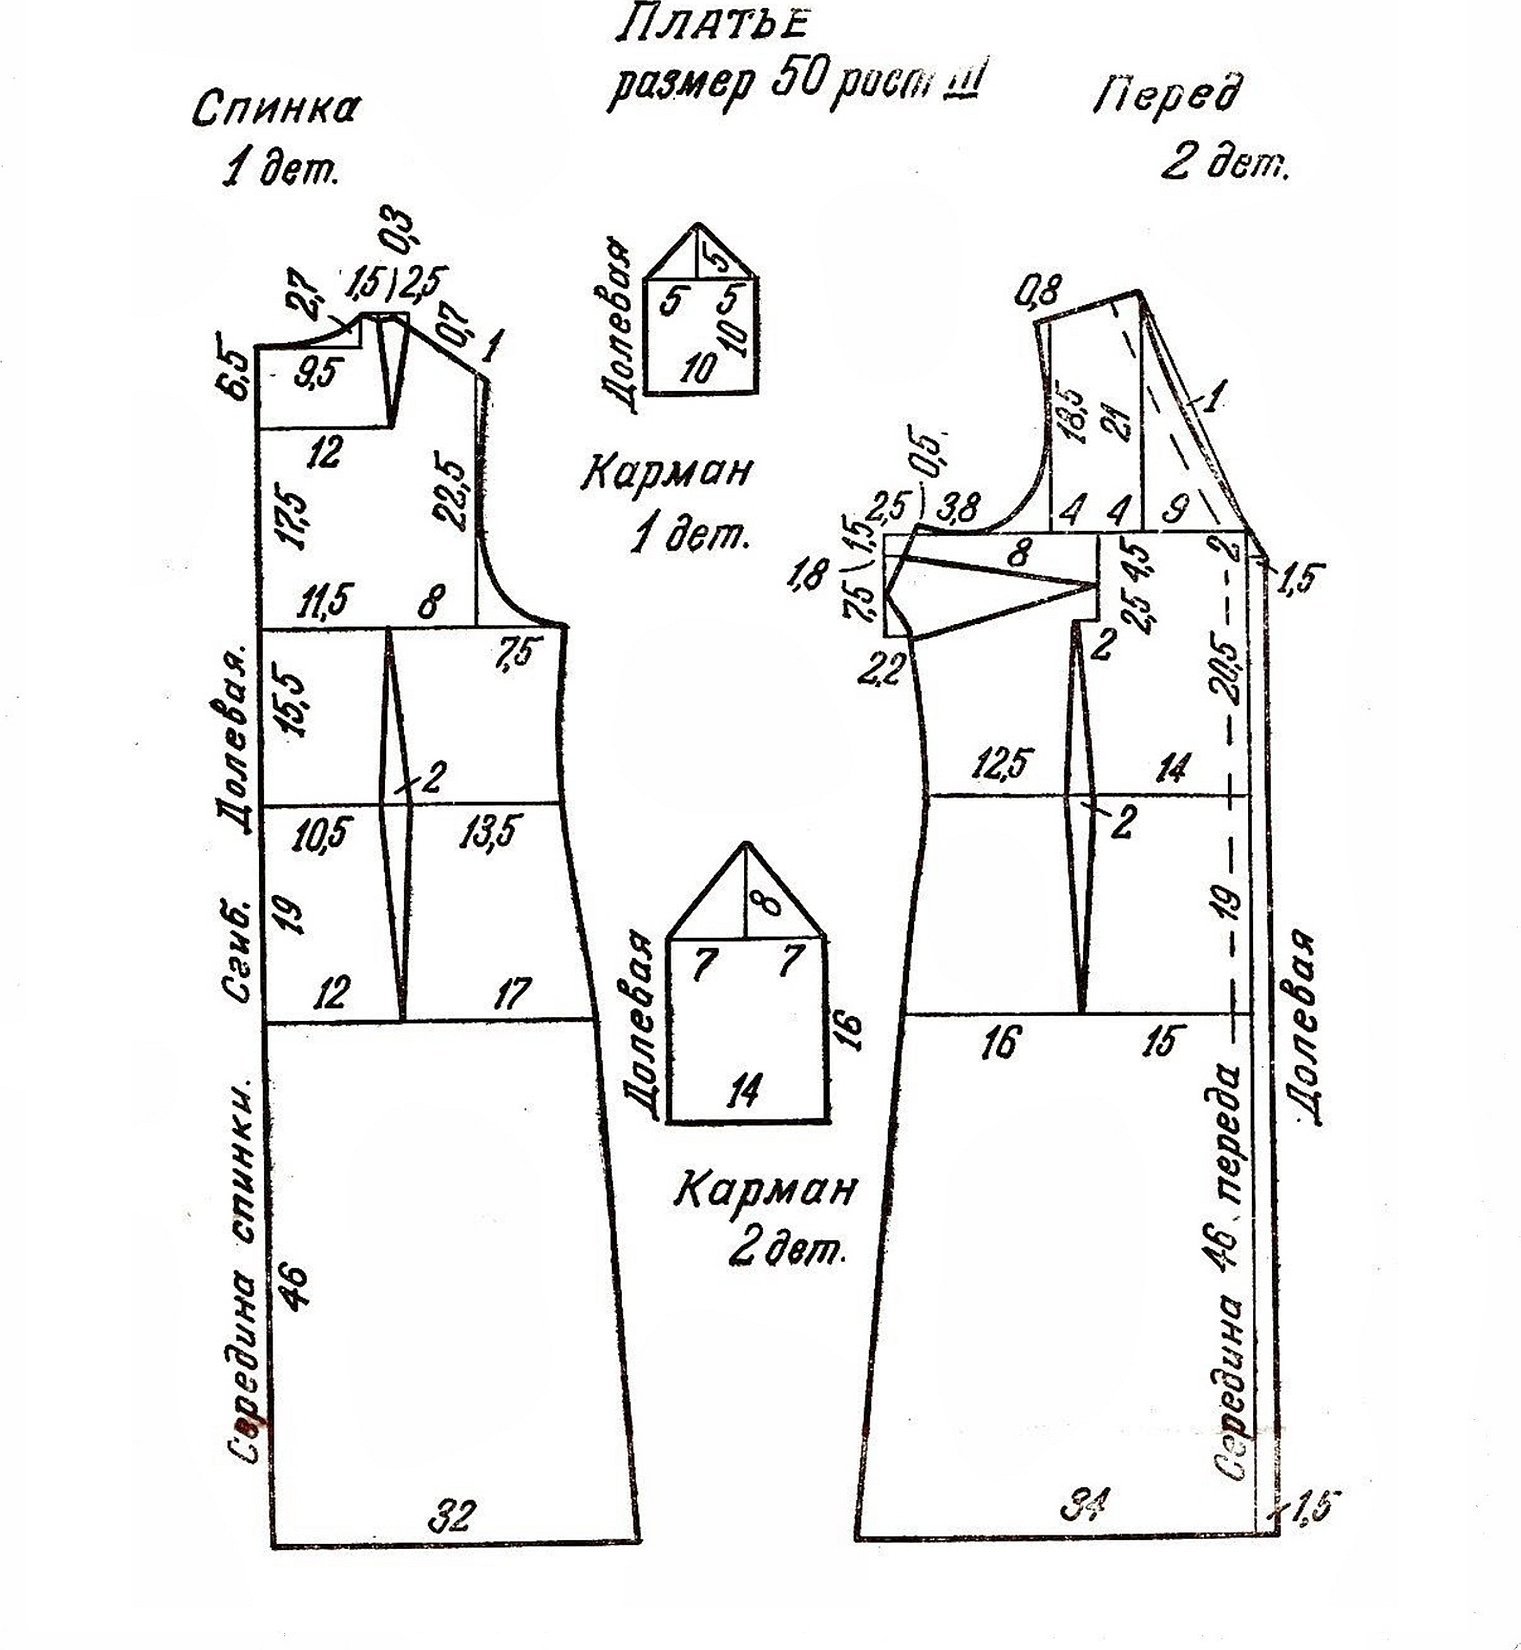
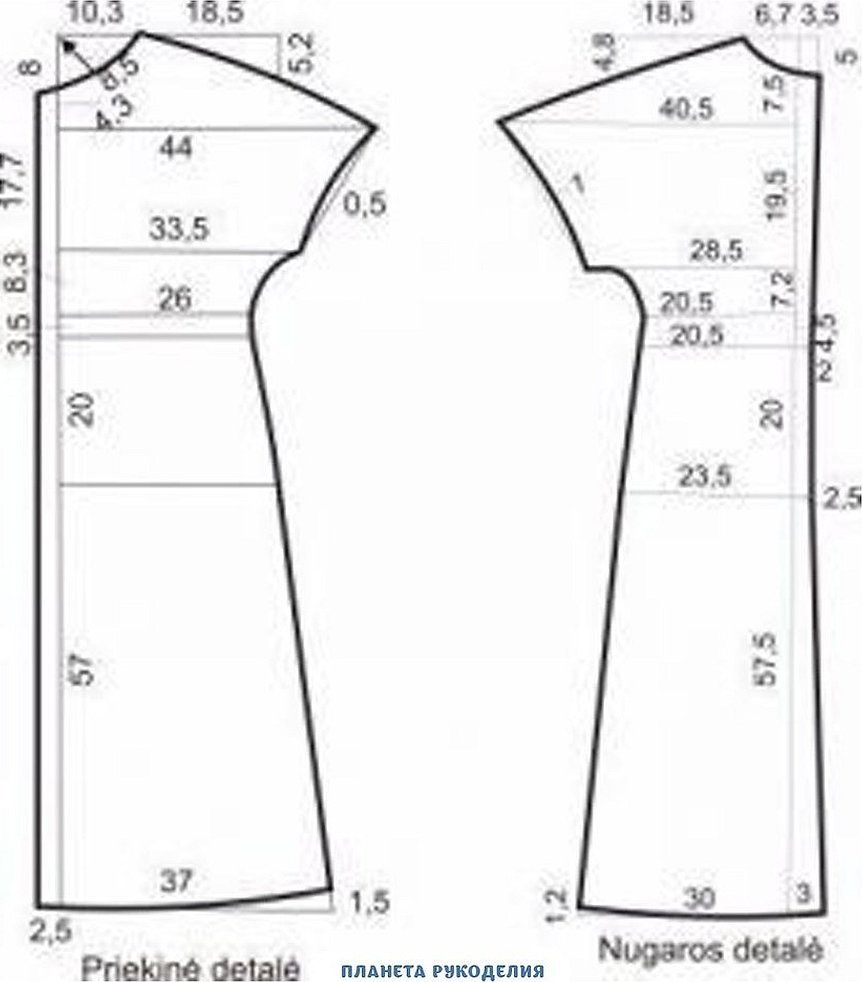
Dress patterns for sizes 48-50
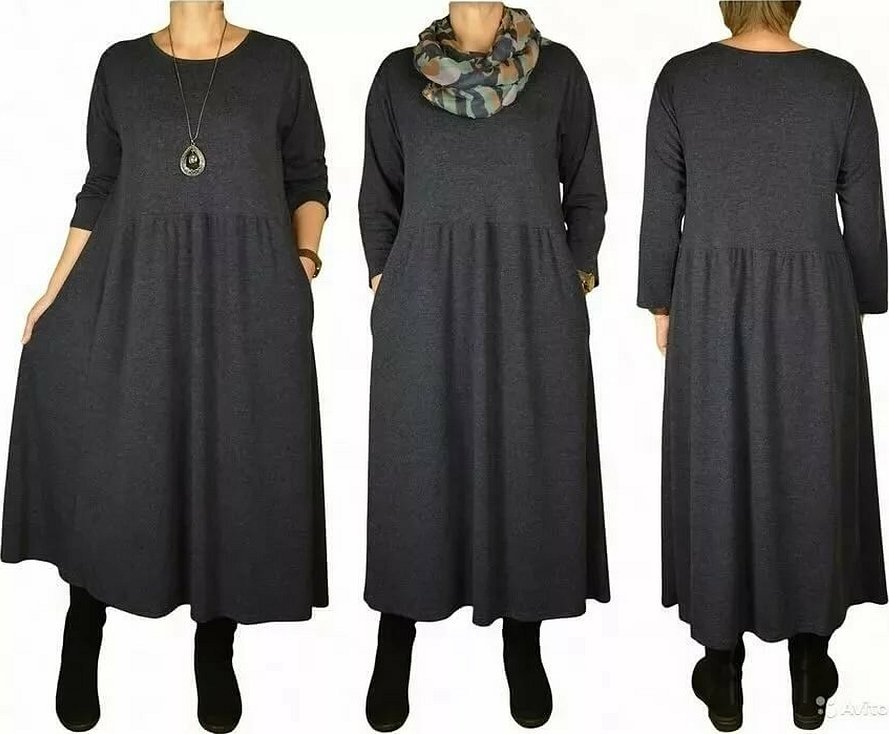
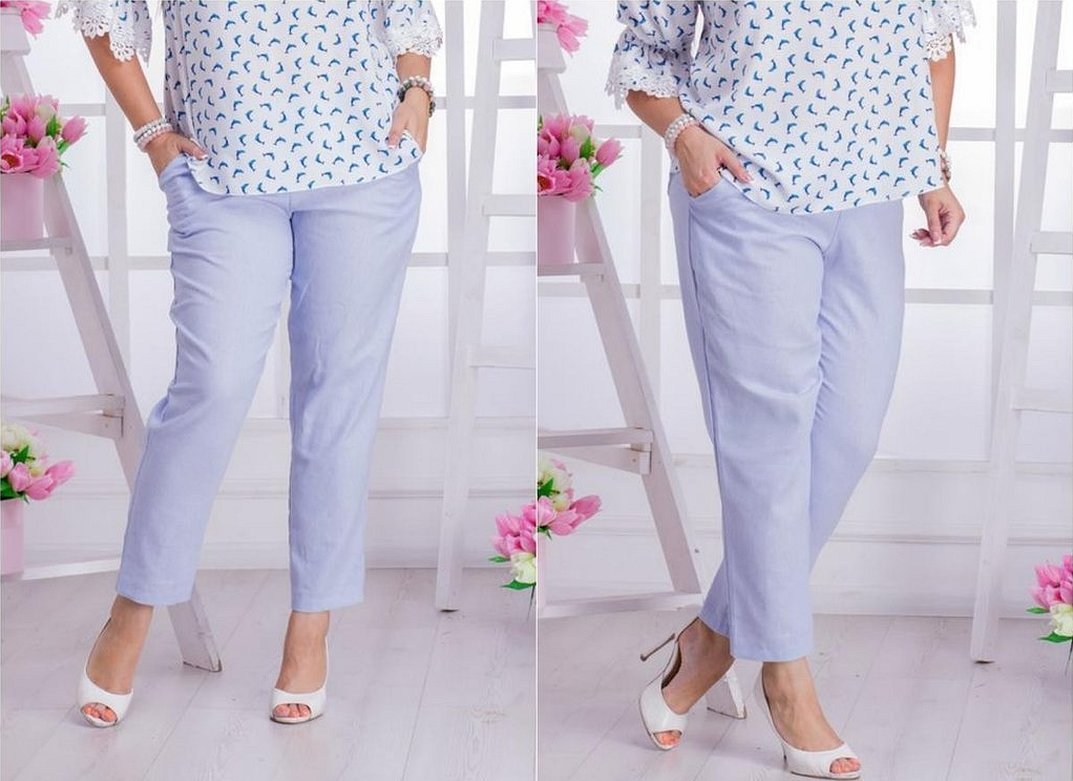
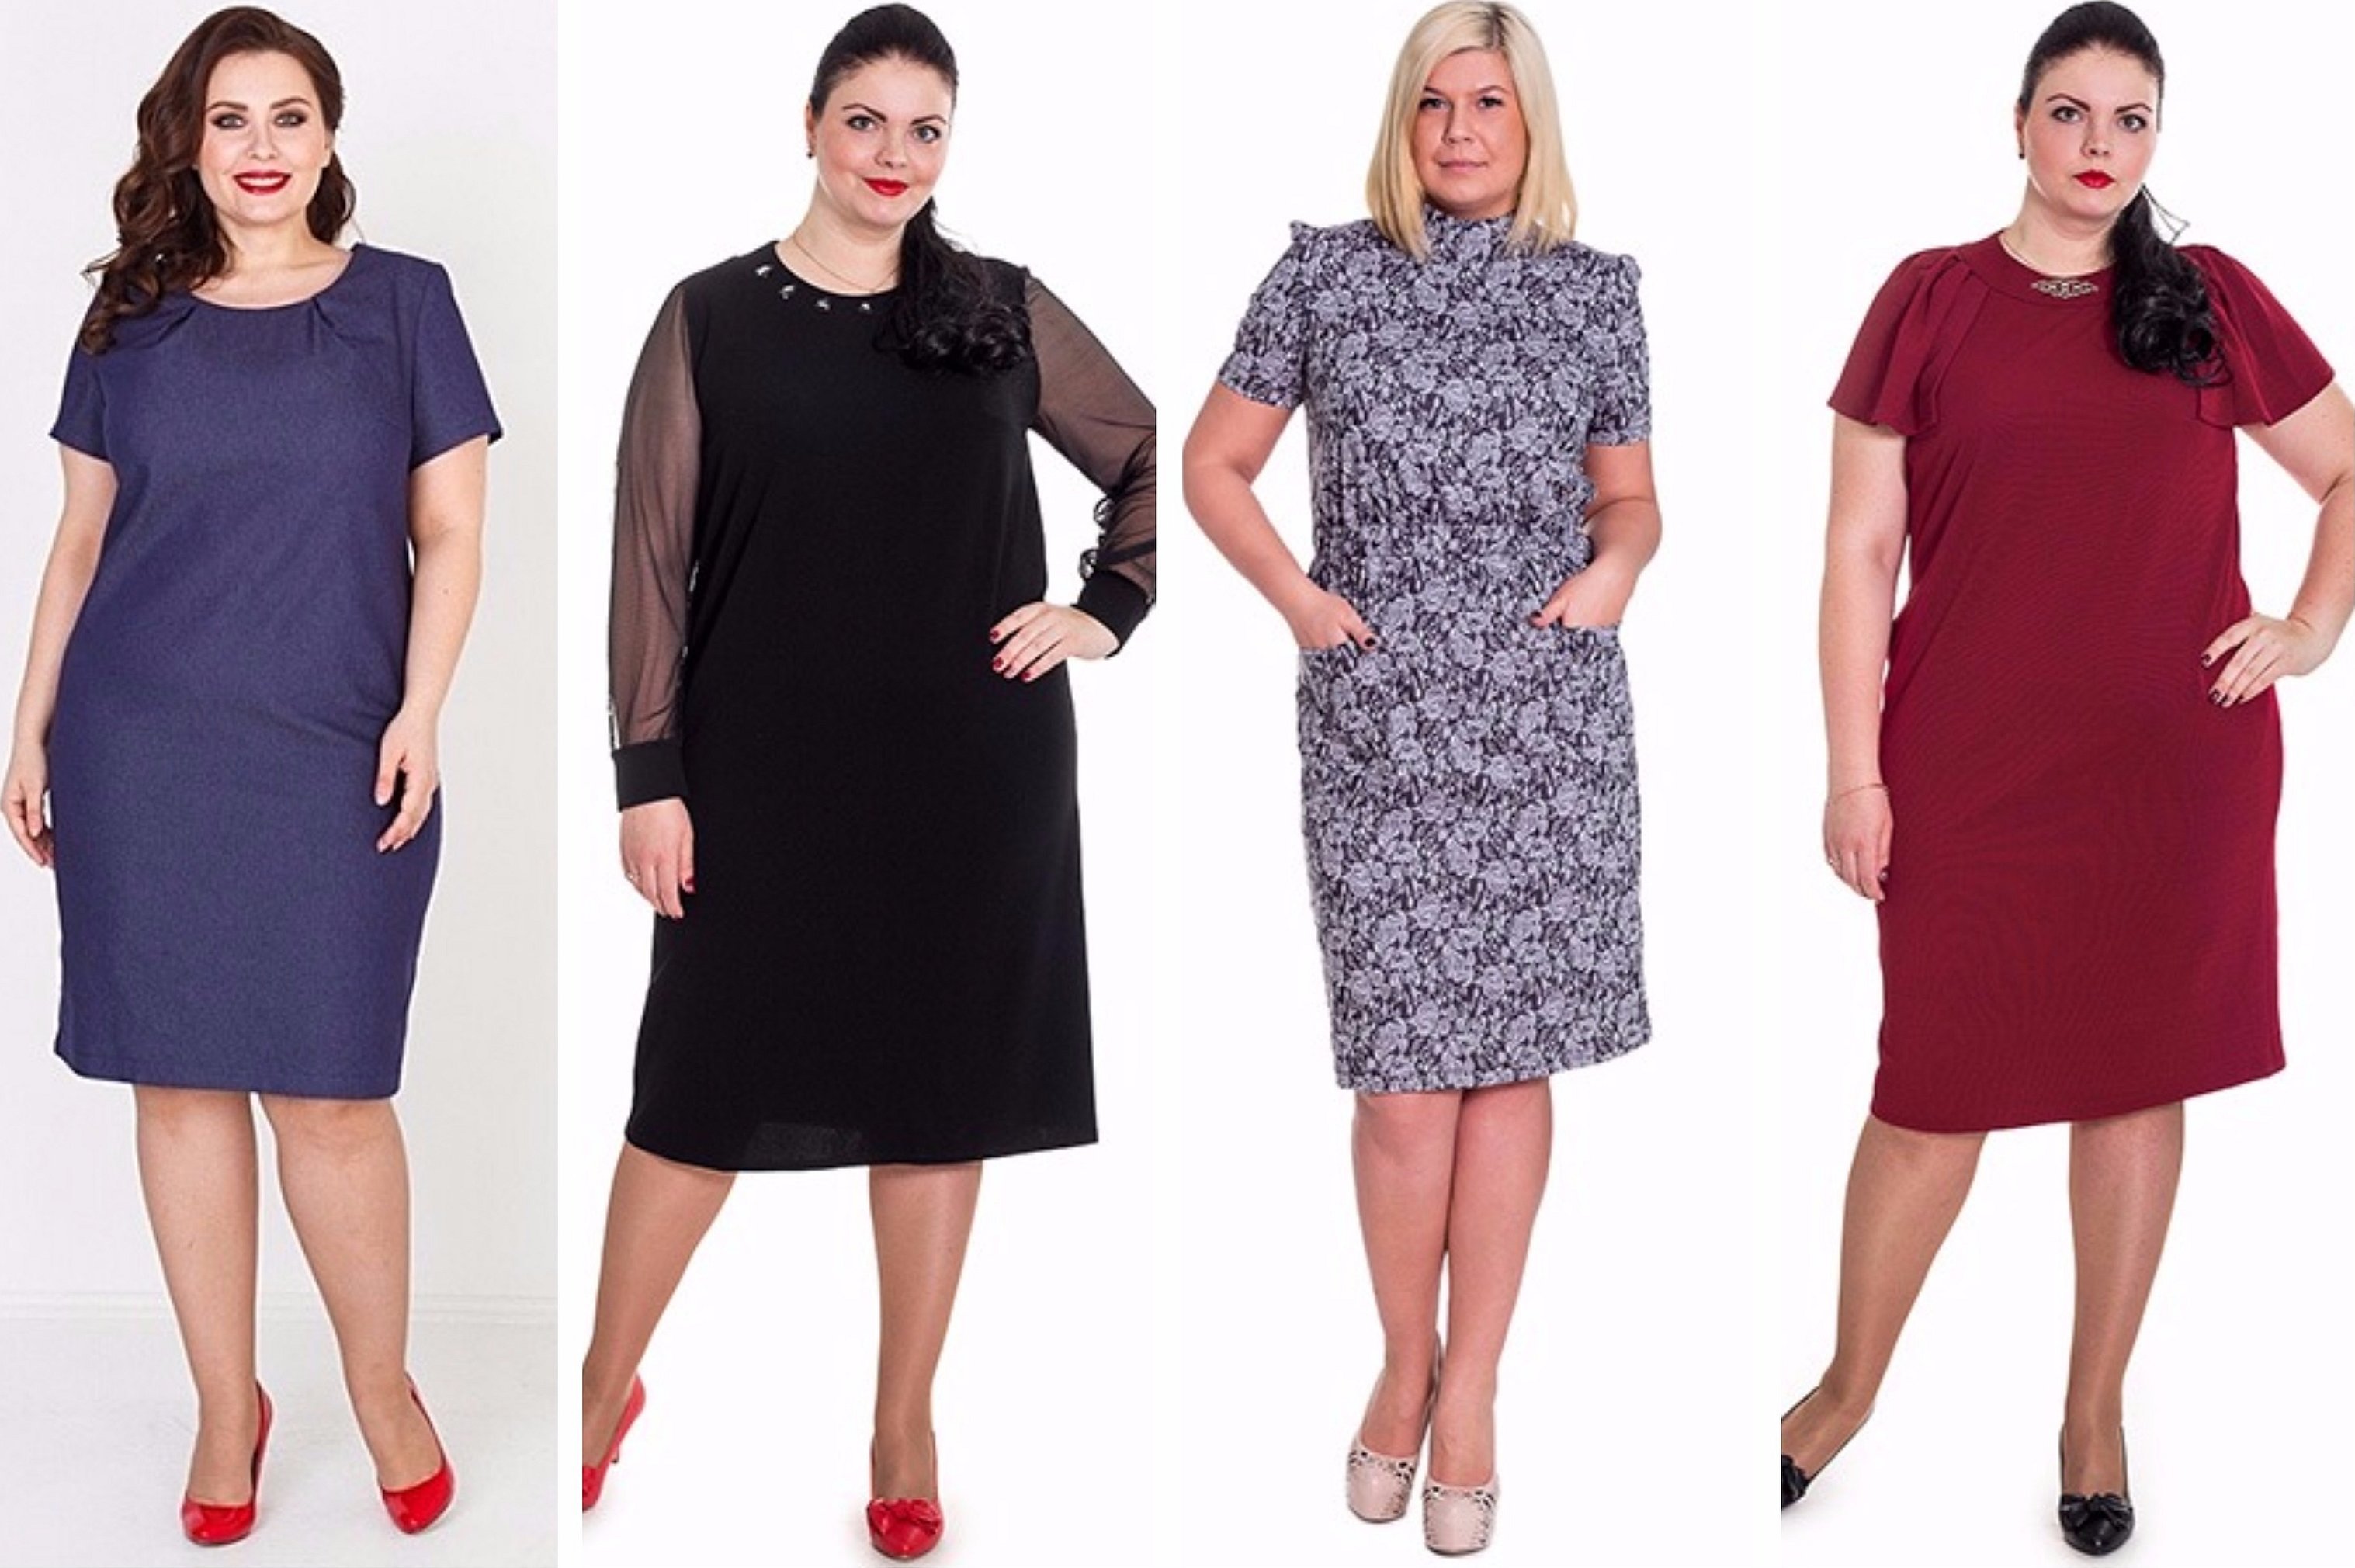
Dress patterns for sizes 48-50 are sometimes more difficult to construct than for sizes 44 and below. Here it is important to make allowances so that it is comfortable to walk in the product. The dress should not restrict movement or interfere with sitting on a chair. For plump girls, it is recommended not to sew tight-fitting clothes, because this can emphasize the flaws of the figure. For curvy shapes, wrap dress models are very often used. This helps to visually correct the figure. Patterns for size 50 can be found on the Internet, and there is also a basic basis for constructing bat-style blouses, nightgowns or sundresses for the summer and for home. Dresses for curvy girls are usually made of lightweight fabrics, such as cotton or chintz.
How to check a pattern
If the pattern was found on the Internet and printed on a printer, the device could involuntarily compress it, thereby ruining the measurement. Therefore, for this purpose, a "test square" equal to 100x100 mm is applied to the elements of the pattern. After printing the sketch, first of all, it is necessary to measure the sides of the test square, and check that the template is printed correctly.
To check the template for correctness, you need to measure the following parameters according to the pattern:
- waist circumference = 2(x1+x2+x3+x4);
- hip circumference = 2(Y1+Y2).
- the length of the central seam, that is, the distance between marks 1 and 2 along the line of the central seam.
Control of finished indicators
You need to compare the results of X and Y with your (another person's) waist and hip measurements. These measurements should be a few centimeters larger than the corresponding parameter.
Checking the length of the central seam. It is necessary to put off the distance AC on a centimeter and stretch the tape between the legs from the point of the waist of the shelf to the mark of the waist of the back. Check the degree of tension of the centimeter, it should be free, but at the same time not hang on the body.
Editing waist and hip measurements
Sometimes it happens that when choosing a template for a certain measurement, the hip circumference does not match the waist circumference. What to do in this case?
Then you need to edit the waist line when outlining the template. This is quite easy to do, relying on the extreme lines of the sketch. For example, if the hips are size 46, and the waist line is 44, then when constructing the waist line, you need to go to the contour segment of the previous 44.
You can also find a special pattern check chart on the Internet. The Porivan website presents patterns of 50 and more sizes. There you can also talk to experienced craftsmen who will give advice, tell you how to properly cut a thing or decorate it.
It is important to remember that when buying a piece of fabric for full figures (from size 48), take at least 20 cm more than necessary. This is due to the fact that when cutting, sewing and processing, allowances must be made for a loose fit. And a standard cut of 110-130 cm will not be enough for larger sizes. Therefore, in order not to add unnecessary scraps of material during work, it is better to take more and cut off the remains.
In conclusion, it should be noted that it is not so difficult to construct a pattern yourself. The main problem is the correct measurements of the figure. Experienced tailors recommend taking measurements two or three times and rechecking them, because if you do not do this, you can end up with a low-quality item. For beginner needlewomen, there are many video tutorials on how to correctly construct patterns.


