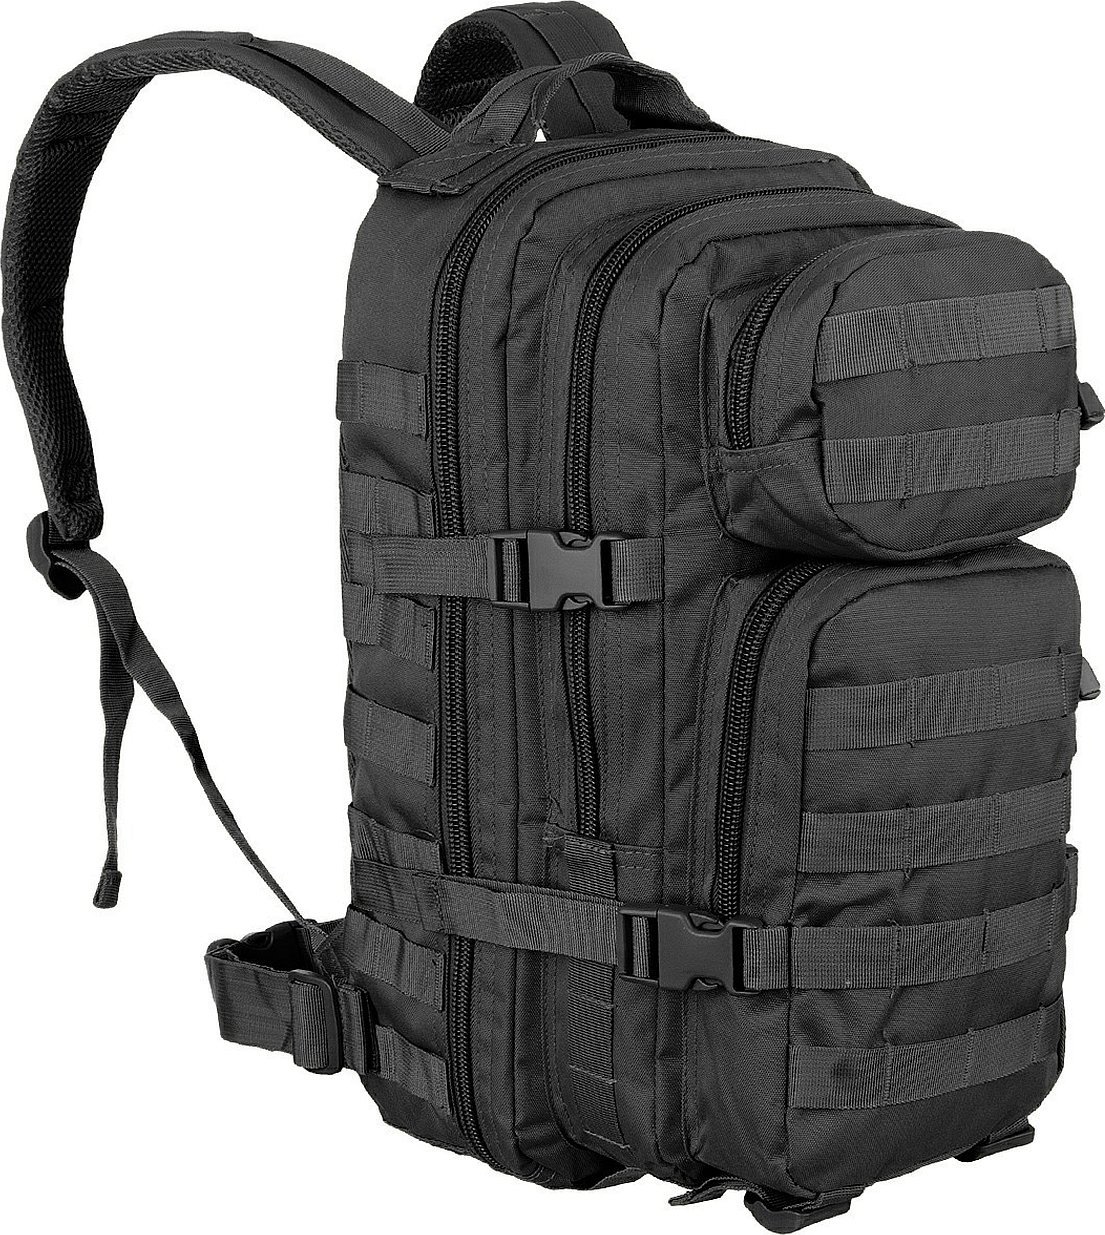
A backpack is always stylish and fashionable. It serves not only to carry things, but is also an element of style. A properly selected backpack that matches clothes and accessories will complete a person's image and will serve him not only as a bag. Most often, such types of bags do not last long, because they are made of low-quality materials, and they quickly fall apart. That is why some craftswomen want to make such an accessory themselves, choose the fabric, color and other elements. Such a backpack will not only be a faithful assistant on a trip, but will also please the eye. This material will consider how to make a pattern for a backpack, sew a backpack with your own hands and select the appropriate materials.
- Material for sewing a backpack
- How to make a pattern yourself
- Pattern of a tourist backpack
- Leather backpack pattern
- Step by step instructions
- Working with belt loops
- Working with the valve
- Working with the main part of the backpack
- Working with stalemates
- Working with straps
- How to sew a backpack-pack from scratch yourself
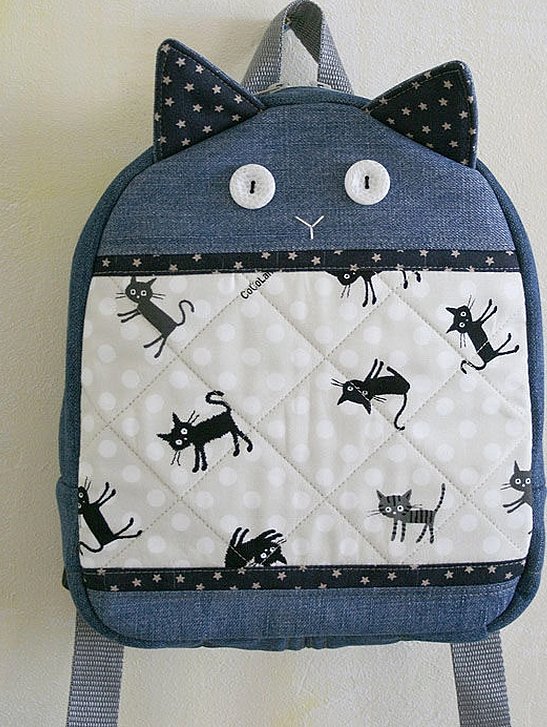
- Backpack from old jeans
Material for sewing a backpack
Before sewing, you need to prepare the following materials:
- Pieces of leather;
- Upholstery fabric;
- Cords of a certain diameter and length;
- Tie tape for backpack straps;
- Length adjusters for the same belts;
- Large carabiner clasp;
- Several blocks;
- A pair of buckles with a pin;
- A pair of half rings.
There is no need to buy new upholstery fabric when sewing it yourself. You can use old clothes, the material of which you like. Old jeans are also used for flaps or pockets. If the product is made for a child, then old clothes that he really loved or things that have become small will do.
Important! When sewing a bag for a child, remember that its size should be smaller than for an adult. Otherwise, it will be difficult and uncomfortable for the child to carry it.
The question remains: how to sew a bag yourself if there is no pattern for a backpack. To solve this problem, you need to familiarize yourself with the patterns available on the Internet and choose the one that you like best. You can also make it yourself, but if you have little theoretical and practical knowledge about this, you may get a defect.

How to make a pattern yourself
Before you start thinking about the pattern, you should decide on the model of the future product: what size and shape it will be. The basis of any model are the following geometric shapes: square, oval or rectangle. It is the choice of the shape of the bottom that directly affects the model.
Beginners and inexperienced needlewomen or newbies should first model the bag from paper and then transfer it to fabric. This will help not to spoil the remains of valuable fabric and correct the work when transferring parts to fabric material.
The appearance of the product and its size directly depend on the pattern, so it is worth carefully approaching the development of the pattern and thinking through all the parameters: the bottom, the main part, the valve, the handles, the belts, etc. With the correct dimensions of each part, the process of sewing and assembling them will be easy and simple.

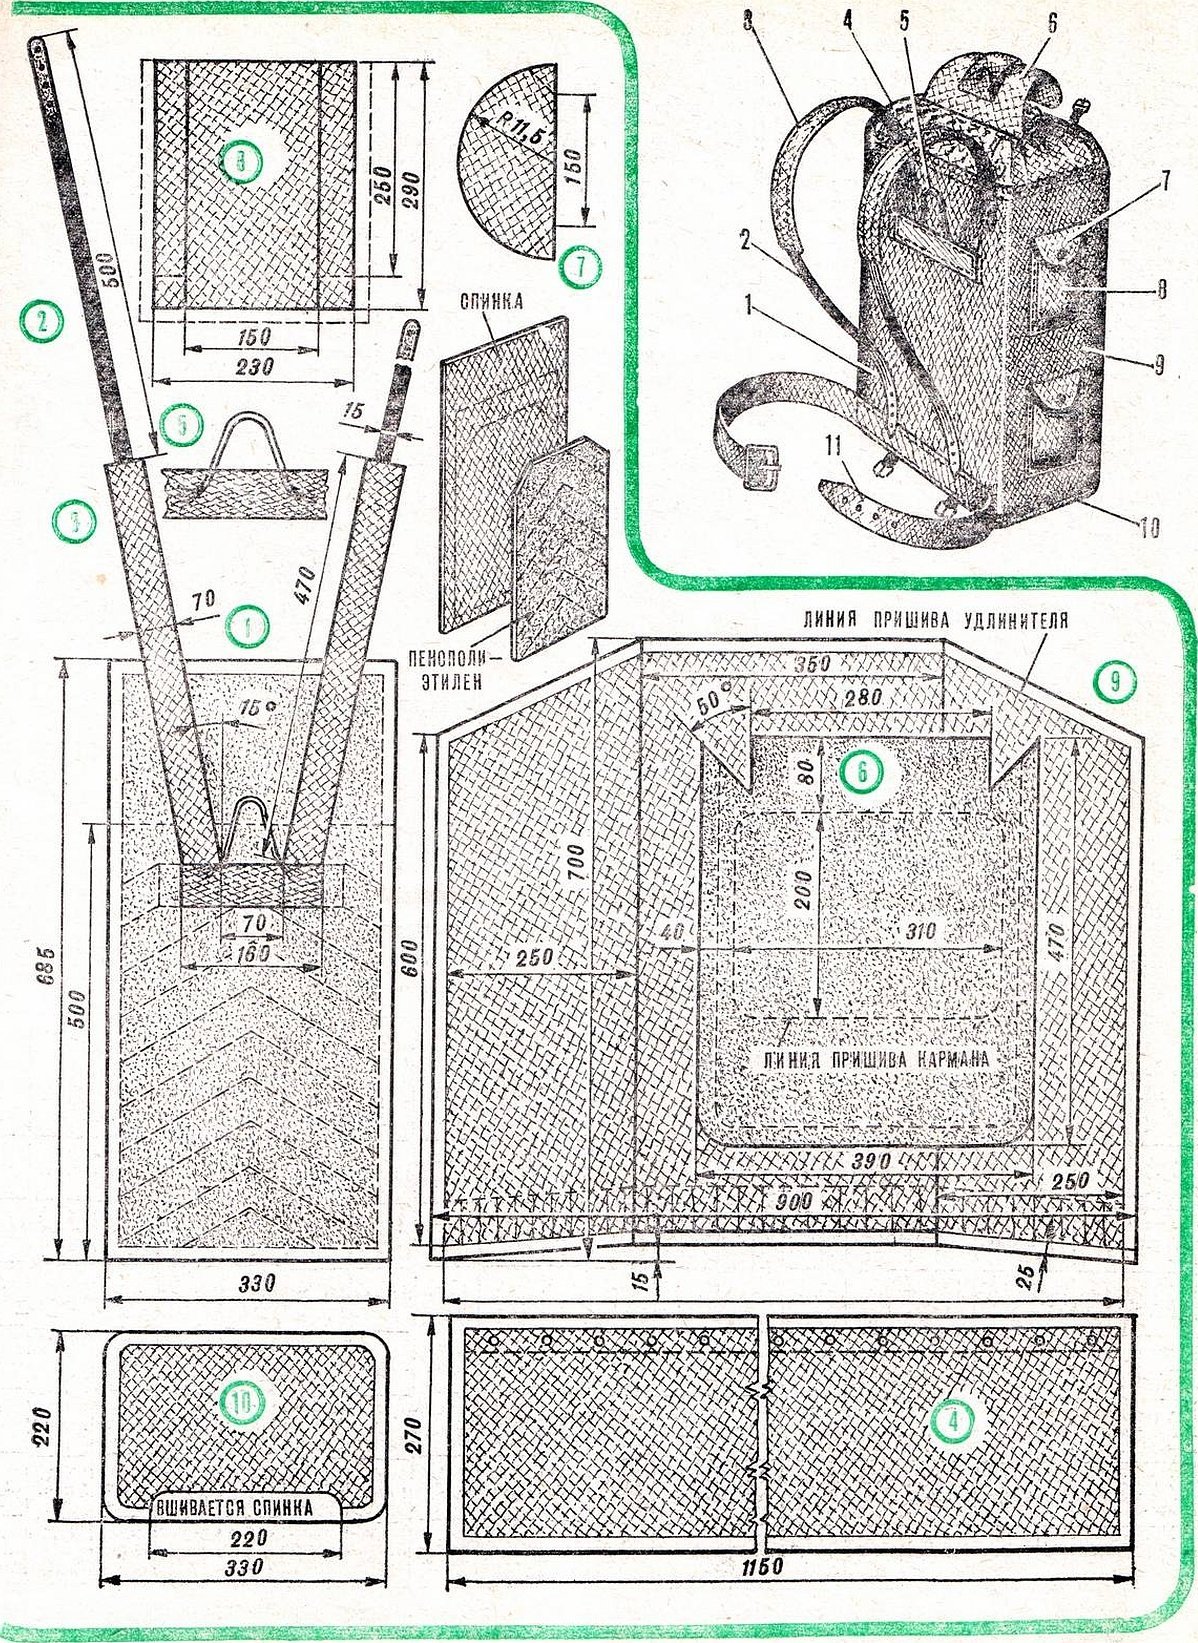
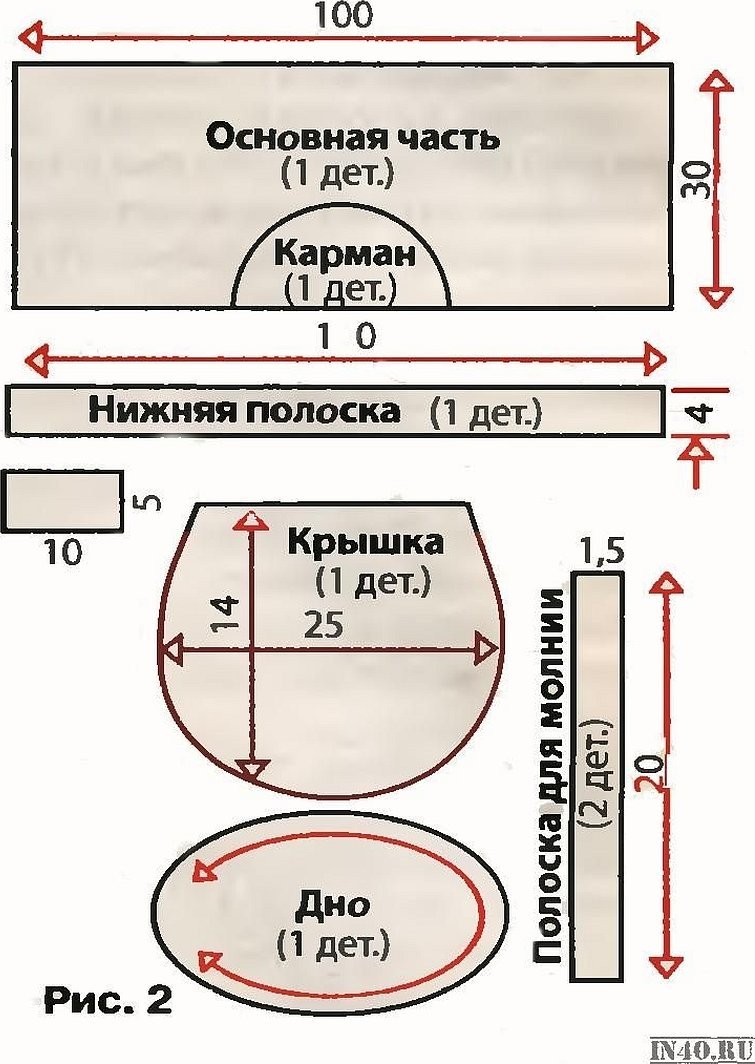
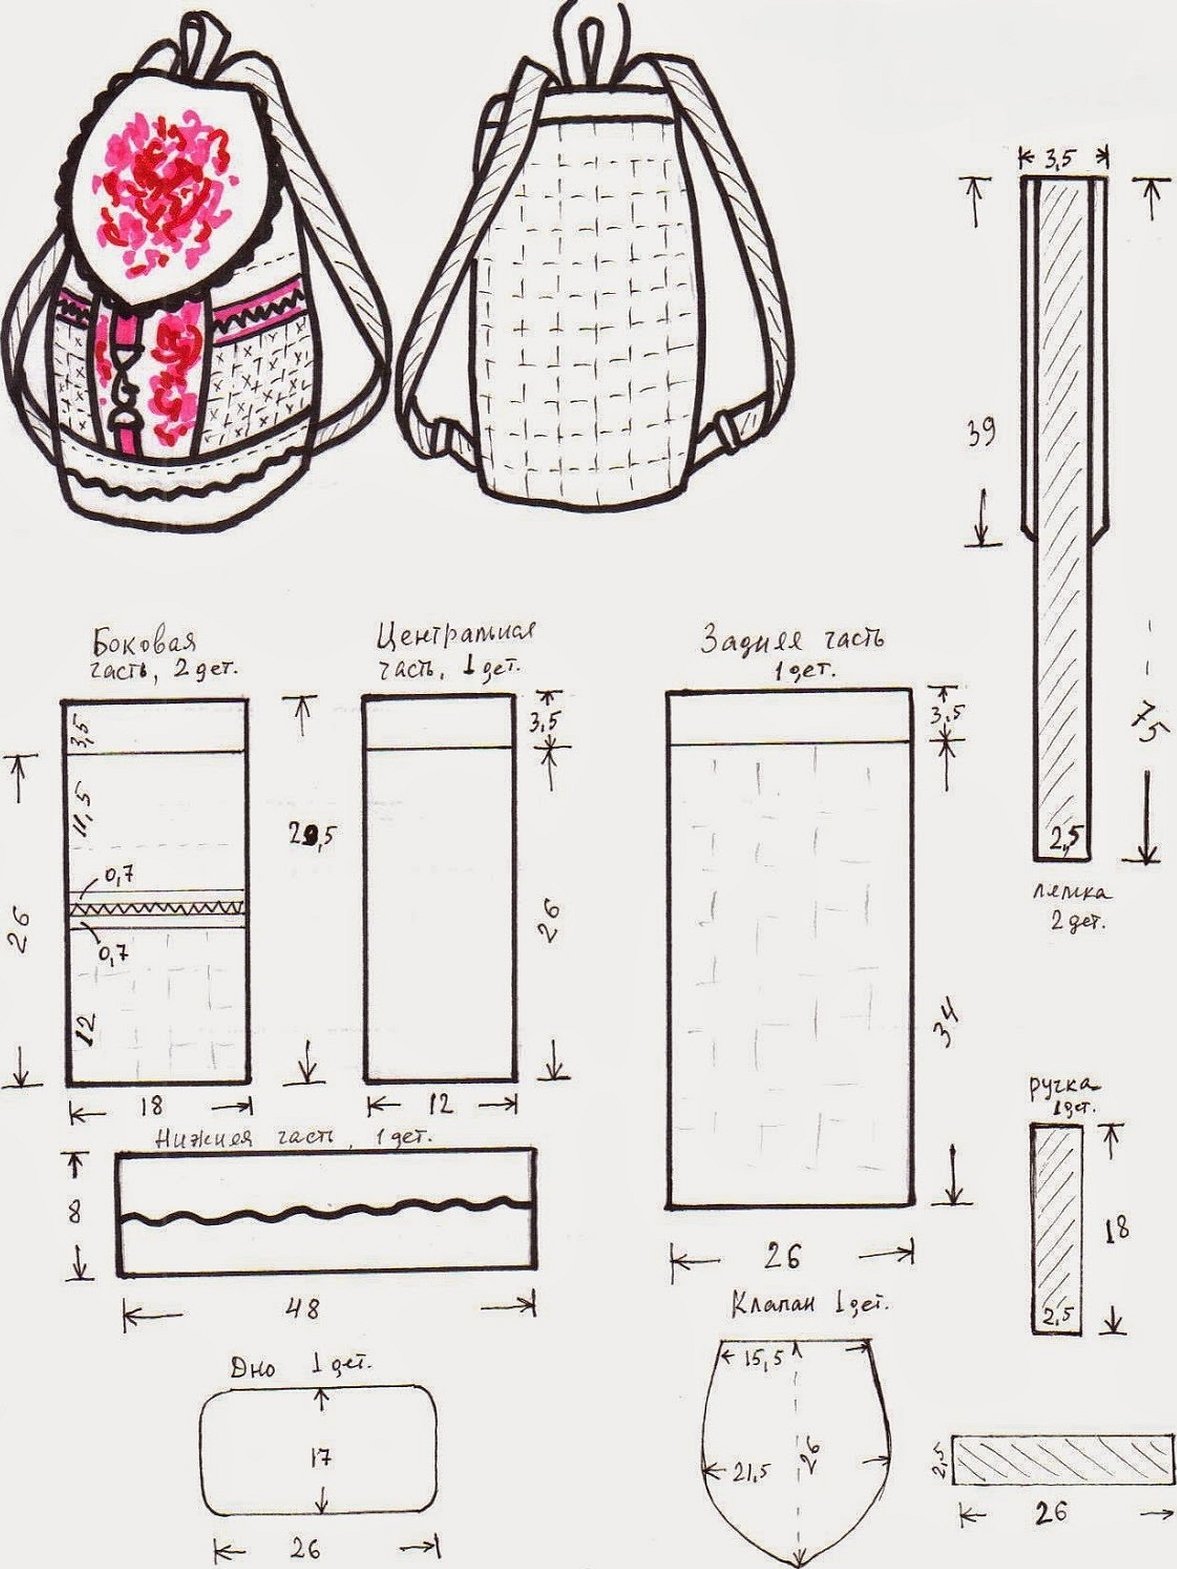
Pattern of a tourist backpack
Sewing any backpack, including a tourist or fishing backpack, begins with cutting out all the details. After cutting out, it is important not to burn the edges of the fabric with a lighter or burner so that it does not unravel or fray. It is best to stitch the seams with strong nylon or lavsan threads using the zigzag method. If the sewing machine cannot do this, then simply use two parallel lines. The picture below shows an example of a pattern.
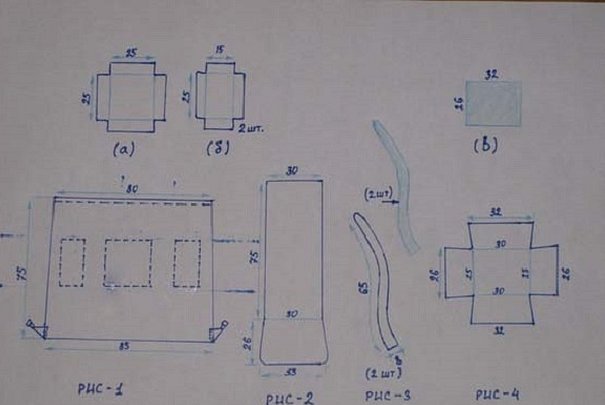
Figure 1 is the body of the product. It shows the places for pockets. At the bottom, at the corners, you can sew on straps that will be reinforced with fabric kerchiefs. Figures a and b are the pocket pattern. A zipper is sewn into them, in a place at the discretion of the needlewoman. It is recommended to decide on this in advance.
Figure 2 — the back of the bag with an additional cut for the bottom. It is made of thick nylon. The bottom is sewn on separately, but it is best to cut them together with the back on one piece of fabric. This will simplify the product and reduce the number of seams.
Figure 3 — Shoulder straps. Two pieces are made of thick nylon, and two of thin nylon. Exactly the same shape requires cutting two blanks from isolon to increase comfort. The second strap is created mirror-symmetrically from the first.
Important! To make the straps, you need to sew a thick and thin part along the contour. After that, turn them inside out and insert a strip of isolon inside. Sew a strap on top of the thick side, which should end with a tightening buckle with a strap.
Figure 4 - A flap that is cut and sewn from thin fabric to create a kind of box. A zipper is sewn into it in the center or along the seam. Tightening buckles are sewn on each corner.
Leather backpack pattern
The pattern of this type of bag requires special attention, since leather is not a cheap material and any mistake can cost money. In case of sloppiness, an attempt to save money and sew the product yourself will end in failure. Basically, a pattern from leather or its substitutes is made in exactly the same way as in ordinary cases.
Step by step instructions
Once all the pieces are cut out, all that remains is to assemble them together in the correct order. You should start with the following steps:
- Turn the seam allowance for the top to the front side;
- Turn it over and sew with a machine;
- Iron the seam allowances for the bottom and sides inside out. Do not touch the seam allowances on the short edges;
- Fold the pocket;
- Place the fold lines on the pressed edges and iron the side and bottom folds;
- Make small seams at the corners;
- Again, smooth out the folds in the corners;
Working with belt loops
After the above steps, you need to fold the belt loops in half with the wrong side inside and tuck in the longitudinal allowance for the top of the belt loop. After that, stitch the edges of the belt loop and trim the remaining allowances.
It is necessary to make a hole into which the buckle pin will be inserted in one belt loop. The hole should be located 2 cm from the end of the belt loop itself. Immediately after this, the belt loop is threaded through the buckles, and its other end is tucked under. As soon as this is done, the belt loop is sewn to the pocket so that it looks up. Work with the other belt loop is similar.
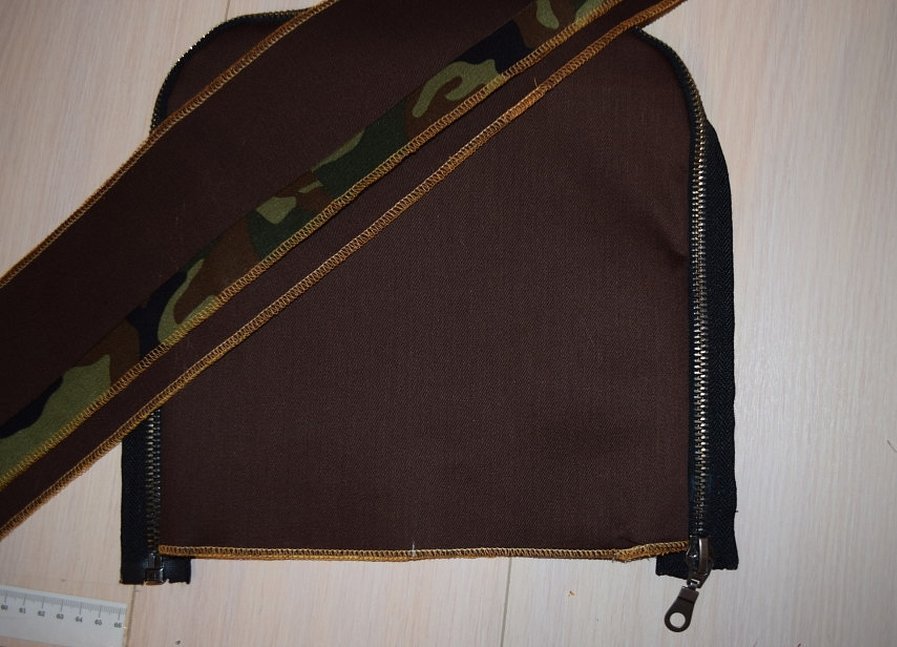
Working with the valve
It is necessary to sew two valve blanks and edge their edges with a ribbon of leather or any other dense material. The valve is sewn to the base and ironed down. The pocket valve is made in a similar way.
Working with the main part of the backpack
If the flap and pockets are sewn on and in place, you can start working on the base. This is done as follows: fold it in half and sew the side seams. Carefully fold the allowance at the top and make repeated seams.
Working with stalemates
This subsection will tell you how to attach a fastener. First, the tab is folded over from the flat side and sewn over the backpack flap. It should overlap the flap by a couple of centimeters. The tab for the pocket is sewn in the same way.
Important! It is advisable to make the seam square, like in children's Velcro bags, and then go along the diagonals of this square. After that, a bri block for the buckle pin is inserted into each patch.
The half-ring loops are folded in half, while the allowances are folded in, just like the loops themselves. Then the excess pieces are cut off. The finished loop is wrapped around the half-ring and folded in half. The backpack is laid out on a flat surface, and all the corners of the bottom are placed between the halves of the loop. After that, it is sewn on securely.
Working with straps
For the straps, use a twill tape. It needs to be folded into a "V" shape, with the sharp end sewn to the top of the back of the bag. The seam is made exactly in the middle, and the ends of the tape are passed through the strap length adjusters. One end is pushed through the half-ring on the corner of the backpack, and a carabiner clasp is secured to the other end.
Next, the top of the product is pulled together. To do this, blocks are inserted around the perimeter every 10 cm. A cord is pushed through these holes, with the ends tied or pinned on both sides so that it does not come out.
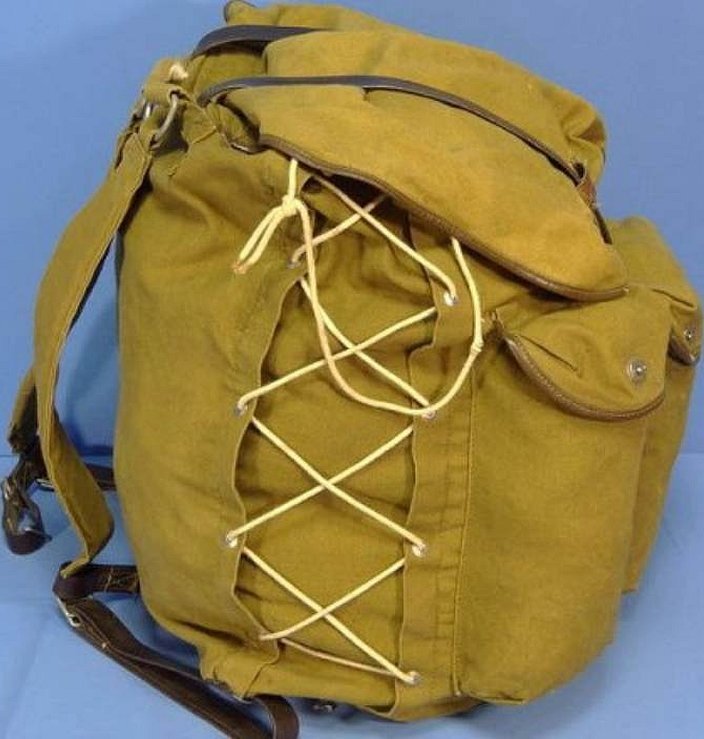
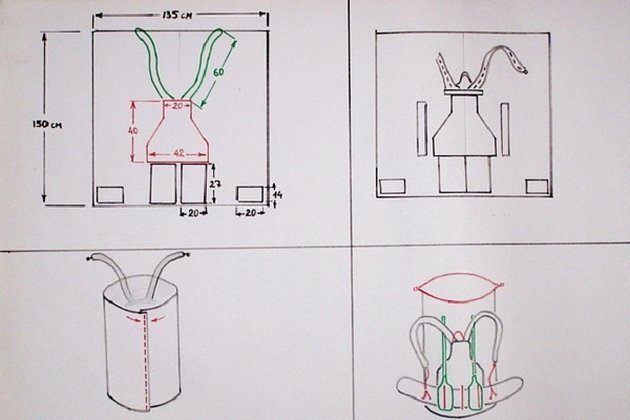
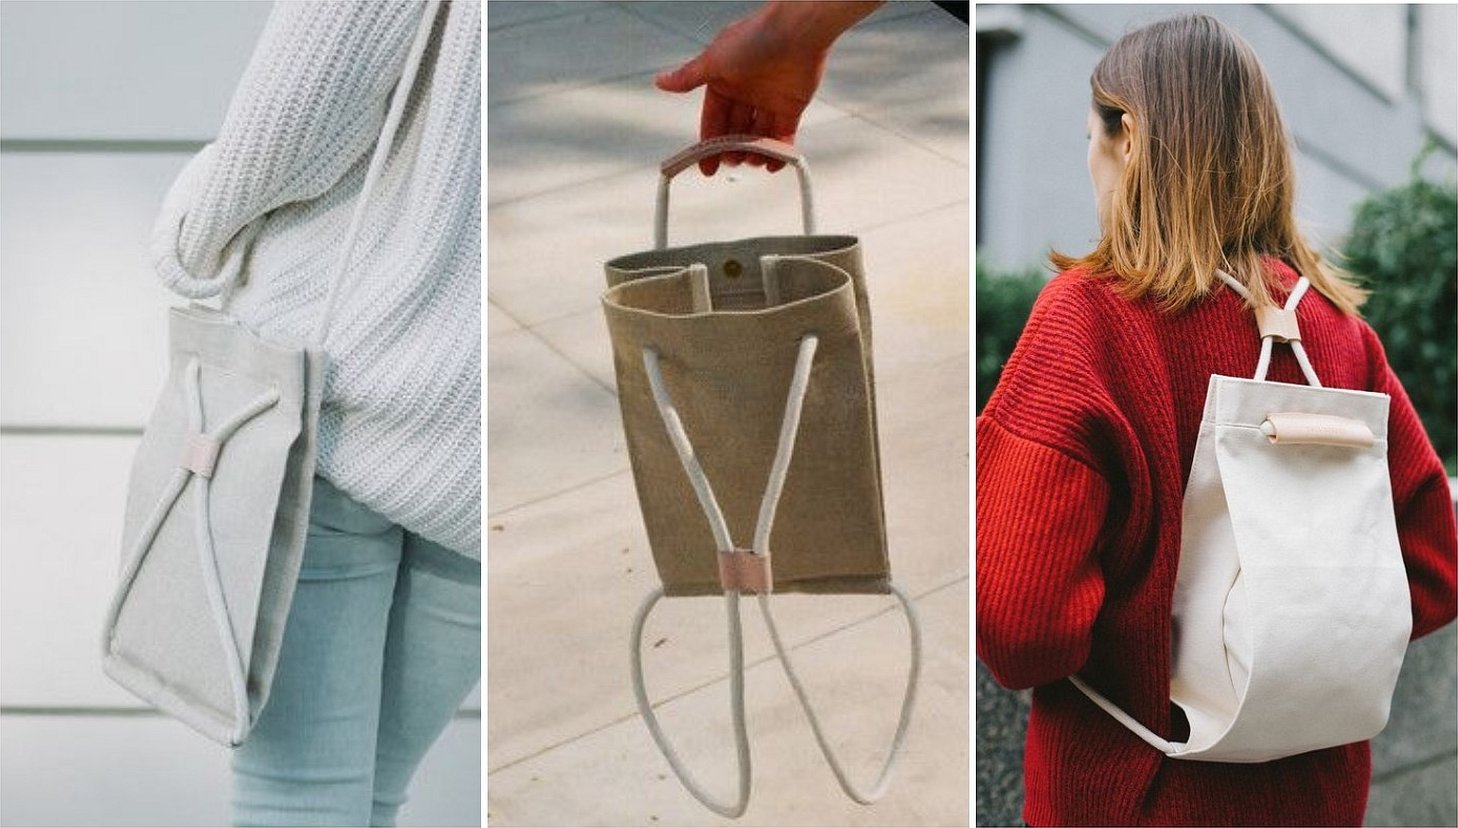
How to sew a backpack-pack from scratch yourself
The cut of such a product consists of rectangles. Its strap with loops can be cut together with the front panels or separately: there is no difference. You will also need a seam allowance so that the backpack does not shrink after sewing.
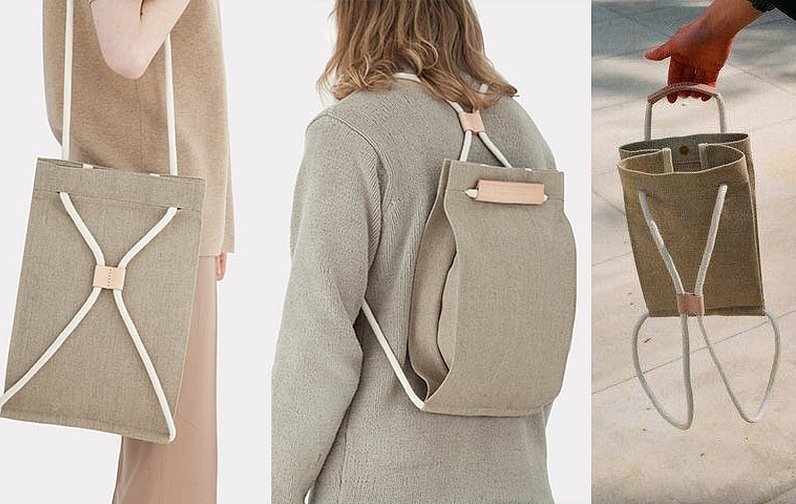
It is worth noting that the "faces" of the panels can be duplicated with adhesive bando both entirely with hatching and unhatched. After the duplication is complete, a pocket can be made. To do this, the hem is ironed and the entrance to the future pocket is secured with a line. The pocket is applied and stitched along the markings and ironed well.
The front panels are edged separately, and all the side panels are folded and ironed. After that, the rope handle is threaded through the pre-prepared holes and stitches. After threading, the rope is sewn by hand.
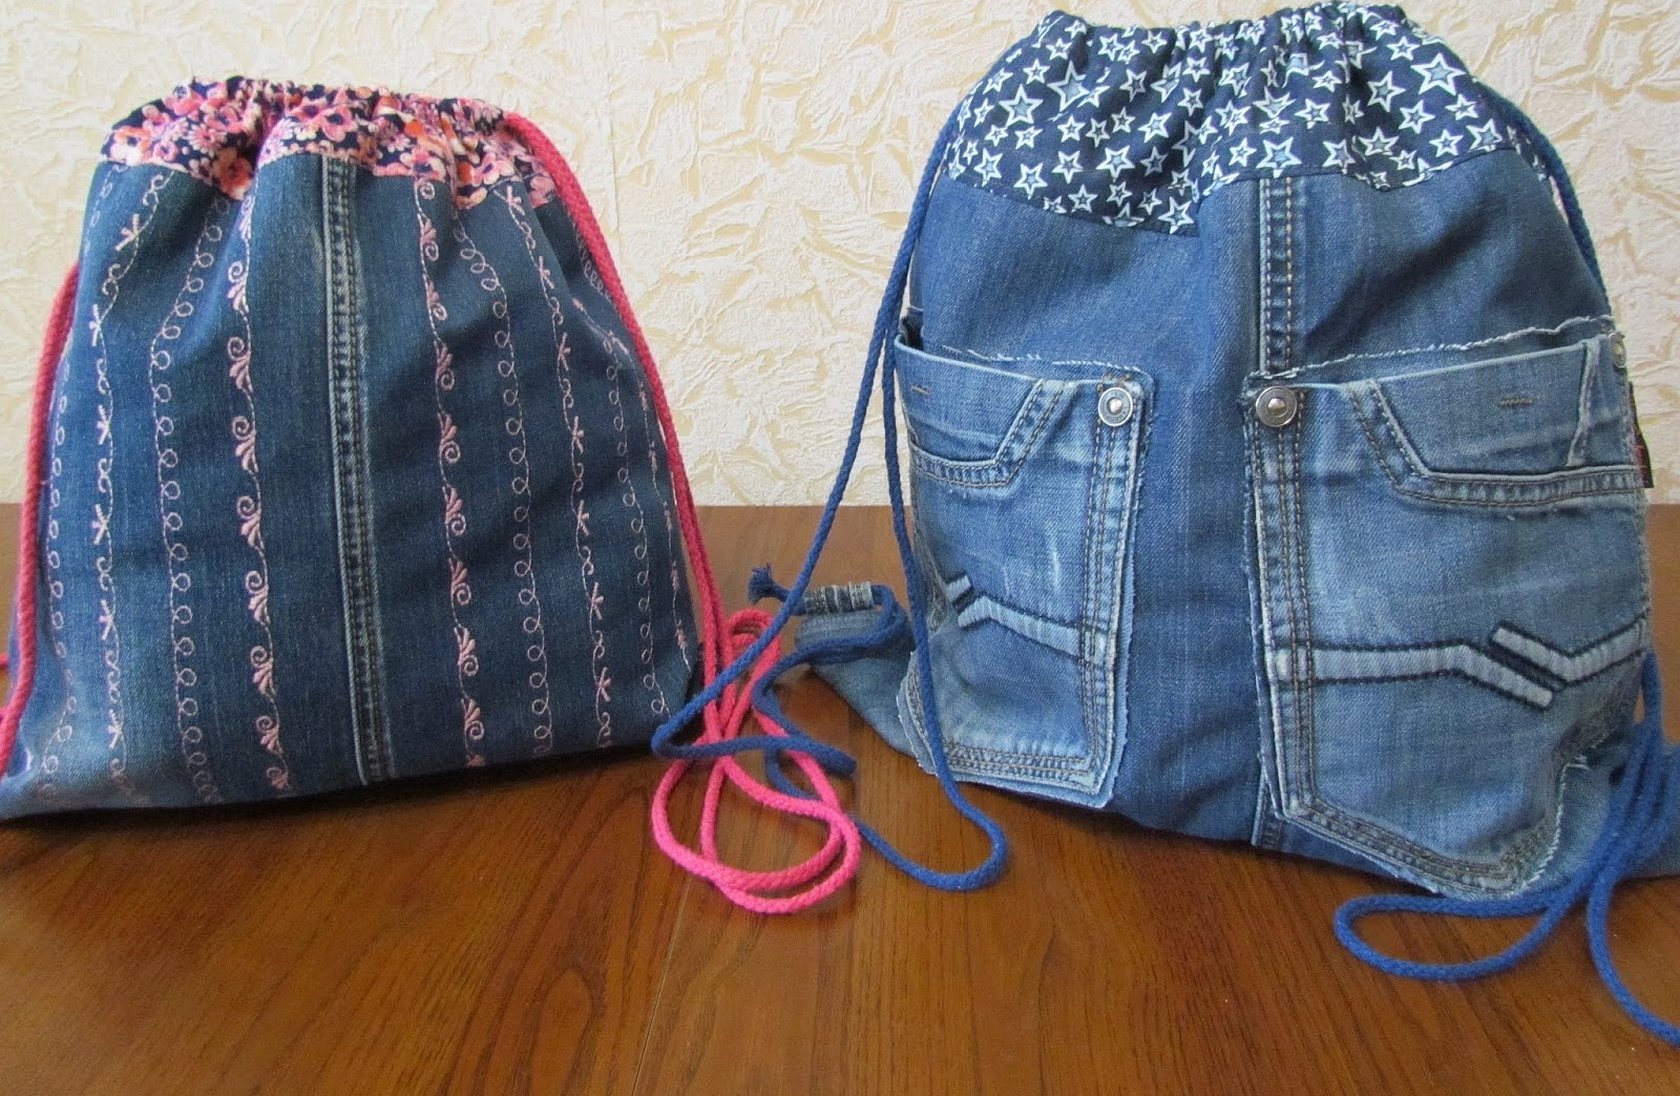
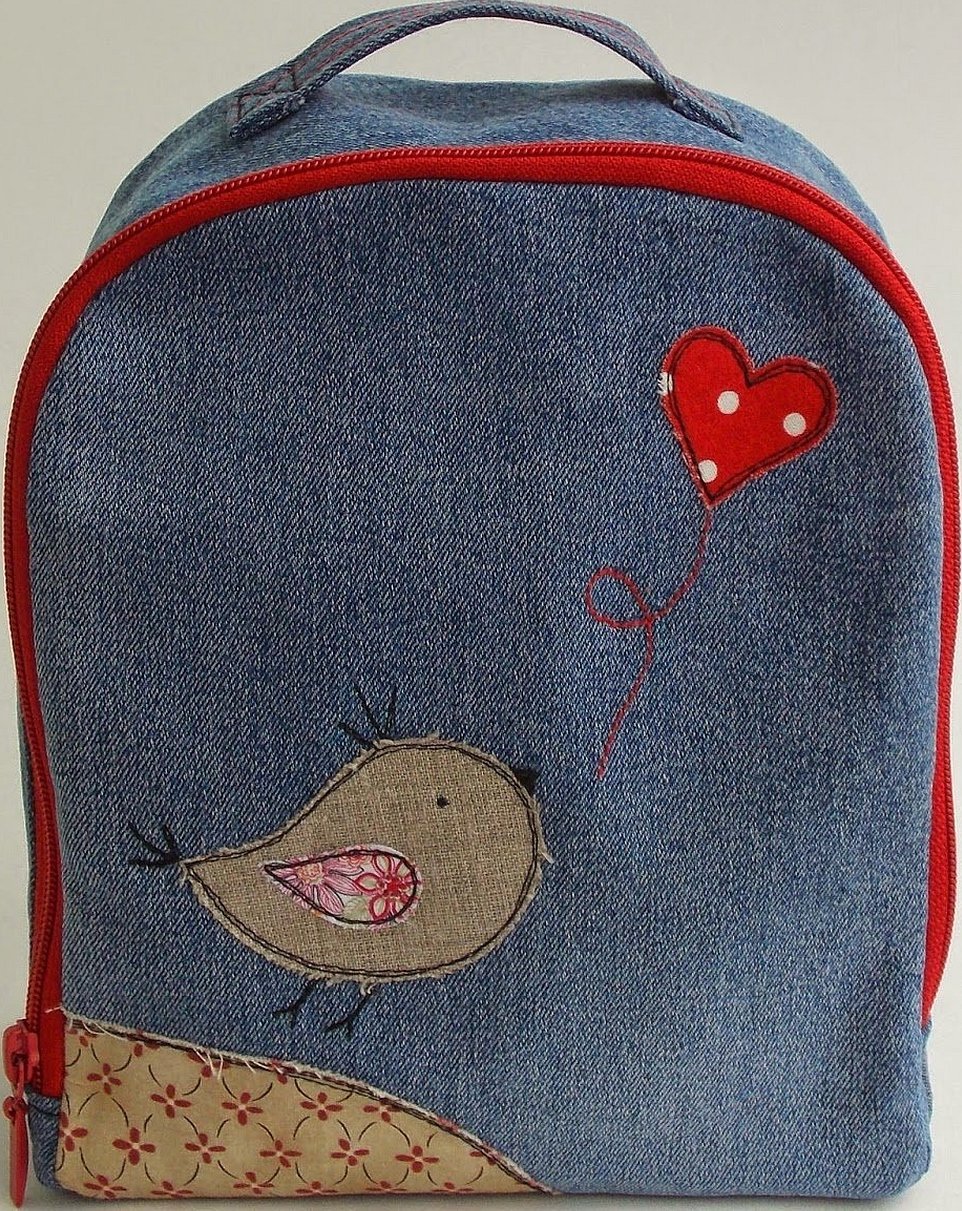
Backpack from old jeans
Sewing a backpack from jeans that have gone out of fashion or have become small is no different from sewing a leather product and other models. The patterns are the same everywhere. The only nuance here is what kind of fabric is used for sewing. Jeans can be both very thin and very thick. This must be taken into account when choosing materials and tools (needles, awls, threads) for processing fabric and sewing.
Thus, a master class was given on sewing various types of backpacks. They are all different, but they are united by common principles of modeling, cutting and sewing. A backpack can be not only an assistant when carrying things, but also a stylish and fashionable attribute.


