Making paper crafts is a fashionable and exciting activity. A large paper deer made with your own hands will come in handy as an apartment decoration for the New Year or as a prop for a photo shoot, and for children, making simple crafts will become an exciting way to spend their free time, or even a new hobby.
How to Make a Deer Head Out of Paper: Step-by-Step Guide
There are many ways and techniques to make a deer out of paper. These include origami, papercraft, 3D kirigami cards, and quilling – everyone can find a creative method that suits them personally, and the smallest are recommended to start their paper modeling journey by gluing toys together using ready-made templates.
Additional information. Working with paper has a relaxing and anti-stress effect on a person. Concentration on diagrams and numbers helps to distract from everyday thoughts.
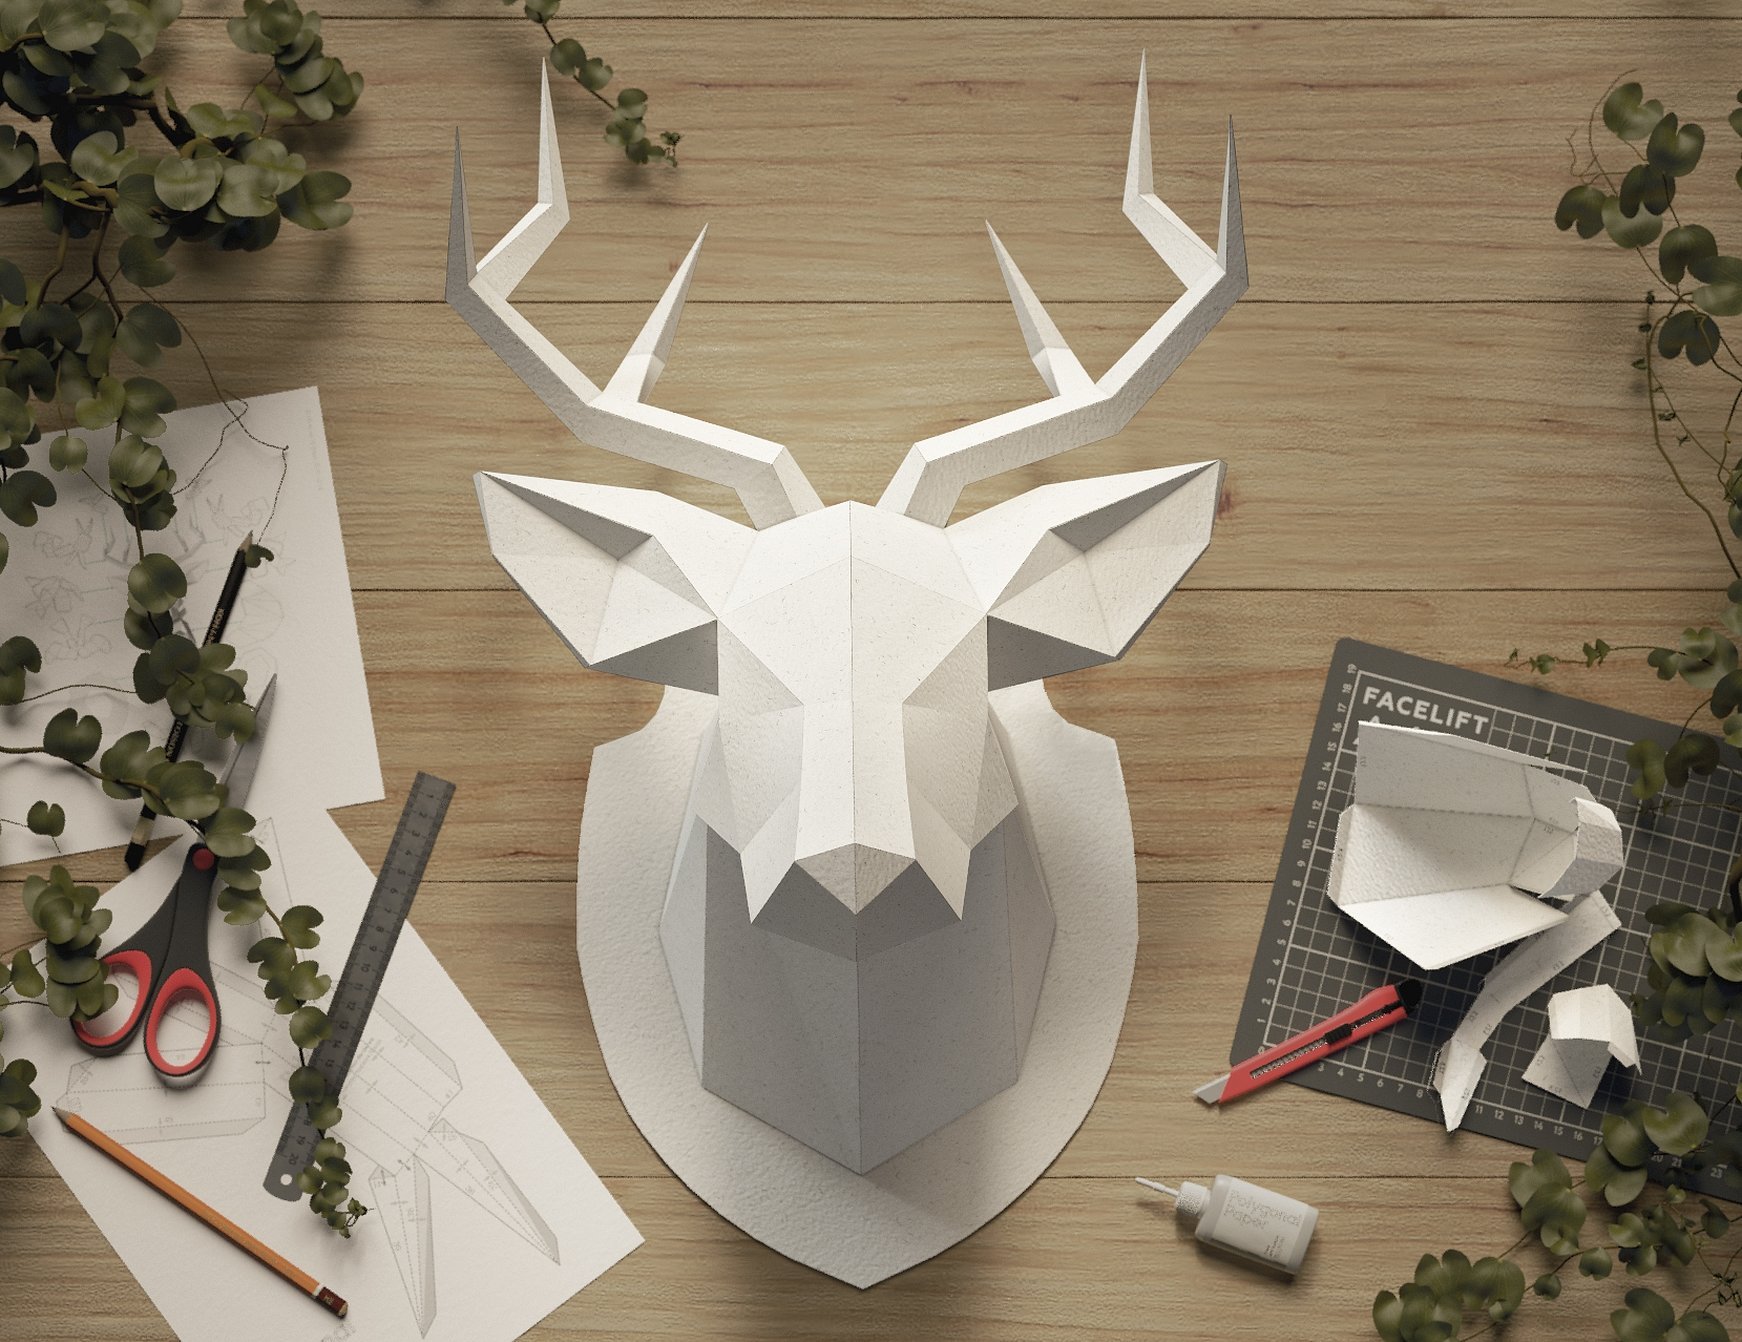
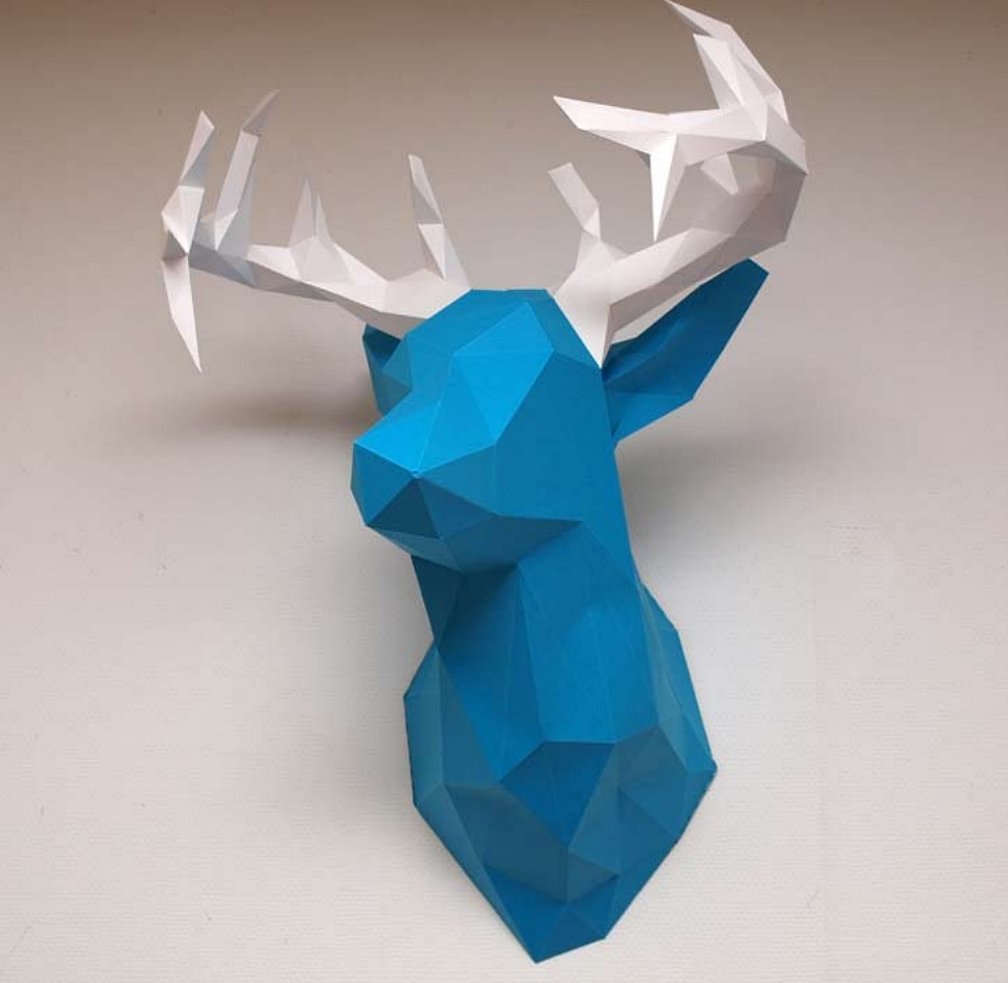
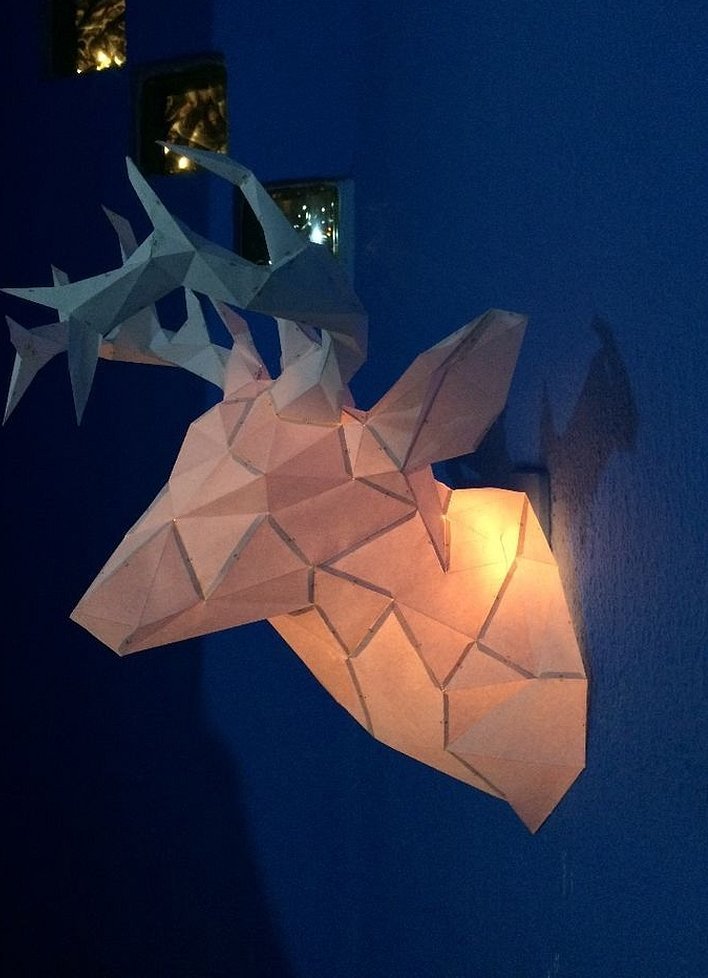
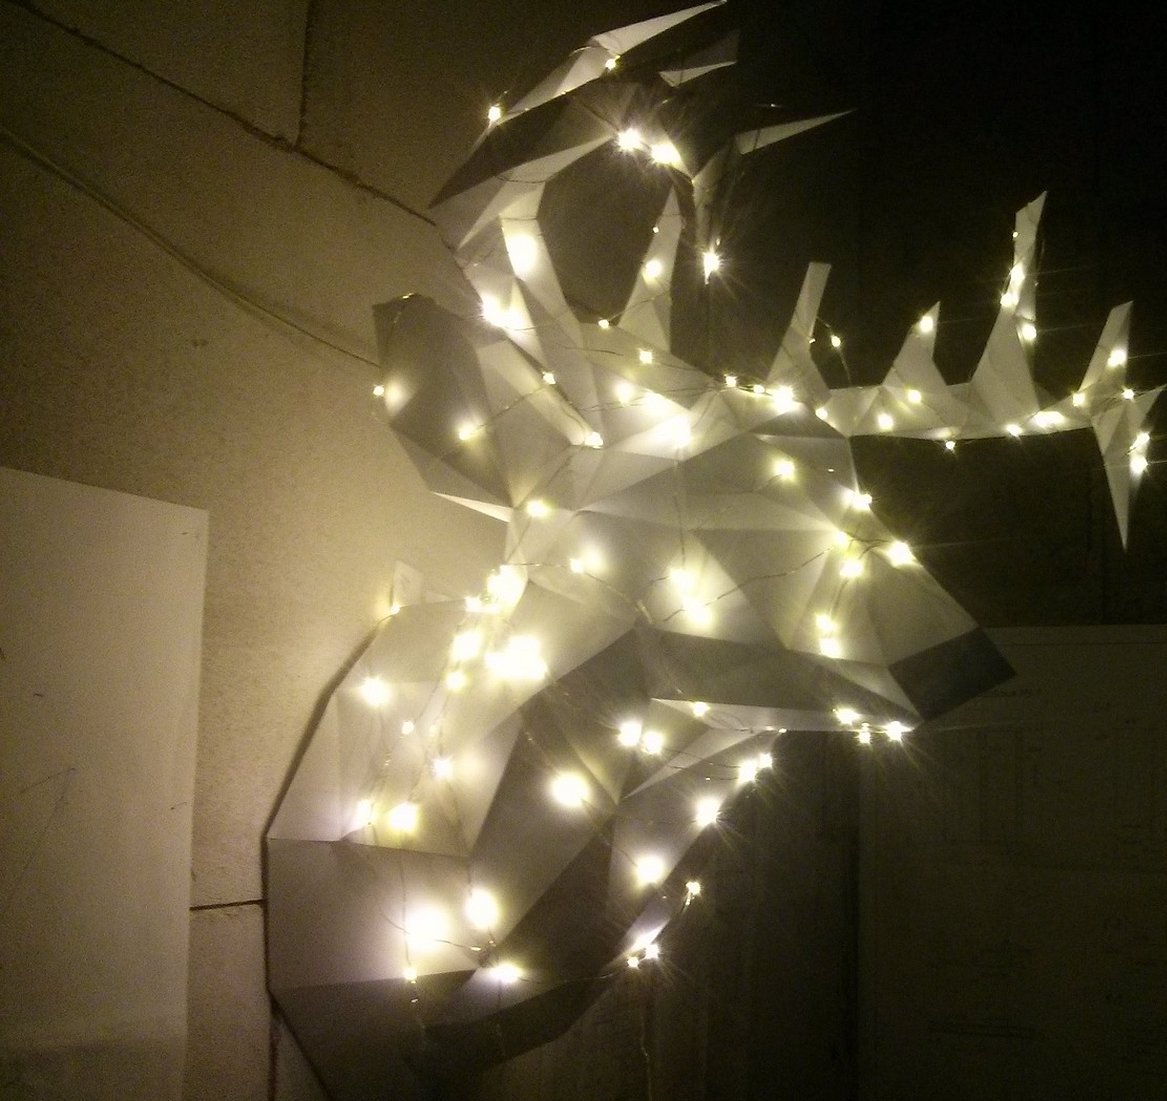
An interesting interior solution can be a paper deer head, the assembly template for which can be downloaded below. The model is made using the new papercraft technique. Although the work seems complicated, you can make the figure in two or three evenings. To get a beautiful and durable craft, it is better to assemble it from thin cardboard.
To create this craft you will need:
- printed scans;
- glue;
- brush or spatula for applying glue;
- metal ruler;
- scissors;
- stationery knife.
Please note! To glue the model, use a glue stick or other non-water-based glue. If you use PVA, it will warp the paper and spoil the appearance of the craft.
Step by step assembly plan
The step-by-step process of making a paper sculpture consists of simple stages:
- Each scan must be cut out carefully.
- Run the blunt side of the scissors along the fold lines along the ruler to obtain clear contours.
- Apply glue to the valves and assemble the parts, starting with the smallest ones and connecting the paired numbers on the planes.
Important! Before gluing the finished parts, you need to wait until each element is completely dry.
Templates should be printed on thick paper or A4 cardboard. Regular office sheets will not hold their shape, and the product will be flimsy and short-lived.
Cutting out the parts is a very important stage, which determines the appearance and neatness of the finished model. It is better to cut long straight lines with a knife along a metal ruler, and place a sheet of cardboard or a thick magazine underneath the workpiece to protect the work surface from scratches and get an even cutting line.
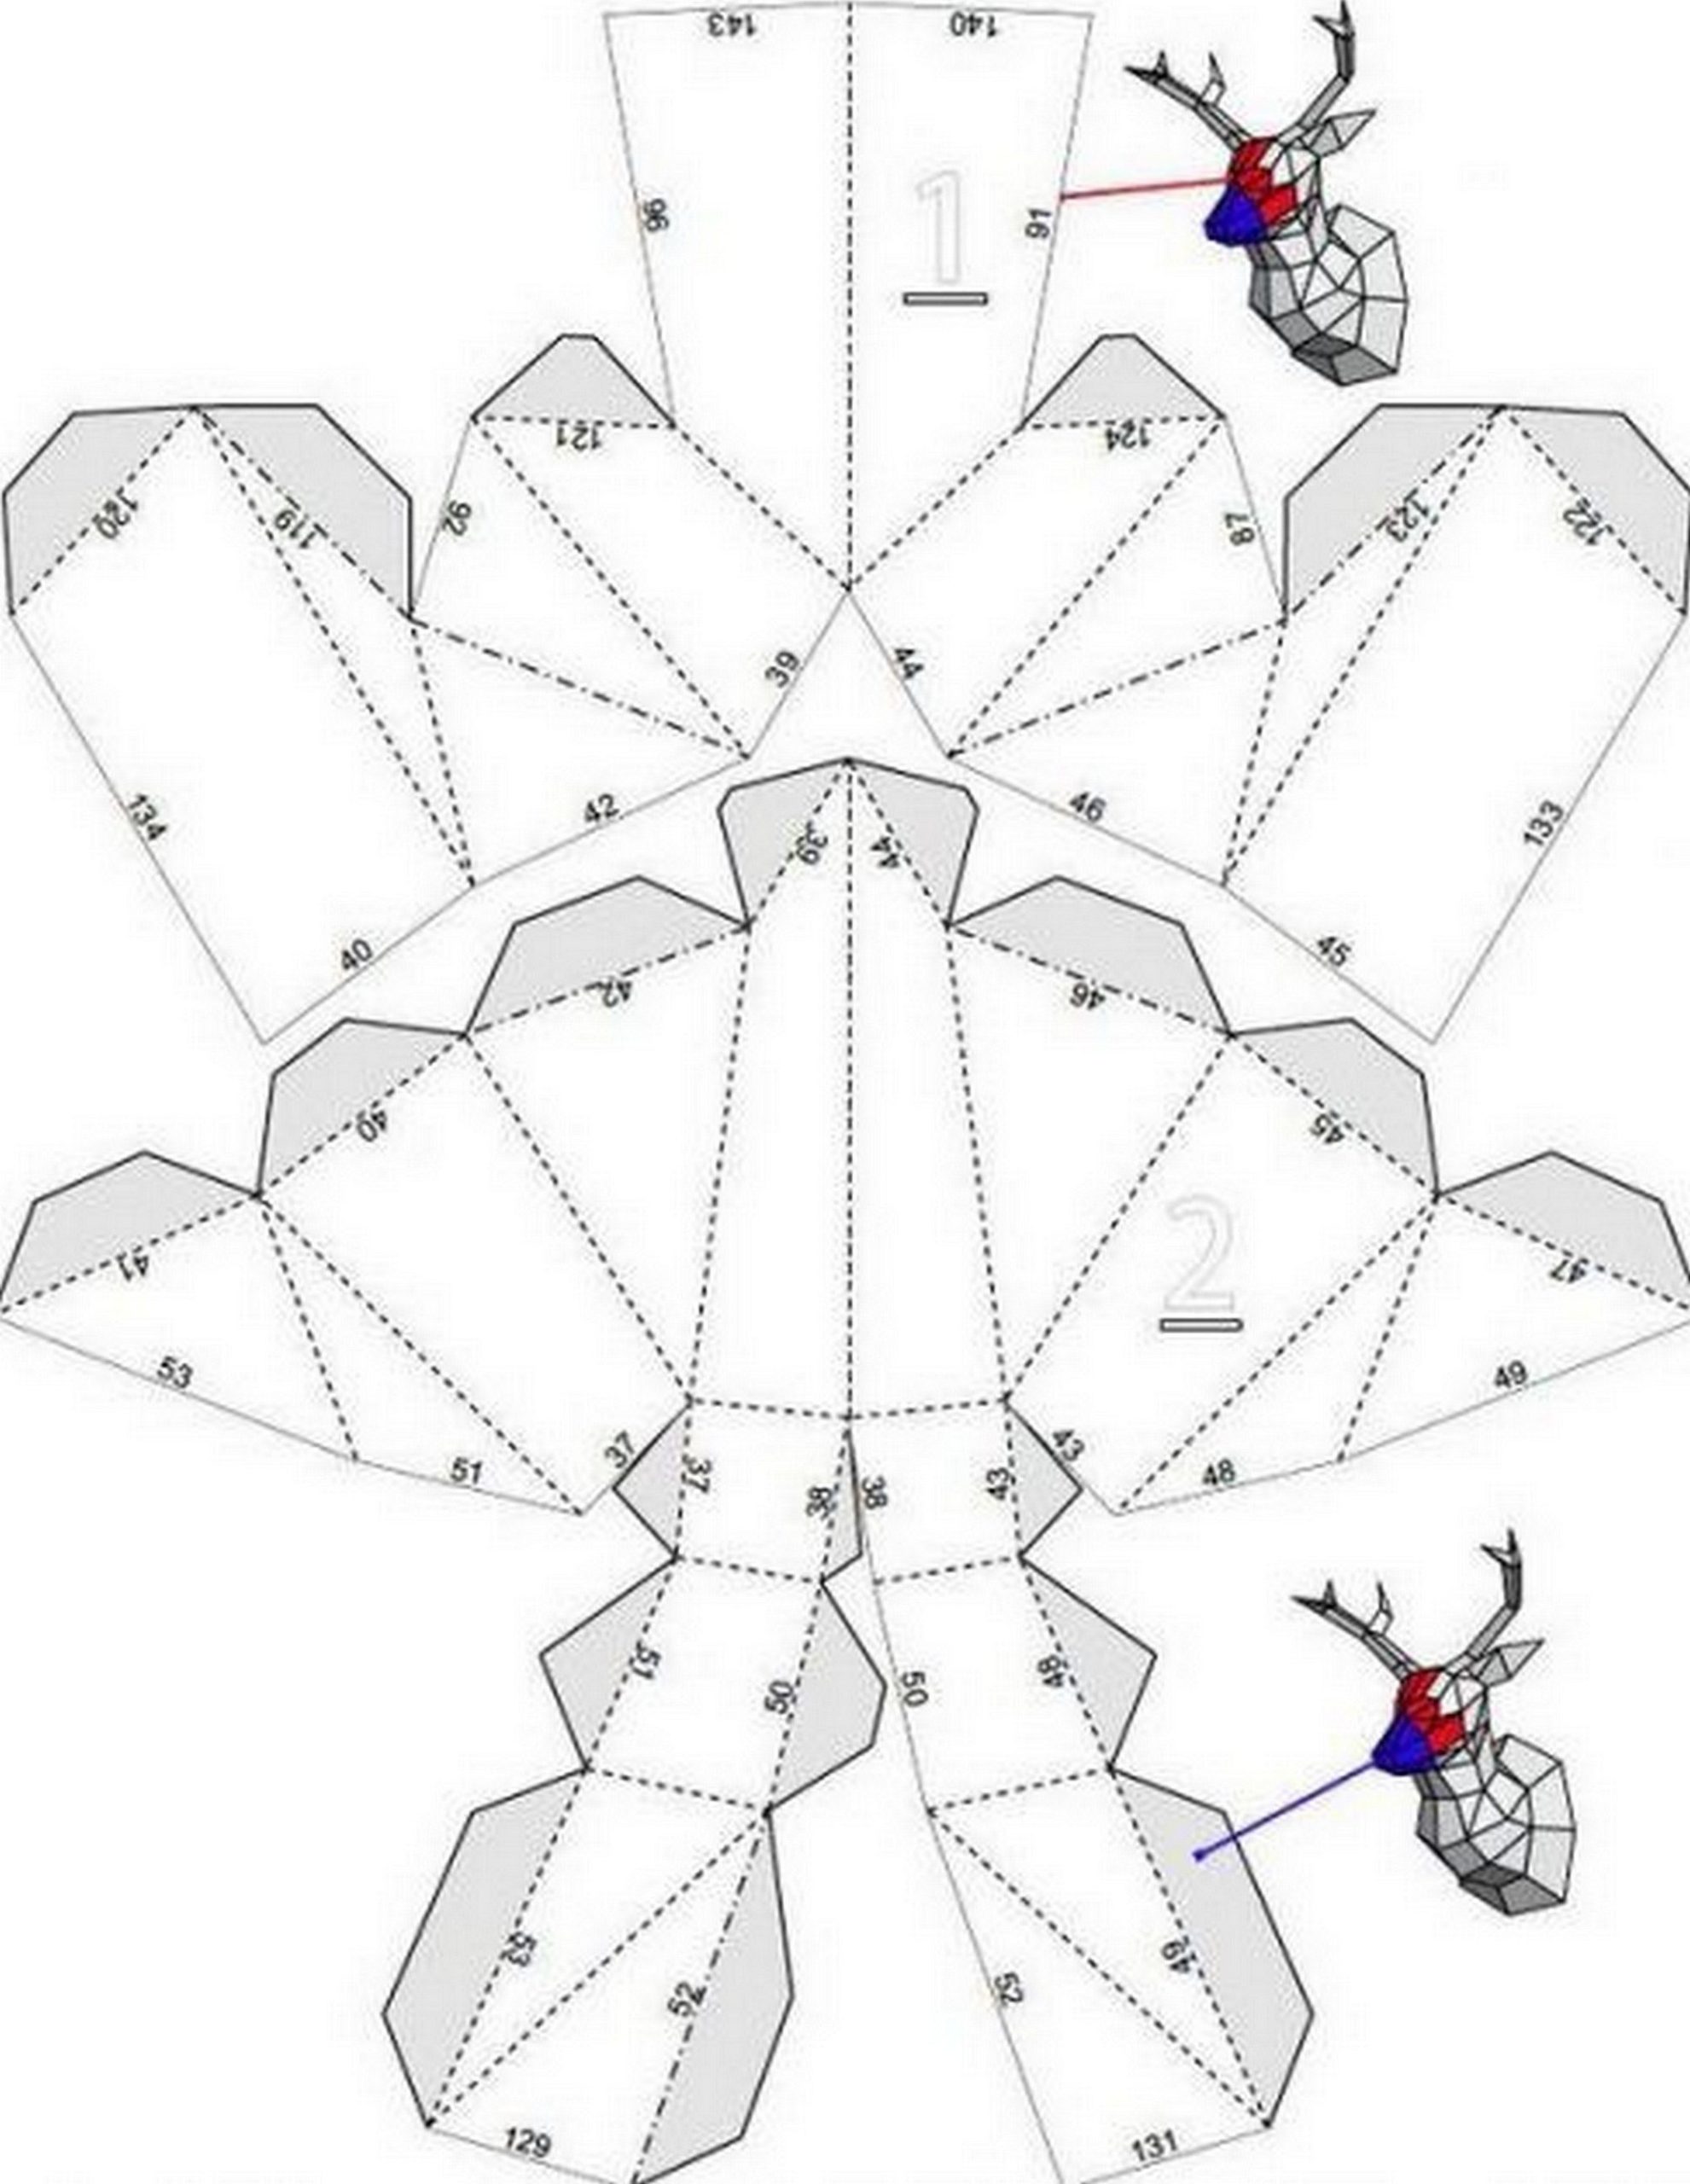
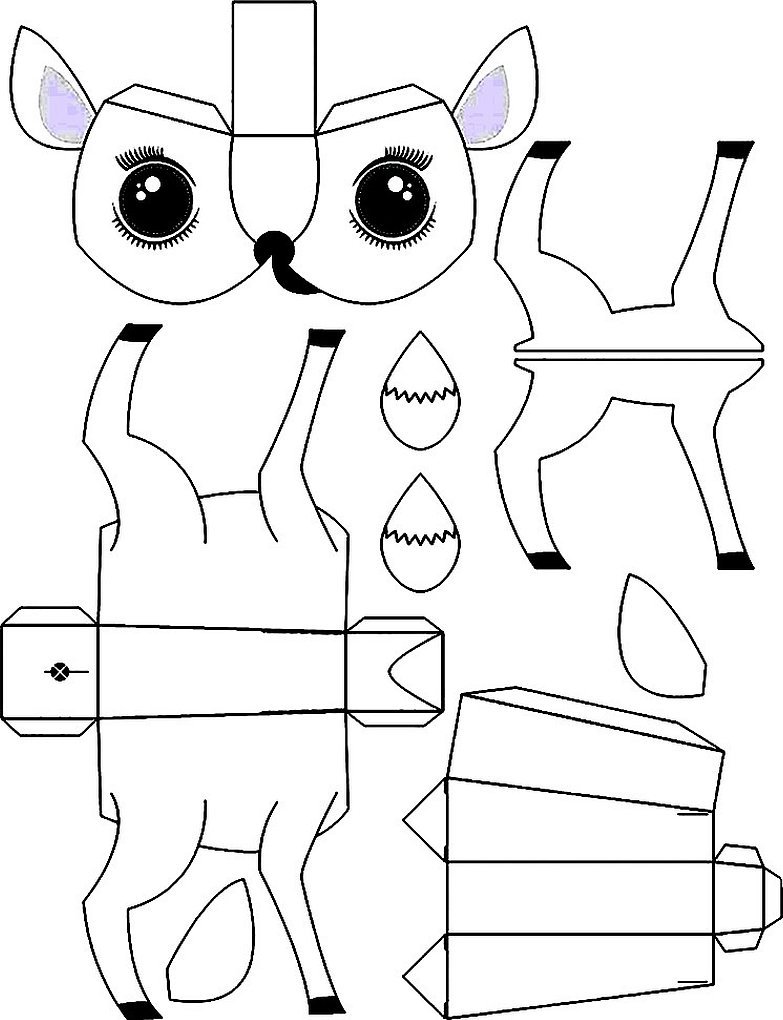
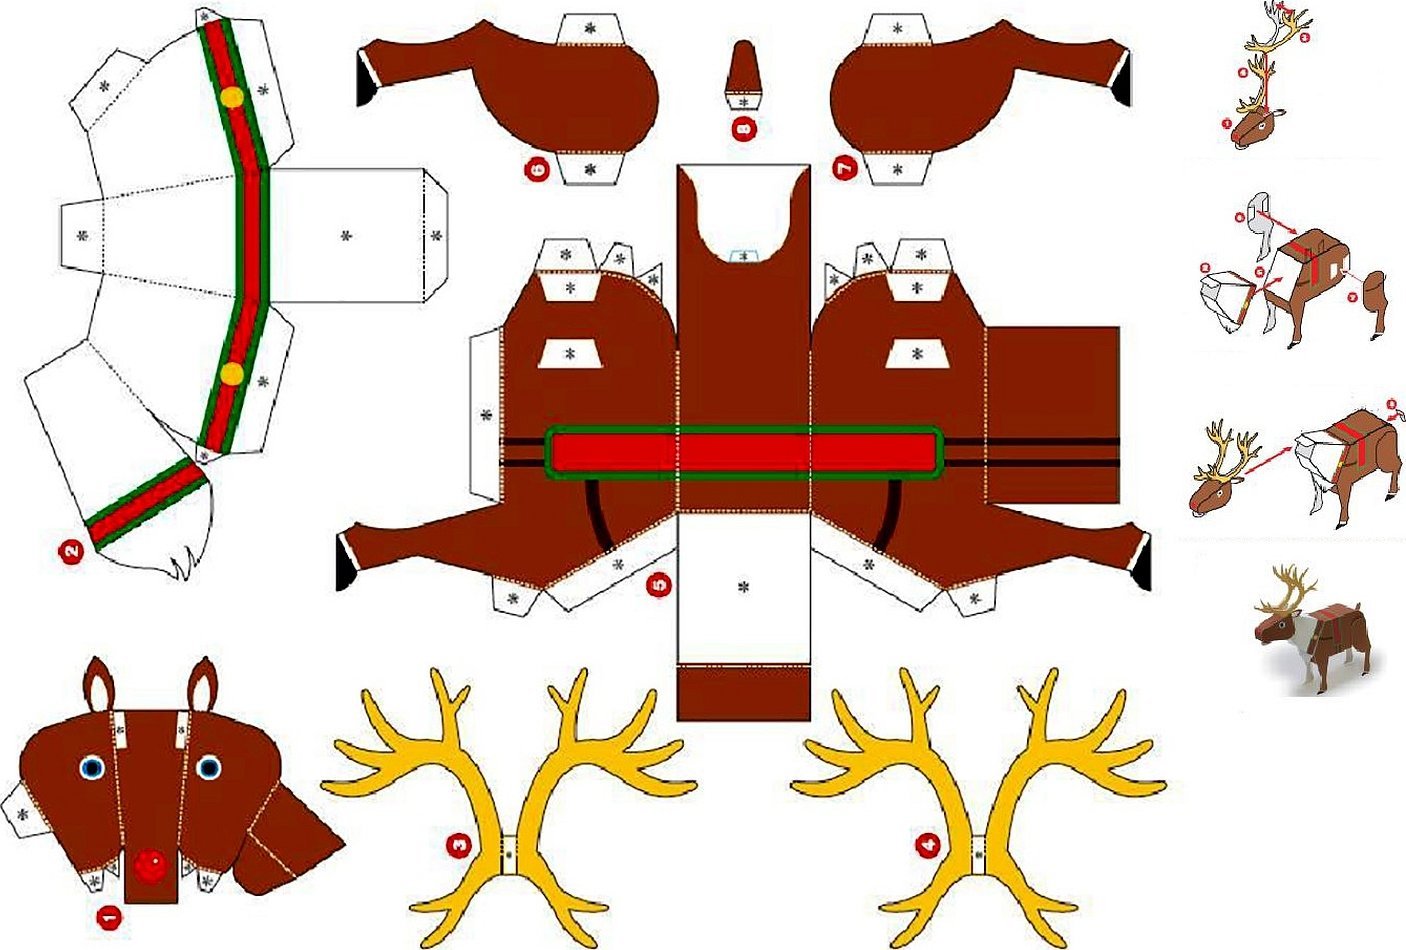
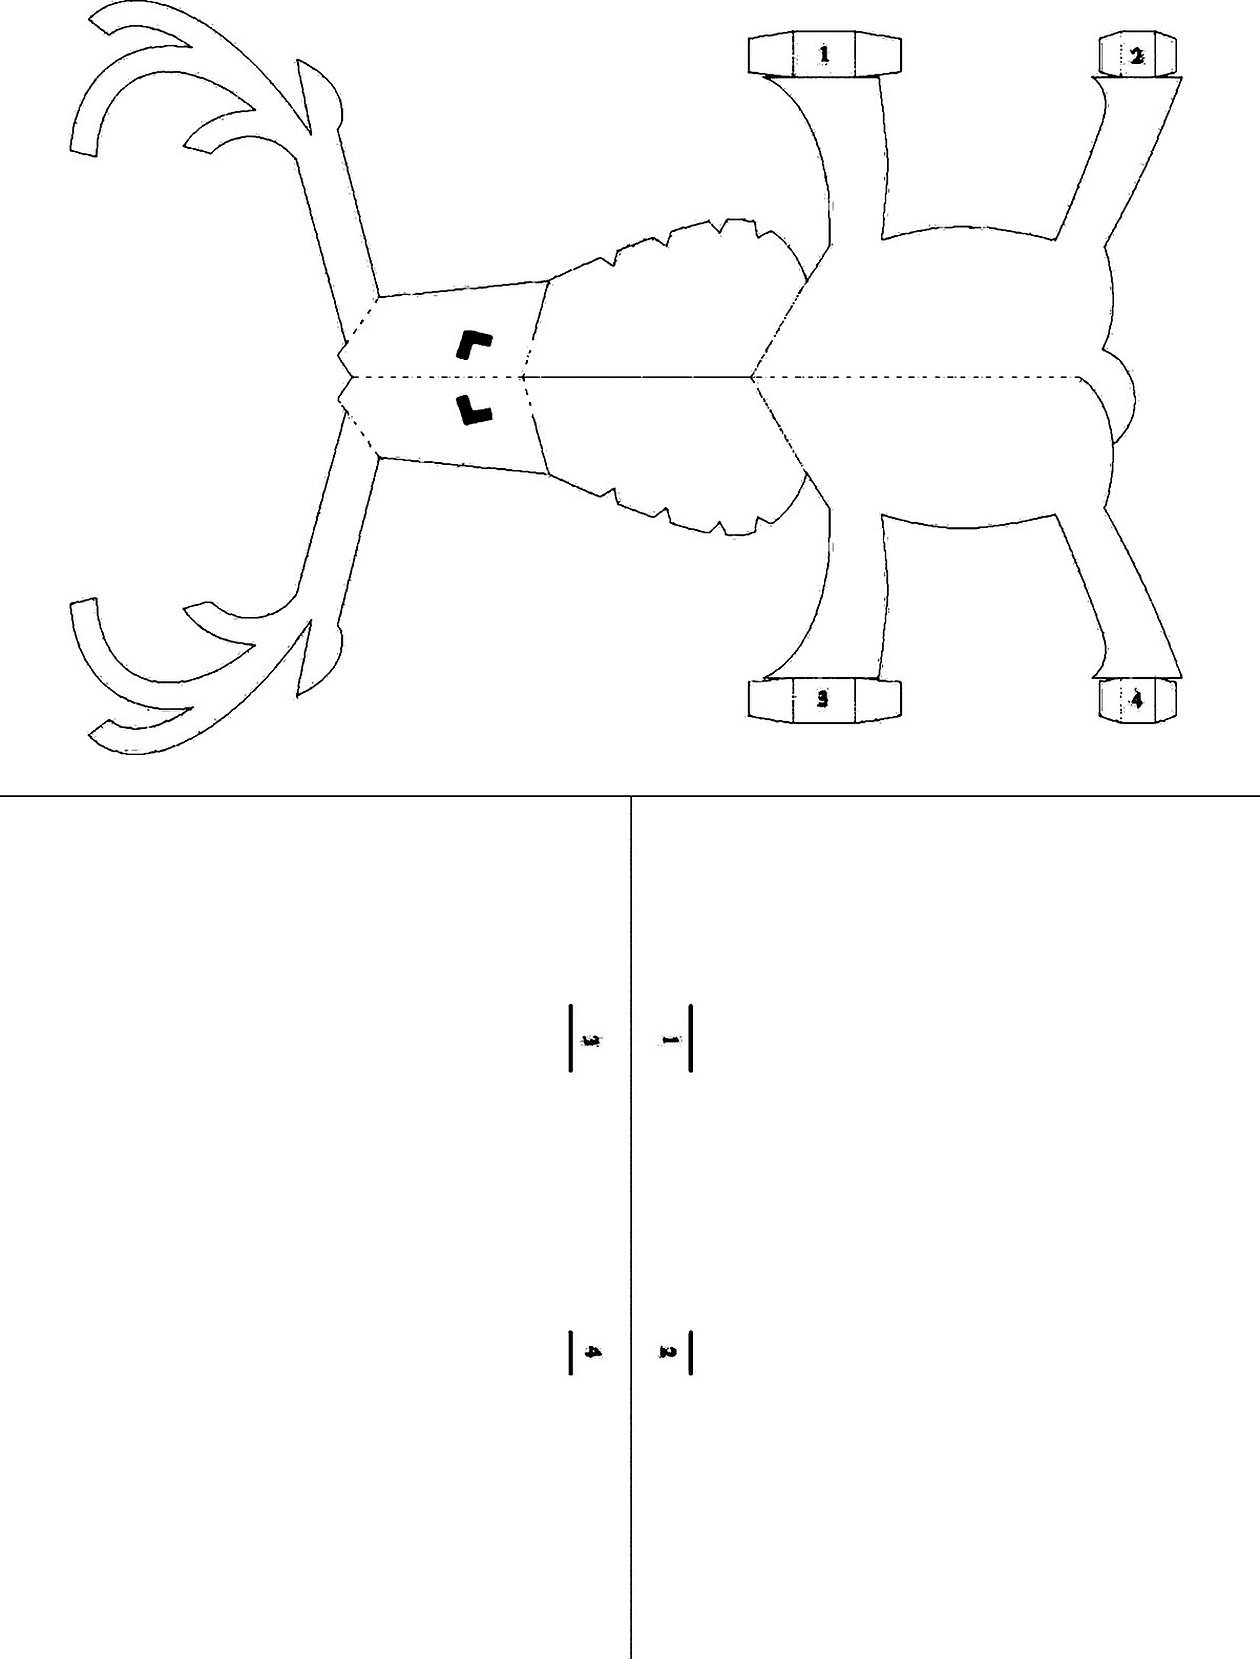
3D scans of the layout for printing
Before you start gluing, it's worth taking the time to carefully examine the cut-out elements, comparing pairs of numbers and determining which parts belong to which part of the body. After that, it will be easier to determine the order of assembly.
Volumetric deer made of paper
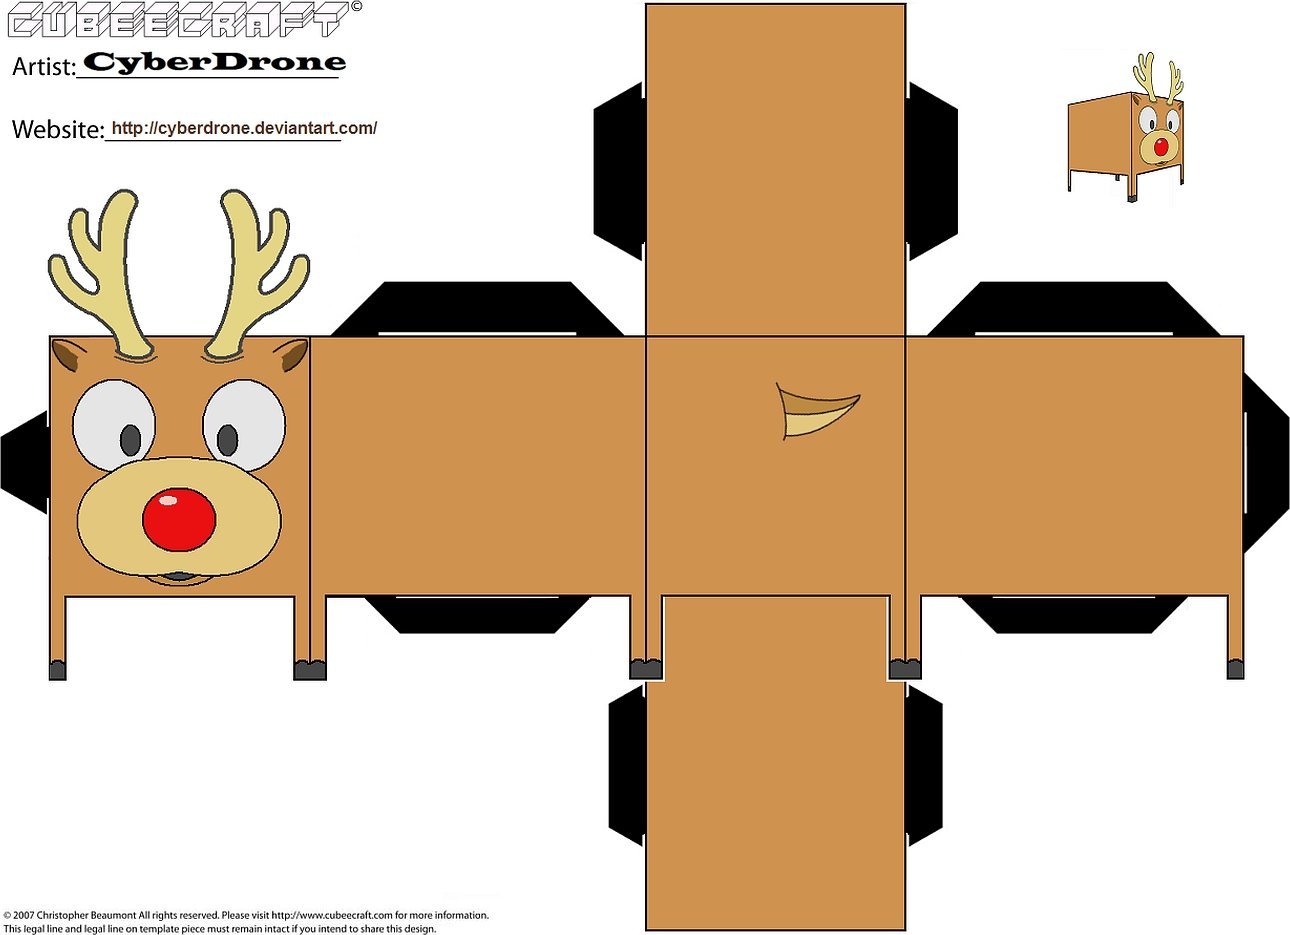
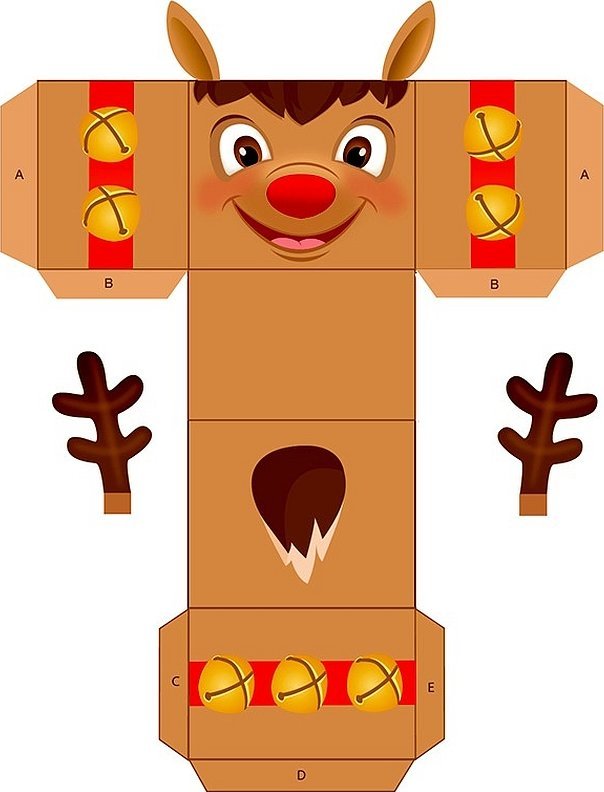
Every child can assemble a paper craft from a ready-made pattern. You can simply play with a realistic animal figurine or put it in your paper zoo, and square “deer” boxes are great to hang on a New Year tree or fill with candy and give to classmates or friends. On New Year's, it's time to put Christmas figurines on the window to create a festive atmosphere.
Paper toy assembly plan:
- Print the selected layout on a color printer.
- Cut along the contours, trying to accurately follow the drawn lines.
- Fold along the fold lines.
- Apply glue to the valves and connect them.
- To make the toy more stable, you can strengthen the body from the inside using cardboard.
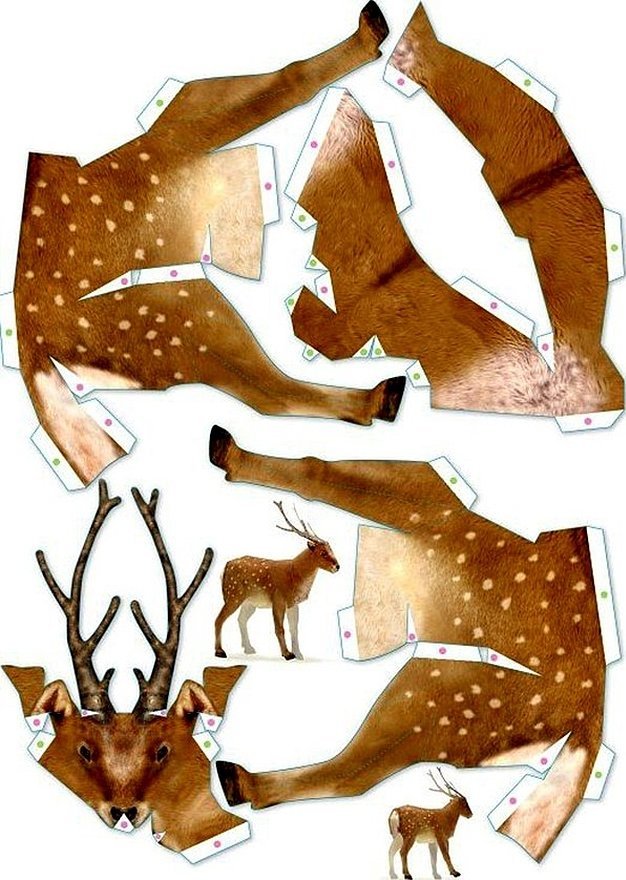
Scans for printing
Paper deer in kirigami technique
The craft can be used as a New Year's card or for holiday home decoration. If desired, you can make a cover for the finished product from colored paper so that it acquires a complete Christmas look.
Tips for cutting kirigami:
- Small details should be cut out first, starting from the middle of the drawing.
- The details on the edges of the card are cut out last.
Important! The cuts need to be made carefully and precisely along the lines. To avoid your hand shaking at the wrong moment and ruining the entire workpiece, you can first practice cutting out complex contours on a rough sheet.
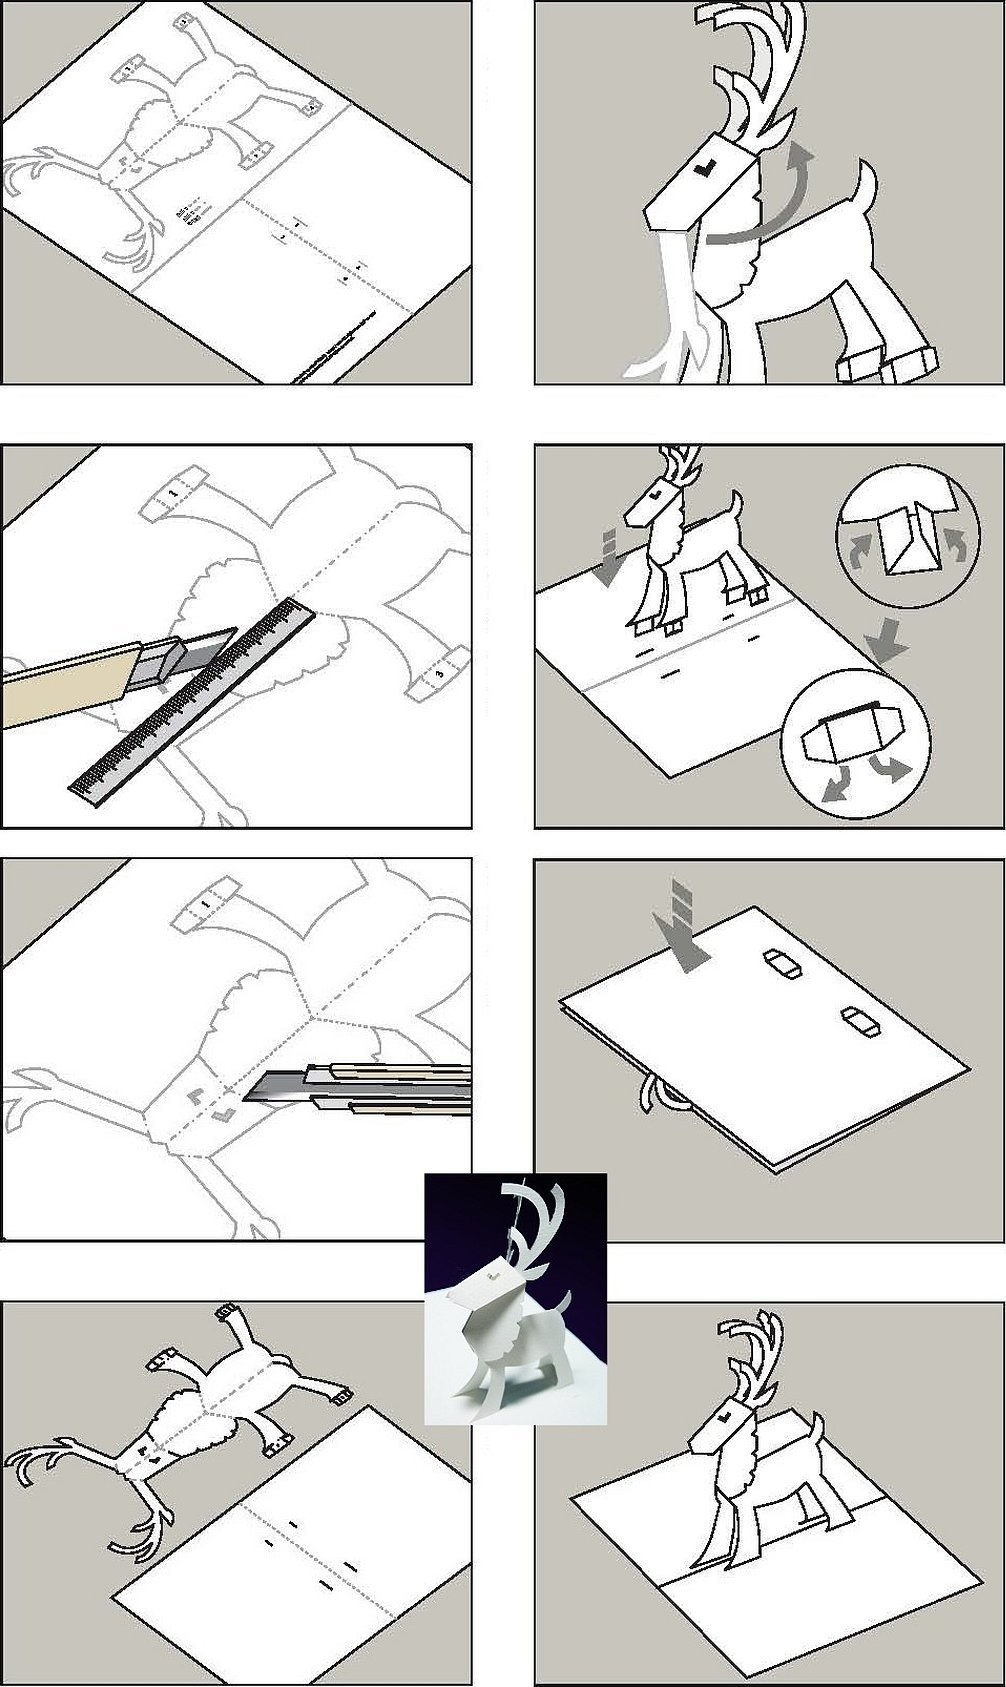
Printable template
To copy a template, you don’t have to print it out; just place the sheet on your laptop screen and carefully trace the outline with a pencil.
Making a Paper Deer Using Papercraft Technique
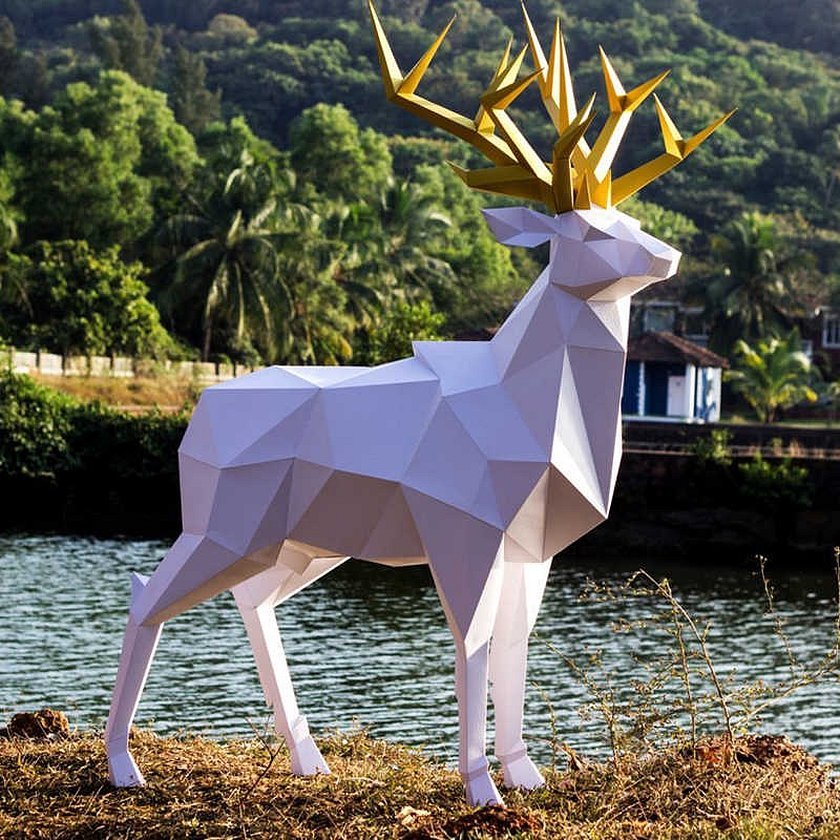
Using the papercraft technique, you can make a full-length volumetric forest dweller. If you cover the finished figurine with epoxy glue, sand it and spray paint it, it will become durable and will not look any different from a plastic one.
Papercraft is a type of modeling using parts cut out of paper or cardboard. Creating a deer figure is a rather painstaking process, since it consists of a large number of small parts. They must first be cut out using ready-made patterns (scans), and then carefully glued together. The work can take more than one day, especially if you want to make a full-length deer.
Please note! If you wish and have some free time, you can find the templates of the layouts on the Internet and print them on A3 sheets. In this case, the assembled figure will be more than 2 meters high. Painted with waterproof paint, it can become a decoration for your yard or cottage.

Such an inexpensive material as paper is good because it provides unlimited scope for creativity. Based on the proposed schemes and techniques, you can create your own versions of crafts, experimenting with types of paper, sizes of figures, additional elements or coloring.


