Sewing toys with your own hands is a fascinating activity not only for adults, but also for their children. In addition, toys are an element of assignments in labor lessons in the 7th grade at school. This type of activity develops a child's creative inclinations and imagination, as well as accuracy, precision and discipline. Below we will talk about how to sew mice from felt.
Benefits of Felt
Felt is a fabric used in various methods of making crafts, toys and other things. Its structure is different from all other materials. Its main qualities are pliability and long shelf life.
It is from this material that a large number of soft souvenirs, postcards with appliques, clothes and dolls are made.
Advantages:
- huge variety of palette;
- different thicknesses;
- no difficulty in sewing and gluing;
- no fraying of the material during sewing;
- there is no front and back sides.
A beginning needlewoman should choose felt for her first crafts.
For reference! The material is made from wool or animal down. The dense, woolen, pressed mass is sold in sheets rolled into a roll.
When creating toys from it, various types of seams are used.
| Seam | Summary |
| Forward needle | Joining small parts along the edge. |
| Back needle | Imitation of machine stitching. Assembly of any parts. |
| Assembly | Sewing round and voluminous parts. |
| Over the edge | Tilt of parts to the right or left. |
| Buttonhole (overlock) | The strength and beauty of the finished product. |
A felt mouse is a craft that uses all of the listed stitches.
Important! Before starting work, you need to read the instructions for making the toy.
What you will need for work
DIY felt mice are easy to make. You will need:
- Felt sheets. The thickness may vary: for small toys, a thin sheet of material of 1-1.3 mm is used as a base. Harder felt is used for individual parts.
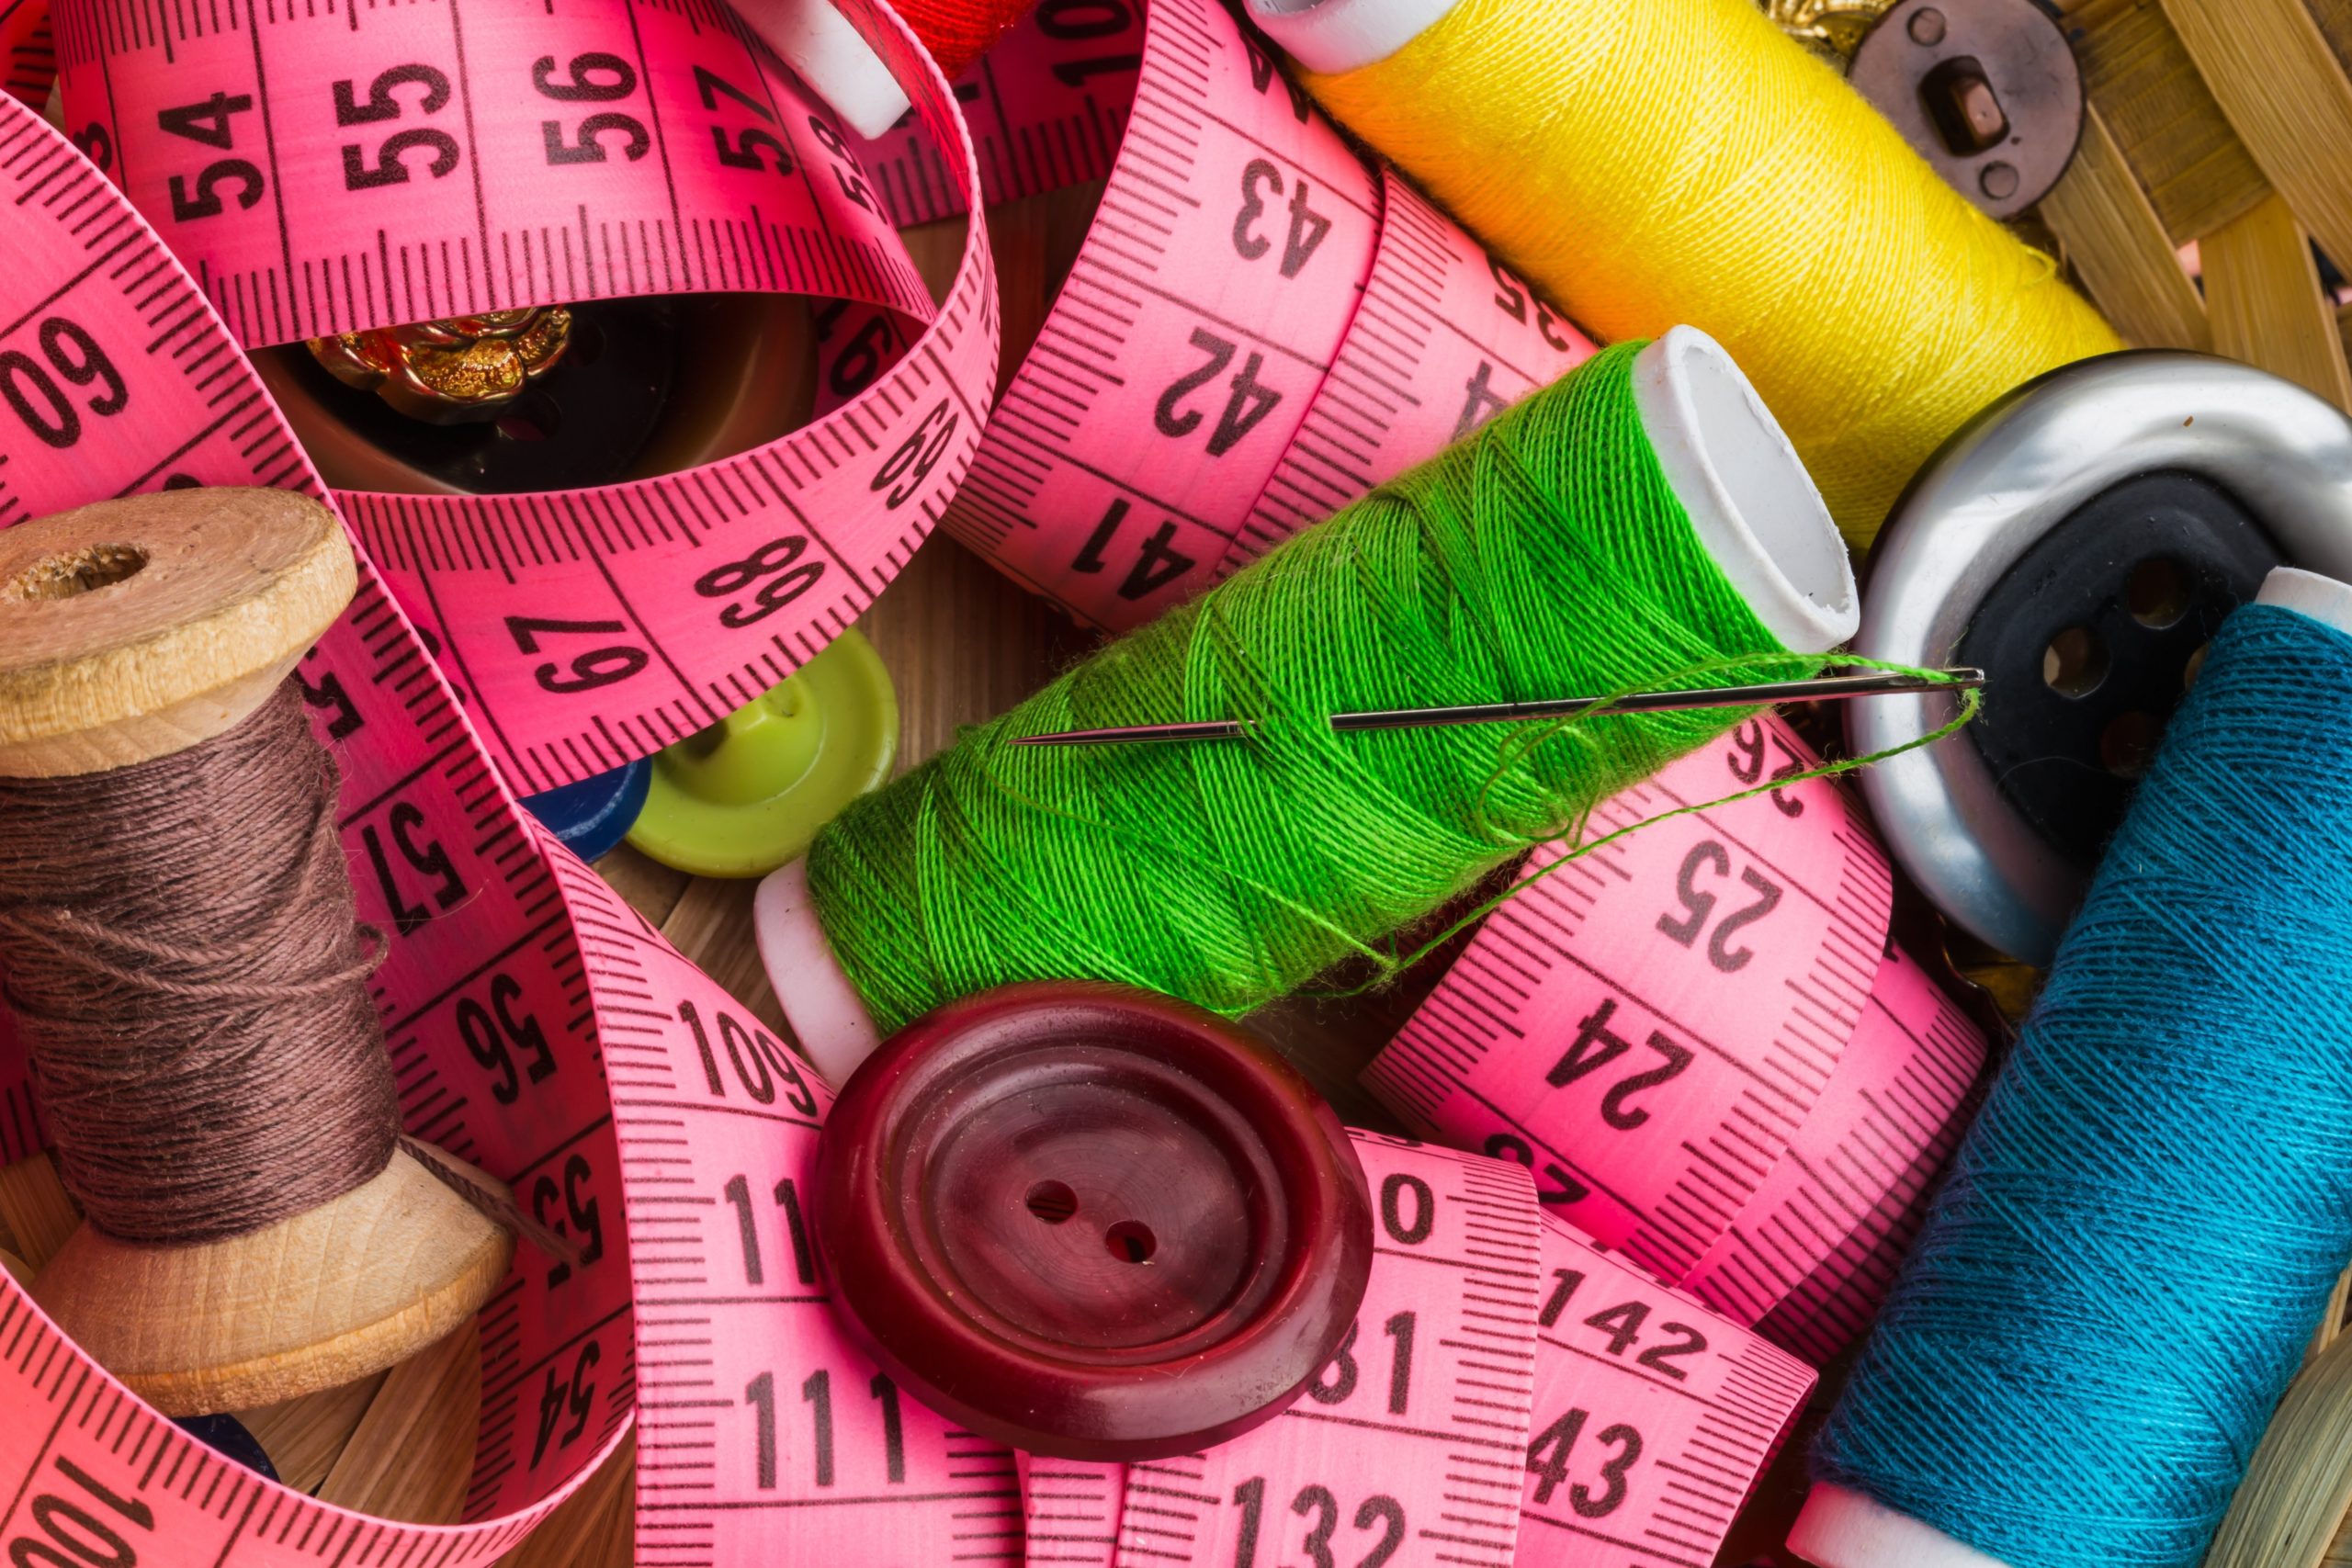
- Threads. It is recommended to take medium thickness. Craftsmen use floss in 3 additions: such threads do not twist during the work.
- Filler. The best options are synthetic fluff, holofiber and camphorel. For a limited budget: synthetic padding.
- Decorative elements. In any craft store you can find beads, buttons, ribbons, rhinestones, glitter, seed beads.
A mouse made of thin felt at home with your own hands cannot do without this:
- scissors;
- marker (chalk);
- needles;
- glue.
Before starting work, you need to prepare all of the above.
Rules for working with a template, pattern
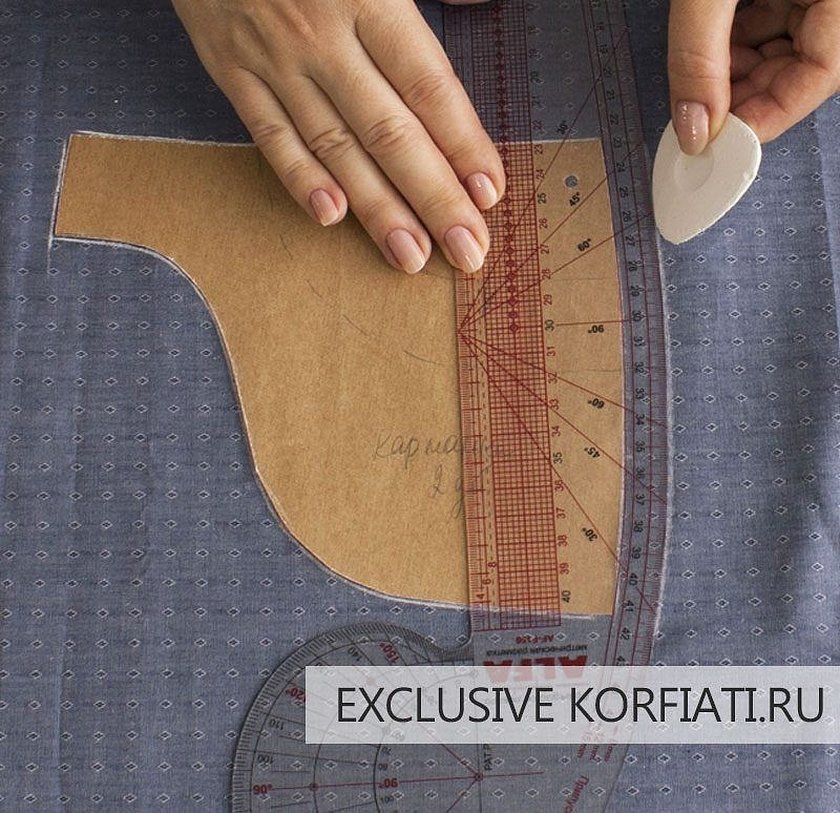
The first stage of work: choosing a toy and the corresponding template or pattern.
The difference between a template and a pattern is small: the first gives an approximate size of the toy, and the pattern - the true one. The second option is conveniently first drawn on graph paper, cut out and placed on the fabric. Then, using chalk, draw the details (with allowances for seams). Cut out the elements.
The technology of creating and using schemes is simple, but has its own specific features:
- Before work, you need to check the size of the pattern. If you need to increase or decrease the pattern, you can use a graphic editor.
- For each part, you need to cut out the corresponding template. On it, indicate the name, lines, arrows and other elements of the diagram.
- When transferring the pattern to the fabric, it is necessary to leave allowances for the seams. If the fabric is defective, the edges may fray.
- Since the felt is thick, you need to cut out the details with tailor's scissors.
The further production of the toy depends on how quickly and accurately the pattern is made.
By the way, the small mouse template can be used for sewing instead of a pattern.
Additional information! Patterns can be made using a screenshot of a laptop or smartphone, then add the image to a graphics editor, stretch it to the desired size and print it.
How to make a felt mouse with your own hands: a step-by-step description of the work process
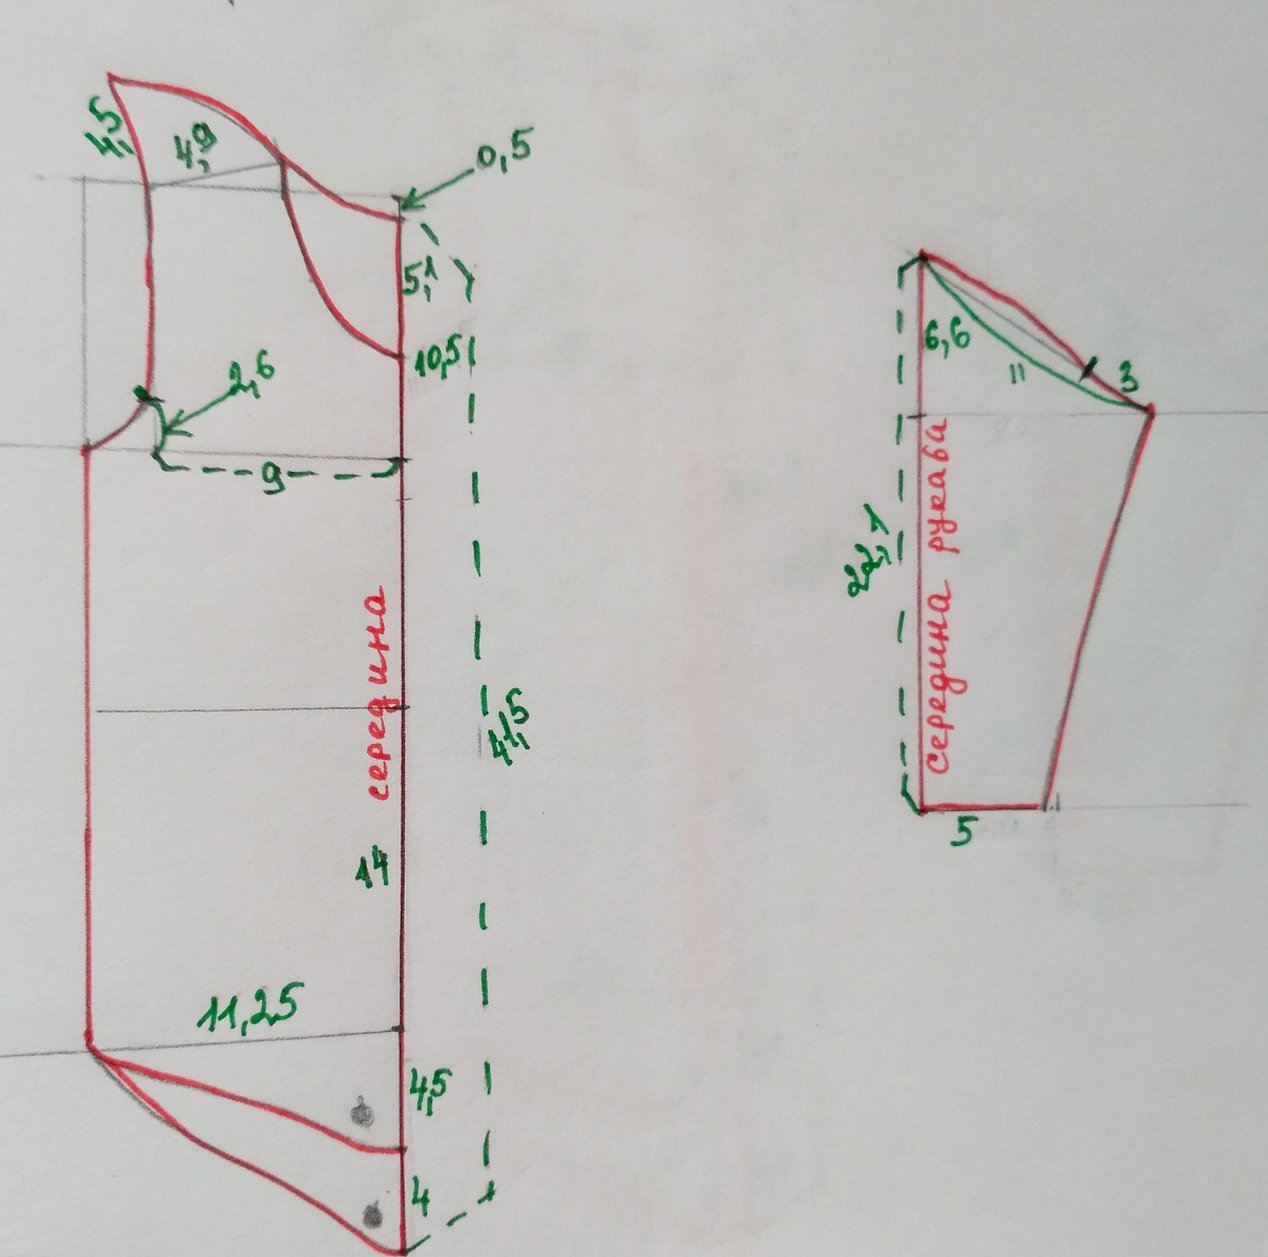
It is almost impossible to make a toy without a template. Below are ready-made patterns for fabric mice and instructions for making them.
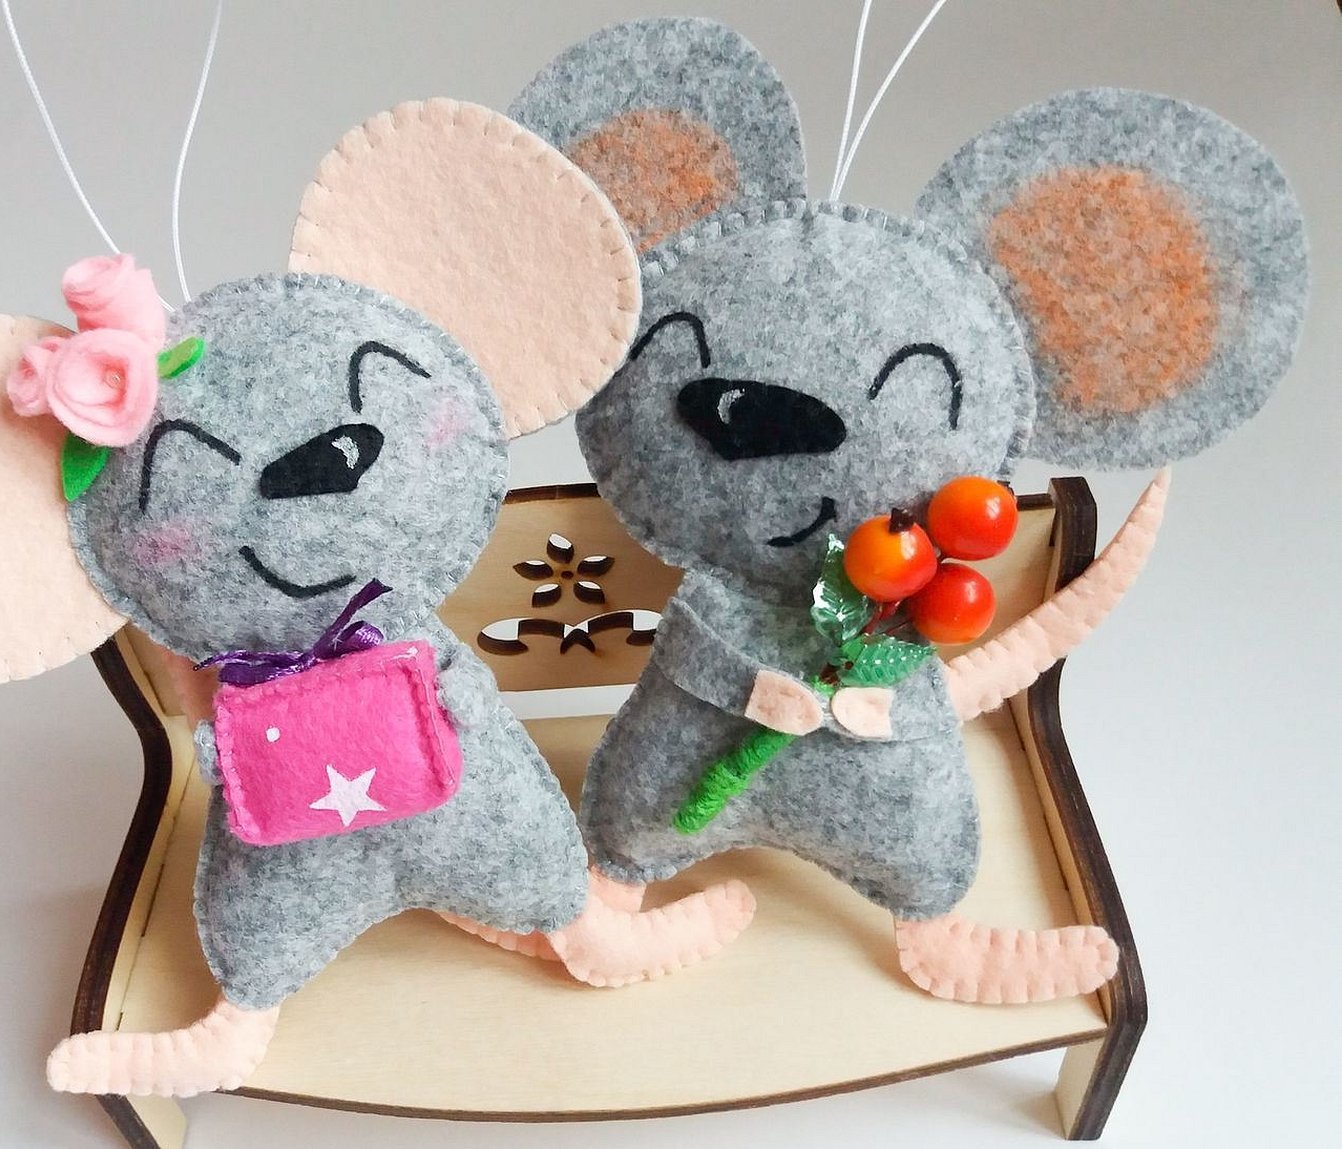
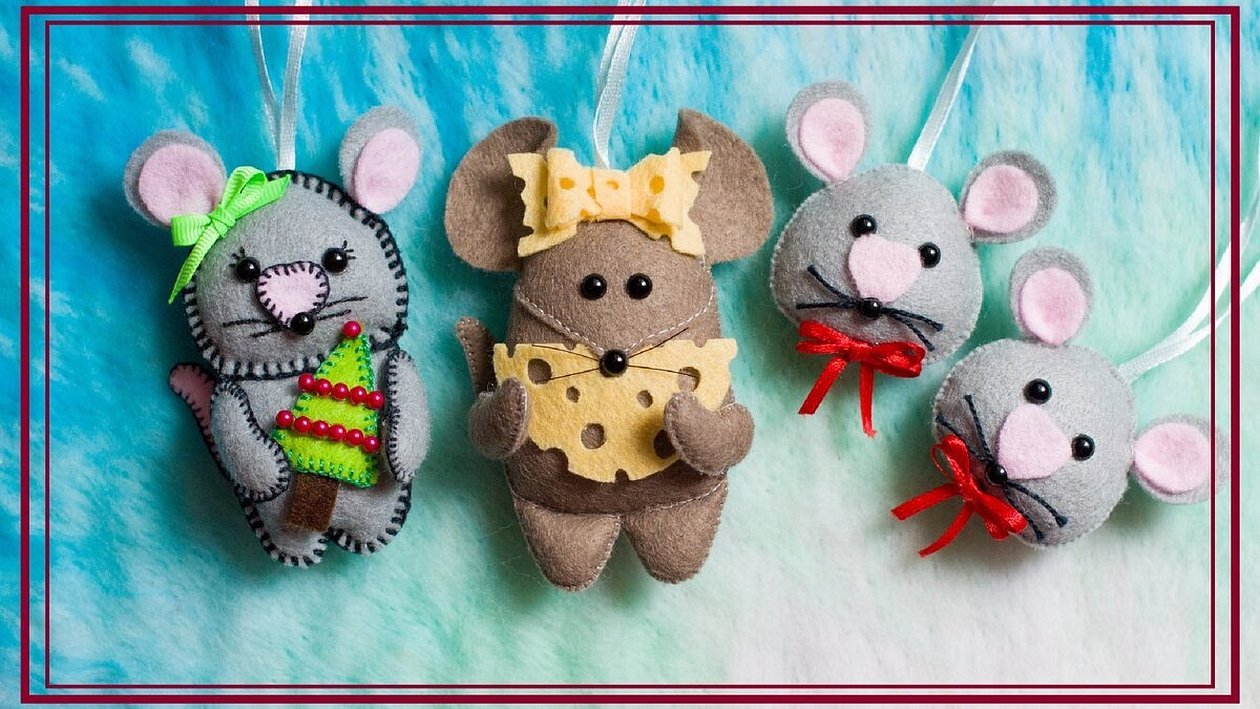
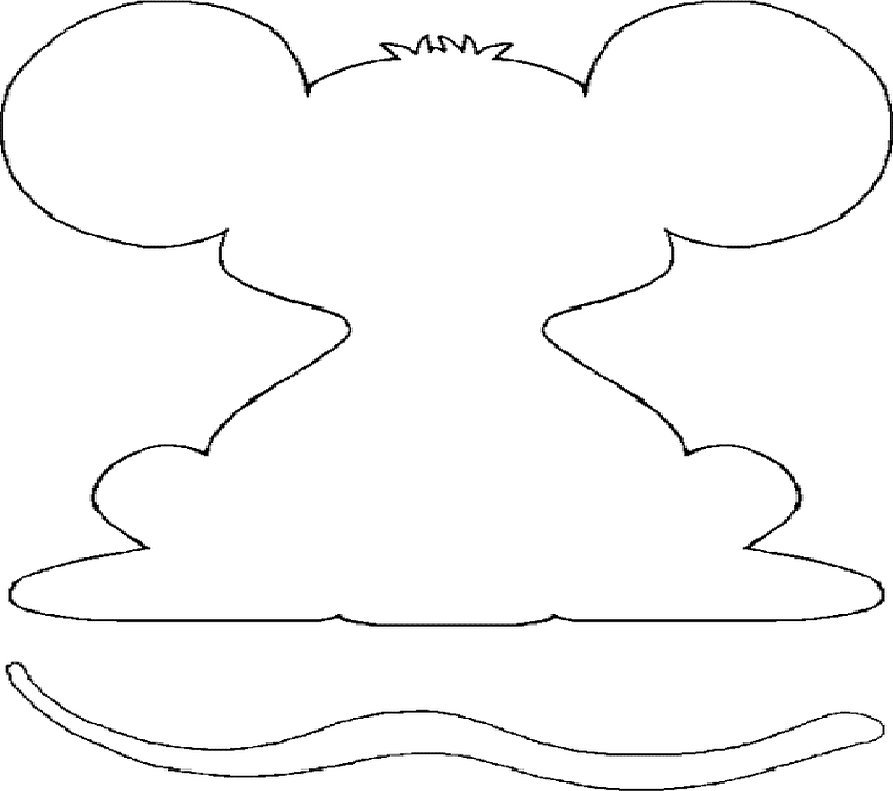
Volumetric mouse
The voluminous mouse can be used not only as a soft toy, but also as a New Year's element under the tree together with Father Frost and Snow Maiden.
Step by step manufacturing process:
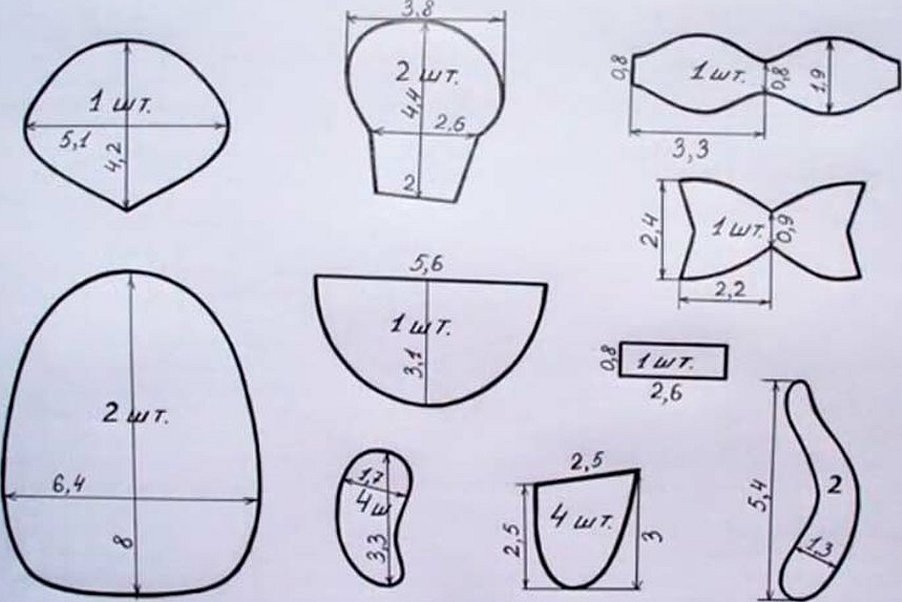
- Cut out flat templates of all the parts from paper.
- Place the body parts on the grey felt and trace. Cut out 1 piece for the central part of the head and tail; 2 pieces for the side of the head, ears and body; 4 pieces for the legs and arms.
- Place the clothing pieces on the red felt and trace around them. Cut out 1 piece for the front and back of the top of the dress, 1 piece for the bottom of the dress, and 2 pieces for the hat.
- Cut out ears (2 pieces) from grey cotton using the appropriate template.
- Sew the paired parts. Sew the arms and legs together with an overlock stitch, and then fill them with padding polyester. First, sew the darts of the body parts with a running stitch, and then finish the edges with an overlock stitch. At the same time, you need to fill the toy with material. Leave the top open.
- Sew the top of the dress and the side seams of the hat. Do not sew the bottom. Turn right side out.
- Make the ears: combine the cotton and felt pieces (cotton with the right side inside), sew in a circle except for the bottom. Turn right side out. Then connect the lower part of the ears along the darts and stitch.
- Similarly, stitch the side parts of the head and overcast them from the nose to the neck.
- Make the head of the future toy with an overlock stitch, do not sew the bottom. Fill with synthetic padding.
- Sew the head to the body. Connect the upper and lower parts of the dress (the second part must be gathered first).
- On the head, make a mouse nose with pink threads, and a smile with black threads. Glue on the eyes.
- Carefully put the dress on the toy.
- Make a belt for the dress: cut a strip of white (20 by 0.8 cm). Glue with a glue gun. Use the same glue gun to glue the cap to the mouse's head, ears, arms and legs, and tail. Leave the craft to cool.
Please note! The ears, tail and paws are glued, not sewn in. Otherwise, the toy will look ugly.
The mouse is ready!
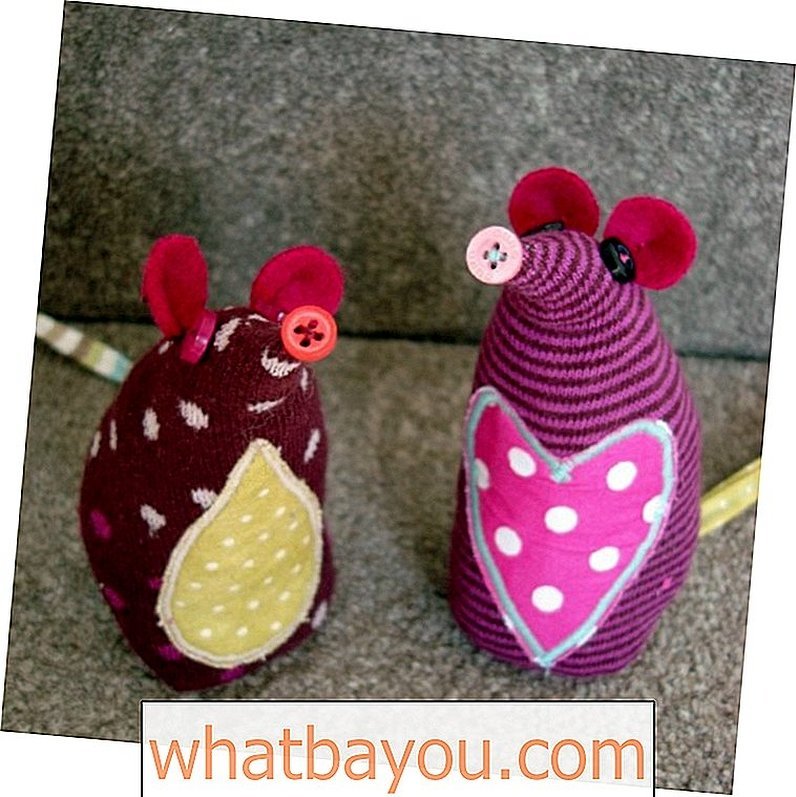
Mouse in a sock
A hand-made felt mouse in a used sock looks beautiful.
Technology:
- Prepare the sock: make a cut along the entire length.
- Make a heart: cut out an applique from red fabric of the required size, not forgetting about seam allowances. Sew the finished heart to the sock.
- Make a tail from the same fabric as the heart.
- The bottom (the support for the mouse) is the last thing to sew up. It is through it that the toy is filled with padding polyester. Before closing the bottom, you also need to insert the tail.
- Use a glue gun to attach ears (2 circles from the remaining fabric), a nose (large bead) and eyes (decor).
The mouse is ready!
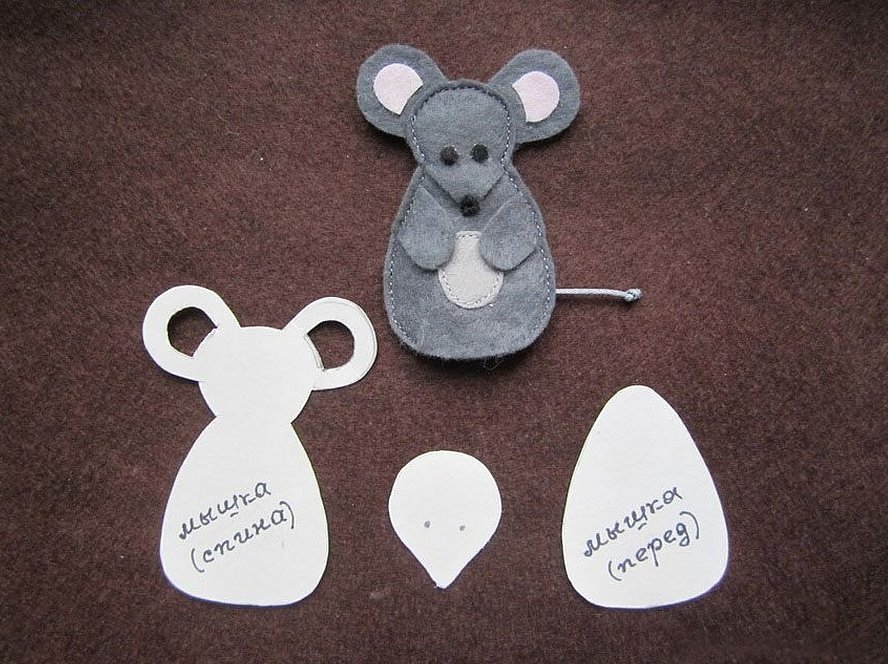
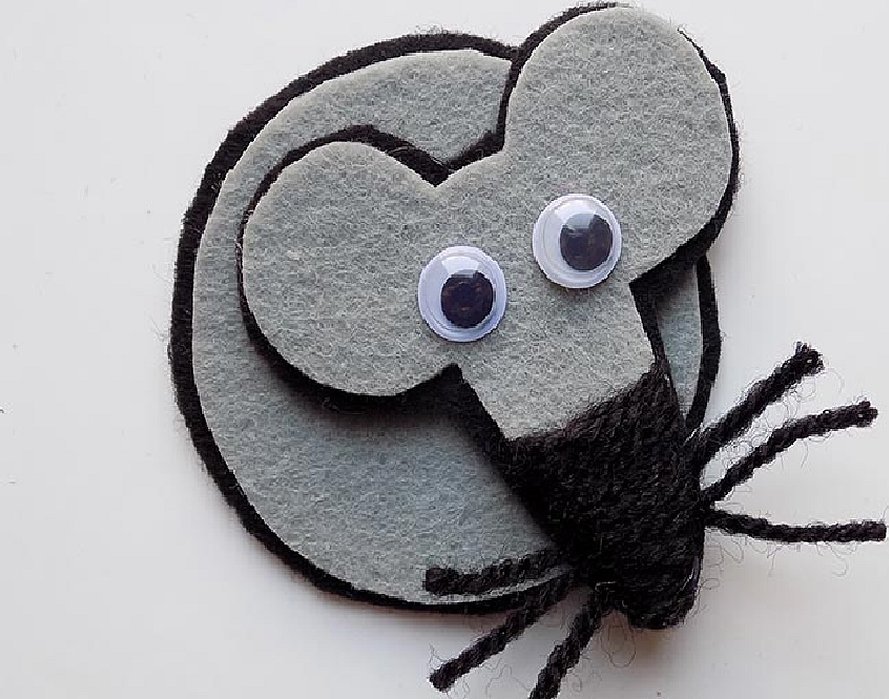
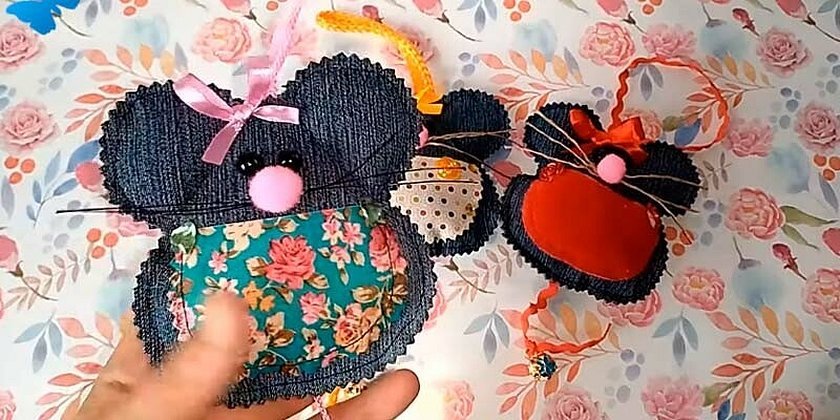
Mouse fridge magnet
A magnet is a universal gift. Making a mouse in this shape is not that difficult.
Technology:
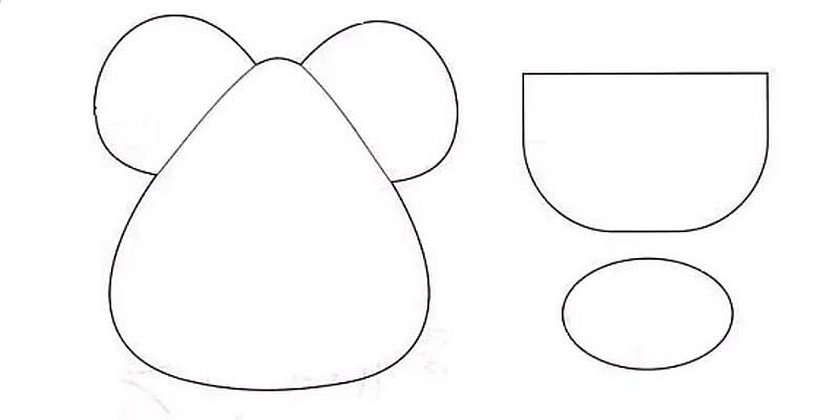
- Draw templates on paper and cut them out.
- Place them on the fabric (gray felt), trace and cut out.
- Repeat steps 1-2 on black felt. However, the details along the edge need to be reduced by 2 mm.
- Connect the body parts: place the grey circle on top of the black one and then glue it.
- Decorate the toy's head. Take a black thread: fix the end on the inside of the blank with ears with a glue gun, start winding. The other end is similarly fixed on the back side.
- Make whiskers from several pieces of thread. Glue them to the black side of the muzzle. Glue the gray muzzle on top.
- Attach decorative eyes to it.
- Connect the body and head. Glue the magnetic tape.
The mouse is ready!
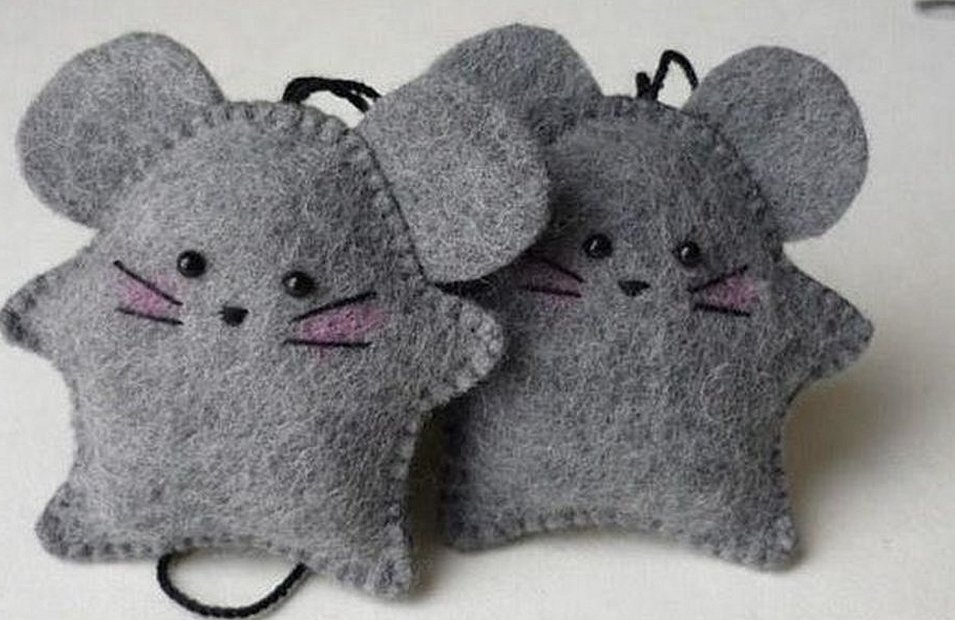
Mouse Keychain
The keychain is another universal souvenir. The technology is simple.
Manufacturing process:
- Cut out the fabric according to the templates: gray for the body and head, and pink for the ears and tail.
- Decorate the front part of the keychain: embroider the mouth, nose and glue on the eyes (beads).
- Place the ears between the two body parts and start sewing the parts together. The seam in this case will become a decorative element.
- Before closing the body, it should be stuffed with padding polyester, and then sewn up. Don't forget to attach the tail!
- Attach the craft to a thread, ribbon or chain.
Important! Cotton wool cannot be used as a filler in this model. Otherwise, the finished craft will be hard. And it will not be washable.
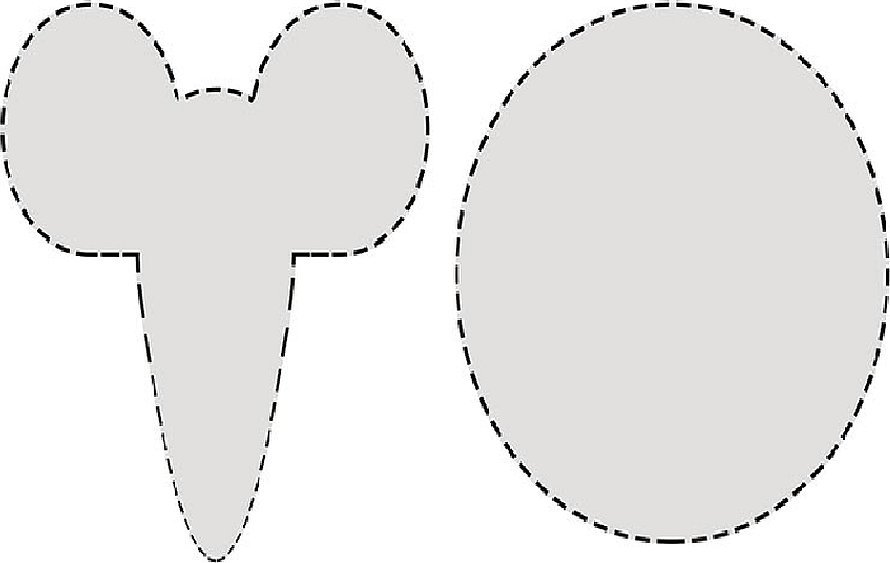
New Year's mouse on the tree
Another toy option: a DIY New Year's mouse made from felt.
Manufacturing process:
- Make patterns using templates. Cut out pieces from grey and pink felt.
- Thread the pink “8” shaped piece through the large grey oval piece with the slit.
- Glue grey “droplets” onto the edges of the pink element.
- Glue a ball for the nose and 2 plastic eyes to the muzzle.
- Pass the thread through the slit and under the pink piece.
The mouse is ready!
General rules and work process
Soft felt mice are the most versatile toys for beginner craftsmen. And all because they are easy to make.
The general process can be described as follows:
- Prepare paper templates. Cut them out.
- Transfer the templates to the fabric. Cut out the required number of parts.
- First, assemble the head of the future mouse: sew the head parts and stuff, sew on the nose and ears.
- Design the face: glue on the eyes, make the whiskers, draw the mouth.
- Sew the body in the same way and stuff it. Sew on the paws and tail.
- Connect the head and body.
- Decorate the craft with decorative elements depending on the master’s imagination.
Making a toy is a long and painstaking process. However, making a felt mouse with your own hands is not so difficult - this is a craft option for a beginner. The process is short, a minimum of tools, a maximum of imagination. However, do not forget about safety precautions when working with piercing and cutting objects.


