The symbol of 2020 was the rat, so crafts of this animal or its close relative - the mouse - are especially relevant now. You can make a toy using various paper techniques. Any crafts can be changed at your discretion, adding accessories and additional details.
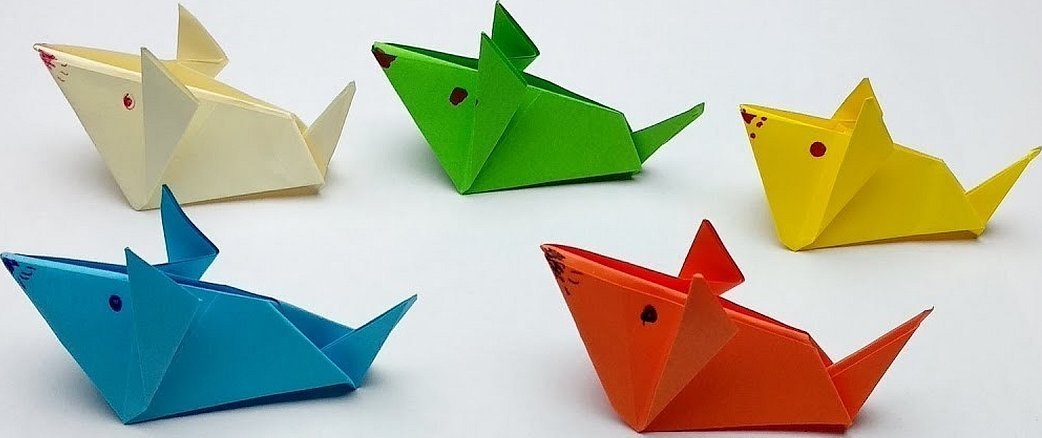
Origami mouse
Before making an origami paper mouse, you should first practice assembling the craft on a simple piece of notebook paper.
You can choose the base color yourself from a variety of options. And to color the muzzle, it is recommended to use felt-tip pens or a gel pen.
Step-by-step instructions for creating a mouse using origami technique:
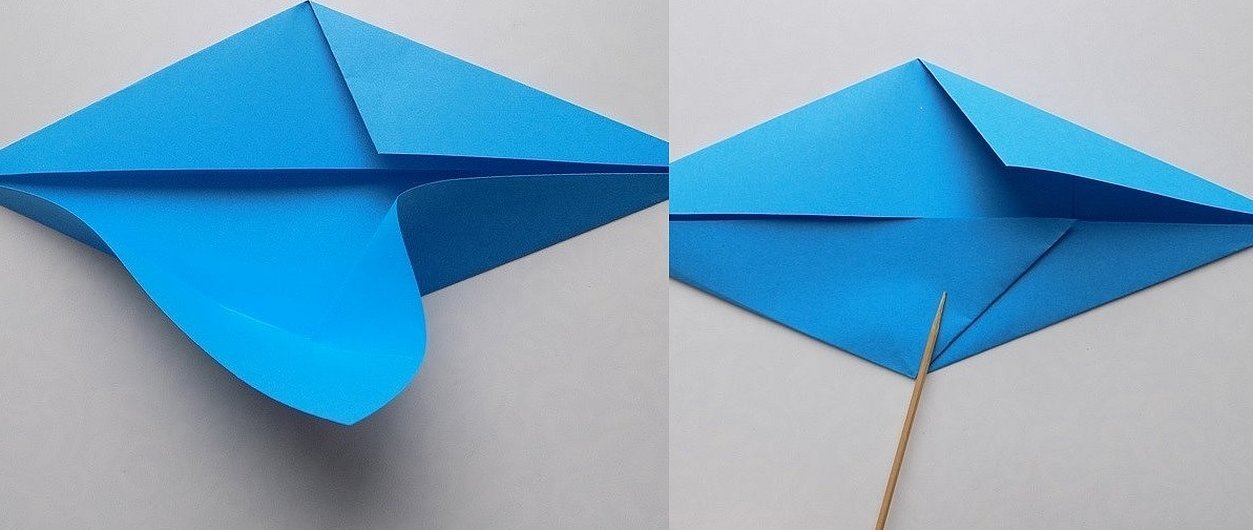
- Take a perfectly square sheet of thick colored paper and fold it diagonally.
- Unfold it back to its original position and bend the corners towards the fold line that formed in the middle.
- Make similar folds on the other side of the craft.
- Now you need to straighten the bottom edge on one side and make a reverse fold, as shown in the picture below. Repeat the same manipulations on the back side.
Continue as follows:
- The resulting corners need to be bent upwards. The edges should be parallel to the middle line of the figure.
- The corner that lies on top of the other should be folded in the opposite direction.
- Bend the top corner of the product by a third in the bottom corner. Now straighten it and bend it in the same way in the opposite direction.
- Turn the craft over to the other side and bend the obtuse corners down.
- Fold the paper product lengthwise inward.
- To make a tail for the future mouse, you need to bend the lower sharp corner down, as shown in the picture below.
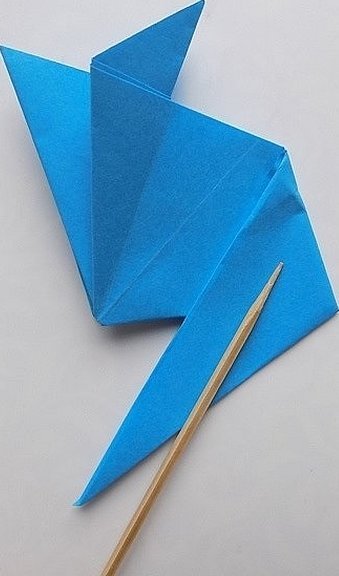
There are only a few steps left:
- Now bend the tip of the same corner in the opposite direction to achieve a zigzag shape.
- Fold the lower protruding corners of the future tail in the opposite direction.
- To form the ears, fold the top corners back.
- The final touch is to paint the animal’s face.
Please note! To make the craft look cuter, you can slightly straighten the origami ears.
Mouse applique made of colored paper
Applications help develop the imagination of children, so they are often used for children's creativity. You can make a mouse from colored paper using the application technique in several ways, which are presented below.
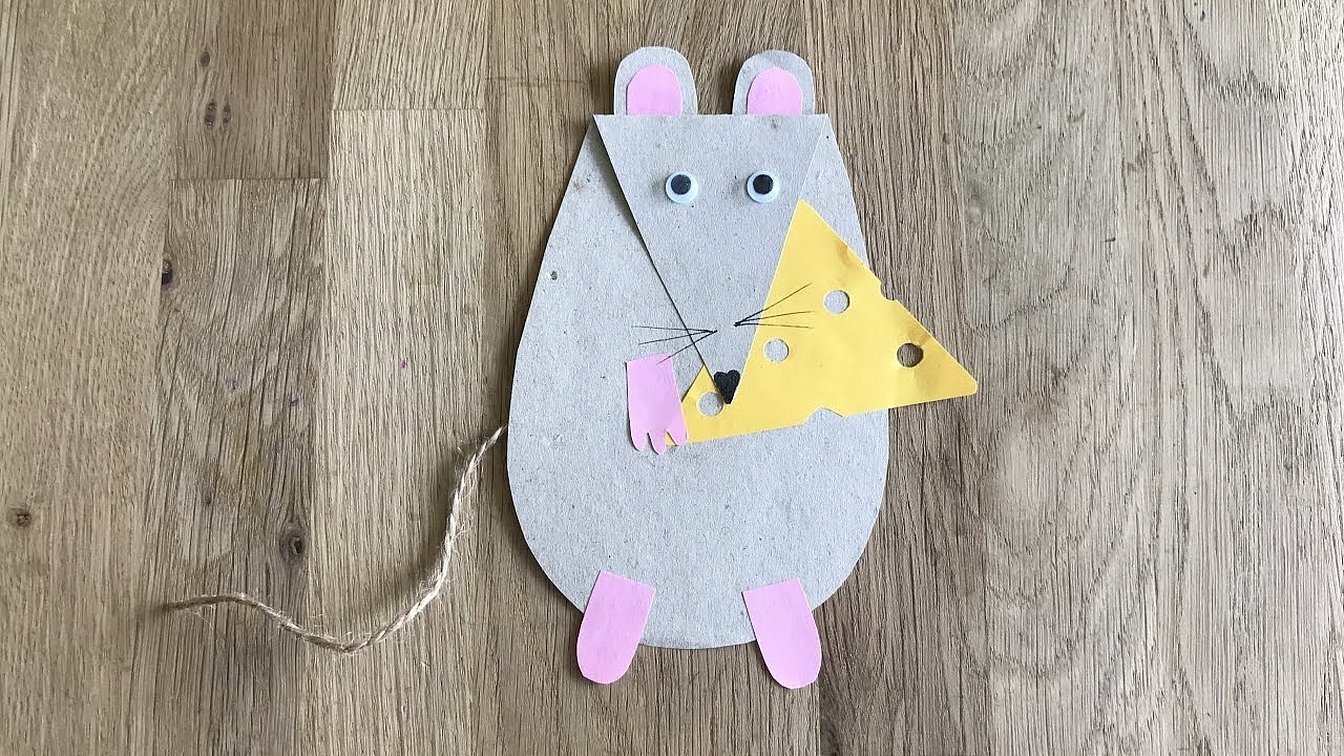
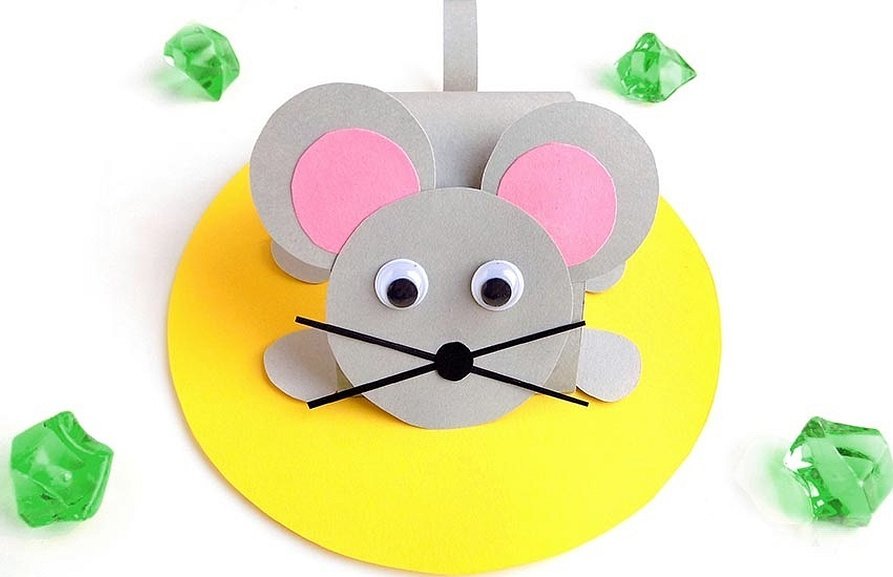
The first application is done like this:
- Cut out a teardrop-shaped semicircle and cut off its top.
- Then, from the same paper, make a sharp triangle and two semi-oval ears.
- From pink paper, cut out slightly smaller semi-ovals and small elongated paws.
- Separately, make a triangular cheese with holes from yellow paper.
- For the tail, you can take a piece of woolen thread.
- Glue the cheese to the side in the middle of the body, and attach a paw with claws to the inner corner of the treat.
- On the triangular face make eyes and a nose, and ears at the back.
- Fix the head at the top of the body.
- Attach the paws and tail.
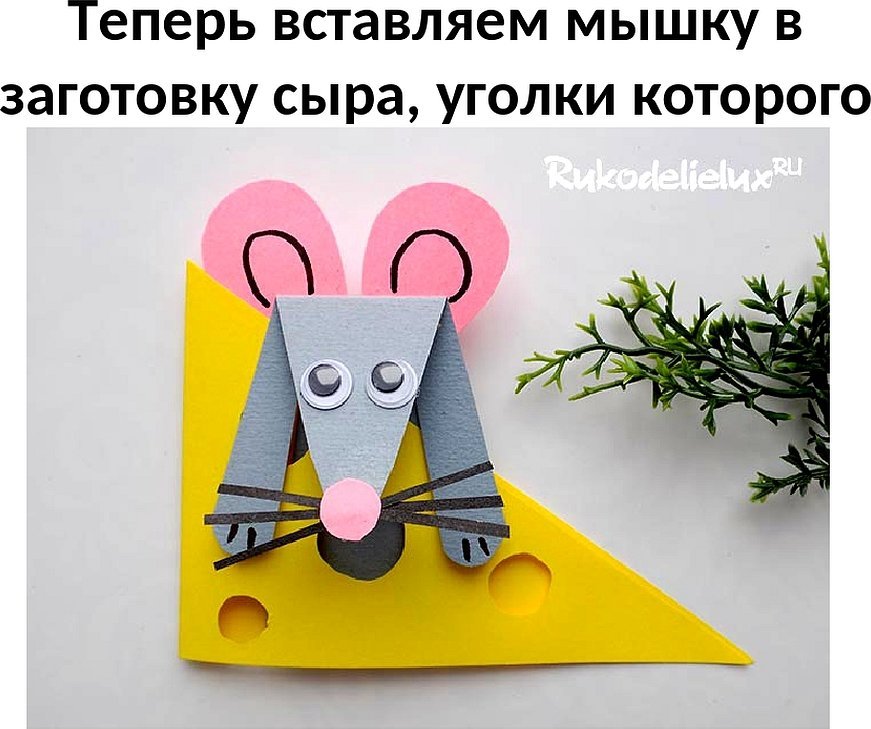
The next applique is a mouse made of colored paper, perfect for decorating a greeting card for a boy or a girl.
- Cut out a yellow square, fold it diagonally and make several small holes on one side.
- Cut out an elongated triangle with an acute angle from gray colored paper.
- Make identical cuts along its edges and draw claws onto their ends.
- Bend the top of the triangle down and glue the ears on the back and the eyes, antennae and nose on the front.
- Make a cut along the diagonal fold of the cheese and insert the mouse into it, sticking out its paws.
- Glue the applique to a card or a sheet of paper.
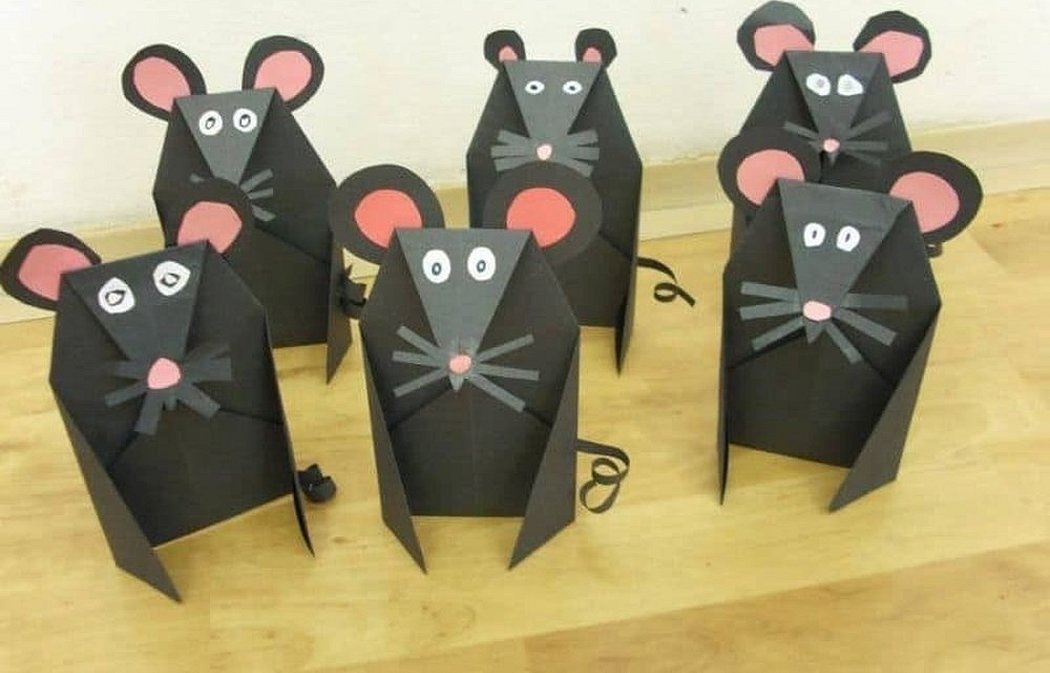
Cardboard Mice Variations
You can make a paper mouse with your own hands even in a very short period of time. The process of making the product is exciting for creative work with a child.
Attention! To make the toy last longer and not lose its shape, it is better to make it out of cardboard.
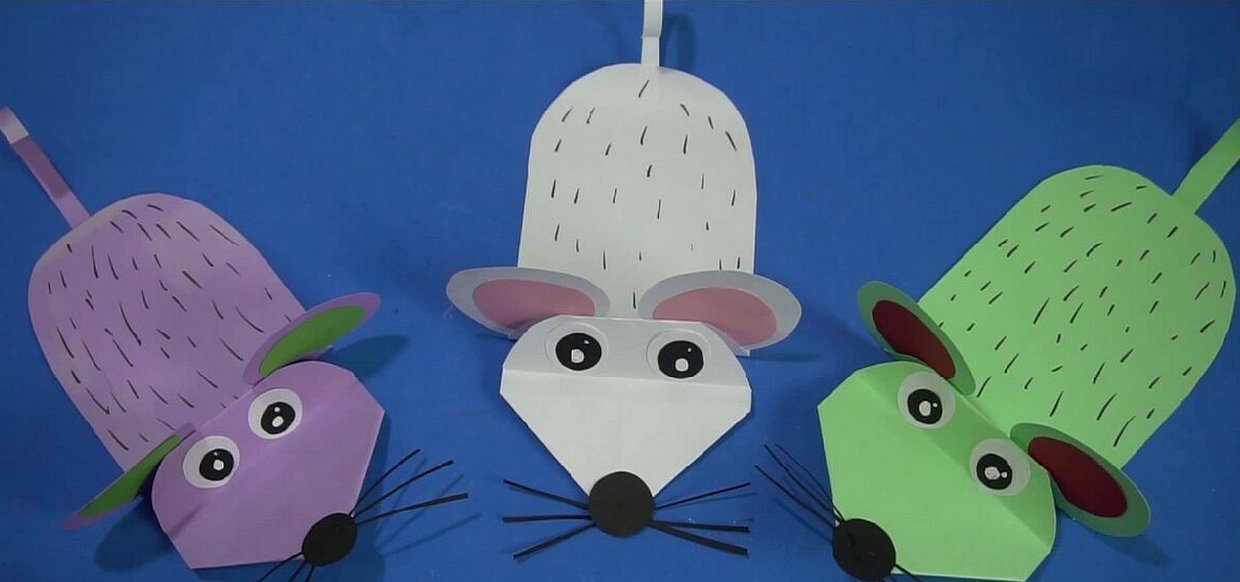
This quick and easy to make paper toy is made as follows:
- Cut a strip of cardboard 5 centimeters wide and about 30 centimeters long.
- Glue the ends together with the right sides facing outwards so that the top edge protrudes forward by 1 cm.

Then do the following:
- The end of the glue needs to be cut off, forming an angle that will represent the mouse's face.
- Cut two circles of 3 to 4 centimeters in diameter from white paper. Make two more circles of a smaller size from the cardboard that was used to create the toy's body. Glue them to each other.
- Bend the edges of the eyes and glue them to the body so that they stand up.
- Glue a strip of cardboard to the opposite side, forming a tail.
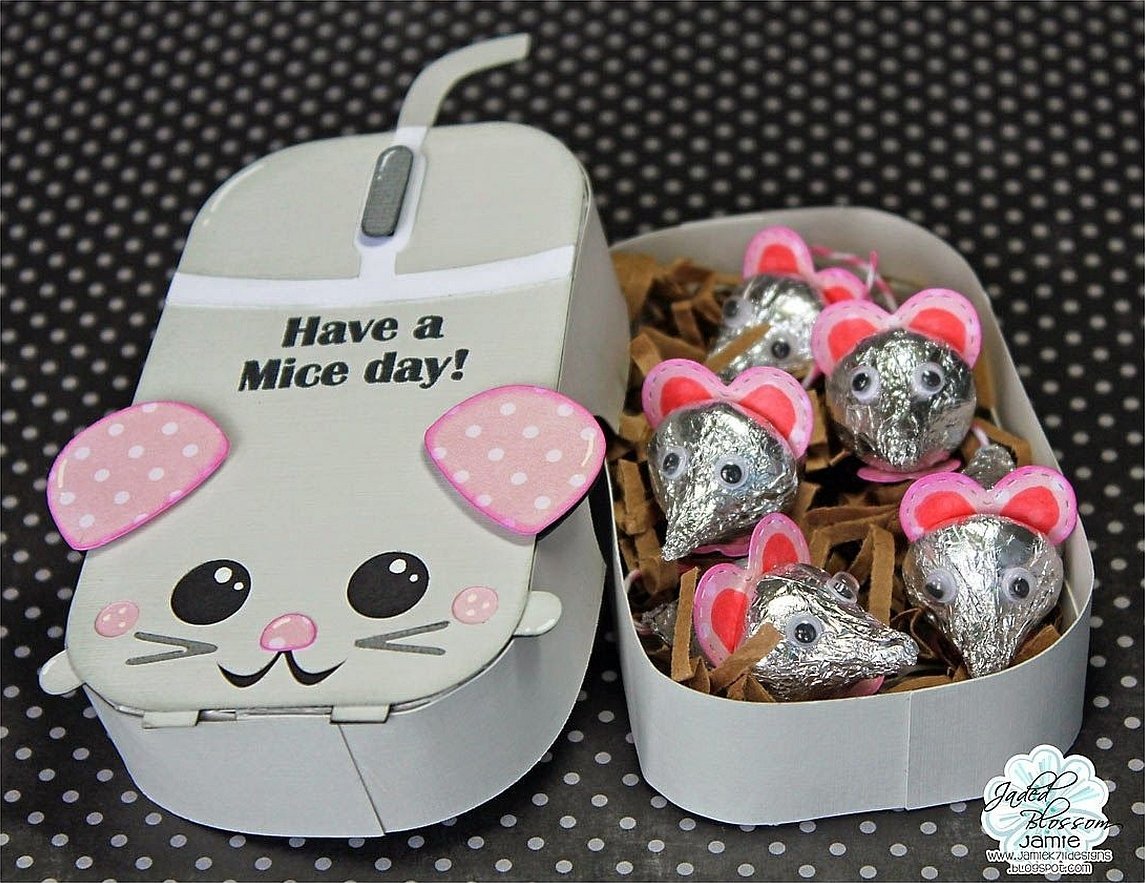
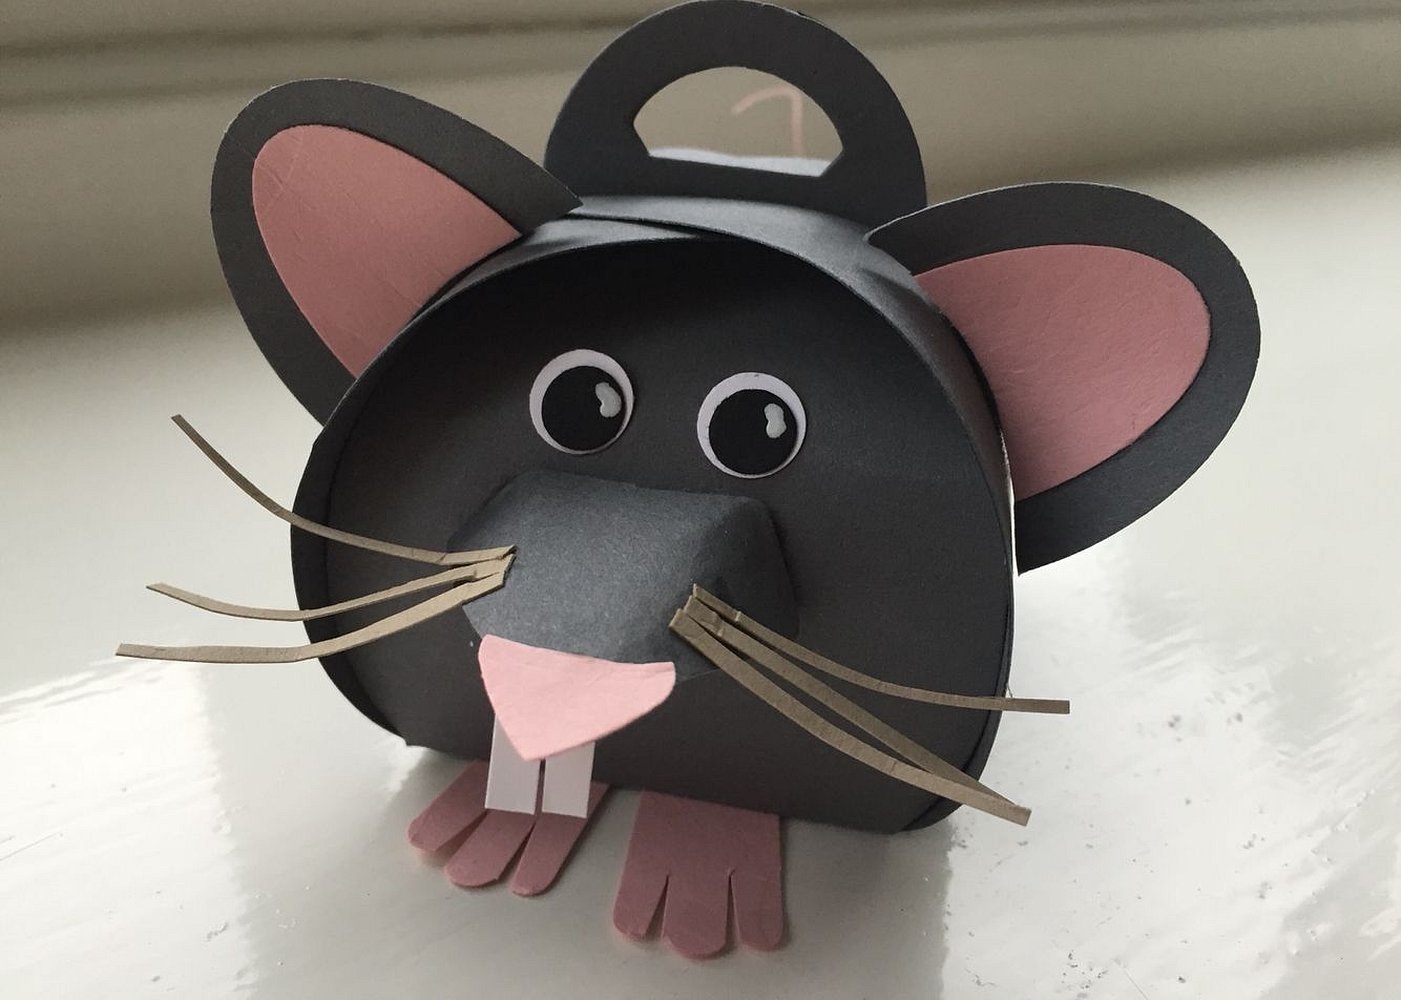
You can make a box for small items from cardboard, decorated in the form of a mouse. You can use a ready-made box or assemble it yourself.
It is best if it has an oval shape. You need to glue eyes, a nose, antennae and ears to one half of its lid. Hanging paws will also look cute on that side.
On the other hand, attach a thin tail. Kids will definitely enjoy playing with such a craft and storing their small trinkets in it.
Volumetric mice made of colored paper
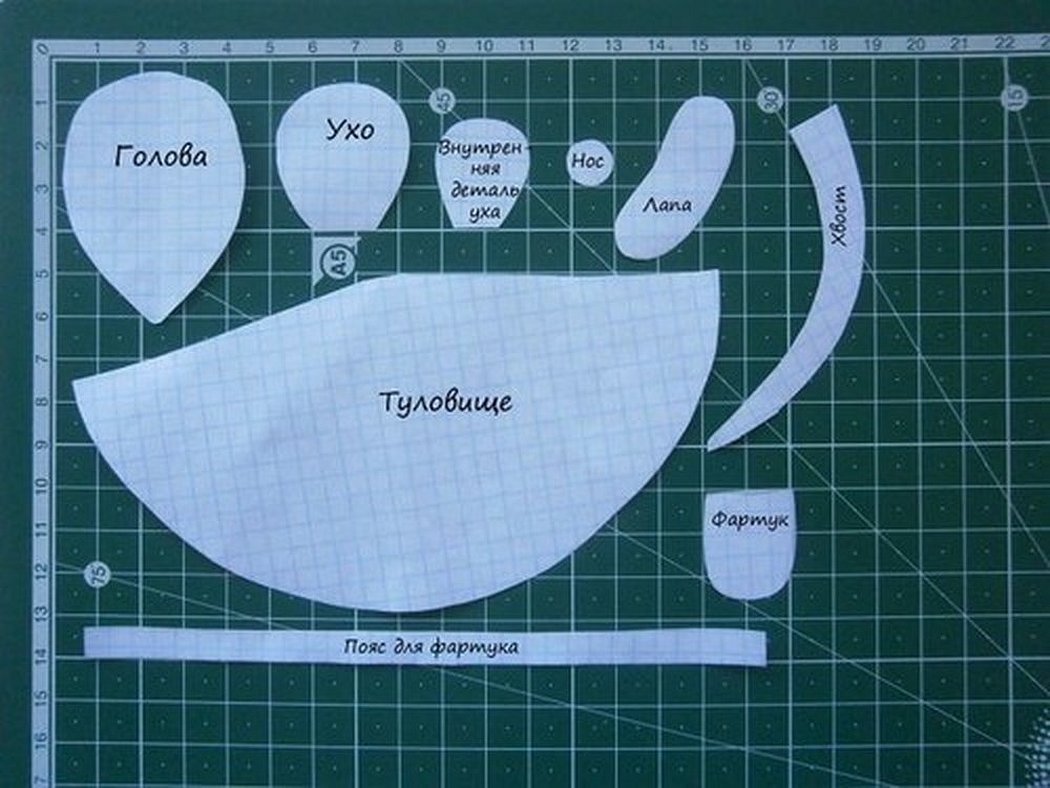
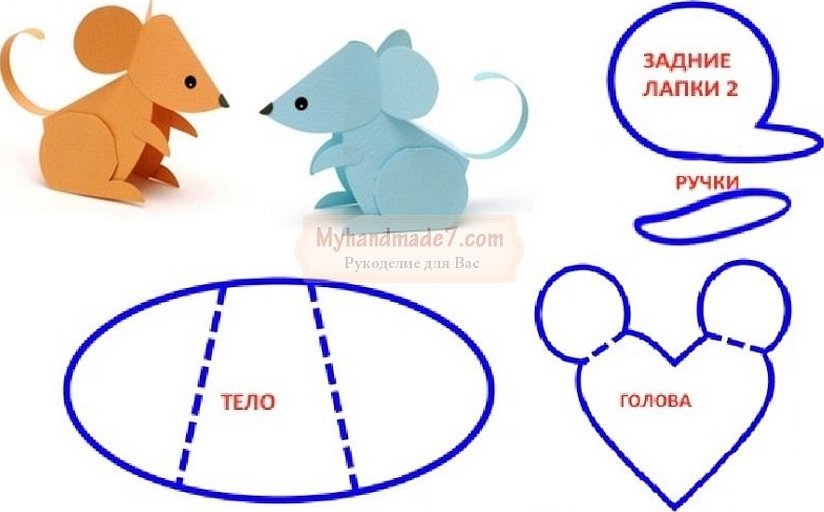
In order to make a volumetric paper mouse, it is best to print out a ready-made pattern in advance. More experienced craftsmen can make a toy, checking its details by eye. A master class on how to make a paper mouse in a volumetric format is presented below.
First, you need to prepare the mouse parts according to the diagram below.
Then proceed as follows:
- The largest part should be brightly colored, as it will later become the mouse's dress. The main parts can be made white, gray or black, and the inside of the ear - pink.
- Eyes and a nose need to be attached to one of the head parts.
- Glue the pink ear pieces to the main large pieces. Then attach them to the other head piece, and glue the nose and eyes piece on top.
- Make a cone from the largest of the patterns and attach the mouse's head to its tip.
- Glue the mouse's paws to the body and attach the tail to the back.
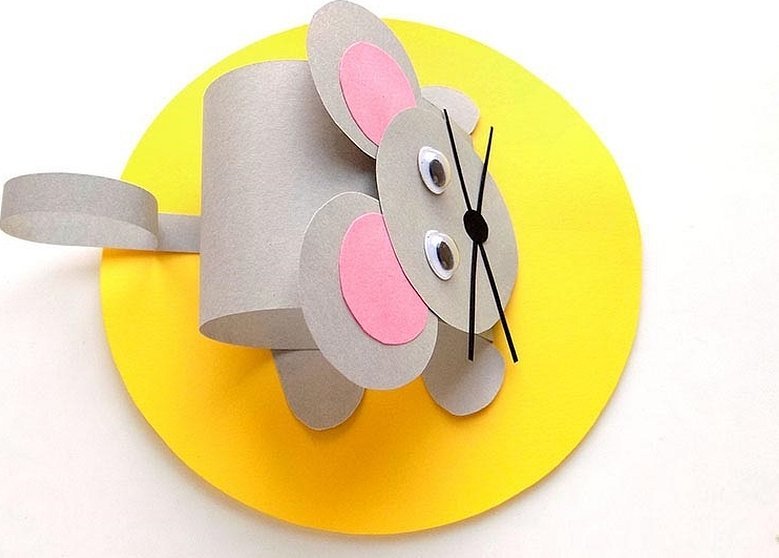
Another way to make a paper mouse with your own hands:
- Take yellow or orange cardboard and cut out a large circle with a diameter of 15 centimeters. It will depict the cheese, from which the mouse's head will peek out.
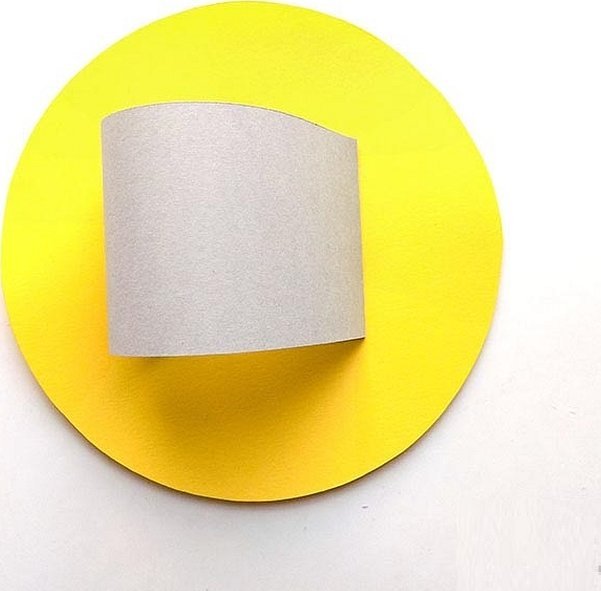
- Cut a strip of grey cardboard 20 cm long and 5 cm high.
- Make a straight fold of 1.5 cm from one end of the edge.
- Then push the other edge into the resulting fold and glue it. You will get a figure that looks like a drop.
- Glue the resulting figure with one edge at the sharp corner onto the cheese stand.
Then everything is simple:
- Cut three circles out of grey cardboard: one large one for the head and two small ones for the ears.
- Glue smaller pink circles onto the ears. Then attach them to the back of the round paper head.
- Make eyes from white and black cardboard, thin whiskers and a round nose. Attach all parts to the face of the product.
- Fix the head on the teardrop shape of the body.
You can attach grey paws and a tail to the base of the toy, then you will get a miniature mouse standing on a round head of cheese.
Please note! To make the mouse's face even more expressive, it is better to buy special ready-made eyes for crafts from the store.
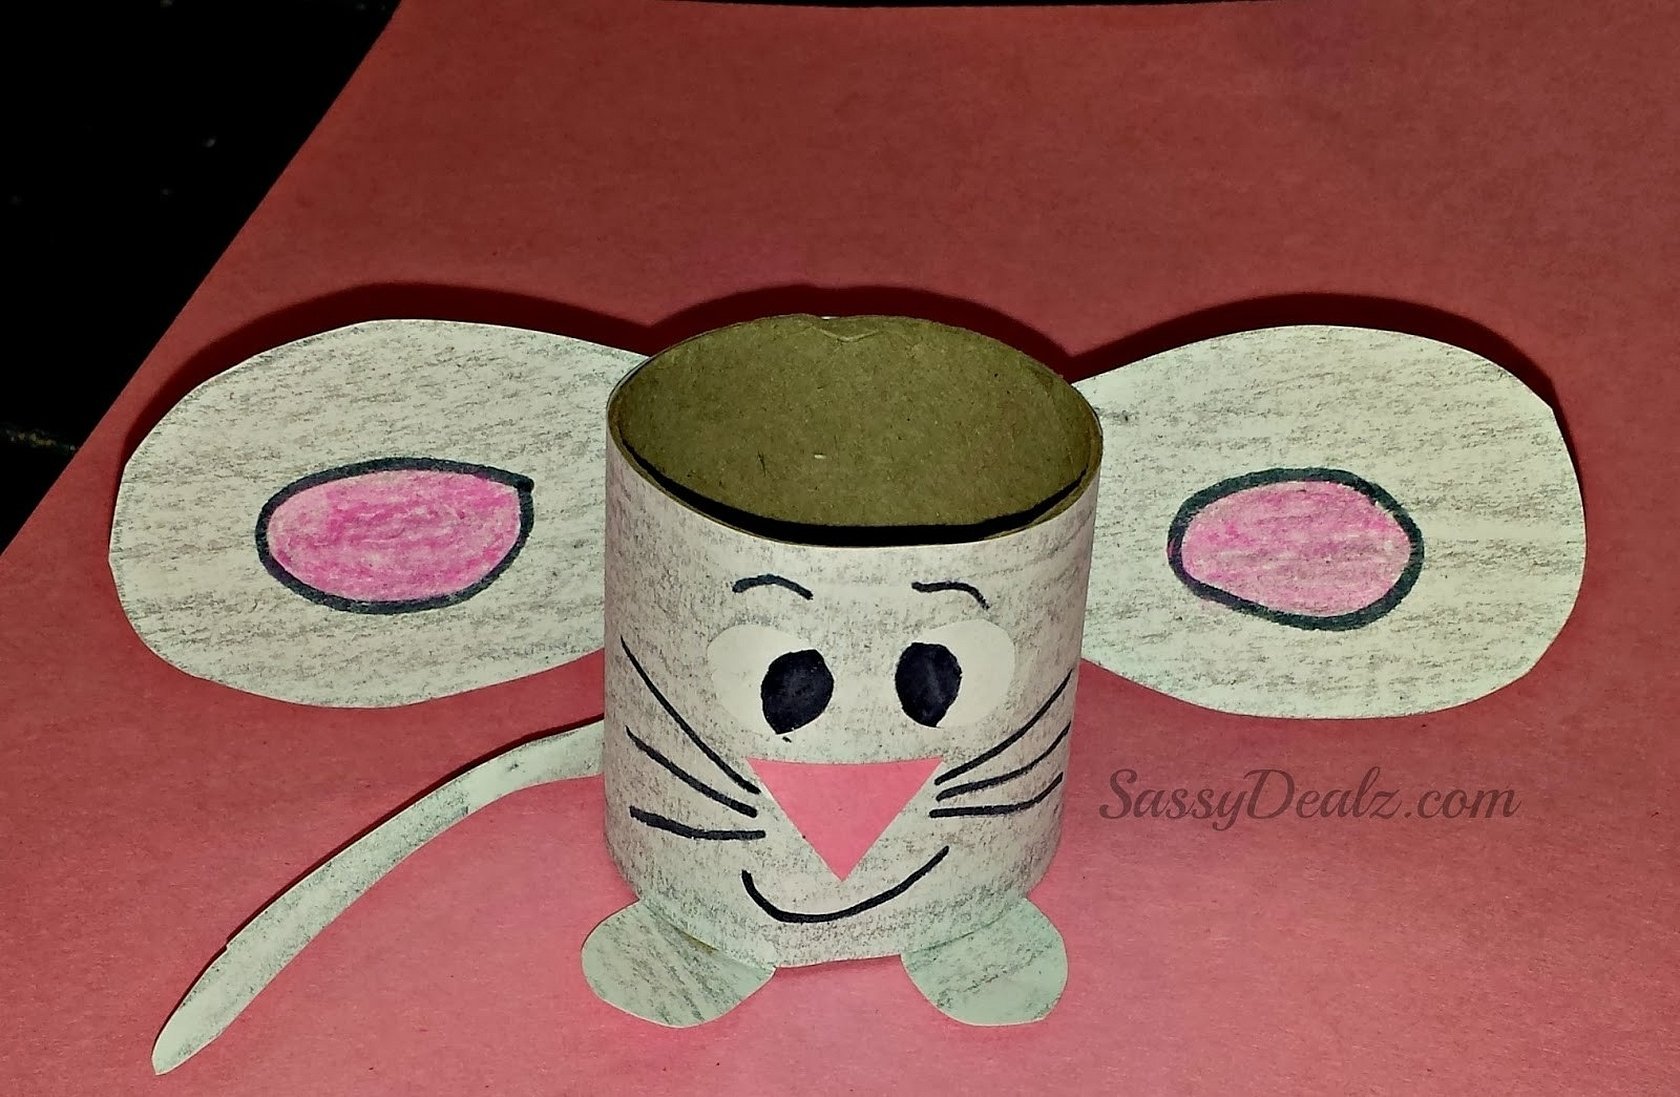
A cute 3D mouse can be made from a toilet paper roll:
- Cover the outer surface of the sleeve with colored paper.
- Cut out round ears from cardboard and glue or draw pink circles inside.
- Attach a tail to the back and paws to the front.
- Paint the animal's face.
The eyes of the toy can be made from colored paper or glued to parts of old toys. For a more voluminous look, it is recommended to make the antennae from thin strips of cardboard.
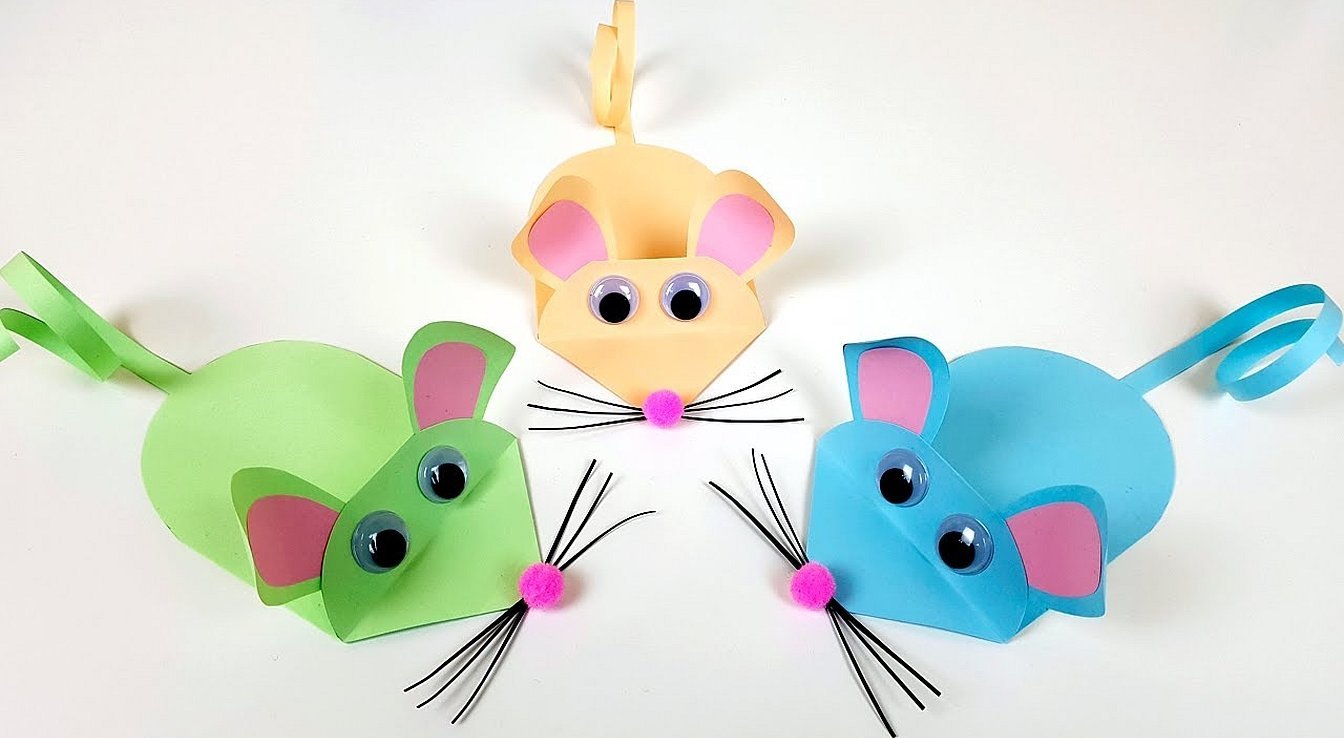
Paper mice for the Christmas tree
A great idea would be to decorate the New Year tree with colorful paper mice. Before you start assembling the toy, you should cut out the necessary parts:
- oval for the body;
- a heart-shaped head, the continuation of which is two rounded ears;
- elongated small paws;
- a round piece with a tangentially extended rear leg.
Step by step process of making paper Christmas tree decorations:
- Bend the body into an oval and the head into an arc. Before this, the ears should be bent forward.
- Glue the edges of the head to the top of the animal's body.
- Attach the eyes and nose to the muzzle and glue the upper legs to the body.
- Attach a semicircle with a back paw to the lower edges of the body.
- Glue a tail on the back, the edge of which can be twisted with scissors. It is best to attach the ribbon to the upper base of the body.
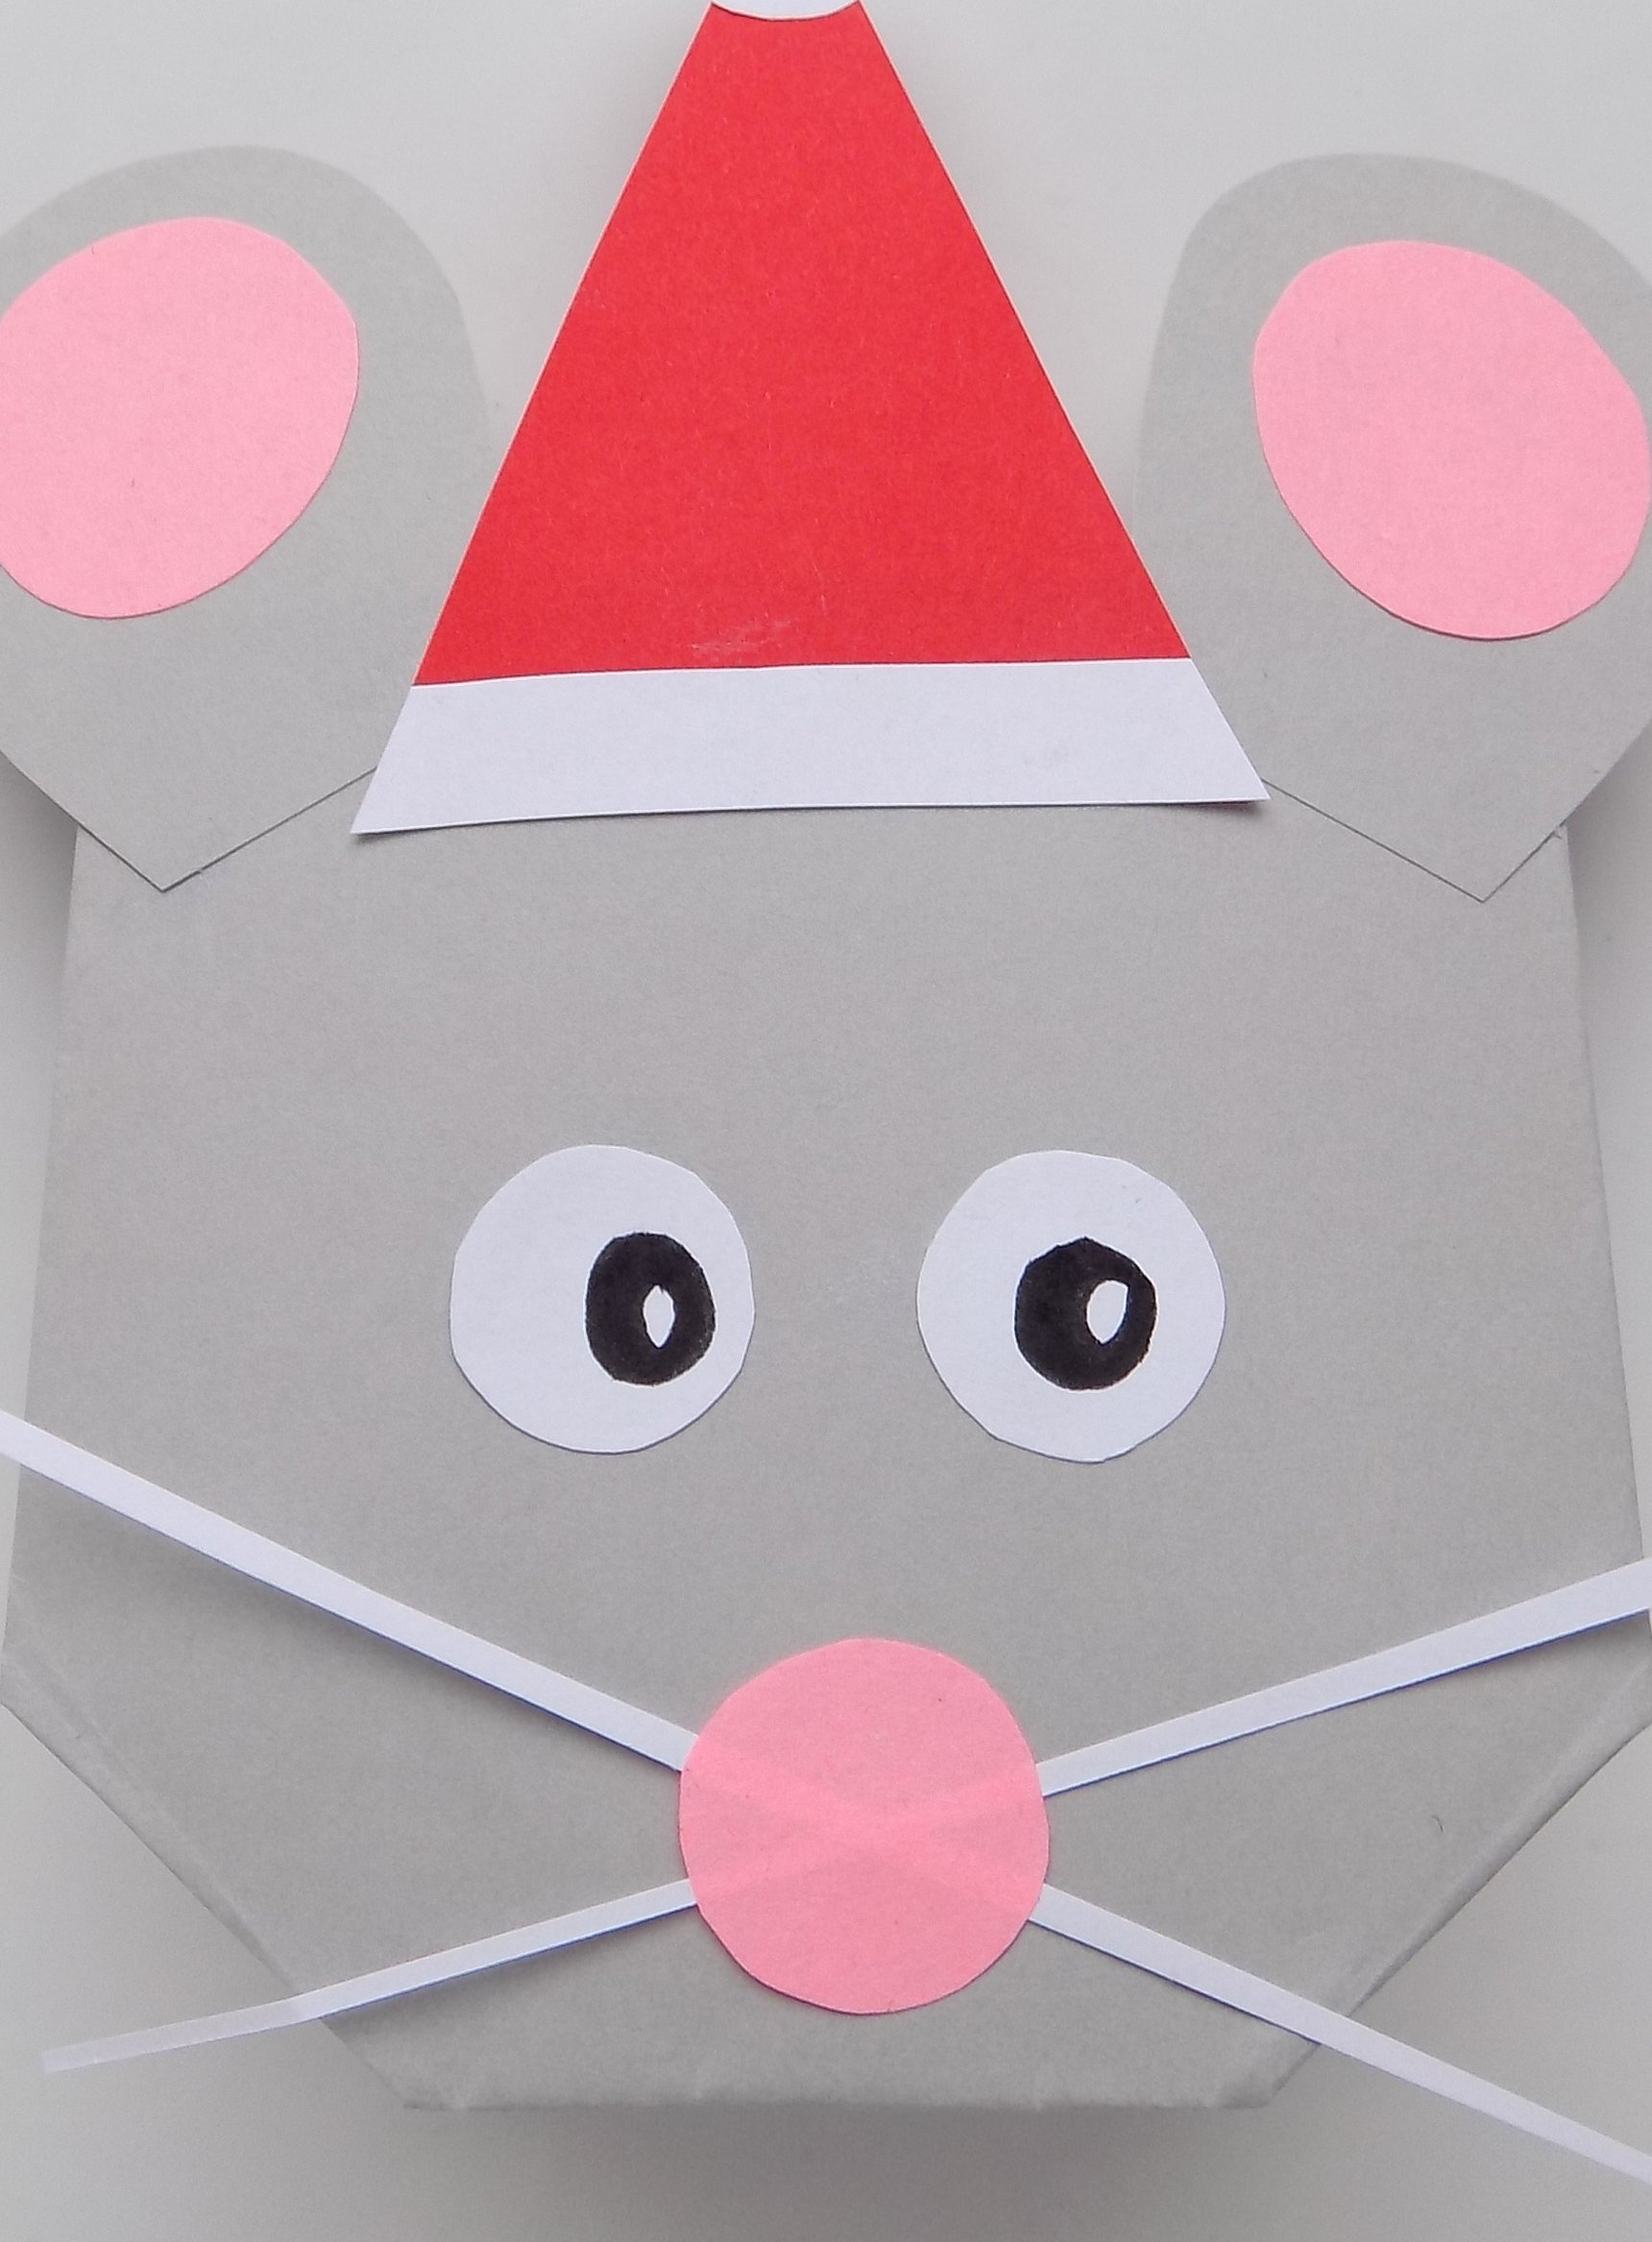
Another option is to make a mouse face with a New Year's hat:
- Cut out two semicircles for the ears and glue pink circles to them.
- Cut out two pentagons, glue the ears to one of them and place a ribbon on top. Glue the other part of the head tightly on top.
- Attach the antennae, eyes and nose.
- Glue a red triangular hat with a white pompom on top.
White paper mice
From ordinary white printing paper you can make a mask, which comes in different versions: for the whole face or only half.
To make a half-face carnival mask, you will need regular snow-white thick paper, scissors, glue and an elastic band. Instead of an elastic band, you can take a regular lace, but in this case, there is a high probability that the finished product will slip off your head.
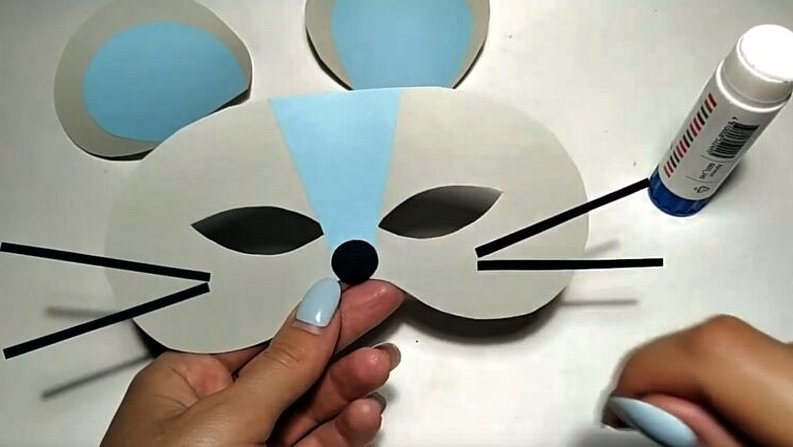
Step-by-step instructions for making a mask:
- Draw the top half of the mouse's face on the back of the paper. Cut out holes for the eyes.
- Cut out the ears separately. The inner part of the ears should be made from pink paper.
- From black construction paper, cut out a small round nose and thin strips for the antennae.
- Glue the nose to the muzzle and the two ear pieces to each other. Attach the whiskers to the edge of the muzzle.
- Attach a ribbon or elastic band and the craft is ready.
Please note! For beginners and children, it is better to print out a ready-made mask template, adjusting it to the desired size.
There are many different ways to make paper mice. They all have their own special touch and are made from materials that are readily available.


