Paper cubes are often used in children's games, competitions, and events. The product can also be used to decorate your home. There are many ways to make paper cubes. Some of them require a certain amount of skill, while others can be handled even by children. Below are popular options for creating cubes using different techniques.
Origami cube diagram
To create a cube using origami technique, you need to prepare scissors, colored paper, and a simple pencil. It is best to take printer paper.
How to make a paper cube using origami technique:
- First of all, you need to take 6 squares of colored paper. They should be the same size. You can take squares of different colors.
- One of them will be the base. It needs to be folded in half, unfolded to the fold line.
- Fold the corners to the near line (right at the top and left at the bottom).
- Bend the parts of the sheet closer to its middle.
- Make folds.
- Fold the bottom right corner under the top part of the paper, and fold the top left corner under the bottom part of the sheet.
- Turn the resulting piece over.
- Make folds.
- This will create the first module. You will need to make 6 of these.
- When all the parts are ready, they need to be connected. To do this, the tongues are inserted into the resulting pockets on the modules.
The origami cube is ready.
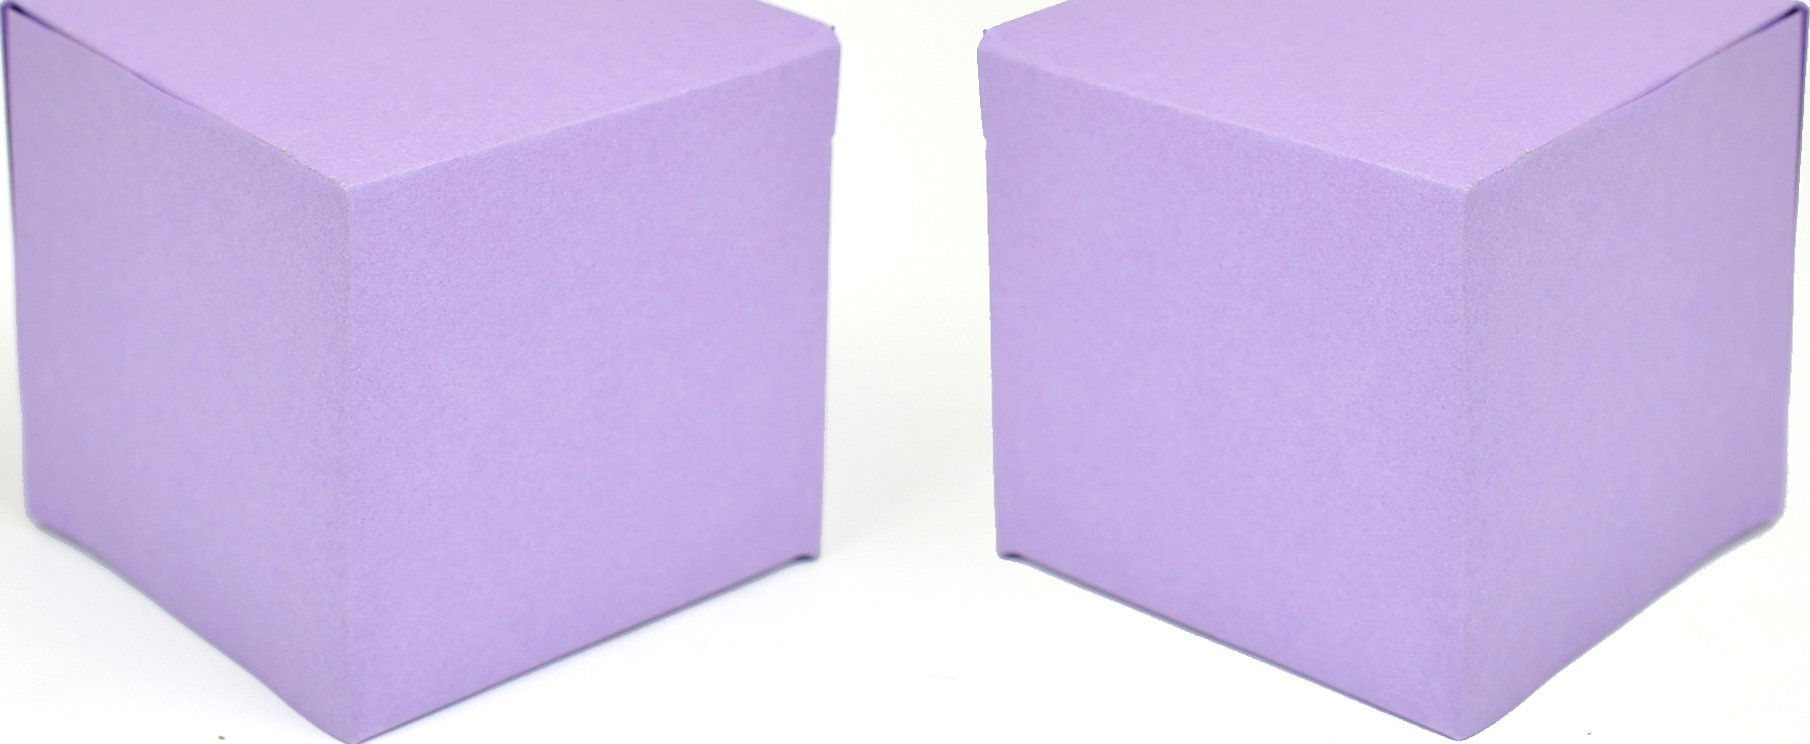
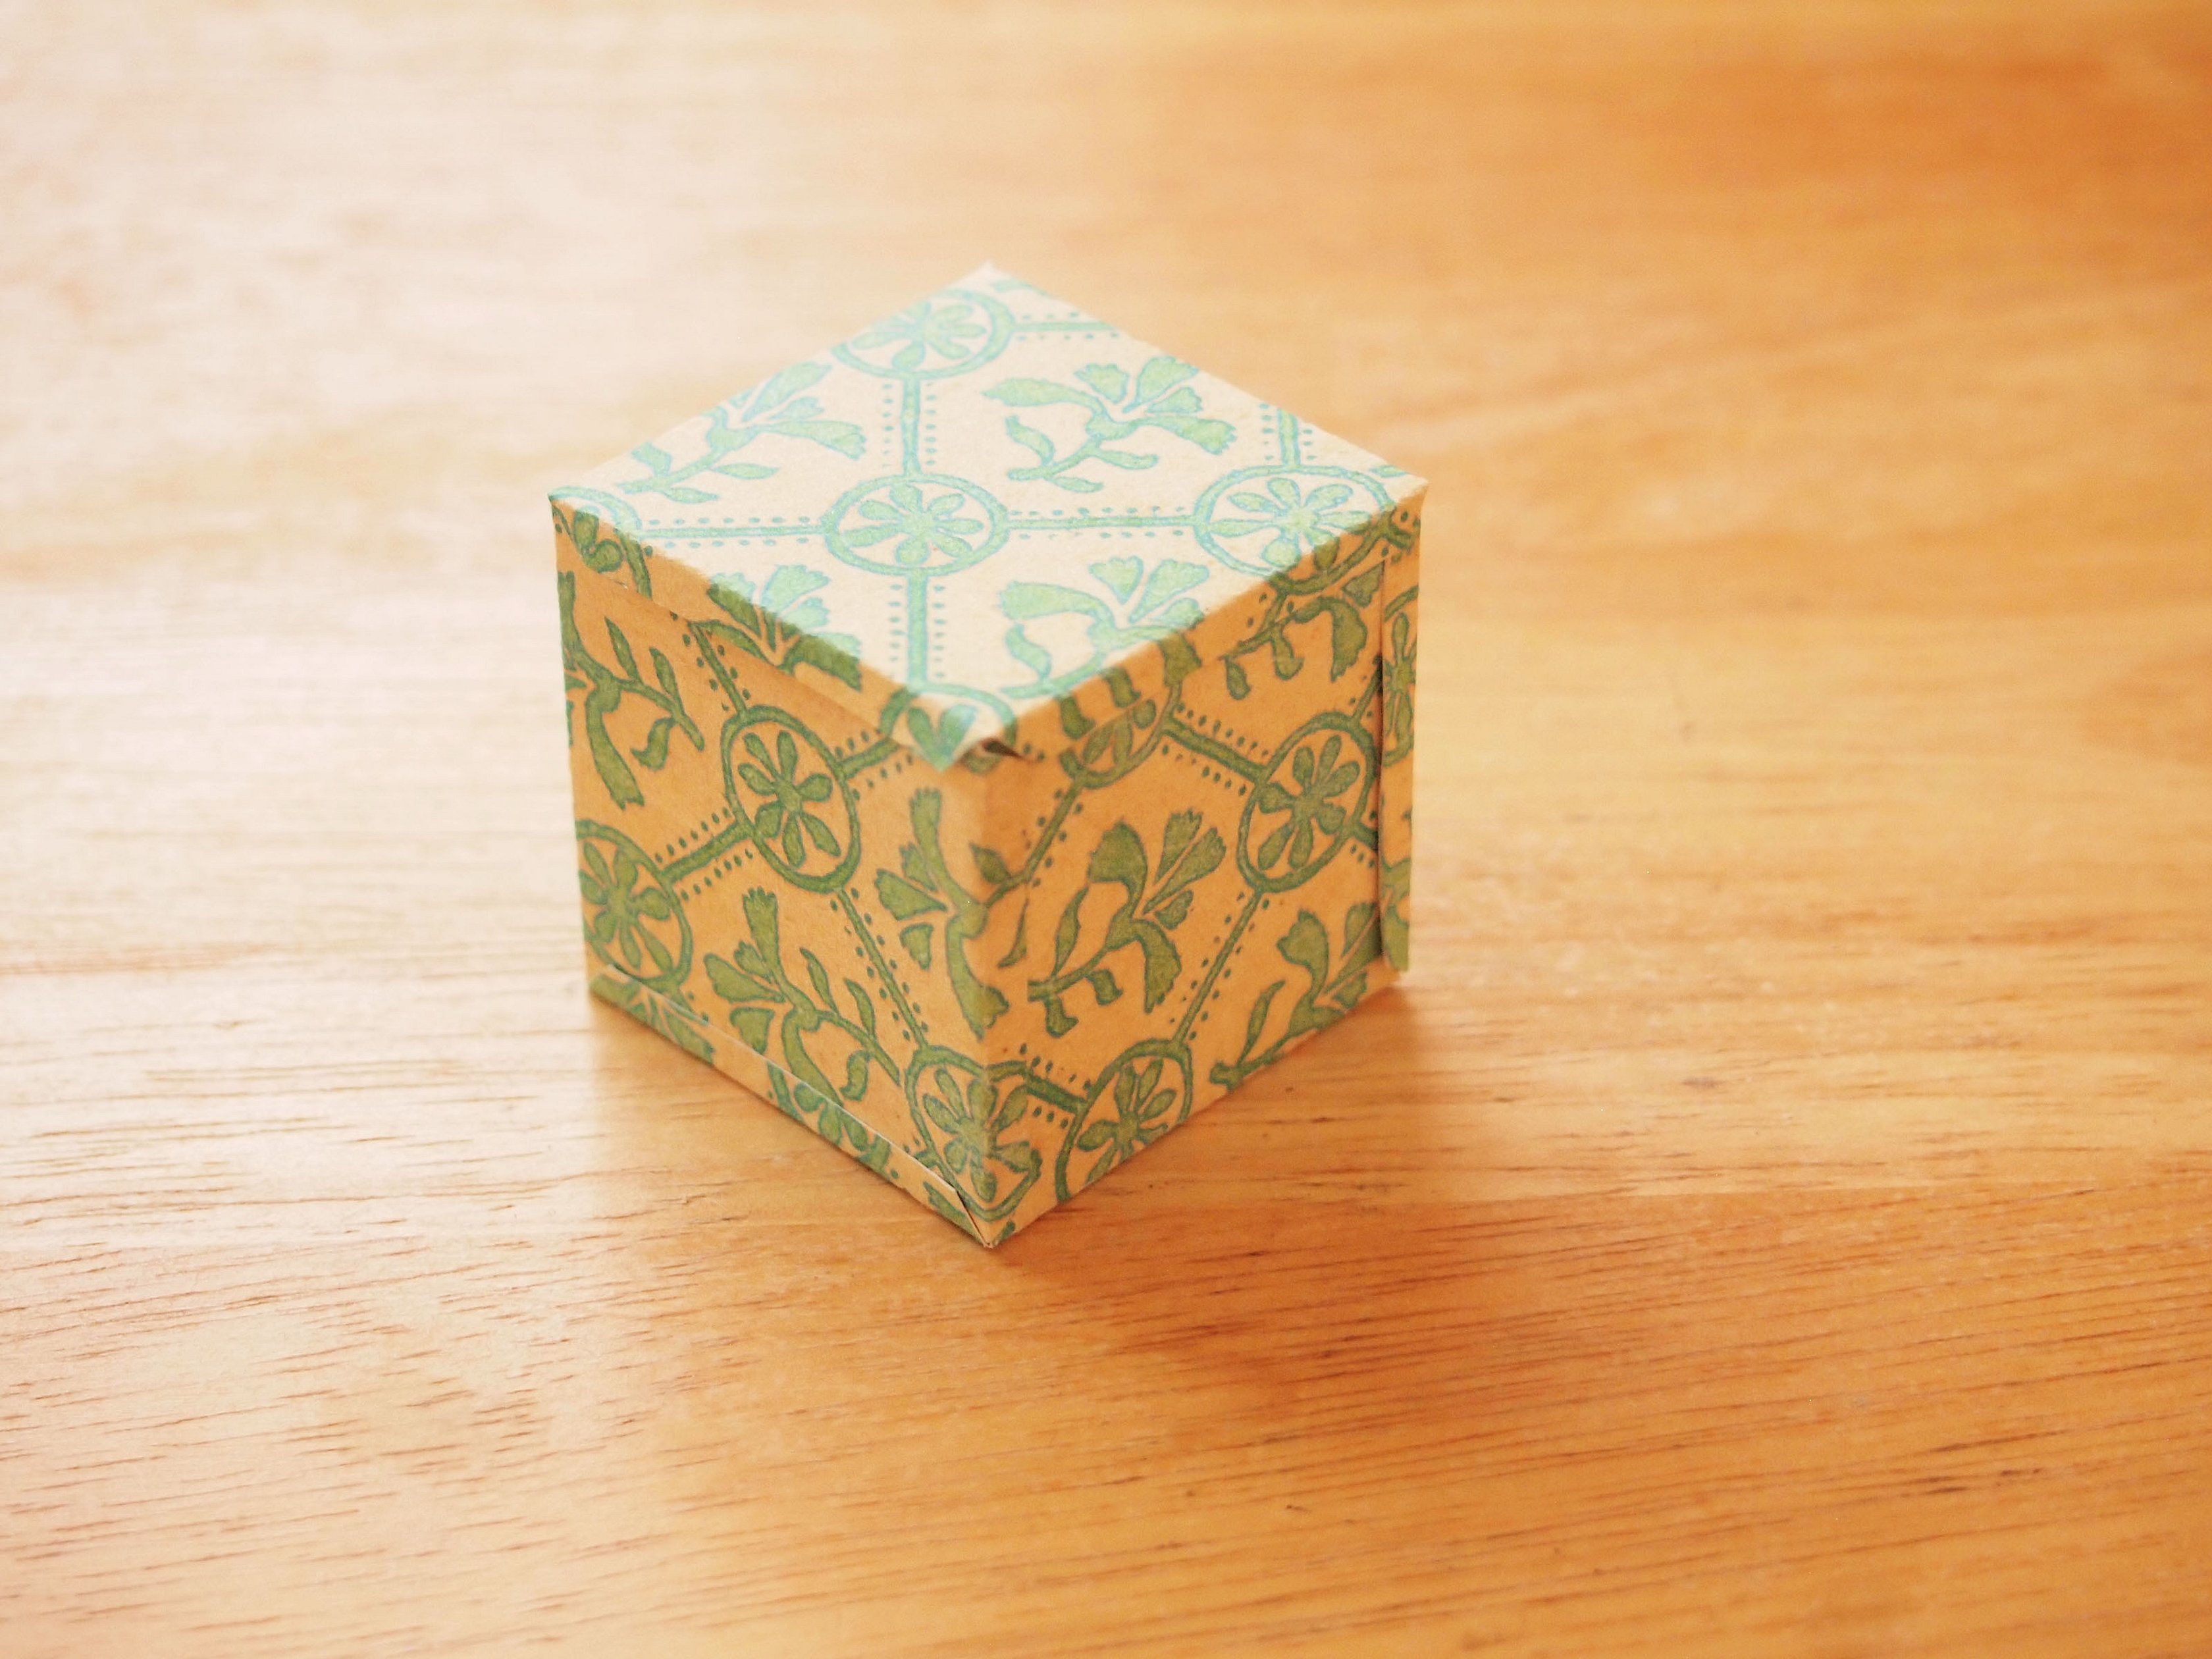
Simple paper cube
For work you will need a sheet of A4 format. You also need to prepare scissors. To make a simple paper product, you need:
- Fold the album sheet in half diagonally. The piece that sticks out needs to be cut off.
- Unfold the product, the result will be a square.
- Along the resulting fold lines, you need to fold the paper so that it becomes triangular in shape.
- Fold the left and right edges towards the middle of the piece.
- Repeat the same steps on all sides of the triangle.
- Fold the side corners towards the middle.
- Carefully insert them into the resulting pockets.
- Do the same steps on the other side of the product.
Important! To make the cube three-dimensional, you need to open one of the corners and fill it with air.
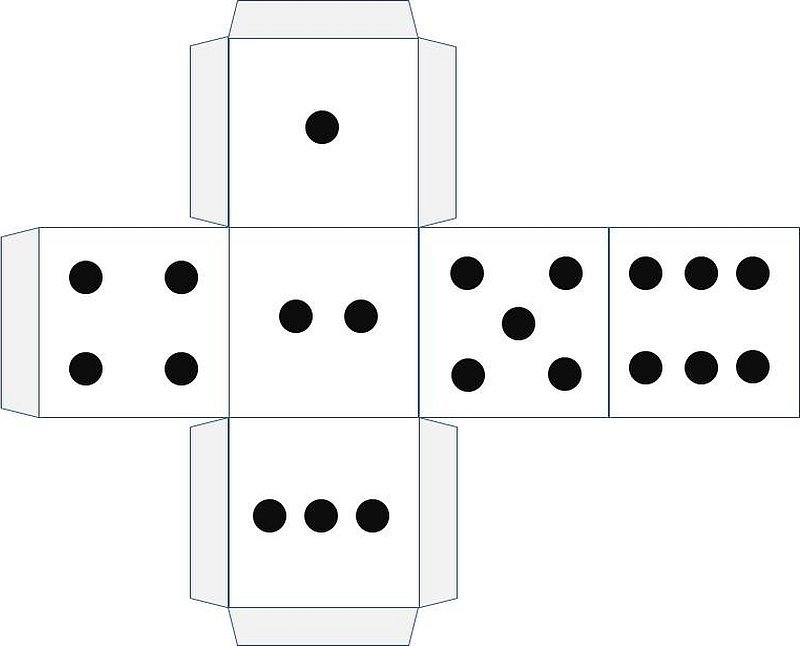
Making a cube in a hurry
To make a cube quickly, you can turn to simple patterns. They are on sites for creativity and in thematic publications. You can make your own template according to the existing pattern, but of a different size. What to do next:
- Print out the dice template for the craft.
- Cut out the resulting diagram.
- Fold the cube along the contours.
- Use office glue to glue the places where the sides are in weak contact.
A simple paper cube is ready.
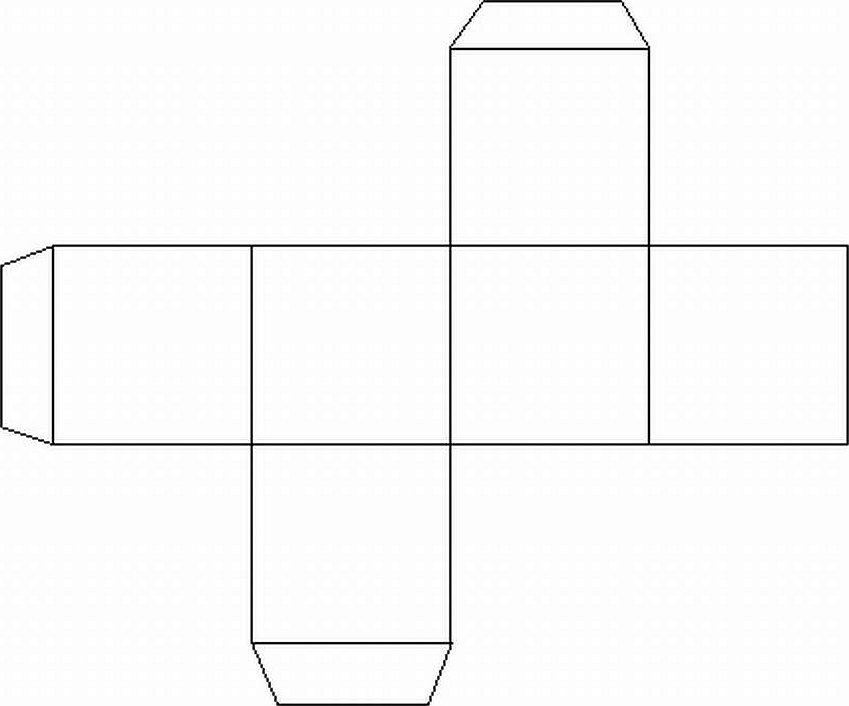
Cube development for gluing according to the drawing
To make a product in a scanned pattern, it is necessary to prepare:
- A4 sheet of paper;
- simple pencil;
- ruler;
- scissors.
The creative process must begin with the design of the scan. This is the name of the scheme needed to create a three-dimensional cube from paper.
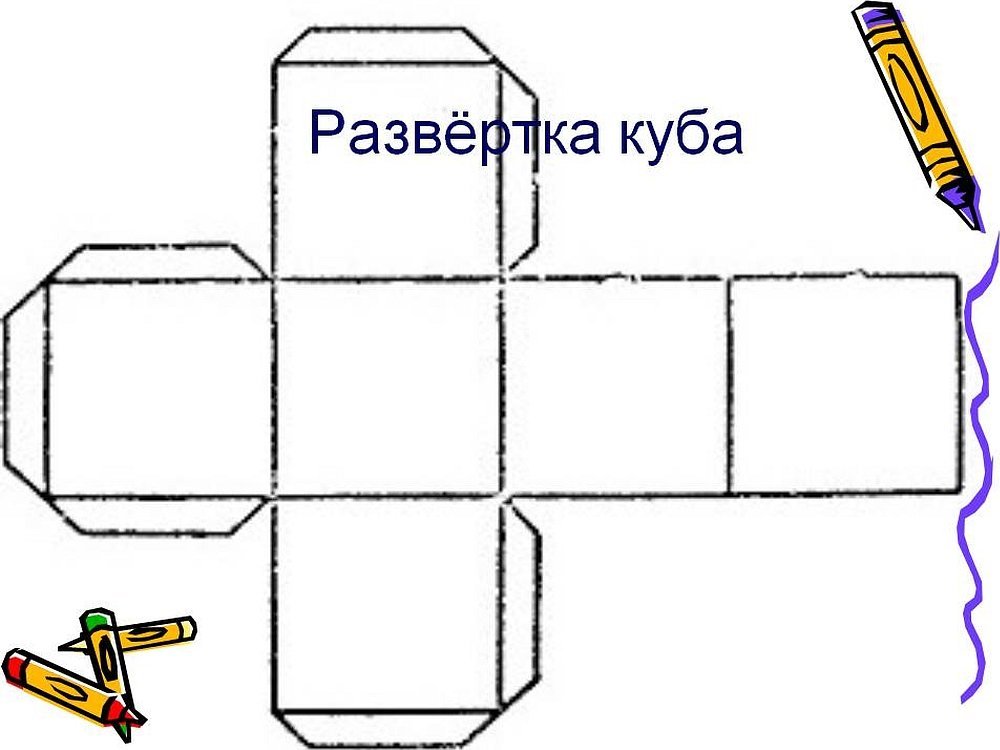
Unfolding the cube for gluing, step-by-step and quick instructions, according to which you can do everything:
- Draw a square on a sheet of paper. It is important to ensure that its sides are the same length and that the angles are right angles.
- Since the cube has 6 faces, you will need 6 paper squares for the craft.
- Draw such squares of the same size on other sheets.
- To connect the figures, allowances will be needed. They need to be drawn on the sides of the 3 parts.
- The width of the allowances should be kept at 1 cm.
- Cut out the resulting pattern and glue the edges using a glue stick. Don't forget to remove the corners of the allowances during the process to make it easier to glue the figure.
Important! You can write letters or draw animals on the resulting cube, and then play educational games with your children.
How to make a cardboard cube with your child
Crafts develop children's imagination and increase endurance. A simple cardboard cube can be made together with a child. The creative process looks like this:
- Find a suitable drawing of the cube. You can draw it yourself if your parents know the basics of geometry. But to avoid confusion, it is better to find a ready-made layout online.
- Print the template on a printer.
- Cut out the resulting parts.
- Transfer them to prepared cardboard. This can be regular colored cardboard or a sheet from a box.
- Cut out the product along the lines and glue it together using PVA glue.
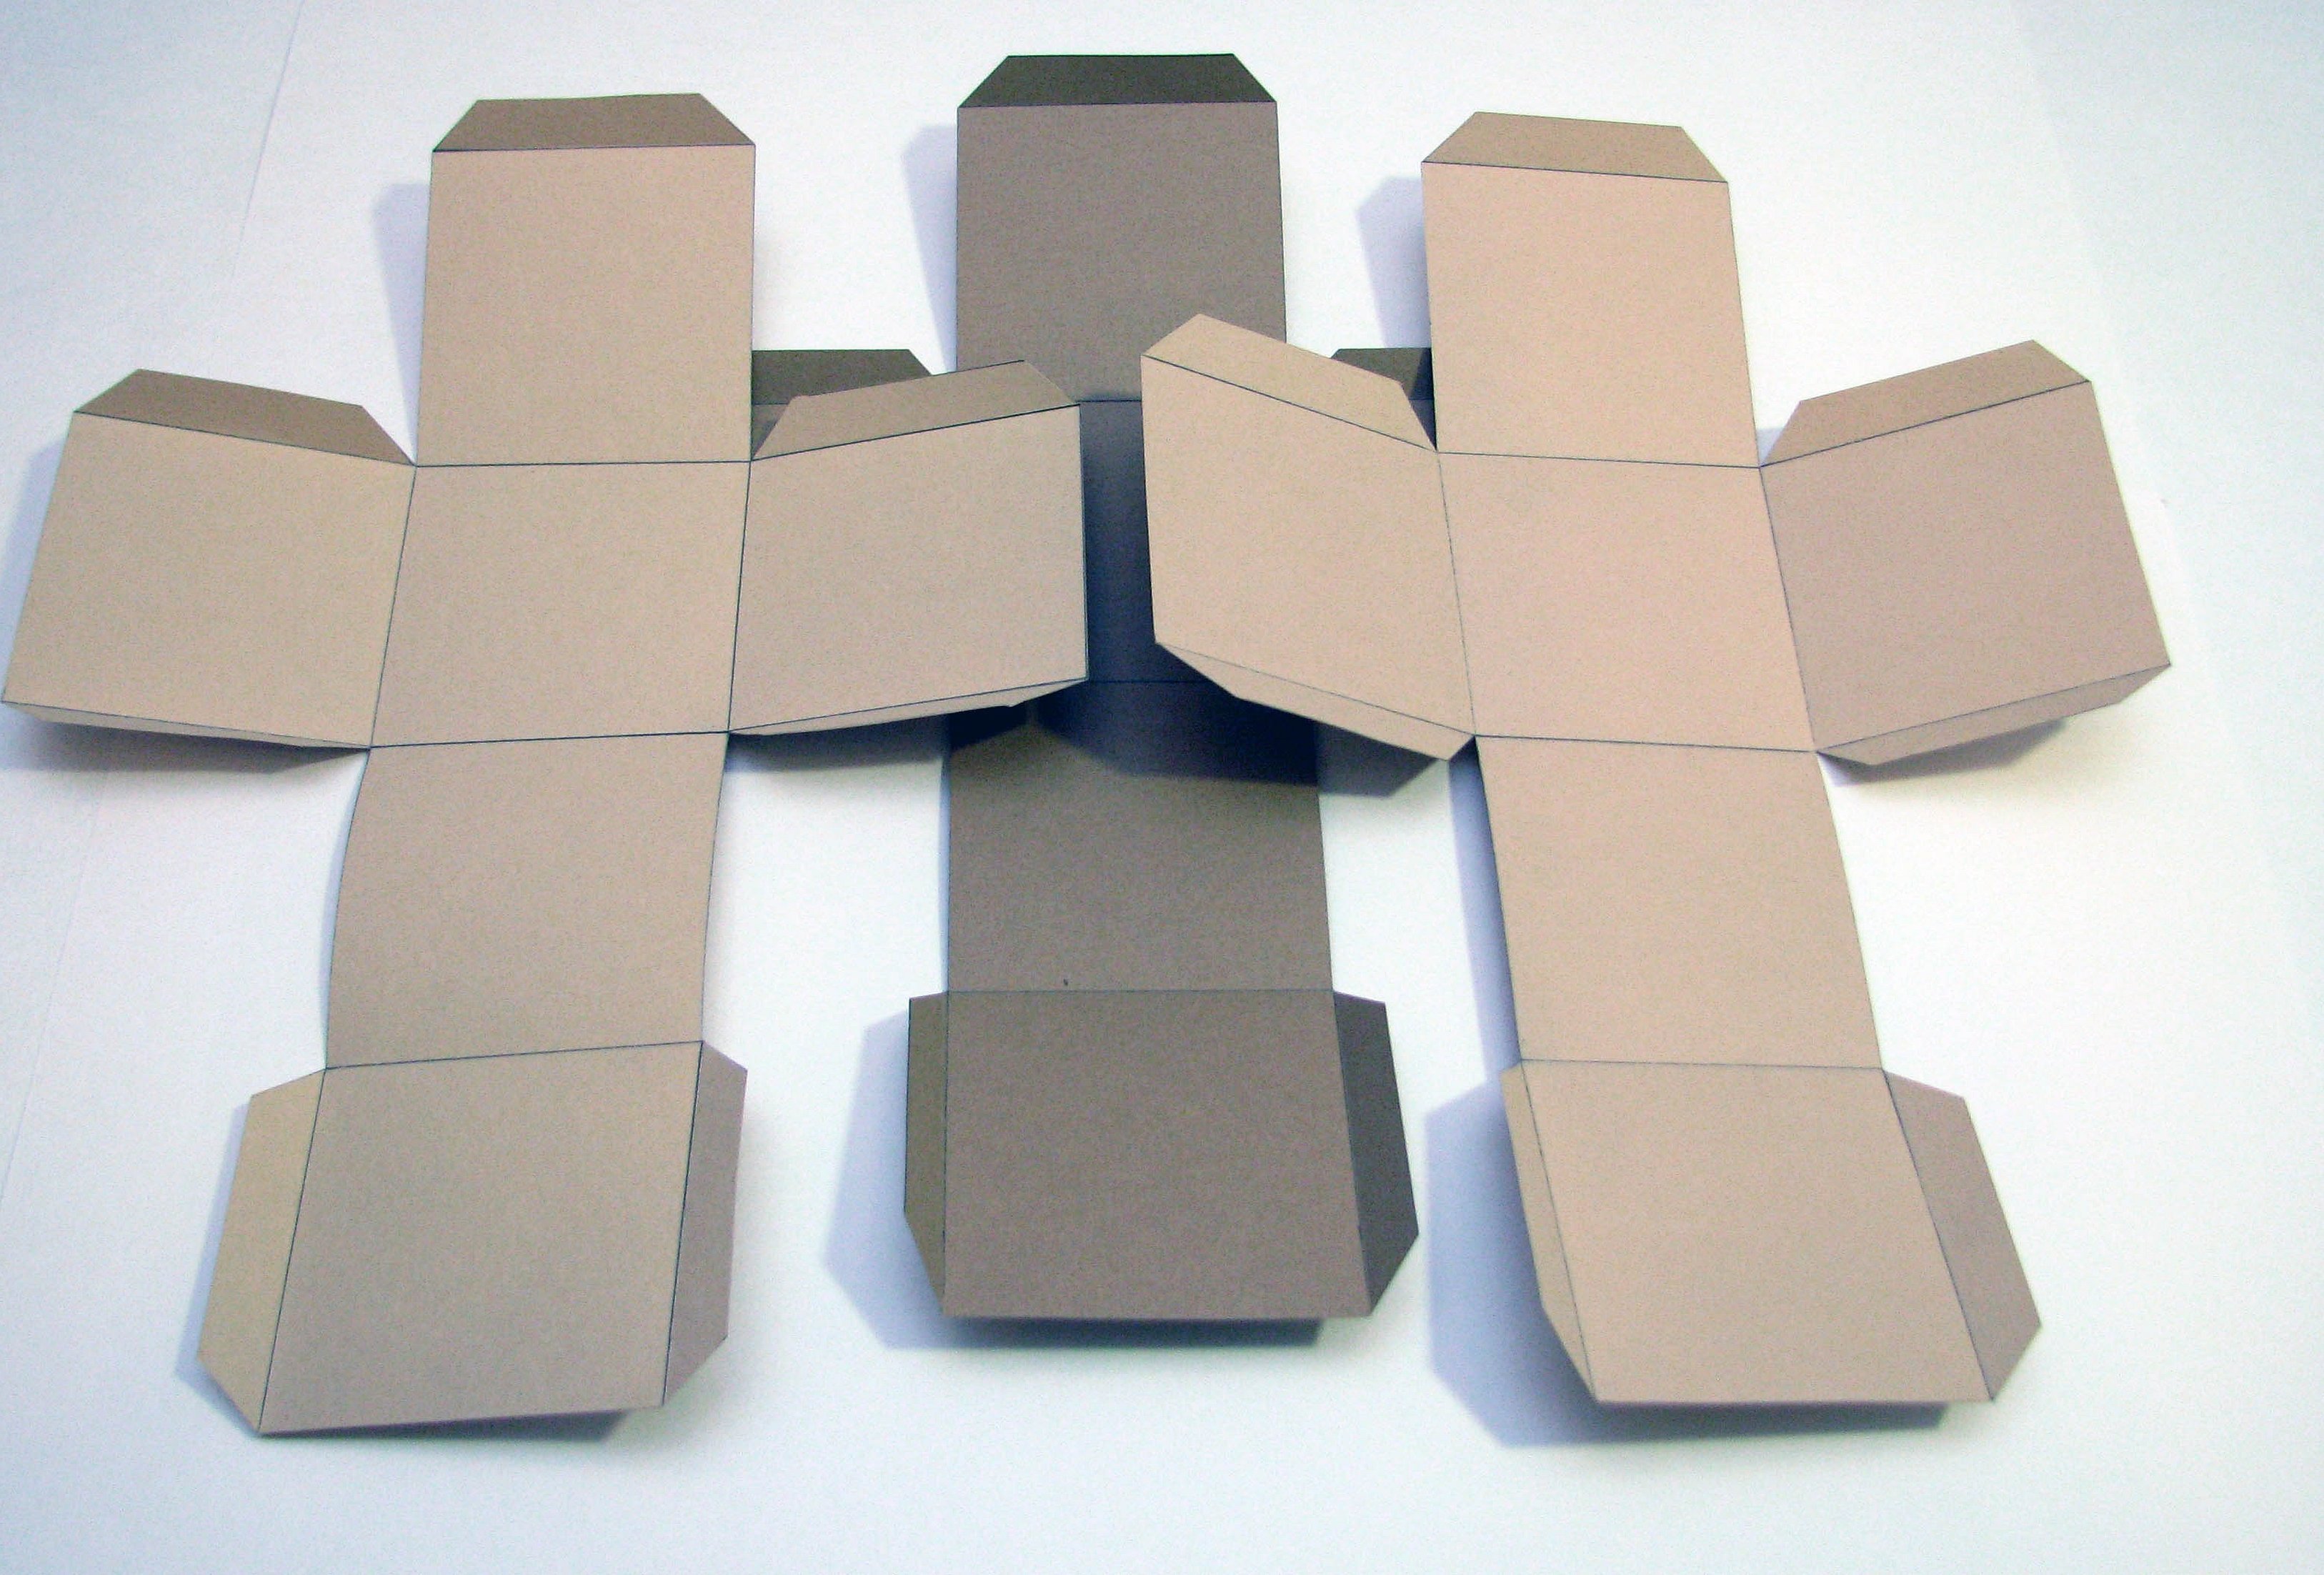
If you are working with thick cardboard (a box), it is best to cut the parts with a stationery knife. Scissors can damage the sheet.
You can also make a gift cube from thick cardboard with your children. Step-by-step instructions on how to make a cardboard cube:
- Measure the gift. The dimensions of the product will depend on these parameters. You will need to measure the width of the gift and add a few more centimeters to this parameter so that the present lies freely.
- Take cardboard of the required size. If the gift weighs a lot, it is better to use cardboard from a packaging box. On the resulting material, it is necessary to draw a layout of the future craft.
- Draw a square of the required size.
- Draw 5 more of the same parts on the other parts.
- If the finished cube is not going to be covered with paper, it is better to draw weak lines with a simple pencil so that they can be erased later. If you plan to cover the product with gift paper, you can make the lines thicker.
- To glue the product, it is better to use special flaps. To do this, you need to draw small stripes on the sides of the squares.
- Now you should go over the drawn lines with a stationery knife. Don't forget about the valves, otherwise you'll have to redo the craft.
- Bend the base of the craft along the lines inward.
- Take glue and apply it to the flaps, thus gluing all sides of the gift cube. Some parts can be glued using tape.
Important! It is advisable to cover the product with gift paper or decorate it with decorative elements at the child's discretion. This way, glue residue and uneven seams will not be visible.
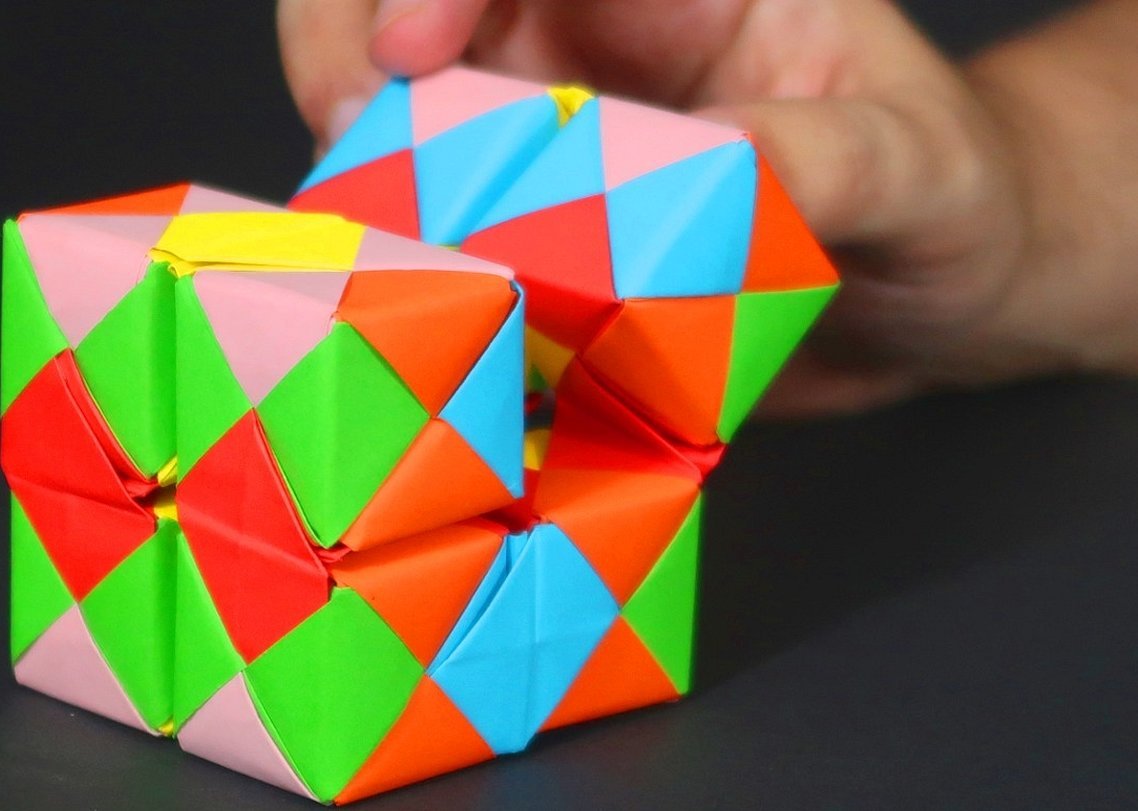
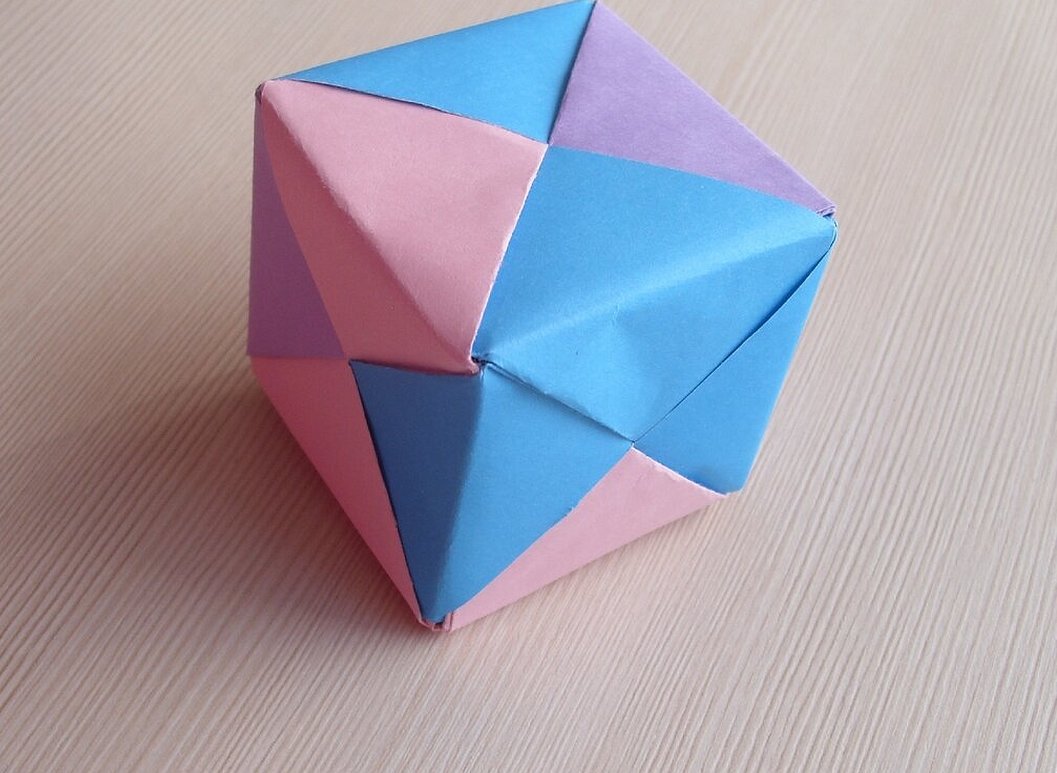
Modular cube
To make a modular cube, you need to take 6 sheets of colored paper. They can be the same or different in color. It is desirable that each 2 sheets are the same shade. How to make a cube from modules:
- Cut out 6 squares of paper measuring 15 x 15 cm.
- Fold the first one in half to create folds, then unfold it again.
- Using the center fold as a guide, fold the two sides of the square toward the middle.
- Turn the leaf over and fold each corner towards the center.
- The result should be a trapezoid. You will only need to fold the opposite corners.
- Fold the corners of the trapezoid to the middle on the other side.
- Lower all corners.
- Repeat all the same steps with other squares that will be used to create a volumetric cube.
- Now you can start assembling the modules. To do this, you need to take two parts of the same color. The corner of the first of them will need to be inserted into the body of the second.
- Insert the second module in the other direction. One opening on the resulting squares accommodates two triangles (module tongues).
- Continue to stack the modules until you have a complete piece.
The modular cube is ready.
How to make a paper dice
The easiest way to make a small dice is to make one using a ready-made template. You can find it online or create it yourself.
What the step-by-step actions look like when using the foldout layout:
- Find a diagram for creating a craft or draw it yourself.
- Print the template. It is best to use special paper for office equipment or for drawing. If thin sheets are used, then it is necessary to additionally glue it to the cardboard.
- Cut out the pattern of the future craft.
- Select points on it.
- Glue the toy along the lines. You will need to hold the gluing points for a bit so that they stick tightly.
Another option for creating a dice is to assemble it from modules:
- Cut out 6 identical squares measuring 10 x 10 cm. In this case, it is better to take parts of the same color (preferably light).
- Fold one of them in the center and unfold it.
- Fold both sides towards the middle so that the piece is divided into 4 horizontal parts.
- Turn the workpiece over and fold the corners to the middle to form a trapezoid.
- Fold the corners towards it from the other side.
- Put them down.
- The first module is ready. Do the same with the other parts.
- Let's start assembling the craft. To do this, you need to insert the tongues of some modules into the square holes of others.
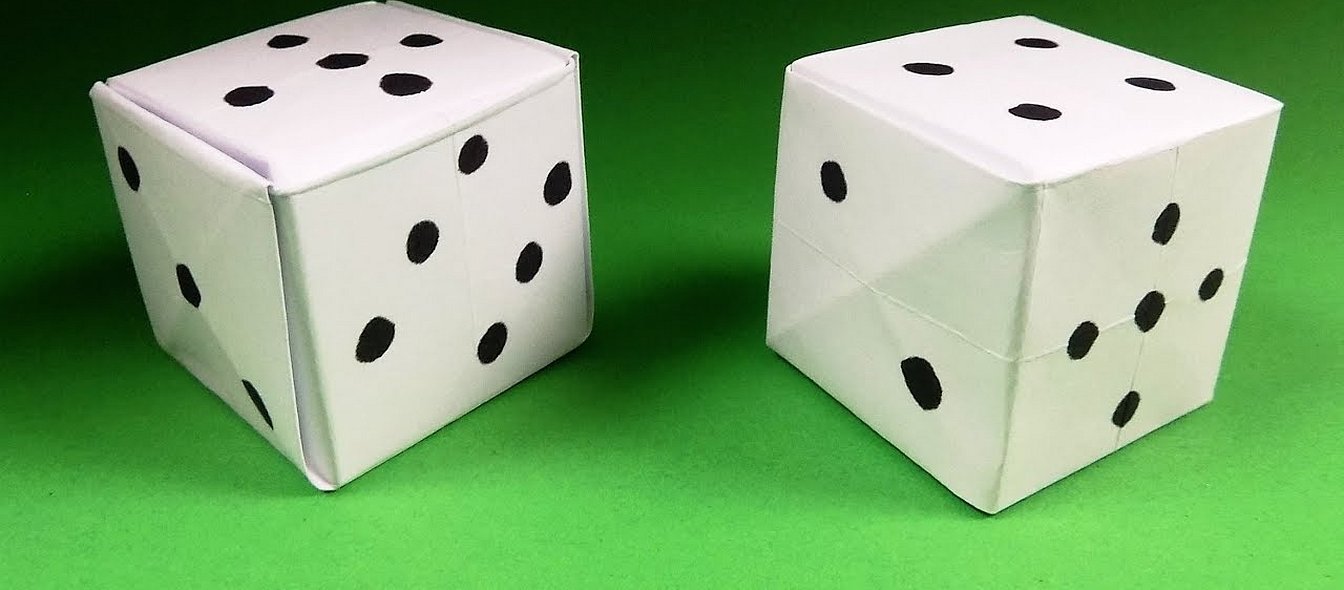
Important! When you have a finished cube, you need to draw dots on it with a black marker. You can choose the color at your discretion. The main thing is that it should be visible against the background of the paper used for the craft.
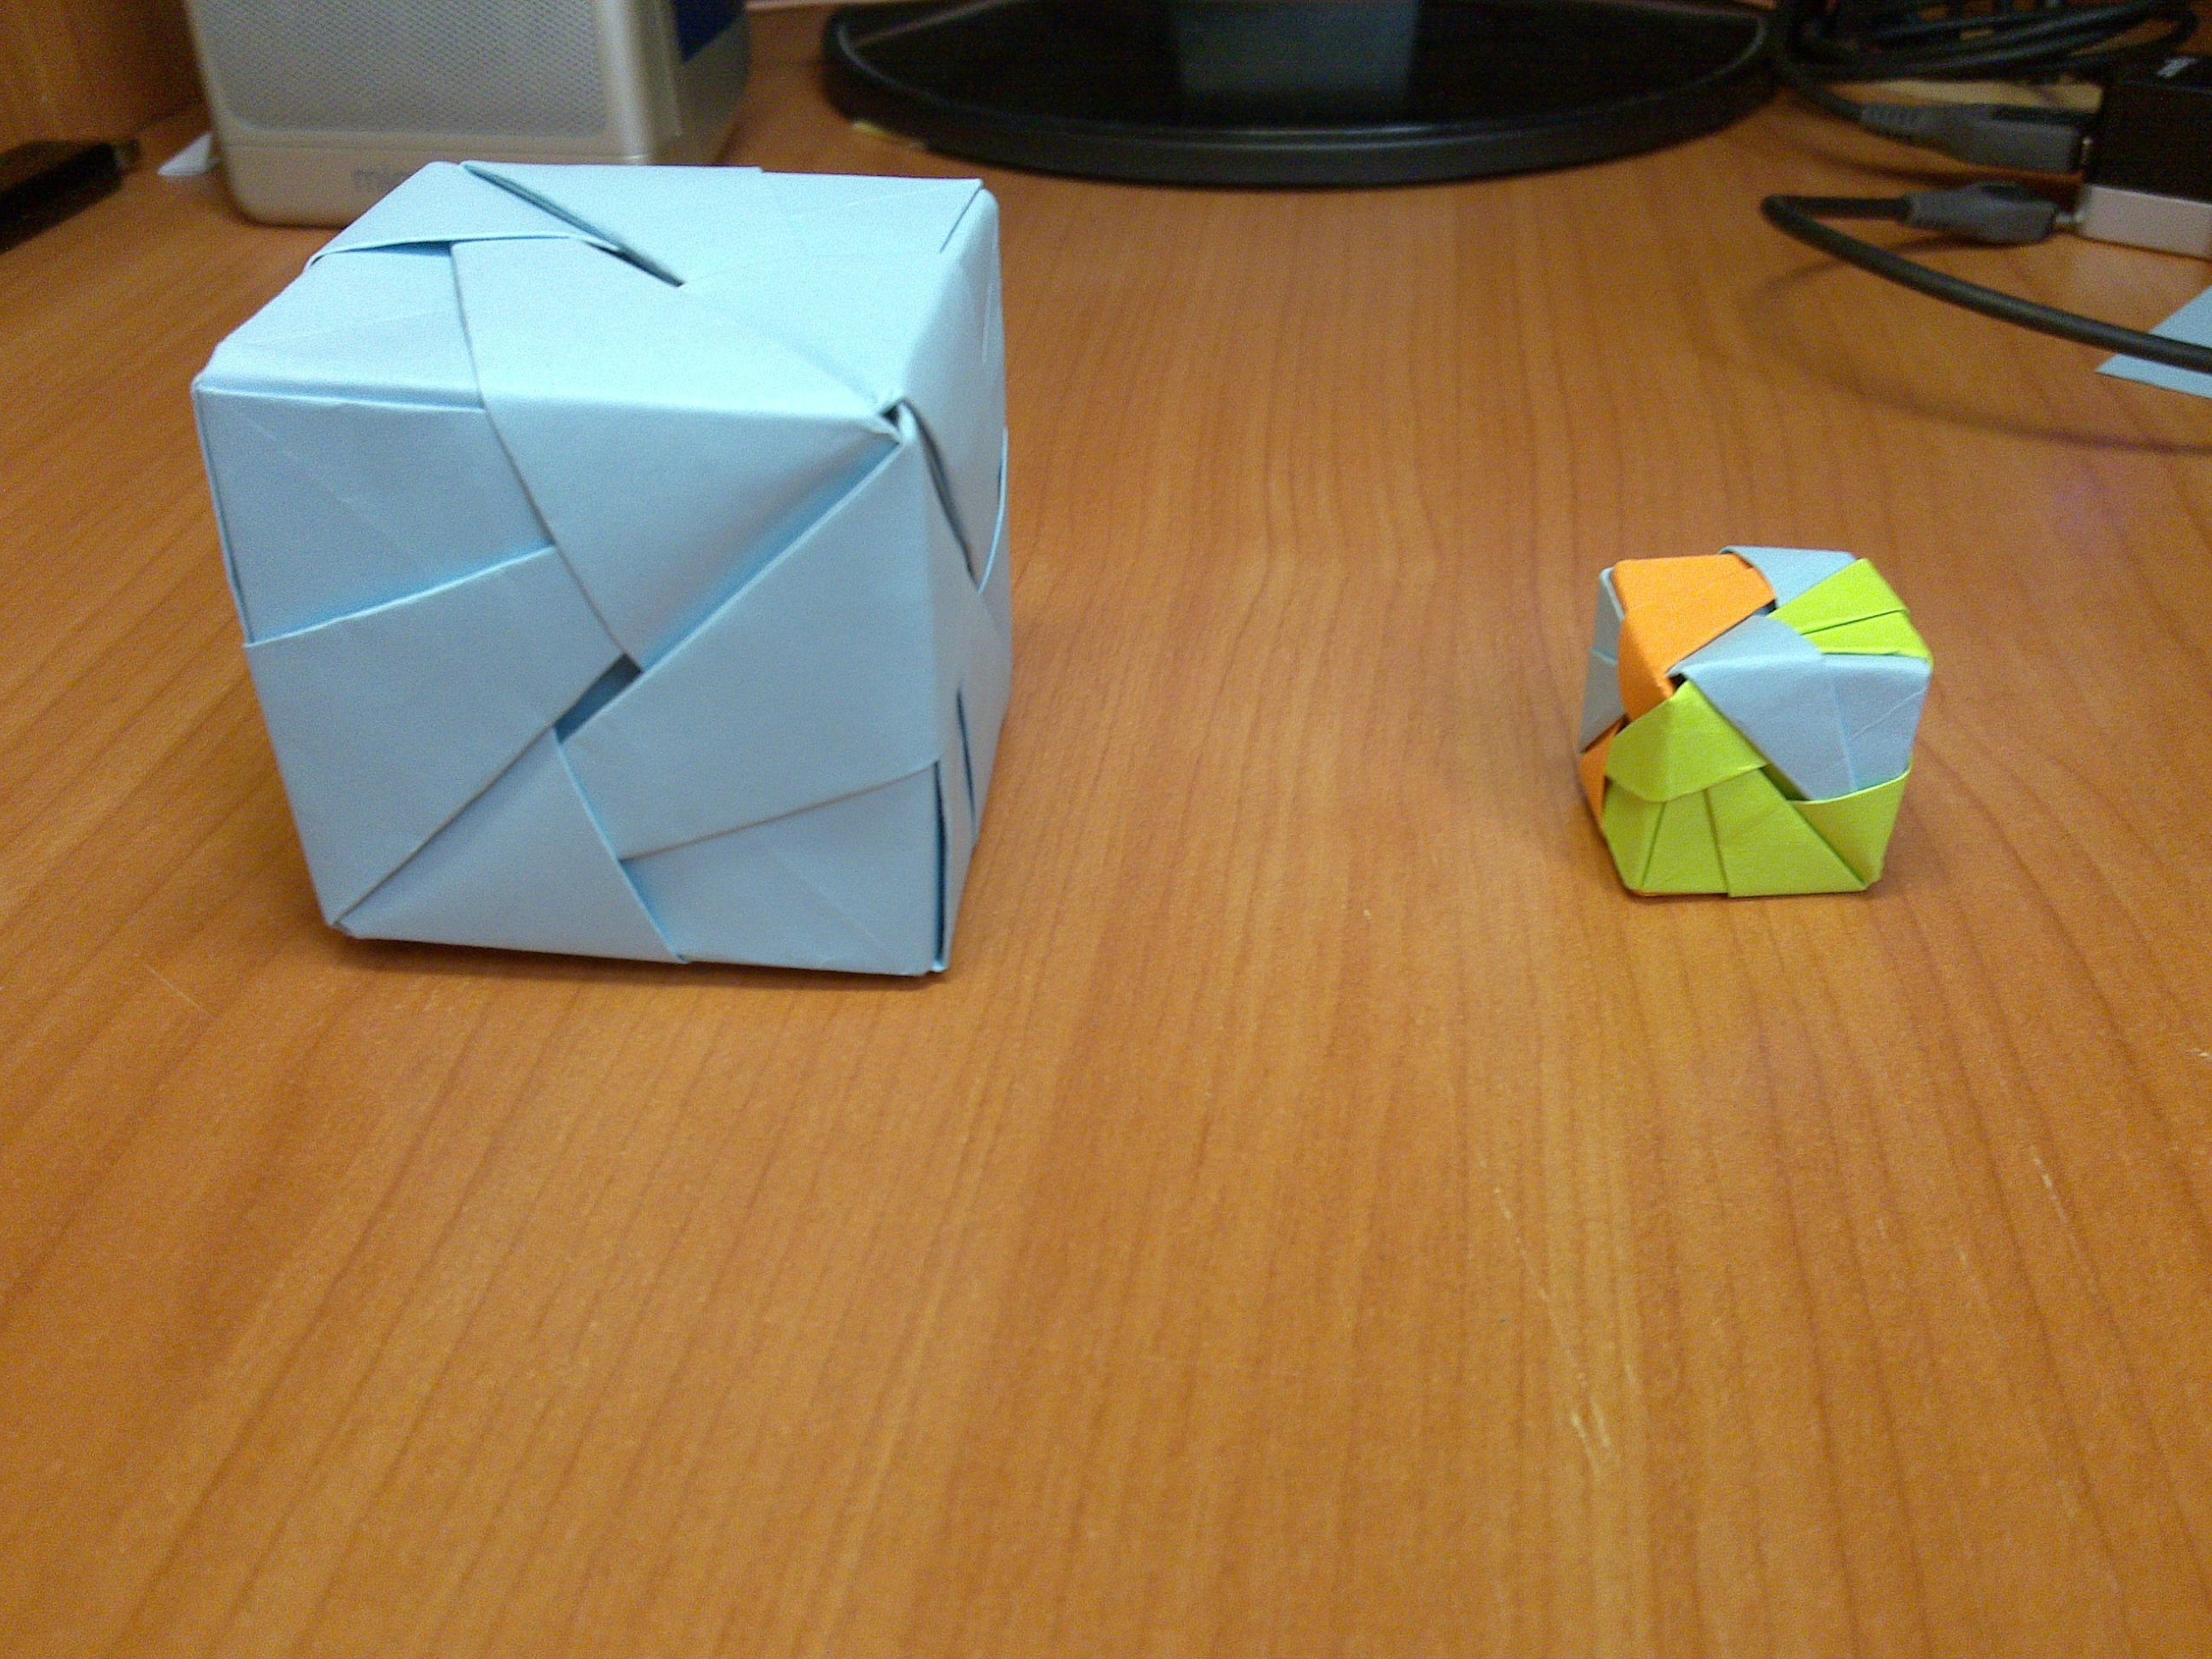
Volumetric paper cubes without glue and scissors
A three-dimensional product can be made without glue and scissors. Step-by-step instructions:
- Take a sheet of paper of the desired shade (with the same sides).
- Fold it and unfold it again.
- Fold the left and right corners to the center, they should meet each other. You will get a figure that will resemble a tent in its appearance.
- Fold the upper right corner upward.
- Bend the right corner of the resulting triangle towards the center of the piece.
- Fold the end that forms at the top into a pocket. It will be on the top side of the triangle.
- Do the same steps on the other side.
- Turn the workpiece over and repeat the same steps with 2-5 sides.
- Fold the top part down and straighten it out.
- Do the same with the bottom triangle.
- Carefully take the resulting figure and open it on four sides, all of which should be perpendicular to each other.
- Blow into the resulting hole. This is necessary so that the cube takes shape and becomes three-dimensional.
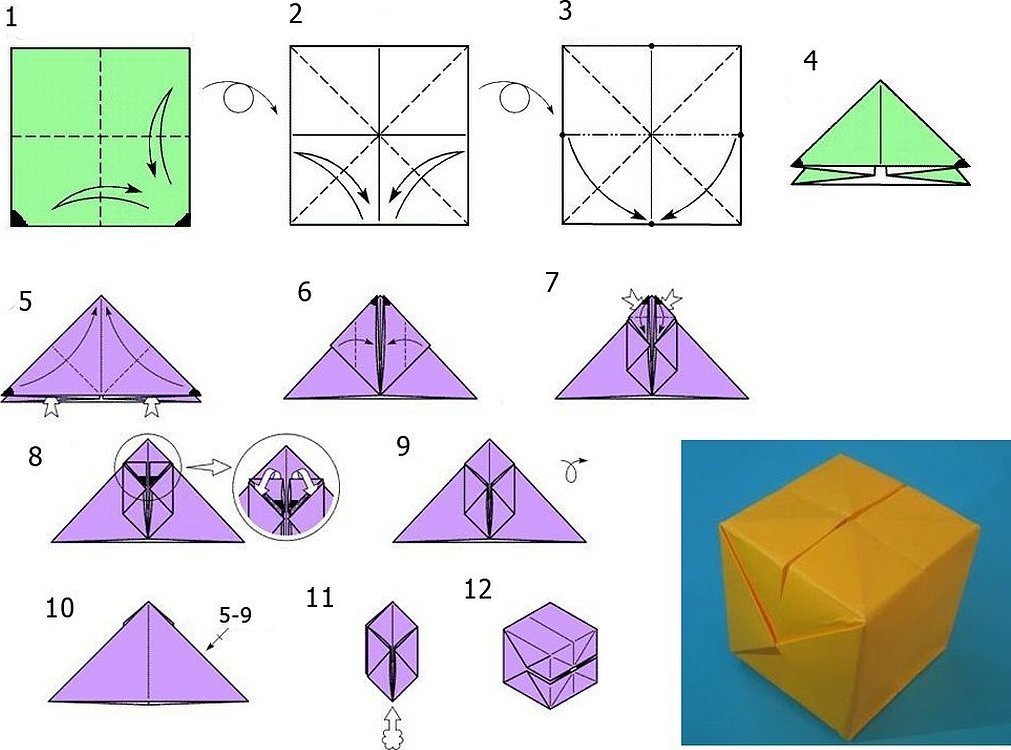
If one of the folds does not open, then you need to fold it and try to open it again. The craft is ready. The resulting craft can be left in its original form, or you can decorate it with decorative elements. If a child is going to play with it, then on each side of the cube you need to write letters or numbers. Such toys are often used for the development of preschool children.
A paper cube is a simple, but at the same time interesting product that has a lot of variations in execution. It can be made from paper, cardboard, using origami technique, using a scan and ready-made schemes. You can even make paper crafts with children. The creative process will not take much time, and the finished result will please with its originality and simplicity.


