A plush bunny knitted with knitting needles is a very cute and gentle gift for a loved one, especially for a child. To knit such a toy, you will need to master basic knitting skills and be patient. Even an inexperienced needlewoman will be able to knit a beautiful bunny.

- The benefits of handmade toys
- What yarn is better to use
- What else do you need for work?
- How to knit a bunny with knitting needles: a selection of master classes for beginners
- Bunny with long ears
- Little funny bunnies
- Lovebird Rabbits
- Bunnies with colored ears
- How to knit clothes for a bunny: knitting patterns
The benefits of handmade toys
Soft toys, knitted with your own hands, are distinguished by their originality and uniqueness. Knitted animals and dolls seem to give off the warmth of the hands that made them. They look very tender and touching, so they will become a wonderful memorable gift for a loved one.
Any needlewoman can knit any toy from high-quality yarn: a cat, a bunny, a dog, a teddy bear, a doll. In recent years, knitted dolls "Tilda" and "Zhdun" have become very popular.
Knitting toys is not the easiest craft, but with time you can learn it.
What yarn is better to use
For knitting you will need smooth yarn of medium thickness. The ideal option is plush yarn (sometimes called marshmallow). Acrylic and wool are also great.
For reference! If you want to make a fluffy toy, you can fluff up the threads with Velcro or a comb.
Acrylic is the best option for beginner knitters. Experienced craftswomen can knit with cotton or mohair yarn: the products turn out very beautiful, but these threads are difficult to handle.
What else do you need for work?
Knitting toys requires additional tools and items. Multi-colored floss threads are always needed to embroider the muzzle and other decorations.
It is essential to prepare simple sewing threads that match the color of the yarn.
You will need:
- knitting needles No. 2.5 or No. 3,
- needles of different lengths,
- pins,
- paper clips,
- scissors.
How to knit a bunny with knitting needles: a selection of master classes for beginners
Skillful hands will be able to knit such a beautiful and simple toy as a hare with knitting needles: the diagram and description will help novice needlewomen cope with the task.
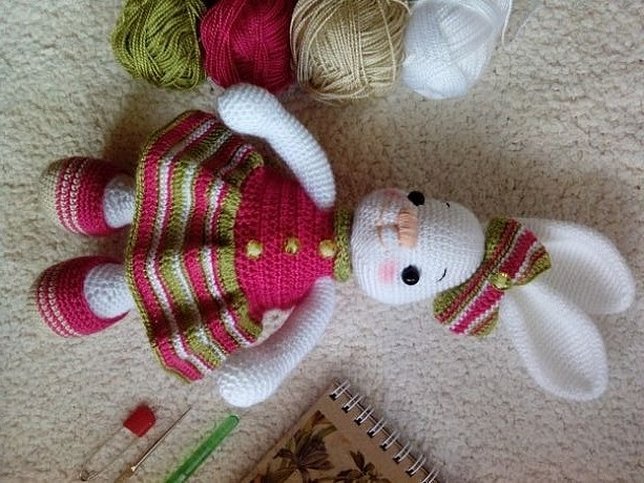
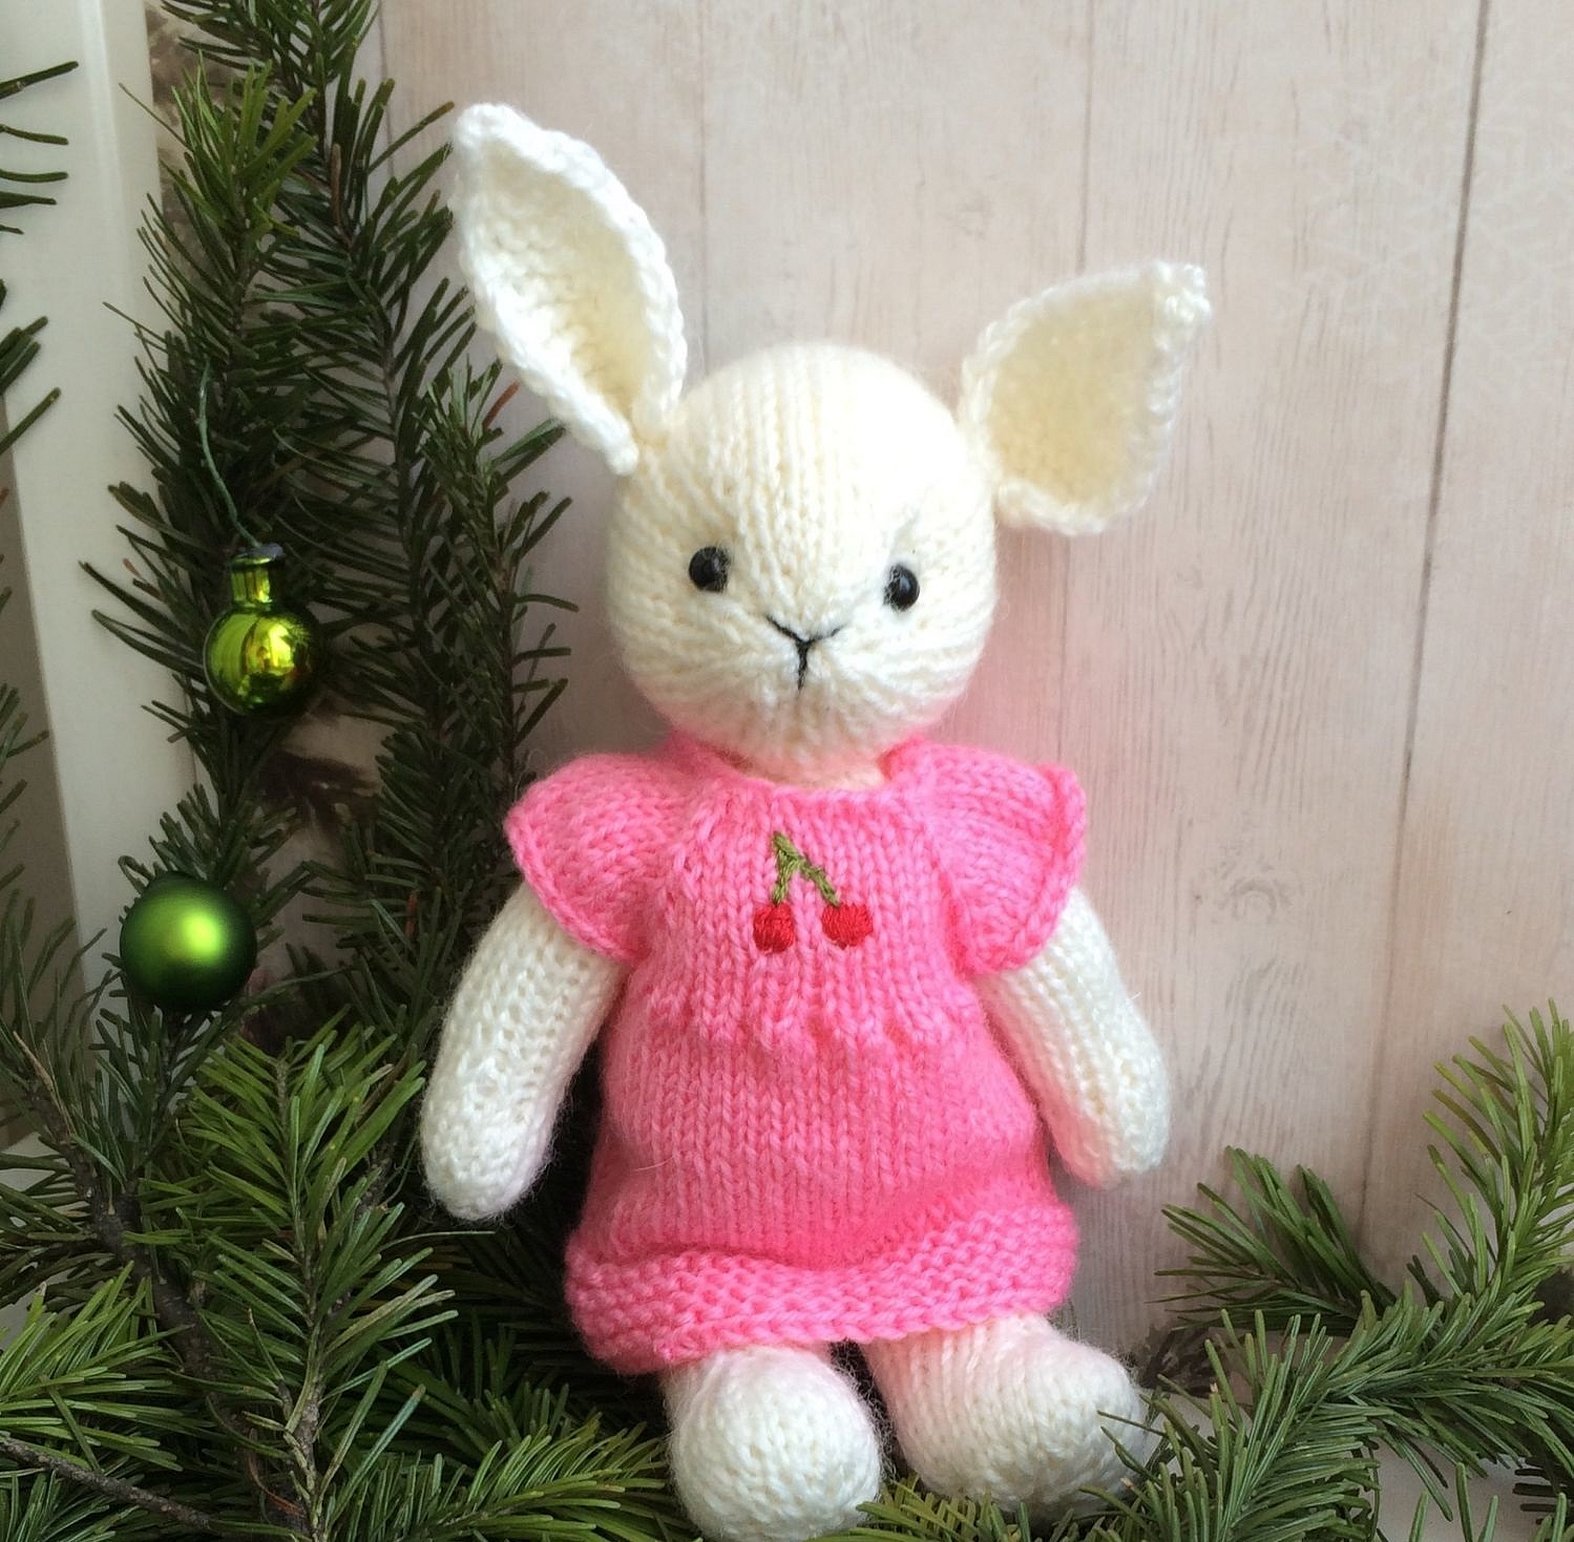
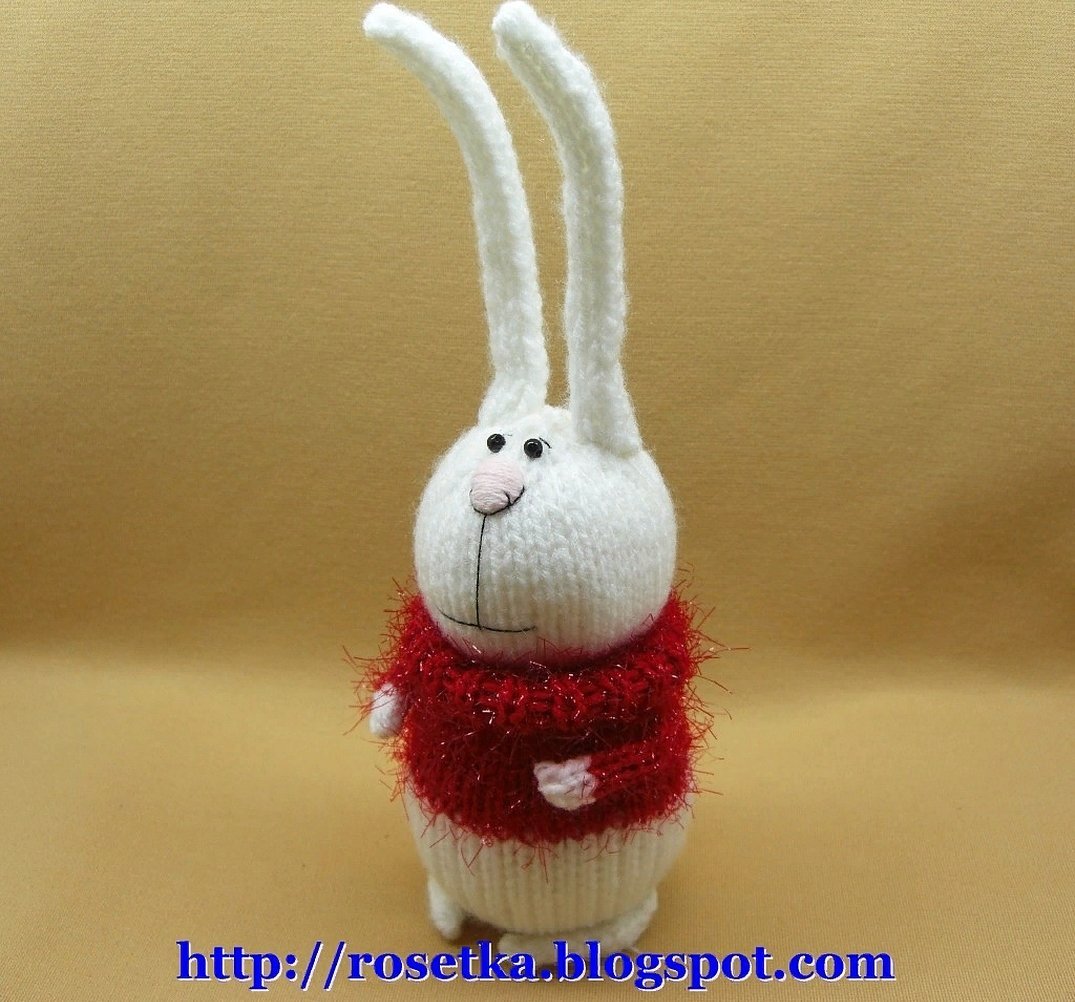
Bunny with long ears
The long-eared bunny looks very cute. Not only an experienced but also a beginner craftswoman will be able to knit a bunny with long ears: the description can be found on the forum dedicated to the topic of needlework.
Students are eager to learn how to knit a hare with long ears with knitting needles. Many knitting lessons are devoted to this. There are many original methods and techniques that will help you make a cute bunny from yarn.
Materials:
- plush yarn;
- knitting needles No. 2.5;
- floss;
- large beads for eyes;
- holofiber or synthetic padding for filling;
- needle and thread for sewing.
Knitted bunny (master class):
- Cast on 8 stitches.
- The second row is knitted with 8 purl stitches.
- Make an edge loop, then do the combination *front loop + increase (knit two loops from one loop)*. This combination is repeated to the end of the row. The last loop should be front. Total 14 sts in the row.
- In the fourth, all 14 loops will be purl.
- Edge loop, then *front st + increase* (to the end). Finish with another 1 front st. Total 26 sts.
- All 26 loops are purl.
- All loops are knit.
- Make the same number of loops purl.
- In the ninth row, weave one edge P, and then the combination *increase + 4 persons. P*, which is repeated to the end of the row. You will get 32 P.
- Knit the same amount (32 sts) purlwise.
- Next, work with the front surface. To do this, knit all the back rows with back loops, and the front rows with front loops. In this way, you need to do from the 11th to the 21st rows inclusive.
- In the 22nd: edge + 11 knits. P + decrease (knit 2 loops into 1) + 4 knits. P + decrease + 12 knits. P = 30 loops.
- Thirty purl stitches.
- For the 24th: edge + 6 decreases + 4 front sts + 6 decreases + 1 front st = 18 sts.
- Knit 25–27 rows in stockinette stitch.
- In the 28th: edge P, and then decreases to the end of the row. Total 15 loops.
- Measure 20 cm of thread and cut it. Then thread this thread into a needle and tighten the hole by the last 15 loops. Fill the bunny's head with holofiber or synthetic padding, and then sew up the hole.
Torso:
- The first row will consist of 15 cast-on stitches.
- Make 15 purl stitches.
- Knit the edge loop, then the combination *increase + 1 knit. P* (repeat 14 times). You will get 29 P.
- Knit all loops from the previous row (29 pcs.) purlwise.
- Rows 5–8 are knitted in stockinette stitch.
- In the 9th, make a combination of *7 persons. P + increase* (repeat 2 times). Then make another 1 persons. P and repeat the same combination twice again. The result is 33 P.
- Stockinette stitch – rows 10–14.
- For the fifteenth: 15 persons. P + increase + 3 persons. P + increase + 15 persons. P = 35 P.
- Rows 16–18 – stockinette stitch.
- In the nineteenth: 15 persons. P + decrease + 3 persons. P + decrease + 15 persons. P = 33 P.
- Rows 20–22 knit with stocking stitch: purl or knit, depending on how the knitting lays.
- For the 23rd: 13 knits P + decrease + 3 knits P + decrease + 13 knits P = 31 P.
- Twenty-fourth - purl stitches (31 pcs.).
- The combination *1 knit. P + decrease* is repeated until the end of the row. Total 21 P.
- In the 26th all loops are purl.
- In the 27th, make an edge loop, and then knit decreases to the end. In total, there will be 11 P.
- All stitches will be purl in 28th.
- Fill the product with holofiber and sew it up.
Upper legs:
- Thread 6 stitches onto knitting needles.
- In the second row, knit 6 purl loops.
- For the third: edge loop + combination *increase + 1 persons. P*. This combination is repeated until the end of the row and 11 P are obtained.
- All 11 loops will be purl.
- Edge + complex combination *increase + 4 persons. P + increase + 1 persons. P*. Repeat the combination twice. Total 15 P.
- Knit 6–7 rows with the front surface.
- In the eighth, make a combination of *1 persons. P + decrease*, which is repeated three times, and then make another 6 persons. P. The result is 12 P.
- Rows 9–11 – stockinette stitch.
- Twelfth: edge + increase + 9 persons. P + increase + 9 persons. P = 14 loops.
- Stockinette stitch – rows 13–21 inclusive.
- In the 22nd: edge + 6 decreases + 2 front. P = 8 P.
- Eight purl stitches.
- For the 24th: edge + 3 decreases + 1 front. P. Place stuffing inside and sew.
The difference in the technique of knitting the right and left paws appears only in the 8th row. When making the right paw, you must first create a combination, and then dial 6 front loops. When working on the left paw, everything is done the other way around (first front loops, then the combination).
Legs:
- Collect 10 loops.
- Knit the whole row purlwise.
- In the third: edge and combination *increase + 1 persons. P*. Perform this combination to the end. You will get 19 P.
- Knit the fourth row only with purl stitches (19 pcs.).
- In the fifth: edge + 1 knit. P + increase + 7 knits. P + increase + 1 knit. P + increase + 7 knits. P + increase + 2 knits. P = 23 loops.
- Rows 6–7 are knitted in stockinette stitch.
- In the 8th: make an edge, then 6 persons. P and 4 decreases. Then knit another 8 persons. P. Total 19 loops.
- For the 9th: edge + 5 purl stitches + 4 decreases + 5 purl P = 15 stitches.
- Tenth: edge + 5 knits. P + decrease + 7 knits. P = 14 P.
- Stockinette stitch – rows 11–13.
- In the 14th: edge + increase + 12 persons. P + increase + 1 persons. P = 16 loops.
- Knit another 6-10 rows in the same way. Then put the stuffing on and sew it up.
Ears:
- There are 10 loops on the knitting needles.
- In the second: edge loop, and then the combination *front. P + out. P*. It is repeated 4 times. The row should be closed with a front loop.
- Third: edge P + *purl P + front P* (four times). The last loop should be a purl one.
- This pattern, in which the front and back loops alternate, is called "checkerboard". You need to knit the bunny's ears with this method up to the 16th row.
- Seventeenth: edge + front + back + front + decrease + back + front + back + front = 9 sts.
- Eighteenth: edge + purl + knit + purl + decrease + purl + knit + purl = 8 sts.
- Nineteenth: edge + front + back + decrease + front + back + front = 7 sts.
- Twentieth: edge + purl + knit + decrease + knit + purl = 6 sts.
- In the 21st: edge + knit + decrease + purl + knit = 5 sts.
- For the 22nd: edge + knit + decrease + knit = 4 sts.
- In the 23rd: edge + decrease + front = 3 loops.
- For the 24th: edge + decrease = 2 loops.
- In the 25th you only need to make one decrease.
- Stuff the product and close the hole.
- Attach the ears to the head with pins and check if they are positioned evenly. Then sew them to the head with threads.
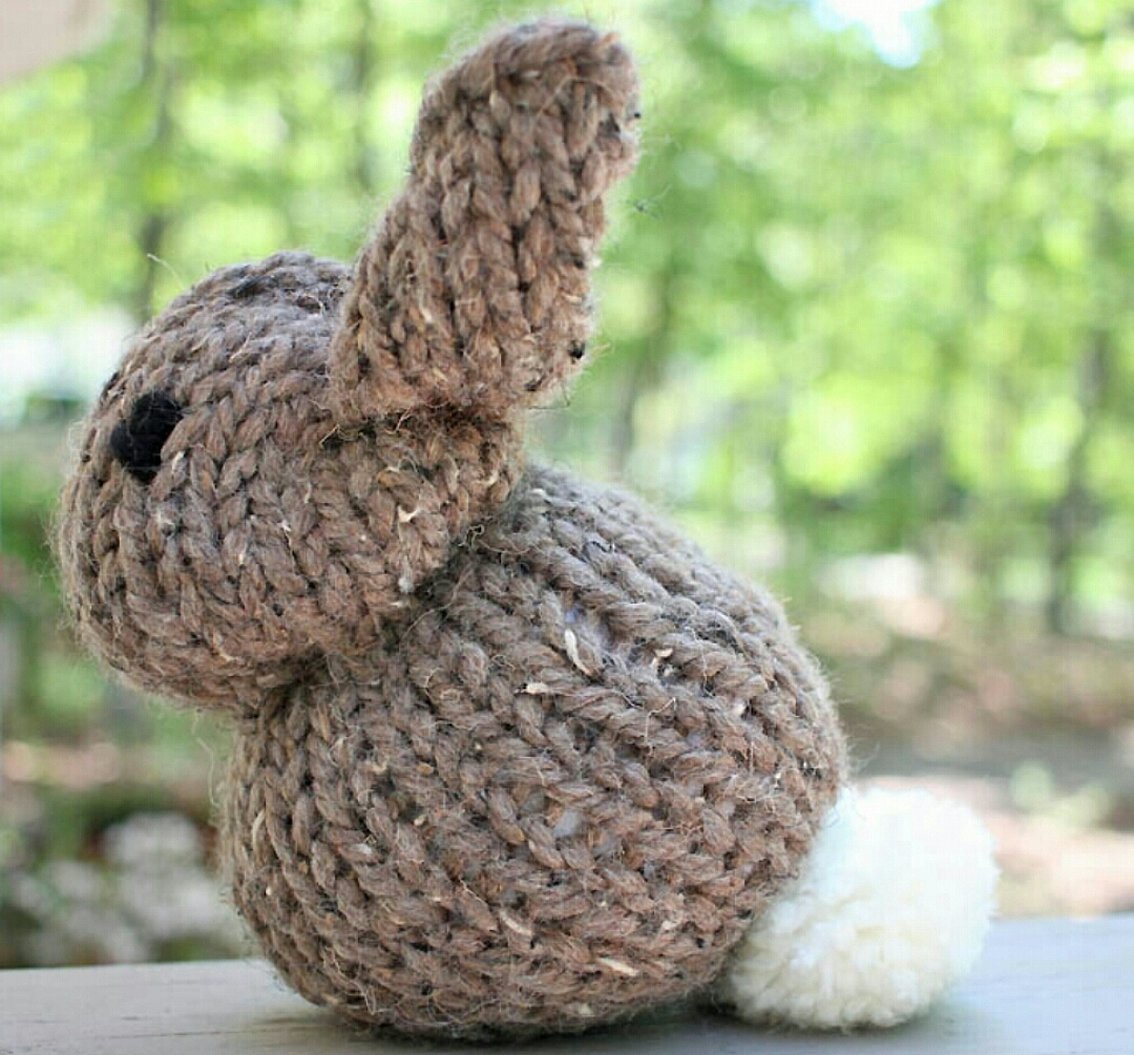
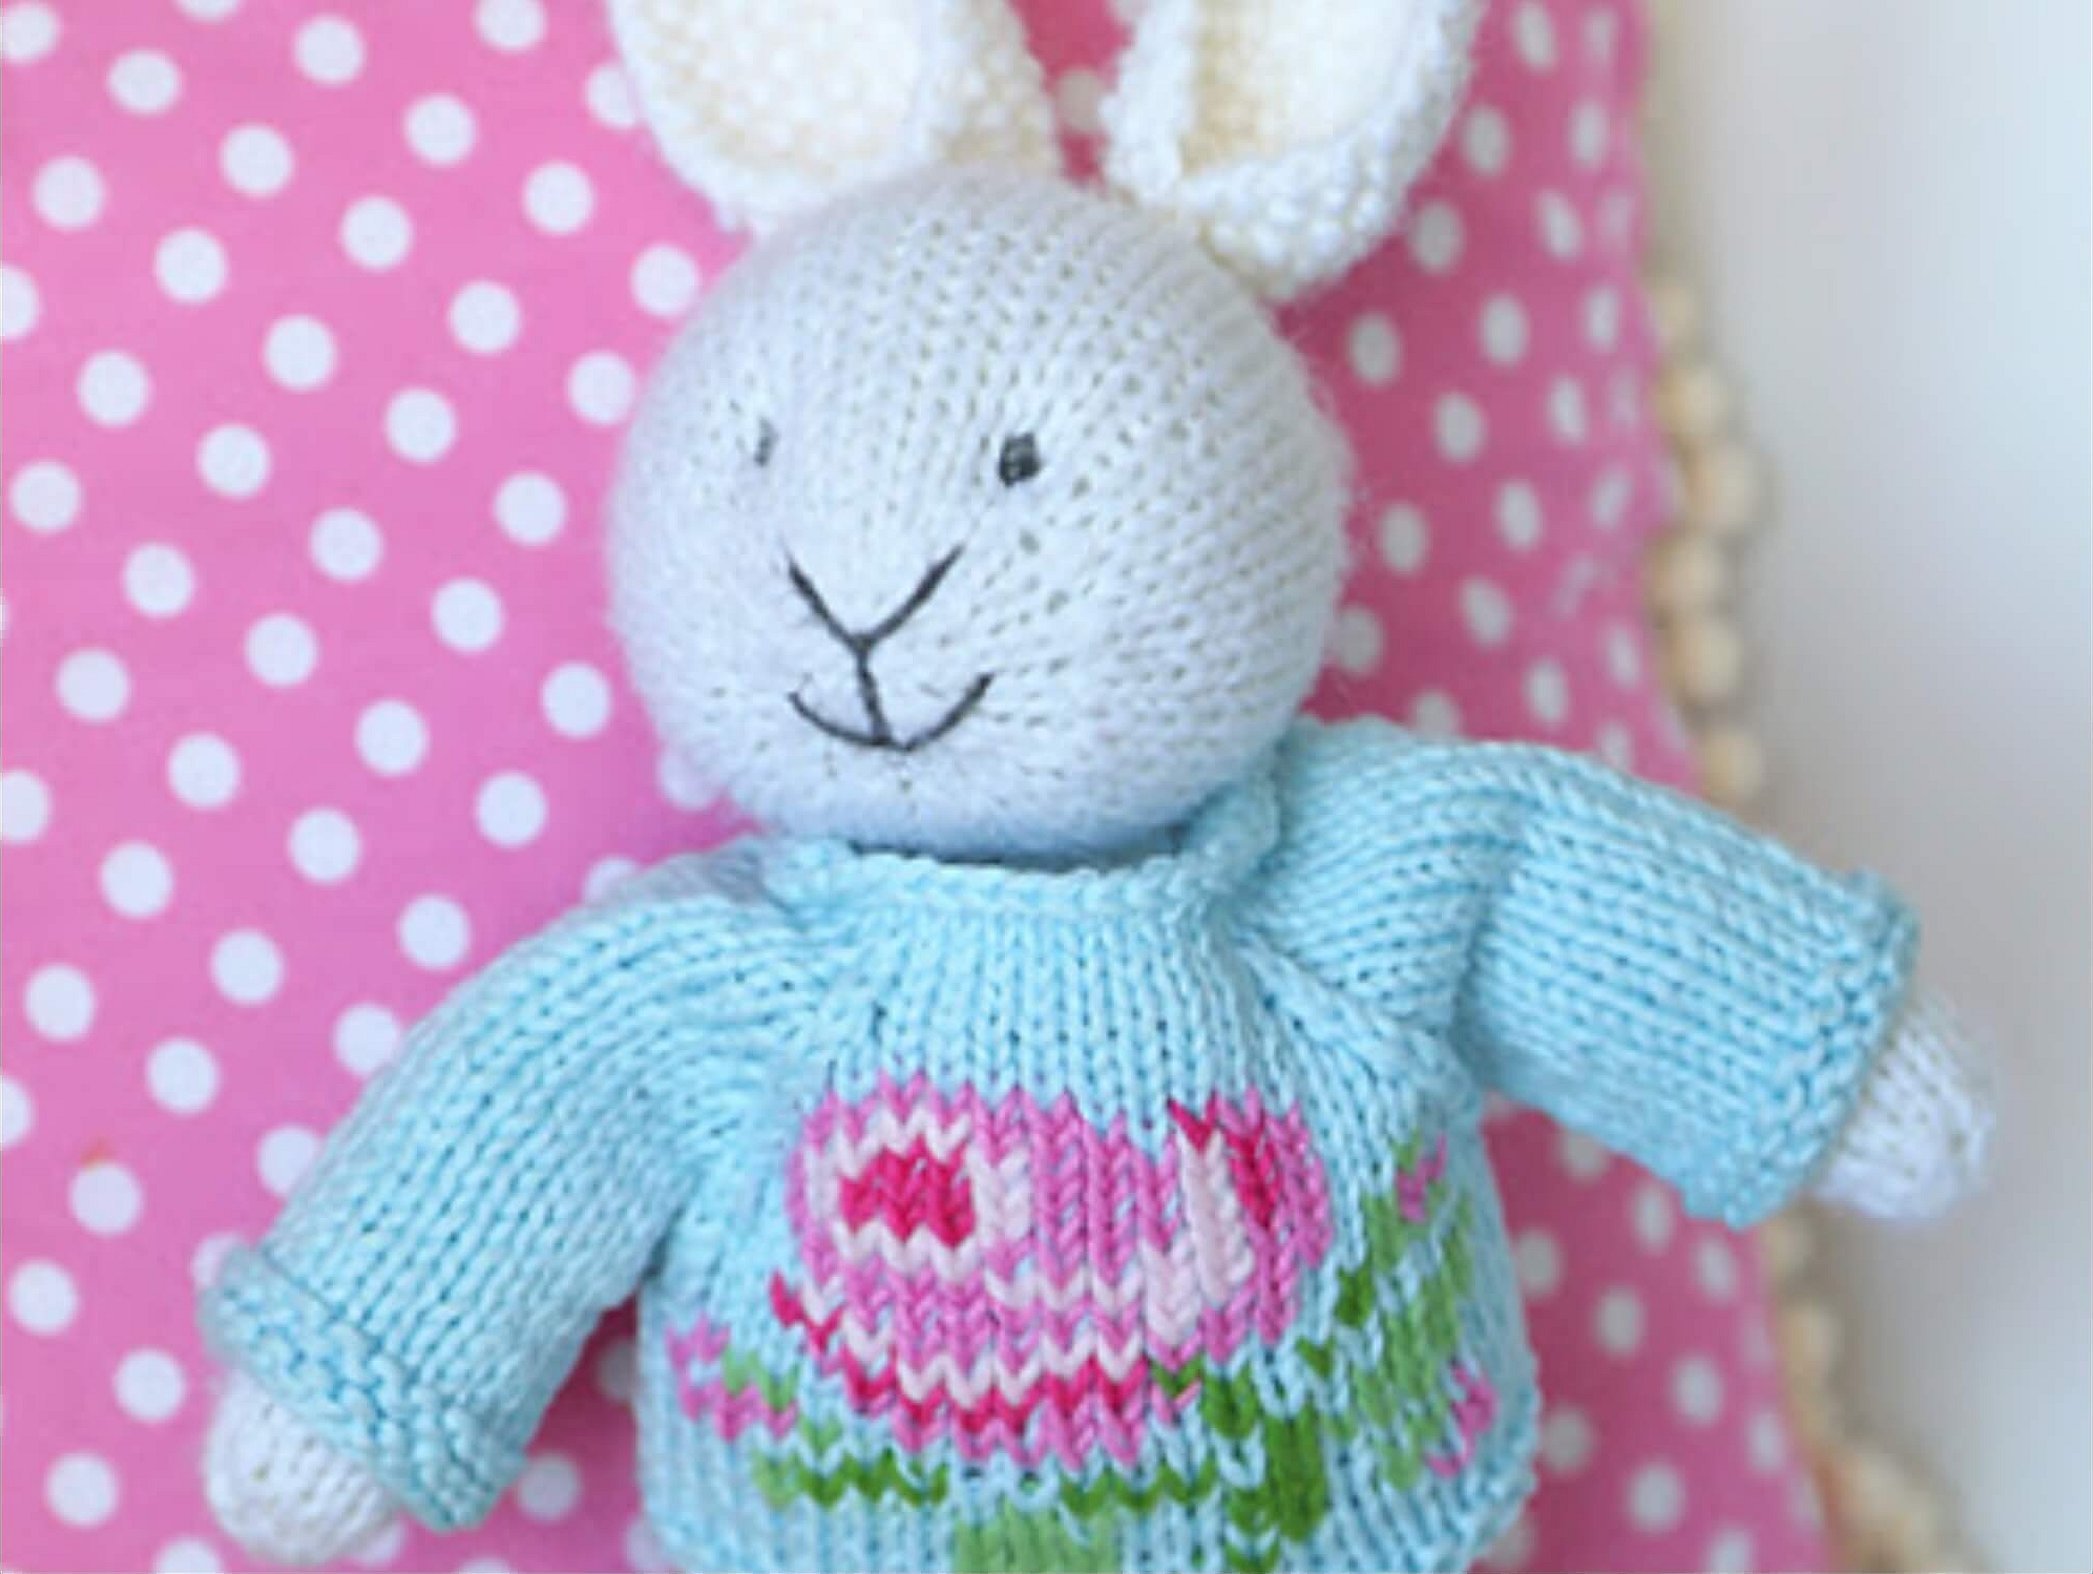
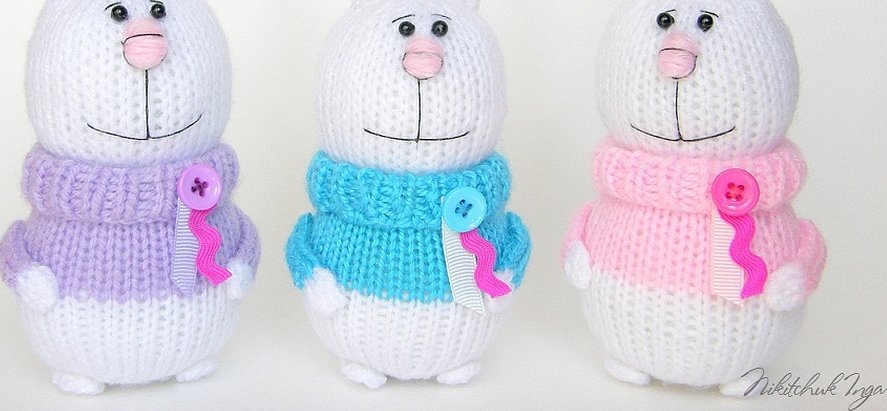
Little funny bunnies
A charming knitted hare evokes delight and affection in everyone who looks at it. Such an animal can be knitted with knitting needles using a fairly simple technique.
It is best to use acrylic yarn of several colors. In addition to it, you will need:
- 4 double pointed needles No. 3;
- simple knitting needles No. 2.5;
- floss threads;
- beads;
- white sewing threads;
- needle.
Knitted bunny (master class):
- You need to start from the lower part of the body. With white yarn, cast on 18 loops at once on 2 knitting needles and knit the first row with face loops.
- Distribute the resulting 18 loops across three knitting needles. Next, knit with the front surface in a circle.
- In the second row, knit 2 front loops, then make an increase (we make two from one loop). This combination must be repeated five times. You will get 24 loops (P).
- In the third, knit 24 regular front loops (LF).
- In the fourth there will be a combination: *3 LP + increase* (repeat 5 times) = 30 P.
- Knit the fifth row with 30 regular loops.
- For the sixth: *4 LP + increase* (five times) = 36 loops.
- From the 7th to the 15th knit 36 loops in each.
- Attach a colored thread, without tearing off the previous one. With this thread of a different color, you need to knit another 10 rows of stocking stitch (in each row 36 loops, as before).
- From the 11th to the 21st knit with a rib: the first loop is the front one, the second is the back one (it is knitted behind the back wall). Then fasten the knitting. The collar of the suit needs to be turned back.
- Pull the main color thread (white) through the colored fabric and continue knitting from the last row before the beginning of the elastic band. Cast on 36 loops of white color on three knitting needles. There will be 12 loops on each knitting needle.
- Knit 17 rows in stockinette stitch.
- In the 18th combination: *4 LP + decrease (2 loops in one)*. Repeat 5 times. Total 30 P.
- For the 19th: *1 LP + decrease + 3 LP + decrease* (five times). Then weave 2 more LP. Total 24 P.
- In the twentieth: *2 LP + decrease* (five times) = 18 P.
- For the 21st: *decrease + 1 LP* (5 times) = 12 P.
- In the 22nd: six decreases. Fasten the threads and stuff the product with stuffing. Close the opening.
- Above the collar, you need to sew a line to mark the hare's neck. For this, you will need a thin but strong white thread. Sew with a running stitch and tighten.
Ears:
- Cast on 6 stitches on two needles at the same time.
- Knit 25 rows with a rib pattern.
- Leave a 10 cm long end of thread.
- Remove the workpiece from the knitting needles and tighten the lower end.
- Pull the end of the thread through the entire ear. You will get strong, upright ears.
Paws:
- Take the yarn you used to knit the suit and cast on 5 stitches on both knitting needles.
- Knit 5 rows with a rib pattern.
- Attach white yarn and knit 4 more rows using the same method.
- Remove the workpiece from the knitting needles and pull the end of the thread through it.
- The legs are knitted in the same way: cast on 5 loops with white thread and knit 12 rows. Then remove the product and pull the thread through it.
Tail:
- Using white yarn, cast on 7 stitches and knit in stockinette stitch.
- Thread the end of the thread through a needle with a large eye and pull the entire tail together with an over-the-edge stitch.
- The end of the thread will go inside the tail. You should get a small round ball.
Sew the ears to the head so that they are not on the top of the head, but slightly closer to the back of the head. The paws need to be attached perpendicular to the body in line with the ears. Sew the legs horizontally so that the bunny sits on them. The toy should be strong so that it can stand on the table for a long time. Lastly, we will sew on the tail, and then decorate the muzzle.
For reference! The pink nose can be embroidered with floss, making stitches in several layers so that it is convex.
Lovebird Rabbits
These tender kissing lovebirds look so cute. You will need Trinity yarn, which is half wool and half acrylic. You will also need to prepare:
- knitting needles No. 2.5;
- red and black floss;
- threads of the same color as the yarn;
- blue and pink satin ribbons;
- synthetic padding for stuffing;
- pins;
- needle.

MK on knitting:
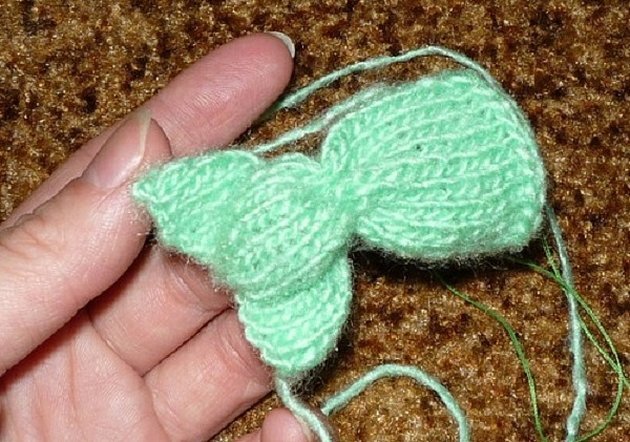
- Make 27 loops and knit 34 rows in stockinette stitch.
- The finished square needs to be steamed, folded in half, and then the middle marked with a pin.
- Along this central line, you need to sew the fabric together from one edge using “forward needle” stitches. Pull the thread tightly and sew another 2–3 securing stitches.
- From the central seam, use a needle to sew a seam to the top edge so that you get an isosceles triangle.
- Fold this triangle in half and make a few stitches that will secure the beautiful bunny ear.
- Repeat the same on the other half of the fabric: sew a line from the middle seam to the upper edge. You will get a second isosceles triangle. Then fold it in half and sew it up. You need to check that the ears are the same.
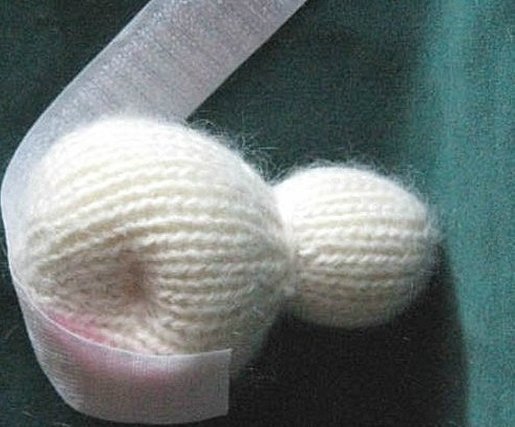
- Pull the thread from the central seam: you will get a bunny's head, turning into a neck.
- Place the synthetic padding in the bunny's head and sew it up.
- Sew up the ears without filling them with cotton wool.
- Turn the part of the fabric remaining below the head inside out and sew it with a strong seam.
- Then turn it right side out again and fill it tightly with padding polyester.
- Sew the figure from the bottom, tighten it tightly and secure with stitches.
- Embroider the eyes and muzzle. Tie a satin ribbon around the neck.
The second bunny is knitted in the same way. Let the first bunny be a boy, so we tie a blue ribbon to him. The second bunny will be a girl with a pink ribbon.
When the second bunny is ready, you need to knit their mouths, then they will kiss. Even a child can knit this simple toy himself. You will get very tender bunnies, which will be a great gift.
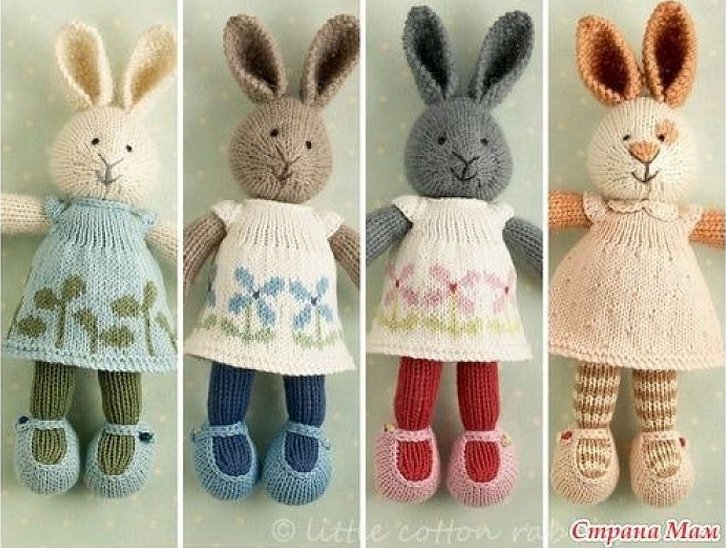
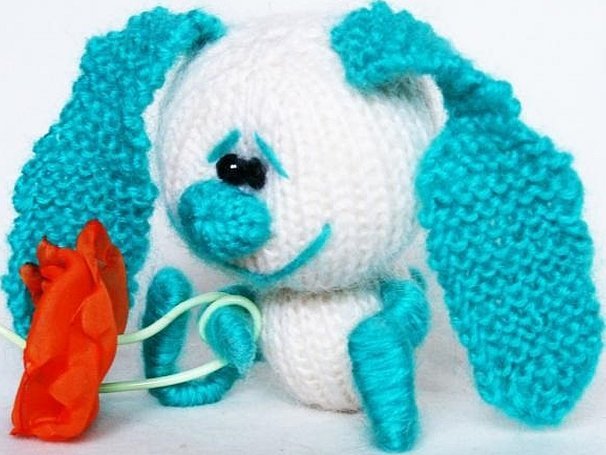
Bunnies with colored ears
A cute bunny with multi-colored ears will bring a lot of joy to children and adults. To knit such a figure, you will need several balls of yarn of different colors.
The body should be knitted on 4 double-pointed needles, and the ears on two single needles. The paws do not need to be knitted at all: the thread is tightly wound on a hard wire. The entire body is knitted with a garter stitch, and only the ears are knitted with a garter stitch (all loops are knit).
What you need to prepare:
- 4 sock knitting needles No. 3;
- 2 single knitting needles;
- white and colored yarn;
- long needle;
- hook;
- regular light-colored threads;
- 2 beads or buttons for eyes;
- cotton wool, padding polyester or holofiber;
- copper wire with a diameter of 2-3 mm;
- pliers;
- paper clip;
- nippers;
- polymer glue "Dragon";
- comb or velcro.
Just in case, you need to prepare a pencil or marker, as well as embroidery floss.
Knitted bunny - detailed master class:
- Collect 9 loops and place them equally on 3 knitting needles. The beginning of the row should be secured with a paper clip or a mark should be made on the thread with a felt-tip pen.
- In the first row, make an increase - knit 2 new front loops into one loop of the previous row (one for the front wall, and the second for the back). After the increase, dial 2 more front loops. Repeat this combination three times to get a total of 12 loops (P).
- The second will be a combination of: *increase + 1 loop*. It should be repeated 6 times. You should get 18 P.
- Combination for the third row: *increase + 2 knit stitches* (six times) = 24 sts.
- In the fourth: *increase + 3 persons. P* (six times) = 30 P.
- From the 5th to the 19th inclusive, knit 15 rows, each of which consists of thirty loops.
- In the 20th, make a decrease - 2 front loops are knitted together to make a single loop. Repeat this knitting element 15 times to make fifteen loops.
- Rows 21–23 should be knitted with the front surface. Each row has 15 loops. This will be the bunny's neck.
- In the 24th, weave the combination: *increase + 4 persons. P* (3 times) = 18 P.
- Rows 25–34 – 18 loops in each.
- For the 35th: *decrease + 1 knit st* (6 times) = 12 sts.
- In 36th: 6 decreases (6 P).
- Fill the toy with cotton wool, holofiber or synthetic padding and close the hole.
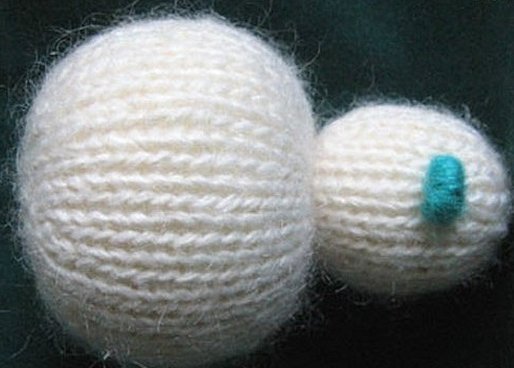
- Wrap a thread of yarn of the same color around the neck of the toy and tighten it.
- Use Velcro or a comb to comb the material so that the bunny is fluffy.
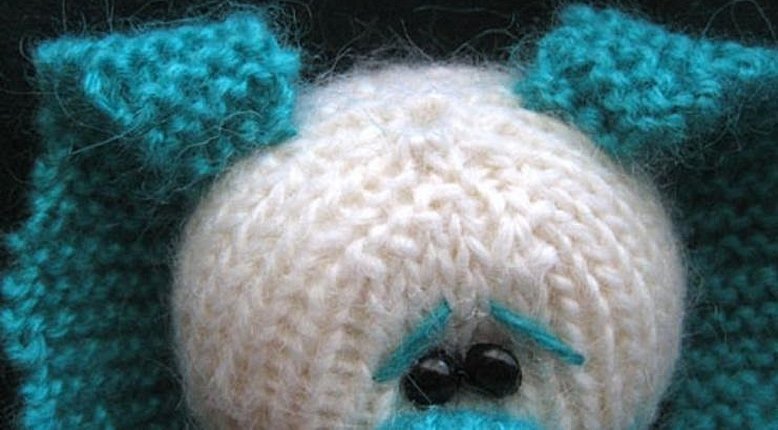
- Sew on beads and embroider the face.
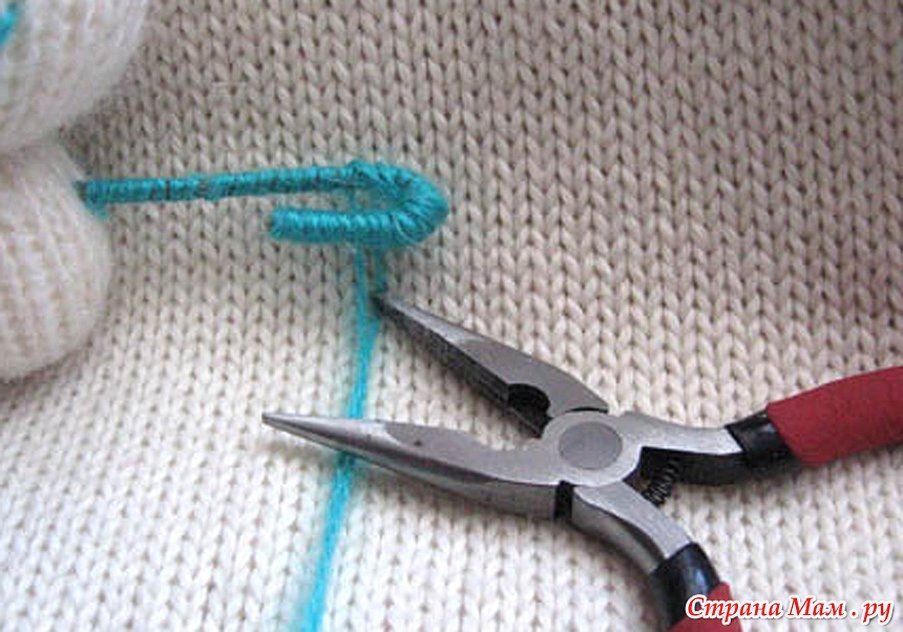
- Using a different color of yarn, tie a French knot at the bottom of the toy. This is the bunny's tail.
Nose:
- Take yarn of a different color and knit the bunny's nose separately. You need to cast on 12 stitches and distribute them across 3 double-pointed needles. You need to knit in a circle.
- Knit the first and second rows with the front surface: 12 loops in each row.
- The third will have a combination of: *decrease + 2 knits. P* (three times) = 9 P.
- In the 4th, weave 9 front loops. Fasten the threads.
- Sew the nose to the muzzle.
Colored ears:
- You will need colored yarn and 2 simple knitting needles. Knit with garter stitch.
- You need to place the knitting needle horizontally on the top of the figure and knit 4 loops from the white thread of this top. Then take a thread of a different color and knit 4 more front loops from this base.
- Knit the second row again with four front loops.
- In the third: increase + 2 persons. P + increase = 6 P.
- From the 4th to the 11th, knit in garter stitch, 6 loops in each.
- Twelfth: increase + 4 persons. P + increase = 8 P.
- Rows 13–41 are knitted in exactly the same way (each of them will have 8 loops).
- In the 42nd, remove one loop, then knit 4 and make a decrease. Total 7 P.
- For the 43rd: slip one stitch, then 4 knit stitches + decrease = 6 knit stitches.
- In the forty-fourth: remove the first loop, then 3 persons. + decrease = 5 P.
- In the 45th: remove 1 P, knit 3 P and decrease = 4 P.
- For the 46th: remove 1 loop, knit 2 and decrease = 3 P.
- In the 47th, remove the first loop and decrease (2 P).
- In the 48th there will be only one decrease (a single loop).
How to make paws:
- You will need wire. You need to cut off a piece 14 cm long. These are the arms (upper paws).
- Then cut off the second piece, 21 cm long. These are the legs.
- Pass both wires through the knitted body, twist the ends with pliers.
- Coat the wire with glue.
- Wind several layers of yarn tightly onto the wire.
- Secure the threads with a double knot and hide the ends.
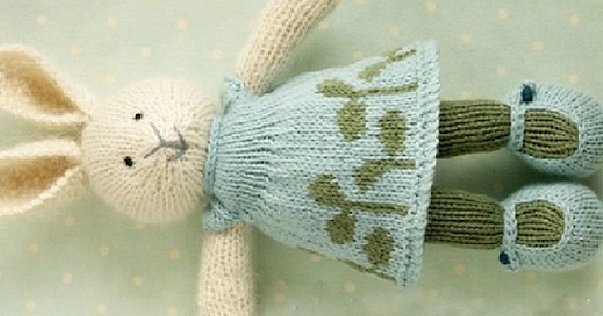
How to knit clothes for a bunny: knitting patterns
There are toys that are knitted already dressed. But most often, a knitted bunny will need clothes. From yarn of a different color, you can make any suit: a dress, pants, overalls, a jacket, a pullover, a hat, etc.
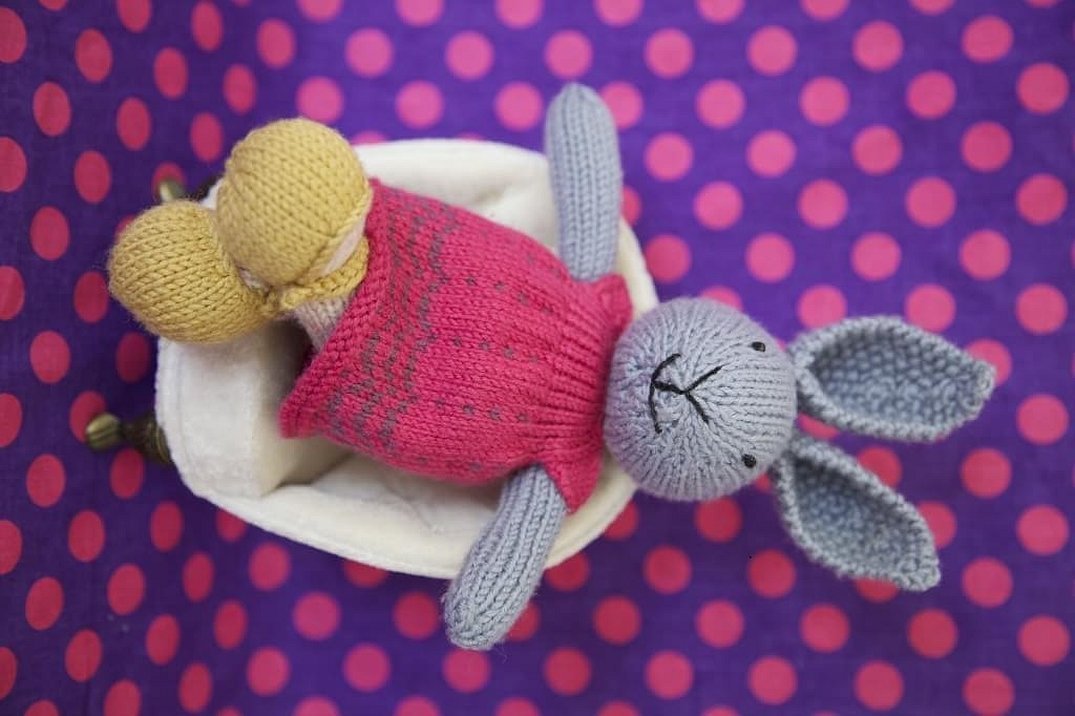
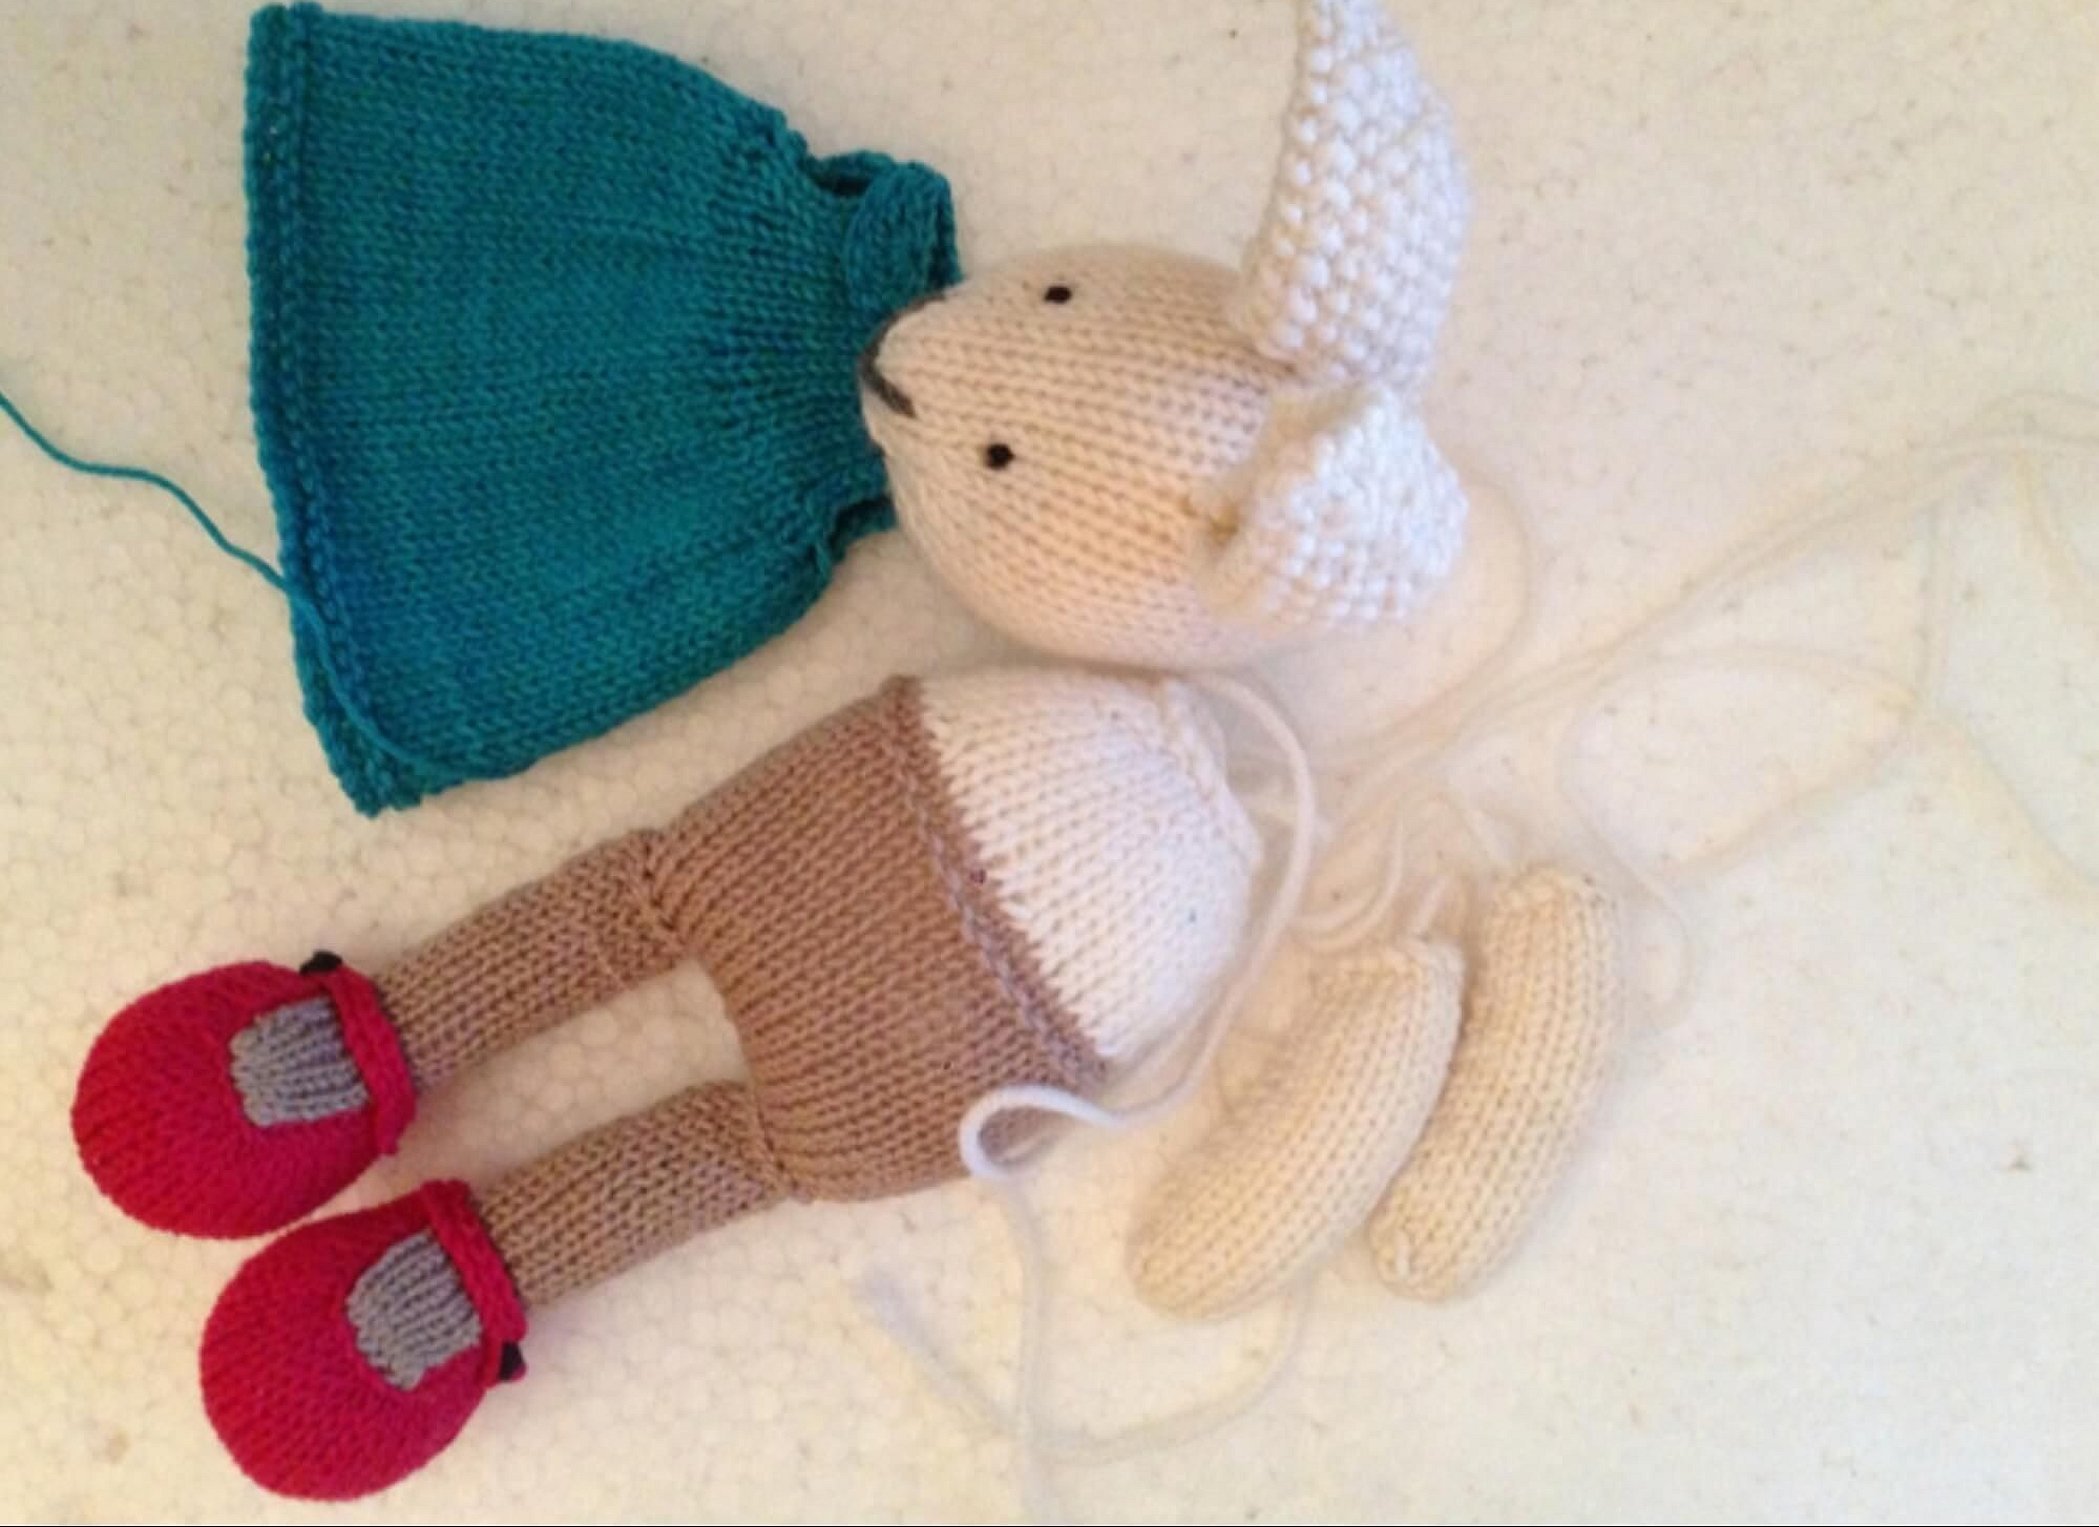
Dress for a bunny (knitting lesson):
- The dress is knitted with simple knitting needles No. 2.75 and blue, white and red yarn. You need to start from the hem. Cast on 62 loops with blue yarn.
- Knit 2 rows in garter stitch.
- The next 26 rows are knitted with the front surface. Here you need to alternate the multi-colored threads: each row is made in one color. The first is knitted with white threads, the second - with blue ones, and so on.
- Starting from the 27th, return to the red yarn again. Make 1 front loop, then knit a decrease to the end. At the end, you need to make another front loop. Total 32 P.
- Row 28 knit with purl stitches.
- In the 29th: 6 LP + decrease = 7 P. Then you need to turn the product over.
- Knit the thirtieth row with purl stitches.
- For 31st: 5 LP + decrease = 6 P.
- In 32: purl only.
- For the 33rd: knit.
- The last 34th - all purl. Fasten the knitting and tighten the thread.
- All actions, starting from the 27th row, must be repeated on the other sides of the top of the dress so that it turns out to be one piece.
The bunny's hat can be knitted on circular needles, alternating purl stitches and yarn overs.

A cute bunny knitted with needles will bring a lot of joy to children and adults. The knitting process helps to calm the nerves and improves the mood. With the help of yarn and knitting needles, you can create magnificent masterpieces of home needlework. Delicate toys will give the whole family a feeling of care and love.


