A soft toy is the best gift not only for children, but also for adults. But good toys are very expensive, so amigurumi knitting has become fashionable. The birthplace of this type of handicraft is Japan. Such a toy can be bought at the market from skilled craftswomen, but it is much nicer if the bear is crocheted from plush yarn with your own hands.
Description of the toy teddy bear
Plush yarn is increasingly used for handicrafts, products made from which have a beautiful appearance and are pleasant to the touch. Blankets and toys are made from such threads. Various little animals turn out especially beautiful, and they are very easy to work with. The yarn has a wide palette of colors, which allows you to make bright and elegant velvet products.
Plush yarn does not cause allergic reactions, since the material the threads are made of is hypoallergenic. Therefore, such toys are completely safe even for infants. In this case, you need to choose only high-quality threads that do not lose villi, which can be dangerous for the child's body. It is best to choose threads from the following manufacturers:
- Nako Paris;
- Alize Softy;
- Adelia Dolly;
- Kartopu Yumurcak;
- Ayaz Baby Soft;
- Dolce.
From such a skein of yarn you can easily make everyone's favorite teddy bear, using a simple knitting pattern.
Features of knitting with plush yarn
A crocheted teddy bear can have any color according to the yarn palette. In addition, when knitting, you need to consider how the threads will be stretched during the work. Therefore, you should not worry that the product will turn out completely different from the original.
Important! A thing crocheted with a very thin hook comes out dense and therefore stiff. If you choose a thicker tool, the toy will turn out to be a mesh, through which you can see what it is filled with, respectively, the appearance is spoiled.
Before crocheting a bear from plush yarn, you need to read the recommendations from experienced specialists:
- For knitting a plush toy, hooks with numbers 4, 5 and 6 are best suited.
- Since it is difficult to knit things from plush yarn (rows merge), it is recommended to use “beacons”.
- During the knitting process, it is not recommended to unravel the knitted part in case of an error. The plush fibers will fall out of the yarn, which will make the bear less fluffy. Instead, it is necessary to carefully monitor the knitting and avoid failures.
- The parts of the toy should be sewn together with simple knitting threads, matching them by color. This work can be done with a needle or a crochet hook. When sewing the bear, do not pull the thread too tightly, or let it go, since unsightly seams will spoil the appearance of the toy.
- The teddy bear's body should be filled in moderation, since overfilling will lead to deformation of the parts. If the toy is underfilled, it will lose its shape and, accordingly, will look bad.
- Each piece should be filled in such a way that a little emptiness remains. During the stitching process, the empty space is filled through a small hole. You can push the filler in with a stick. After that, the seam is completely closed.
- Markers will help you see the first and last loop, so it is very important to use them in your work. You can use paper clips, pins, and even brighter colored threads as a "beacon".
- It is recommended to use synthetic fluff or holofiber to fill the toy.
- When sewing all the parts together, it is necessary to adhere to symmetry and sizes. Legs, handles and ears should be sewn at the same distance from the chosen central point.
- During the knitting process, the yarn must be from the same manufacturer. This is because the quality of the threads from each company differs significantly from each other.
- It is recommended to knit the bear's face from thinner threads.
Important! You shouldn't use regular cotton wool or fabric as a filler. They tend to roll into one lump or fall out through the mesh formed during knitting. This will make the bear lose its attractiveness.
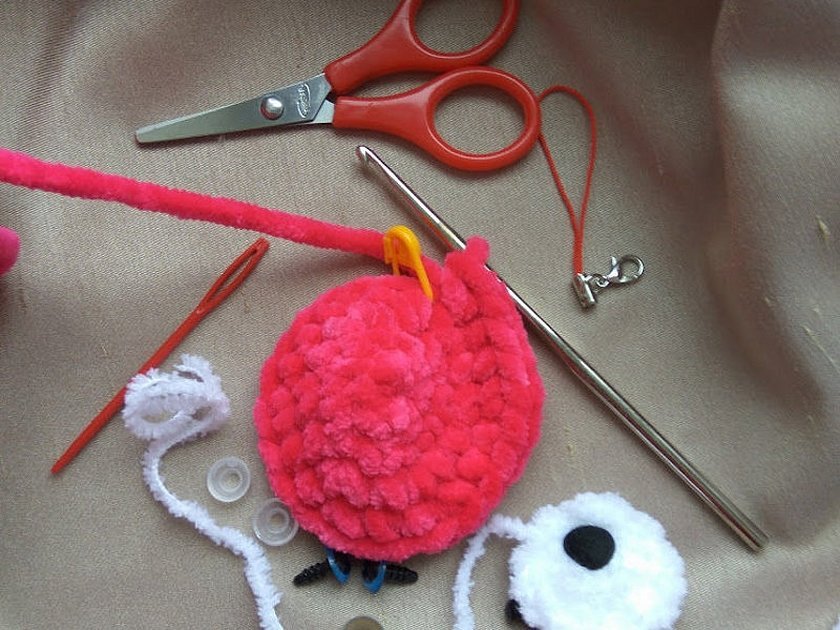
Tools and materials required for work
Even a woman with no experience in needlework will not find it difficult to make a teddy bear. It is enough to learn to read the pattern and strictly adhere to it. Before starting work, you need to buy everything you need:
- hook No. 4-5;
- a skein of brown yarn;
- white yarn;
- filler;
- a ready-made nose piece or black yarn;
- details that will serve as the bear cub's eyes;
- a large needle with an eye for thick threads;
- scissors;
- tools that will serve as markers;
- threads for connecting toy parts;
- materials for decorating toys.
Master class on knitting a teddy bear
To knit a toy using the amigurumi method with high quality, you must first learn how to read the pattern. To do this, you will need to study the abbreviated designations of the loops. They must be indicated at the beginning of the knitting pattern.
Legend:
- Sbn – single crochet.
- Ub – decrease loops.
- Pb – adding loops.
- Ka – amigurumi rings.
- Vp – air loops.
- (*) – the number of repetitions is indicated.
It is very important to learn how to make amigurumi rings correctly. Thanks to them, the bear's body will be dense and without a mesh. Air loops alone will not help to achieve the desired result.
Knitting the legs:
- Work begins with a set of 6 air loops. In the second loop, 4 single crochets are knitted, then 3 single crochets. Then the row continues on the other side of the product: 3 sbn, pb. As a result, there should be 12 columns.
- Рb, 3 sbn, 3 pb, 3 sbn, 2 pb (18).
- Sbn, pb, 3 sbn, (sbn, pb) repeat 3 times, 3 sbn, (sbn, pb) repeat 2 times. You should end up with 24 stitches.
- 24 single crochet stitches.
- 24 single crochet stitches.
- 6 sbn, 5 ub, 8 sbn (19).
- 5 sbn, 4 ub, 6 sbn (15).
- 15 single crochet stitches.
- 3 sbn and ub – repeat 3 times. There should be 12 columns left.
- From rows 10 to 16, you need to knit 12 single crochets.
- In row 17 there are only 6 decreases.
Handles:
- 6 sbn are knitted into ka (6).
- 6 pb (12).
- Sbn and pb – repeat 6 times (18).
- 18 sbn.
- 3 sbn, 6 ub, 3 sbn (12).
- From rows 6 to 12, knit 12 sbn.
- In row 13 6 ub (6).
The second handle is made in the same way.
Torso:
- 5 sbn knit into ka. As a result, 6 single crochets.
- 6 pb – 12 columns.
- Sbn and pb – knit 6 times (18).
- 2sbn and pb knit 6 times (24).
- 3sbn, pb (30).
- 4sbn, pb – repeat 6 times (36).
- 36 sbn.
- 36 sbn.
- 36 sbn are knitted, capturing only the back wall of the loop.
Head:
- 6 sbn knit in ka. As a result 6 columns without nakida.
- 6 pb – 12 columns.
- Sbn and pb – repeat 6 times (18).
- 2 sbn and pb – repeat 6 times (24).
- 3 sbn and pb – repeat 6 times (30).
- 4sbn and pb – repeat 6 times (36).
- 5 sbn and pb – repeat 6 times (42).
- Starting from the eighth to the 12th row, you need to knit 42 sbn.
- In the 13th row, 5 sbn and ub repeat 6 times (36).
- 4 sbn and ub – repeat 6 times (30).
- 3sbn and ub – repeat 6 times (24).
- 2sbn and ub – repeat 6 times (18).
- Sbn and ub – repeat 3 times (15).
The end thread must be securely fixed and the excess cut off.

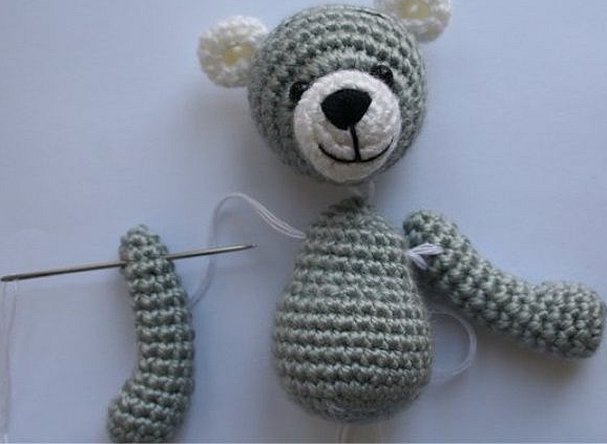
Ears and muzzle
The muzzle of the teddy bear is knitted from white threads:
- Cast on 6 vp, starting from the second loop knit 4 sbn, in the initial loop - 3sbn together. The product is turned and knitted 3sbn and pb. In the end, you should get 12 loops.
- In the second row, knit pb, 3 sbn, 3 pb, 3 sbn, 2 pb – a total of 18.
- 24 sbn.
The ears of the toy are knitted with the same yarn as the main parts:
- 6 sbn tie in ka.
- Make 6 increases – 12 loops in total.
- Sbn and pb – repeat 6 times (18).
- The fourth and fifth rows consist of 18 sbn.
The second eye is knitted in the same way. In this case, you need to leave a long part of the thread so that it is possible to sew the parts.
Tail:
- 6 sbn tie in ka.
- 6 pb – 12 loops in total.
- 12 sbn.
- 6 ub.
Enough thread is left to sew the piece to the base.
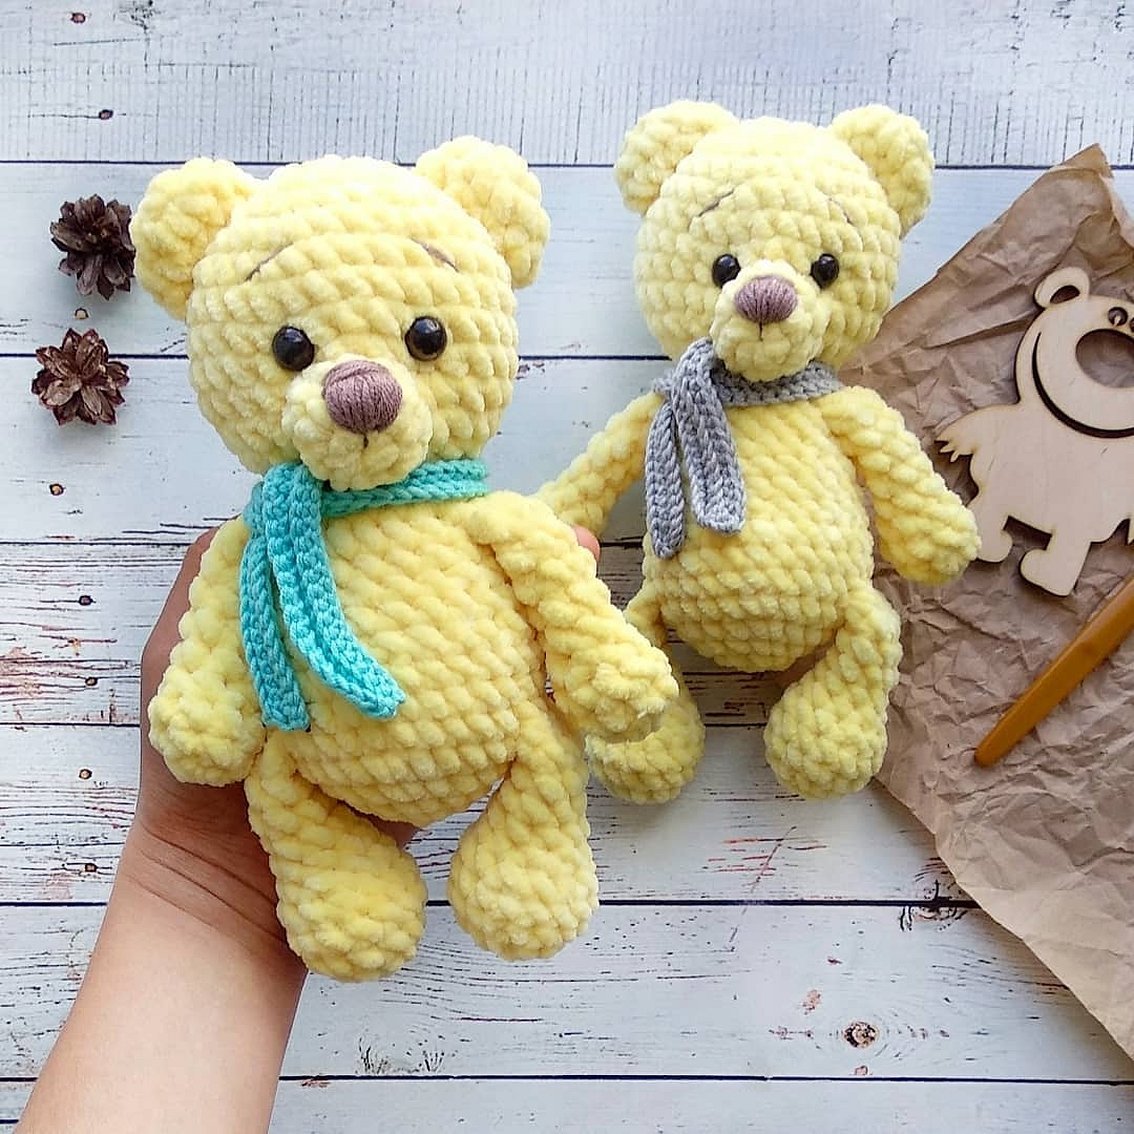
Scarf
For the Teddy bear, you can knit a scarf. This detail can be made from semi-cotton threads of any color. To work, you need to dial 80 vp and follow the following pattern:
- Rb, 79 sbn. Knit a row and turn the product.
- Pb and 79 sbn should be knitted, capturing only the back wall of the loop. The thing turns the thing.
- Pb and 79 sbn again need to be knitted behind the back wall of the loop.
- Repeat this until you get a scarf of the desired length.
Once the piece is completely finished, the thread is securely fixed and cut off.
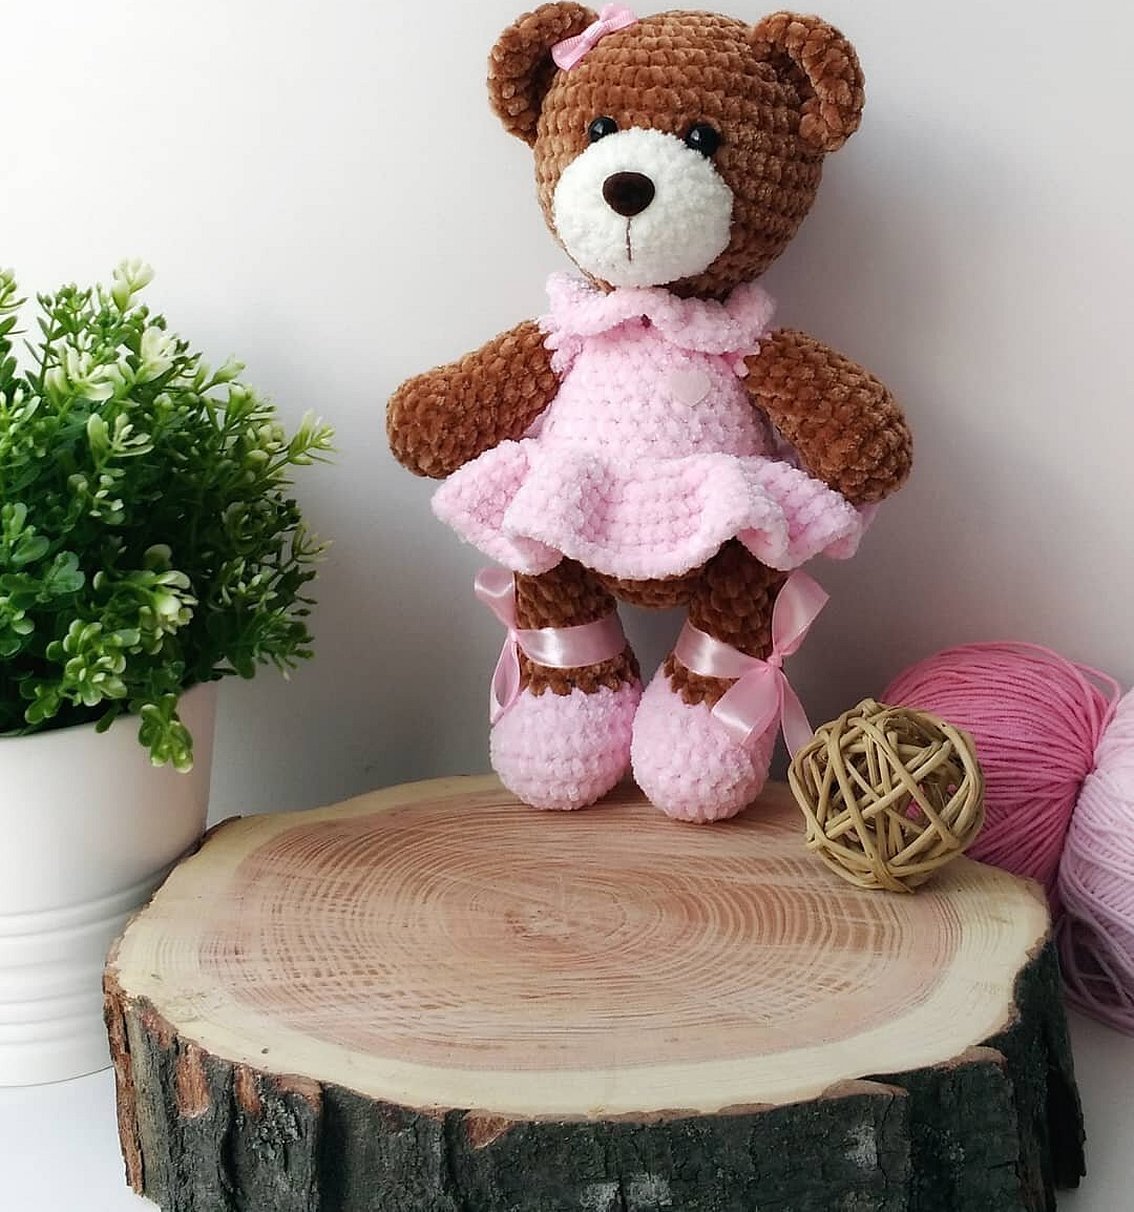
This is the simplest pattern for knitting a teddy bear toy. There are many other more complex options that can only be taken up after the initial skills have been acquired. For the bear, you can knit clothing items such as pajamas, a sweater, a dress, a bow, a hat.
How to assemble a toy
When all the parts are ready, you need to proceed to further actions. First of all, each element is stuffed with filler. To make the head stable, in the neck area it also needs to be filled with holofiber.
Having filled the legs with stuffing, you need to close the hole by knitting a row of single crochets. After that, the last loop is firmly fixed and the thread is cut off. All the elements are now ready for complete assembly. This process occurs as follows:
- On the main parts, you need to make marks where additional elements will be sewn on. All beacons are made strictly symmetrically.
- The head is sewn to the body and filled with stuffing in the right place so that it does not fall to the side.
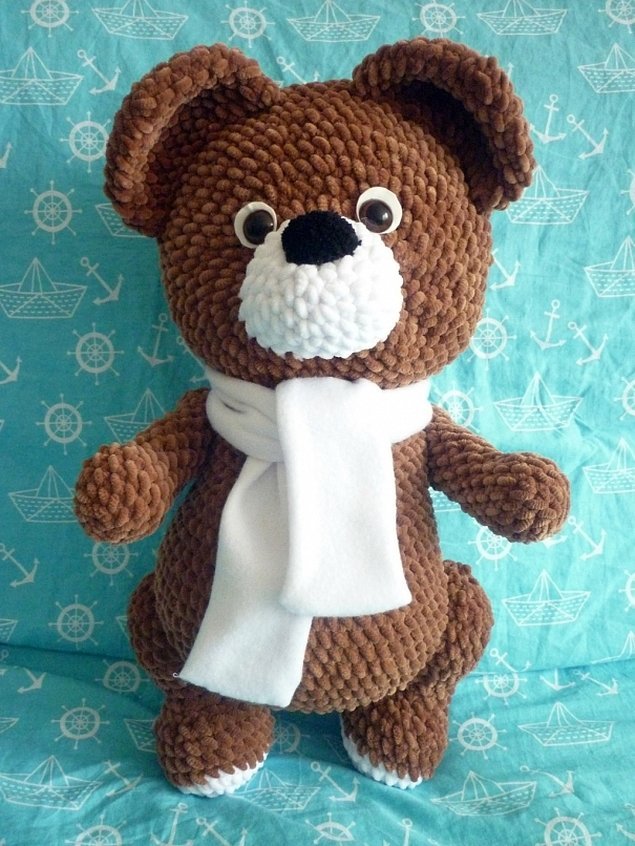
- You need to sew the eyes on the bear. There should be a distance of 5 columns between them. For the eyes, you can take black buttons or buy ready-made accessories in a special store.
- Eyebrows are embroidered above the eyes. Regular embroidery threads are suitable for this.
- The muzzle is sewn below the eyes.
- The nose is attached between the third and fifth rows of the muzzle. It can be knitted, made from a black button, or embroidered.
- Ears are attached to the head, maintaining symmetry.
- The next step is to sew on the handles. As you work, make sure they are at the same level and at the same distance.
- Working on the legs requires special attention. For this reason, before sewing the parts to the body, it is recommended to attach them with pins. After that, it is recommended to see if the bear will sit. Only then can you securely fix them. The legs can be decorated with embroidered nails.
- At the end of the work, a tail is sewn on.
A scarf is tied around the bear's neck. In addition, Teddy can be dressed in knitted clothes.
Important! A toy made according to this pattern will be 30 cm high. To make a product of larger parameters, you need to increase both the number of rows and the number of loops or look for another version of the detailed pattern.
Homemade soft toys made of velour yarn are loved by both children and adults. Since handmade products have always been in demand, a crocheted plush bear will be a great gift for a birthday or other holiday. To knit it, you do not need special training or attend courses. It is enough to know how to use a crochet hook and read patterns. It is also important to choose the right material and tools, follow all the rules and recommendations for making a toy.


