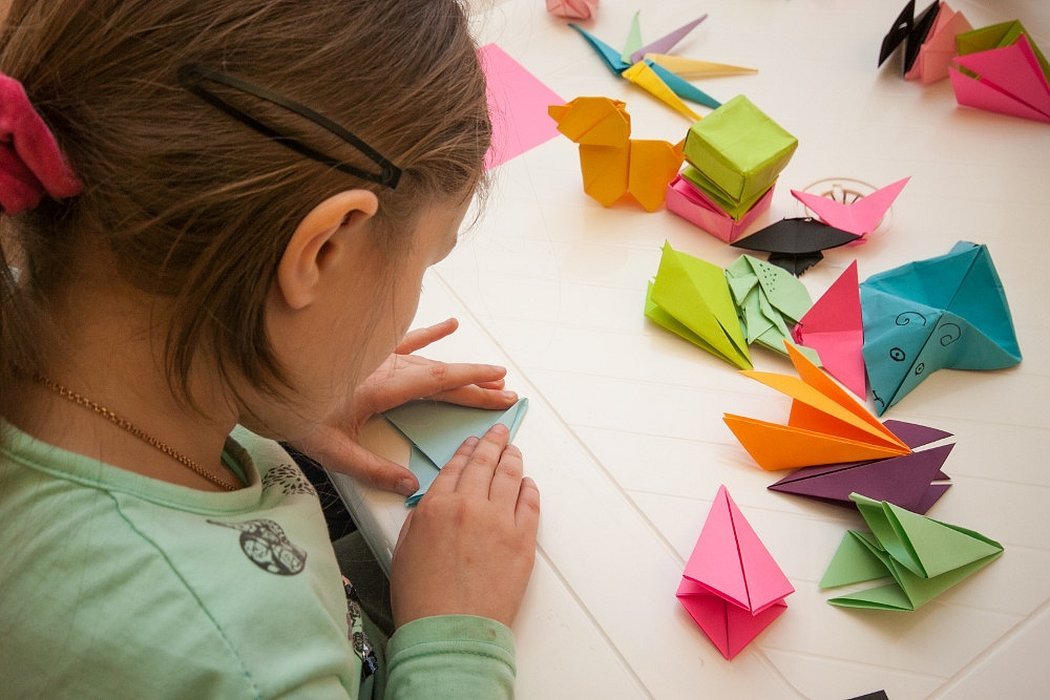
Making crafts with your own hands is an entertaining and exciting process for both children and adults. Making a paper fox does not require much money and time even for beginner needlewomen. After all, the material for its production is usually available in any home where children live.
Origami paper fox
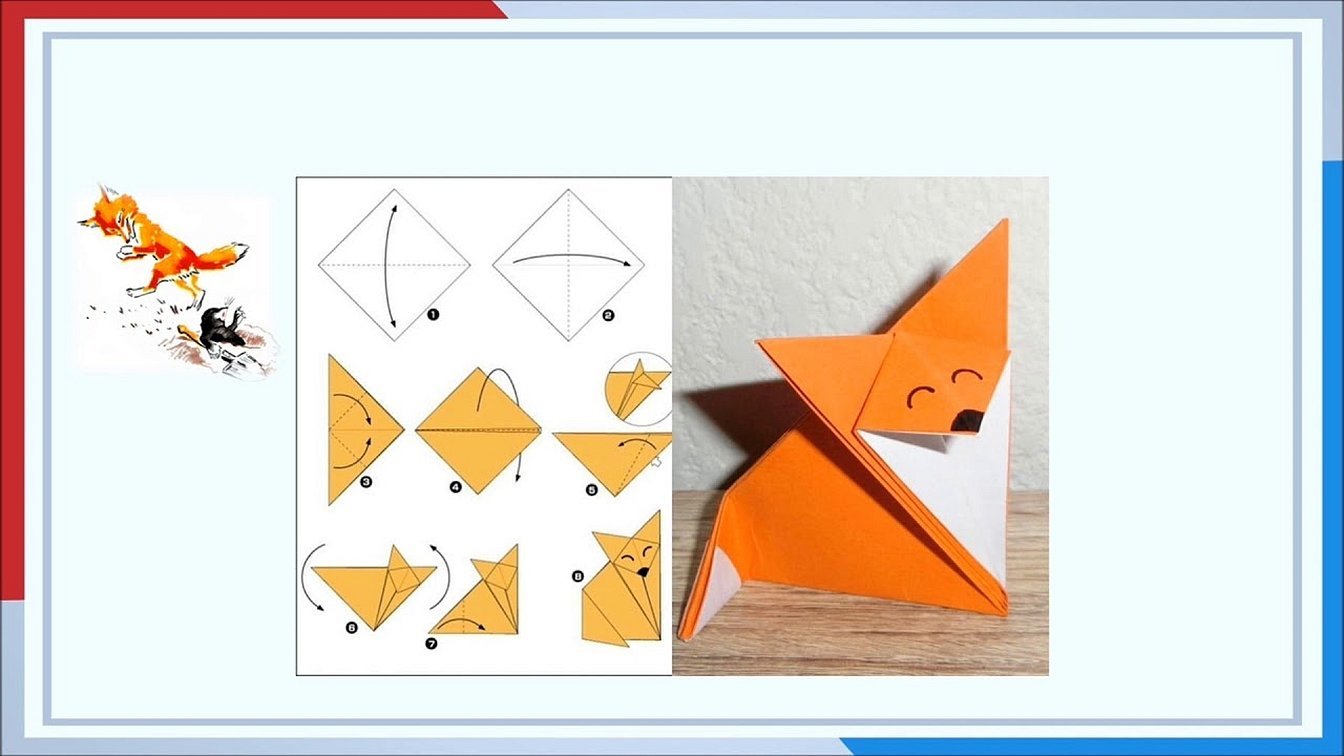
There are many options for making a fox out of paper in origami style. First, you need to master the simplest way to create a figure. To do this, you need to follow the step-by-step instructions:
- At the first stage, you need to prepare a square sheet of paper of a suitable color. It is permissible to initially use white paper, then the animal should be colored at your discretion.
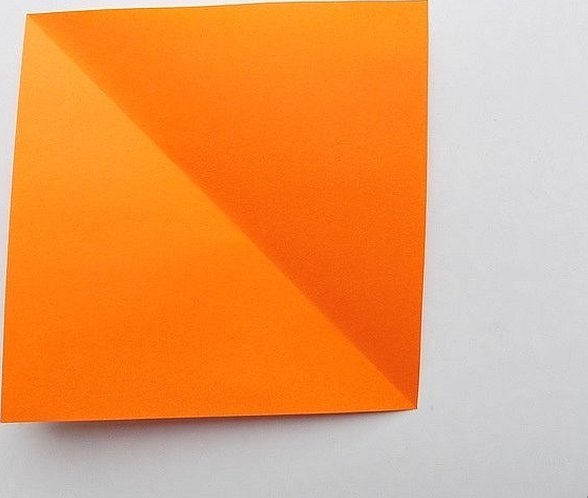
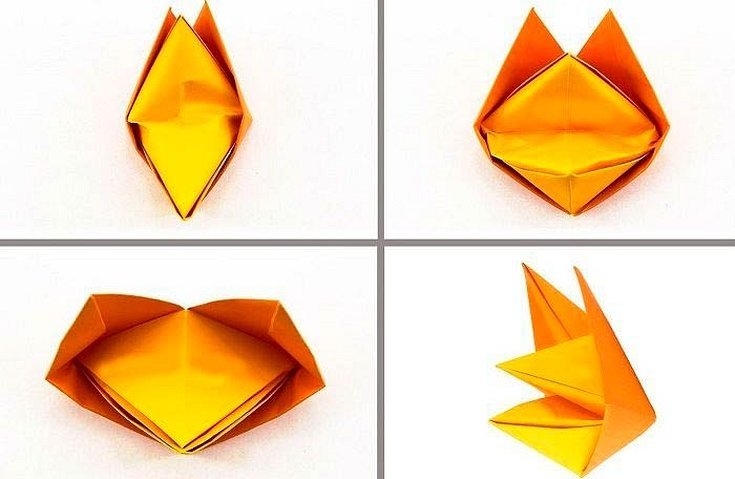
- The square sheet should be folded exactly diagonally, then folded in half again along one of the folds, turning it into an isosceles triangle.
- It's time to bend the workpiece in half away from you. To do this, you need to grab 3 corners and bend them toward you along the vertical axis of the roll.
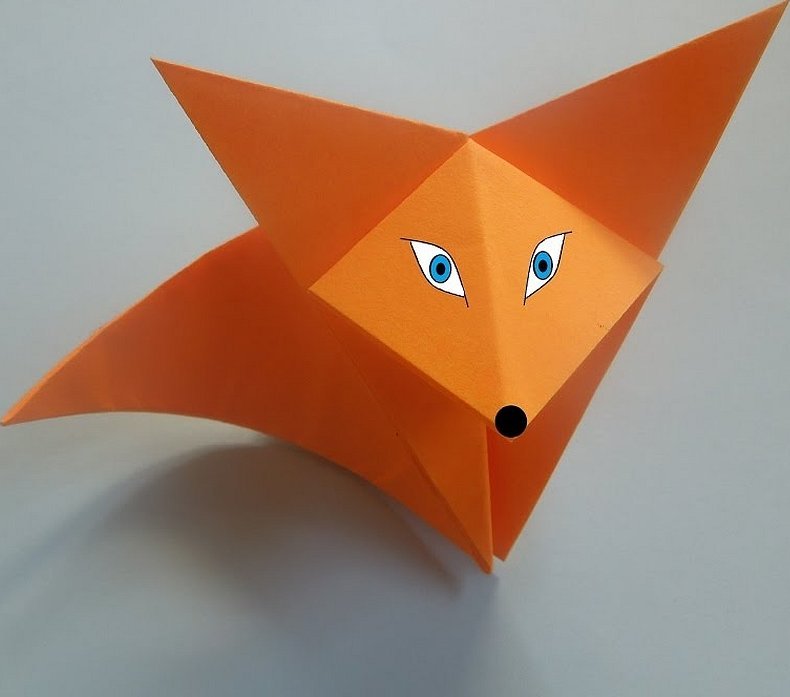
- The bent corners should be unbent. The doubled piece in the center will serve as the animal's muzzle, it should be unfolded from the inside. The extreme corners will be the ears.
- The fox's tail needs to be tucked behind the figure, which will allow it to remain stable on the surface.
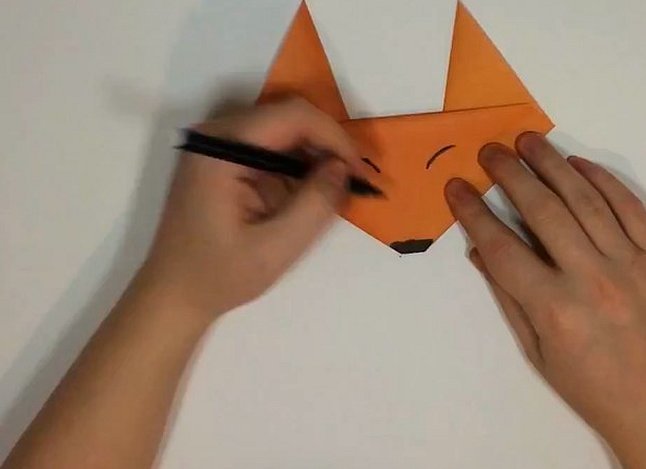
- Finally, use a black felt-tip pen or marker to draw the fox's nose, whiskers and eyes.
Please note! This small craft can be used as a bookmark.
To do this, you need to smooth out the part of the body with the tail so that it is flat and fits between the book pages. The cute little fox face will remain outside, as a reminder of the unread material.
Volumetric fox - craft made from colored paper
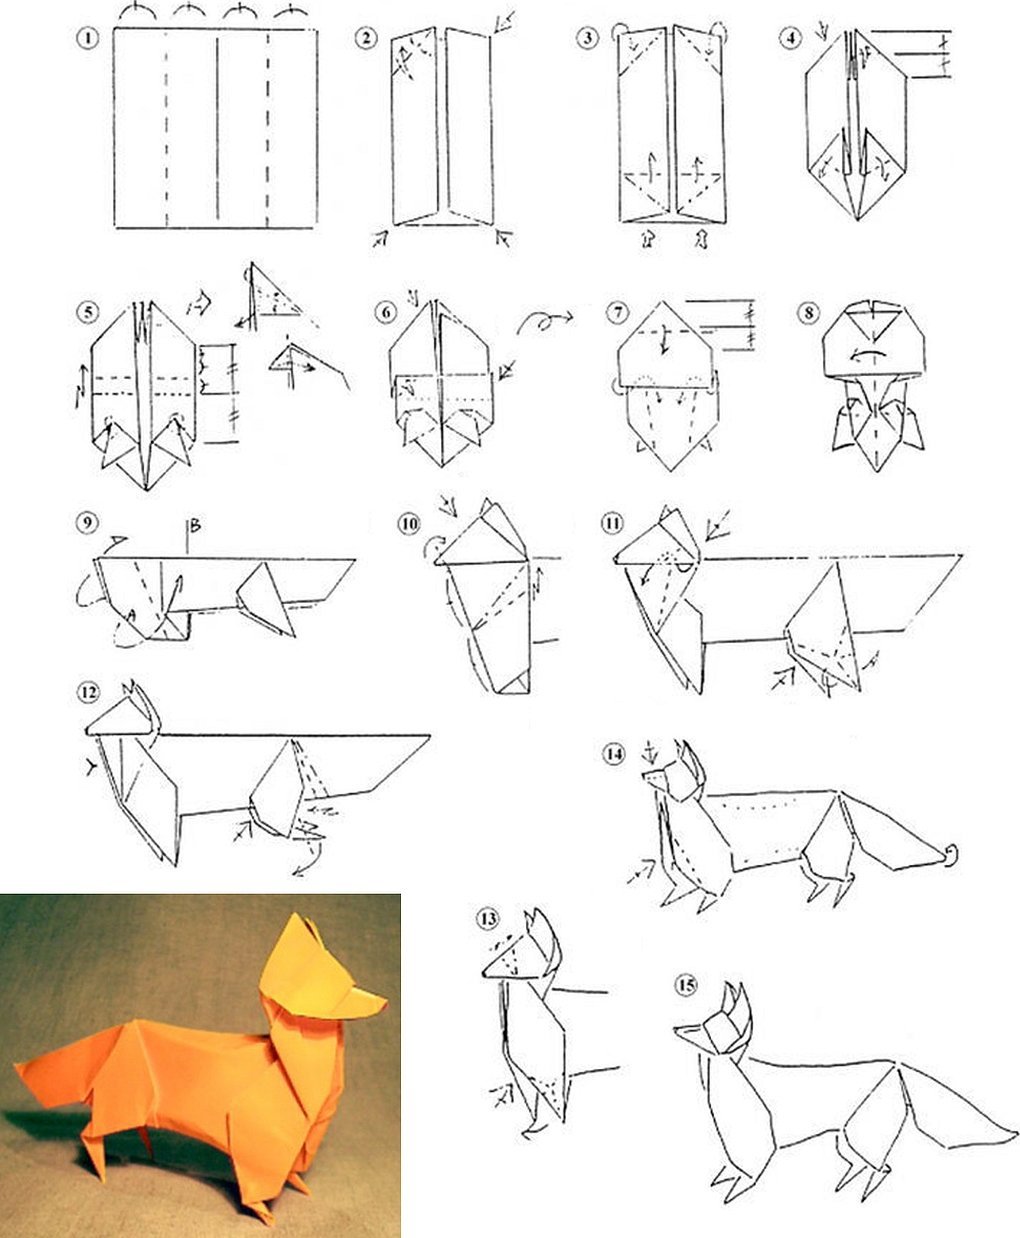
It's time to make a three-dimensional complex paper fox with your own hands. This design looks quite realistic and belongs to the category of complex models.
Step-by-step implementation:
- A square sheet of paper should be divided into 4 equal parts in the horizontal direction. The two outer quarters should be folded to the vertical central line.
- To mark the edges, you need to fold the corners at the bottom and top inward.
- Next, open the pockets at the corners from the inside bottom and iron along the fold lines. The upper corners need to be turned inward.
- The fox's ears need to be formed by folding the two upper corners towards themselves, folding them again. These parts should end up folded towards each other.
- The lower corners that stick out need to be bent down. Then the workpiece should be clamped in the center and returned to the previous position.
- The figure needs to be folded like an accordion along the dotted line, with the corners bent towards you.
- For convenience, it is better to turn the product horizontally, bend the upper left corner towards you, forming the animal’s head.
- Next, you need to separate the hind legs from the front ones, flatten them, and do the same with the muzzle and tail.
- Finally, you need to give the body a voluminous shape, emphasizing its anatomical features.
Please note! The volumetric fox according to this master class should be made by children of senior or junior school age, with their parents.
This red pet will take pride of place in your home paper zoo.
Options for making chanterelles from cardboard
To make a fairytale fox craft with your own hands, you can use cardboard and paper at the same time. For work, you need to prepare the following materials:
- cardboard;
- colored paper, preferably double-sided;
- glues (PVA and rubber);
- ruler, paints, brushes, scissors and a compass.
The following steps must be performed:
- On the cardboard you need to draw the patterns, cut them out, you should get 4 parts for the paws, body and head. Then glue them with fast-acting glue. As a result, 4 cones should be formed (their size is determined independently depending on what size the fairy-tale hero will be).
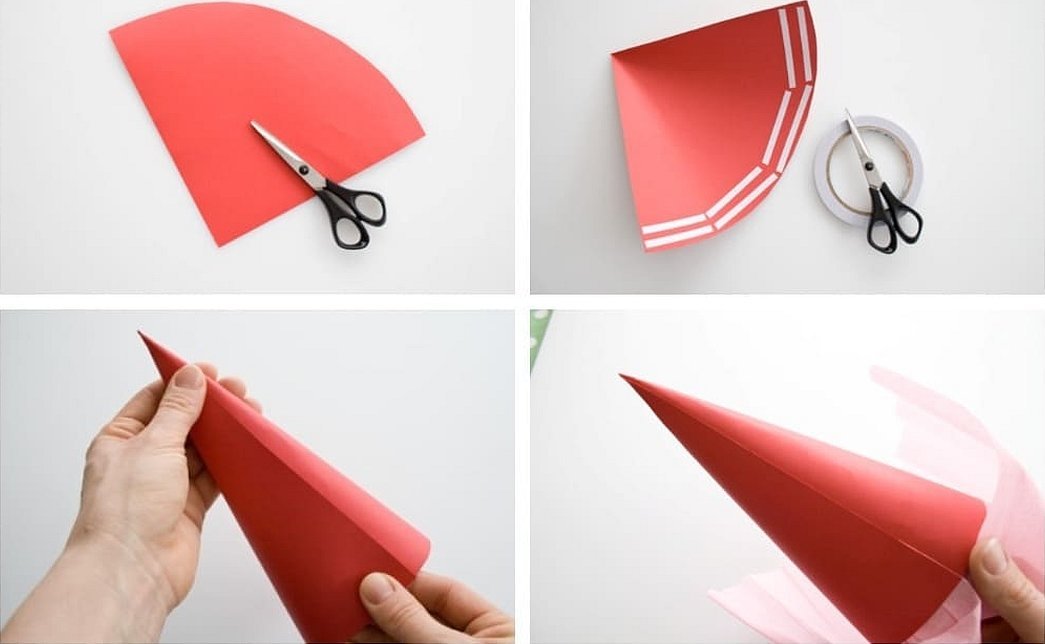
- The bottom needs to be glued to the head. If white cardboard was used, the parts need to be painted orange or their entire surface needs to be covered with colored paper.
- An apron should be cut out of colored paper and simple patterns of different tones should be drawn on it. This element will need to be glued to the body.
- At the end of the work, the head and paws are also glued to the body.
Attention! It is recommended to use rubber glue for gluing cardboard, as it does not deform the material.

- To create the fur, you need to cut orange colored paper into thin strips, their thickness should not exceed 15-25 mm. Then each strip will need to be cut in the form of grass, after which it needs to be pulled with scissors from the bottom up. This way, the thin villi will be bent, which will give the fur a realistic look. It is necessary to glue such details to the entire body, except for the apron and muzzle.
- From colored paper in the same tone, you need to make triangular ears and glue them to the head.
- You can make a fox's hairdo and tail in the same way as the curled fur.
- The parts of the limbs with fingers must be cut out of paper in a flat shape and glued as intended.
- You should glue a black circle of paper or thread onto the muzzle to create a nose.
- Finally, you will need to draw the eyes, eyebrows and mouth.
How to make a fox head out of paper
How to make a fox out of paper, namely the body, is already known. Now it is worth considering the instructions on how to create the animal's head in origami style. To do this, you need to follow these steps:
- To make this craft, you need to take a square sheet of paper, make a vertical fold on it, then fold it horizontally.
- The edges need to be folded towards the center of the product.
- Then the right and left corners should be straightened.
- The craft should be turned towards you with the other side.
- Move the edges towards the center.
- Fold the top layer diagonally, with the bottom part folded upwards.
- The corner should be folded back, straightening out the volume from the inside.
- Connect the corners by pressing on the central part of the product.
- The eyes, nose and mouth should be drawn using felt-tip pens.
Please note! Every person has a creative streak, but it is better to develop it from early childhood.
Making crafts with your own hands helps a child decide on his favorite type of creativity. Thanks to various hand manipulations, the baby develops quickly. When mom or dad helps the child with this, the relationship between them becomes even stronger.


