New Year at any age is associated with the expectation of something bright and fabulous. Moreover, adults sometimes believe in miracles more than children. Not only gifts make this time wonderful, but also the aroma of a Christmas tree decorated with toys. It is especially interesting to make them with your own hands together with children. Toys made of cotton wool will look no less interesting than chic products from stores.
- History of cotton wool Christmas tree decorations
- Features of making cotton toys for the Christmas tree
- Materials required for work
- General order of work
- Making the frame
- Adding volume
- How to paint a doll's face
- Master classes on making Christmas tree toys from cotton wool for beginners step by step
- Boy with bagels
- The Boys and the Snowman
- Snow Maiden
- Boy with brushwood
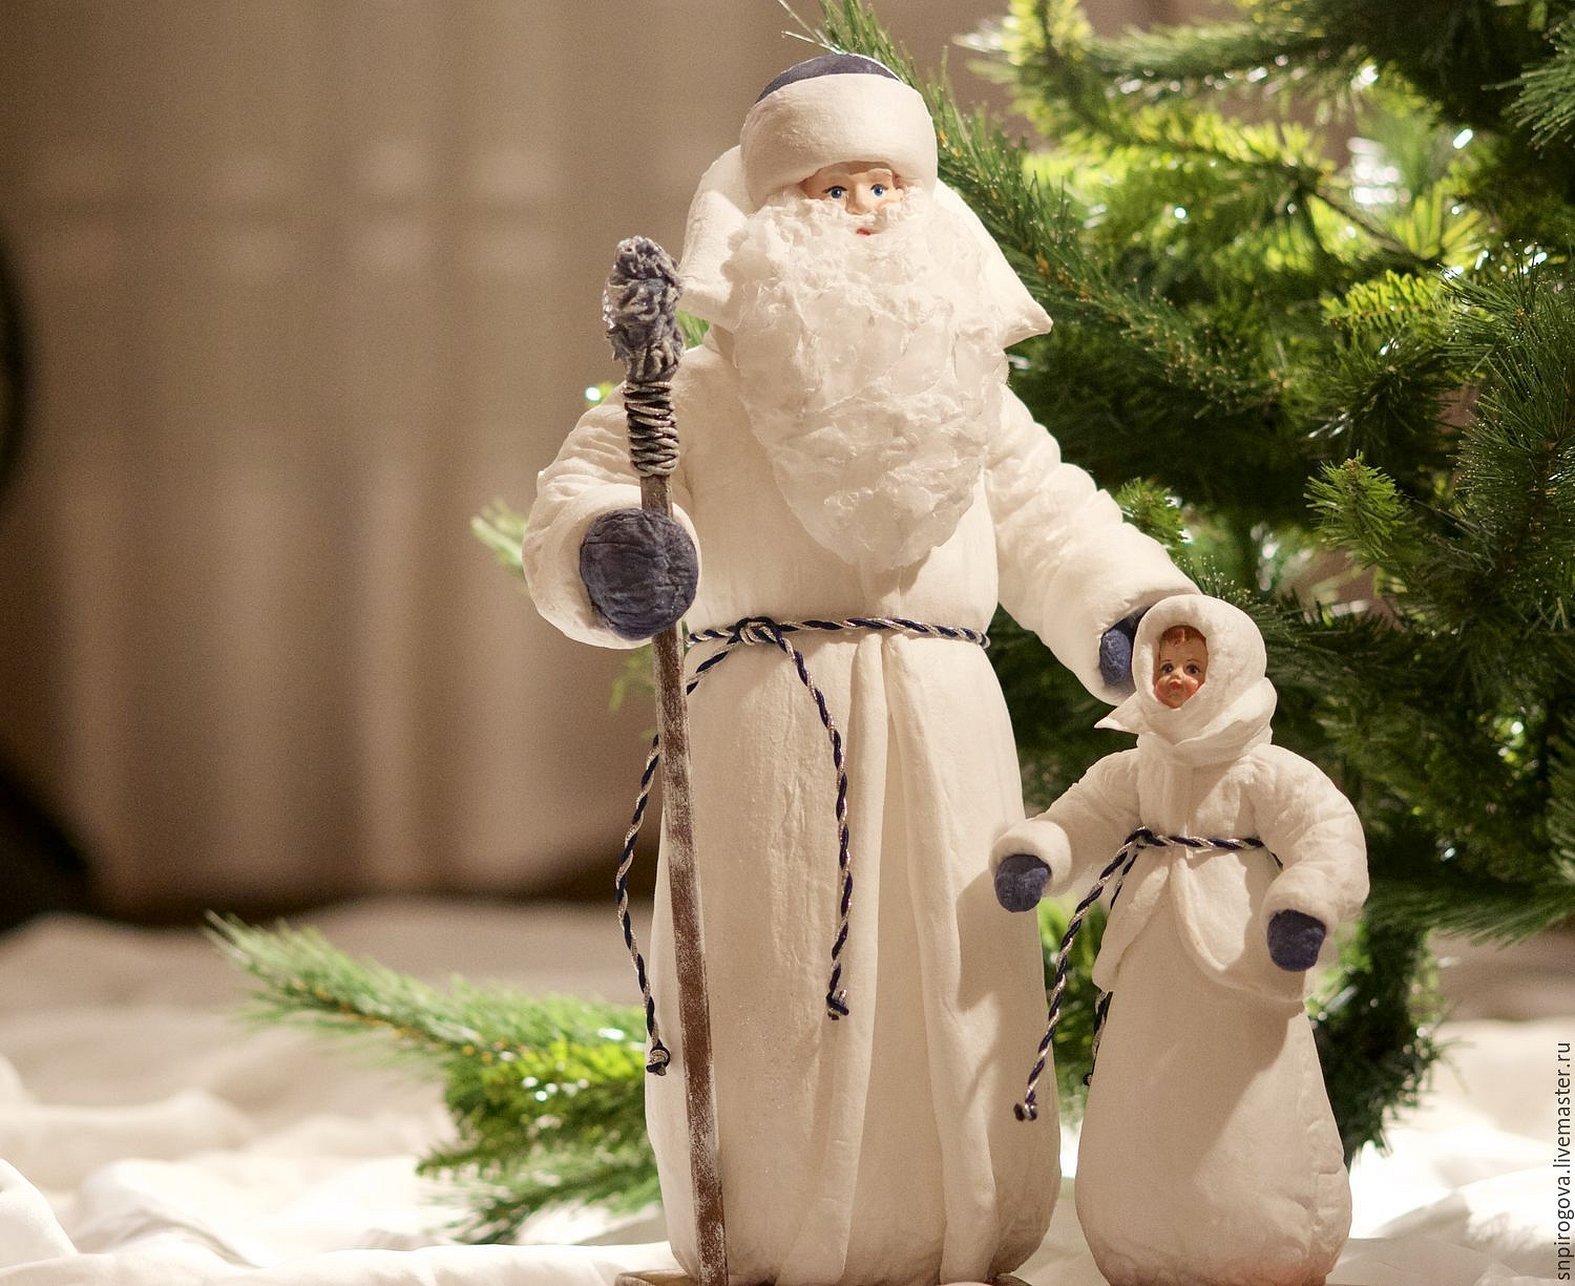
- Father Frost made of cotton wool for the Christmas tree
- Kitty
- Bullfinch
- Boletus mushroom
History of cotton wool Christmas tree decorations
In Russia, the New Year began to be celebrated in winter only at the end of the 17th century. It was then that Peter I decreed that this holiday was moved from September to December. Its main attributes were fireworks and illumination, and houses were simply decorated with spruce or pine branches.
Please note! The tradition of putting a Christmas tree inside the house and decorating it with toys came to our country from Germany in the 19th century.
After the revolution, the celebration of the New Year became a kind of replacement for Christmas. Of course, the fight against religious holidays made some adjustments to the traditions of celebrating the New Year in Russia, but the old ritual of putting up a Christmas tree as a symbol of the coming year remained. The industry of the young country began to manufacture toys with new symbols, but Father Frost, Snow Maiden and Snowman remained untouched.
The most common Christmas tree decorations were made of cotton wool. Of course, the best ones at that time were beautiful glass balls, dolls and candies. Decorated with glitter and bright painting, they enlivened the tree. But there was no raw material for making a sufficient number of glass products. And the range of such goods was poor.
In this regard, cotton toys were more accessible. They were inexpensive, and if you really wanted to, you could make them yourself. Any toy could be created from the pliable cotton raw material. The artels created for the production of such important products used the experience accumulated by hereditary craftsmen and created toys of new themes:
- Ruddy boys on skis.
- Border guards in full armor.
- Funny animal figures.
- Fairy tale characters and many others.
The basis for most of the figures was a wire frame, which was wrapped in cotton wool. The face was made of special mastic, wax or papier-mâché. The painting was done by hand. The dress was cut and sewn separately from pre-prepared cotton wool. The finished product was covered with paste boiled from starch and sprinkled with pieces of crushed glass beads.
Among the toys, one could most often find images of fruits, berries, vegetables or mushrooms. They were a dream of a well-fed and calm life and therefore were hung on the Christmas tree every year as a talisman. The toys were kept for decades in many houses and passed down from generation to generation.
Interesting! The largest dolls were made of cotton wool, such as Father Frost and Snow Maiden. They were placed under the Christmas tree and after the holiday they were put away in a separate box.
Features of making cotton toys for the Christmas tree
Manual labor was gradually replaced by mechanization. Machines for winding cotton wool and its molding allowed to increase the quantity of products several times. Modern Christmas tree toys made of this seemingly nondescript material are not durable, but they look like works of art. They are scary even to touch. If desired, everyone can make something similar for their Christmas tree. For specialists, the Polish and Czech versions of making toys will be of interest.
The technology for making such decorations is quite simple. The main thing is to study the style and show your imagination. An original craft will be a great gift for a friend for the New Year or an exhibit at a folk art exhibition. Using cotton wool to make toys has a number of advantages:
- Safety.
- Ease of molding.
- Ease of processing.
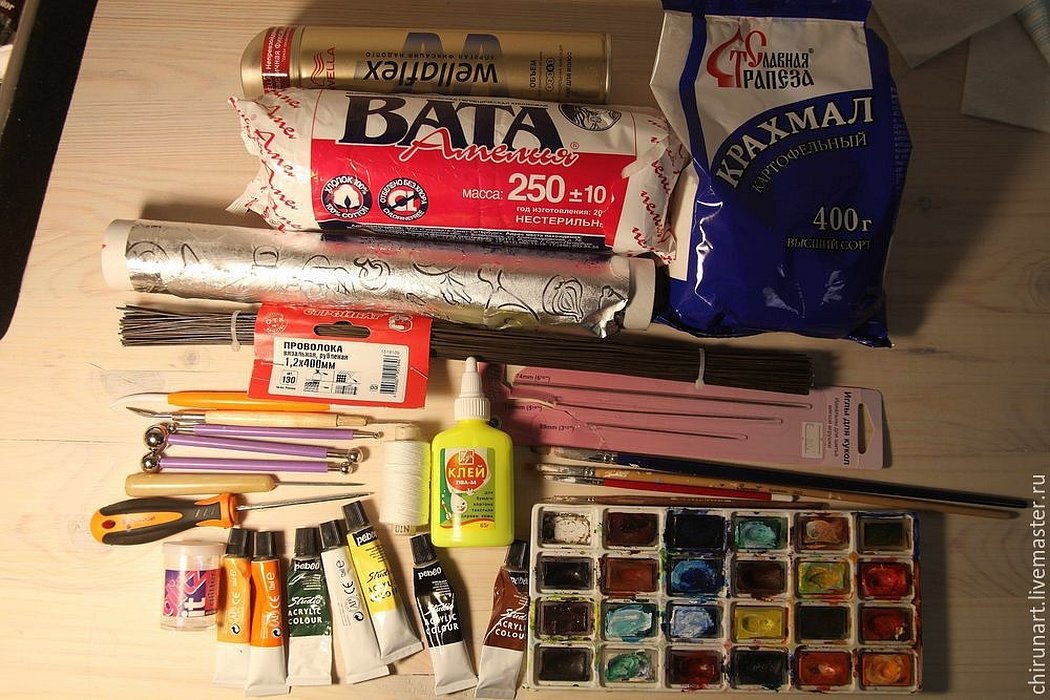
Materials required for work
Before you start working, you need to prepare the tools and materials needed for the process. There are not many of them, and even if you have to buy everything, you won’t need a lot of money. For most crafts you will need:
- Empty tin can.
- Cotton wool or cotton balls.
- High quality glue and brush.
- Thick paper.
- Pieces of fabric.
- Cord and wire.
- Pencil.
- A piece of soap.
- Scissors and some other tools.
It is better to choose PVA glue, and cotton balls are better to buy at the pharmacy. They are snow-white and of the same shape.
Important! When choosing glue, you need to remember that it should be suitable not only for fabrics, but also for other materials.
General order of work
When starting to make toys from cotton wool with your own hands, you need to understand that the process has common technological features. Experts call this principle papier-mâché. Only instead of paper, cotton wool is used here, and the paste is replaced with PVA glue.
First, you need to make a drawing of the future toy to understand what parts need to be made. Then a frame is created and material is wound onto it to obtain the desired shape of the part. Moreover, each layer is coated with glue. The finished product is painted and varnished.
Important! The adhesive joint must ensure the strength of the structure, so it is important to carry out the gluing very carefully.
Making the frame
If the craft has a complex configuration, it is better to use a wire frame. For example, a mouse with a long tail or a doll with bendable arms and legs simply will not work without special support.
To ensure mobility and stability, a frame is needed. After creating it, it must be wrapped in foil, giving the necessary smoothness to the lines and smoothing out the sharp edges. Then the first layer of cotton wool is placed on the frame.
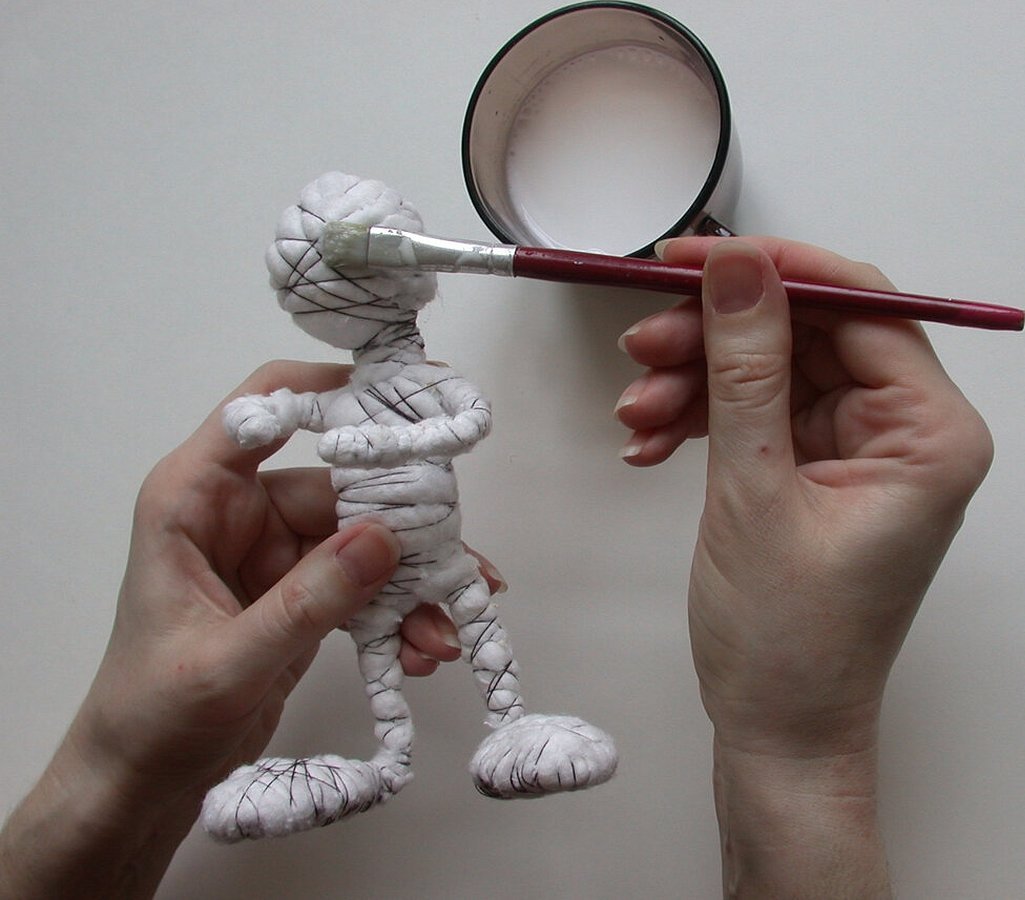
Adding volume
In order to save money, overly bulky items are first covered with a layer of unnecessary paper (newspapers, magazines). The sheets are carefully crumpled into balls and wrapped in foil. Strong threads are used to highlight individual zones. When wrapped around the body in a given place, they form a certain shape. The technology is suitable for such items as a snowman or an owl.
How to paint a doll's face
To make a doll's face beautiful, it needs to be carefully painted. White paint is applied to the eye area. The eyebrows and upper eyelid are highlighted with black using a thin brush. It is better to make the iris blue, and highlight the pupils with brown with small light dots on the side. The lips are painted with a pink shade, and the smooth skin tone is emphasized with beige. You can add a little blush to the cheeks. You can add volume to the costume with soft strokes of red.
Please note! To make it possible to hang the toy on the Christmas tree, a hole is made in the top part and a thread is pulled through.
Master classes on making Christmas tree toys from cotton wool for beginners step by step
To master the process of making Christmas tree toys from cotton wool, a novice craftswoman should study the process in detail. A step-by-step version of the work can be found on a specialized website on the Internet. Most often, the technology of work and its complexity depend on the selected model. Some of them are considered in more detail.
Boy with bagels
The instructions for making cotton wool men are quite simple:
- Create a frame based on the drawing and give it volume using paper in the right places.
- Coat the base with adhesive.
- Wrap the workpiece in foil.
- Wrap it in a spiral with cotton wool and give it shape.
- Soak the product in a starch solution.
- Let dry thoroughly.
- Paint and varnish with acrylic varnish.
The buns are made separately. For work you need to additionally prepare flour and bandage:
- A piece of cotton wool is rolled into a tourniquet and wrapped with a bandage.
- The resulting tight sausage is folded into a ring and sewn together.
- The ring is dipped into a pre-mixed dough of flour and water. It should have the consistency of thick sour cream.
- The product is baked for about ten minutes until golden brown.
All that remains is to string it on a thread and put it into the hands of a cotton wool boy. Such a master class will be easy to repeat even for a beginner.
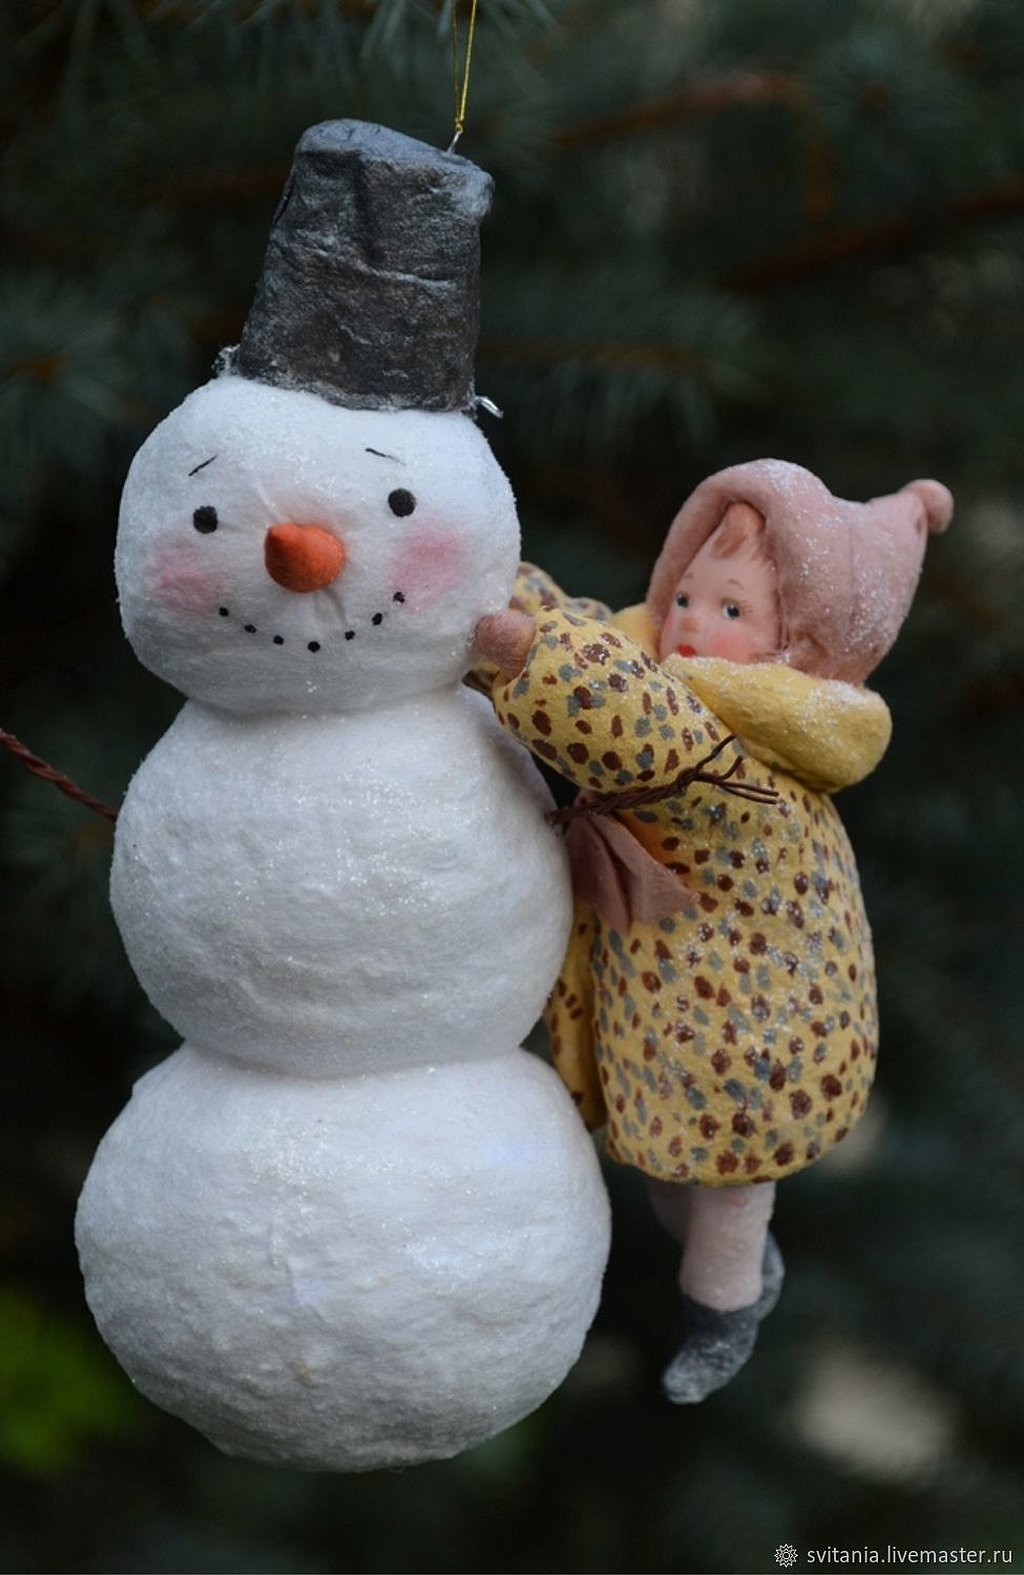
The Boys and the Snowman
Christmas tree toys in the form of a man are made according to the same principle as the boy. Having created a frame and given it volume, you can begin to form the image of the figure. After gluing and painting, the blank is sent to dry. To create a Snowman, you will additionally need a toothpick and decor.
The process consists of the following steps:
- Roll three tight balls of different sizes.
- Treat their surfaces with a thick layer of starch and secure toothpicks inside.
- Make handles from twigs and a scarf and hat from threads.
- The final step is to draw a face. Glitter sprinkles are used as decoration.
- Cover the finished toy with acrylic varnish.
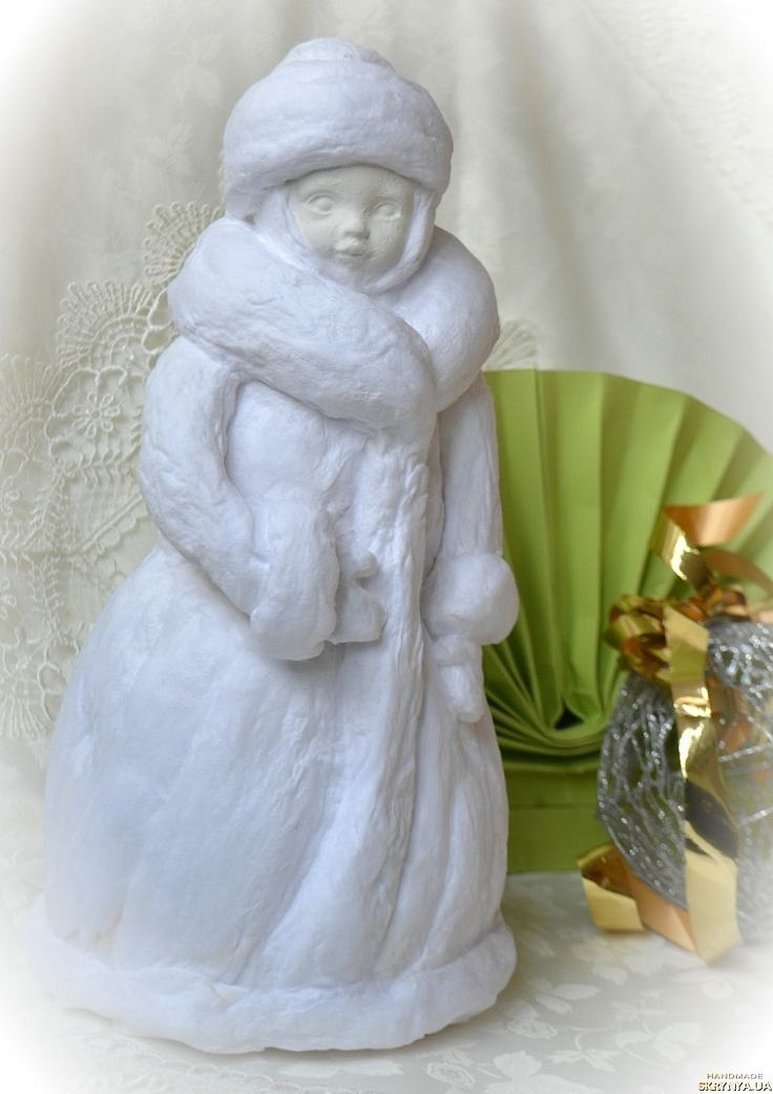
Snow Maiden
When creating a Snow Maiden from cotton wool, you need to clearly imagine what image you want to get in the end. A beautiful girl can be made in the same way as a lady doll, carefully painting her face and choosing an outfit. It is much faster and easier to make a Snow Maiden-girl. This granddaughter is still small and does not need makeup.
The work proceeds as follows:
- After sprinkling a little cotton wool, you need to sculpt the face, making small indentations for the eyes and mouth.
- Correct all defects with a wet brush.
- Make a wire loop on the head.
- For the body, create a wire frame blank.
- Wrap the finished frame in layers of cotton wool, each of which is moistened with glue.
- When wrapping, you should take into account what shape the arms, legs and other parts of the body should have and, depending on this, adjust the thickness of the wrapping layer.
- Make a scarf or hat out of cotton wool.
- Also form felt boots and a fur coat.
The product dries for a very long time. It will take several days to be completely ready. At the first stage, it is better to dry it in the oven for about ten minutes. Then the figurine is painted with watercolors.
Please note! To give the face a natural shade, the beige paint should be diluted with water. The same can be done with blush, using pink color. The details of the face are drawn with acrylic paint.
Boy with brushwood
How to make a boy can be seen above. Figures of people on Christmas trees have always been very popular. To add variety, brushwood is put in the toy's hands. It must be attached using the same glue.
Father Frost made of cotton wool for the Christmas tree
All the cotton toys, the master class on making which is described above, are interesting and attractive. But what New Year's holiday without Santa Claus. After the granddaughter is made, you can move on to creating the most important symbol.
The production of a cotton Santa Claus is carried out as follows:
- A blank of the future figure is made from cardboard.
- A loop is made for convenient placement on branches.
- A sheet of paper or newspaper is torn into pieces and gathered into lumps. They should be glued to a cardboard base, creating the desired volume.
- To make the loop strong, it must be wrapped with strong nylon thread and glued to the back of the toy.
- The cotton wool is divided into strips, which are wrapped around the product. Several layers are required to obtain the desired shape.
- The toy must be thoroughly coated with adhesive solution and allowed to dry completely.
- Using pieces of cotton wool treated with glue, make a hat, a chic sheepskin coat, comfortable felt boots and other details that Old Man Frost has.
- The finished figure is painted and a face is created.
Kitty
The process of creation is the same as for any four-legged animal. It consists of the following:
- Creating a paper sketch.
- Making a wire frame.
- Adding volume using paper.
- Foil coating.
- Covering with cotton wool.
- Painting and varnishing.
Recommendations! To make the craft look interesting, you can create a house for the cat and hang it nearby.
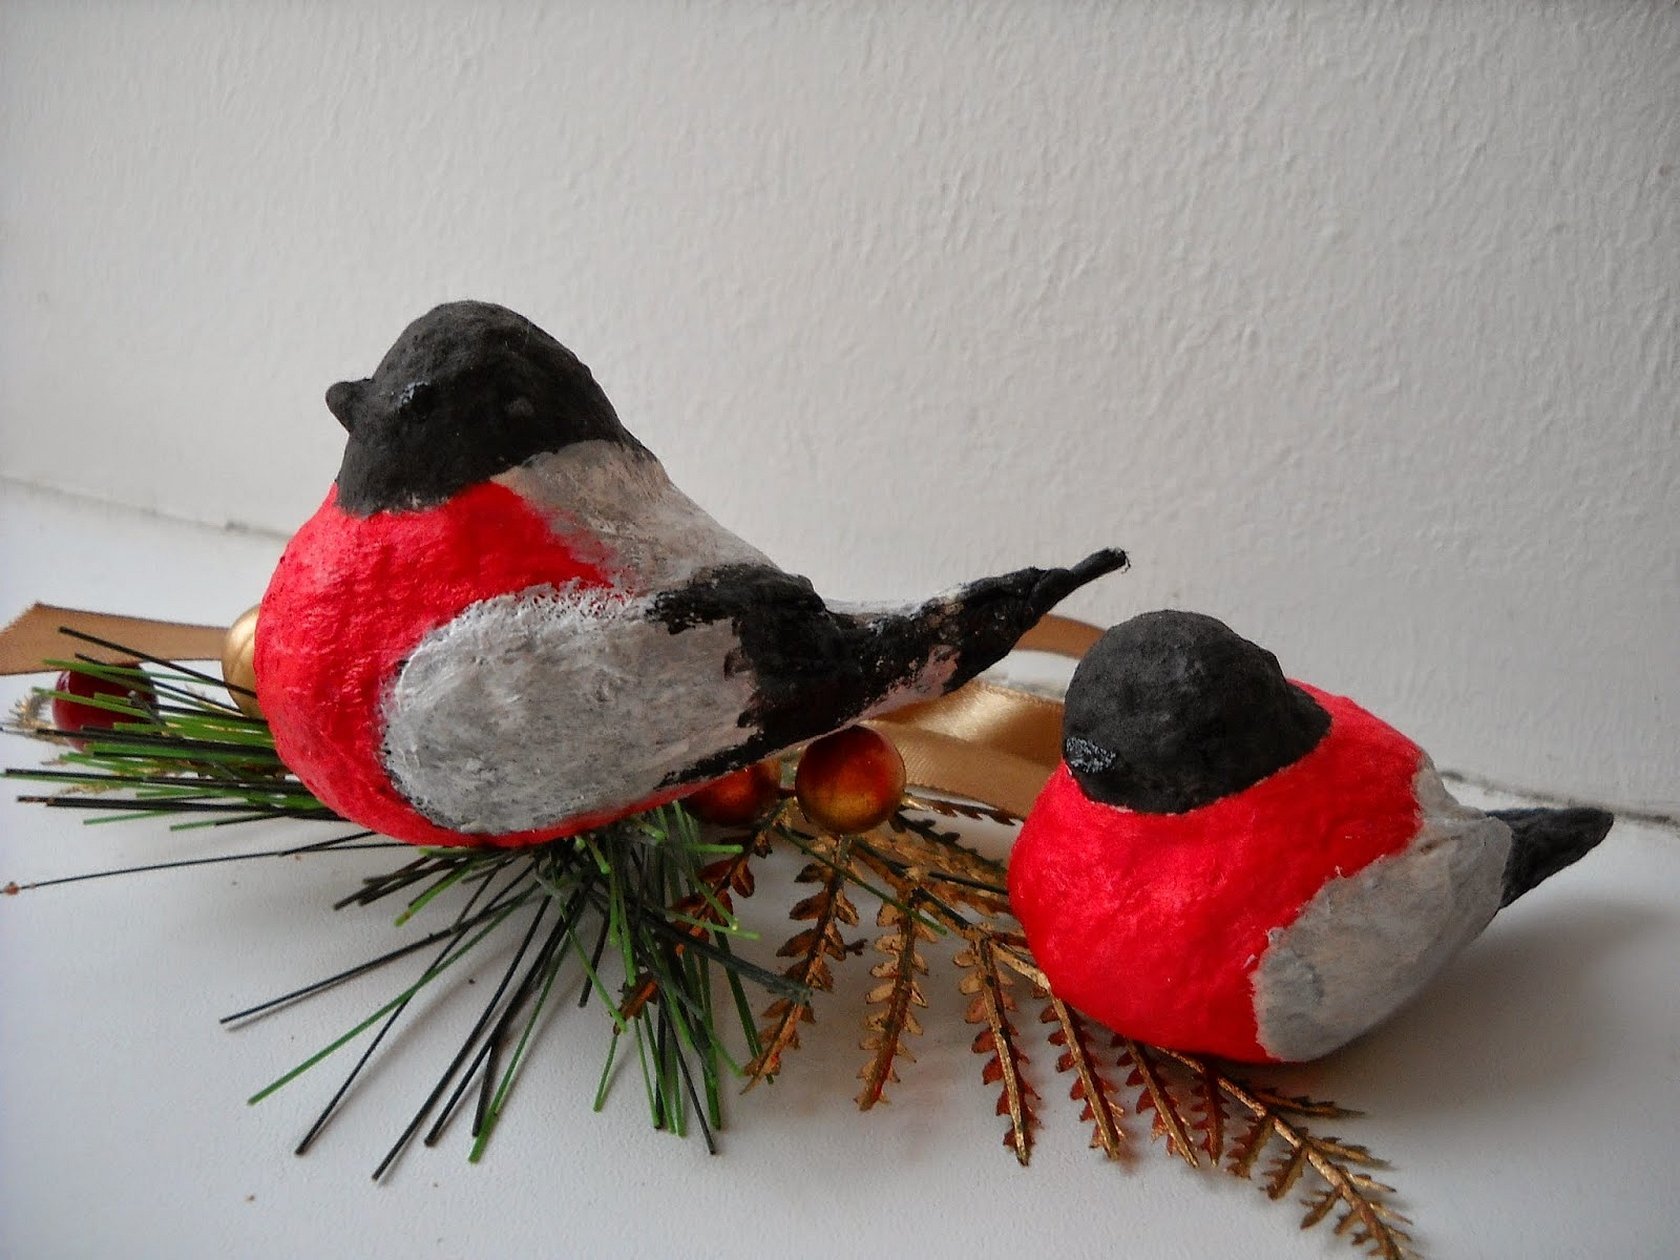
Bullfinch
This bird has bright plumage and is considered a symbol of winter, so bullfinch toys are often hung on Christmas trees. You can make the craft as follows:
- Form the body of the bird from cotton wool according to the selected design.
- Cut out a beak from cardboard.
- Generously coat the surface with adhesive solution and leave the product to dry.
- Paint the figurine and varnish it.
Boletus mushroom
To create the craft, take a strong cotton swab and wrap it in a layer of cotton wool. This will make the mushroom stem. Then cut out the cap from thick paper and, after giving it the desired shape, glue it to the stem. All that remains is to paint and varnish the toy. You can make other mushrooms in the same way, for example, a bright fly agaric or a delicate honey fungus.
The tradition of making Christmas tree toys appeared long ago. Each nationality has its own secrets of making them. Every year before the New Year, a fair of such products is held. Antique toys attract special attention. The fashion of making crafts with your own hands is gradually reviving. Master classes on making Christmas tree toys are easy to find on the Internet. Having mastered the technique of creating toys, novice craftsmen will definitely want to expand their knowledge.


