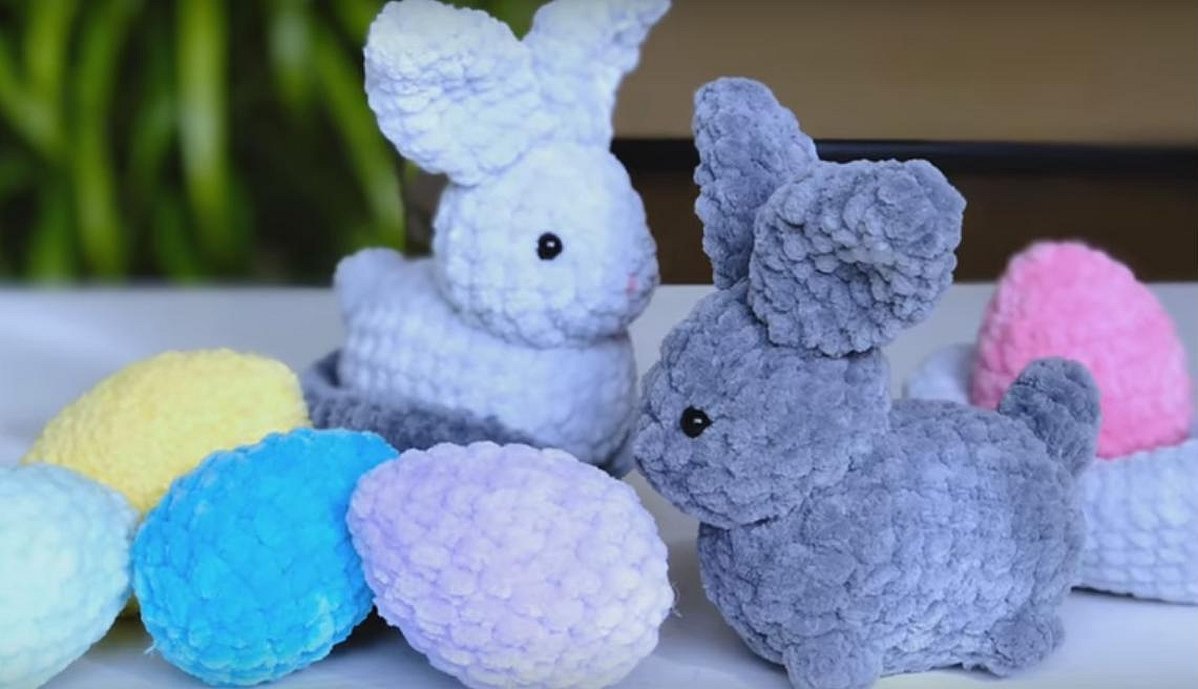
Germany is considered the birthplace of the Easter bunny, as in the culture of this country it has long been a symbol of fertility and vitality. Over time, this character became so beloved by adults and children that it spread throughout the world. Now this cute little animal is not only a symbol of the bright holiday, but also a favorite character of children's fairy tales, cartoons, and often a favorite toy of a child. And before the onset of the Year of the Rabbit, needlewomen try to knit a toy with their own hands.
Description of the toy
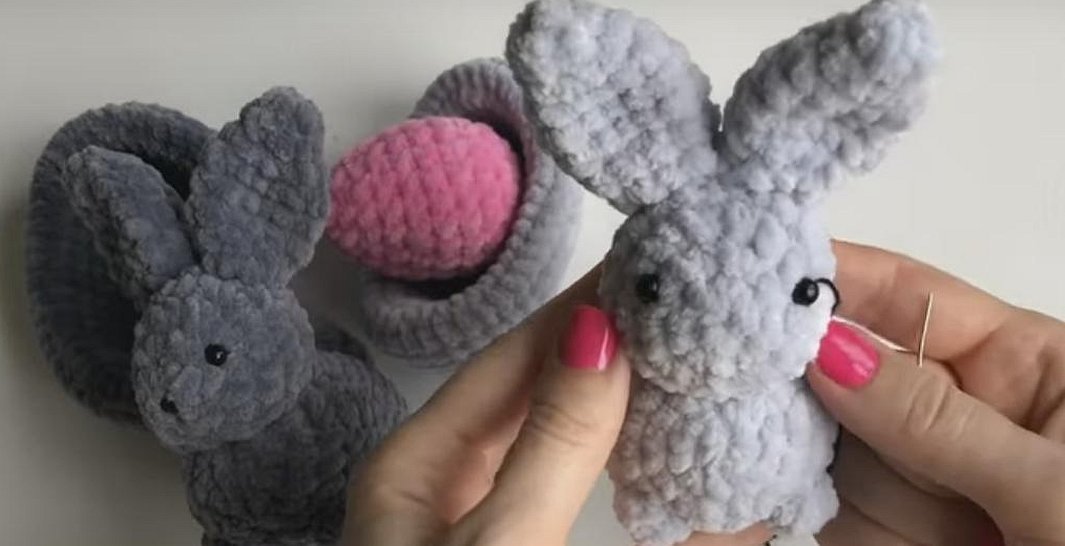
Those who can only knit or crochet, but are afraid to take on large projects (a jacket or a hat), will like this easy-to-make plush animal. This crocheted rabbit can become a child's favorite toy, especially if he or she participates in its creation.
Despite the simplicity of execution, the animal turns out to be quite realistic, thanks to the use of plush yarn in the work. The toy is so similar to a living fairy-tale hero that it becomes unclear whether this is a crocheted rabbit or the one that Alice was chasing when she got to Wonderland.
What you will need for work
If creating a stylish amigurumi in the form of a rabbit is your first crochet experience, then before going to the store you should decide what materials and tools you will need for the job:
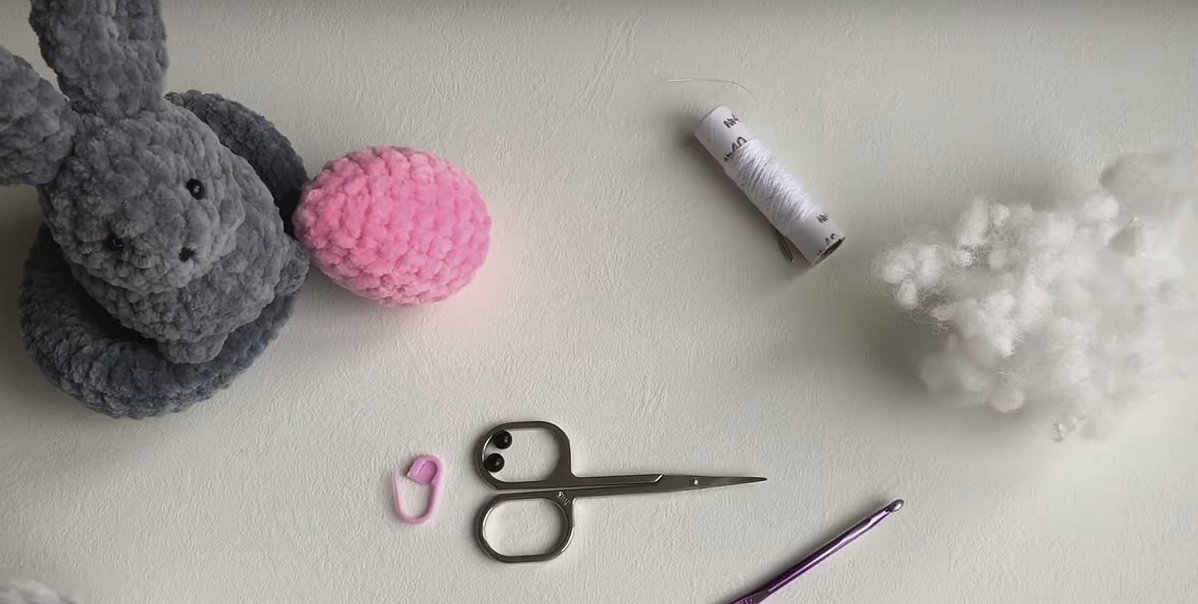
- gray yarn - of course, you can use any knitting thread with a yardage of 120 m per 100 grams, but toys made from plush or velor yarn, for example, Himalaya Dolphin Baby, look more realistic;
- crochet hook No. 4;
- marker - since knitting is done in a circle, in order not to get confused in the number of rows, it is better to mark the beginning of the work;
- filler - holofiber is ideal, but cotton wool should not be used under any circumstances;
- scissors - you can take special "herons" or any other, but sharp ones.
- needle and thread to sew all the details of the rabbit and sew on the eyes;
- large black beads for eyes.
Advice! The nose of the toy can be embroidered with black or pink threads, or you can buy a larger bead for it.
Crochet rabbit: master class on knitting with step-by-step description
This MK is suitable for both experienced knitters and beginners. Everyone can make a plush rabbit that looks like a real one. Knitting the toy is quite easy, since to create it you only need to master two basic elements of crocheting - a chain stitch and a single crochet.
Conventional designations
Before moving on to the step-by-step master class on how to crochet a rabbit doll, you should familiarize yourself with the symbols that will be used for the description:
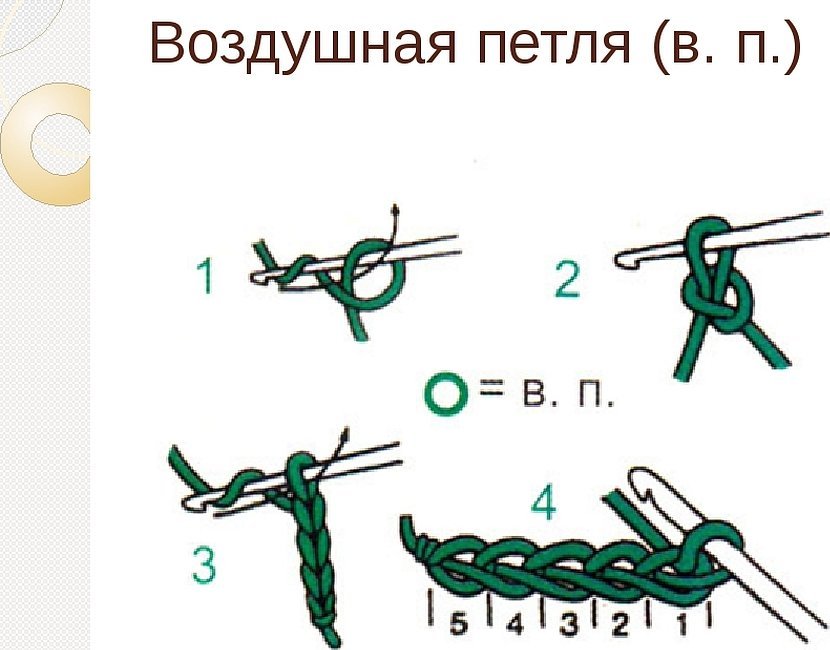
- v. p. — air loop.
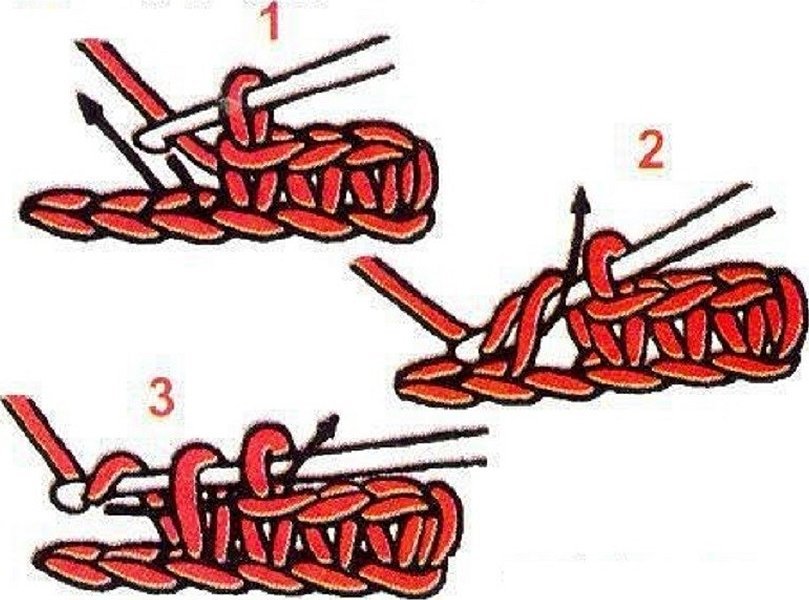
- sc - single crochet, short or basic column.
To make the beginning of the work look neater, you can start knitting with an amigurumi ring. It allows you to tighten the columns of the first row so that there are no holes or gaps.

Stages of work
The toy rabbit consists of such parts as the head, body, ears, tail and four paws. Below are step-by-step diagrams of how to knit a rabbit from individual parts.
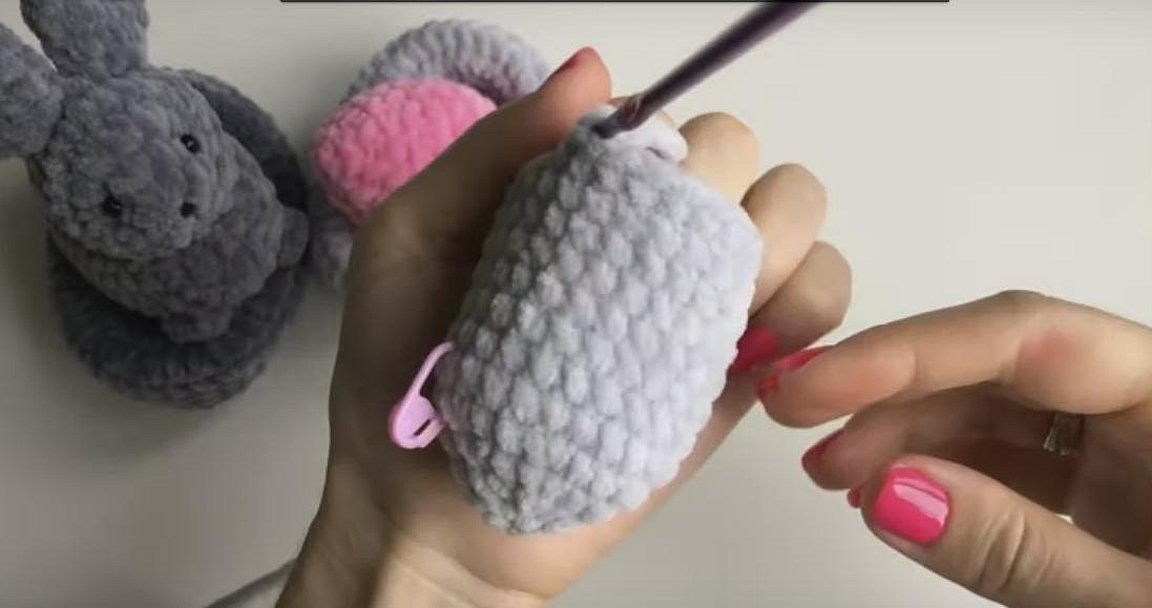
Body - first 12 rows:
- First, knit an amigurumi ring with 6 sc or 3 ch, and then 6 sc in the first loop.
- Next, knit 6 increases, that is, from each sc of the first row, you need to knit 2 sc.
- In the third row, knit 1 sc, 1 increase. Repeat until the end of the row, you should get 18 loops.
- In the next row - 2 sc, 1 increase to the end of the row.
- From rows 5 to 12, knit 24 sc in a circle.
You need to continue like this:
- In row 13, there are 2 sc, 1 decrease to the end of the row. To decrease, pull the thread through two loops of the "braid" of the previous row so that there are 2 loops on the hook, which are knitted as in a regular sc. In total, there will be 6 decreases.
- Next, cut the thread, leaving a small “tail” that is pulled under the loops of the braid of the last row.
- After this, stuff the body with holofiber, tighten and secure the thread pulled under the loops of the last row. Hide the remaining piece of thread in the middle of the part.
Advice! You need to tighten the ring on the body, holding the filling inside the part with your finger, and do this very carefully so that the thread does not break.
Head:
- The first and second rows are knitted in the same way as for the body: an amigurumi ring with 6 sc and 6 increases.
- Row 3 – 12 increases, i.e. knit 2 sc from each loop.
- Rows 4-6 knit 24 sc.
- Row 7 - 2 sc, 1 decrease.
- Row 8 - 1 sc, 1 decrease.
- Next, as when knitting the body, cut the thread and pull it under the loops of the last row. Stuff the head with filler, pull the thread tight and fix it.
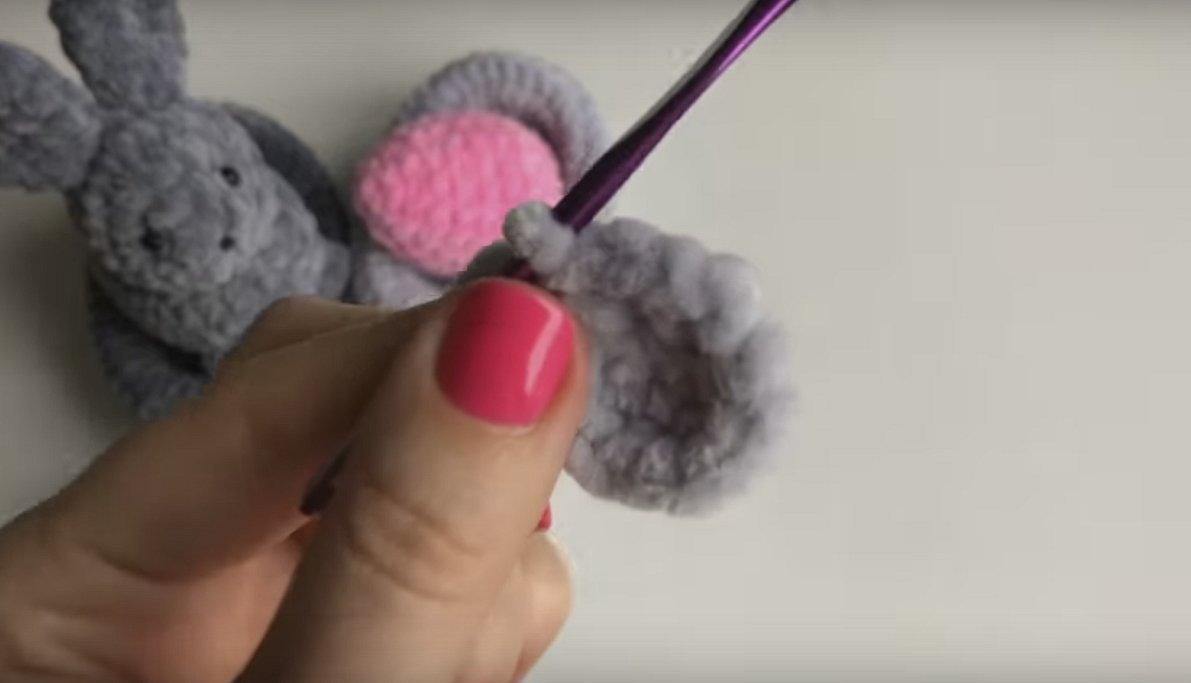
Ears:
- First, knit an amigurumi ring with 6 sc or 3 ch and 6 sc in the first loop.
- Next, 6 st/b, and in the 3rd row make 6 increases.
- After that, turn the knitting inside out and knit from the 4th to the 6th row 12 sc.
- In the 7th row, 1 sc, 1 decrease to the end of the row. You will get 4 rapports.
- Row 8 - 8 sc, make a slip stitch and cut the thread.
The other eye is knitted in a similar manner.
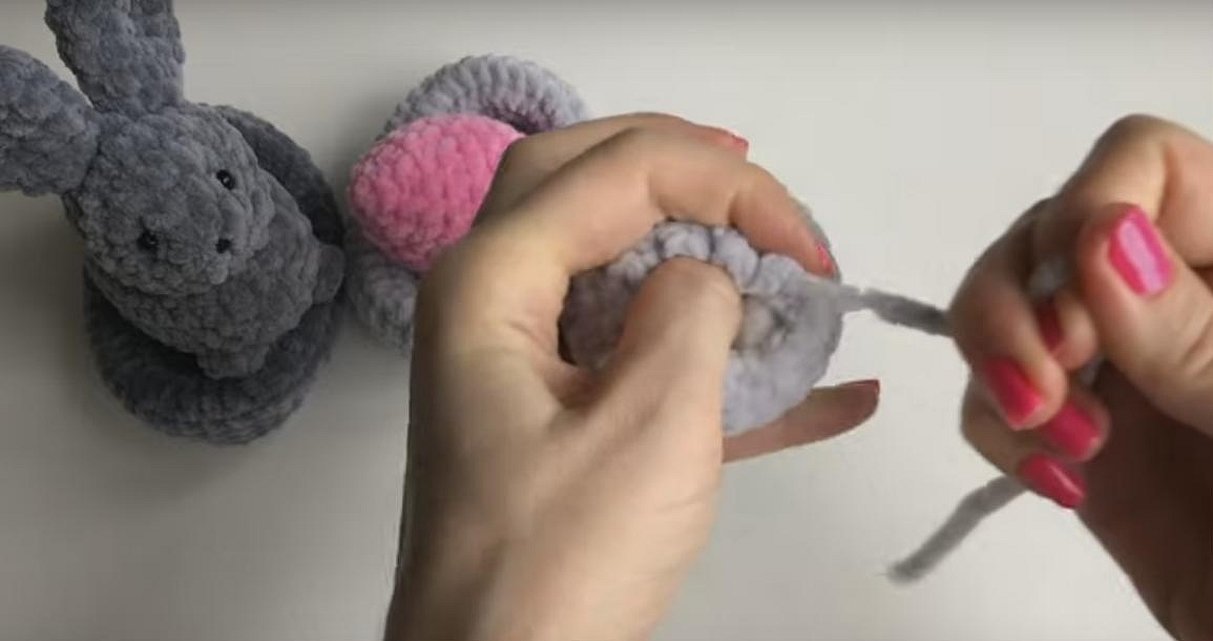
Tail:
- First make 3 ch and 4 sc in the first loop.
- In the second row make 4 increases
- In the 3rd row, 8 sc, slip stitch. Cut the thread and hide it inside the tail.
The paws are very easy to knit: 3 ch and 6 sc in the first loop, slip stitch and cut the thread. You need to make 4 of these paws.
How to assemble a toy
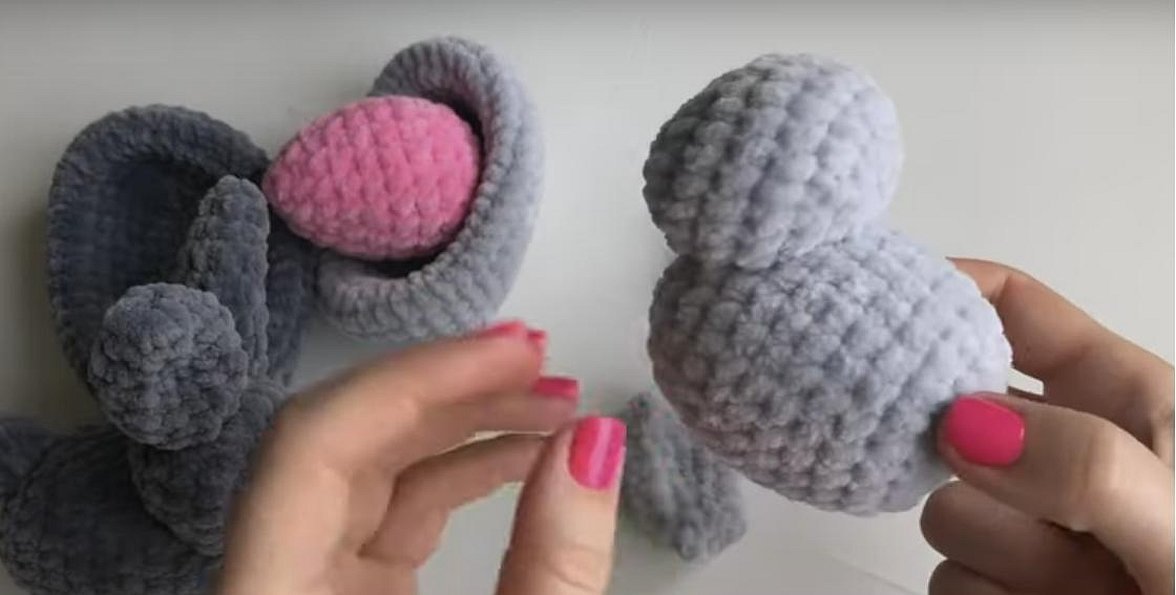
When the crocheting of the rabbit toy parts is finished, you can start assembling this cute handmade miracle. The sequence of this process will be as follows:
- Attach the head to the body and sew it in a circle using a needle and simple sewing threads that match the yarn.
- Then attach the tail to the body on the opposite side and sew it in the same way. Since the yarn is plush, there is no need to fill this part with holofiber.
- Next, you need to sew the ears to the head. Thanks to the properties of the plush threads, they will stick up playfully.
- After the ears, you need to sew on the paws, ensuring the stability of the doll.
- Now it's time to "bring to life" the crocheted rabbit, namely, sew on eyes made of black beads and embroider a nose on the face with black thread.
Advice! To make the head look more realistic, when sewing on beads, you need to pull them together a little.
In conclusion, it is worth saying that a knitted rabbit requires special care. To prevent the fluff from bunching up and fraying, wash the toy only by hand in warm soapy water, wring it out slightly and dry it by laying it on a horizontal surface. If these conditions are met, the fluffy animal will decorate your home for many years.


