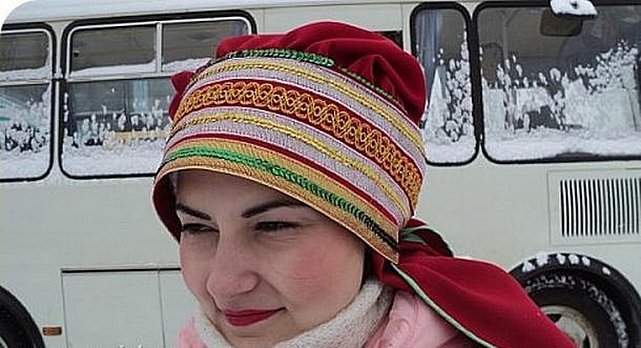
Povoynik is a traditional headdress. It exists in several variations. The use of povoynik is still popular today, it has only been slightly modified, following new trends in fashion. This headdress combines beauty and originality of cut. There are similar varieties: soroka and khimona. The use of traditional motifs in fashion combines originality of cut and style.
What is a povoinik and a soroka
These headdresses are both new and traditional. In traditional Russian clothing, headdresses played an important role. They were not only for beauty, but also had an important semantic meaning. The povoynik was a headdress that only married women could wear. It was believed that it should cover the hair completely. Those who wore long braids put their hair under the povoynik. There was a belief that if even a hair came out, the devil could drag the unfortunate woman to the attic or send misfortune to her family.
In traditional costume, a woman's headdress could be the inner part of a headdress, on which a magpie or scarf was put on. These headdresses can be worn not only together, but also separately.
Additional information! In each province, the povoiniki had a special style that expressed the social status of the woman.
It was believed that if a married woman had her hair uncovered, it was a disgrace to her. If another woman tore off her headscarf or headdress in the heat of an argument, she could sue the offender. It was believed that power was hidden in hair. It was believed that if it was properly styled and completely covered, it would give the family strength and luck.
Unlike the men's hat, the headdresses in question had social and symbolic meaning.
For your information! There were many traditional women's headdresses. The povoynik was the most common, and the soroka was the richest and most prestigious.
There were different versions of this headdress: Diveevsky and others. The main one was considered to be the following:
- A kichka was put on the head. This is a soft canvas cap with a hard forehead protector. Wood or birch bark was used to make it. It could be flat or have protrusions on the sides (like in the Pomor costume).
- A cover was put on top. This was, in fact, a magpie. It was put on so that it covered the back of the head and hair. It was made of velvet, red calico or silk.
- The forehead piece was an ornament that was worn on the forehead part of the headdress. It had to match the other parts in size.
This form was not the only one. Over time, a large number of variations of the headdresses in question appeared.
For your information! This article provides a detailed description of what a soroka is, a povoinik (pattern, how to sew), and what to pay attention to when making it.
We sew an ancient headdress - a povoinik
Here we will tell you how to sew a headdress with your own hands, and a pattern for it will be described.
To sew this headdress, you will need 2 hours. For work, you need to prepare the following:
- threads;
- sewing machine;
- scissors;
- fabric for the outer part;
- lining fabric.
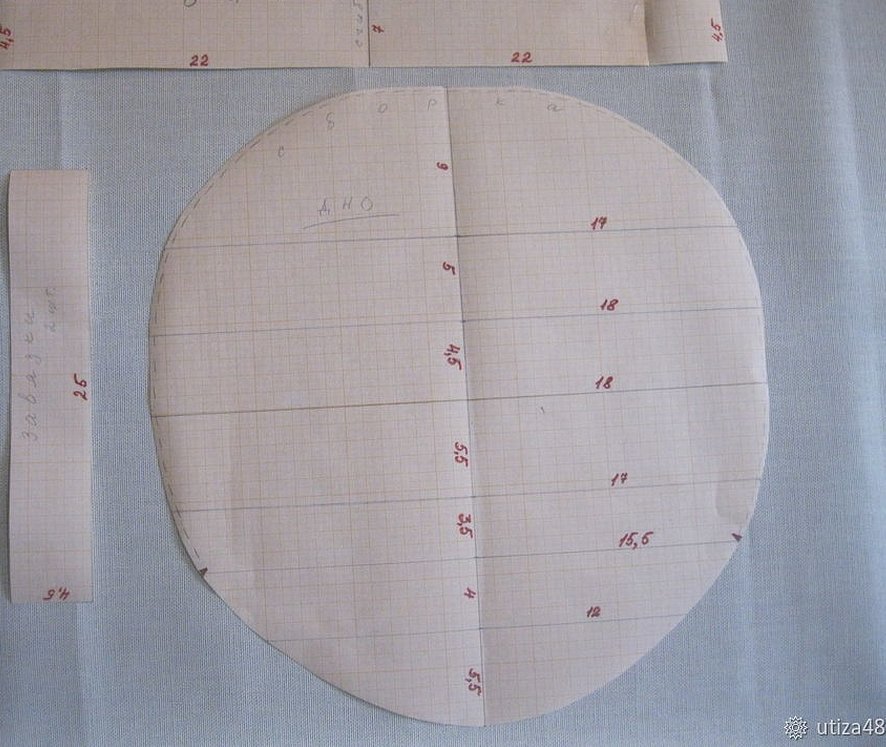
It is necessary to prepare a pattern for the headdress. It includes four parts:
- The bottom is round and is the main part of the headdress.
- The front part of the eyeglass case is decorated with a headband.
- You will need two garters that will be connected to the forehead and the bottom.
Each of the mentioned parts is cut out of the main natural fabric and the lining. The types of material are chosen according to the master's taste.
Additional information! For example, you can use velveteen for the lining and chintz for the outer.
The step-by-step instructions for sewing are as follows:
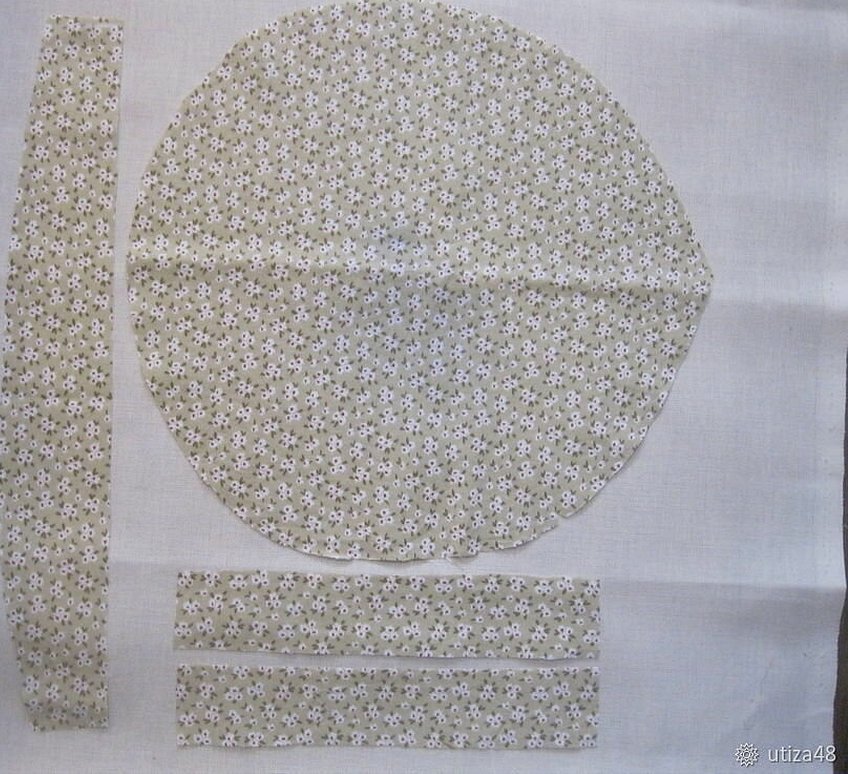
- Each of the parts indicated on the headdress (povoynik) pattern must be cut out from the main fabric and from the lining. Seam allowances can be omitted during production.
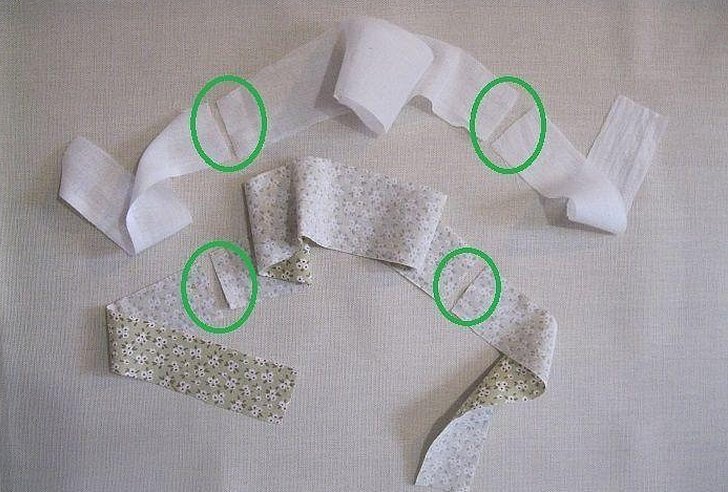
- Now you need to fold the parts with the right sides facing each other. The edges of the lower border of the headdress are marked with small cut-out corners on the pattern. The parts are folded so that these marks coincide. Between these marks along the edge at a distance of 5 mm from the edge, a seam is basted.
- Now the product needs to be turned to the front side and the edges carefully ironed.
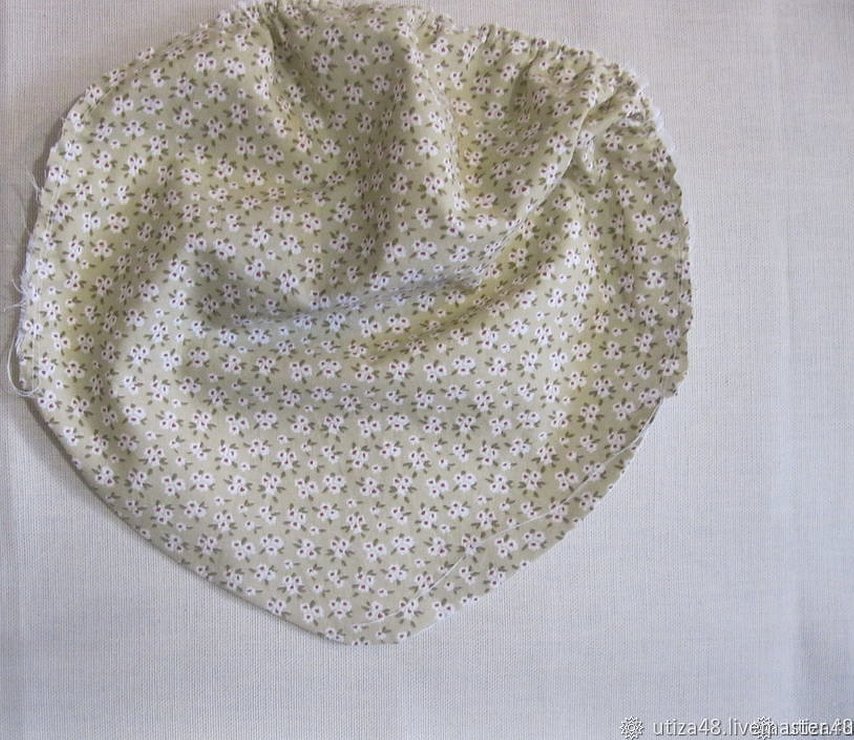
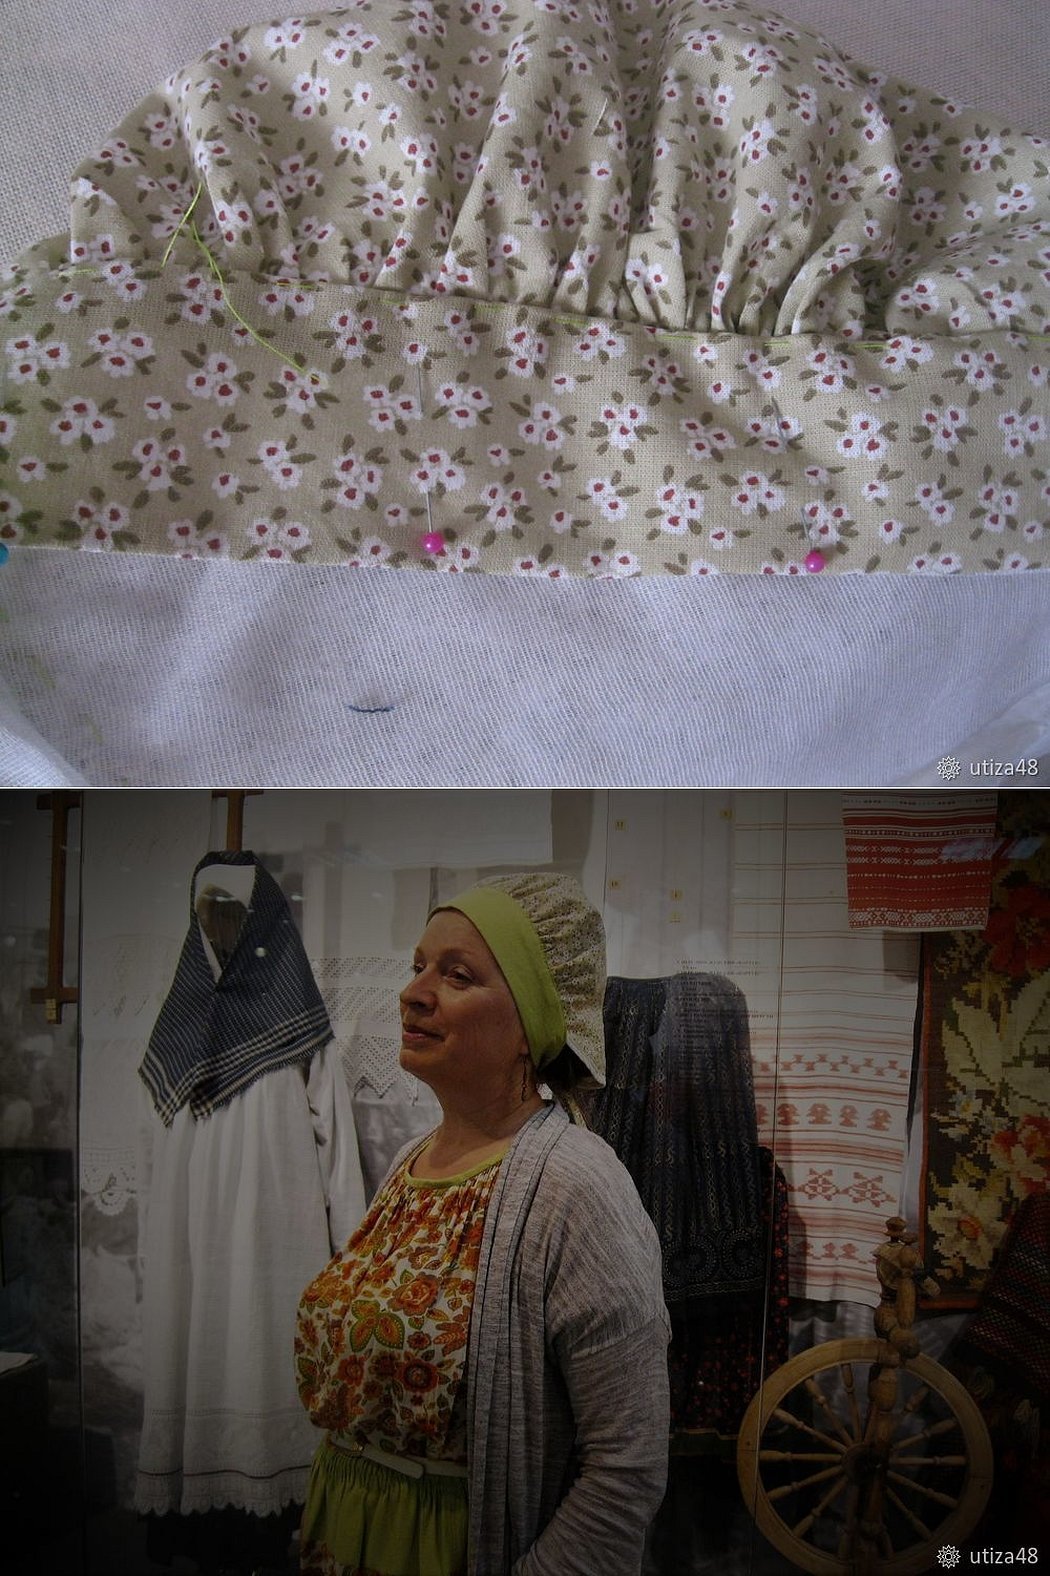
- Now you need to stitch the front part parallel to the edge with a double seam. It is made parallel to the edge at a distance of about 5 mm from the edge. This seam will be used to gather the edge of the headdress a little. Before stitching, the parts must be carefully pinned.
- Now you need to make a gathering and distribute it evenly along the edge. As a rule, the master makes the gathering thicker in the front part, and more sparse at the edges at the temples. The front edge should have a size corresponding to the circumference of the head.
- Now you need to prepare the headband and ties. In this case, the front and back parts are processed separately. A tie is sewn to the headband on each side.
- After the front and back sides have been stitched, they are carefully ironed.
- Both parts are placed next to each other and secured with pins. Along one side along the edge, both ties and the headband are sewn.
- Now the pieces are turned right sides out, folded and ironed. This must be done before sewing the headdress further.

- It is necessary to precisely determine the middle of the forehead band and mark it. Later, it will be necessary to sew the details to the middle of the bottom. They are applied to the inside of the bottom and sewn from the middle to the edge of the tie. First, this is done on one side, and then on the other. Then the forehead band is turned inside out and placed on the front side of the headdress.
- Now the second edge of the headband is basted and sewn on. After the edge of the headband is sewn on, the ties need to be ironed. Then the edges of the main fabric are folded so that they cover the back side and sewn on the machine.
Based on this master class, a beautiful headdress will be sewn.
Sewing a magpie
Below we will tell you how a soroka (headdress) can be sewn; the pattern and manufacturing procedure are described in detail, step by step.
To begin work, the following must be prepared:
- threads;
- pins;
- sewing machine;
- awl;
- measuring tape;
- sequins;
- textile;
- scissors;
- braid.
A magpie is a traditional and modern headdress with a hard band.
For your information! Women initially wore it over their headdress. Gradually, the soroka began to be used as an independent headdress.
The description of the production will be given taking into account the head circumference, which is 54 cm. The master class on sewing a magpie looks like this:
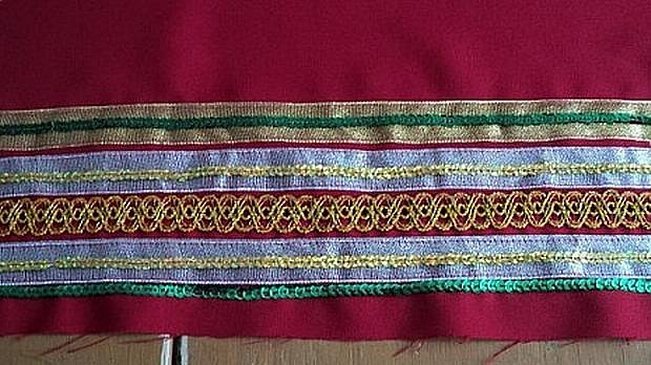
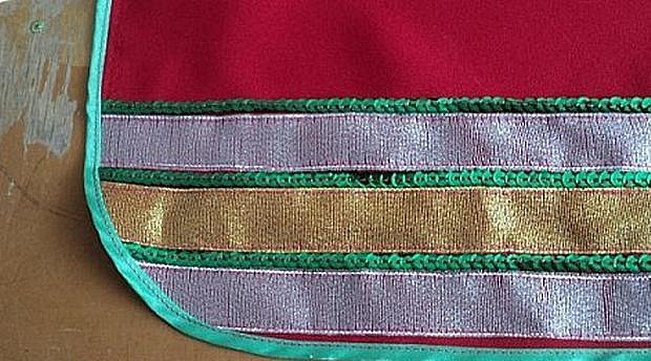
- In accordance with the head circumference, you need to cut out a strip 20 cm wide. You need to step back 2 cm from the edge, and then sew various decorations onto the 10 cm wide strip. You can use embroidery for this purpose. Appliques, beautiful braid, sequins or other types of decorations are also suitable for this. A two-centimeter strip is left for hemming.
- Now the strip of fabric needs to be folded in half and stitched along the fold.
- To make it, you will need another piece of fabric. Its size is 50 by 70 cm. With this cut, the headdress will slightly cover the back. If the master does not consider it necessary to do so, he can take not 70 cm, but a little less.
- From the middle of the length, the front part is made rounded. On the back part, parallel to the straight edge, a strip with decorations is made. The corners can be slightly rounded or left straight, according to your choice.

- It is necessary to sew the edge with bias binding. This should be done only in the back part, starting from the middle. The front part does not need to be sewn.
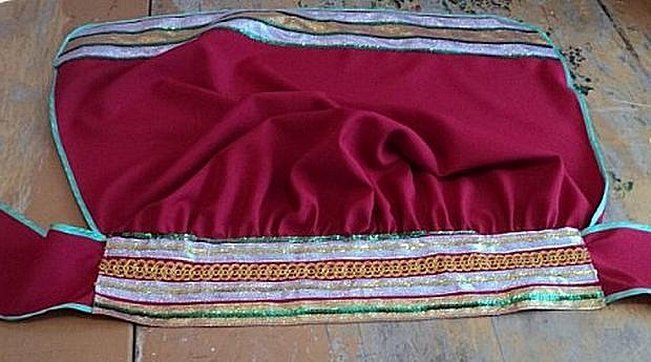
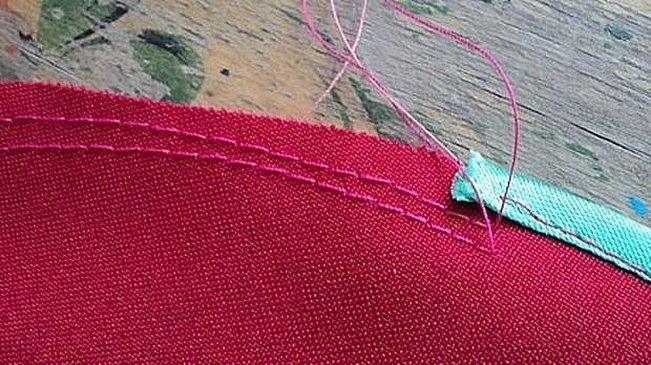
- A double seam is made in the rounded front part. It is made from one edge of the piping to the other. If you pull the threads, the edge of the fabric will gather. This must be done in such a way that the gathers go evenly and beautifully.
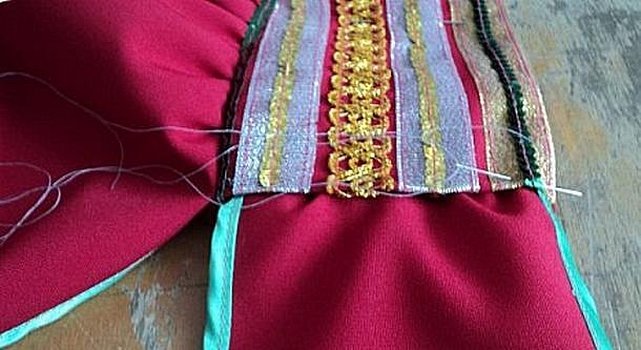
- The gathered edge needs to be sewn to the edge of the headband. For this, a 2 cm wide strip is used, which was left when sewing on the decorations. In this case, you need to sew only the edge of the strip where the decorations are located and do not touch the other half.
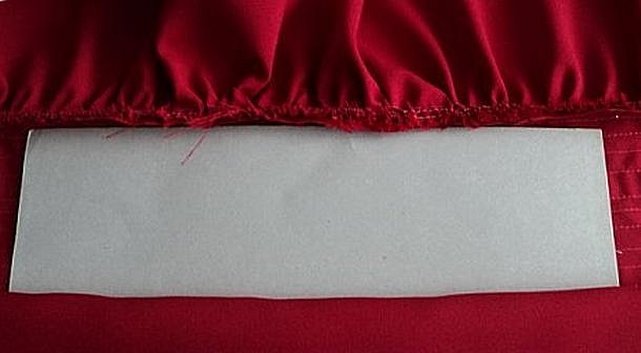
- Now the headdress is turned over and a strip of cardboard is installed, which will give strength to the band. It should be of such a width that its edge matches the edge of the strip with decorations.
- For the ties, two strips of fabric with rounded ends are used. They are trimmed with bias tape. The ties are attached to the sides of the headband. The joint is stitched.
- It is necessary to make several stitches in order to sew the cardboard to the inner part of the headband. This is necessary so that it does not shift when worn. This completes the sewing master class.
The traditional headdress has not lost its beauty even in our time.
Sewing Himona with Your Own Hands
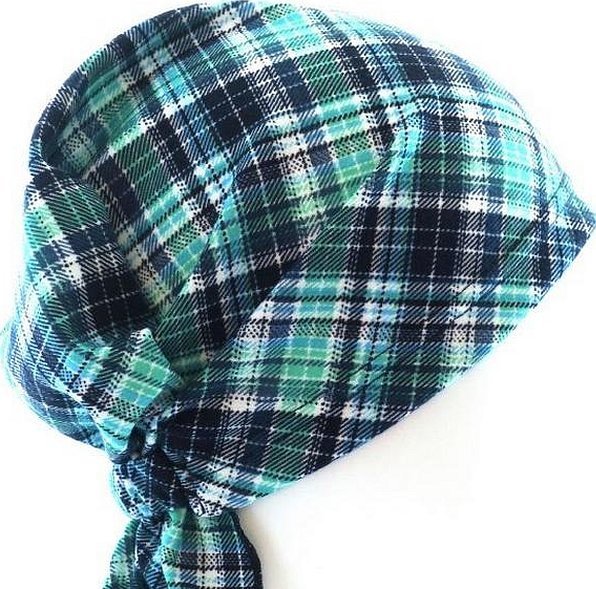
The khimona headdress has features that combine elements of a soroka and a povoinik. When creating it, you can focus on sewing a povoinik. It should be taken into account that the bottom is not round, but elongated. When wearing this summer headdress, the ties are connected at the back so that the main part of the khimona is inside. In some versions, the headdress is connected at the back with a wide elastic band. Step-by-step instructions can be based on sewing a povoinik.
Traditional headdresses - povoinik and soroka - combine originality and beauty. They can be used as an independent headdress or as a separate part of it. You can sew not only according to classic patterns, but also make the necessary changes, giving a new look to the traditional outfit. Now, headdresses of other cuts are also used, similar in appearance, but having a slightly different cut. One such example is the khimona, which was described above.


