Options for a do-it-yourself pincushion made of fabric with patterns are easy to find on the Internet, they are easy to make. Even novice needlewomen make them. For a beautiful decoration of the workplace, they make pillows, pumpkins, cacti, hearts. In skillful hands, the pincushion takes on a variety of shapes.
- What materials and tools to prepare
- Types of seams
- How to sew a pincushion with your own hands: master class
- How to sew a funny cat-pincushion: master class
- Pincushion “Turtle” with diagrams
- Round pincushion with butterfly decoration
- How to make a "Blooming Cactus" pincushion step by step
- Sewing a pincushion "8 funny Chinese"
- DIY Felt Cactus Pincushion
- Pincushion in the form of a hat
- Pincushion "Caterpillar" made of fabric with patterns
- How to properly visualize your desired reality
- How to sew a pumpkin-shaped pincushion: step-by-step master class
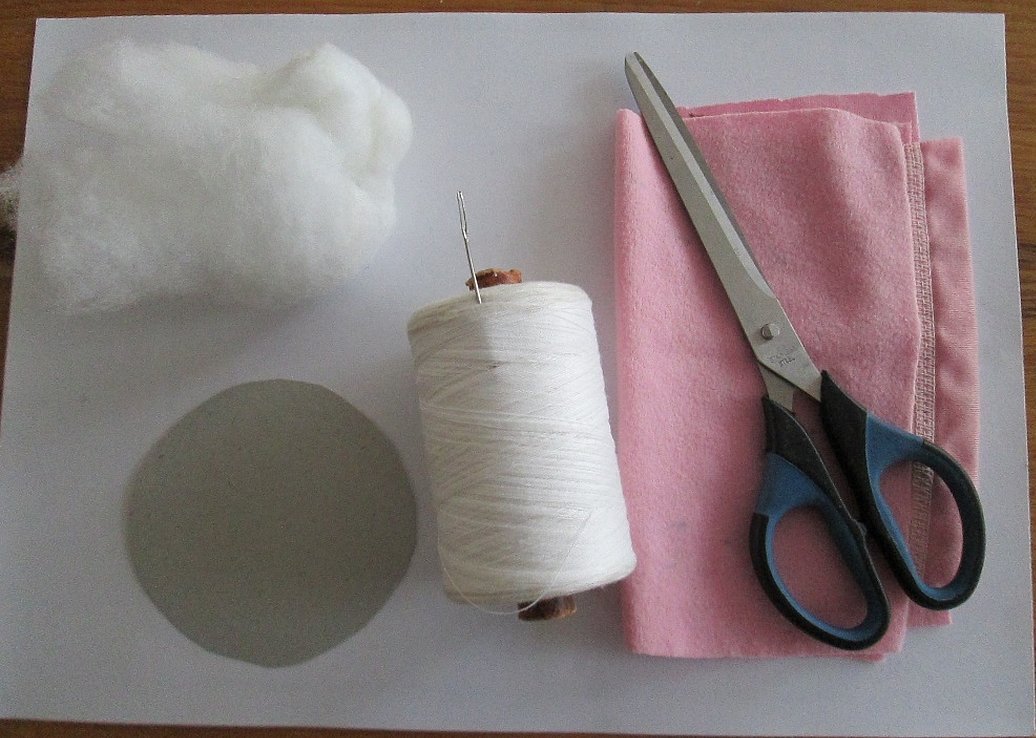
What materials and tools to prepare
Before you learn how to sew your first pincushion with your own hands, you should collect all the tools for the job:
- fabric of your choice;
- needle depending on the material;
- threads of matching color;
- scissors, paper, pencil and chalk;
- filler;
- beads, ribbons for decoration, buttons, if necessary.
The craftswoman usually already has all the necessary materials and tools. There will be no problems if the shape of the product is simple, for example, a pillow, and no decorations are required.
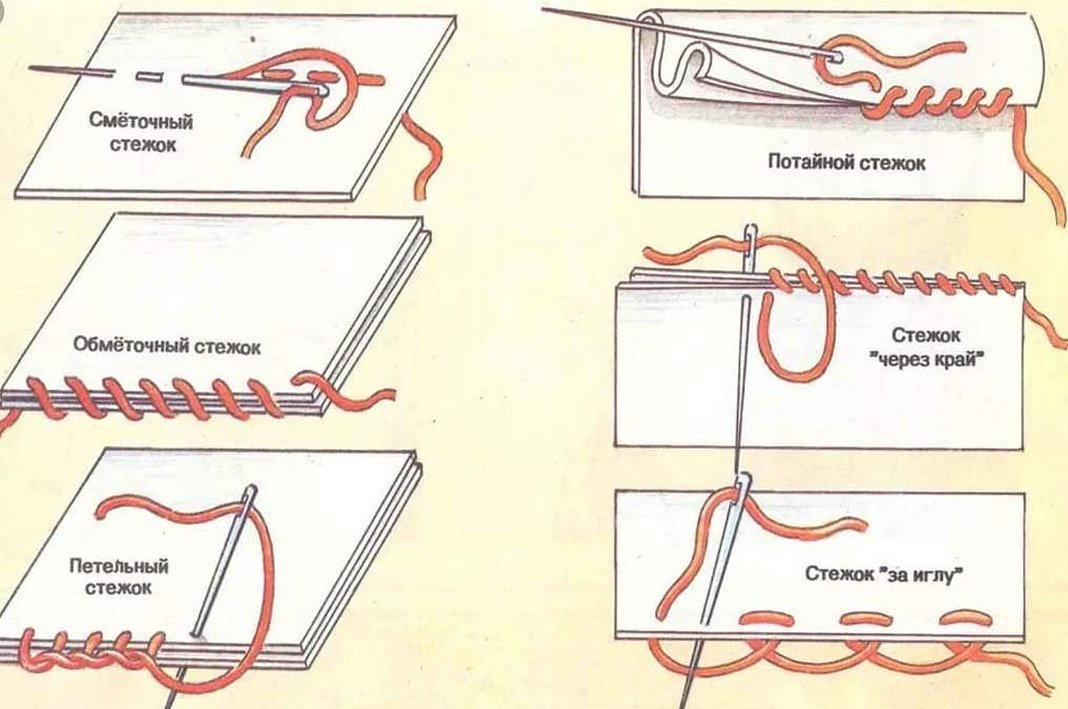
Types of seams
There are several types of stitches used for hand sewing. They perform different functions. Which stitches are suitable for the process:
- straight stitches. Used to temporarily join fabric. Indicate allowances;
- Oblique stitches are suitable for temporary and permanent fastening. More durable;
- Cross stitches are used to hem the lower parts of the garments. This preserves the appearance of the fabric;
- buttonhole stitches for overcasting;
- special stitches for attaching buttons, loops, snaps.
Complex projects may require all types of stitches and lines.
How to sew a pincushion with your own hands: master class
Pincushions can be of different colors, sizes, shapes and levels of complexity. But there is a principle by which all products are created.
How to sew a pincushion:
- Draw the details on cardboard. Cut out.
- Draw everything on the fabric. Cut out.
- Connect the parts, leaving space for filling.
- If the product consists of several parts, connect them.
- Fill the figurine.
- Decorate. Sew on a loop or other fastening device.
Depending on the complexity of the pillow, the sequence of actions changes.
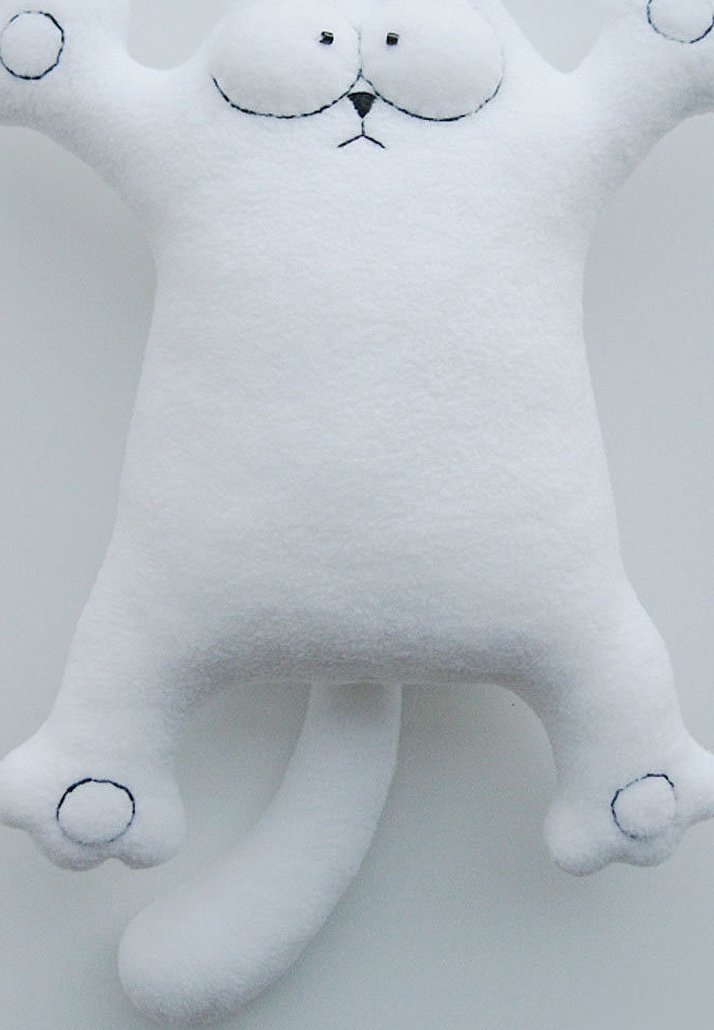
How to sew a funny cat-pincushion: master class
An ideal option for creating a needle holder with children or for beginner needlewomen is Simon's cat. It has a simple shape. And such a product looks funny. The pattern can be used to sew a children's toy.
Instructions:
- Print or draw the pattern and transfer it onto the fabric.
- There should be two blanks of the main shape, 2 eyes, 2 tails. Leave 5 mm for seams.
- Sew the base, leaving a space. Use an overcast stitch.
- Sew the tail.
- Make cuts for bends and corners.
- Turn the cat right side out.
- Fill the figure. Sew all the holes.
- Sew on the eyes. They should have stuffing in them.
- Embroider the nose, eye contours, and mouth with thread.
- Sew beads onto the eyes to resemble pupils.
Attention! You can use more than just white.
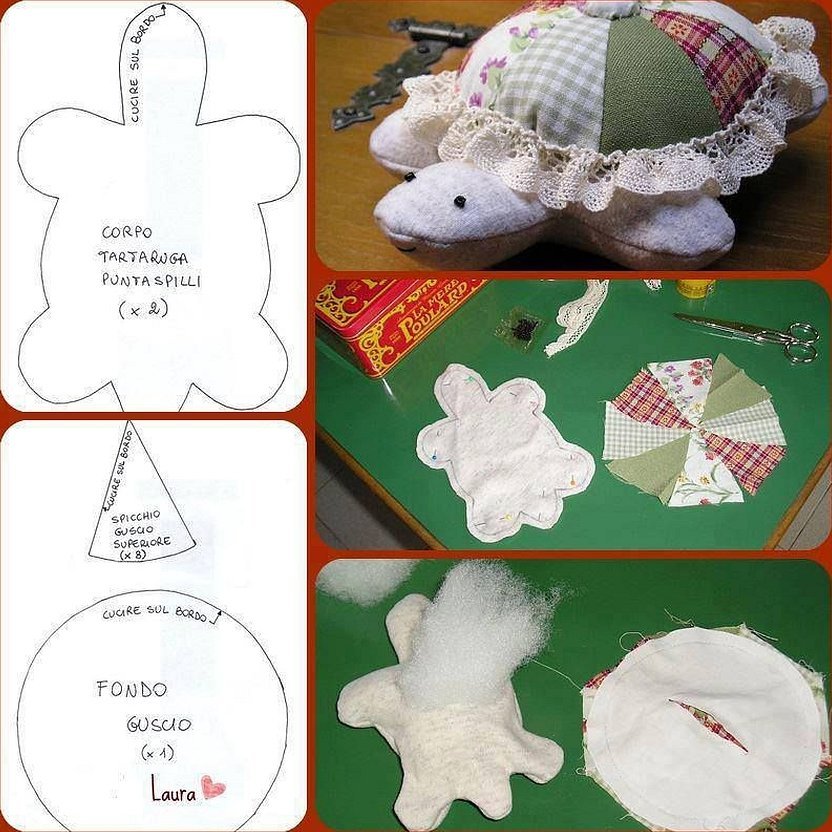
Pincushion “Turtle” with diagrams
The turtle is an option for beginner craftswomen. It is easy to stick needles into it. And sewing does not take much time.
Master class on sewing:
- Draw the details and transfer them to the fabric. Leave space for seams.
- Cut out all the pieces.
- Connect the triangles. You get a circle.
- Sew two circles together.
- Sew two parts of the turtle base. Don't forget to fill it.
- Connect the two parts together.
- Sew on the eyes.
- Decorate the shell with lace if desired.
You can use different colors for the shell to make the holder bright.
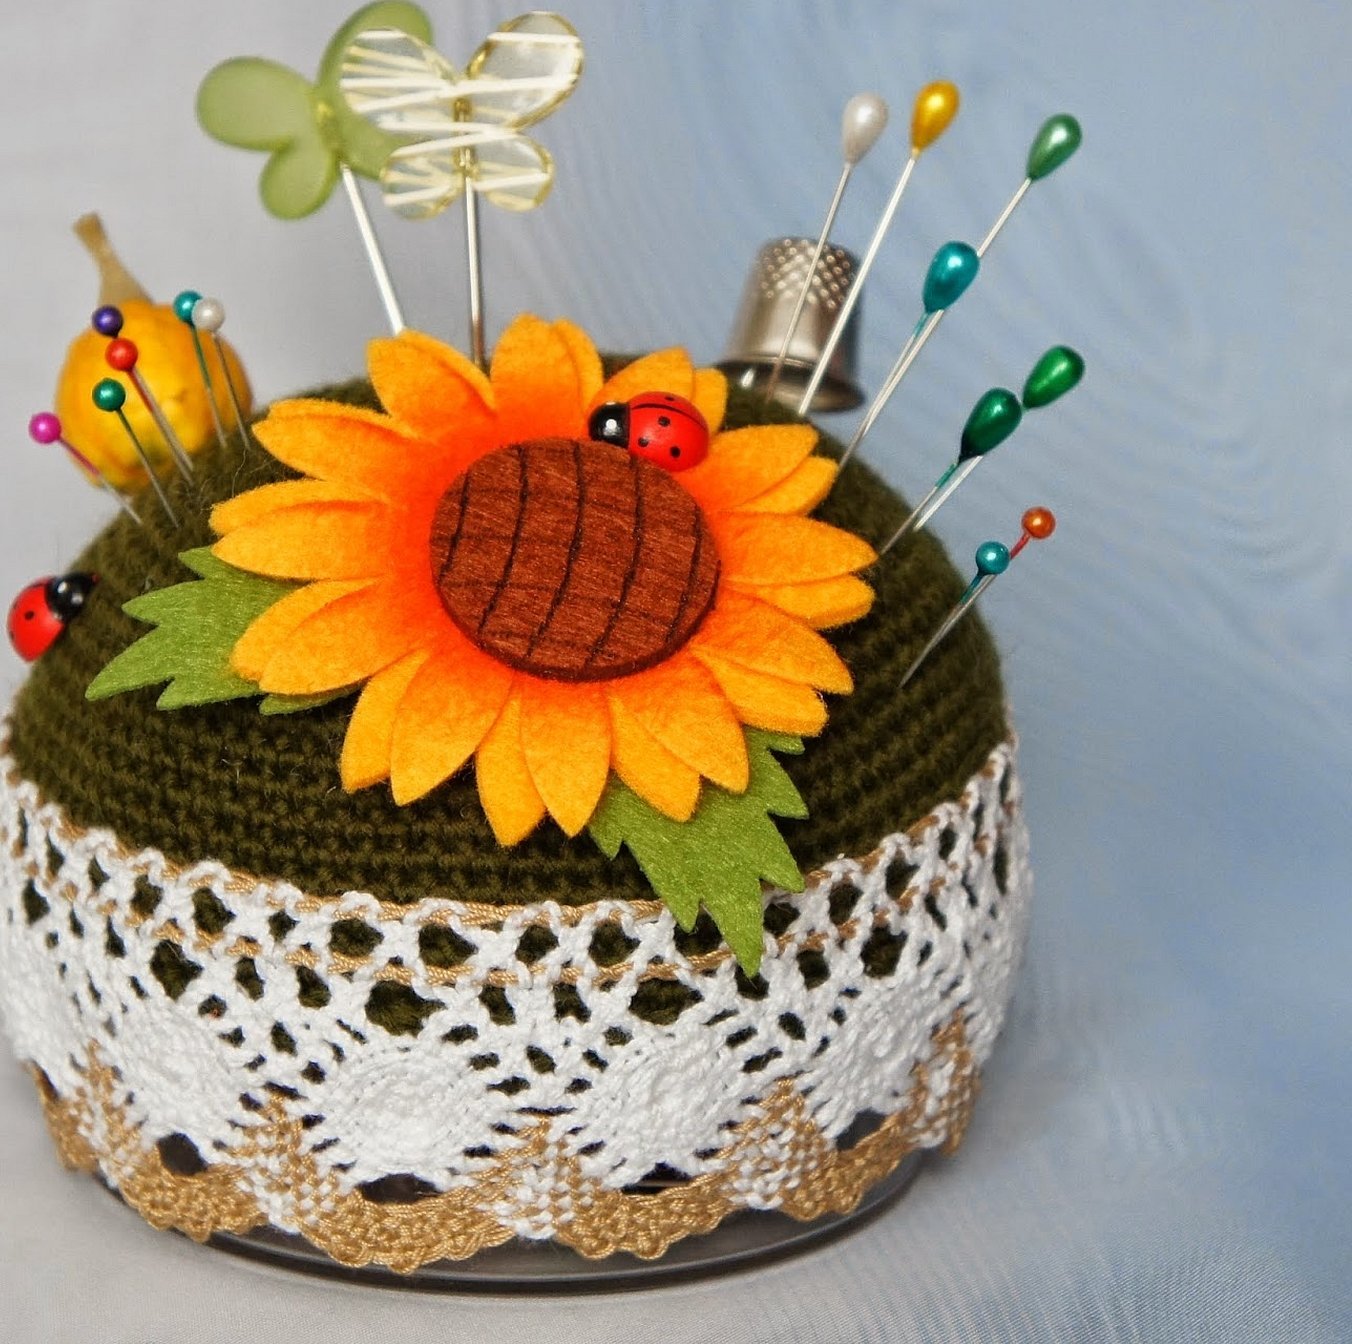
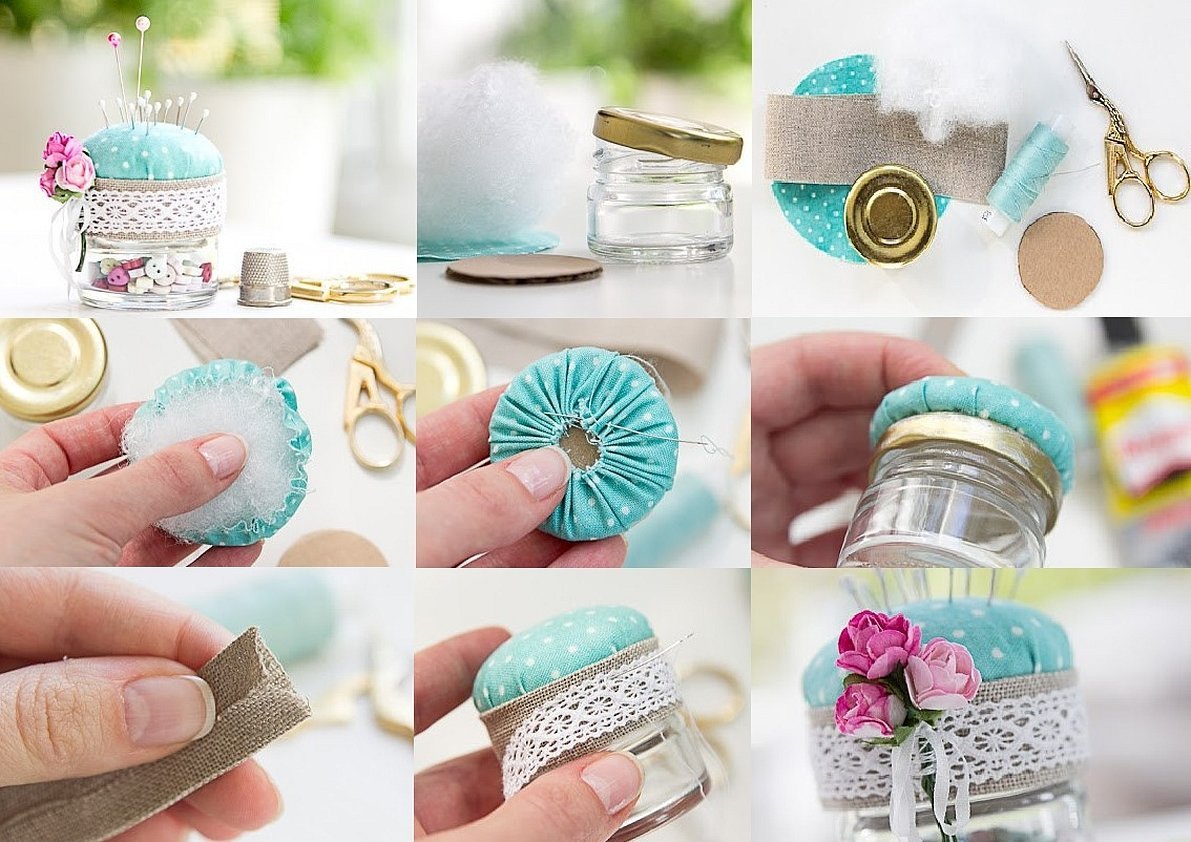
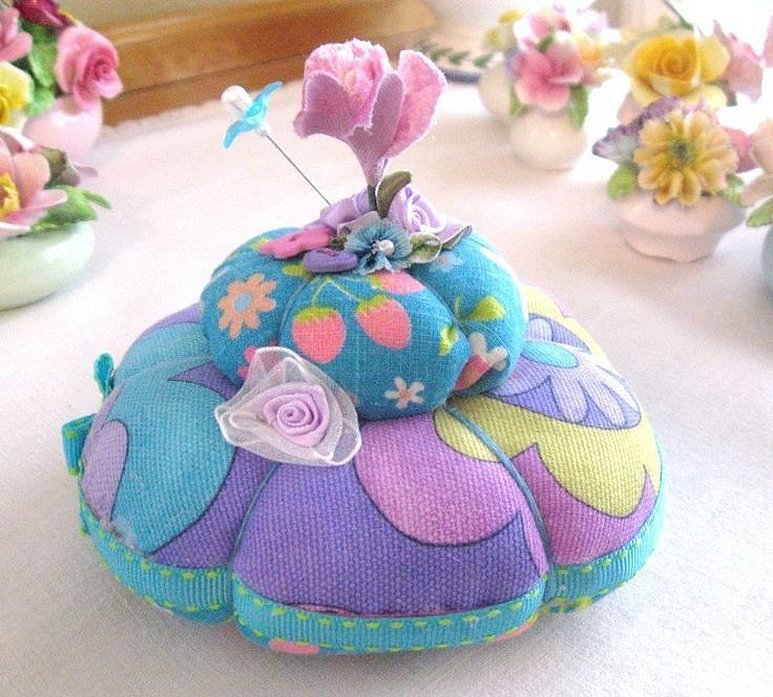
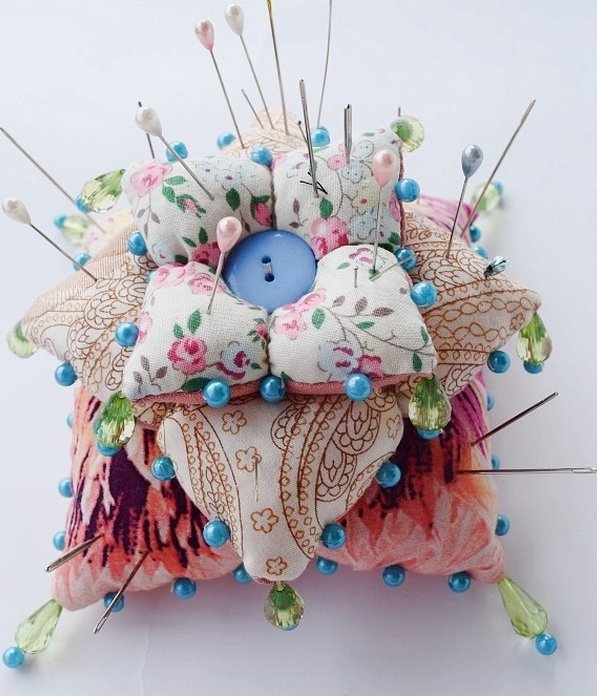
Round pincushion with butterfly decoration
Pincushions embroidered with satin ribbons on disks are popular. But for beginner seamstresses they may seem complicated. Therefore, it is recommended to make a round pillow with a butterfly on top.
Subsequence:
- Cut out 2 circles of the same radius from paper or cardboard, and 2 more smaller ones. Transfer to paper.
- Connect the fabric. You should get 2 different circles. Fill with stuffing as desired.
- Trace each circle with thread to create a flower-like shape.
- Make a butterfly-shaped decoration in the center. It can be big, small, with beads or ribbons, as desired.
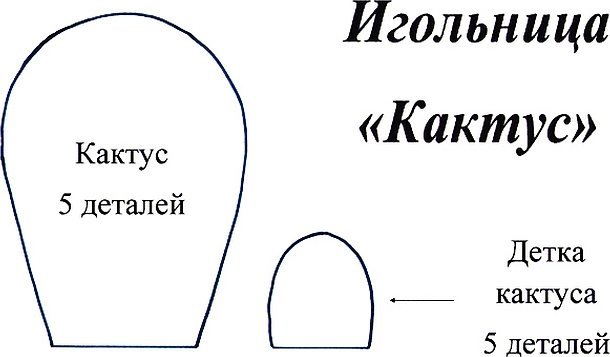
How to make a "Blooming Cactus" pincushion step by step
The pincushion, the pattern of which is attached, is made of felt or other fabric. A flower is added if desired.
Instructions:
- Draw on cardboard the details for the 5 "children" and the main "petals" of the cactus. Each is sewn from two semi-ovals.
- Sew the parts of the adult cactus and the “babies” to the center.
- Fill all the details and sew.
- Add a flower in the middle.
- Also attach the small part. Do not add a flower to it.
Attention! You can embroider a cactus with beads to make it look like needles.
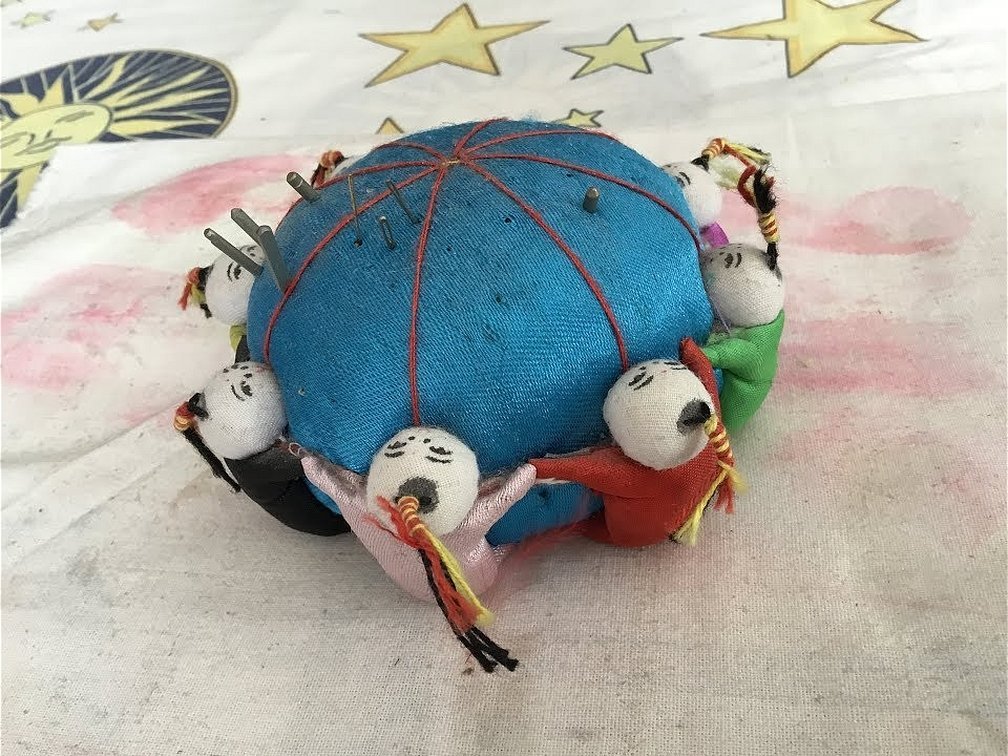
Sewing a pincushion "8 funny Chinese"
A pincushion with cross stitch or with the number 8 in China brings popularity. Therefore, it is symbolic to create an unusual product for needles.
Sewing:
- Draw the details for the main part. Cut out two circles, sew them together, and stuff them with filler. You will get a simple round pillow. Outline it with a thread, dividing it into halves. Cover the fastening with a flower or other detail in the center.
- Make 8 Chinese. Sew the bodies from rectangles. Make the heads in the form of white circles. Add eyes from beads. Hair from knitting threads.
- Sew each Chinese little thing to the place where the thread is.
The fabric for making can be brighter, with patterns.
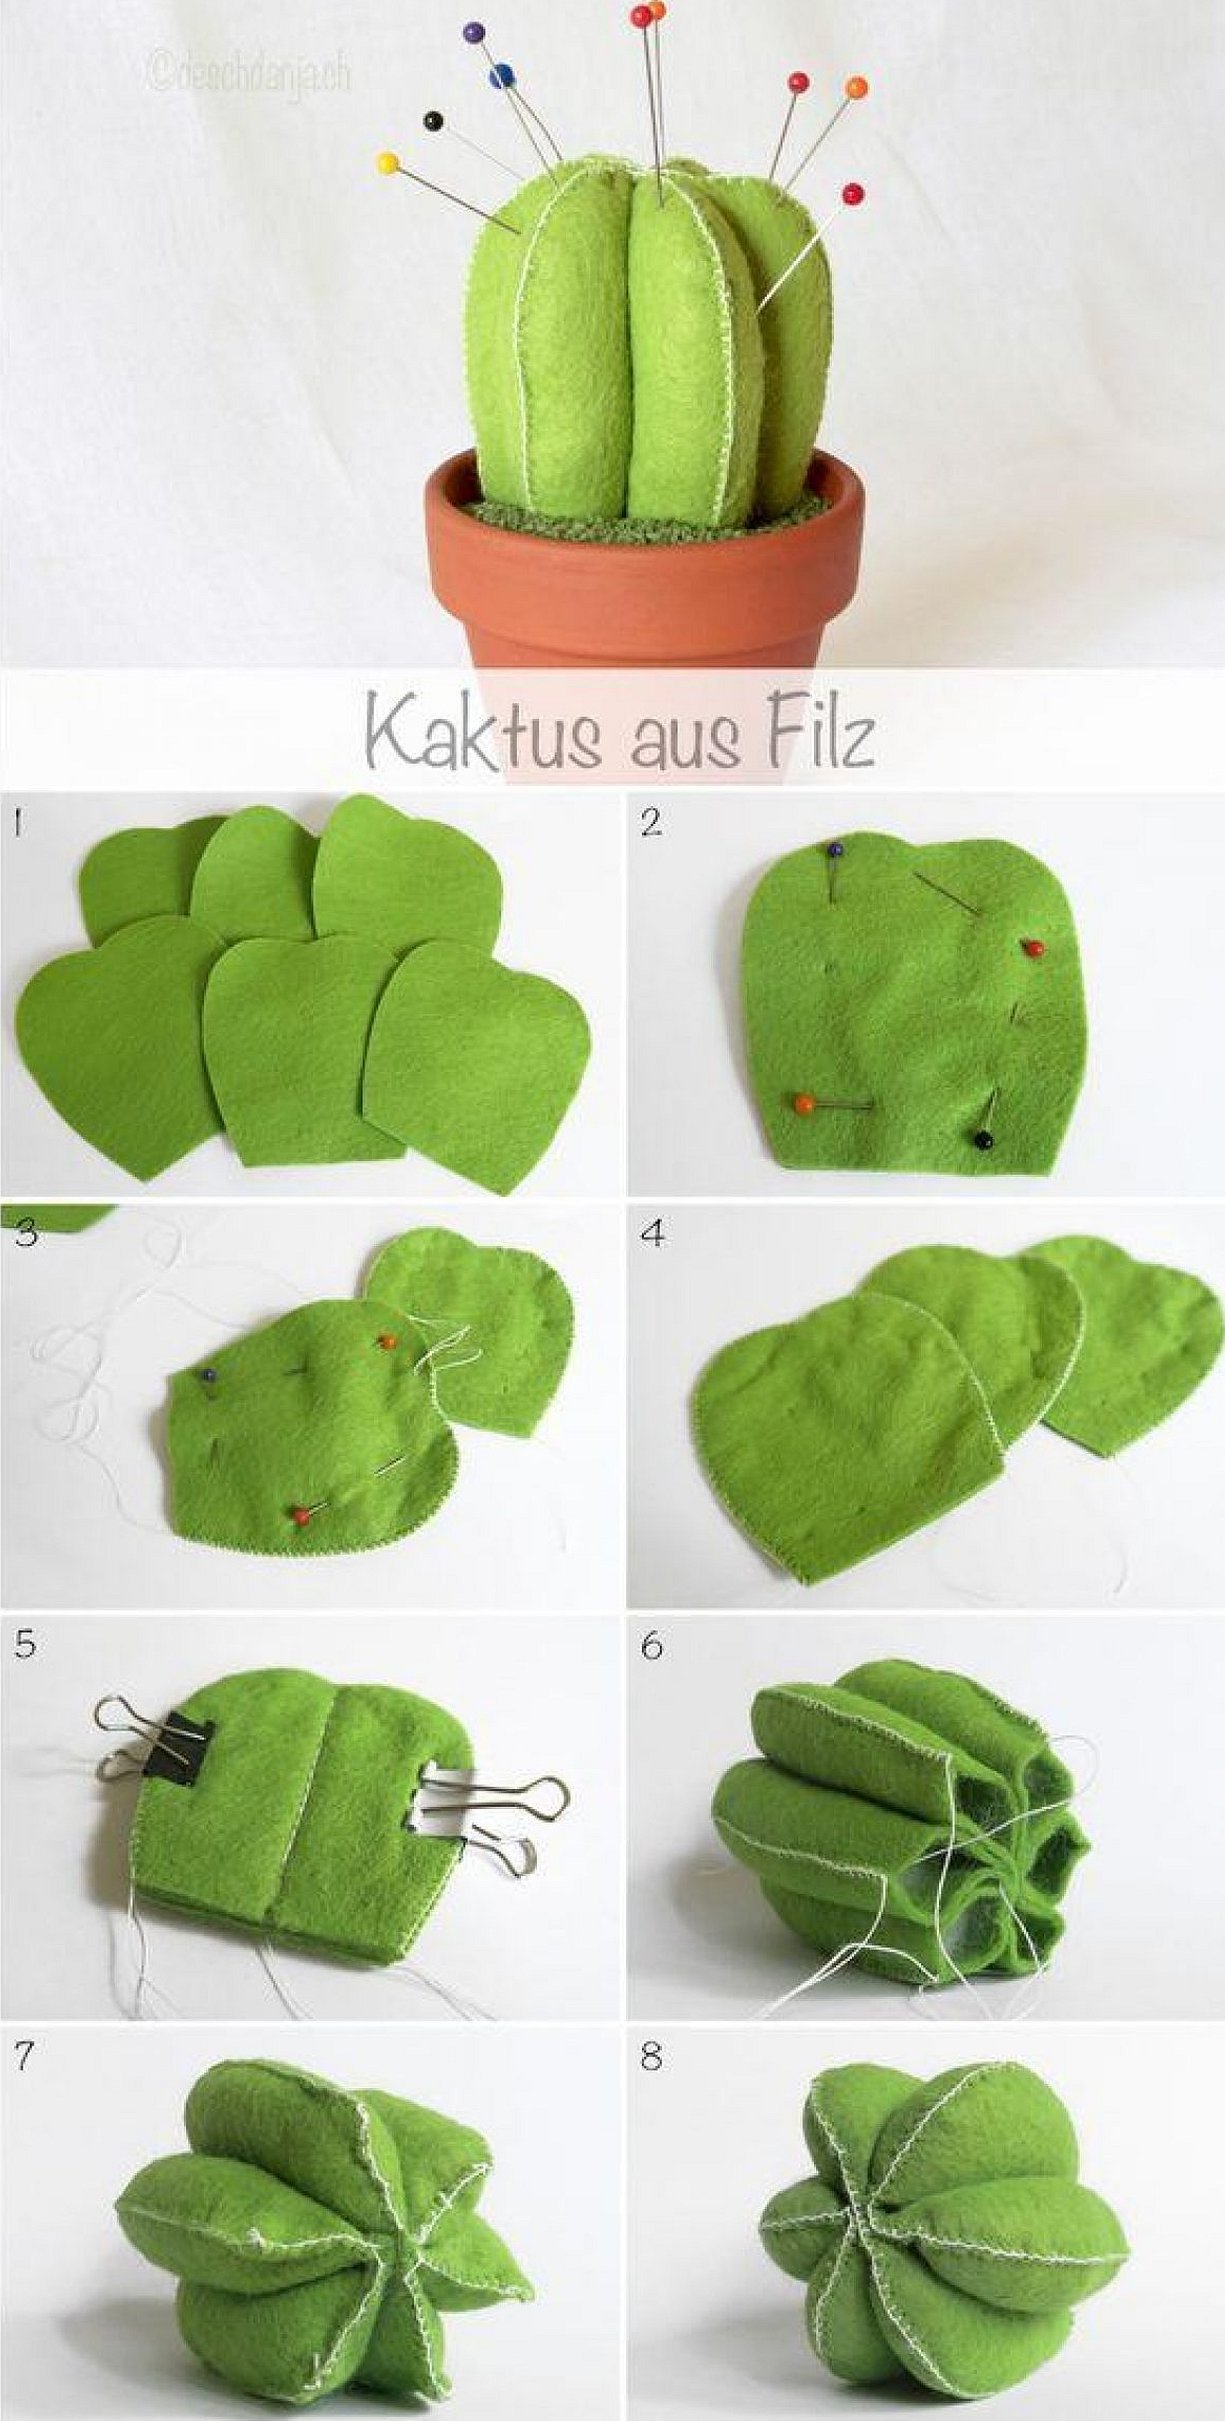
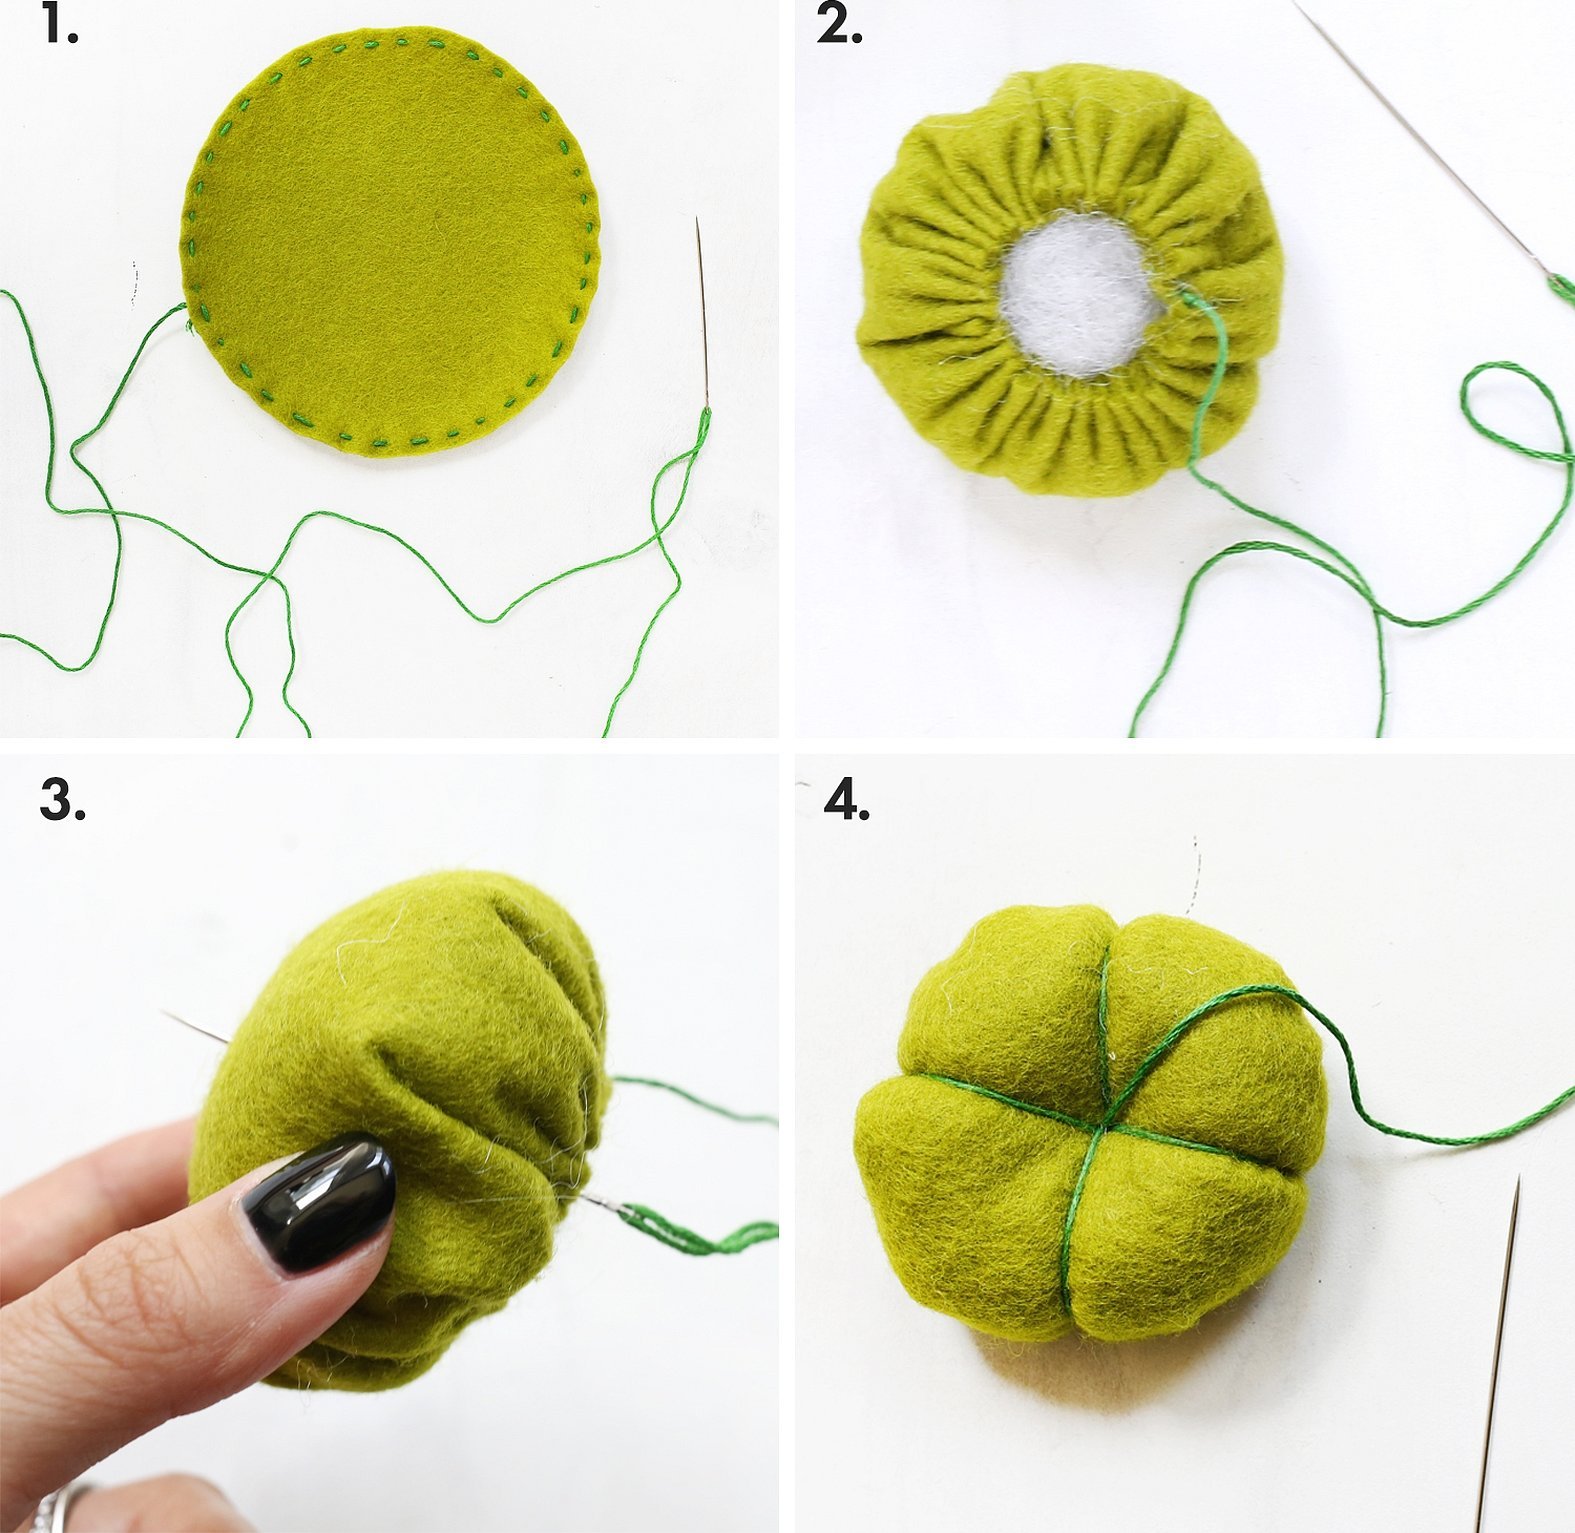
DIY Felt Cactus Pincushion
A DIY mannequin pincushion with patterns is a more complex option for decorating a workspace. It is easy to make a cactus out of felt.
How to sew:
- Cut out 6 main pieces in green.
- Sew the pieces together to make 3 pieces.
- Sew each one in the middle.
- Connect.
- Add filler.
- Place the cactus in the pot.
The cactus pot can be used to store other sewing supplies or buttons.
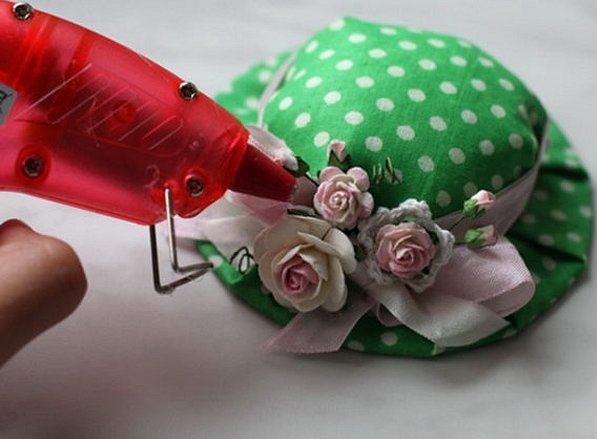
Pincushion in the form of a hat
The master class on making a hat confirms that even a creative thing is easy to make.
Manufacturing:
- Cut a circle with a diameter of 10 cm according to the template.
- Cut 2 circles 22 and 14 cm from fabric.
- Connect the fabric by wrapping it around the cardboard circle. Make folds.
- Take the filling and cover it with 14 cm of fabric to form a ball.
- Connect the two halves with glue.
Decorate with ribbons or flowers.
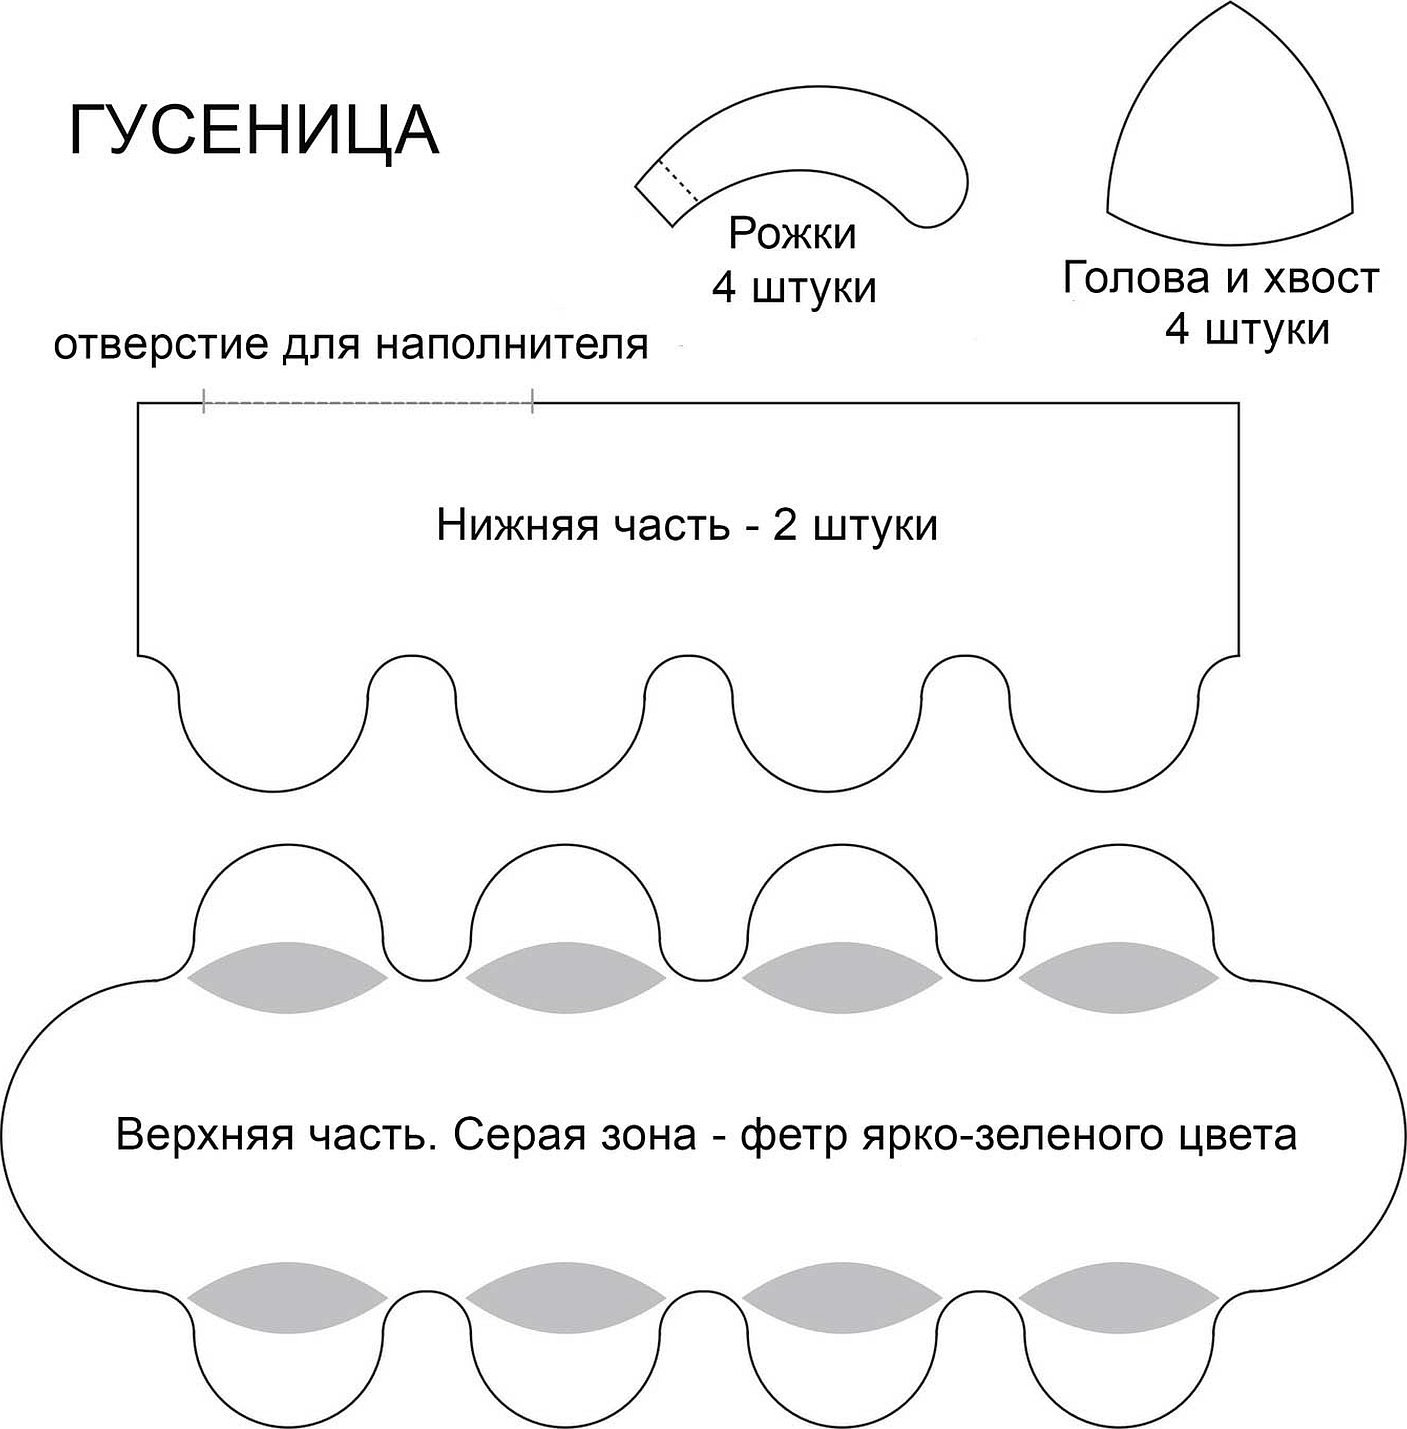
Pincushion "Caterpillar" made of fabric with patterns
The satin ribbon embroidery of the pincushion can be used to create a caterpillar.
Simple sewing option:
- Cut out the top, two bottom parts, horns and head with tail.
- Connect the 2 lower parts to leave space for filling. Sew to the upper part.
- Fill the base and sew it up.
- Make 2 horns by sewing and stuffing the parts for them. Do the same with the head and tail.
- Connect all parts to the body.
- Make eyes.
Important! You can decorate the caterpillar with a bow made of ribbons.
How to properly visualize your desired reality
Visualization of the desired reality can be transferred to sewing. Making a needle holder is one of the options. It is easy to create a pillow for needles in the form of the desired object using patterns for beginners. But even the simplest stand for needles will help to constantly face what needs to be brought to reality. And to achieve the goal.
How to sew a pumpkin-shaped pincushion: step-by-step master class
The pumpkin is an option for those who are just beginning to master sewing. If desired, the work can be made more difficult.
Let's sew a simple pincushion:
- Cut 2 circles from fabric.
- Sew the parts together.
- Pull them off.
- Fill to form a ball.
- Divide with a thread.
You can use orange material, in which case brown thread will do.
A pincushion can be not only useful, but also interesting. To make it part of the interior, buttons, hats, animals, etc. are created. The product does not necessarily have to be complicated. It is complemented with embroidery, beads and bows for brightness.


