The art of handicrafts is usually a rarity. In the modern world, high technology allows us to produce a huge number of types of clothing. However, it is not always of sufficient quality and exactly matches the required size. When making it yourself, if you strictly follow the relevant instructions, you can make dresses that combine a stylish look and practicality. The article tells you how to start working on creating your own wardrobe.
- Taking measurements to create a pattern
- What is a pattern and how to approach it
- What is pattern control and what is it for?
- Preparing fabric for cutting a dress
- Progress of work
- Basic pattern
- Front shoulder line
- Back armhole line
- Bust dart
- Neckline
- The Easiest DIY Dresses: Practical Recommendations
- How to sew a simple dress from knitwear with your own hands
- Dress with a round yoke theory
- Pattern of a floor-length dress
- Dress pattern with straps
- Simple DIY Maternity Model
- Guipure dress practice
- How to sew a simple evening dress
- How to quickly sew a home dress without a pattern
- Various tips for beginners
Taking measurements to create a pattern
When a future master just starts learning cutting and sewing, he tries to determine what the first step is. It is necessary to start working on a new product by drawing up a pattern, and it is impossible without first taking measurements.
It is necessary to approach the taking of measurements very carefully. It is necessary to remember that mistakes in this matter will lead to the production of uncomfortable clothes.
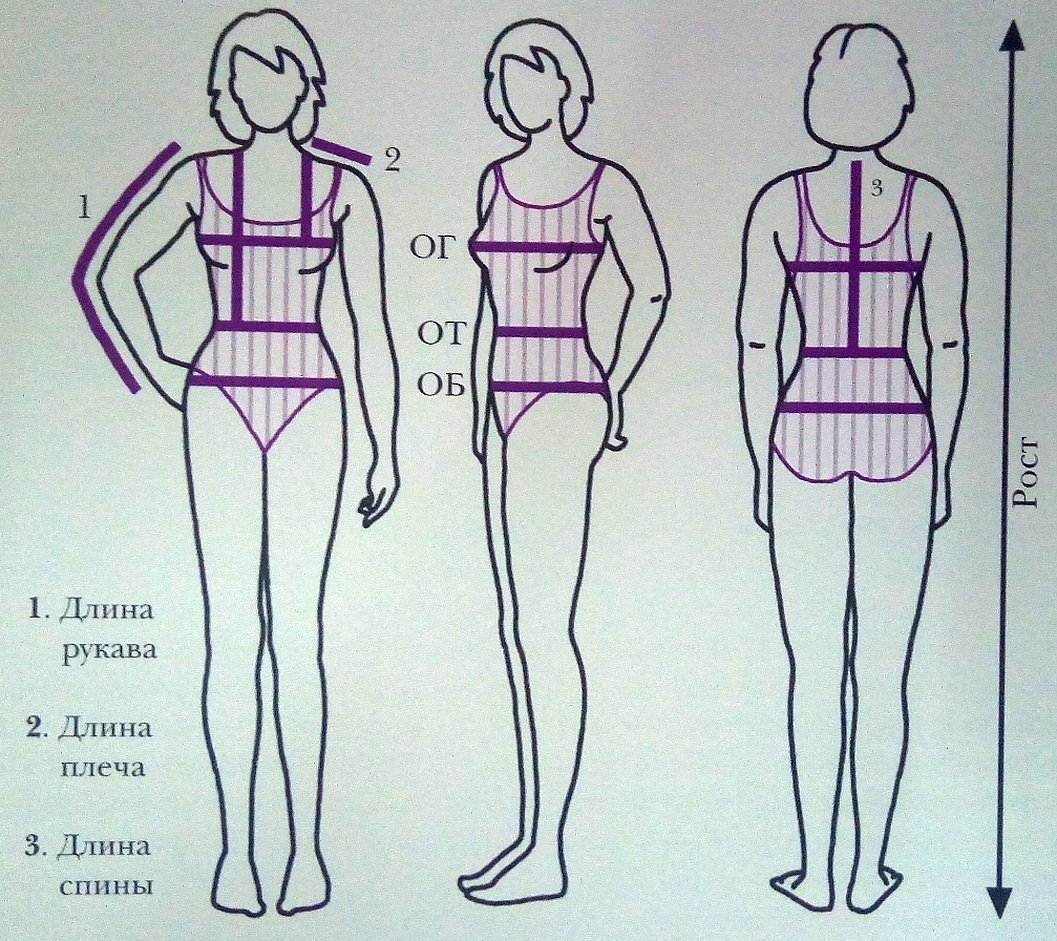
To ensure that the figures obtained are as accurate as possible, the following must be taken into account.
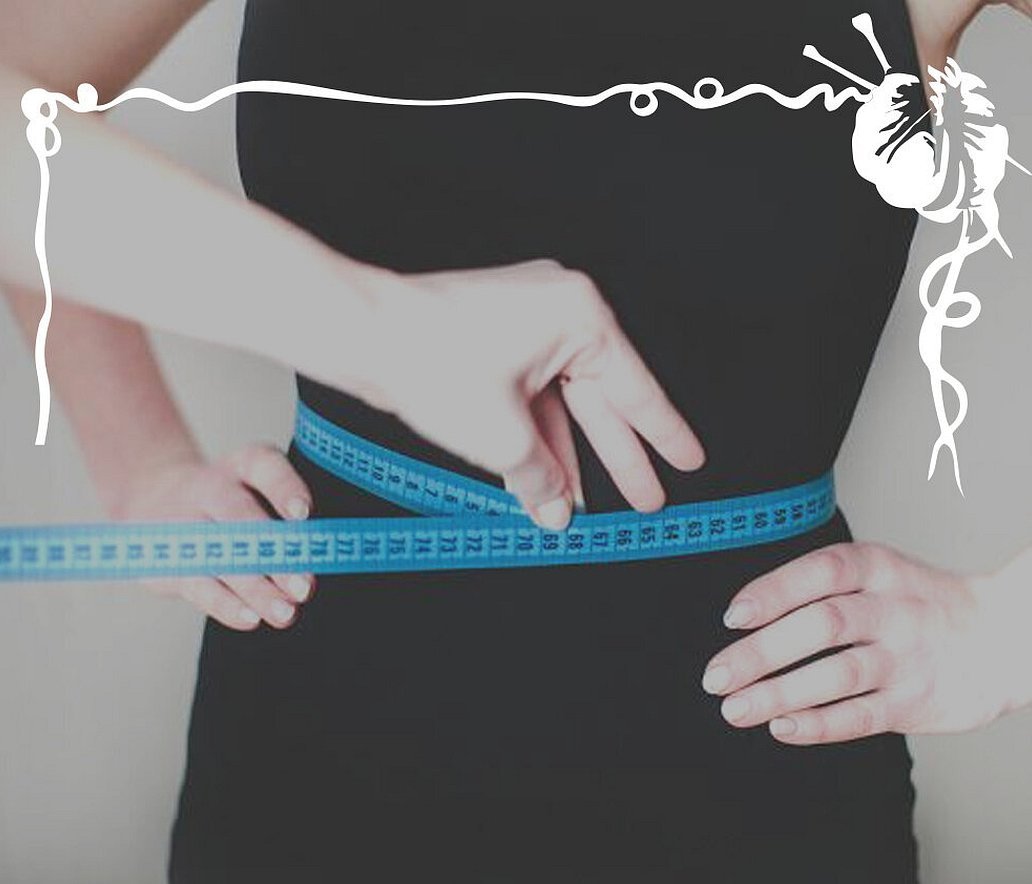
- When taking measurements, do not pull the tape measure too tightly or hold it too loosely.
- Measurements should be taken in tight-fitting clothing to avoid distorting the results.
- During this procedure, you must stand straight, maintaining your posture.
Usually, the chest, neck, waist, and hips are measured. The armhole size, the height from the waist to the neck, and the length to the floor are measured.
In some cases, additional measurements may be required.
What is a pattern and how to approach it
Usually, a drawing made according to strict rules is used to create a dress, or a standard pattern is used. In some cases, this procedure can be simplified by the fact that the pattern will consist of several simple figures.
The basis of the pattern is the measurements obtained in advance. Although in some cases it is allowed to cut the fabric directly, nevertheless, usually first the patterns are made from thick paper or other similar material.
After this, pieces of the required size are cut out of the fabric and a dress is made from them in a precisely defined order. This procedure is more complicated than making a duvet cover, but in fact consists of similar steps.
What is pattern control and what is it for?
After the pattern has been created, it is necessary to check its correctness. To do this, a model is created using unbleached ligature. It is allowed to make it from paper, pinned with pins, but such a check will be of less quality.
It is necessary to feel how the dress, which has not yet been sewn, fits the body and evaluate its intended appearance.
Preparing fabric for cutting a dress
In order to transfer a pattern from templates to fabric with high quality, this procedure must be properly organized.
To do this, you will need a table of sufficient size, pins to secure the fabric, and chalk. After the dimensions have been transferred to the fabric, you need to check how accurately this was done. To do this, you need to measure the main parts. If everything is done correctly, you can proceed to further work.
Progress of work
When creating a pattern, you need to pay special attention to the most difficult moments. These issues will be discussed in more detail below.
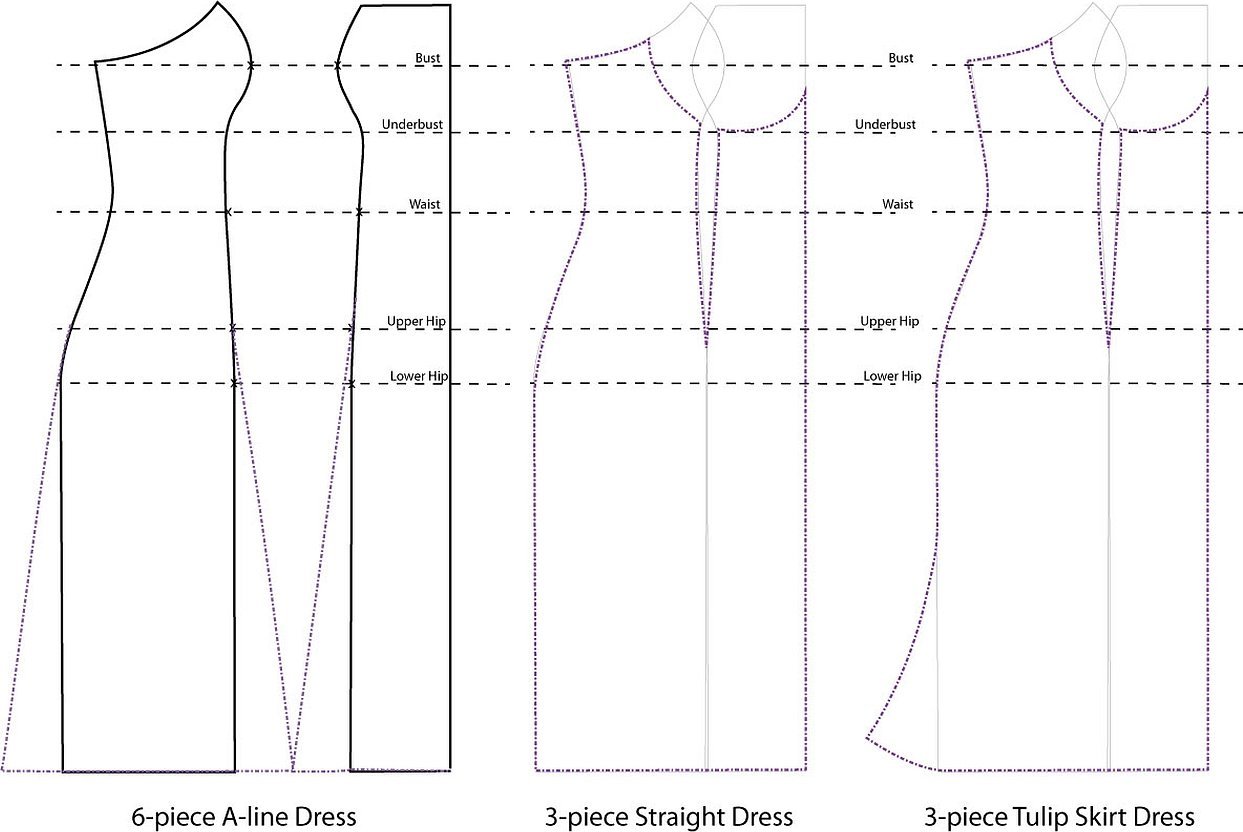
Basic pattern
When constructing a basic pattern, you can use one of the standard drawings. It is necessary to construct a pattern taking into account the required degree of fit: a fitted, semi-fitted or loose dress.
Next, you need to make adjustments to it according to the measurements taken.
Front shoulder line
This seam may be made evenly or shifted forward or backward due to inaccuracies in cutting. This circumstance is usually revealed during pattern inspection. In this case, you need to do the following:
- If there is a forward shift, then the corresponding strip is cut from the shoulder of the back and attached to the pattern of the shelf.
- If the shoulder line is shifted back, then the strip is cut from the shoulder of the shelf and attached to the back.
Important! After the changes are made, the shoulder line will be made even.
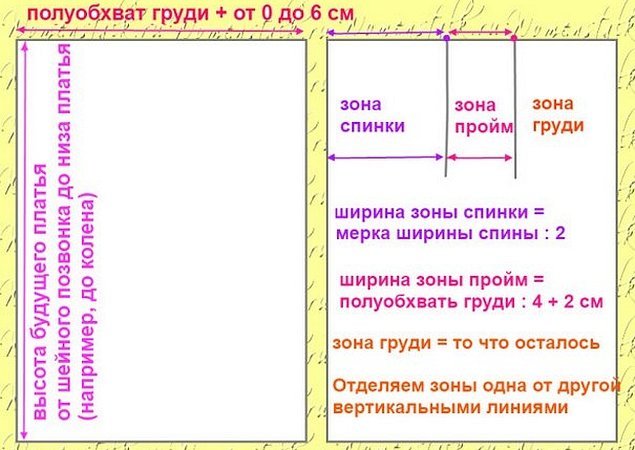
Back armhole line
When creating a pattern, the drawing is conventionally divided into three zones: the back, the armhole, and the chest. The first part has a size equal to half the width of the back, the armhole corresponds to half the half-girth of the chest, divided by four. The remaining part is the front pattern.
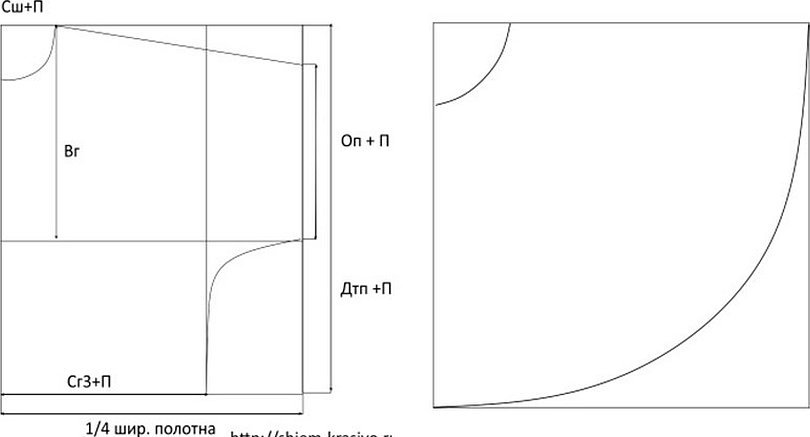
Bust dart
To calculate the length of the dart, you need to subtract the half-girth of the waist from the half-girth of the chest. This is the excess fabric that needs to be hidden. Usually, the following are used for this: a chest dart, sewing in the back and in the shelf.
Typically, in each of these cases, about a third of the calculated amount is removed.
Neckline
To determine the size of the back neck, divide the half-girth of the neck by three and add 1-1.5 cm. To calculate the height, multiply the half-girth of the neck by 0.15 and add 7 mm.
The front of the neck is the same width as the back, but the depth is one centimeter greater.
The Easiest DIY Dresses: Practical Recommendations
For beginning dressmakers, there are opportunities to make dresses of various styles on their own. The most popular options for sewing according to a pattern will be discussed below.
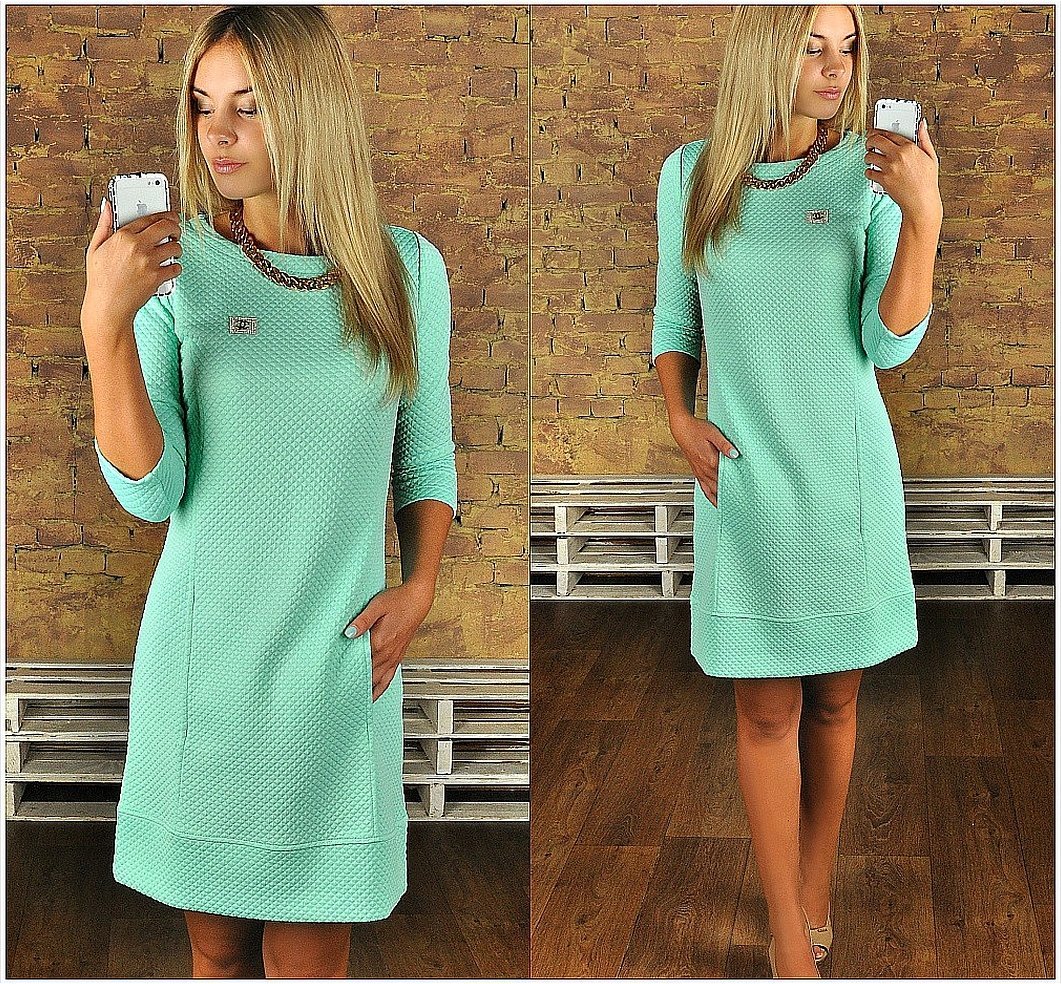
How to sew a simple dress from knitwear with your own hands
To create a pattern, you need to do the following:
- Step back 4 cm from the top edge. Move slightly away from the edge horizontally and mark the starting point.
- Now measure the length of the back. On its basis, place the waist line horizontally.
- From the last one, measure the distance to the hips.
- You need to take half the length of the back and draw a corresponding line.
- The bottom edge is adjusted according to the desired length of the dress.

- From the point initially fixed, draw a neck in the form of a semicircle, which rests on the left and upper sides of the drawing.
- Draw a slightly rounded line from above to the hip level. In this case, you need to take into account the measurements taken earlier.
- At the lowest level, a slight narrowing of two centimeters is made.
- A horizontal segment equal to half the width of the back is drawn from the center. At this point, a mark is made at the top of the shoulder end. From there, the sleeve of the required length is measured. At its end, the sleeve circumference is measured perpendicularly.
Then the completed drawing is pinned to the fabric and the fabric is cut out. 2 cm are added to the fabric for each seam. To create a dress, it is enough to stitch the side and shoulder seams and process the bottom of the dress by folding the fabric.
Before sewing, you need to baste the fabric and try on the resulting product. After that, sew on the details. Now the dress is completely ready. It can be used to create various styles (for example, boho).
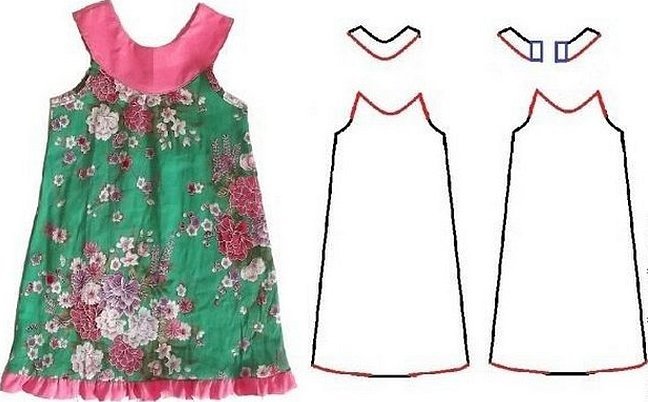
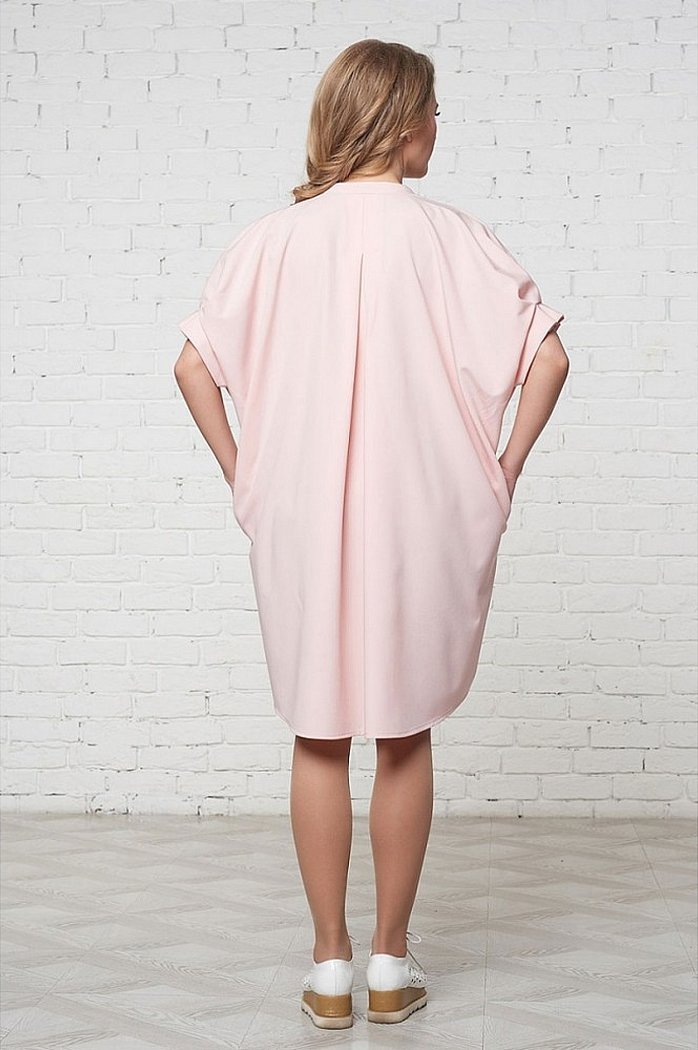
Dress with a round yoke theory
Below we will tell you how to sew a yoke with your own hands:
- For convenience, you can use an old T-shirt. Place it on a flat surface. Measure the full length from the top.
- From the armpits, draw a trapezoid, which will determine the shape of the product. The lower edge should be slightly rounded. In this case, the edges should be a few centimeters higher in relation to the middle.
- You need to draw the shape of the yoke. To do this, draw a strip of the appropriate width along the neck. It needs to be cut off. In this case, it is necessary to provide for seam allowances. Usually, the lower cut line goes through the tops of the armpits.
- The resulting fabric is made in the form of a ring. It must be cut from the back. Thus, the fabric will be in the form of a semicircle.
- At the cuts, you need to add 3 cm on both edges to insert the fasteners. Buttons or snaps are usually used for this purpose.
Having made the yoke according to this pattern, you need to sew it to the top of the dress.
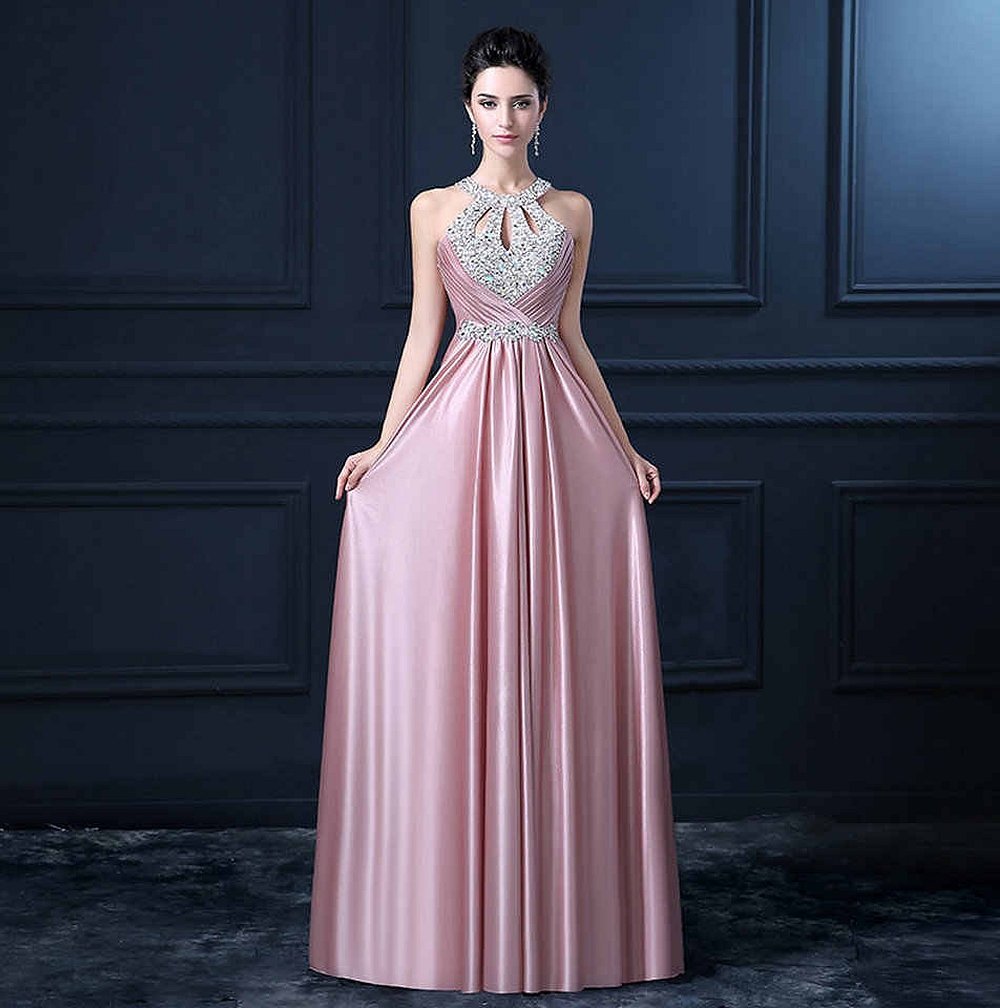
Pattern of a floor-length dress
In this case, you can proceed in different ways:
- Make the dress the appropriate length.
- Create a small train so that it completely covers the legs.
Important! Dresses made in this style effectively emphasize the figure, allow you to better feel the beauty and grace, and express sophistication.
Before the pattern making process, you need to think through your future image in detail.
The cutting must be done in the following sequence:
- Use a basic pattern for cutting.
- It is necessary to take into account the previously taken measurements in the drawing.
- When cutting, for convenience, you can consider the upper and lower levels separately.
- The image of the skirt is drawn taking into account the required length and the cuts that are planned to be made.
- The bodice is cut taking into account the necessary darts and inserts.
Once the cutting is finished, you can use it as a basis for a dress sewn by yourself.

Dress pattern with straps
Such models expose the neck and shoulders as much as possible, emphasizing the beauty of a woman’s or child’s figure.

To make a pattern correctly, you need to take measurements of the chest, waist and hips.
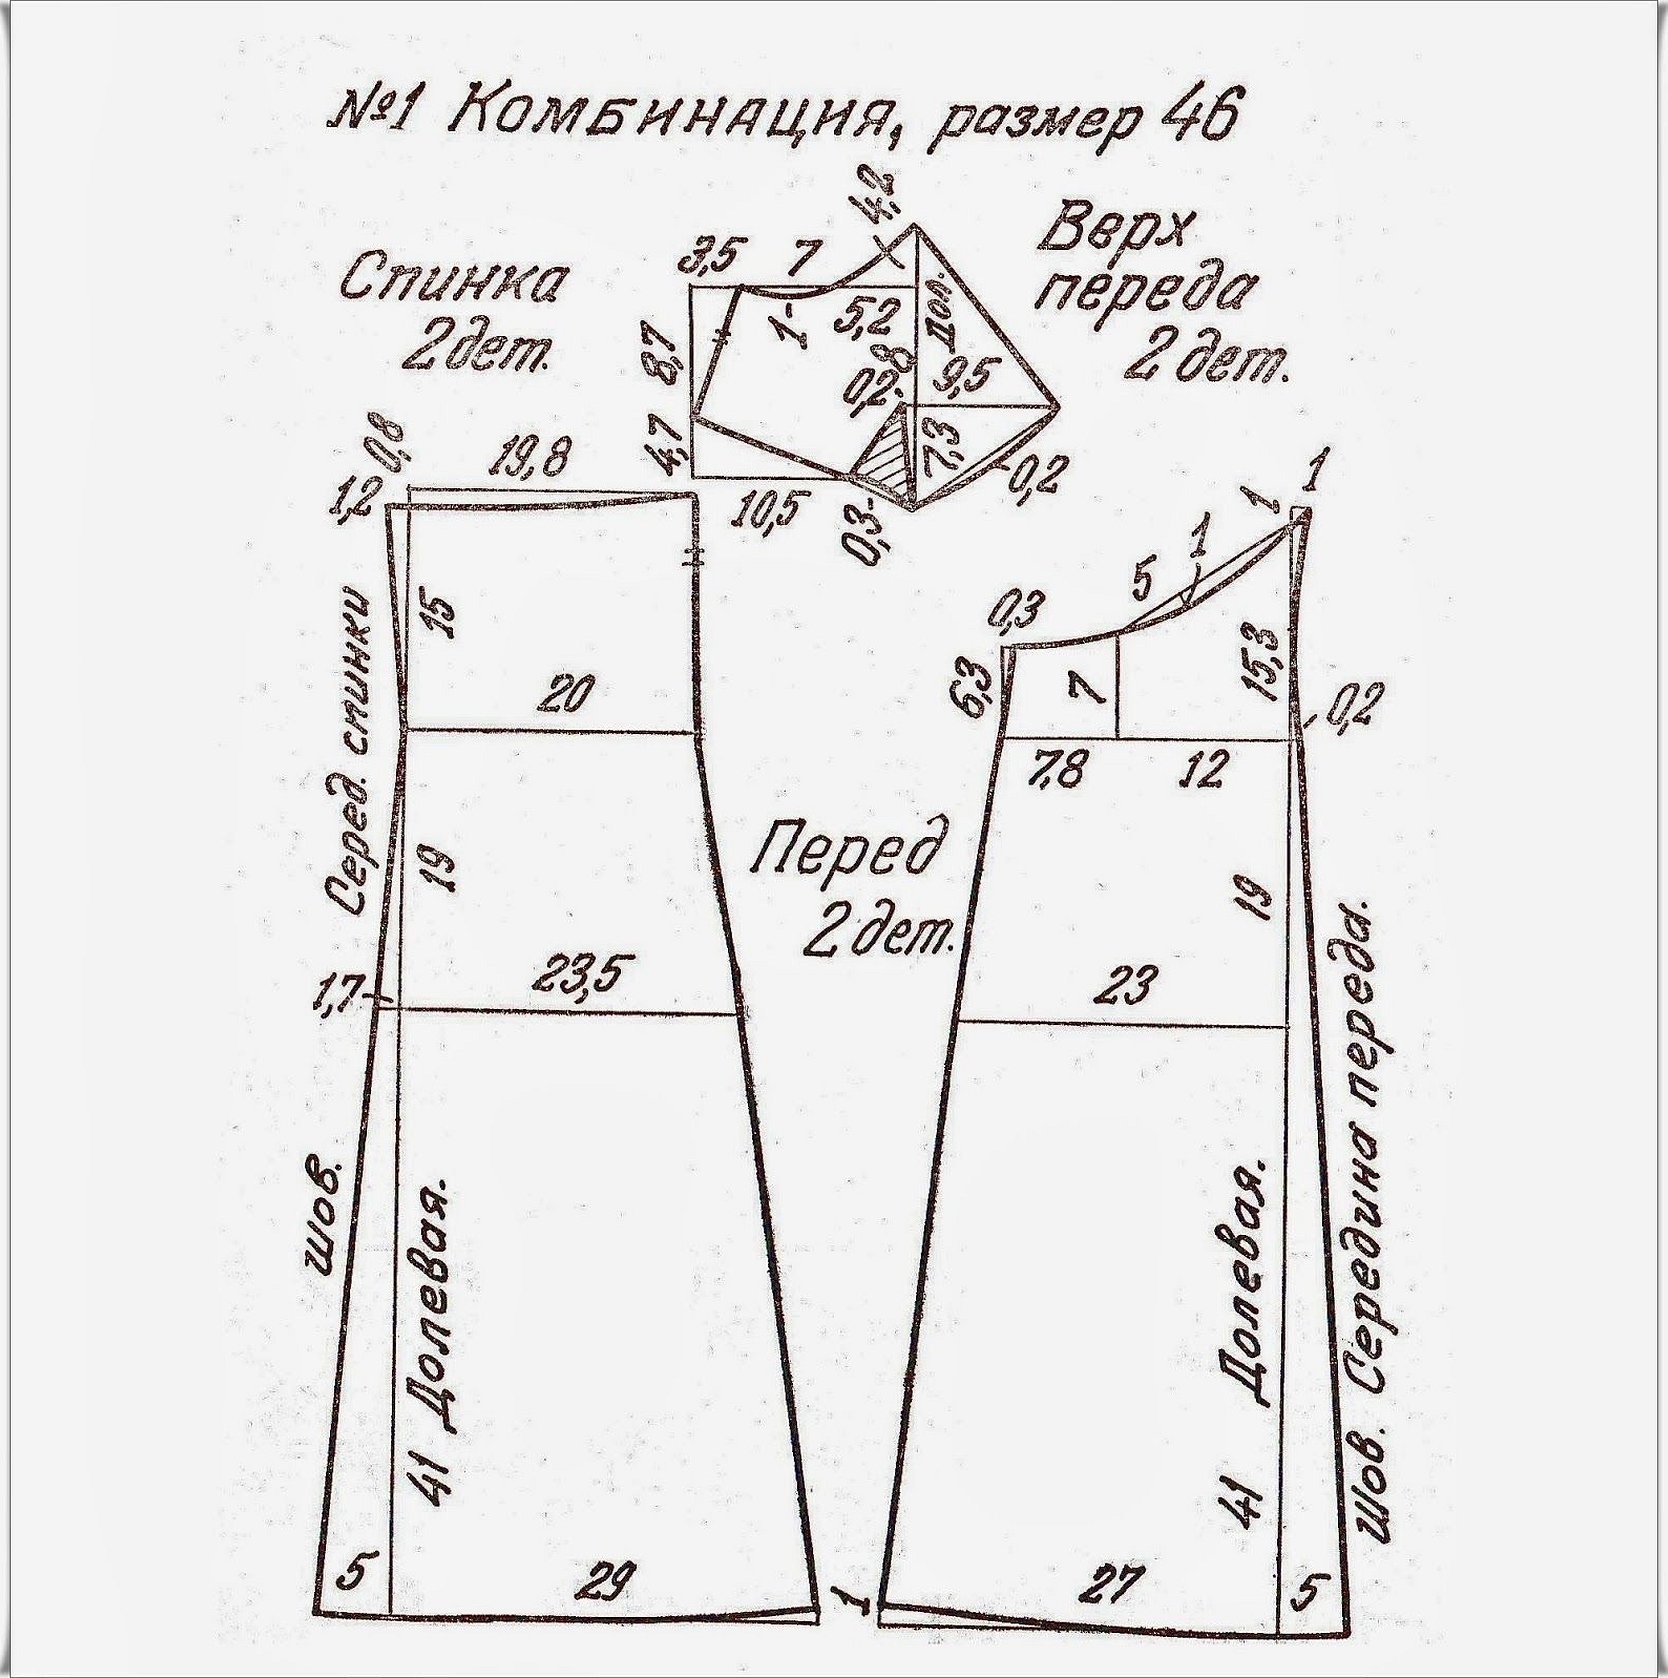
It is necessary to take into account that such a model is usually created from elastic fabrics. Work on creating a dress is carried out according to the following instructions:
- For the front and back, the pattern is taken from the drawing, making adjustments in accordance with the measurements taken. In this case, it is necessary to provide for a seam allowance of one centimeter.
- You need to baste and stitch the side seams.
- When processing the bottom, it is folded over and stitched with a double seam.
- When processing the neck, the allowance on the front and back parts is folded inward and stitched. The same is done with the armhole allowances.
- Make two straps. For this, use strips of fabric of the required length and width of 3 cm. They are folded in half lengthwise and stitched. At one end, pass a needle with thread through the fabric and pull it through the inside of the seam.
Now you need to sew the straps to the top. This completes the creation of the dress.
Simple DIY Maternity Model
During pregnancy, you want to look beautiful. There is an opportunity to sew an outfit in which a woman will look stylish and practical during this difficult period.
One of the options for maternity clothing can be a simple pattern of a dress with a yoke for beginner seamstresses.
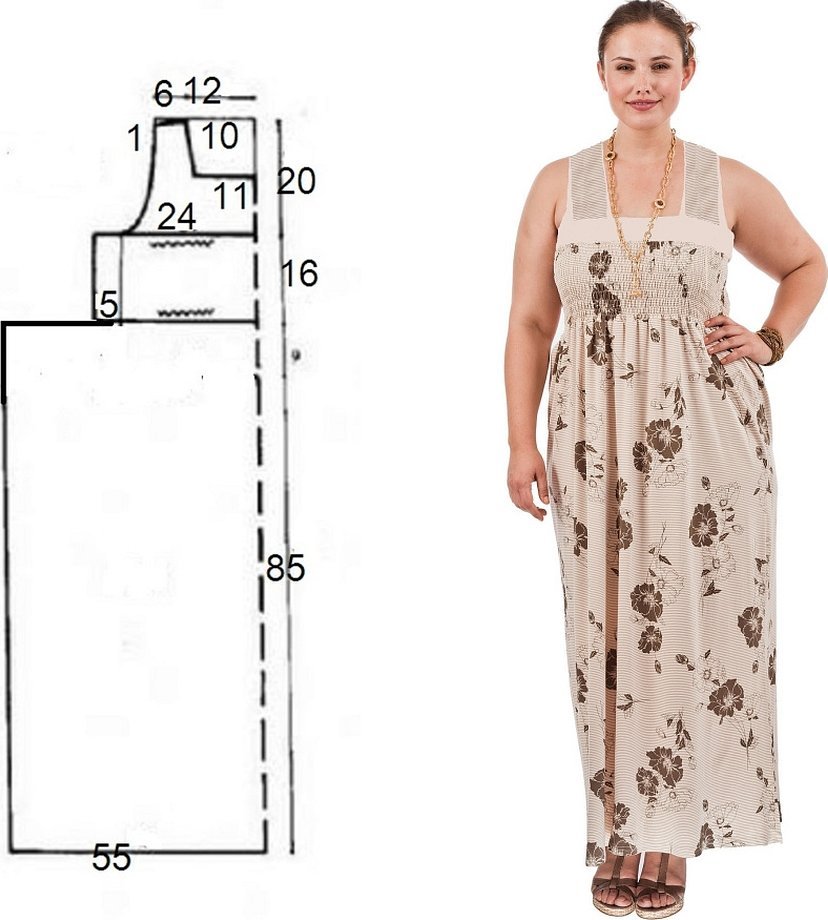
It is fitted at the top and loose at the waist. Creating a pattern is not difficult - it consists of rectangles. To make the clothes fit well, you need to take measurements and adjust the pattern according to your measurements.
The most difficult part of making is creating a yoke. To do this, follow the step-by-step instructions:
- The pattern of this dress part is cut out of paper. At the same time, you need to add a little fabric (1 cm) for seam allowances. This can be done on the basis of a blouse that fits well in style and size.
- The back and front of the dress will each consist of two rectangular pieces. The lower ones are the hem. The upper rectangles will wrap around the back and chest.
At this point the pattern will be ready. You will need to sew the side seams and attach the yoke. Usually, an elastic band is sewn on the dress below the chest to make it comfortable to wear the dress.
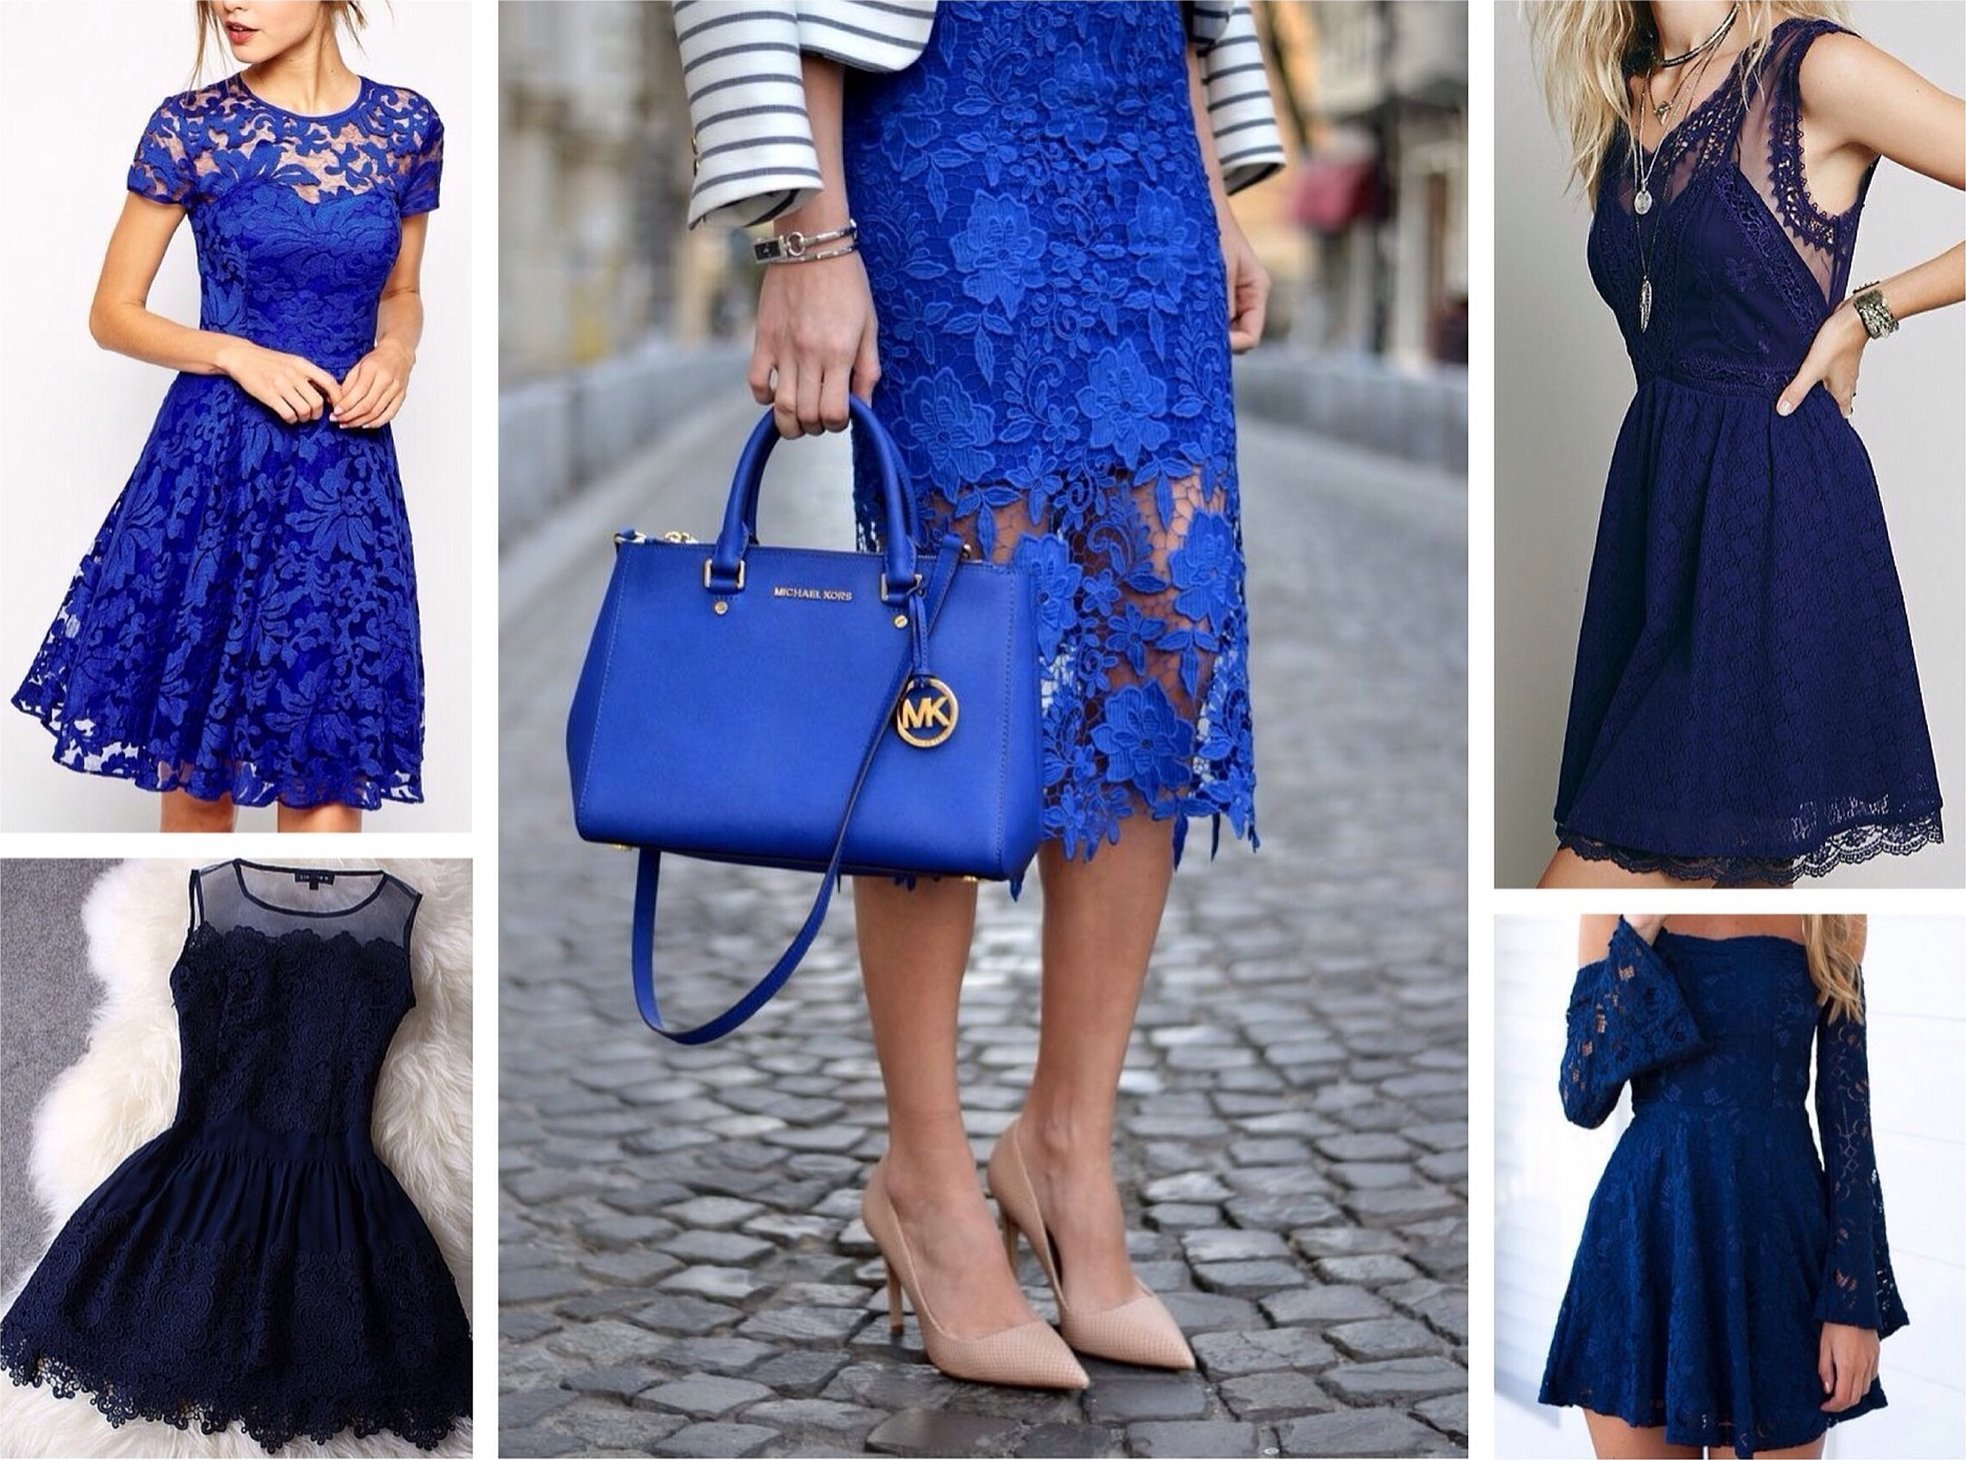
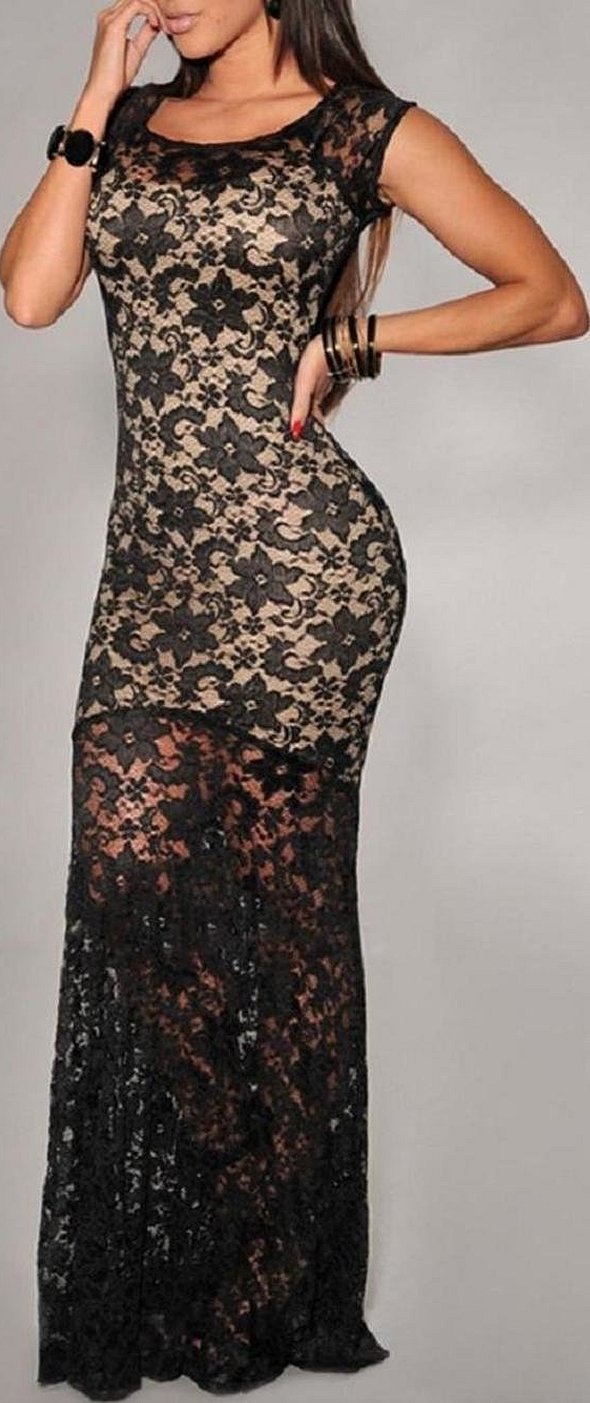
Guipure dress practice
When sewing a dress from guipure, in fact, you need to additionally make a lining for it. In the latter case, it is customary to use thick natural knitwear. For the lining, you need to use a zipper. It should be the same color as the fabric.

The dress is sewn in this way:
- The darts are first sewn onto the dress, then they are done in the same place on the lining.
- The darts are sewn.
- Baste the side seams.
- The dress has darts at the waist.
- The shoulder seams are processed on the cover and then on the guipure dress.
- Next, the lining and the dress are joined together using guipure.
- They sew in a zipper.
- The bottom of both dresses is being processed.
After this, work on the dress is finished.
How to sew a simple evening dress
To work, you need to choose the right fabric. One option may be to use tulle.
It should not only be beautiful, but also comfortable to sew. In this case, the following should be taken into account:
- Avoid using satin or silk fabrics. They do not stretch well and have weak edges.
- The most convenient material for creating a simple evening dress is knitwear.
- It makes sense to avoid complex designs.
A good option for beginners would be to make a knitted dress with lace.
For the top pattern, you can use your T-shirt, and for the bottom, choose a floor-length skirt. To make sure the dress fits your figure, you need to take measurements.
The bottom is made according to the waist and hip measurements. The skirt is slightly narrowed towards the knees.
As a result of cutting, you will get two pieces of fabric for the front and back of the bodice and six strips that will be connected into a floor-length skirt. Now all that remains is to connect all the prepared elements together. The finished product can be used as a prom dress or as an evening dress.
How to quickly sew a home dress without a pattern
To create a dress without cutting, you can make a drawing that consists of two parts: front and back. They will repeat each other in shape.
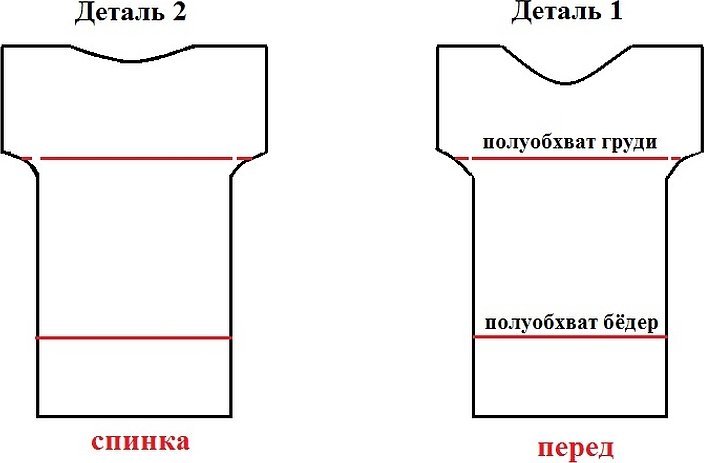
To make clothes according to your size, you need to rely on only two measurements: chest and hips.
After cutting out the fabric, you need to add 1 cm along the edge to make seams. The bottom edge of the dress needs to be folded and hemmed.
Various tips for beginners
When creating a dress yourself, you need to consider the following:
- Before purchasing fabric, you need to choose its type, color and required quantity.
- When working, it is important to make sure that you have all the necessary tools on hand: scissors, threads, needles, a tape measure, chalk, and others.
It is important to follow the instructions exactly when making dresses. When you have more experience and your work class improves, you can act according to your own ideas.
Knowing the basics of cutting and sewing dresses will allow you to fill your wardrobe with original, spectacular and practical models. Understanding and experience will gradually give you the opportunity to sew not only simple, but also complex, unusual and beautiful models. Gradually, your wardrobe will become not only beautiful, but also practical.


