Moms of all boys know that trousers are a must-have item in their son's wardrobe. Matinees, holidays, the first school assembly - you need to look appropriate. The pattern for trousers for a boy is not difficult in practice, so absolutely any mother can cope with the task. Many mothers treat the independent production and knitting of wardrobe details with special trepidation. This article discusses the question of how to sew children's trousers.
- Initial data
- Construction of the basic pattern
- Checking the quality of the completed drawing
- DIY Trousers
- Knee and bottom line
- Arrow line (iron)
- Construction of the back half of the trousers
- Processing technology
- Width along seat line
- Construction of the back of the trousers
- Pleats at the waist line
- Bow line design
- Side pocket processing options
- Back pockets in trousers
Initial data
The initial data for the pattern must first be applied to graph paper and then transferred to the fabric.
The following measurements are taken:
- waist circumference;
- hip circumference;
- leg circumference (measured at the widest point);
- posterior midline;
- inside leg length;
- outer leg length - from waist to feet;

Note: The posterior midline is measured from the waist to the lower edge of the buttocks.
Construction of the basic pattern
Based on the basic pattern of children's pants, you can model sports pants, pants with elastic, and even pants for girls from 1 year old.
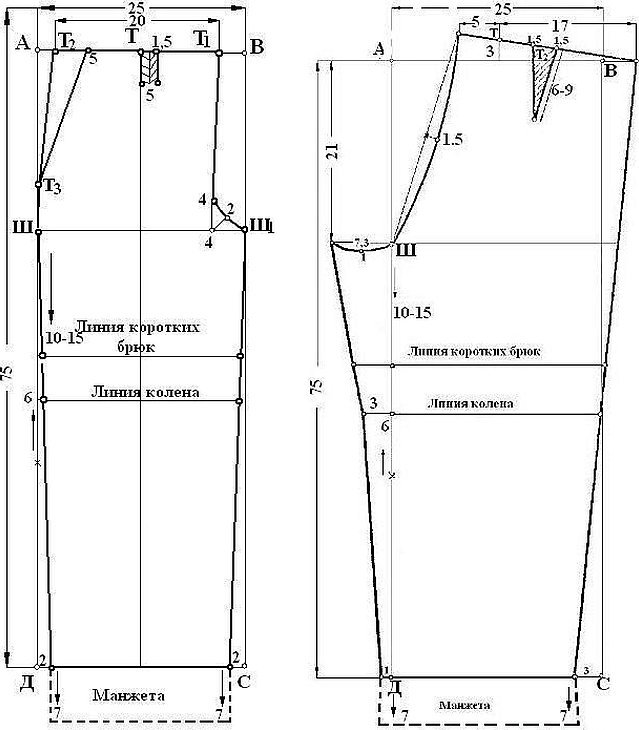
The pattern for boys' trousers with elastic looks like this:
- Draw two rectangles ABCД schematically.
In this case, AB and CD are the hip circumference/2.
Note: In addition to the hip circumference, you need to add 6 cm. If you don’t do this, the trousers will be tight around the leg. 6 cm is allocated for seam allowance.
- AD and BC are the length of the leg from the waist to the foot.
- From point A, mark half the hip circumference + 2 cm. This is the step line (point Ш).
- The knee line is calculated as follows: BC/2 + 2 cm above. Draw a perpendicular to BP.
- To draw the arrow line ШШ1 is divided in half and connected to AD and BC.
- The bow line is calculated as follows: 4 cm are measured along Ш1Ш, then 4 cm are marked upwards from this point. Ш1Ш is connected to АВ at point Т1.
The back pattern is made using the same principle, but with a more protruding bow line (approximately 7 cm longer).
The pattern for pants for a 1-year-old girl with an elastic band is also made based on this diagram.
Checking the quality of the completed drawing
It is necessary to familiarize yourself with the following nuances to be sure of the accuracy of the completed drawing of the pattern of children's pants with an elastic band:
- The length of the trousers is measured completely from the waist to the foot at the desired level.
- Knee length is measured together with the trouser length size. It is written down in full.
- Half waist circumference is measured at the narrowest point. Only half the length is marked.
- Half hip circumference. The measurement is taken using a measuring tape and a ruler, at the most convex part of the buttocks. The ruler must be placed perpendicular to the tape so that the latter does not fall in and does not tighten the buttocks. Half the length is marked.
- The seat height is measured while sitting. From the waist to the horizontal of the chair. The measurement is noted in full length.
- The width of the bottom of the trousers is measured according to personal preference.
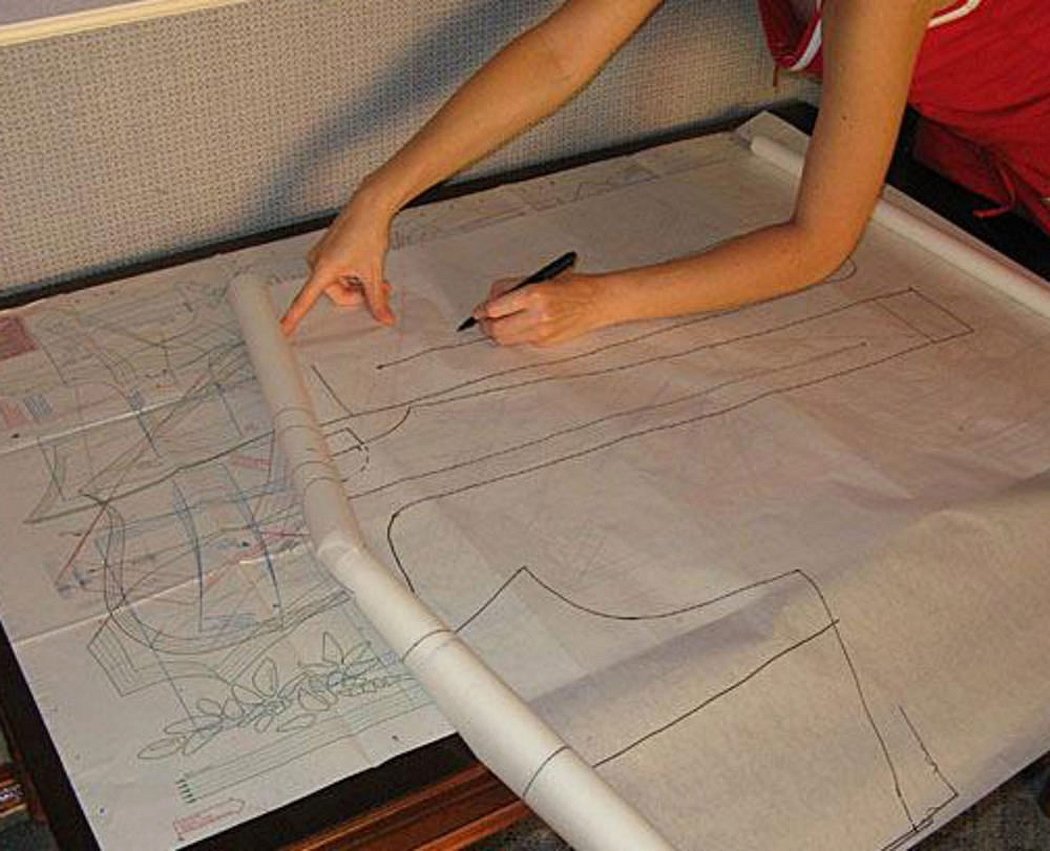
Later, when cutting out the pattern itself, experts do not recommend that girls sharpen machine seams right away. It is better to draw up the pattern by hand, try it on, and only then sew it on the machine. It is quite possible that during the process you will need to make adjustments, draw darts, and adjust the trousers.
Important! During the process of taking measurements and adjusting trousers, the child should stand calmly, straight, with the center of gravity shifting to both legs at the same time.
The pattern drawing can be printed in full size. This will help to accurately transfer the parameters to the fabric.
DIY Trousers
For beginning needlewomen, this is an interesting task, because patterns for pants for girls and boys with elastic, whether they are sports pants or formal pants, have their own details and difficulties.
Important! For work it is recommended to use knitted fabrics that are stretchy and elastic.
Knee and bottom line
In the pattern of trousers for boys from 1 year old, the knee line is located when dividing Ш1С in half. It is necessary to add another 6 cm upwards to the division point. From this last point, draw a perpendicular to АД.
Arrow line (iron)
It passes exactly in the middle of Ш1Ш, perpendicular to АВ and ДС. The point of intersection with line АВ is marked by the letter Т.
Construction of the back half of the trousers
To construct the back half of the trousers, you need to follow the same rules for designing the knee lines and the arrow as when constructing the front part of the trousers.
Processing technology
Before cutting, the fabric must be prepared. Since we chose jersey, we need to steam it (iron/steamer) before cutting.
Width along seat line
Segment 7.3 is divided in half and 10 mm is measured down from the division point. The seat line passes through points 1, Ш to point 5. (see fig.)
Construction of the back of the trousers
To construct the back of the trousers, you need to follow the same rules for designing the knee lines and the arrow as when constructing the front of the trousers.
Pleats at the waist line
AB continue to the right for an indefinite length, then divide by half and from the division point put a point T upward at a distance of 3 cm. From point T to the right to the intersection with the extended AB draw a waist. To the left it will connect with the seat line.
Bow line design
It is done on the front part of the trousers. From point Ш1 to the left, measure 4 cm. From point 4, draw a perpendicular to АВ, mark point Т1. Then from point 4, measure 4 centimeters upwards. Draw the bow line through points Ш1, 4, Т1.
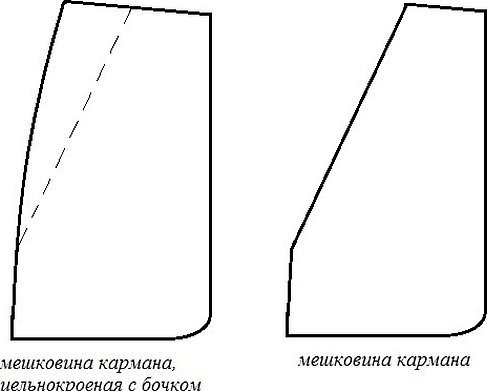
Side pocket processing options
The easiest way to make a pattern is a side pocket with a cut-off side. For this, you can take ready-made parameters of the drawings: the width of the pocket "entrance" at the waist is 5 cm (from the side seam at the waist); the width of the lower part of the pocket is 14 cm. The depth of the pocket is calculated at the discretion of the seamstress.
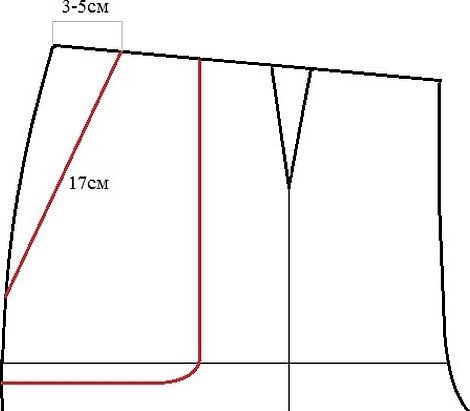
The entry line is drawn as follows: from the side seam at the waist, set aside 3-5 cm and draw a curve to the side seam of about 17 cm. The second (back, invisible) detail of the pocket burlap is drawn even more simply: trace the first detail along the contour and cut off the side, see Fig.
Back pockets in trousers
Back pockets on trousers can be treated in two ways:
- Patch pocket;
- Double patch pocket.
A simple patch pocket is located at a distance of ~7 cm from the waistline, ~5 cm from the side seam of the top of the pocket, 16 cm wide, the bottom part is 17 cm. The length can be selected at your discretion. The standard length is 18 cm. The outer entrance line is 7 cm, 6 cm in length.
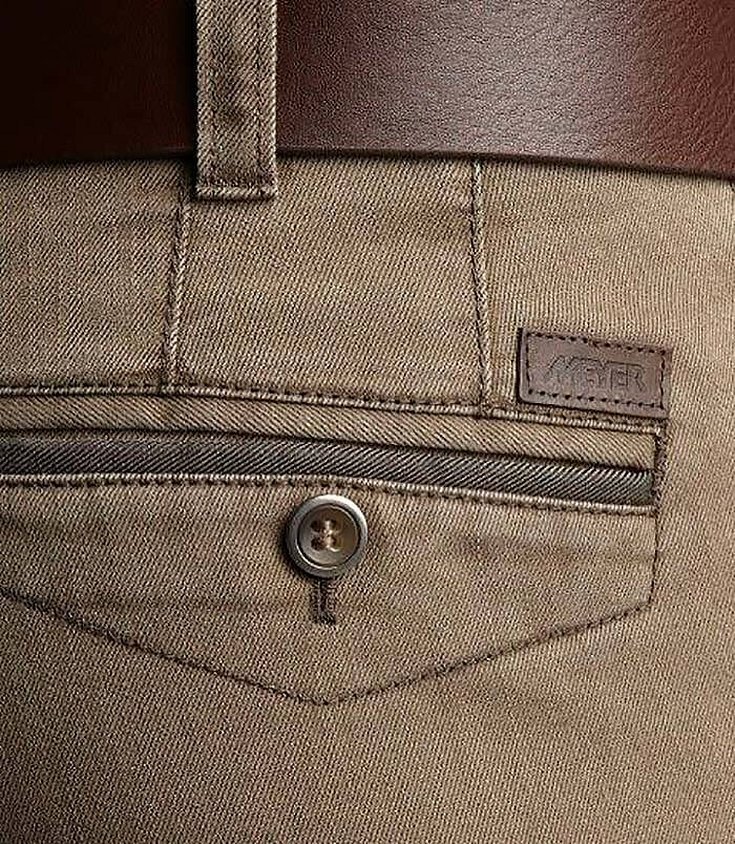
In a double patch pocket, the lower one is located 7 cm from the top of the waist, the width is 18 at the top and 20 at the bottom. Length 21.5 cm. Entry line 6.5. The pocket that will be located on top is drawn at a width of 15.5 at the top and 16.5 at the bottom. Entry width is 4 cm.
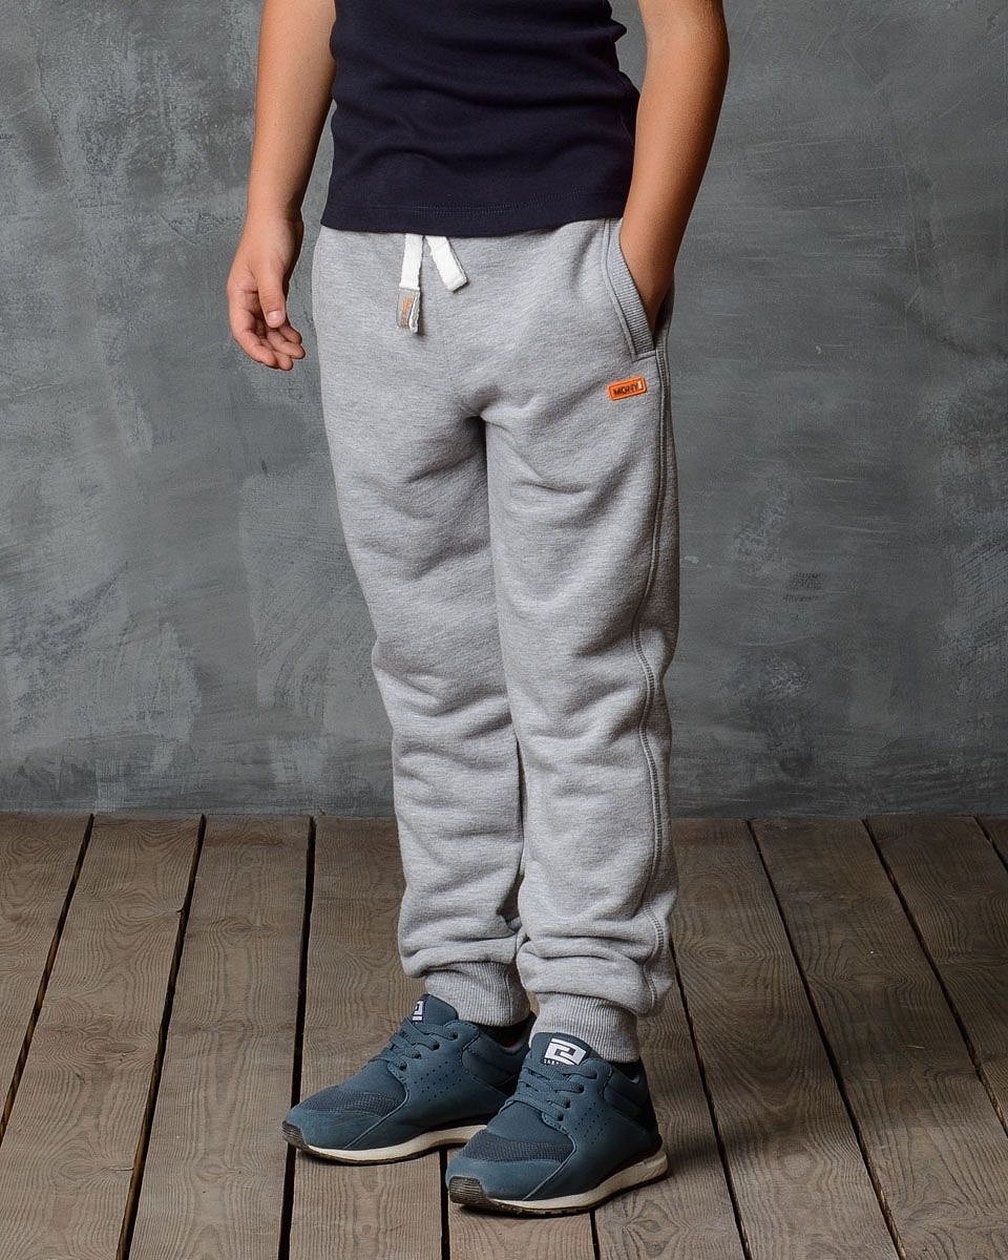
The provided drawing schemes are universal for many models of trousers. Based on them, you can easily make a pattern, for example, of elasticated sweatpants for a boy. Following the instructions above, you can sew excellent trousers for a boy that will fit perfectly and look beautiful from the side, as they will be sewn according to individual measurements.


