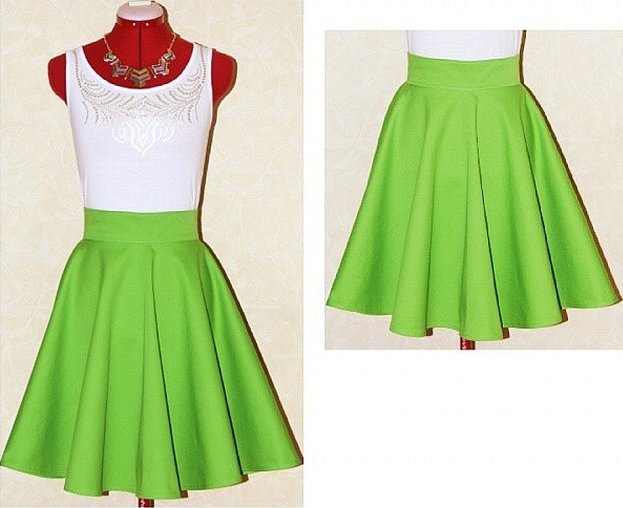
Any woman can handle sewing a skirt, you don’t have to be a professional seamstress to do it. But there may be difficulties with sewing a belt to a skirt. After all, this is not the easiest element in creating a product. To do a quality job, you should put in a lot of effort and patience. But the result is worth it.
Calculating belt sizes
It is worth putting aside precision and scrupulousness, because measuring everything by millimeters, the chance of correcting errors during work is lost. Clarity in measurements does not guarantee that the skirt will fit the figure, all measurements are taken as work progresses. If everything is strictly by millimeters, there will be no opportunity to adjust the belt or the product itself. Everything should be done in moderation.
To avoid a situation where the belt is shorter than the skirt cut, there should be a margin of error in the calculation of sizes. Especially if it concerns how to sew a belt to a skirt with a zipper, here the size requires a particularly careful approach.
Another reason why precise measurements are not good is the subsequent processing of the fabric. It is common to glue the back of the belt with adhesive fabric. Due to its properties and texture, it can shrink when exposed to high temperatures, which happens when the product is ironed.
When working with the fly, you should be more careful, because the waist line can shift and change. You should leave some extra space for the belt not only in length, but also add a little to the width. Excess fabric can always be cut off. Do not forget that after trying on, you may want to change the waist circumference, making the belt narrower or wider.
How to sew a belt to a skirt
The process requires concentration and skill. When cutting the belt, the pattern should be placed across the grain. Only in some cases is the cutting done lengthwise.
Important! It is best to cut the belt from at least two pieces, and preferably three, this will make it easier to adjust the fit along the side seams even for the most complex figure.
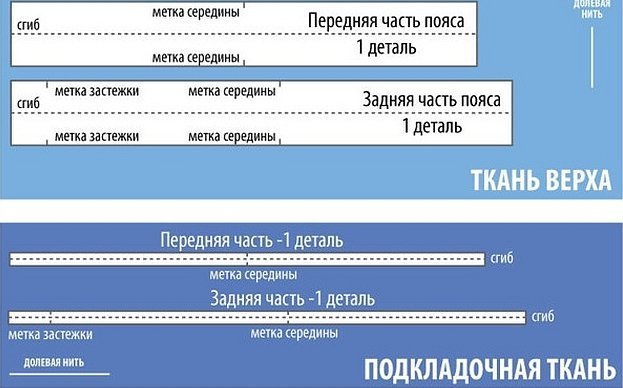
Cutting out the parts
Using a pencil, draw rectangles of the appropriate size on the fabric, not forgetting to add a few cm for future adjustments.
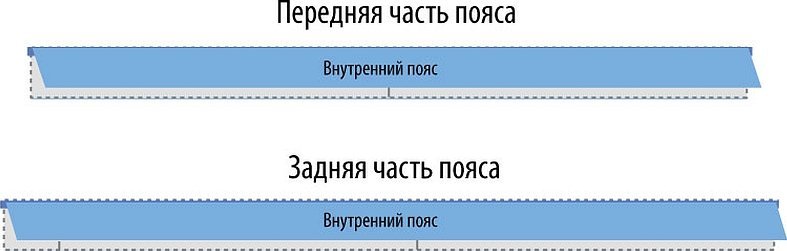
The inner and outer sides of the belt are cut in two separate pieces (not to be confused with the inside and outside sides). For the fastener, add 3-4 cm and additionally set aside seam allowances of 1-1.5 cm.
Then take the lining fabric and make a pattern along the grain line - 2 pieces 1.5-2 cm wide, and the length should be equal to the rectangles of the initial piece (it is also necessary to set aside an allowance for the seams).
Correct duplication
For the backing fabric, it is best to choose materials with adhesive properties when heated with an iron and that stretch well.
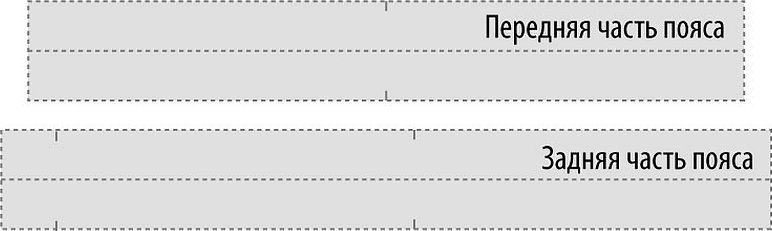
The details for the duplicating layer are cut out with an additional seam allowance of 0.5-1 cm.
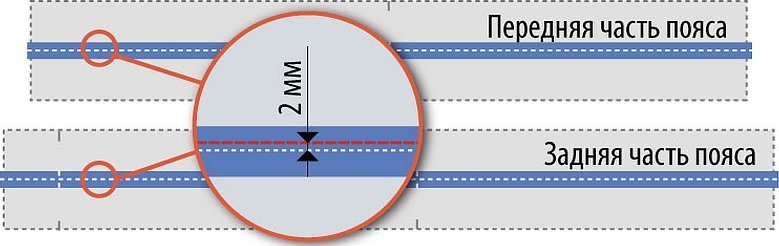
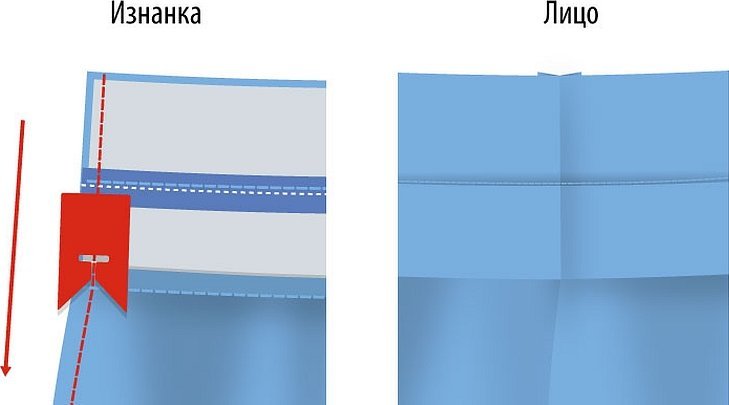
The lining is placed on the wrong side along the central part of the pieces. It is basted to the parts with wide stitches. Then, 3 mm is stepped back from the fold line and a line (3.5 mm) is made on the inside of the belt. This procedure will help maintain strength and durability throughout the entire wear. The risk of the product stretching over time will be reduced along the fold.
Ironing seams
Each part should be folded and ironed. As a result, you will get 2 finished parts.
Important! Do not stretch the fabric while ironing.
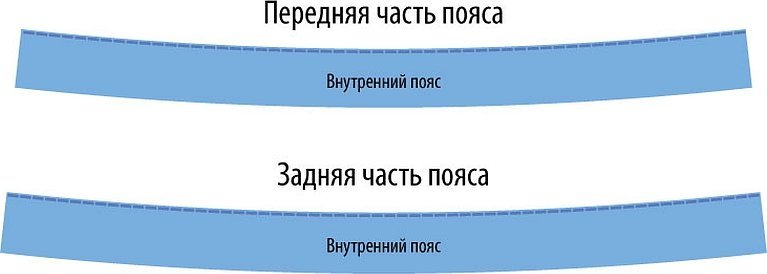
Without touching the fold, the workpiece is pulled with an iron at the bottom of the workpiece. The result: 2 even "half-sun" pieces that will make up the front and back of the belt.
To give a denser texture, an additional duplicate layer should be attached to the shape of the workpiece on the outside of the backing layer.
Fitting
Fitting is the most important stage of sewing and finishing details.
- The first thing you need to do is baste the resulting pieces to the skirt.
- The belt should be tight, and at the same time the skirt should have a slight rise along the gusset line.
- The side seams should be basted.
- Trying on the product.
Additional information! This procedure will prevent the darts from showing through from the side seam.
If the belt is exactly where it was intended, does not cause discomfort and does not slip, you can continue sewing. Excess fabric can be tucked into the seams on the sides.
Sewing
After all the parts are ready and the first fitting of the future product has taken place, you can start sewing following the instructions below:
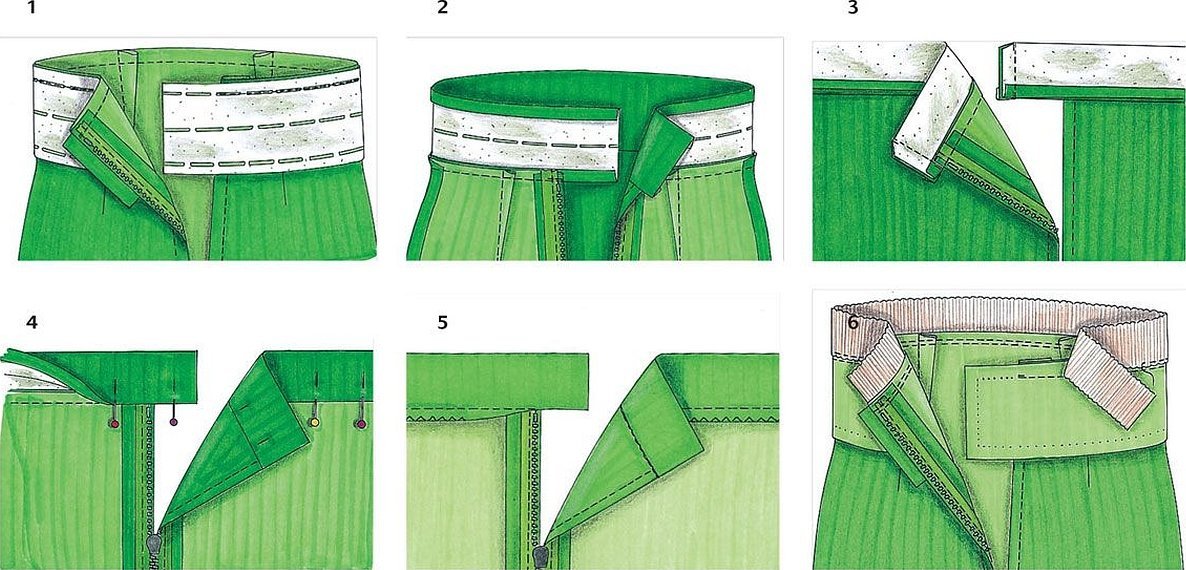
- The following elements are made on the front and back of the belt: pockets, yokes, a fastener (button, lock or zipper), trim, etc. is attached.
- The lining, if any, is folded in.
- The pieces are folded with the right sides facing inwards and stitched.
Important! You need to be careful with the stitching, as the machine will shrink the bottom layer a little. To avoid mistakes, place the belt piece under the machine foot.
- The allowances need to be ironed and trimmed from the waistband side to a width of 0.6-0.7 cm. Afterwards, the thickness of the seams and darts is cut out, if necessary.

- The allowances are ironed, placing them on the belt.
- The seams on the sides of the skirt should be joined, aligned along a horizontal line, the seam should be stitched on both pieces.
- Using an overlock or bias tape, process the place where the lining and the back of the belt are connected.
- Having folded the parts with the right side inward, vertical seams are made near the fastener. The part is turned outward.
- After sweeping along the fold and bottom edge and aligning the lines, sweep the piece towards the skirt.
- A double stitch is made between the skirt fabric and the belt. Although the stitching will not be visible, the thread should be matched to the fabric tone. The allowance is ironed towards the lining.
- The clasp is attached.
Important! For convenience, an elastic band can be pulled into the waistband; to do this, during cutting, mark the place where it will be pulled with a dotted line.
Having studied this master class, even the most inexperienced hand of a novice master is able to cope with the task. The most difficult work will be with sun-style skirts due to numerous folds. The wrap on the skirt also creates some difficulties, as well as a children's skirt will require careful sewing of small details.


