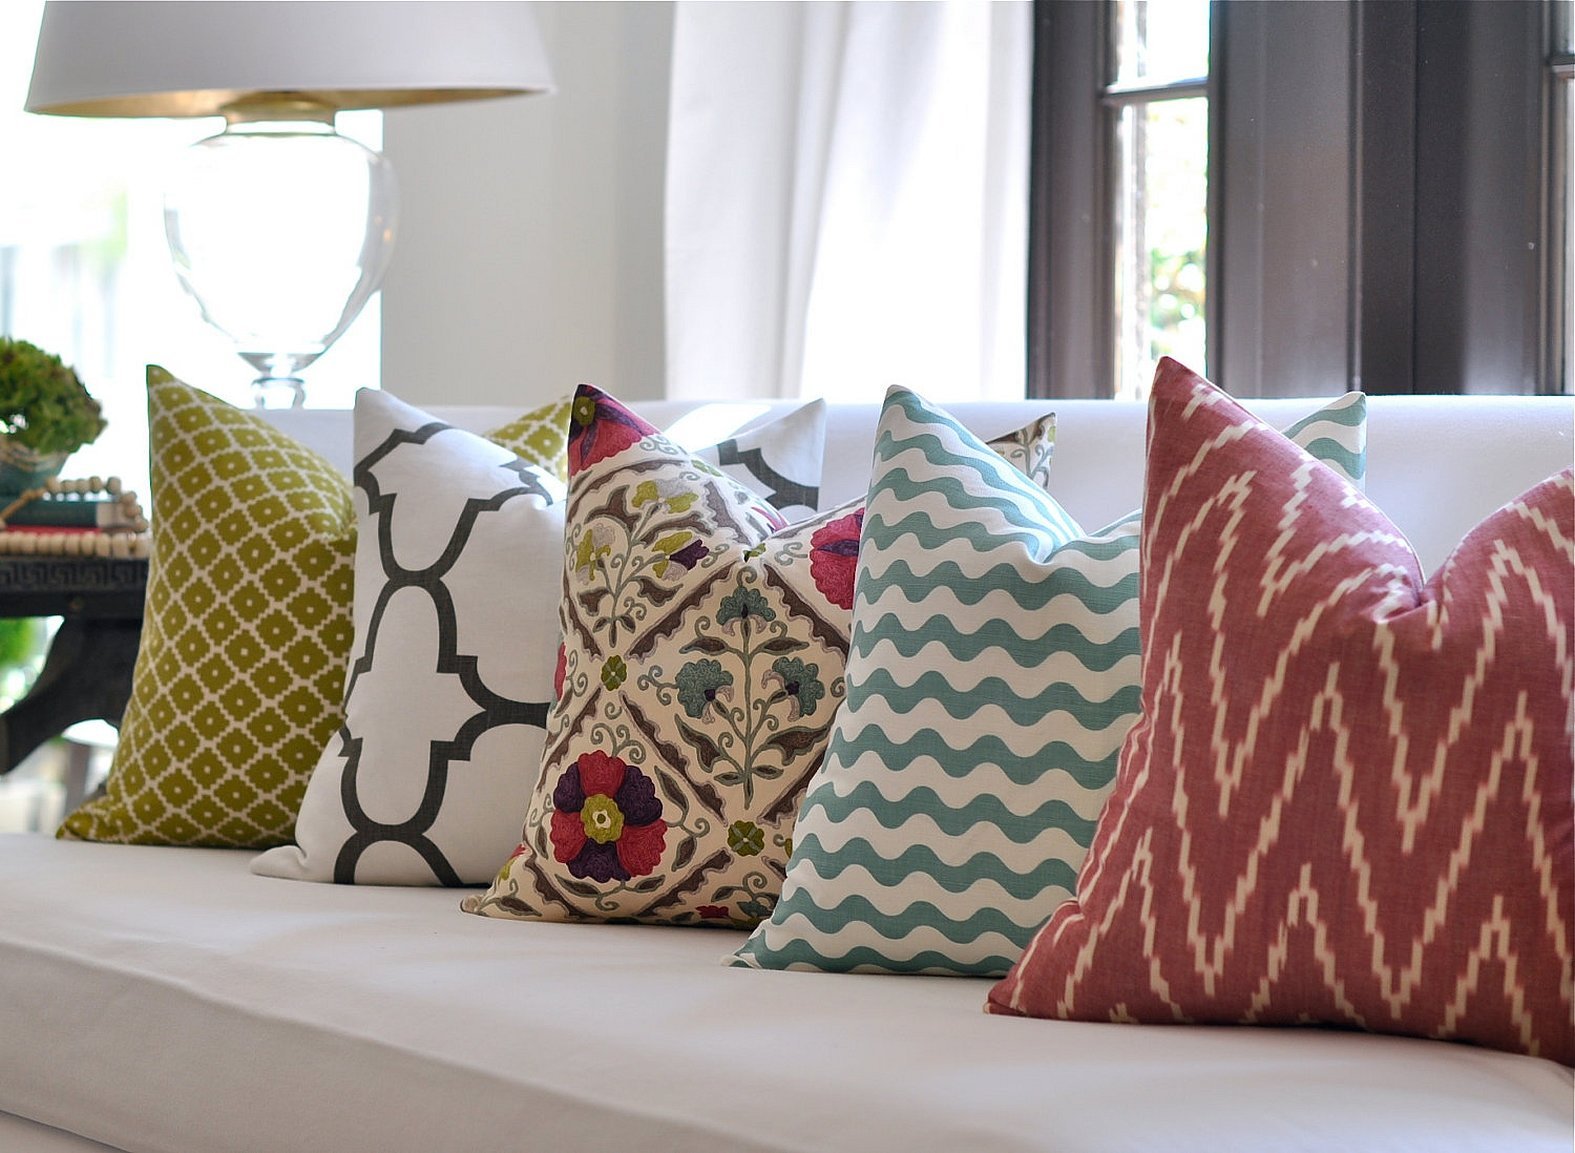
A person uses a pillow not only for a good night's sleep. No sofa can do without them. Pillows and cushions can be seen in a variety of places - in a car, in a work chair, in the kitchen and in the nursery, just on the floor. Pillows come to the rescue after injuries, during monotonous sedentary work, on a picnic, during pregnancy and in adulthood.
And the pillowcase has become not only an item of bed linen, but also an element of textile design. The simple design of the pillowcase and minimal experience with a sewing machine allow you to create a unique item for your home or an original gift.
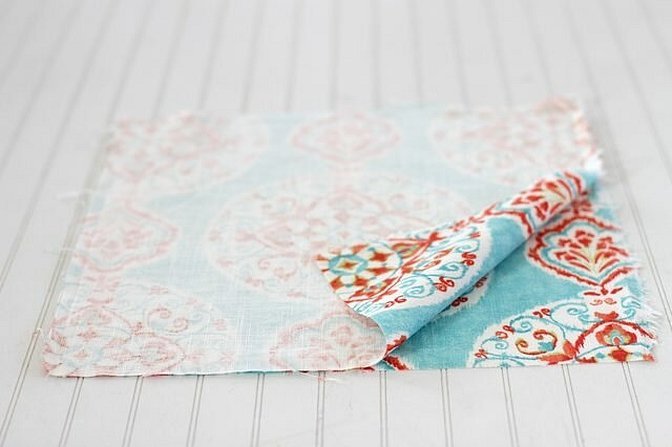
Fabric for decorative pillowcase
In order to give a decorative pillow a neat appearance and the correct shape, it is necessary to correctly fasten the pillowcase. For this, zippers have become more common instead of the traditional flap or buttons. It allows you to give the pillow a clear shape. But the problem of how to sew a zipper into a pillowcase scares needlewomen away from this project. Following the step-by-step instructions of a simple master class, you can easily cope with this task.
The color and pattern of the pillowcase are chosen in accordance with personal tastes and interior style. But for the first experience, it is worth paying attention to the type of fabric. Smooth and silky material will slide, and it is difficult to neatly connect the parts made of it. It is easier to sew fabric with a dense structure - wool, linen, tapestry, denim. These fabrics have less thread shedding on the cuts, they are easier to process.
AdviceBefore starting work, the selected fabric should be washed and ironed.
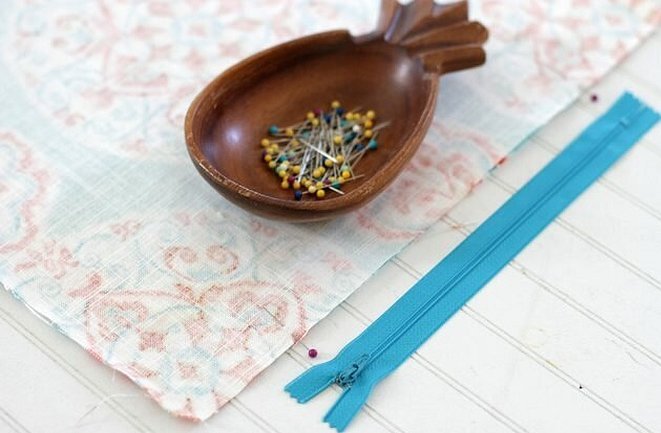
What types of zippers are there?
After the fabric for the pillowcase has been selected, a zipper is selected. In order not to get confused in the store when choosing, you should know exactly which of the locks of this type is suitable for the job. Many models of zippers have been designed for different types of products - spiral, tractor, hidden, with metal and plastic teeth, with detachable halves and fixed. In addition, they differ in the size of the teeth.
For pillowcases, non-separable simple or hidden ones with plastic spiral teeth and a metal runner are suitable. Such fasteners are put on skirts and dresses, because they are almost invisible on the product. They are a little more expensive, and sewing it is a little more difficult. But such a lock will not cause accidental injuries and will not cause discomfort, since it is hidden inside the product.
How to sew correctly
The final result of the work will depend on how the zipper is sewn in. In order for the work not to be wasted, you should accurately and carefully perform all the steps of this sewing operation. If you understand the principle and follow the sequence of actions, then sewing a fastener into a pillowcase will not be difficult.
- If the instructions suggest using a 20 cm zipper, it is better to buy 22 cm. This will simplify the sewing process where the zipper teeth are fastened with a staple and have a seal. The extra centimeters allow you to sew the zipper in evenly. After sewing, cut off the tails of the zipper.
- If the required size is not available, you can take a longer one. It can always be made shorter to fit the required size.
- Make precise markings - use a water-soluble marker or pencil along a ruler to draw the lines of the future straight stitch. Such markings will allow you to sew on a regular or hidden zipper exactly the first time.
- If your sewing skills are minimal, then it is better to baste the zipper to the fabric. And when trying on, it is better to baste than to use needles.
- As a rule, a concealed zipper is first sewn into the garment, and then the seam is stitched. This allows the parts to be connected evenly.
- Lay the pieces out flat. Pin or baste the secret zipper according to the markings and stitch it. And only then stitch the seam. This is much more convenient than the other way around.
Tools and materials for work:
- Sewing machine
- Special foot for sewing on zippers (if available)
- A piece of fabric
AdviceBefore you start working, you should make sure that the fabric does not fade or shrink when washed.
- Sewing threads in the color of the fabric
- Tailor's pins,
- Chalk or water-soluble marker, ruler
- Scissors
- The zipper is 5 cm shorter than the length of the pillowcase.
AdviceIf the zipper is too long, it can be cut to the desired size by securing the ends.
Progress of work
Cut the fabric:
- Cut out the pillowcase pieces - two rectangles. The sides of the pattern should be 2 cm larger than the finished pillow size on each side.
- Overlock or zigzag one edge of each piece.
Place lightning:
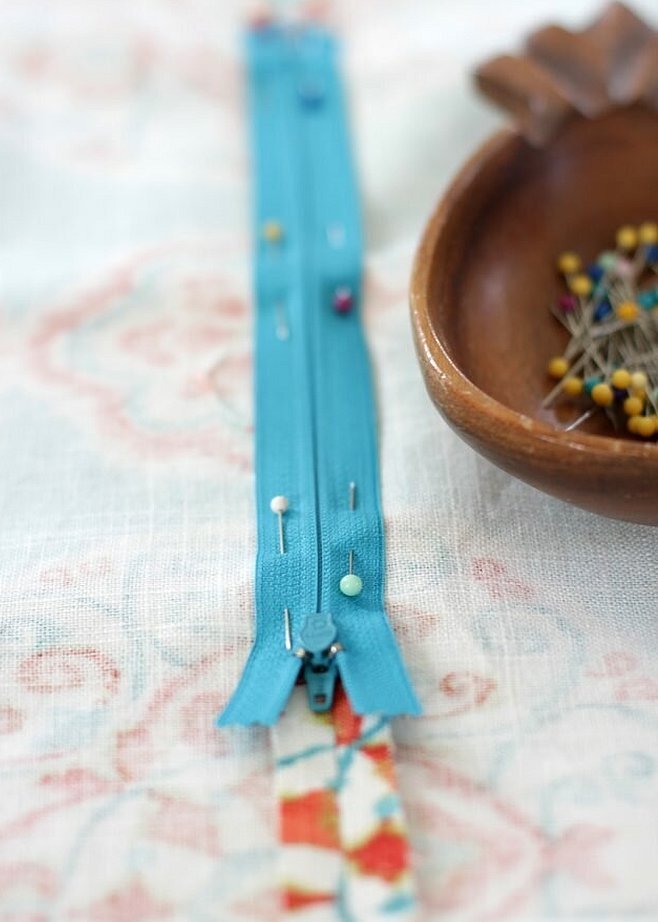
- Combine the processed sides and pin them together. The fastener will be sewn in here.
Advice. It is convenient to use long and thin tailor's pins instead of basting the parts. To prevent them from interfering with sewing the parts, they should be attached perpendicular to the stitching.
- Find the center of the zipper and the working side of the rectangle, mark the place in the middle with a marker.
- Align the center marks on the pattern and the zipper.
- Mark the end and beginning of the zipper on the material with pins. Do not pin the zipper.
AdviceThe zipper starts and ends at the teeth, not at the edges of the tape.
Check edge alignment:
- Check that the edges and corners of the fabric match exactly before sewing.
- Step back 1 cm and sew along the side line from the edge to the mark on both sides.
Prepare to sew in the zipper
- Between the pins, stitch the patterns with the widest straight stitch or the widest zigzag stitch, so that the thread can be easily removed later.
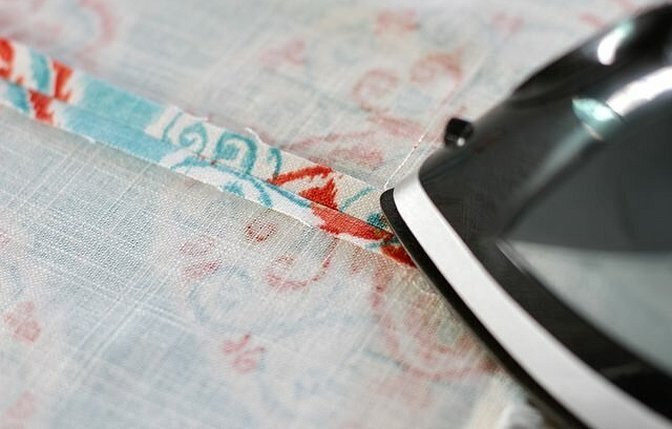
- Iron the seam open.
Place the zipper in its rightful place:
- Place the fastener face down on the seam from the inside. Match the seam line and the longitudinal line of the zipper as accurately as possible. Fix the position of the parts with needles.
AdviceWhile working, do not stretch the fabric too much, otherwise the tape will form lumps after stitching.
- Change the stitch on the machine from wide to regular (with a step of 2 mm).
- Sew in the zipper, stitching around the fastener.
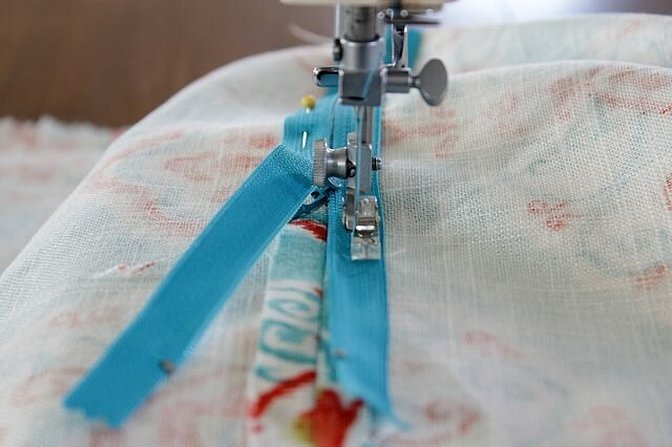
AdviceIf a regular foot is used, the stitch is laid as close to the teeth as possible.
- Having reached the lock, raise the machine foot. The needle is lowered down to hold the fabric. Carefully unfasten the lock, move it behind the foot, lower the clamping mechanism and continue stitching, moving along the fittings along the perimeter. At the end, make a securing step.
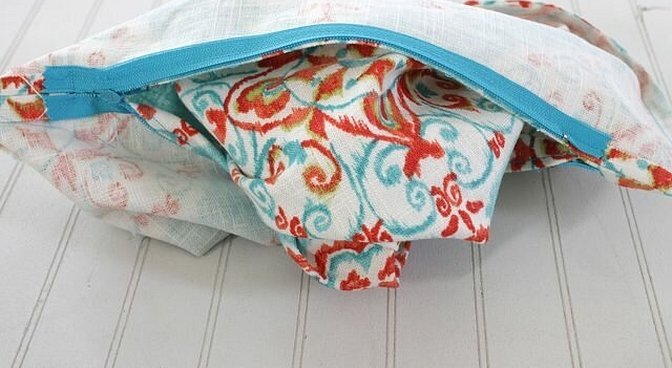
Remove temporary suture:
- Turn the work over to the front side and carefully remove the temporary basting in the middle. The working mechanism of the lock will be in the ripped seam. It should be easy to unfasten and not bend in a wave.

Assemble the pillowcase:
- Align the edges of the fabric squares, baste them with a running stitch or pin them together. Sew three sides of the pillowcase, finish the edge with an overlock or zigzag stitch.
- Turn the product right side out, iron, and place on the pillow.
Methods of securing the lock
The method of sewing in a zipper will depend on its type, product, fabric and the place where it will be located. In the case of a pillowcase, several sewing options can be used.
- In the side seam.
- In the middle of one side of the pillowcase.
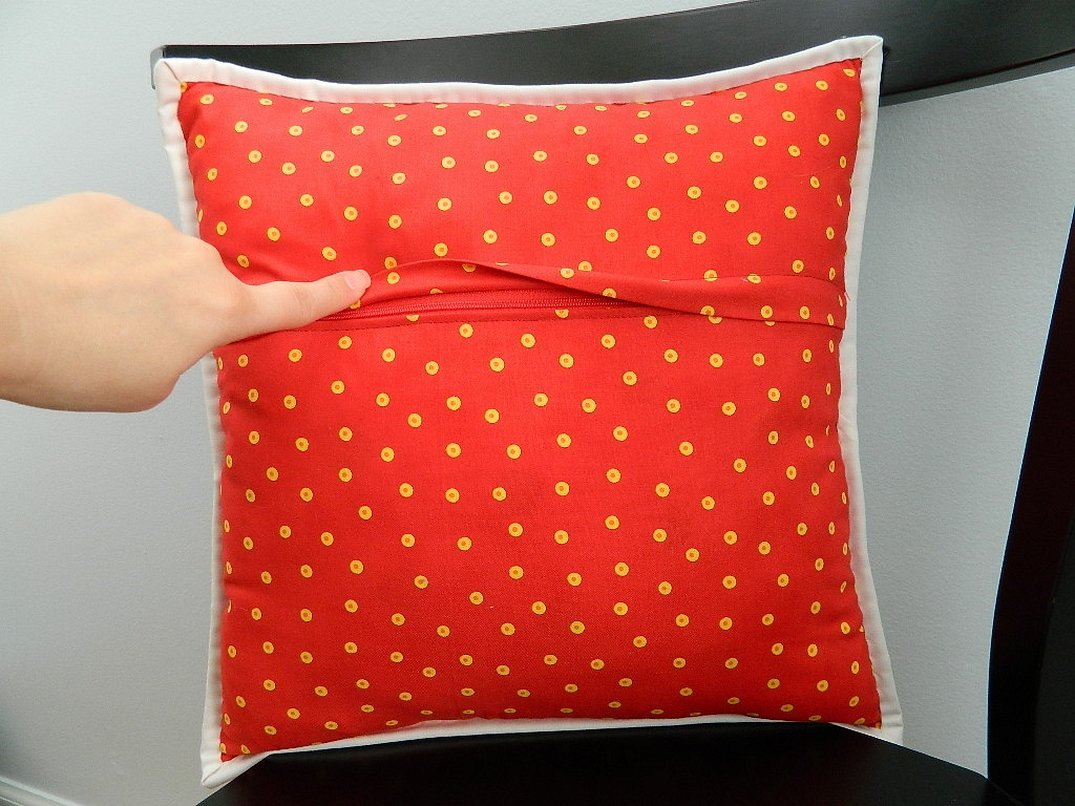
- Sew in a regular fastener, covering it with a flap.
- Insert an open regular clasp on a contrasting ribbon in the middle of the product as a decorative element
How to sew a zipper into a pillowcase without a special foot
If your sewing machine does not come with a special foot, you can learn to do this operation with a regular foot. You can achieve a good result if you carefully follow the instructions and are patient.
- Unzip and pin both parts to the garment.
- Manually baste the fastener, stepping back 5 mm from the teeth. Use contrasting threads for basting. Make a baste along the entire length of the future machine stitch so that the zipper does not slip during sewing.
- Sew the lock in an open position. Place it together with the basted part under the sewing foot and turn away the plastic teeth with your finger.
- Start the seam so that the needle goes down as close to the teeth as possible. The correctness of the fastening depends on the attention to the movement of the foot - it should go under the spiral all the time.
- After completing the operation, close the zipper and inspect the seam - the zipper should be sewn evenly and open freely.
Knowing how to sew a decorative pillowcase with a zipper, it is easy to diversify your home interior and make it cozy. Improving your sewing skills, an everyday item can be turned into art.


