When a beautiful dress is sewn, the quality of the set-in sleeve can be considered as the master's calling card. If this element of clothing is made correctly, the product sits beautifully and flawlessly. If you pay special attention to the sewing of the sleeve, it will pay off by giving the dress an elegant and stylish look.
What is a set-in sleeve
Sewing in a sleeve is a complex operation. However, it is important for how the dress will look. To ensure that everything turns out well, you need to carefully follow the rules for performing this operation.
At first glance, sewing in a sleeve looks like a normal operation in the process of making clothes. In fact, it often happens that failure in this operation can cause the craftswoman to fail. To avoid this problem, you need to know how to sew sleeves to a dress correctly.
There are several varieties. The peculiarity of the set-in sleeve is the choice of the place where the connection occurs. In this variant, we are talking about the natural place of connection. In the raglan, this issue is solved differently.
The set-in sleeve can be used in different ways depending on the master's idea. It can be made in such a way that it will not restrict movement in any way or narrow and rigid, which will emphasize the shape, but will limit mobility. It can be used in knitted products.
With this type of sleeve, the sleeve can be chosen in different ways. It can be used with a cuff, flared, with a frill, tapered at the bottom or any other, corresponding to the preliminary design.
The set-in sleeve is considered one of the classic solutions. With its help, you can create a dress with a strict silhouette.
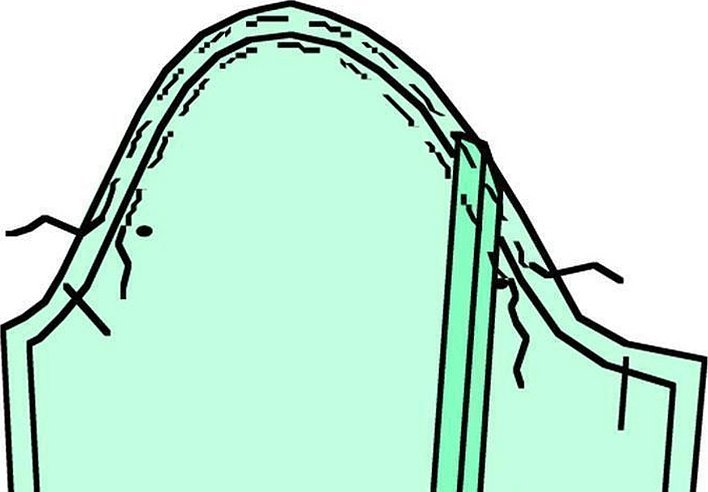
When cutting a product, it is necessary to take into account the following features of its configuration:
- The front edge contour should have a slightly concave shape along which it is sewn. This is necessary in order to correctly take into account the shape of the shoulder joint when the person's front arm hangs freely down.
- Due to the vertical position of the shoulder, the back contour will have a convex shape. This is due to the ratio of the width of the sleeve at the top, elbow or bottom.
- The lower, axillary part is a straight section located horizontally.
This must be taken into account both when cutting it and in the case when the craftswoman is going to knit a product with sleeves.
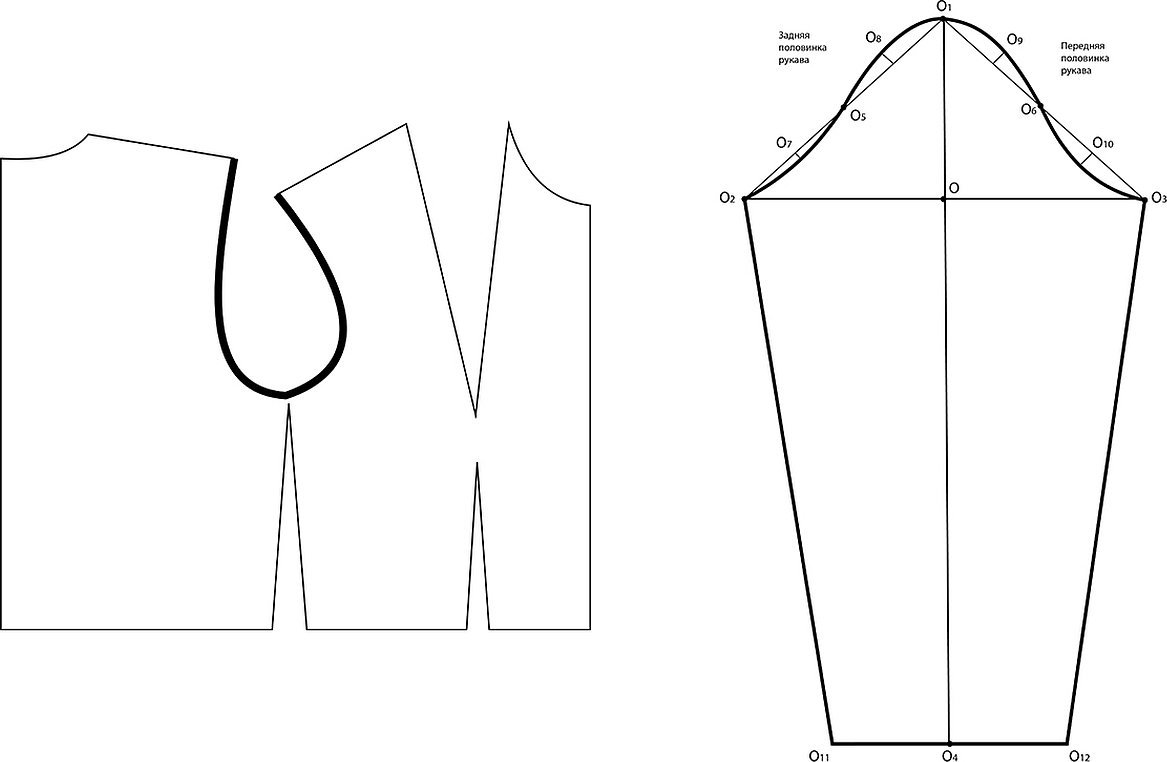
In order to correctly cut a sleeve in a shirt or dress, you need to do the work in the following order:
- First, you need to determine the basic data: length and width, from which you need to proceed.
- A drawing is made in which the shape and dimensions of the product are recorded.
- The markings of the front and elbow sleeve rolls are fixed.
- Based on the previous stages, the final modeling takes place.
After making the working drawing, it is necessary to check how much its dimensions correspond to the armhole.
The article will tell you how to sew a sleeve into the armhole of a dress for beginners.
Preparing parts for work
First, you need to sew a seam with the maximum stitch length along the edge at a short distance from it. The thread in it should remain free.
Before starting work, place the sleeve with the inside down. Its parts, if it is double-seam, need to be pinned or basted. It is necessary to stitch or simply pin the edges. Allowances will need to be ironed.
It is necessary to make sure that the armholes do not stretch during work. For this purpose, a non-woven strip is basted inside the armhole along the edge. Its width should be 12 mm, and it should be located 4 mm from the edge. Below we will tell you how to sew in a sleeve.
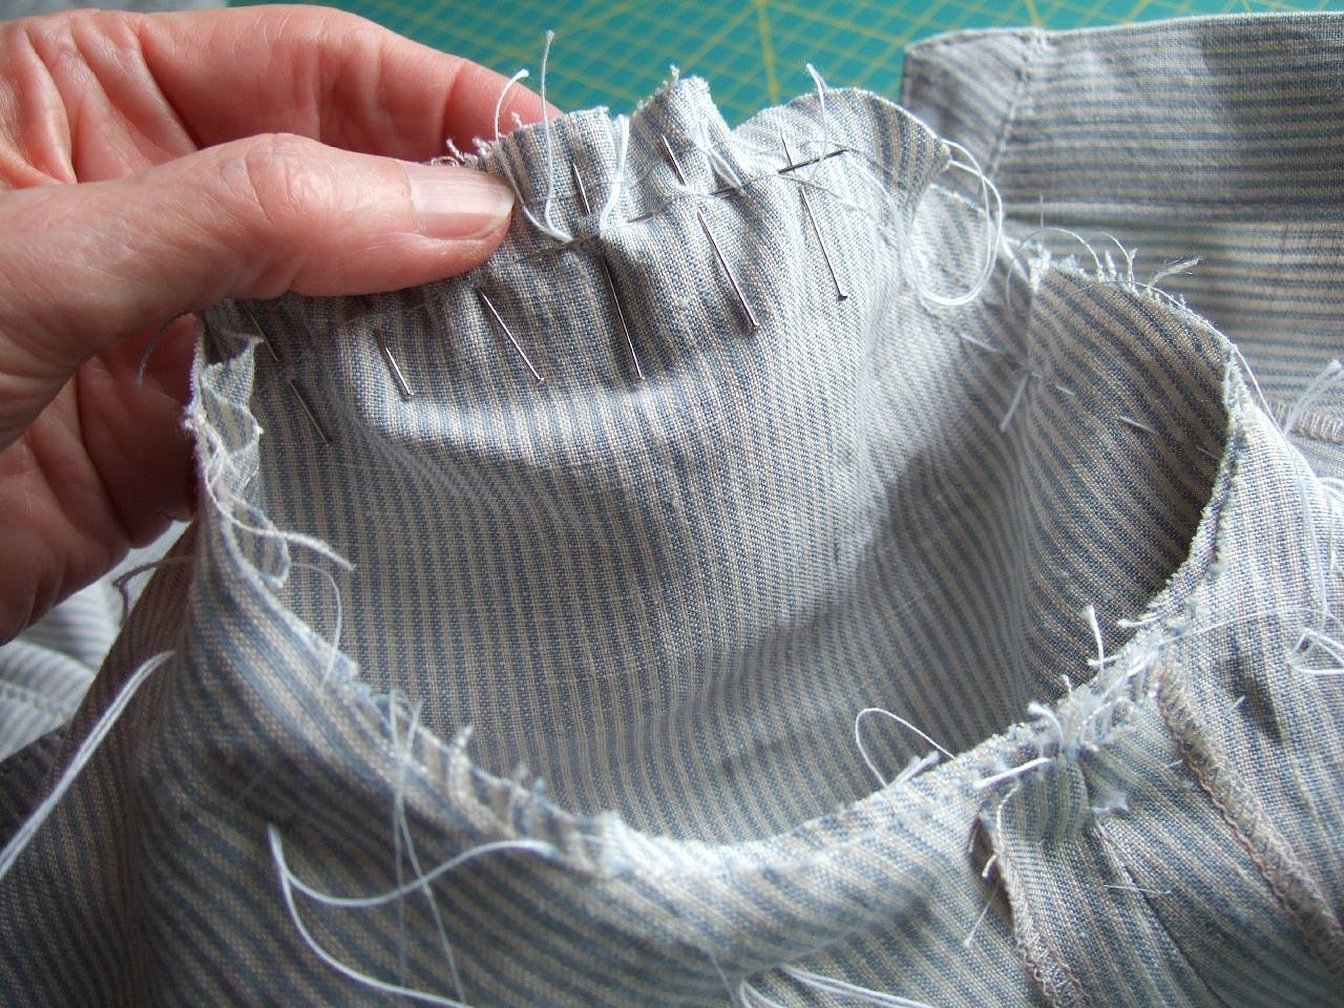
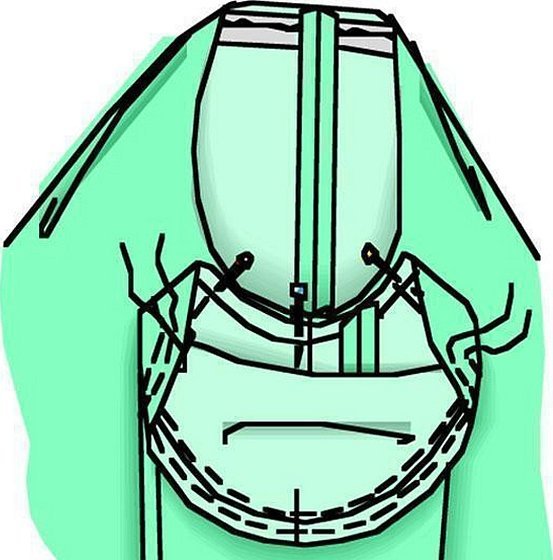
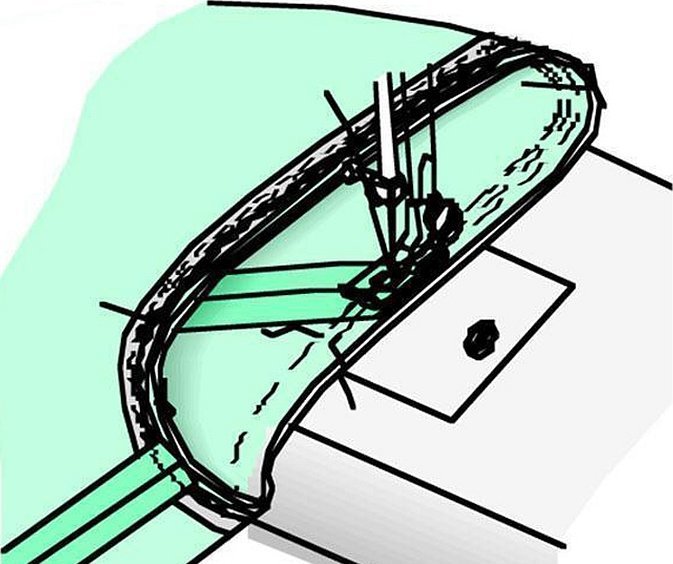
Distribution of planting by ball
Before starting work, the sleeve is applied to the armhole. Their front parts should be facing each other. But at first, they are tacked to each other only at the very bottom. In this case, it is necessary to match the seams on the sleeve and the side marks of the shelf and back on the armhole.
If a two-seam type is used, the cross mark should be aligned with the side seam on the dress. There is no need to gather the sleeve. It should be connected without wrinkles and lie smoothly on the armhole.
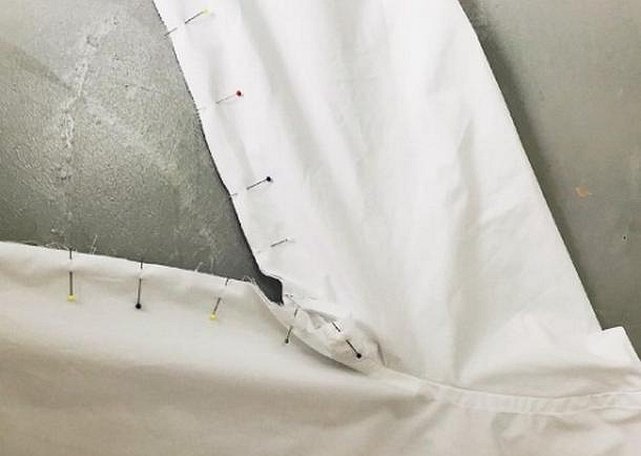
Important! The transverse mark on the armhole should match the location of the shoulder seam. After fixing the connection, you can slightly tighten the previously loosely stitched thread so that the edges of the sleeve and armhole match exactly.
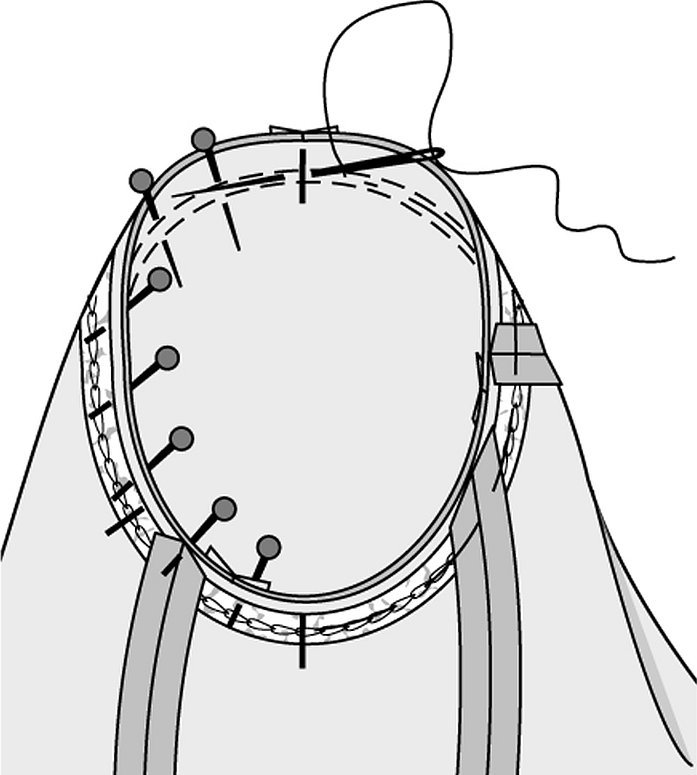
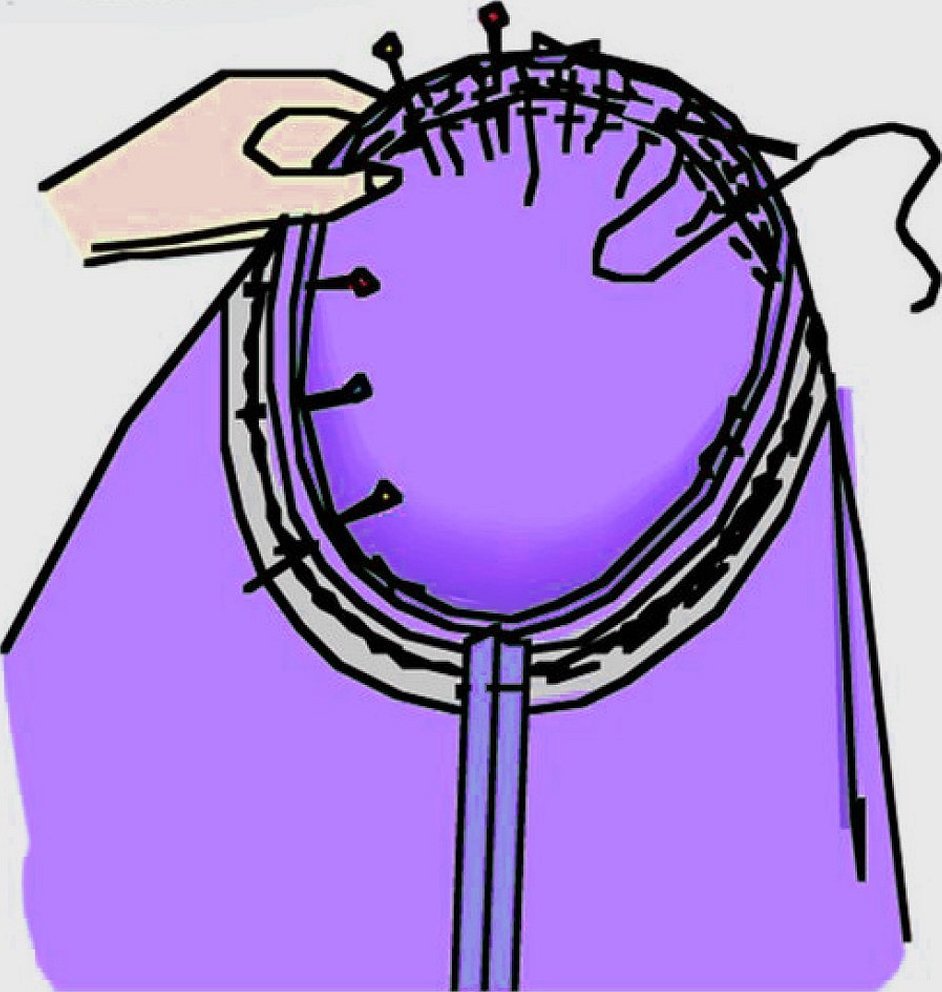
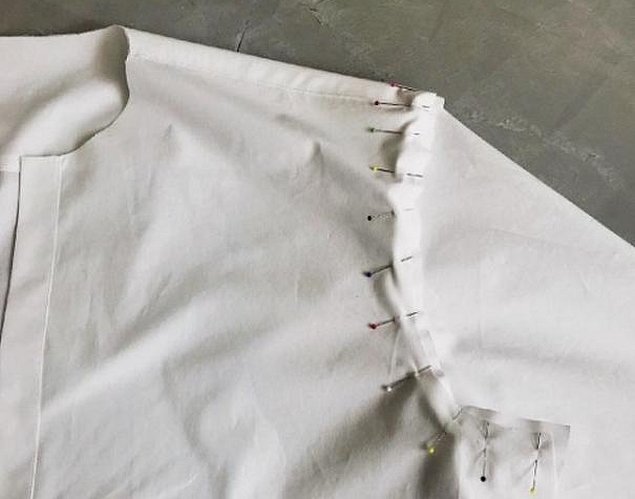
Now you can baste it to the armhole. If there are folds, you can distribute them evenly.
Trying on the product
After the sleeve is basted, a fitting is required before sewing the sleeve to the armhole. Even with the most accurate calculation, deviations from the exact shape are inevitable. What is important is how the sleeve will look when trying it on. Even a T-shirt is difficult to sew on the first try.
It is necessary to consider whether the dress is planned to be fitted with shoulder pads. If so, it is necessary to try it on with them.
Important! During the fitting, the pose should be straight, you need to stand without tension. The seams should be examined as they should look during normal wear. It is important that the product lies flat and has no wrinkles.
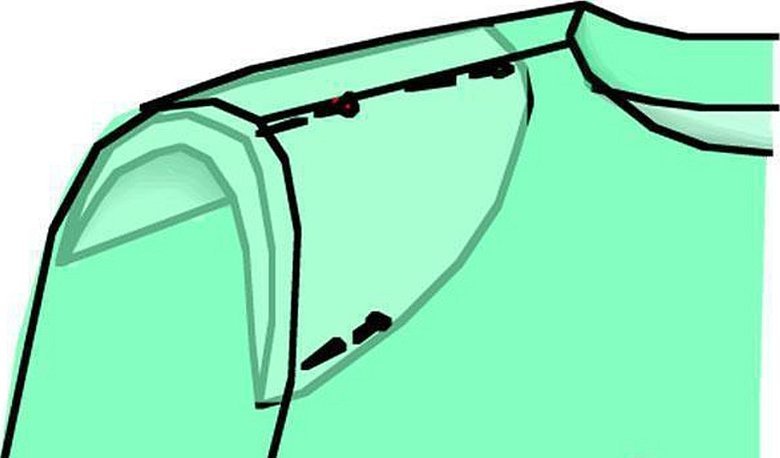
It is necessary to pay attention to the presence of waves on the armhole. If they are present, then it is located too high. The correction is done as follows. In this case, the gathering stitches need to be ripped out. It is also necessary to cut off about 5 mm of fabric in this place.
Another situation is possible when the waves are arranged in such a way that they look from the bottom up. This feature indicates that the armhole was sewn too short. In order to fix this, the lower part of the armhole will have to be slightly re-cut.
It is also possible that the waves are located from back to front. To fix this, you will have to slightly turn the sleeve forward. To do this, slightly loosen the waistband on the back upper part. In this case, the upper mark will be slightly forward. In this case, there is no need to re-cut the part of the sleeve related to the armpits.
In the case where the distortion is formed in the other direction (waves are visible from front to back), then the adjustments are made in a similar way, but in the opposite direction.
Step by step instructions
Once the fitting has been completed and the attachment has been done correctly, it is necessary to move on to the next stage of work - sewing it into the armhole.

The step-by-step instructions for further actions look like this:
- Sewing begins from the sleeve seam and is carried out along the preliminary basting stitches.
- It is necessary to ensure that no additional folds are formed. To do this, when laying the seam, it is necessary to make careful movements with your fingers, smoothing the fabric in both directions along its entire length. It is strongly not recommended to try to stretch the armhole instead of smoothing.
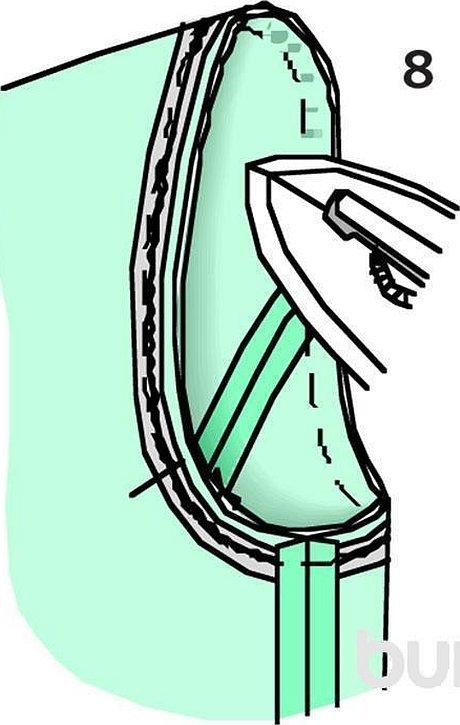
- The seams should not be ironed either on the back or on the front. They are only lightly ironed so that they do not come off.
If the work is done for a coat or a warm jacket, then it is necessary to slightly tuck the armhole. To do this, take two strips of batting 20 cm long and 4 cm wide. The ends of the strips must be rounded. Each strip must be sewn so that its middle falls on the stitching seam. In this case, the strip of batting is manually stitched to the allowances of this seam.
If there are shoulder pads, they are sewn on so that they protrude approximately 1 cm from the armhole. The lining is sewn on by hand, and the stitches are not tightened.
If you can't avoid folds when sewing on a sleeve, you can fix it. To do this, just make the armhole a little wider.
Common mistakes
Most often, mistakes made by novice craftsmen are related to the fact that the instructions were violated when cutting. It often happens that the sleeve is larger than the armhole. Faced with a problem, they begin to feverishly try to solve it, but they do it incorrectly. The result of unprofessional actions is the formation of unsightly wrinkles and folds that spoil the appearance of the product.
In fact, the specified excess is not something exceptional and is corrected in cases where the technology of work execution is observed when sewing in a male or female sleeve. One way to solve the problem is to create a voluminous top of the shoulder joint. If sewn in this way, it makes it possible to ensure freedom of movement of the arm in the shoulder joint when wearing.
Another common problem is the misalignment of the sleeve seam and the open side seam of the armhole. If after all the adjustments there is a skew, it seems that the error is fatal. However, the most common reason for this is the incorrect order of sewing the product. This situation can serve as a lesson. The point is that you should not first sew the front and back and only then sew the sleeve to the armhole. It is necessary to perform these actions in accordance with the detailed sewing technology. After that, the side seams will exactly match each other.
It is possible that when sewing in, it will be discovered that the shoulder seam does not coincide with the very top point of the cap. The reasons here are the same as in the previous case. As a result, there will be a distortion, which will worsen the appearance of the product.
Sewing in a sleeve is one of the most important operations when sewing a dress. Correctly made armholes will give the dress beauty and completeness. If it is made carelessly. With distortions, then the appearance of the product will be much less attractive.


