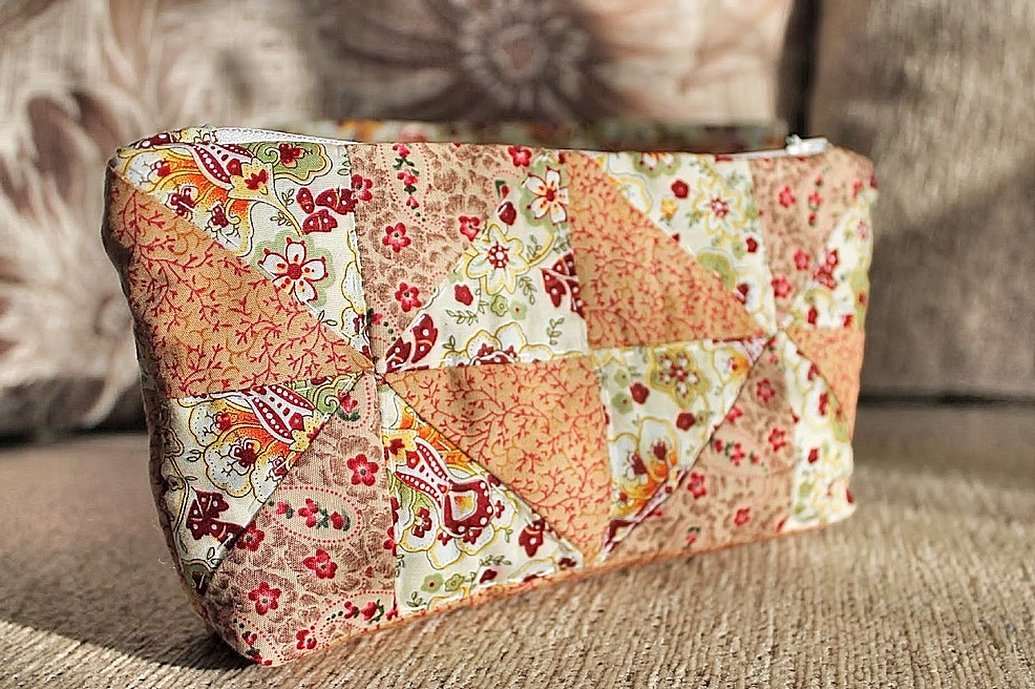
A cosmetic bag is an accessory that every woman has. Bags are small in size, so they can be sewn from the remains of fabric used to sew something more voluminous. The process takes a little time, and the result can always please the owner. This article will tell you how to sew a cosmetic bag with your own hands from different materials and sew a zipper into it.
DIY Cosmetic Bag - Patterns
There are several different ways to create a beautiful accessory. The Internet is full of various ideas and patterns for handbags.
Any material can be used for sewing. It is most rational to give preference to scraps and pieces of fabric left over after sewing. Mandatory elements, without which it is impossible to imagine a handbag, are a zipper and a lining. The size of the zipper depends on the dimensions of the product, and the lining material on the main fabric.
Standard set of materials used:
- pencil;
- sheet of paper;
- fabric for a future cosmetic bag;
- pins;
- scissors;
- chalk, soap or washable marker for marking;
- marking ruler;
- threads for finishing;
- a sealant in the form of a piece of cotton;
- insert zipper;
- bias binding.

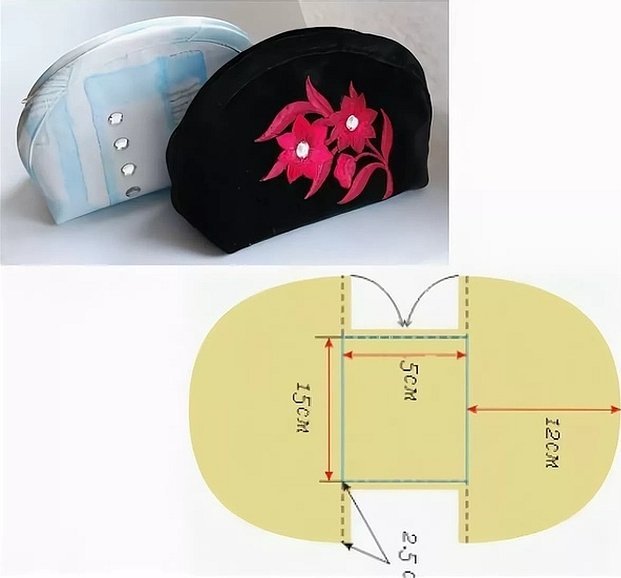
It is most convenient to take a notebook sheet in a cage or an A4 album. Usually, the pattern of the cosmetic bag is not drawn completely, but only half. The second part is exactly the same after folding the paper.
The template is usually placed on the fabric that will be the base of the product. It is recommended to secure it with pins or needles. The same should be done with the lining material. The contours should be outlined with chalk or pencil, cut out, and then basted with threads.
The next step is sewing on the zipper. You can find out more about how to do this at the end of the article.
The lining plays a special role in the product. With its help, the main material does not fall apart, and the cosmetic bag can serve much longer. It is usually sewn after the zipper.
The result should be a workpiece consisting of several layers, which are swept and machine stitched on the other three sides.
Please note! The seams are machine stitched from the wrong side of the fabric. This way, when finished, you can turn the product inside out and decorate it with any decorative elements.
This creates a small bag suitable for storing cosmetics or other accessories.
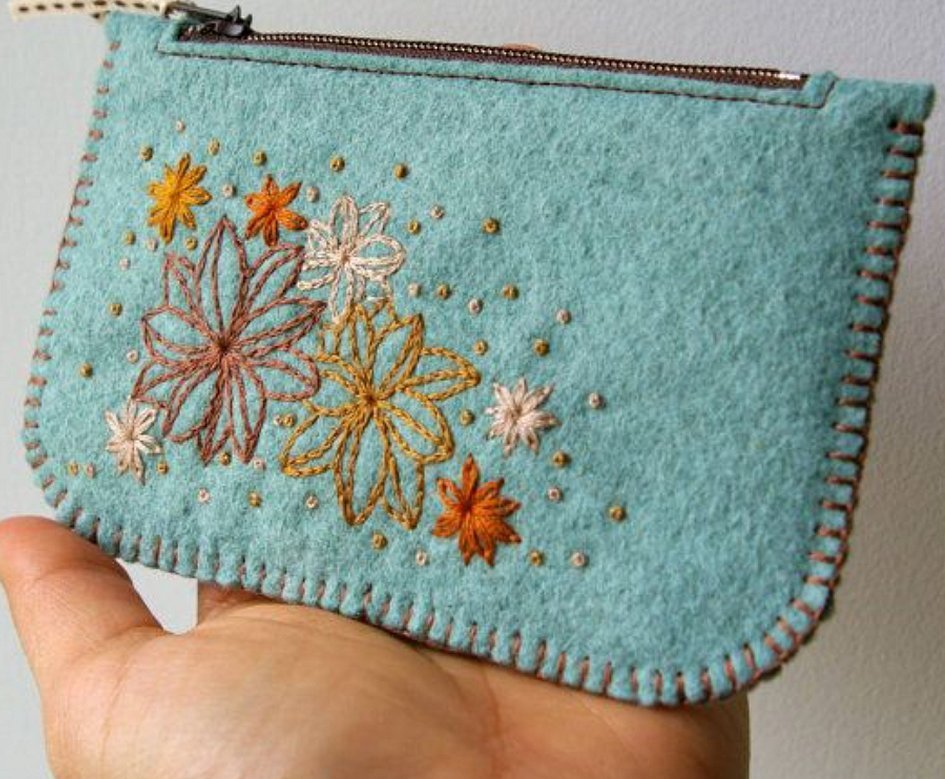
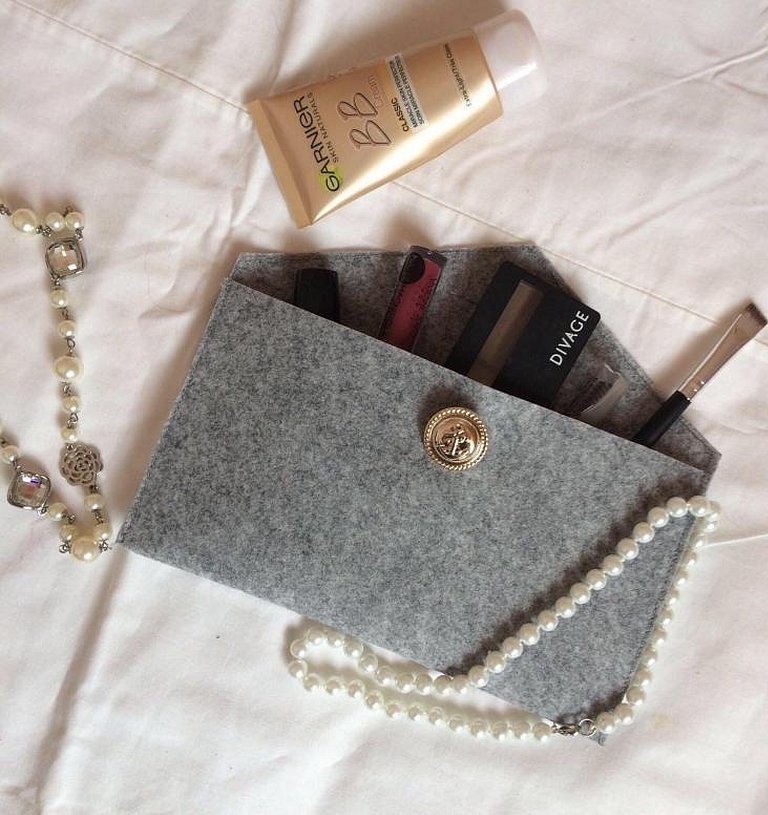
Felt handbag
You can sew such a small cosmetic bag without the help of special equipment - a sewing machine.
- A piece of felt is laid out on a flat surface.
- Using a ruler and pencil, measure the middle of the material and construct a rectangle in the center. The dimensions are chosen arbitrarily so that a zipper can be sewn in there and it can function successfully.
- After this, the clasp is inserted and sewn to the fabric.
- Then we sew the cosmetic bag in such a way as to obtain a rectangle. From the inside, the product is basted along the perimeter and turned inside out.
- The result is a ready-made felt handbag that can be decorated at your discretion with appliques, beads, embroidery, rhinestones and other decorative elements.
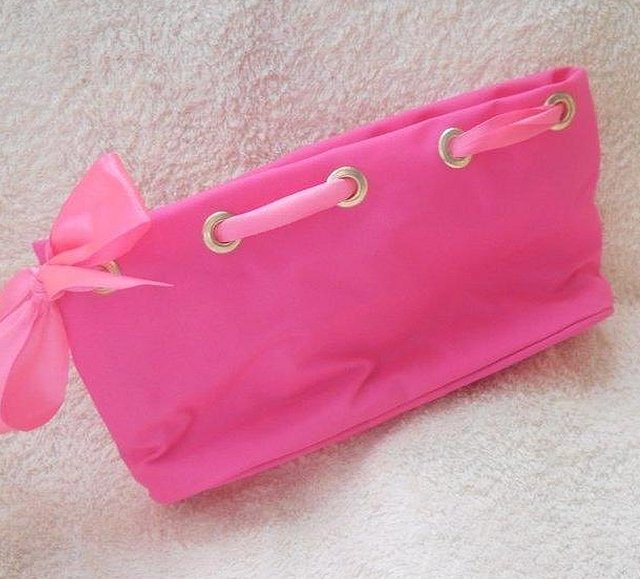
Satin cosmetic bag
Cosmetic bags made of satin deserve special attention. The material looks very beautiful, smooth and delicate, so it is popular with girls. Bags made of satin ribbons look especially attractive.
You will need to purchase several satin ribbons, the total length of which will be approximately 15 m; A4 lining fabric; threads; a 25 cm zipper; 50 cm bias binding and adhesive interlining.
- First, you need to make a blank from satin ribbons. To do this, you need to interlace them and place them on the adhesive interlining. It is recommended to secure the ends of the ribbons with pins so that the pattern does not fall apart during the process of creating the cosmetic bag.
- The resulting fabric must be smoothed out and ironed, cutting the fabric to the size of the lining material.
- The short sides of the blank and lining are placed face to face, and a zipper is placed between them and secured with a regular seam.
- The template and lining are applied with the wrong sides facing out and stitched with thread.
- Next, the product needs to be turned inside out, and a seam needs to be made around the perimeter, lowering the zipper 1 cm inside.
- Bias binding is needed to process the side of the product. Its end, located next to the zipper, needs to be folded and tucked inside.
- The corner is cut off 1 cm from the edge, then a seam is made and processed with bias tape.

The result is a very light and elegant bag for storing personal items, hygiene products or cosmetics.
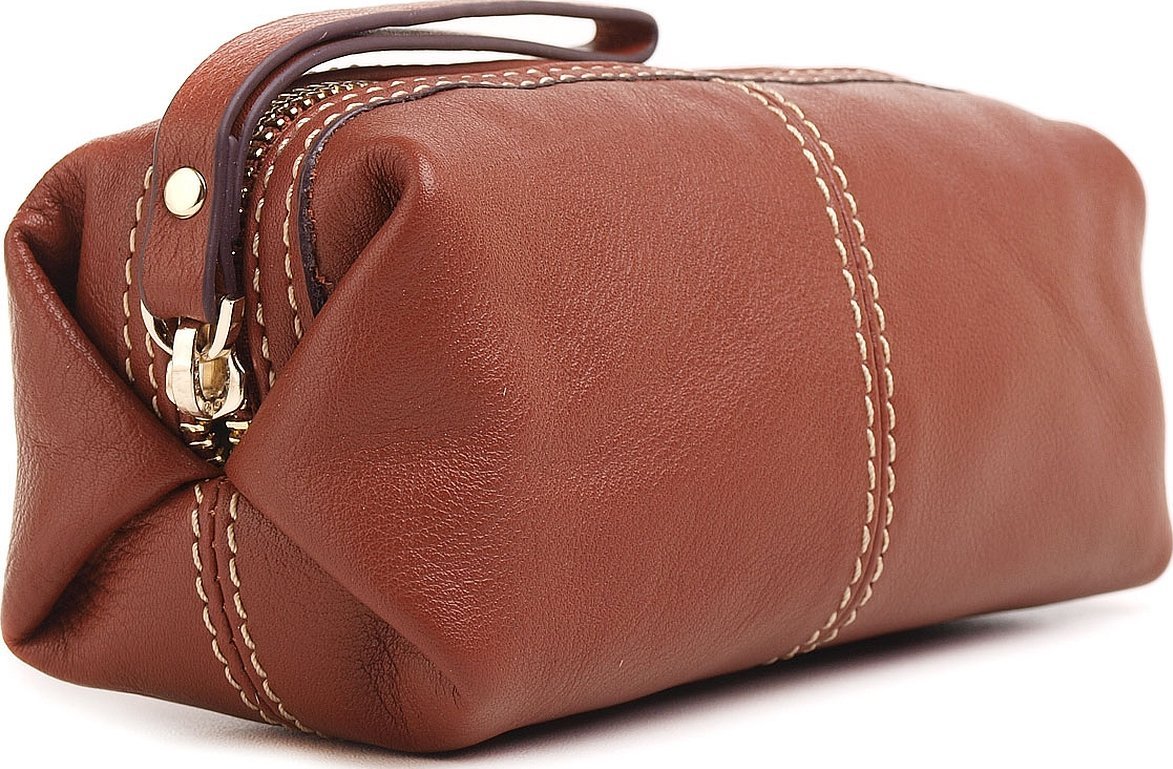
Leather cosmetic bag
Leather products in most cases look high-quality and luxurious. In order to create a leather cosmetic bag for yourself, it is enough to have a desire, the necessary items for sewing and free time.
Genuine leather requires a special approach and accuracy. It is important to be careful not to spoil the material. In advance, you need to buy needles for leather and use a special Teflon foot for a sewing machine. Working with leather is not difficult. Even if you do not have a piece of the required size, but have several small ones, they can be sewn together, creating a single material.
When creating an accessory, it is important to pay tribute to the zipper. It is recommended to choose a high-quality zipper that will not only look good, but also function perfectly.
Important! When working with a workpiece, a person must remember that pins cannot be used to secure the patterns. Otherwise, the material will be damaged, as holes and puncture marks will remain on it.
In addition to leather fabric, you will need to arm yourself with a metal ring, leather threads, scissors, glue and several additional tools. In this creation process, two colors of leather will be used: the first - 34x27 cm, the second - 2 pieces of 5x4 cm and 1 piece of 2x9 cm.
- The leather pieces of the same color are folded in half and glued together. This way you get 2 pieces 2×4 cm and 1 slightly smaller — 1×8.
- The folds formed during the gluing process are tapped with a hammer to form the folds.
- The short sides of the second skin are folded inwards by 1 cm and glued with glue. During the process, the fold is fixed with a clothespin.
- Threads for leather are placed in the machine, and a zipper is placed under the leather of the second color, which is sewn onto the material.
- The threads are pulled out from the back side and secured with a drop of glue. After 2-3 minutes for the glue to dry, you can continue the process.
- Threads of a different color, corresponding to the color of the leather, are placed in the machine, and the details of the first color are stitched according to the thickness of the foot. The threads are pulled out, a knot is tied on the back side, which is secured with glue.
- It is necessary to make two parts according to point 5, which then need to be glued in half and treated with glue along the edges.
- The first leather pieces are placed along the edges of the zipper so that the cuts match each other. They are machine stitched along the edge, and the thread knots are fixed with glue from the inside.
- The resulting rectangle needs to be turned inside out and the zipper needs to be cut in half.
- The side of the product is stitched along the width of the sewing machine foot, while the edges of the threads remain free. From each corner, you need to mark 3 cm, leaving marks with a pen or a dull pencil.
- The corners need to be secured with clothespins and a line drawn at a 90-degree angle from the mark to the fold. (A right angle is formed to the stitch.) Along the marked line, stitch on the machine, again securing the threads with a knot and glue.
- The remaining threads are pulled out and also secured with a double knot and glue.
- It's time for the lining. The material on the short sides of the rectangle is folded by 1 cm and fixed with an iron. It is necessary to create a model of the product from it that will correspond to the leather copy.
- The leather product is turned inside out and a cosmetic bag made from the lining is inserted inside it.
- The lining fabric must be sewn to the edge of the zipper by hand using a blind stitch.
- At the end, there is one piece of fabric of the first color, into which you need to insert a ring or a half ring of metal. It is inserted into the zipper runner to simplify the opening process and make it beautiful.
The result is a very beautiful cosmetic pocket bag, which does not even need to be supplemented with any decorative figures.
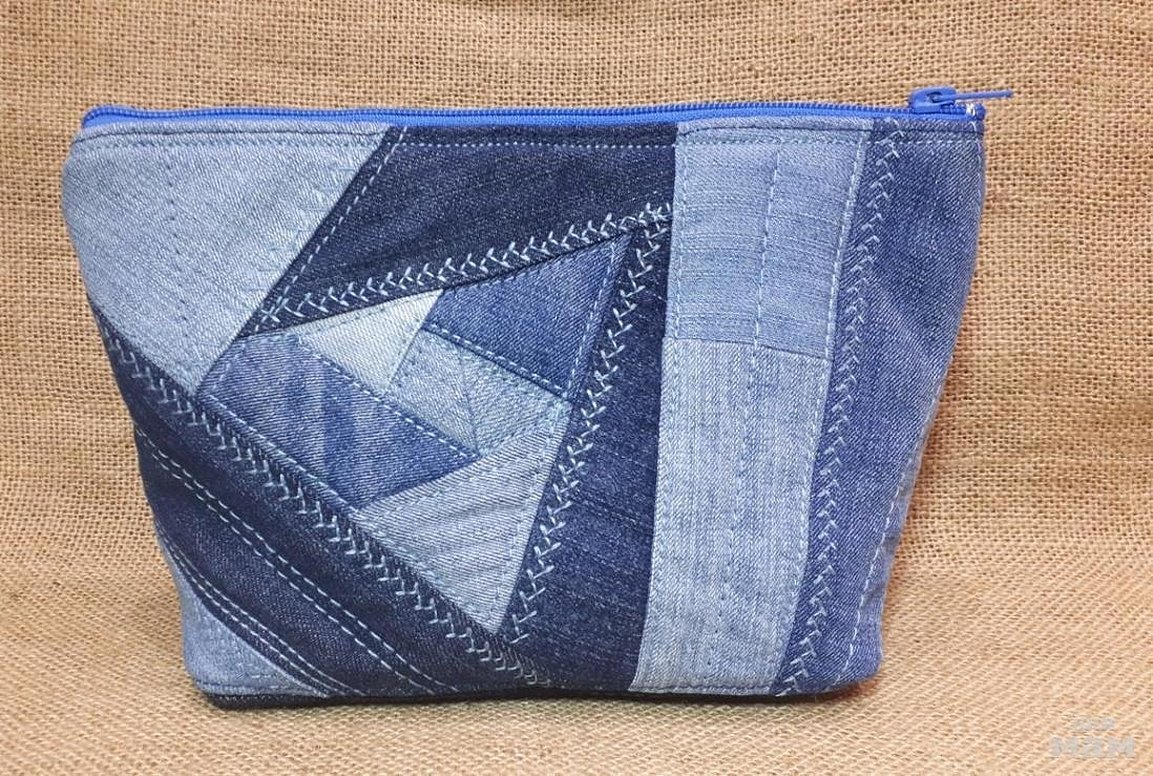
Cosmetic bag made of denim
A denim bag is sewn in the same way as a felt bag. Denim material can be purchased specifically for such needs, or old jeans or leftover scraps can be used.
The result is a stylish accessory that looks great with beads, rhinestones, appliques, fringe and other decorations.
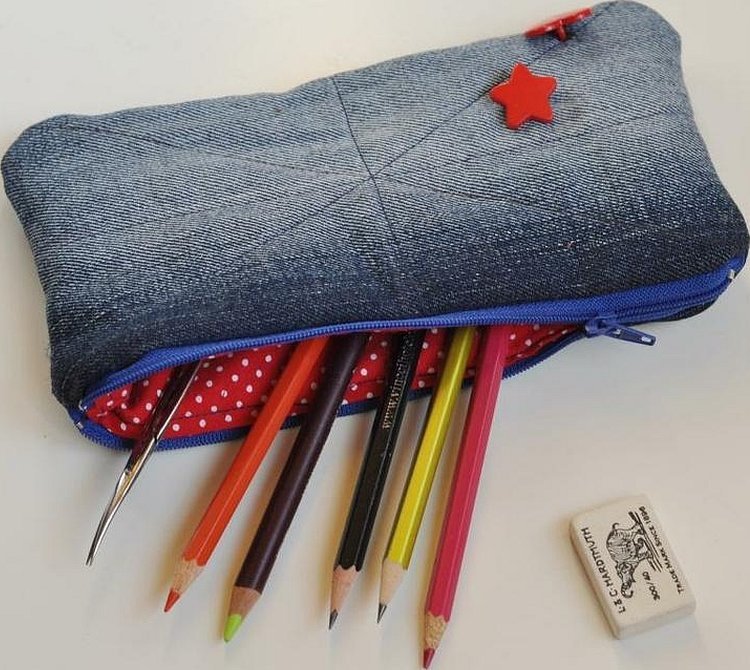
Pencil case
Before creating a pencil case, you need to take care of the fabric. The material, as well as its design, is selected independently, based on desires. It is worth remembering only that a denser material will last much longer than the rest.
The standard style of school pencil cases is a circle or rectangle. The amount of material depends on the shape and size of the product. It is worthwhile to estimate the required dimensions in advance and add a few centimeters for allowances.
It is important not to forget about the zipper. Its length is also selected based on the length of the product itself. It is not scary to buy a clasp with a reserve.
A pencil case, in which pens, pencils and other office supplies are stored, resembles a small cosmetic bag in its shape and structure. Therefore, the processes of sewing a pencil case and a small bag are identical.
Sewing process
The process of creating a cosmetic bag usually does not take much time. In order for efforts and materials not to be wasted, it is recommended to follow the instructions and be extremely careful. So, DIY cosmetic bag patterns master class:
Let's look at the process of creating a pattern for a cosmetic bag with a zipper:
- It is necessary to make a template using a sheet and a pencil. It is recommended to take a double-checked sheet from a notebook. It is necessary to draw on one side so that after cutting and unfolding you get a symmetrical pattern.
- Then take the fabric and apply the pattern to it. You need to fold the patch in half, apply the template, secure it with pins or needles and cut out along the outline.
- Loose fabrics, such as linen, need to be reinforced to prevent fraying. The most convenient reinforcement is cotton material cut to the size of the pattern.
- After that, you need to put 1 layer of fabric for the cosmetic bag face down, place 2 layers of pieces of cotton above it, and put the material for the handbag face up even higher. 4 layers need to be secured with pins or needles around the perimeter.
- Using a sewing machine, you need to connect the parts together, leaving 3 mm from the edges.
Important! It is necessary to leave a free, unstitched space for the zipper.
- Then the workpiece needs to be straightened and ironed.
- The place for the zipper is edged with a bias tape. You need to act in such a way that the front side of the bag is located on top. You need to act especially carefully on rounded areas. It is recommended to first baste the bias tape, and then finally sew it on using a sewing machine.
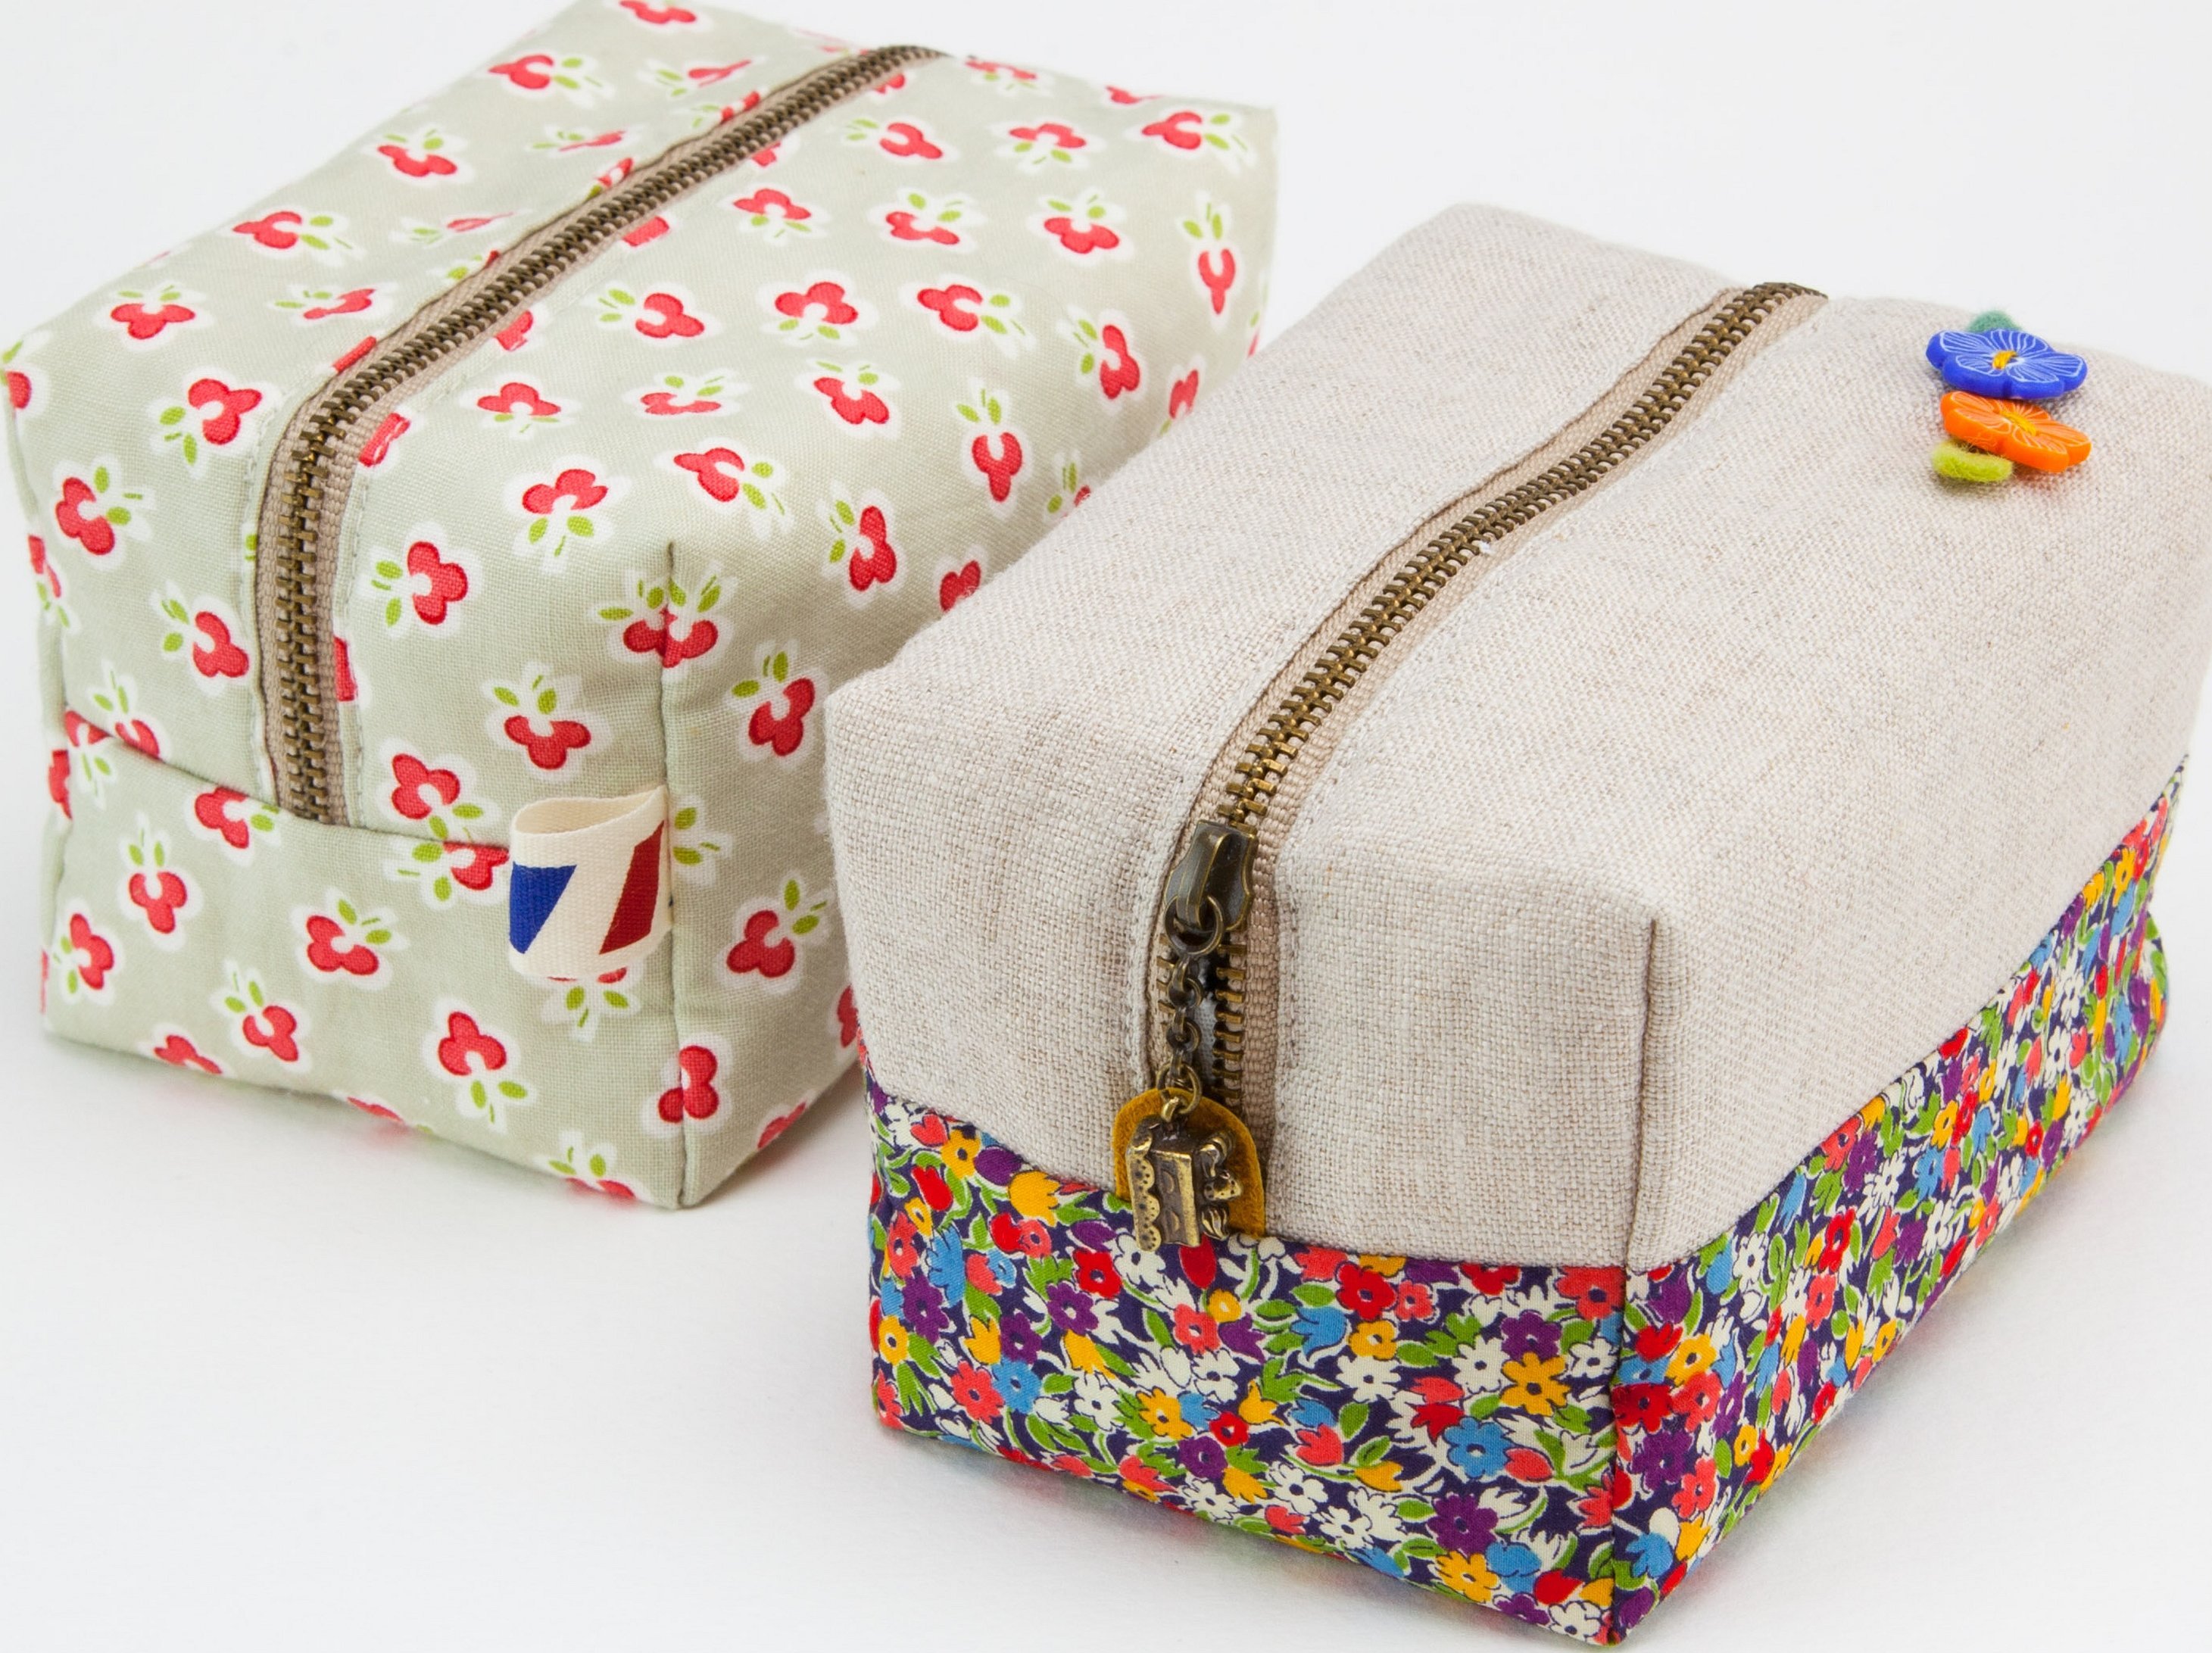
- Then the part needs to be turned inside out, placing the front side inside. From the bottom fold to the top of the bag, measure 9 cm and make a mark. You can secure it with pins or baste it.
- The side seams must be sewn on a sewing machine, making fastenings at the beginning and end.
- On the side, you need to measure 2-3 cm from the bottom and make a mark with a pencil. You can make a mark higher, then the cosmetic bag will be more voluminous.
- The corners will need to be sewn on both sides using a machine.
- After this, the fastener is sewn on. The optimal length of the zipper is 25 cm.
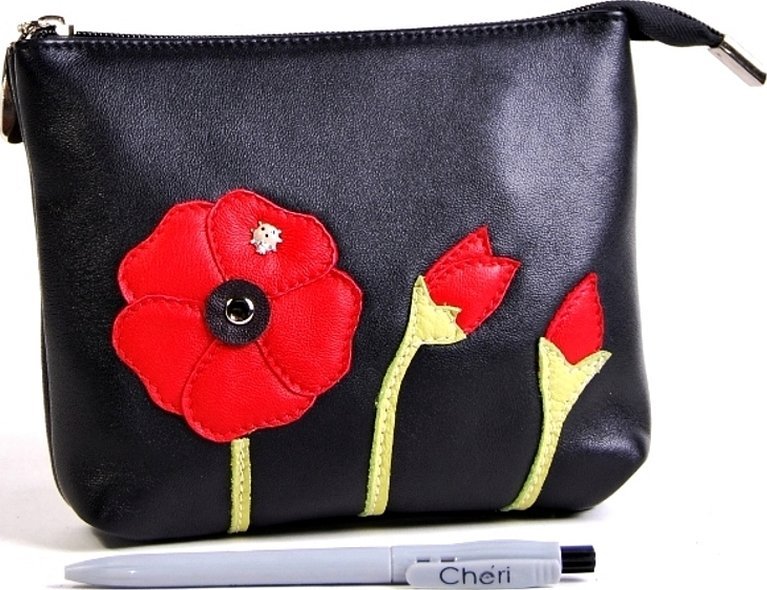
- For decoration, you can use beautiful stitches with finishing threads, beads, sequins and other decorations.
This completes the sewing. The finished accessory can be used for its intended purpose. The pattern sizes can be increased or decreased as desired. The same applies to the shape and design of the bag.
Advice! To increase the puffiness of the bag, it is recommended to place a layer of insulation between the lining and the main material according to size.
This cosmetic bag can be a great gift for a girl for any occasion.
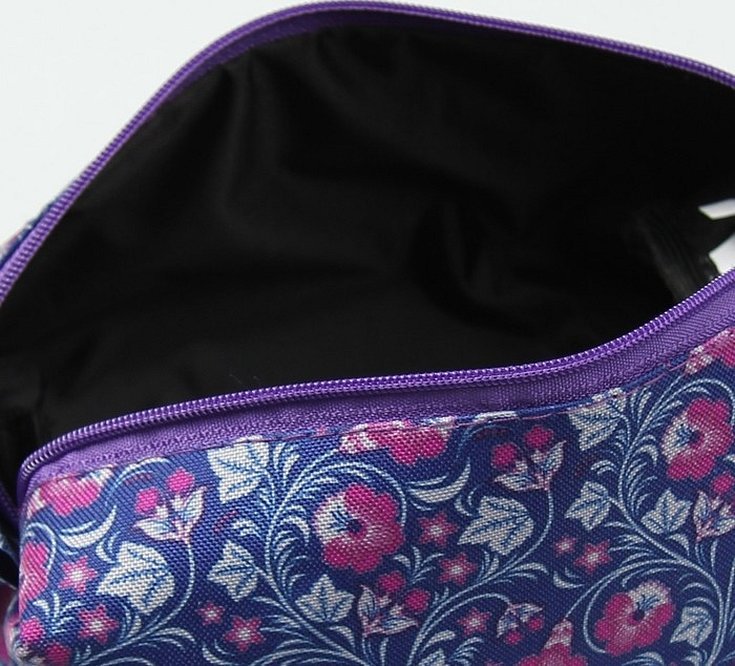
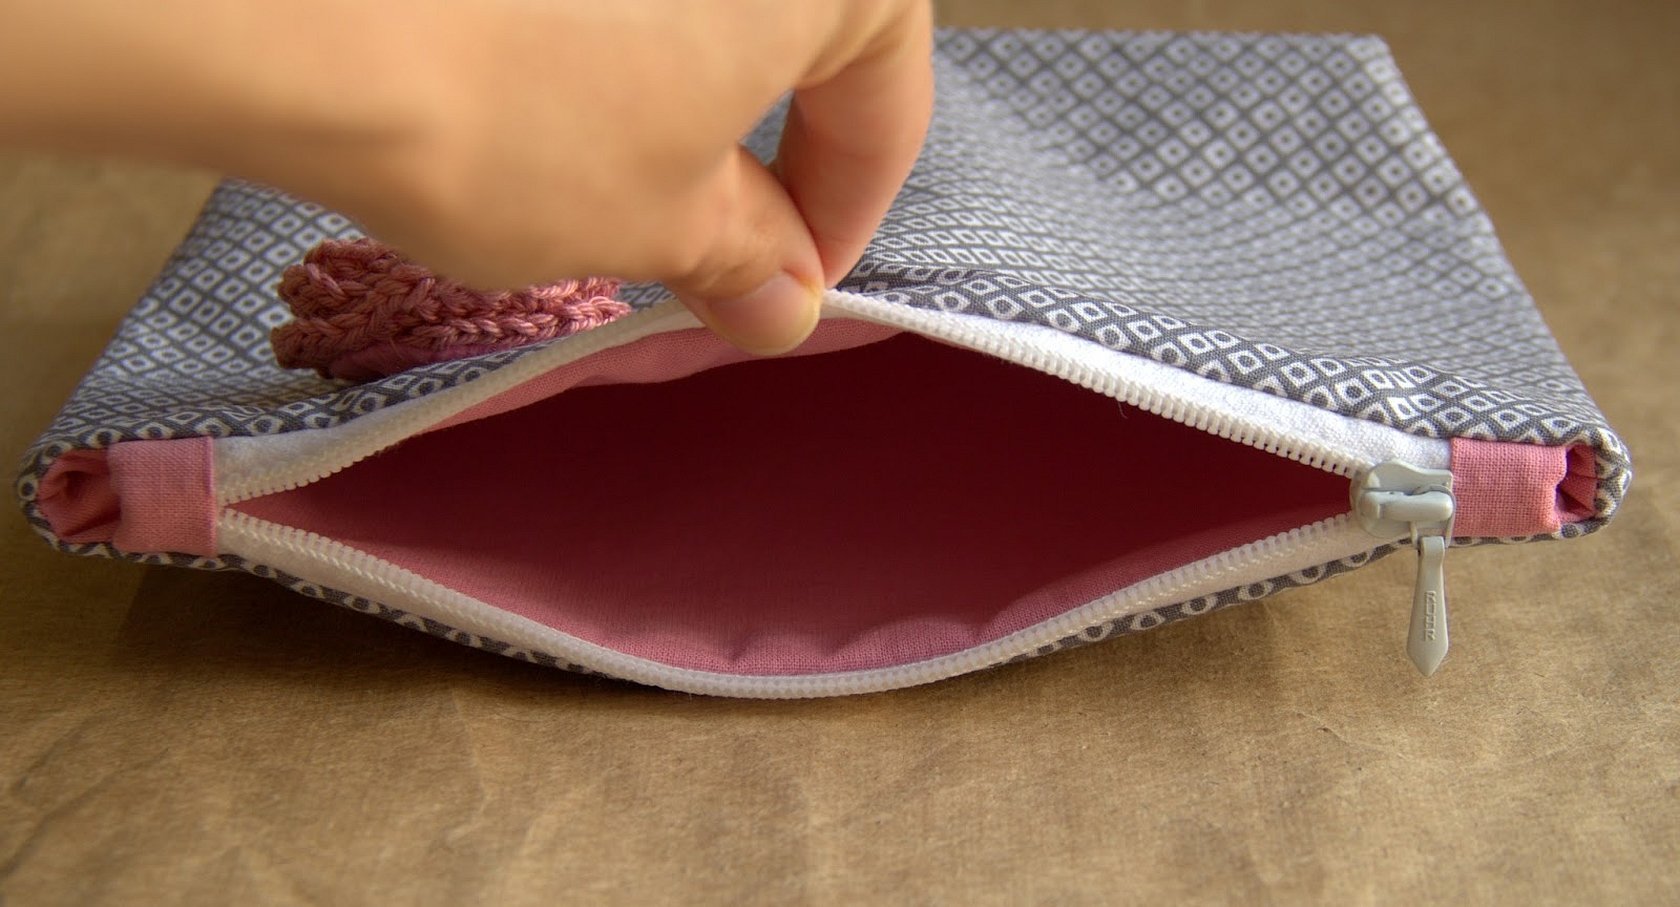
How to sew a zipper into a lined cosmetic bag
It is quite easy to sew a zipper into a cosmetic bag. To do this, you need to turn the product inside out. The zipper is applied to the inside and basted with a needle and thread. After this, the fabric is placed on a sewing machine, and the fastener is sewn to the product.
On a cosmetic bag with a piping, you need to make a seam for the zipper on the front side. You should be very careful and try to make sure that the seams match. First, sew one side of the zipper, and then the other.
Important! When sewing, the zipper should be placed with the right side facing the material.
During sewing, a situation may arise where the calculated zipper length is too long or too short. In the first case, the problem is quite easy to solve. It is enough to cut the fastener and hem it from the cut side.
Every girl knows that you can never have too many cosmetic bags. It is quite easy to create such items for yourself. Finding patterns on the Internet or inventing them yourself is not difficult, and a set of items necessary for sewing is available in almost every home. Therefore, to create a beautiful accessory, you only need desire and a little time.


