Normal work on a sewing machine is impossible without its proper setup and preliminary adjustment. This applies not only to sewing beginners, but also to professionals. No one will be able to create a truly high-quality and beautiful thing if he uses cheap materials and does not set up the machine before work. If everything is clear with the first (it is enough to take care and buy normal fabrics and threads), then the second causes difficulties for inexperienced seamstresses. This material will tell you how to thread a sewing machine, and how the upper thread is threaded in sewing machines of various models.
- General instructions for threading a sewing machine
- Correct threading of the bobbin
- Threading the upper thread
- How to thread the bottom thread
- Instructions: How to Properly Thread a Sewing Machine
- Threading in "Podolsk"
- Janome old model
- Old style brother
- Errors in threading a sewing machine
- Tips for caring for your machine
General instructions for threading a sewing machine
First, you need to familiarize yourself with the general principles of refueling and determine some steps that should be followed. The step-by-step instructions look like this:
- The thread to be worked with is wound onto the bobbin. After that, the upper pin is put on the spool for the upper thread.
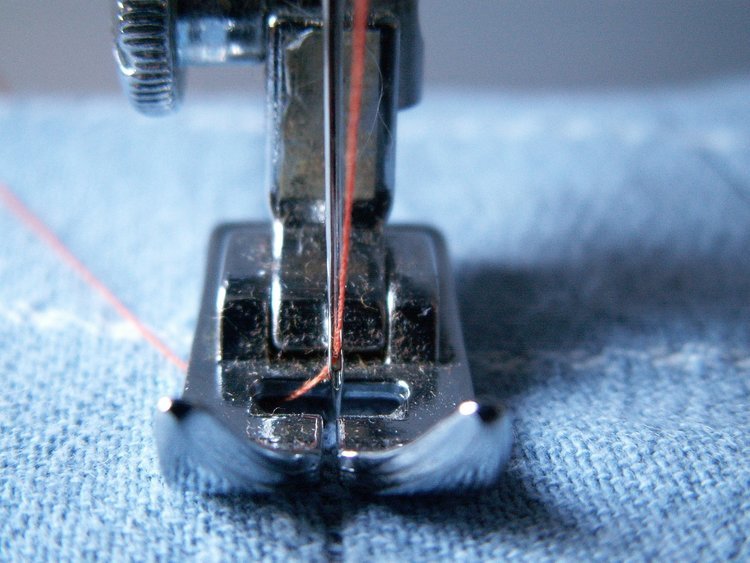
- The upper thread is threaded into the sewing unit. Modern devices usually have threading instructions on their body. The upper thread is the one that is pushed through the eye of the needle. Before threading it into the needle, the machine foot is raised so that it goes to the extreme upper position.
- Check the thread tension. Relatively recently manufactured machines are equipped with special regulators.
- Once the upper thread has been threaded, you can do the same with the lower thread. This involves turning off the machine's drive (flywheel) and installing the bobbin in its place. After this, you need to turn on the winding drive and wind the thread until there is enough thread on the lower bobbin.
- Install the bobbin cap into the special shuttle device until you hear a click, characteristic of insertion. This will mean that everything went correctly and you can move on.
- Bring the thread through the sliding plate and close it. The upper and lower threads are connected and placed behind the blade.
Important! To establish the fact that the work was done correctly, it is necessary to turn the drive (flywheel) and observe the process. The needle should rise and fall, and a loop from the lower thread will appear from the plate on the upper thread.
Correct threading of the bobbin
Now it is worth talking about the process in more detail and combining the points into several important stages. You need to start with threading the bobbin with the lower thread. To do this, simply remove the additional platform-table of the device, which easily moves to the left. Next, remove the shuttle plate, and then raise the needle to the extreme upper position. To do this, turn the flywheel of the drive to the desired angle. The bobbin mechanism is removed very carefully: it is pulled by the edge, and the bobbin is removed without problems.
Please note! When threading the sewing machine, the thread is wound onto the bobbin, securing the spool on the upper pin and connecting it to the thread holder in a cross-shaped position. During this process, the edge of the thread should go to the drive. The bobbin is placed on the second peg, and the thread itself is attached to it, which is wrapped around the mechanism a couple of times.
Next, all that remains is to press the pedal or turn on the drive and rotate the flywheel, which will automatically thread the bobbin.
Threading the upper thread
This process is no different from the previous one in terms of complexity and intricacy of actions. The main thing is to follow the step-by-step instructions for refueling presented below:
- Pass the upper thread from the spool through a special lock located on the body of the sewing machine.
- Also pass the thread through the tension regulator and insert it into the compensation spring, which looks like a hook.
- Pass the upper thread through the designated hole in the thread guide and pull it out.
- Pass the thread through a special fastening and only then thread it through the eye of a sewing needle.
Important! Some models of sewing units have not a thread guide, but a fork. In such cases, the thread is simply placed on this fork, but not threaded into the hole, as in the instructions above.
How to thread the bottom thread
It remains to consider the threading of the lower thread. To do this, you just need to remove the bobbin case with the bobbin inside from the machine. This works not only for mechanisms with a vertical shuttle, but also with a horizontal one.
Next, you need to wind a certain amount of thread onto the bobbin, which will be enough for sewing or repairing clothes.
For your information! If you have a lot of work ahead of you, you can fill the bobbin completely, but if you only need to do a couple of lines, then half of the volume mentioned earlier will be enough.
The step-by-step procedure for further actions is as follows:
- The flywheel is pulled back. The direction of pulling is away from the sewing unit.
- Place the thread on a special spool pin and pass it through the thread guide. All that remains is to pass the end of the thread through the hole in the bobbin and wind it with your hands a couple of turns to secure it.
- After fixing the thread on the bobbin case, install it on the winding spindle and move it towards the drive wheel. At this stage, you can already turn on the machine and wind the required amount of thread on the bobbin.
- Wind the required amount of thread for the job and stop the machine.
- Move the spindle away from the drive wheel and cut the thread by removing the bobbin from the spindle.
Instructions: How to Properly Thread a Sewing Machine
So, if all the theoretical basics have been studied, then you can move on to practice, but before that it is advisable to prepare the following materials and tools:
- Spool of thread.
- Scissors.
- Magnifying glass.
- Tweezers.
If all this is available, or for some reason a person is confident that he can cope without a magnifying glass or tweezers, then you can begin. It is worth considering the process of threading various sewing machines from Podolsk to Brother.
Threading in "Podolsk"
The Podolsk unit belongs to class 2M and is sold not only with manual, but also with foot drive. Electric modifications are extremely rare. The Podolsk machine itself is a rarity, the repair and maintenance of which often cost the same amount for which you can buy a new and modern machine. Refueling is carried out as follows:
- The needle is raised by means of a wheel on the side.
- The reel is mounted on the top rod.
- The thread is pulled through the thread guide.
- The thread is lowered under the tension regulator and inserted into the loop of the spring.
- The thread is pulled up and threaded into the thread guide.
- It is inserted into the second and third guides.
- The thread is inserted into the needle and the thread guide lever is positioned upward.
Janome old model
On Janome machines, you often have to change the threads and thread them again, which is also typical for other machines from different manufacturers. The easiest and fastest way to thread is through the upper thread. It looks like this:
- Turn the flywheel drive towards you to raise the thread take-up lever.
- Raise the presser foot using the special lifter.
- Take a spool of thread and insert it into any spool pin located on the body.
- Pass the thread through the guide from above.
Important! After all this, you need to pass the thread along the guide down through the tension regulator and the spring holder, threading it into the eye of the needle. It is enough to take the tail back through the hole in the foot.
Old style brother
As an example, we can use the Brother LS 1217 machine. It is simple and already quite outdated, which means that it is no more difficult to operate and guide than other models. The step-by-step process is as follows:
- Install the spool of thread. To do this, place the spool on a special spool pin located on the top of the machine body.
- The thread is wrapped. This is done by pulling its free end from the spool through the upper guide around the bobbin tension disk, which is located at the other end of the machine.
- Thread the thread through the hole on the bobbin. It is enough to pull the free end through the hole on the bobbin. This is done from the inside up, and the length of the pull reaches 5-8 centimeters.
- The spool is fixed. To do this, it is placed on the bobbin winding mechanism and moved to the right to secure it. It is important to make sure that the free end is located where it should be, with the front side facing up.
- The bobbin is wrapped with thread. The free end is held by hand while the drive is gently set in motion. This is necessary to wrap the bobbin with several skeins of thread.
- Continue winding until there are as many threads on the bobbin as needed for the job.
- Remove the spool and cut the thread connecting it to the bobbin, then remove the spool from the rod.
- The thread take-up lever is raised by manually turning the flywheel.
- Place the thread spool on a special holder.
- The thread is pulled into the right channel of the conductor.
- Wrap it around the tensioning mechanism and through the release lever.
- The thread is fixed in the thread guide and threaded into the needle.
Errors in threading a sewing machine
If the thread is not threaded correctly, the stitches will loop from side to side while sewing, and rings will form from a straight thread. Usually, the cause is weak tension of the upper or lower thread. Some people think that it is enough to adjust the tension parameter only at the bottom, and everything will be fine, but this is not true. It is the upper thread that affects the quality of the final stitch.
Important! You should work with high-quality and tested threads that can cope with even the most capricious fabric - knitwear. If the line loops even with good threads, then you need to pay attention to the tension in the thread guide.
Also, beginners often make the following mistakes:
- Poor thread pressure by the spring that regulates its tension.
- Very strong tension (similar to weak).
- The lower version is thicker than the upper one.
Tips for caring for your machine
Despite the fact that a sewing machine is a fairly strong and reliable device, it is necessary to take measures to care for it. They include the following points:
- It is absolutely necessary to regularly lubricate the main internal components of the machine, especially those that move and rub the most.
- Choose materials, lubricants, threads and needles wisely. They must match the type of fabrics used in the work and the machine requirements.
- Clean the mechanisms of the device that are hidden under the case. Excess grease can absorb a lot of dust, and the mechanisms will eventually stop working correctly.
It became clear how to thread a sewing machine and how exactly this process occurs on various manual and not the most modern devices. It is almost always necessary to act according to a certain scheme, which is similar for all devices.


